深圳市天科恒业科技有限公司(KVS)矩阵产品手册 V1.3
- 格式:pdf
- 大小:14.31 MB
- 文档页数:36
前言运动控制器提供丰富的接口,具有优良的运动控制性能,可以满足各种项目的扩展需求。
本手册介绍了产品的安装、接线、接口定义和操作说明等相关内容。
本手册版权归深圳市正运动技术有限公司所有,在未经本公司书面授权的情况下,任何人不得翻印、翻译和抄袭本手册中的任何内容。
前述行为均将构成对本公司手册版权之侵犯,本司将依法追究其法律责任。
涉及设备软件方面的详细资料以及每个指令的介绍和例程,请参阅Basic编程手册或PC函数库编程手册。
本手册中的信息资料仅供参考。
由于改进设计和功能等原因,正运动公司保留对本资料的最终解释权!内容如有更改,恕不另行通知!调试机器要注意安全!请务必在机器中设计有效的安全保护装置,并在软件中加入出错处理程序,否则所造成的损失,本公司没有义务或责任对此负责。
为了保证产品安全、正常、有效的使用,请您务必在安装、使用产品前仔细阅读本产品手册。
更新记录产品型号:VPLC711系列机器视觉运动控制一体机用户手册文件名版本号版本(更改)说明更新日期更改人用户手册V1.0 1.用户手册发布2023/5/16 xcx● 本章对正确使用本产品所需关注的安全注意事项进行说明。
在使用本产品之前,请先阅读使用说明并正确理解安全注意事项的相关信息。
● 本产品应在符合设计规格要求的环境下使用,否则可能导致设备损坏,或者人员受伤,因未遵守相关规定引发的功能异常或部件损坏等不在产品质量保证范围之内。
● 因未遵守本手册的内容、违规操作产品引发的人身安全事故、财产损失等,我司将不承担任何法律责任。
按等级可分为“危险”、“注意”。
如果没有按要求操作,可能会导致中度伤害、轻伤及设备损伤的情况。
请妥善保管本指南以备需要时阅读,并请务必将本手册交给最终用户。
安装危险◆ 控制器拆卸时,系统使用的外部供应电源全部断开后再进行操作,否则可能造成设备误操作或损坏设备;◆ 禁止在以下场合使用:有灰尘、油烟、导电性尘埃、腐蚀性气体、可燃性气体的场所;暴露于高温、结露、风雨的场合;有振动、冲击的场合;电击、火灾、误操作也会导致产品损坏和恶化。
380V 1kW 二代单轴驱动器 硬体操作说明书(SVD32C1-010)匯出日期:2023-05-11修改日期:2022-04-202023/05/11, 00:491 序言感谢您长期对本公司产品的使用与支持。
本公司伺服团队不断致力於各项产品的研发,期许本公司产品与服务能给使用者带来最大的效益。
新代高性能驱动器系列产品为本公司最新推出之伺服驱动器,本产品使用高品质之元件与材料,并经过严格测试,采用精密向量控制,具有高精确度、高稳定性、高效率之特性。
本使用说明内容包括驱动器的硬体规格、安装、配线与讯号,能提供给使用者最正确的指引与操作,为充分发挥产品应有的优异性能与维护人员及设备的安全,在使用前请详细阅读本使用手册,并且妥善保存,以备日後调校与保养时使用,若有任何疑虑,请与本公司联络,本公司专业人员将竭诚为您服务。
2 适用机型本单轴操作手册适用於新代 1kW 二代单轴驱动器。
3 硬体规格3.1 说明每部驱动器在出厂前均经过详细品管检查与防撞包装处理,请使用者收到产品後应先检查外观有无撞击损伤,并将外盒与产品上之序号做比对是否一致,若有不符,请第一时间与本公司联络。
型号说明3.2 外观介绍3.3 外形尺寸SVD32C1-010驱动器规格新代驱动器SVD32C1-010电源额定电源电压三相 380~440V 50/60Hz电源电压容许-15 ~ +10%范围电源频率变动±5%范围输出 额定输出电流 4.3A过电流能力150% 60s、200% 1s控制方式 三相全波整流输入,空间向量脉宽调变控制,可变电压可变频率(SVPWM-VVVF)输出回生电阻 建议使用内建即可,如要外接,请参考回生电阻选用章节新代驱动器SVD32C1-010反馈编码器 支援串列介面:Tamagawa、SYNNET、NIKON、FeeDAT、EnDAT、Panasonic、Mitsubishi、Mitutoyo、HCFA。
产品说明书AMC8300运动控制器硬件手册AMC8300硬件使用手册(文档版本)文档版本版本号修订日期修订内容V1.12016.12.13初稿V1.22017.1.6增加转接板接口定义V1.32017.2.23修改了2.2的图序号V1.42017.7.31增加台州亿丰驱动器接线图V1.52017.10.31增加禾川、研控、儒竞驱动器接线图第一章概述 (5)1.1简介 (5)1.2产品特点 (6)1.3型号说明 (7)1.4硬件规格 (7)1.5控制器外观与安装尺寸 (8)第二章控制模式 (9)2.1控制模式与接线 (9)2.1.1Alone(AMC+VGA)模式 (9)2.1.2A+PC模式 (11)2.2系统控制架构 (13)2.2.1八轴同步/异步开路脉冲控制 (13)2.2.2八轴闭回路电压(速度命令)输出控制 (14)2.2.3近端数字输入输出 (15)2.2.4远端数字输入输出 (15)2.2.5模数转换器(8组ADC) (16)2.2.6数模转换器(8组DAC) (16)第三章使用说明 (17)3.1开箱检查 (17)3.2安装环境 (17)3.3准备工作 (17)第四章硬件说明 (19)4.1控制器型号规格参数说明 (19)4.2接口信号定义 (21)4.2.1Axis(8个轴轴控信号) (22)4.2.2Ethernet A+PC模式网口 (23)4.2.3RS232&RS422连接终端 (23)4.2.4VGA标准接口 (23)4.2.5EtherCAT专用总线接口 (23)4.3滤波板 (24)4.3.1接口五说明 (24)4.4转接板 (25)4.4.1GPIO与LIO引脚定义 (26)4.4.2GPIO说明 (27)4.4.3232接口说明 (28)4.4.4RS485接口说明 (29)4.4.5MPG接口说明 (29)4.5远端串行RIO&ARIO板 (30)第五章驱动器接线与参数设置 (33)5.1英威腾伺服驱动器 (33)5.1.1英威腾DA100伺服驱动器连接示意图 (33)5.1.2英威腾DA100伺服驱动器绝对式编码器配线图 (33)5.1.3英威腾DA100伺服驱动器驱动器参数设置 (34)5.1.4英威腾DA200伺服驱动器连接示意图 (36)5.1.5英威腾DA200伺服驱动器绝对式编码器配线图 (36)5.1.6英威腾DA200伺服驱动器驱动器参数设置 (37)5.2台达伺服驱动器 (39)5.2.1台达ASDA_A2系列伺服驱动器连接示意图 (39)5.2.2台达ASDA_B2系列伺服驱动器连接示意图 (40)5.2.3台达ASDA_A2、ASDA_B2驱动器绝对式编码器配线图 (40)5.2.4台达ASDA_A2伺服驱动器参数设置 (41)5.3山洋伺服驱动器 (43)5.3.1山洋R2驱动5668连接示意图 (43)5.3.2山洋驱动器绝对式编码器配线图 (44)5.3.3山洋伺服驱动器参数设置 (44)5.4图科I GD伺服驱动器 (46)5.4.1图科iGD系列伺服驱动器连接示意图 (46)5.4.2图科驱动器绝对式编码器配线图 (47)5.4.3图科伺服驱动器参数设置 (47)5.5松下伺服驱动器 (48)5.5.1松下A4、A5伺服驱动器连接示意图 (48)5.5.2松下A4、A5驱动器绝对式编码器配线图 (49)5.5.3松下A4驱动器参数配置 (49)5.5.4松下A5驱动器参数配置 (49)5.6迈信伺服驱动器 (51)5.6.1迈信Maxsine EP3系列伺服驱动器连接示意图 (51)5.6.2迈信驱动器绝对式编码器配线图 (52)5.6.3迈信驱动器参数配置 (52)5.7多摩川伺服驱动器 (53)5.7.1多摩川TAMAGAWA TA系列伺服驱动器连接示意图 (53)5.7.2多摩川TAMAGAWA TA系列驱动器绝对式编码器配线图 (54)5.7.3多摩川TAMAGAWA TA系列驱动器参数配置 (54)5.8高创CDHD伺服驱动器 (55)5.8.1高创CDHD系列伺服驱动器连接示意图 (55)5.8.2高创驱动器绝对式编码器配线图 (56)5.9.1欧瑞伺服驱动器连接示意图 (57)5.9.2欧瑞驱动器绝对式编码器配线图 (58)5.10台州亿丰伺服驱动器 (59)5.10.1台州亿丰伺服驱动器连接示意图(标准版) (59)5.10.2台州亿丰伺服驱动器连接示意图(进阶版) (60)5.10.3台州亿丰伺服驱动器绝对式编码器配线图(标准版) (61)5.10.4台州亿丰伺服驱动器绝对式编码器配线图(进阶版) (61)5.11研控伺服驱动器 (62)5.11.1研控AS1伺服驱动器连接示意图 (62)5.11.2研控AS1伺服驱动器绝对式编码器配线图 (63)5.11.3研控AS1伺服驱动器驱动器参数设置 (63)5.12禾川伺服驱动器 (64)5.12.1禾川SV-X3伺服驱动器连接示意图 (64)5.12.2禾川SV-X3伺服驱动器绝对式编码器配线图 (65)5.12.3禾川SV-X3伺服驱动器驱动器参数设置 (65)5.13上海儒竞伺服驱动器 (66)5.13.1上海儒竞SE A2伺服驱动器连接示意图 (66)5.13.2上海儒竞SE A2伺服驱动器绝对式编码器配线图 (66)附录一:系统更新说明 (67)第一章概述1.1简介由本公司所开发的AMC(Intelligent Motion Control Chip)运动控制平台,运用DDA原理由PGE(Pulse Generator)①均匀送出各轴脉波移动量,实现八轴定位及同动/不同动控制。

深圳昊诚矩阵控制软件说明书V 1.3.81.安装软件1.1先安装光盘中的软件,只需点击下一步即可。
1.2安装完成显示桌面图标。
2. 系统设置当清除设置后或是第一次运行本软件时会出现系统设置对话框,如下图所示:1. 串口号必须是本机系统中存在的空闲串口。
2. 矩阵的出厂默认地址是 0XFE(16进制),也就是十进制的254。
3. 输入数和输出数必须是大于0的正整数。
4. 矩阵类型共分为3种:VGA、RGB、Video。
5. 如果你选购的矩阵可以支持AV切换请选中“支持AV切换”。
3. 主界面主界面如下所示:主界面分为菜单条、右上的切换模式控制以及系统设置和右下的模式管理。
3.1 切换通道比如要把输入2切换到输出3,只要用左键点击一下第2行的第3列的矩形框就行了。
软件默认是显示16行X16列,当矩阵规模的输入数或输出数大于16时就会出现上一页和下一页的按钮。
3.2 关断输出端口要关断那个输出只要对那路输出点击右键,然后点击弹出的右键菜单中的“关断”项就能关断该输出,如果输出端口被关断了颜色就变成红色。
当有输入端口切换到关断的输出时输出端口会自动恢复到打开的状态。
3.3 设置端口名称每个输入或输出端口下面都有一个输入框,在该输入框中可以输入端口的名字用来标识每个端口链接的对象(比如输入端口1连接了摄像头1就可以在1号输入端口的输入框中输入摄像头1)3.4 把某路输入切换到所有输出只要双击某个输入端口的蓝色小筐,就能把该输入端口输出到所有的输出端口。
如下图所示:3.5 设置切换方式该功能只有当矩阵支持AV切换的时候有用。
3.6 系统设置在系统设置曲可以设置用那个串口控制矩阵,以及每个切换命令之间的时间间隔。
3.7 模式管理(1)保存模式,点击“保存模式”按钮会出现如下所示的对话框:输入模式名点击“确定”按钮可以把当前切换状态存成一个模式。
(2)预览模式,当点击该模式的时候可以预览实际的切换效果。
(3)执行模式,如果要执行某个模式,只要选中一个模式然后点击“执行选中的模式”按钮。
Wi-SUN SDK 1.3.2.0 GAGecko SDK Suite 4.1 September 28, 2022Wireless Smart Ubiquitous Network (Wi-SUN) is the leading IPv6 sub-GHz mesh tech-nology for smart city and smart utility applications. Wi-SUN brings Smart Ubiquitous Networks to service providers, utilities, municipalities/local government, and other enter-prises, by enabling interoperable, multi-service, and secure wireless mesh networks. Wi-SUN can be used for large-scale outdoor IoT wireless communication networks in a wide range of applications covering both line-powered and battery-powered nodes. Silicon Labs' Wi-SUN hardware is certified by the Wi-SUN Alliance, a global industry association devoted to seamless LPWAN connectivity. Wi-SUN builds upon open stand-ard internet protocols (IP) and APIs, enabling developers to extend existing infrastruc-ture platforms to add new capabilities. Built to scale with long-range capabilities, high-data throughput and IPv6 support, Wi-SUN simplifies wireless infrastructure for industrial applications and the evolution of smart cities.These release notes cover SDK versions: 1.3.2.0 released September 28, 2022 1.3.1.0 released August 17,2022 1.3.0.0 released June 8, 2022Compatibility and Use NoticesFor information about security updates and notices, see the Security chapter of the Gecko Platform Release notes installed with this SDK or on the TECH DOCS tab on https:///developers/wi-sun-protocol-stack . Silicon Labs also strongly recommends that you subscribe to Security Advisories for up-to-date information. For instructions, or if you are new to the Silicon Labs Wi-SUN SDK, see Using This Release . Compatible Compilers:IAR Embedded Workbench for ARM (IAR-EWARM) version 9.20.4 •Using wine to build with the IarBuild.exe command line utility or IAR Embedded Workbench GUI on macOS or Linux could result in incorrect files being used due to collisions in wine’s hashing algorithm for generating short file names.•Customers on macOS or Linux are advised not to build with IAR outside of Simplicity Studio. Customers who do should carefully verify that the correct files are being used.GCC (The GNU Compiler Collection) version 10.3-2021.10, provided with Simplicity Studio.Contents Contents1Wi-SUN Stack (2)1.1New Items (2)1.2Improvements (2)1.3Fixed Issues (2)1.4Known Issues in the Current Release (3)1.5Deprecated Items (3)1.6Removed Items (3)2Wi-SUN Applications (4)2.1New Items (4)2.2Improvements (4)2.3Fixed Issues (4)2.4Known Issues in the Current Release (4)2.5Deprecated Items (4)2.6Removed Items (4)3Using This Release (5)3.1Installation and Use (5)3.2Security Information (5)3.3Support (6)1 Wi-SUN Stack1.1 New ItemsAdded in release 1.3.0.0•Most of the stack crypto operations are now made through ARM PSA Crypo API.•Added a new API sl_wisun_set_device_private_key_id() that indicates which PSA Crypto key handler contains the de-vice private key and has to be used by the stack. It is the application’s responsibility to create the key.•Added a new API sl_wisun_set_regulation() that configures the regional regulation to which the stack must comply. Refer to UG495: Silicon Labs Wi-SUN Developer's Guide for more information about regional regulation in the Wi-SUN Stack.•Added a new event SL_WISUN_MSG_REGULATION_TX_LEVEL_IND_ID that is fired when the transmission budget crosses one of the transmission budget thresholds. The transmission budget is defined by the regional regulation. Refer to UG495: Silicon Labs Wi-SUN Developer's Guide for more information about regional regulation in the Wi-SUN Stack.•Added a new API sl_wisun_set_regulation_tx_thresholds()that configures the threshold used to fire SL_WISUN_MSG_REGULATION_TX_LEVEL_IND_ID event.•Added a new API sl_wisun_set_advert_fragment_duration() that configures the asynchronous transmission fragment duration. It can be used to reduce the impact on the latency of long advertisement periods.•Added a new API sl_wisun_set_unicast_tx_mode() that enables a high-reliability transmission mechanism for unicast communication. It trades off unicast communication reliability for latency.1.2 ImprovementsChanged in release 1.3.1.0•When ARIB radio regulation is selected, the stack refuses all EDFE initialization requests sending an EDFE final frame.Changed in release 1.3.0.0•sl_wisun_set_channel_mask() channel filter is now applied to asynchronous transmissions and unicast listening schedule.The function was renamed sl_wisun_set_allowed_channel_mask() to make it more self-explanatory.1.3 Fixed IssuesFixed in release 1.3.2.01023782 Fixed an invalid Path Control field configuration in RPL DAO packet.Fixed in release 1.3.1.0851960 Fixed PAN Advert and PAN Config Trickle timer configuration. Inconsistent transmissions were not correctly managed. It could lead to suboptimal behavior in dense areas of a network.840698Fixed a performance issue that was causing Linux Border Router RCP to become unreachable when running throughput tests with high-speed data rates. That issue was fixed by using DMA to collect UART data.853035 Fixed an initialization issue that was causing PAN Advert and PAN Config asynchronous transmission requests to be dropped. That issue was most likely to happen with TEST and SMALL network size configuration and couldcause connection durations to be significantly longer.Fixed in release 1.3.0.0Fixed an error that was causing radio calibrations to be skipped during Wi-SUN Stack initialization. 8134407742901.4 Known Issues in the Current ReleaseNone1.5 Deprecated ItemsNone1.6 Removed ItemsNoneWi-SUN Applications 2 Wi-SUN Applications2.1 New ItemsAdded in release 1.3.0.0iPerf2 support•Integrated into Wi-SUN - SoC Network Measurement Application•Option to install the Iperf2 component to other applications alsoWi-SUN Configurator – UI Tool•Configuration options are being used by the Applications automatically•MAC Address•MAC Allow/Deny List•Unicast Dwell IntervalCoAP discovery feature (limited, RFC 6690):•Register Resources•Return list of Registered Resources in response to GET .well-known/core request2.2 ImprovementsAdded in release 1.3.1.0Wi-SUN Linux Border Router RCP•Released version 1.1.0•It now collects UART data using a DMA.2.3 Fixed IssuesNone2.4 Known Issues in the Current ReleaseIssues in bold were added since the previous release.Simplicity Studio – Network Analyzer: Wi-SUN Encrypted Packets arenot supported.2.5 Deprecated ItemsNone2.6 Removed ItemsRemoved in release 1.3.0.0•Wi-SUN - SoC Border Router with backhaul.3 Using This ReleaseThis release contains the following•Wi-SUN stack library•Wi-SUN sample applications•Wi-SUN border router pre-compiled demos•DocumentationIf you are a first time user, see QSG181: Silicon Labs Wi-SUN Quick-Start Guide.3.1 Installation and UseThe Wi-SUN SDK is provided as part of the Gecko SDK (GSDK), the suite of Silicon Labs SDKs. To quickly get started with the GSDK, install Simplicity Studio 5, which will set up your development environment and walk you through GSDK installation. Simplicity Studio 5 includes everything needed for IoT product development with Silicon Labs devices, including a resource and project launcher, software configuration tools, full IDE with GNU toolchain, and analysis tools. Installation instructions are provided in the online Simplicity Studio 5 User’s Guide.Alternatively, Gecko SDK may be installed manually by downloading or cloning the latest from GitHub. See https:///SiliconLabs/gecko_sdk for more information.Simplicity Studio installs the GSDK by default in:•(Windows): C:\Users\<NAME>\SimplicityStudio\SDKs\gecko_sdk•(MacOS): /Users/<NAME>/SimplicityStudio/SDKs/gecko_sdkDocumentation specific to the SDK version is installed with the SDK.3.2 Security InformationSecure Vault IntegrationThis version of the stack does not integrate Secure Vault Key Management.Security AdvisoriesTo subscribe to Security Advisories, log in to the Silicon Labs customer portal, then select Account Home. Click HOME to go to the portal home page and then click the Manage Notifications tile. Make sure that ‘Software/Security Advisory Notices & Product Change Notices (PCNs)’ is checked, and that you are subscribed at minimum for your platform and protocol. Click Save to save any changes.3.3 SupportDevelopment Kit customers are eligible for training and technical support. Contact Silicon Laboratories support at /support.Silicon Laboratories Inc.400 West Cesar Chavez Austin, TX 78701USAIoT Portfolio/IoTSW/HW/simplicityQuality /qualitySupport & Community/communityDisclaimerSilicon Labs intends to provide customers with the latest, accurate, and in-depth documentation of all peripherals and modules available for system and software imple-menters using or intending to use the Silicon Labs products. Characterization data, available modules and peripherals, memory sizes and memory addresses refer to each specific device, and “Typical” parameters provided can and do vary in different applications. Application examples described herein are for illustrative purposes only. Silicon Labs reserves the right to make changes without further notice to the product information, specifications, and descriptions herein, and does not give warranties as to the accuracy or completeness of the included information. Without prior notification, Silicon Labs may update product firmware during the manufacturing process for security or reliability reasons. Such changes will not alter the specifications or the performance of the product. Silicon Labs shall have no liability for the consequences of use of the infor -mation supplied in this document. This document does not imply or expressly grant any license to design or fabricate any integrated circuits. The products are not designed or authorized to be used within any FDA Class III devices, applications for which FDA premarket approval is required or Life Support Systems without the specific written consent of Silicon Labs. A “Life Support System” is any product or system intended to support or sustain life and/or health, which, if it fails, can be reasonably expected to result in significant personal injury or death. Silicon Labs products are not designed or authorized for military applications. Silicon Labs products shall under no circumstances be used in weapons of mass destruction including (but not limited to) nuclear, biological or chemical weapons, or missiles capable of delivering such weapons. Silicon Labs disclaims all express and implied warranties and shall not be responsible or liable for any injuries or damages related to use of a Silicon Labs product in such unauthorized applications. Note: This content may contain offensive terminology that is now obsolete. Silicon Labs is replacing these terms with inclusive language wherever possible. For more information, visit /about-us/inclusive-lexicon-projectTrademark InformationSilicon Laboratories Inc.®, Silicon Laboratories ®, Silicon Labs ®, SiLabs ® and the Silicon Labs logo ®, Bluegiga ®, Bluegiga Logo ®, EFM ®, EFM32®, EFR, Ember ®, Energy Micro, Energy Micro logo and combinations thereof, “the world’s most energy friendly microcontrollers”, Redpine Signals ®, WiSeConnect , n-Link, ThreadArch ®, EZLink ®, EZRadio ®, EZRadioPRO ®, Gecko ®, Gecko OS, Gecko OS Studio, Precision32®, Simplicity Studio ®, Telegesis, the Telegesis Logo ®, USBXpress ® , Zentri, the Zentri logo and Zentri DMS, Z-Wave ®, and others are trademarks or registered trademarks of Silicon Labs. ARM, CORTEX, Cortex-M3 and THUMB are trademarks or registered trademarks of ARM Holdings. Keil is a registered trademark of ARM Limited. Wi-Fi is a registered trademark of the Wi-Fi Alliance. All other products or brand names mentioned herein are trademarks of their respective holders.。
目录第一章泰坦混合矩阵切换器简介 (5)1.1 机箱外观 (5)1.2 设备简介 (7)1.3 功能特点 (8)1.4 泰坦混合矩阵切换器典型应用示意图 (11)第二章泰坦混合矩阵切换器技术参数 (11)2.1 输入接口-VGA (11)2.2 输入接口-YPbPr (12)2.3 输入接口-DVI(普通) (12)2.4 输入接口-模拟视频 (12)2.5 输入接口-SDI (12)2.6 输入接口-HDMI (13)2.7 输入接口-DVI(双链路) (13)2.8 输入接口-双绞线 (13)2.9 输出接口-DVI/VGA (14)2.10 双绞线输出接口 (14)2.11 设备控制 (14)2.12 功率和尺寸 (14)2.13 安装与其他 (15)第三章泰坦混合矩阵切换器软件使用方法 (15)3.1 Titans™1000混合矩阵切换器运行和配置 (15)3.2 Titans™1000混合矩阵切换器输入输出及功能 (18)3.3 Titans™1000混合矩阵切换器窗口控制 (31)3.4 Titans™1000混合矩阵切换器场景 (34)3.5 Titans™1000混合矩阵切换器特殊功能 (35)3.6 Titans™500混合矩阵切换器运行和配置 (40)3.7 Titans™500混合矩阵切换器输入输出及功能 (42)3.8 Titans™500混合矩阵切换器切换控制 (54)3.9 Titans™500混合矩阵切换器场景 (55)3.10 Titans™500混合矩阵切换器特殊功能 (57)第四章混合矩阵切换器控制指令集 (60)4.1 混合矩阵切换器设置组合方式(窗口模式)指令 (60)4.2 混合矩阵切换器1000设置输出屏显示分辨率指令 (61)4.3 混合矩阵切换器500设置输出屏显示分辨率指令 (62)4.4 混合矩阵切换器1000输出显示屏开窗口指令 (62)4.5 混合矩阵切换器1000移动窗口指令 (63)4.6 混合矩阵切换器1000更改窗口的输入源选择指令 (63)4.7 混合矩阵切换器保存场景指令 (64)4.8 混合矩阵切换器调用保存的场景指令 (64)4.9 混合矩阵切换器1000将窗口置顶或置底指令 (65)4.10 混合矩阵切换器1000关闭窗口指令 (65)4.11 混合矩阵切换器1000关闭一个拼接屏的所有窗口指令 (65)4.12 混合矩阵切换器读取输入通道的参数指令 (65)4.13 混合矩阵切换器更改VGA输入通道参数指令 (66)4.14 混合矩阵切换器恢复VGA卡为默认参数指令 (66)4.15 混合矩阵切换器输出测试指令 (67)4.16 混合矩阵切换器1000使能和关闭拼接屏指令 (67)4.17 混合矩阵切换器查询拼接屏信息指令 (67)4.18 混合矩阵切换器查询当前输入状态指令 (67)4.19 混合矩阵切换器查询窗口信息指令 (68)4.20 混合矩阵切换器设置同步模式指令 (68)4.21 混合矩阵切换器1000设置显示屏的输出映射指令 (68)4.22 混合矩阵切换器查询IP地址信息指令 (69)4.23 混合矩阵切换器修改IP信息指令 (69)4.24 混合矩阵切换器将字符缓冲区的内容写入到相应的输入通道指令 (70)4.25 混合矩阵切换器设置时间指令 (70)4.26 混合矩阵切换器读取时间指令 (71)4.27 混合矩阵切换器1000设置底图使能指令 (71)4.28 混合矩阵切换器500切换输出通道 (71)4.29 混合矩阵切换器设置输入源类型 (71)第五章安装说明 (72)5.1 打开包装 (72)5.2 安装机器 (72)5.3 机器调试 (72)第六章常见故障分析及解决 (72)6.1 安装完软件无法运行原因 (72)6.2 输出的画面无显示 (73)6.3 画面出现偏色现象 (73)6.4 画面出现抖动或者花点 (73)6.5 画面在显示设备中显示出现黑边 (73)安全使用说明线缆不容许在电源线、信号线、通讯线等线缆上压放物品,应避免对线缆踩踏和挤压,以防止出现漏电和短路等危险情况。
声明感谢您选择新三思试验机!您能成为我们的客户是我们莫大的荣幸。
本公司不仅给您提供质量优异的产品,而且将为您提供满意的服务!为了您能更熟练地使用本试验机,我们随机配备了说明书。
本手册主要介绍本设备有关的结构原理、设备安装、操作方法以及安全注意事项等方面的知识。
特别提示:有时为了提高设备的性能,我们会对软件部分或机械部分做一些改动,这样可能会产生操作系统与使用指南在某些细节上不一致的情况。
在此声明:您所购买的设备的随机说明书以该试验机实际配备为准。
在编写本手册时,我们难免有错误和疏漏之处,请多加包涵并热情欢迎您提出宝贵意见或建议。
本手册的内容如有变动,恕不另行通知。
本手册版权所有深圳市新三思材料检测有限公司;本手册的任何部分未经深圳市新三思材料检测有限公司书面许可,不得以任何方式影印、复印或翻译成其它语言。
本书中带有“★”的地方,请您特别注意并仔细阅读。
随机文件:随机装有如下文件:1、《使用说明书》一份2、《产品出厂装箱单》一份3、《产品保修卡》二份4、《产品合格证》一份在您接收本设备时,请检查上述文件是否齐全,并妥善保管。
★特别声明:根据客户具体要求不同,具体配置见装箱单。
本说明书不能作为向本公司提出任何要求的依据。
本说明书的解释权在本公司。
目录安全守则 (4)第 1 章.产品信息 (4)1.1. 概述 (4)1.2. 功能 (4)1.3. 主要特点 (4)1.4. 执行的标准 (4)1.5. 主要技术参数 (5)第 2 章.结构和工作原理 (6)2.1. 工作原理 (6)2.2. 产品结构 (6)第 3 章.设备的安装和调试 (8)3.1. 设备安装 (8)3.2. 连线 (8)3.3. 检查泄漏 (8)3.4. 通电检测 (9)3.5. 设备调试 (9)第 4 章.注意事项 (10)4.1. 计算机部分 (10)4.2. 试验部分 (10)第 5 章.设备保养 (11)第 6 章.常见问题分析及处理 (11)附录一电气原理图 (12)附录二电气接线图 (12)附录三设备布局图 (13)附录四关于RKC温控表参数控制说明 (13)附录五电子数显指示表使用说明 (15)安全守则●设备停止使用时,必须切断主机和适配器电源●设备不得在无人看管情况下长期运行●第一次注入或更换导热油时,必须根据导热油闪点设定温控表温度上限值,防止意发生第 1 章.产品信息1.1.概述ZWK系列微机控制热变形维卡试验机是用于测定热塑性塑料试样在一定的负荷、一定的等速升温条件下,试样被1mm2压针头压入1mm时的温度(简称维卡温度)以及测定热塑性塑料试样在等速升温和呈简支梁式的静弯曲负载作用下,试样弯曲达到规定值时的温度(简称热变形温度)的专用设备。
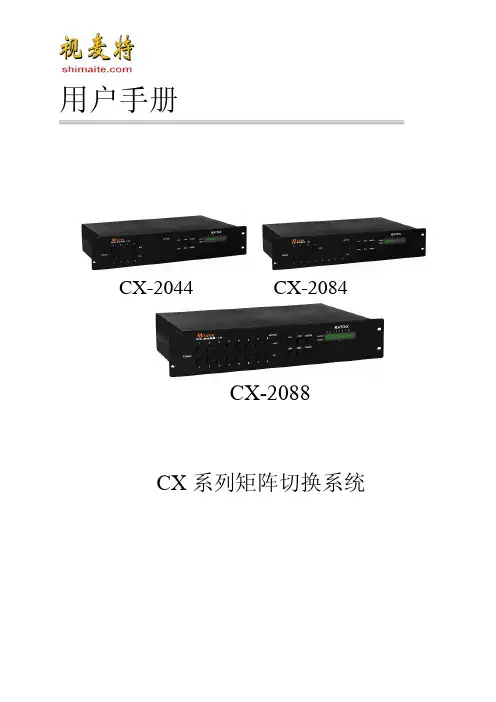
用户手册CX-2044 CX-2084CX-2088CX系列矩阵切换系统使用前须知1、阅读说明书——使用前,请仔细阅读各项使用说明。
2、产品安置环境——只能安装室内,干燥通风的稳固机框或桌面上。
3、闪电——在闪电或一段时间不用时,请拨掉插头和电源线。
以防止损坏设备。
4、维修——如发生故障,必须由专业技术人员检修或到指定经销商维修更换零部件。
目录一、矩阵系统概述 (4)1.1CX矩阵系统 (4)1.2CX矩阵系统包装说明 (4)二、CX矩阵主机安装 (5)三、CX矩阵系统分类 (6)四、矩阵系统前后面板示意图 (6)4.1 CX-2044前后面板示意图 (6)4.2 CX-2084前后面板示意图 (7)4.3 CX-2088前后面板示意图 (7)五、CX矩阵与外围设备的连接 (8)5.1 输入、输出接口 (8)5.1.1 音视频连接线 (8)5.2 CX矩阵和控制电脑的连接 (10)5.3 远端控制方法及设定 (10)5.3.1 RS-232通讯端口、连接方法 (10)5.3.2 RS-485通讯端口 (12)5.3.3 切换开关的设置 (13)5.3.4 CX矩阵系统与控制系统的连接 (15)六、矩阵控制面板操作说明 (17)6.1输入输出切换的按键操作格式 (17)6.2前面板按键功能说明 (18)6.3 操作示例 (19)七、矩阵应用软件 (21)7.1软件介绍 (21)7.1.1 软件说明 (21)7.1.2 软件启动 (21)7.2 软件功能说明 (21)7.2.1主操作界面功能说明 (22)7.2.2 Disconnect功能按钮说明 (24)7.2.3 Select all output、DeSelect all output切换功能的使用 (25)7.2.4 Disconnect all指令....................................................... . (25)7.2.5 Memory功能的使用............................................................ .. (25)7.2.6 Scan功能的使用............................................................ . (26)7.2.7 Options功能的应用 (26)7.2.8 Exit功能应用............................................... (27)7.2.9其他应用 (27)八、通讯协议与控制指令代码 (27)九、CX矩阵系统技术参数 (28)十、常见问题及解决办法 (29)一、矩阵系统概述1.1 CX矩阵系统CX系列矩阵切换器,是一款高性能的视频信号和音频信号专业切换设备,用于多个视频信号和音频信号输入输出交叉切换,提供独立的视频和音频输入、输出端子,每路视频分量信号和音频信号单独传输,单独切换使信号传输衰减降至最低,图像和声音信号能高保真输出。
秒会的全能P D F 编辑神器2021产品手册万兴PDF关于万兴科技万兴科技成立于2003年2003主电子商务网站全球排名TOP500TOP500用户覆盖全球200多个国家和地区200电子商务网站年累计访问量超6亿人次600M软件产品年度累计下载量超1亿次100MG2 Crowd 最佳软件公司TOP100TOP100万兴科技(300624.SZ )成立于2003 年,2018 年登陆A 股创业板,是全球领先的新生代数字创意赋能者。
公司研发总部位于深圳,并在北京、长沙、温哥华、东京等地设有运营中心,业务范围遍及全球200 多个国家和地区。
万兴科技是中国政府认定的国家规划布局内重点软件企业、国家级高新技术企业,连续跻身德勤高科技高成长亚太区500强”、“福布斯中国最具发展潜力企业”,在全球拥有数百项专利、著作权、商标等自主知识产权。
万兴PDF 简介万兴PDF 是我们针对工作应用场景打造的高效数字文档解决方案,旨在用效率重塑个人与商业客户的办公体验。
万兴PDF 采用类似Word 界面和工具条设计,集格式转换、再编辑、分发、加解密、阅读、修改、批注、填表单、电子签名、水印等功能于一体,具有易操作、高效、功能全等特征,帮助全球超过50万家企业不再依赖Adobe ®Acrobat ®。
强大、易用、高效的数字文档解决方案2014发布V1.0 | 全球5000万用户| 自有版权| 提高效率工具为企业降低成本我们为企业提供终身授权,企业仅需要考虑授权数量,无需顾虑逐年付费;支持产品持续更新升级,无需再为升级付费;具备强大的功能,接近Office的操作习惯,减少企业的培训成本,是您更换Adobe®Acrobat®的明智之选。
使企业便捷管理支持批量部署,提升企业IT人员的工作效率;我们为企业提供Online授权管理工具,企业可对安装了软件的设备进行授权或解除授权;对于连接互联网有严格限制的企业提供全功能的安装包,并提供Offline授权管理工具。
可编辑修改精选全文完整版科力达RTK 产品系列风云K9系列RTK测量系统产品手册科力达仪器二○一五年四月目录第一章风云K9系列RTK概述 (3)§1.1关于风云K9 (3)§1.2二大独创 (3)§1.3四大特色 (4)§1.4技术特色 (4)第二章风云K9系列RTK主机 (6)§2.1主机外型 (6)§2.2接口 (7)§2.3电池的安装方法 (7)§2.4指示灯和仪器设置 (8)§2.5手簿与蓝牙连接 (13)§2.5.1 手簿设置 (13)§2.5.2 连接设置 (17)§2.6网络设置连接 (18)第三章风云K9系列RTK电台 (23)§3.1电台概述 (23)§3.1.1 产品简介 (23)§3.1.2 产品特点 (23)§3.1.3 技术指标 (24)§3.2GDL25电台外型说明 (25)§3.2.1 GDL25电台的面板 (25)§3.2.2 GDL25电台的外型 (26)§3.3GDL25电台使用注意事项 (26)§3.3.1 供电电源 (26)§3.3.2 天线口负载 (27)§3.3.3 电磁环境 (27)§3.3.4 天线选择 (28)§3.3.5 接口电缆 (28)第四章风云K9系列RTK附件介绍 (29)§4.1风云K9系列GPS的仪器箱(包) (29)§4.2电池及充电器 (29)§4.3数据收天线及发射天线 (31)§4.4各种传输线及电缆 (32)§4.5其他 (33)第五章操作说明 (34)§5.1基准站和移动站安装 (34)§5.2仪器设置 (35)§5.3仪器操作表现 (35)§5.4天线高的量测方法 (35)第六章与软件的连接 (37)§6.1数据传输 (37)§6.1.1 磁盘拷贝 (37)§6.1.2 仪器之星的使用 (37)§6.2在线升级方法 (39)§6.3K9系列GPS的注册 (41)附录1 技术参数 (43)附录2 联系方式 (44)第一章风云K9系列RTK概述§1.1 关于风云K9科力达仪器一直致力于把国际先进的GPS测绘勘测技术与产品普及到国测量用户手中。
广东科力达天启RTK测量系统使用手册第二版广东科力达仪器有限公司二○二二年一月目录目录 (1)第一章概述 (1)§1.1引言 (1)§1.2产品功能及亮点 (1)第二章天启测量系统介绍 (4)§2.1整体介绍 (4)§2.2天启主机介绍 (5)§2.2.1主机外型 (5)§2.2.2结构与接口 (6)§2.2.3按键和指示灯 (7)§2.3主机按键与液晶设置 (7)§2.3.1主界面 (7)§2.3.2设置工作模式 (9)§2.3.3设置数据链 (12)§2.3.4系统配置 (15)§2.3.5主机控制 (20)§2.3手簿介绍 (21)§2.3.2键盘及功能介绍 (21)§2.4.2蓝牙连接 (23)§2.5主机配件介绍 (25)§2.5.1仪器箱 (25)§2.5.2电池及充电器 (26)§2.5.3差分电台天线 (27)§2.5.4数据线 (27)§2.5.5其他配件 (27)第三章仪器架设与配置 (28)§3.1静态作业 (28)§3.2RTK作业(内置电台1+1模式) (30)§3.2.1内置电台基站架设 (30)§3.2.2启动基准站 (31)§3.2.3架设移动站 (33)§3.2.4设置移动站 (34)§3.3RTK作业(网络1+1模式) (36)§3.3.1基准站和移动站的架设 (36)§3.3.2基准站设置 (36)§3.3.3移动站设置 (38)§3.4RTK作业(网络CORS模式) (41)§3.4.1移动站的架设 (41)第四章常见功能使用 (44)§4.1点测量 (44)§4.2点放样 (46)§4.3成果数据导出 (48)§4.4惯导功能使用 (50)§4.5WebUI网页配置 (52)§4.6固件升级 (54)4.6.1数据线升级 (54)4.6.2WebUI网页升级 (56)4.6.3工程之星在线升级 (58)§4.7天线高量取方式 (59)附录A天启测量系统技术指标 (60)附录B H6手簿技术指标 (63)附录C联系方式 (64)第一章概述阅读本章,您可以简单了解科力达公司及天启测量系统§1.1引言欢迎使用广东科力达仪器有限公司产品。
中控系统可编程主机系列中控编程主机产品描述:KVS-PM中控系统配置了主频达210MHZ的32位内嵌式处理器,内置了8M内存和8M 存储FLASH,能高速运算复杂的逻辑指令;内置4路E-BUS总线接口,可通过无线WIFI 控制接口实现计算机远程控制。
自带30*8的LED显示面板,可以实时的显示中欧内功主机及网络设备工作运行状态同时支持开机自检信息状态显示,采用全新的E-BUS总线结构,配合KVS-WI100可实现WIFI无线网络控制,国际流行的全贴片式SMT工艺和可编程逻辑阵列电路,能保证更快的运行速度和更稳定的操作系统。
强大的内置可编程接口控制几乎所有的外接设备(包括第三方设备),适用了大型会议厅和拼接系统等各种大型系统工程。
用户建立自有的红外代码数据库,也可以从网站上下载最新的红外代码库,可实现一键发双代码等红外逻辑控制。
技术参数:内置4个E-BUS总线接口最新的30×8液晶显示面板,可实时显示设备运行状态,自定义窗口显示内容。
开放式的可编程控制平台,人性化的中文操作界面,交互式的控制结构采用最新32位内嵌式处理器,处理速度可达257MHZ主机内置8MB内存及8MB的大容量FLASH存储器,可扩展至32M8路独立可编程RS-232控制接口,可以收发RS-232、RS-485、RS-422格式数据8路独立可编程IR红外发射口8路数字I/O输入输出控制口,带保护电路,支持0-5V数字输入信号8路弱电继电器控制接口3个网络控制接口,可任意扩展模块,如多台调光器,多台电源控制器等,可扩充至256个网络设备提供2条可扩展多功能插槽,可选配网络适配卡、智能电话控制卡、音量卡、等扩展模块支持4路E-BUS控制总线,可任意扩展控制模块,如多台调光器、多台电源控制器等,最大可支持256个网络设备前、后面板具有系统软件传输接口可编程触摸屏系列7寸安卓屏产品描述:天科恒业公司2011年最新推出的采用Android2.2系统的新一代触摸控制产品,内置54Mbps无线WiFi模块与中央控制主机实现无缝的双向通讯,显示部分采用主流的16:9宽屏显示,7英寸的32位真彩色TFT显示屏,触摸屏解析度800×480像素,相对于市场上主流触摸屏产品色彩还原度更真实,视觉效果更好;随机提供的界面编辑软件,支持普通/图形按键、进度条、视频、FLASH、天气、日期、时钟、图片、动画、文本等界面元素,用户可通过编辑软件对触摸屏操作界面进行人性化的设计;采用WiFi无线方式进行用户程序的上载接口,速度比普通的串口高出数倍,拥有操作简捷直观的图形用户界面,对周围设备的控制更加轻松,各种操作更趋向人性化。
科视CHRISTIEGS 系列长效 1DLP 激光投影机董事室会议室教育场所政府现场活动舞台博物馆主题公园与旅游名胜宗教场所选择科视Christie® GS 系列作为您下一个项目的固态投影机,避免故障,减少更换灯泡和维护的成本。
从商业场所到现场活动等,专业级科视Christie GS 系列产品可为高使用环境带来卓越的性能和可靠性。
科视Christie GS 系列采用激光荧光体发光,可提供 20,000 小时低成本运行。
凭借无线连接、小巧外形、低重量、静音和全套镜头,GS 系列是董事室、会议室、教育、宗教场所、现场活动舞台和其他中小场所的不二之选。
我们的 850-GS 和 1075-GS 采用科视 BoldColor 技术并配备 1DLP® 激光荧光体,可带来更高的亮度和图像品质,呈现更加准确的色彩还原度。
长效激光投影机拥有成本较低630-GS 和 635-GS 仅限白色,中国地区仅限黑色。
850-GS 提供黑白双色。
1075-GS 仅限黑色。
技术参数科视Christie DWU630-GS科视Christie DHD630-GS图像亮度• 6750 ISO 流明(典型)• 6000 ANSI 流明(典型)• 6125 ISO 流明(典型)•5900 ANSI 流明(典型)• 5400 ANSI 流明(典型)色轮• 4 段(RGBY):2X 或 3X 速度对比度(全开/全关)•全开/关(启用科视Christie RealBlack™):4,000,000:1 • 动态对比度 6000:1• 全开/关(禁用科视Christie RealBlack):1200:1,ANSI 250:1显示技术类型• 单片 0.67" DMD S600HB标准分辨率• 1920 x 1200 (2,304,000 像素 ) (16:10)色彩控制• 拥有精确软件色彩调节,用于调节色调、饱和度和增益。