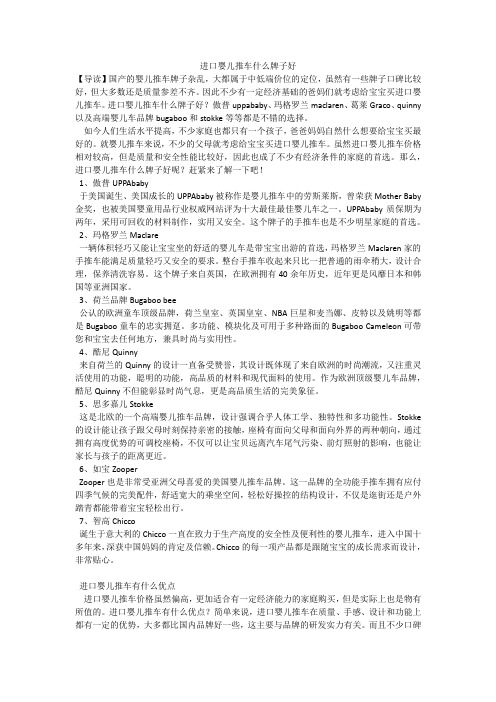
葛莱GRACO 豪华婴儿手推车
- 格式:docx
- 大小:462.93 KB
- 文档页数:4

国外、国内儿童安全座椅品牌大全——附标志图可淘哦儿童安全座椅博客在这篇文章里对国内、国外的所有儿童汽车安全座椅品牌进行详细的汇总、介绍,并附标志图,让您一劳永逸,敬请关注:——第一章:国外儿童安全座椅品牌第一、Britax——英国百得适(百代适)Britax是世界上最大的民用航空头等舱座椅、客机成套内饰设备制造商,其生产的安全座椅是行业的领导者,也是国际公认的豪华品牌,已经有德国奔驰、英国宾利、路虎、捷豹、美国通用、欧宝、福特等在内的知名厂家均已选择Britax的产品作为原厂配置的儿童安全座椅。
上海国家机动车检测中心看到比较多的也是Britax。
第二、STM——斯迪姆,德国品牌德国“斯迪姆”,号称全球第一台儿童安全座椅的发明和制造者。
公司成立于1949年,是世界上最早生产汽车儿童安全座椅的专业生产厂家。
从生产第一个汽车儿童安全座椅到第一个汽车婴儿专用安全座椅的发明,德国斯迪姆公司以先进的技术,可靠的质量及精湛的做工,赢得了业内外人士的一致认可,是公认的行业标准和权威,并享有“汽车儿童安全座椅中的奔驰”之誉。
第三、GRACO——葛莱,美国品牌GRACO设计了全球第一款儿童旅行系统(Travel System),这是一套包含提篮型婴儿汽车安全座椅(infant car seat)及机座(base)和儿童推车(stroller)的组合,机座(base)可以固定在汽车的后座上,提篮(infant car seat)可以从推车(stroller)或汽车(car)中取放固定。
GRACO葛莱儿童安全座椅在网上,国内大型商场,以及国外都有销售,设计样子比较一般,注意,部分产品是由东莞清溪镇明门公司代工生产,选购时请注意。
第四、Chicco——智高,来自意大利的品牌智高(chicco)儿童安全座椅拥有意大利跑车般的流线造型,不得不承认意大利人连儿童安全座椅都可以做的非常漂亮,Chicco是意大利ARTSANA司旗下之专业婴幼用品制造厂,于1945年5月创立于意大利COMO,开发了一系列专业性、高度的安全性及便利性,舒适、方便和可靠的儿童安全座椅。
进口婴儿推车什么牌子好【导读】国产的婴儿推车牌子杂乱,大都属于中低端价位的定位,虽然有一些牌子口碑比较好,但大多数还是质量参差不齐。
因此不少有一定经济基础的爸妈们就考虑给宝宝买进口婴儿推车。
进口婴儿推车什么牌子好?傲普uppababy、玛格罗兰maclaren、葛莱Graco、quinny 以及高端婴儿车品牌bugaboo和stokke等等都是不错的选择。
如今人们生活水平提高,不少家庭也都只有一个孩子,爸爸妈妈自然什么想要给宝宝买最好的。
就婴儿推车来说,不少的父母就考虑给宝宝买进口婴儿推车。
虽然进口婴儿推车价格相对较高,但是质量和安全性能比较好,因此也成了不少有经济条件的家庭的首选。
那么,进口婴儿推车什么牌子好呢?赶紧来了解一下吧!1、傲普UPPAbaby于美国诞生、美国成长的UPPAbaby被称作是婴儿推车中的劳斯莱斯,曾荣获Mother Baby 金奖,也被美国婴童用品行业权威网站评为十大最佳最佳婴儿车之一。
UPPAbaby质保期为两年,采用可回收的材料制作,实用又安全。
这个牌子的手推车也是不少明星家庭的首选。
2、玛格罗兰Maclare一辆体积轻巧又能让宝宝坐的舒适的婴儿车是带宝宝出游的首选,玛格罗兰Maclaren家的手推车能满足质量轻巧又安全的要求。
整台手推车收起来只比一把普通的雨伞稍大,设计合理,保养清洗容易。
这个牌子来自英国,在欧洲拥有40余年历史,近年更是风靡日本和韩国等亚洲国家。
3、荷兰品牌Bugaboo bee公认的欧洲童车顶级品牌,荷兰皇室、英国皇室、NBA巨星和麦当娜、皮特以及姚明等都是Bugaboo童车的忠实拥趸。
多功能、模块化及可用于多种路面的Bugaboo Cameleon可带您和宝宝去任何地方,兼具时尚与实用性。
4、酷尼Quinny来自荷兰的Quinny的设计一直备受赞誉,其设计既体现了来自欧洲的时尚潮流,又注重灵活使用的功能,聪明的功能,高品质的材料和现代面料的使用。

Instruction Manualchrome ™DLXstrollerF IG U R E 29 - 34F IG U R E 41 - 4535 40F IG U R E 51 ~ 5646 5057 61NOTEGBContentsFigures 1-11 WARNING 15 Stroller Assembly18Open Stroller 18 Assemble Front Wheels 18 Assemble Rear Wheels 18 Assemble Armbar 18 Assemble Canopy 19 Stroller Operation 19 Use Canopy19 Switch Seat 19 Adjust Recline 19 Use Buckle 20 Use Shoulder & Waist Harnesses 20 Adjust Calf Support 21 Use Front Swivel Lock 21 Use Brake 21 Adjust Handle 21 Tether Strap 21 Fold Stroller 21 Use Shoulder Harness Pad Cover and Crotch Harness Pad Cover22Use Accessories 23 Care and Maintenance 26EmergencyIn case of emergency or accident, it is most important to have your child taken care of with first aid and medical treatment immediately.ARNINGFOLLOW THE MANUFACTURER’S INSTRUCTIONS.PUT ON ALL THE BRAKES WHENEVER YOU PARK THE PRAM/STROLLER.DO NOT LEAVE CHILDREN UNATTENDED.DO NOT CARRY EXTRA CHILDREN OR BAGS ON THIS PRAM/STROLLER.MAKE SURE CHILDREN ARE CLEAR OF ANY MOVING PARTS IF YOU ADJUST THE PRAM/STROLLER. OTHERWISE THEY MAY BE INJURED.ALWAYS KEEP CHILD IN VIEW WHILE IN PRAM/ STROLLER.DO NOT USE THE SEAT WITH ANY OTHER MODELS OF PRAM/STROLLER.SECURE THE CHILD IN THE HARNESS AT ALL TIMES. USE THIS HARNESS AT ALL TIMES.ALWAYS USE THE CROTCH COMBINATION WITH THE WAIST BELT. IT IS SUGGESTED THAT THE SHOULDER HARNESSES BE USED AS WELL.TO AVOID SERIOUS INJURY FROM FALLING OR SLIDING OUT, ALWAYS USE SEAT BELT.USE THIS TETHER STRAP TO STOP THE PRAM/ STROLLER ROLLING AWAY.DO NOT USE THIS BASSINET ONCE THE CHILD CAN SIT UP UNAIDED.DO NOT USE FOR UNSUPERVISED SLEEPING.Ensure that all the locking devices are engaged before use.Do not let your child play with this product.Never leave the harness buckled when not fitted to a child in the stroller because the harness can form loops which may pose a strangulation hazard.The use of accessories not approved by the vehicle manufacturer is unsafe.Adult assembly required.PLEASE TRANSPORT THE FOLDED STROLLER SAFEL e of this stroller with a child weighing more than 22 kg will cause excessive wear, and stress on the stroller, and could create an unstable condition. Use the stroller with only one child at a time.T o prevent a hazardous, unstable condition, do not place more than 4.5 kg in the storage basket before use. Overloading, folding incorrectly, or using component parts from other manufacturers may cause the pram/ stroller to be damaged﹐ broken or unsafe. Please read the instruction manual carefully.Please read all the instructions in the manual before using the product. Please save instruction manual for future use. Failure to follow these warnings and instructions may result in serious injury or death.Safety belts and restraint system must be used correctly. Child may slip into leg openings and be strangled if the harness is not used.Never use pram/stroller on stairs or escalators.The pram/stroller is not to be used near an open fire or exposed flame.Never allow your child to stand on the pram/stroller orsit in the pram/stroller with head toward front of pram/ stroller.Never place the pram/stroller on roads or dangerous area. The vehicle is designed for use on flat or gently sloping surfaces and may be unstable on higher sloping and uneven surfaces, resulting in the possibility of the vehicle tipping over.Do make sure all parts are assembled and fastened properly before using the pram/stroller.T o avoid strangulation, do not place items with a string around your child’s neck, suspend strings from this product, or attach strings to toys.T o prevent tipping, do not put anything on the handle. Always lift the child in and out of the pram/stroller.Do not lift pram/stroller while child is in stroller.Do not use storage basket as a child carrier.The rear-facing position is suitable for children under 2 years or less.T o prevent tipping, never let child climb the pram/stroller.T o avoid finger entrapment or injury to the body, use care when folding and unfolding the pram/stroller.Be sure the stroller is fully open or folded before allowing child near the pram/stroller.Check that the infant child restraint attachment device is correctly engaged before use.T o avoid strangulation, do make sure your child is clear from the canopy.Discontinue using your pram/stroller if it is damaged or broken.Pram/stroller to be used only at walking speed. This product is not intended for use while jogging.T o avoid suffocation, remove plastic bag and packaging materials before using this product. The plastic bag and packaging materials should then be kept away from babies and children.This product is not suitable for running or skating.Stroller designed to be used from birth shall recommend the use of the most reclined position for new born babies. The parking device must be engaged when placing and removing children.Bassinet is only suitable for a child who cannot sit up unaided, roll over and cannot push itself up on its hands and knees. Maximum weight of the child: 9kg.Bassinet is not to be used for long term sleeping.Do not use or add any mattress other than the one supplied with the bassinet.Please ensure that the storage latch has been properly locked, before lifting or moving the vehicle.The vehicle is not to be used as an unsupervised sleeping environment.The brakes must always be applied when the pram/stroller is not moving.For infant child restraint used in conjunction with a chassis, this vehicle does not replace a cot or a bed. Should your child need to sleep, then it should be placed in a suitable pram body, cot or bed.Stroller AssemblyPlease read all the instructions in this manual before assembling and using this product.Open StrollerSeparate storage latch from storage latch mount 1, and then lift the handle upwards 2, a click sound means the stroller is open completely. Press the recline handle on the back of backrest to rotate the backrest to vertical position. 3! Check that the stroller is completely open before continuing.Assemble Front WheelsAssemble front wheels to front legs. Check that wheels are securely attached by pulling on wheel assemblies. 4To disassemble front wheel, detach front wheel from front leg 5- 2 while pressing the release button. 5- 1Assemble Rear WheelsAssemble brake assembly to rear legs 6, assemble rear wheels to brake assembly 7. Pull the basket tube backward and wrap the connecting tube of rear legs with the flap of the storage basket, and then snap the three buttons 8- 1.! Check that wheels are securely attached by pulling on wheel assemblies. To disassemble rear wheel, detach rear wheel from rear wheel mount 7- 2 while pressing the release button. 7- 1Assemble ArmbarAlign the armbar ends with the armbar mounts, and then insert to lock. 9 To disassemble armbar, press armbar release button 10- 1, and then pull out the armbar. 10- 2Assemble CanopyTo assemble canopy, insert clips into mount 12, then attach 2 pairs of buttons. 11i. Engage the canopy webbing with recline buttons first. 11- 1ii. Then engage the softgood with canopy webbing and buttons. 11 - 2 The completely assembled stroller is shown as 13Stroller OperationUse CanopyOpen the zipper, then push the canopy forwards to open the canopy. 14 ! Please adjust the backrest to upright position before opening the canopy if it is convenient. 15! Please press the backrest before opening the canopy if it is not conve-nient to adjust the backrest to upright position. 16To fold the canopy, pull canopy toward back.! The canopy is NOT removable.Switch SeatThe seat can be switched, which makes mother and child can face to face with each.Squeeze the seat release buttons while lifting the seat. 17Turn the seat to reverse direction, and then insert the seat to seat mounts. 18Adjust ReclineThere are 5 positions for the backrest.To recline the backrest, squeeze the adjustment button 19- 1, and then adjust the backrest to a desired angle. 19- 2 To raise the backrest, push up.!Make sure the recline is set properly for e BuckleRelease BucklePress the center button to release the buckle. 20Lock BuckleMatch the waist belt buckle with the shoulder buckle 21- 1, and click into the center buckle. 21- 2 A “click” sound means the buckle is locked completely. 21- 3! To avoid serious injury from falling or sliding out, always secure your child with harness.! Make sure your child is snugly secured. The space between the child and the shoulder harness is about the thickness of one hand.! Do not cross the shoulder belts. This will cause pressure on child’s neck.Use Shoulder & Waist Harnesses! In order to protect your child from falling out, after your child is placed into the seat, check whether the shoulder and waist harnesses are at proper height and length.22- 1Shoulder harness anchor A22- 2Shoulder harness anchor B22- 3Slide adjusterFor larger child, use shoulder harness anchor A and the highest shoulder slots. For smaller child, use shoulder harness anchor B and the lowest shoulder slots.To adjust the position of the shoulder harness anchor, turn the anchor to be level with the side facing forward. Thread it through the shoulder harness slot from back to front. 23Rethread it through the slot that is closest to child's shoulder height. 24Use slide adjuster to change the harness length. 25- 1Press the button 25- 2, while pulling the waist harness to proper length. 25- 31920Press the recline handle on the back of backrest to rotate the backrest to horizontal position. 31Lift the folding button , step the folding pedal downwards, push the stroller forward to fold. 31The storage latch will automatically hook onto the storage mount, then the stroller is folded and locked completely. 32Use Shoulder Harness Pad Cover and Crotch Harness Pad CoverThe shoulder harness pad cover or crotch harness pad cover can be removed from the webbing. Simply reverse these steps to re-assemble shoulder harness and crotch harness pad cover.Use AccessoriesAccessories may be sold separately or may not be available depending on region.2122Adjust Calf SupportThe calf support has 2 positions.Raise Calf SupportTo raise the calf support, just push it upwards.Lower Calf SupportPress the adjustment buttons on both sides of the calf support 26 - 1, and rotate the calf support downwards. 26 - 2Use Front Swivel LockPush up the front swivel locks to maintain the moving direction. 27 It is recommended to use swivel locks on uneven surfaces.Use BrakeTo lock wheels, step the brake lever downwards. 28 To release wheels, just lift the brake lever upwards. 29 Always apply brake when stroller is in stopped position.Adjust HandleThe handle has 3 positions.To adjust the height of the handle, pull the handle upward or downward 30 - 2 while pressing the handle adjustment button. 30 - 1T ether StrapUse the tether strap to prevent the stroller inadvertently rolling away. Check that when your hand is through the loop, it allows you to easily control the stroller.Fold Stroller! Please fold the canopy before folding the stroller.Use with Joie Child RestraintWhen using with Joie child restraint gemm, i-Gemm please refer to the following instructions.1. To attach adapter, place adapter onto mounts as show 33, A “click”sound means the adapter is locked completely. 342. To attach child restraint, place child restraint onto adapter as show 35,A "click" sound means the child restraint is locked completely. 363. To remove child restraint, lift the child restraint upwards 37- 2 whilepressing the two stroller fix release buttons A. 37- 1!If you have any problems about using the stroller and the adapter, please refer to their own instruction manuals.!To remove adapter, lift the adapter upwards 38- 2 while pressing the two release buttons. 38- 1!Remove the adapter show as 39!Please don’t fold stroller when attaching the child restraint.Use BassinetYou can use this bassinet with the chrome DLX (S1201) stroller. Bassinet Assembly1. Please ensure the 2 support mounts are securely attached.4041! To release the support mounts, please see image 412. Please ensure that both attachment mounts, located on the sides, are securely attached. 4243! To release the attachment mounts, please see image 43- 23. Place the inner mattress and zip the zipper. 44454. Pull up the canopy as illustrated while pressing the buttons on bothsides. 46- 3Check to make sure the handle is secure before placing the child in the bassinet. 46- 1! Please make sure that the handle is in the correct position of usebefore carrying or lifting.5. Attach the loop and hook fasteners on the bottom of bassinet. 47A storage compartment is inside of the bassinet.47- 1! Always use the mattress when using the bassinet. 48! Mattress cover can easily be removed.6. Place the apron onto the top of the bassinet, and attach at the loopand fasteners. 49! Using the apron in cold weather will help give baby a more warm and comfortable environment.7. The completely assembled bassinet is shown as 50! To disassemble the bassinet simply reverse the steps above.8. Place the bassinet directly down until it latches into place. 519. The bassinet is securely attached with a positive “click”. 52! Always remove the seat before using the bassinet.! Please don’t fold the stroller when the bassinet is still attached.! The bassinet can be used with chrome DLX.10. Remove BassinetPress each release side button as shown 53- 1, whilst lifting up the handle simultaneously. 53- 211. Unzip the zipper to remove the canopy soft goods. 542324Use Footmuff ApronThe soft footmuff apron can provide your child with a warm and comfortable environment.Assemble the footmuff apron by following these steps.1. Adjust the calf support and backrest to level position and reclineposition respectively before assembling footmuff apron. 552. Cover the calf support with footmuff apron. 56The assembled footmuff apron is shown as 57.Use Rain CoverTo assemble the rain cover, place it over the stroller. 58!Before using the rain cover, to be make sure the seat has been fas-tened.!When using the rain cover, please always check its ventilation.!When not in use, please check that the rain cover has been cleaned and dried before folding.!Do not fold the stroller after assembling the rain cover.!Do not place your child into the stroller assembled with rain cover dur-ing hot weather.!To be used under adult supervision. Do not use on a stroller without a canopy.Use Seat Linersee images59Use Storage Bagsee images60The maximum load of Storage Bag is 0.45kg.Care and MaintenanceBassinet!Remove mattress from bassinet and mattress pad from liner. Clean liner and mattress with a damp cloth and dry flat.!CLEANING: After removing mattress pad from liner, hand wash,drip dry, NO BLEACH. Only use a damp cloth to clean the mattress pad. Never iron.!Removable seat pad may be washed in cold water and drip-dried. No bleach.!Excessive exposure to sun or heat could cause fading or warping of parts.Stroller!Removable seat pad may be washed in cold water and drip-dried. No bleach.!To clean stroller frame, use only household soap and warm water. No bleach or detergent.!From time to time, check your stroller for loose screws, worn parts,torn material or stitching. Replace or repair the parts as needed.!Excessive exposure to sun or heat could cause fading or warping of parts.!If stroller becomes wet, open hood and allow to dry thoroughly before storing.!If wheels squeak, use a light oil (e.g., Silicon Spray, antirust oil, or sewing machine oil). It is important to get the oil into the axle and wheel assembly. 61!When using your stroller at the beach, completely clean your stroller after use to remove sand and salt from mechanisms and wheel assemblies.2526Nuna Baby Australia Pty Ltd.Unit 1, 35 Lyn Parade Prestons,NSW Australia 2170Share the joy at joie IM-001147E。


FastAction™ Fold Failure to follow these warnings and the assembly instructions could result in serious injury or death.s PLEASE SAVE OWNER’S MANUAL FOR FUTURE USE.s ADULT ASSEMBLY REQUIRED. s NEVER LEAVE child unattended. Always keepchild in view while in stroller.s AVOID SERIOUS INJURY from falling or sliding out. Always use seat belt. After fastening buckles, adjust belts to get a snug fit around your child.s AVOID FINGER ENTRAPMENT: Use care when folding and unfolding the stroller. Be certain the stroller is fully erected and latched before allowing your child near the stroller.s AVOID STRANGULATION.DO NOT place items with a string around your child’s neck, suspend strings fromthis product, or attach stringsto toys.s NEVER USE STROLLER ON STAIRS or escalators. You may suddenly lose control of the stroller or your child may fall out. Also, use extra care when going up or down a step or curb.s STROLLER TO BE USED only at walking speed. Product not intended for use while jogging, skating, etc.s USE OF THE STROLLER with a child weighing more than 50 lbs (22.7 kg) or taller than 45 in. (114.3 cm) will cause excessive wear and stress on the stroller. Use the stroller with only one child at a time.s TO PREVENT TIPPING, do not place more than 3 lbs (1.4 kg) on the parent’s tray.s TO AVOID BURNS, never put hot liquids in the parent’s tray.s TO PREVENT A HAZARDOUS, UNSTABLE CONDITION, never place purses, shopping bags, parcels or accessory items on the handle or canopy.s TO PREVENT A HAZARDOUS, UNSTABLE CONDITION, do not place more than 10 lbs(4.5 kg) in the storage basket and more then 2 lbs (0.9 kg) in the canopy pockets (on certain models).s DO NOT use storage basket as a child carrier.s NEVER PLACE child in the stroller with head towardfront of stroller.s NEVER ALLOW YOUR STROLLER to be used as a toy.s DISCONTINUE USING YOUR STROLLER should it become damaged or broken.USING GRACO® INFANT CAR SEAT WITH STROLLER:s USE ONLY A GRACO®SNUGRIDE®, SNUGRIDE® 30, SNUGRIDE® 32, SNUGRIDE®35, OR INFANT SAFESEAT™CAR SEAT with this travel system. (Not intended for use with AUTOBABY (Europe only) and ASSURA infant car seats.) Improper use of this stroller with other manufacturers’ car seats may result in serious injury or death.s READ THE MANUAL provided with your Graco car seat before using it with your stroller.s ALWAYS SECURE your child with the car seat harness when using the car seat in the stroller. If your child is already in the car seat, check that the child is secured with the harness.Manquer de suivre ces avertissements et les instructionsd’assemblage peut entraîner de sérieuses blessures ou un décès.s VEUILLEZ CONSERVER CE MODE D’EMPLOI POUR ÉVENTUELLEMENT VOUS Y RÉFÉRER.s DOIT ÊTRE ASSEMBLÉ PAR UN ADULTE.s NE JAMAIS LAISSER votreenfant sans surveillance. Toujours garder l’enfant à l’œil alors qu’il est assis dans cette poussette.s AFIN D’ÉVITER QUE L’ENFANT NE SE BLESSE GRAVEMENT en tombant ou en glissant hors du siège : Utiliser toujours la ceinture de sécurité. Après avoir attaché les boucles, régler les ceintures pour obtenir un ajustement confortable autour de votre enfant.s LES DOIGTS COINCÉS : Faire preuve de prudence au moment de plier ou déplier la poussette. S’assurer que la poussette est entièrement déployée et que les loquets sont bien enclenchés avant de permettre à l’enfant de s’en approcher.s AFIN D’ÉVITER LASTRANGULATION: NE JAMAIS accrocher d’objets munis d’un cordon autour du cou d’unenfant, suspendre des cordons à ce produit ou attacher un cordon à un jouet.s NE JAMAIS UTILISER LA POUSSETTE DANS DESESCALIERS fixes ou roulants. L’enfant pourrait tomber ou vous pourriez perdre la maîtrise de la poussette. Faire également preuve de prudence en montant ou descendant une marche ou une chaîne de trottoir.s LA POUSSETTE DOIT ÊTRE UTILISÉE pour la marche seulement. Ce produit n’est pas conçu pour usage pendant la course à pied, le patin, etc.s L’USAGE DE LA POUSSETTE avec un enfant pesant plus de 22,7 kg (50 livres) ou mesurant plus de 114.3 cm (45 po) occasionnera uneusure et une tension excessive à la poussette. Utilisez lapoussette avec seulement un enfant à la fois.s AFIN DE PRÉVENIR LESRISQUES DE BASCULEMENT, NE PAS charger le plateau à plus de 1,4 kg (3 livres).s POUR ÉVITER LESBRÛLURES, ne jamais mettre de liquides brûlants dans le plateau pour parents. s AFIN DE PRÉVENIR DESSITUATIONS DANGEREUSES D’INSTABILITÉ, ne jamais placer de sacs à main ou de magasinage, de colis ou d’accessoires sur la poignée ou le baldaquin.s AFIN DE PRÉVENIR DES SITUATIONS DANGEREUSES D’INSTABILITÉ, ne jamais placer plus de 4,5 kg (10 lbs) dans le porte-bagages et ne pas placer plus de 0,9 kg (2 lbs) dans la pochette de baldaquin (sur certains modèles).s NE PAS utiliser le porte-bagages comme porte-bébé.s NE JAMAIS PLACER l’enfant dans la poussette avec la tête vers l’avant de la poussette.s NE JAMAIS PERMETTREQU’ON SE SERVE DE CETTE POUSSETTE comme un jouet.s CESSER D’UTILISER VOTRE POUSSETTE si elle devient endommagée ou brisée. UTILISATION DU PORTE-BÉBÉ GRACO®AVEC LAPOUSSETTE:s UTILISER UNIQUEMENTUN PORTE-BÉBÉ SNUGRIDE®, SNUGRIDE® 30, SNUGRIDE® 32, SNUGRIDE® 35, OU SAFESEAT™ DE GRACO®avec ce systèmede voyage. (Non conçu pour utiliser avec les dispositifsde retenue pour nourrisson AUTOBABY (Europe seulement) et ASSURA.) Ne pas se conformer à toutes les mises en garde et instructions de montage peut causer des blessures corporelles sérieuses ou même la mort.s LIRE LE MANUEL d’utilisateur fourni avec votre porte-bébé Graco avant de l’utiliser avec cette poussette.s TOUJOURS ATTACHERvotre enfant avec le harnais du porte-bébé lorsqu’il est utilisé avec la poussette. Si votre enfant est déjà dans le porte-bébé, s’assurer qu’il est attaché avec le harnais.Check that you have all the parts for this model BEFORE assembling your product. If any parts are missing,call Customer Service.No tools required.Vérifiez que vous avez toutes les pièces pour ce modèle AVANT d’assembler votre produit. S’il vous manque des pièces, communiquez avec notre service àla clientèle.Aucun outil requis.!LL MODELS s 4OUS MODÒLES2X 2X2X2X2XTo Open Strollers /UVRIR LA POUSSETTE1FOLD/UNFOLD strap,located under this pocket.PLIER/DÉPLIER la courroiesituée sous cette pochette. Pull strap and pull up on handle as shown.Tirer sur la courroie et tirer sur la poignée, tel qu’illustré.2CHECK that the stroller iscompletely latched open every time you open the stroller and before continuing with the rest of the assembly steps.VÉRIFIER que la poussette est entièrement verrouillée en position ouverte à chaque ouverture et avant d’effectuer les autres étapes du montage.SNAP! ENCLENCHEZ!Slide the basket mount over the pin on the frame until it snaps into place. Repeat on other side.Glisser le cadre du porte-bagages sur la tige del’armature de la poussette jusqu’à ce qu’il s’enclenche en place. Répéter l’opération del’autre côté.Basket mount.Cadre du porte-bagages 34Basket Assembly (On certain models)s Montage du porte-bagages (On certain models)To register your Graco product from within the U.S.A. visit us online at /productregistration.We currently do not accept product registrations from those living outsidethe United States of America.Pour inscrire votre produit Graco aux États-Unis, visitez notre site Internet /productregistration. Pour le moment nous n’acceptons pas d’inscriptions de produits des résidents hors desÉtats-Unis.1-A Quick Guide to Your Manual1-B Before You Begin1-C Safety Warnings2-A Car Seat Features2-B Remove Car Seat from Base2-C Attach Car Seat to Base2-D Adjusting Carry Handle2-E Recline the Base2-F Choosing Vehicle Seat Location2-G Choosing LATCH or Seat Belt2-H What Is LATCHRear-Facing Use Pages 24-42 3-A Rear-Facing Checklist3-B Install With Base With LATCH Strap3-C Install With Base With Vehicle Seat Belt3-D Install Without Base With Vehicle Seat Belt24-A Adjust Harness to Fit Child4-B Adjust Buckle to Fit Child4-C Securing Child in Car Seat4-D Removing Child6-A Additional LATCH Information6-B How to Remove LATCH6-C Unsafe Vehicle Seats6-D Vehicle Seat Belts68 8-A Cleaning Seat Pad8-B Cleaning Buckle31 I m p o r t a n t 1-A Quick Guide to Your Manual This car seat is for children 4-30 lb (1.8-14 kg) and 30” (76 cm) or less.Get to Know Your Car SeatReview section 2-A to see all of the features of this infant car seat.What Seating Location Should I Use?Which Installation Method Should I Use?This infant car seat base can be installed in your vehicle using either the vehicle seat belt OR the LATCH system. Both are equally safe to use. DO NOT USE BOTH AT THE SAME TIME.This infant car seat carrier can be installed in your vehicle using only the vehicle seat belt. LATCH is not available to install the carrier.4The best seating location for this infant car seat is one that:• Is recommended by your vehicle owner’s manual, and • Results in a secure installation of this car seat.Never place a child rear-facing in a seating position with an active front air bag.Review section 6 of this manual AND your vehicle owner’s manual.1 Important When Installing BaseLATCH SystemLATCH consists of lower anchors, which are built-in to your vehicle, and connecting hooks that are built-in your car seat.Vehicle Seat Belt There are two types of vehicle seat belts that can be used. Lap/Shoulder Seat Belt or Lap Only Seat Belt.Review section 3-B of this manual AND your vehicle owner’s manual.Review section 3-C of this manual AND your vehicle owner’s manual.When Installing CarrierVehicle Seat BeltThere are two types of vehicle seat belts that can be used. Lap/Shoulder Seat Belt or Lap Only Seat Belt.Review section 3-D of this manual AND your vehicle owner’s manual.51Im po rta nt6Does Your Seat Fit Your Child Correctly?To make sure your child is secured properly, review section 4 tounderstand all of the actions you need to take to properly adjust thecar seat to fit your child.You Need To Adjust:Harness HeightHarness straps at or just below the child’s shoulders. Review section 4-A.Buckle PositionThe correct slot is the one that is closest to your child without being underneath them. Review section 4-B.Harness TightnessIf your fingers slide off the harness straps without pinching the straps, it is tight enough. Review section 4-C.1 Important 7Did You Do Everything Correctly?Base or Car Seat Does Not Move More Than 1” (2.5 cm) At The Belt PathReview section 3.Car Seat Level to GroundReview sections 2-E and 3.Car Seat Is Properly Attached To BaseReview section 2-C.Cannot Pinch HarnessHarness straps at or just below the child’s shoulders. Review section 4-C.Chest Clip Even With ArmpitsReview section 4-C.1 Im po rtant 1-B Before You BeginPlease fill out the prepaid registration postcard attached to the harness and mail it in today or register online at /carseatregistration.Child restraints could be recalled for safety reasons. You must register this restraint to be reached in a recall. Send your name, address, and the restraint’s model number and manufacturing date to:Graco Children’s Products, Inc.Attn: Customer Service3 Glenlake Parkway Atlanta, GA 30328 or call 1-800-345-4109or register online at /carseatregistration For recall information, call the U.S. Government’s Vehicle Safety Hotline at 1-888-327-4236 (TTY: 1–800–424–9153), or go to . Register This Child Restraint8Your child’s safety depends on you. No car seat canguarantee protection from injury in every situation, but properuse helps reduce the risk of serious injury or death.Even if this car seat seems easy to figure out on your own, you must follow the detailed instructions in this instruction manual to ensure the steps below are performed correctly.1 ImportantModel Name _________________________Model Number _______________________Date of Manufacture __________________Date of Purchase _____________________For future reference or if you change addresses, record the model name, model number, date of manufacture, and purchase date of this car seat below. You can find this information either on the registration card if you still have it or on the date label located on the back of the car seat. In the U.S.A, please contact our Customer Service Department with any questions you may have concerning parts, use, or maintenance. When you contact us, please have your product’s model number and date of manufacture ready so that we may help you efficiently. These numbers can be found on a sticker on the back side of your car seat. For additional resources or to get your car seat checked by a child passenger safety technician, please visit the following web sites: • • If You Need Help91Im po rt an tThis child restraint meets or exceeds all applicable requirements of Federal Motor Vehicle Safety Standard 213for use in motor vehicles. This child restraint is certified for use in aircraft.Contact the airline for their specific polices.CertificationSTOP using this car seat and throw it away 7 years after the date of manufacture. Look for date of manufacture label on back of the car seat.Graco Children’s Products Inc. advises against loaning or passing along a car seat unless you know the complete history of the product. We also advise against purchasing a car seat second hand.Car Seat’s Useful LifeProtect vehicle seat. Use a car seat mat, towel, or thin blanket under and behind car seat.Car seat parts can get very hot in the sun or warm weather. To avoid burns, always check before putting child in car seat.Vehicle Seat ProtectionWarm Weather Use101 Important 1-C Safety WarningsNo car seat can guarantee protection from injury in every situation, but proper use helps reduce the risk of serious injury or death. READ THIS MANUAL CAREFULLY .Failure to follow these instructions and child restraint’s labels can result in child striking the vehicle’s interior during a sudden stop or crash.! NEVER PLACE THIS CHILD RESTRAINT REAR-FACING IN A VEHICLE SEATING LOCATION THAT HAS AN ACTIVE FRONT AIR BAG. If an air bag inflates, it can hit the child and car seat with great force and cause serious injury or death to your child.! Review your vehicle owner’s manual for more information about air bags and car seat use.111 I m p o r t a n t ! If your vehicle does not have a back seat, review your vehicle owner’s manual.! The American Academy of Pediatrics (AAP) and National Highway Traffic Safety Administration (NHTSA) recommend that children be rear-facing until age 2 or until they reach the maximum rear-facing height and weight rating for their seat.! This child restraint must only be used with children weighing between 4-30 lb (1.8-14 kg).! Select a suitable location for the car seat in your vehicle.! Secure car seat with a vehicle seat belt or LATCH that is properly routed as shown in this manual.! Vehicle seat belt system MUST hold car seat securely. Not all vehicle seat belts can be used with a car seat.! If vehicle seat belt does not hold car seat securely, read “Vehicle Seat Belts” section 6 and your vehicle owner’s manual.! Always secure car seat with LATCH or a vehicle seat belt, even when unoccupied. In a crash, an unsecured car seat can injure passengers.! DO NOT use car seat if it is damaged or missing parts.121 Important! If car seat is in a crash, it must be replaced. DO NOT use it again! A crash can cause unseen damage and using it again could result in serious injury or death.! DO NOT use accessories or parts other than those provided by Graco. Their use could alter the performance of the car seat.! DO NOT remove LATCH system from car seat. If using vehicle seat belt to secure car seat, LATCH connectors must be stored.! Never leave child unattended, even when sleeping. Child may become tangled in harness straps and suffocate or strangle.! Rear-facing car seat must be properly leveled: • Too reclined can result in injury or ejection. • Too upright can result in breathingdifficulties.! Never attach two LATCH connectors to one vehicle lower anchor point unless specifically allowed by thevehicle manufacturer.! Do not use both the vehicle seat belt and LATCH strap at the same time when using the car seat rear-facing.132 F a t u r e s2-A Car Seat FeaturesACBEA Carry HandleB CanopyC Head Pillow (Select models)D Handle Adjustment ButtonsE Rear-Facing Belt Path(When Used Without Base)DF Harness Release Lever (Under Pad)G Harness Adjustment StrapH Removable Base I Harness Covers (Select Models)14HF G C I2 FeaturesLBK JJ Base Release Lever K Car SeatL Level to Ground LineM Instruction Manual Storage (Under Base)N Chest Clip O Harness Straps P Buckle Tongues Q Buckle R Buckle StrapN OP QR15M2 F a t u r e sABDFCA Base Release LeverB Harness Strap SlotsC Locking ClipD Harness StrapsE Buckle Metal ClipF Splitter Plate16E2 FeaturesGHIJKG Car Seat Base Lock H Base Rear-Facing Belt Path I LATCH Strap J Instruction Manual Storage (Under Base)K LATCH Storage L Base Recline Wedge17L2 F a t u r e s182. Attaching Car Seat To BaseAlign the locking bar at the front of the car seat with the locks in the base. Set car seat in the base. Push down on the front of the car seat. You will hear a “click” when it is locked.Pull up on the front corners of the seat to make sure it is locked.2-B Remove Car Seat from Base1. To Remove Car Seat from BaseFrom the back of the car seat, squeeze the base release handle and lift the car seat out of the base.2-C Attach Car Seat to Base2 Features191. To Rotate HandlePress the red handle adjustment buttons on both sides of handle.MAKE SURE handle locks into position before lifting the carrier.2-D Adjusting Carry Handle2. Handle Has 4 PositionsRotate handle to any of the 4 locked positions. Push and pull the handle to make sure handle is in a lock position.Carry handle MUST be upright in position A when carrying. Handle can be in any position when used in the vehicle.ACDB2 F a t u r e s201. Base Has 3 Recline PositionsPosition 1 is the least reclined position. Remove the base wedge.2-E Recline the Base12For position 2, attach the base wedge with the label marked 2 facing up.2 Features213For position 3, attach the base wedge with the label marked 3 facing up.If needed, rolled towels may be placed under the base, at the vehicle seat crease, until the level line is level with the ground.2 F a t u r e s22According to accident statistics, the safest place for your child in any vehicle is the back seat. The center of the back seat can be the safest during a possible side impact.Review your vehicle owner’s manual for seatinglocations. Review section 6 for additional information.Some vehicles have specific requirements for where the car seat can be installed. Be sure to check your vehicle owner’s manual for all available seating positions.2-F Choosing Vehicle Seat LocationNEVER place this child restraint rear-facing in a vehicle seating location that has an active front air bag.In the event there is no back seat, review your vehicleowner’s manual to see how to use your infant child restraint.。
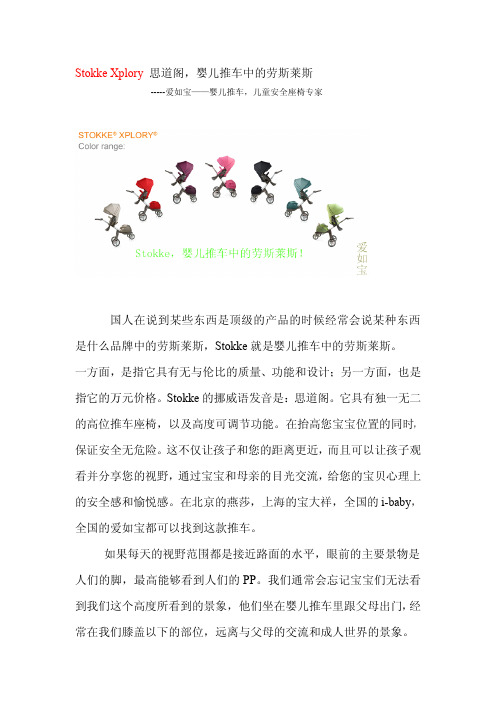
Stokke Xplory思道阁,婴儿推车中的劳斯莱斯-----爱如宝——婴儿推车,儿童安全座椅专家国人在说到某些东西是顶级的产品的时候经常会说某种东西是什么品牌中的劳斯莱斯,Stokke就是婴儿推车中的劳斯莱斯。
一方面,是指它具有无与伦比的质量、功能和设计;另一方面,也是指它的万元价格。
Stokke的挪威语发音是:思道阁。
它具有独一无二的高位推车座椅,以及高度可调节功能。
在抬高您宝宝位置的同时,保证安全无危险。
这不仅让孩子和您的距离更近,而且可以让孩子观看并分享您的视野,通过宝宝和母亲的目光交流,给您的宝贝心理上的安全感和愉悦感。
在北京的燕莎,上海的宝大祥,全国的i-baby,全国的爱如宝都可以找到这款推车。
如果每天的视野范围都是接近路面的水平,眼前的主要景物是人们的脚,最高能够看到人们的PP。
我们通常会忘记宝宝们无法看到我们这个高度所看到的景象,他们坐在婴儿推车里跟父母出门,经常在我们膝盖以下的部位,远离与父母的交流和成人世界的景象。
Stokke思道阁车身高大,但是它非常灵活。
在人群或狭窄的空间中,诸如商店,您会发现,由于Stokke Xplory的轻质设计和旋转前轮,它非常容易操纵,而Stokke Xplory独特的两轮功能使得您能够轻松上下交通工具和上下楼。
由于汽车在国内的火爆发展,马路上面汽车尾气的污染日益严重,这对您宝宝大脑的发育将产生很大的损害。
Stokke Xplory婴儿推车把孩子抬高,帮助宝宝避免智力上的伤害。
Stokke Xplory支持孩子座位两种方向的调节,从而提供更好的用户体验。
座位面对您,则可以缩短您和孩子的距离,提高亲近感和交互性;而座位面对前方,则可以向孩子提供观看周边环境的良好视野。
同时,可调节的搁脚板使得您的孩子能够更舒适地坐在婴儿推车中,无论他们是什么年龄,无论他们希望睡觉、休息还是活动。
一、Stokke婴儿车概览品牌:stokke材质:铝合金标准整车尺寸:高81-130cm,长72-130cm,宽57cm放置婴儿篮尺寸:高81-115cm,长91-123cm,宽57cm折叠尺寸:高42cm,长99cm,宽57cm产地:挪威专柜价格:17500元爱如宝价格:11000元,直接欧洲发货,品质保证!二、产品介绍1、由挪威设计的Stokke Xplory推车,不但从父母的角度,更从坐在里面的孩子角度来设计,也是唯一一部能有上下调节功能的婴儿车。
葛莱GRACO鹦鹉螺系列安全座椅安装操作指南汽车安全座椅对于小孩子乘车安全的重要性,就不需要再次说明了。
近几年因为好多爸妈没有在汽车座位上安装安全座椅,而导致的在车祸事故中宝宝受到致命的伤害甚至死亡足以说明安全座椅的必要性了。
好多爸妈怕安装安全座椅麻烦,就不安装了,那么这里欧美优品小编为各位爸妈们整理出详细的安全座椅安装方法,请各位爸妈一定要认真学习,给自己的宝宝一份安全保障。
【Part 1:组装】1.将靠背平放在座席的上方,抓住座垫,使得安装沟槽露出。
2.确认安全带安装在靠背接合杆的“T”型槽中。
3.用另外一只手提起靠背,以便两边靠背接合杆都能扣入锁定沟槽中。
4.接合杆卡入沟槽内。
5.将座垫底部4个松紧带勾在座席底部挂钩上。
6.将座垫侧后方松紧带穿过安全带引导装置勾在座垫侧边内部挂钩。
另一侧,重复此操作。
7.握按住高度调节按钮,同时将头靠的接合杆插入靠背的沟槽中。
操作前,请先解除靠背上方两侧的魔术贴,以利安装。
【Part 2:使用有内置安全带的安全座椅】1.适用范围:●儿童的体重:9-18公斤●儿童肩部低于顶部的安全带槽孔位置。
如果儿童的肩部高于座椅顶部的安全带槽孔位置,该儿童身型可能过大,不适合佩戴内置安全带。
2.解开安全带:提起靠近调节带旁边的座椅前方的安全带调节杆,然后将安全带朝自己的方向拉动,松开安全套,解开安全带3.检查中腰带:●中腰带的位置必须最接近婴孩,但不可在婴孩下方。
要改变中腰带的位置,可将中腰带扣从安全座椅底部往上推,然后在顶部拉出。
●把中腰带重新插入适当的位置。
当重新插入槽孔时,确保中腰带没有扭曲,将腰带向上拉,确保其安全稳固。
●安全带必须穿过槽孔,位置必须与肩部高度一致或略高。
4.调校安全带:●从座椅背部的金属连接片移除安全带。
●从座椅前方将安全带拉出。
并且将安全带套穿过合适的肩带穿孔,检查安全带套没有扭曲。
●将另一端的安全带套穿入相等位置的穿孔,检查安全带套没有扭曲。
母婴产品市场分析孕婴行业市场现状分析: 1市场潜力中国每年有20003000万婴儿出生,其中0-36月龄的婴幼儿约为7000万,儿童为3.2亿,针对0-4周岁婴幼儿,消费群体就有8000万。
据中国第五次人口普查发布的统计公告数据,中国0-3岁新生儿用品家庭月消费为1500多元,中国的婴幼儿用品市场每年将超过5000亿元的市场规模。
而目前这个市场却只开发了20%。
预测中国的最高出生率大约出现在2016年,人口峰值为2028年,该时期我们也将迎来第五轮“婴儿潮”。
换言之,中国孕婴童产业尚有20多年的牛市,市场容量逐步增至2500亿-3000亿元的庞大规模。
由于居民生活水平显著提高,对婴幼儿产品的支出能力和水平不断增长,加上城镇大多数家庭现在只有一个孩子,婴儿用品,婴儿食品,婴儿玩具,婴儿服装,婴儿护肤品,婴儿药品和保健品,婴儿教育,每一类都是一个巨大的市场。
孕婴童市场需求6大动向生活水平不断提高、中产阶级的迅速突起,城镇化进程的不断推进;80、90年代女孩将成为消费主体――她们更注重品牌和时尚;人们更加关注健康,更加关注下一代,对下一代的投资开始于胎儿甚至更前;孕婴童产品同时兼跨功能和文化两个价值区,成为高投资利润区;功能运用会快速催热市场,知性消费的快速覆盖;孕婴童的消费将会成为消费的风向标并成就中国新的礼品市场。
母亲这个群体,很重视品牌和口碑,她们为什么会买网站上出售的东西?往往是因为在网站上交流了经验。
由于很多育儿社区网站设置了“育儿日志”、“亲子日志”,它比其他社区网站容易有更大的用户黏性和更新率,社区网站也更容易获得商业价值的转换。
更重要的是他能够起到教育、引导消费的作用。
目前,除沿海部分发达城市外,国内母婴用品市场仍属初创时期,杂货铺式的商业店居多。
能够提供规范管理,统一形象,高品质,中高价位的中高档品牌店将是市场的需求。
类似于古埃及的金字塔,即终端管理系统是以一个又一个坚固的基础,一层一层向上堆砌而成的。
美国orbit baby婴儿睡篮宝宝提篮陈慧琳同款0-2岁
万元星级BB车陈慧琳(Kelly)为初生的宝贝儿子刘升所选的BB车,是最近极之热卖的美国品牌Orbit旅行摺叠式婴儿车。
这可能是我见过最有意思的婴儿推车了。
怎么看怎么都会让我联想到旋转炮台。
不过旋转式的基座设计的确非常有趣。
而且圆形接口可以随时把宝宝的摇篮放在车上,摇架上。
也就是说随时可以从推车变成安全座椅,摇篮。
同样的,摇篮也可也升级成为座椅。
虽然其他的推车也有这些功能。
但是orbit的设计还是有其独到的用处的。
圆形的接口给出的一个更为稳固和平滑的接口。
比普通的两侧插口式固定要更为稳固而且容易安装。
另外摇篮的旋转功能,比换向推杆来得更为好用。
#母婴用品##母婴良品##童车#。
@发现生活。
爱乐活母婴用品。
黑色
咖啡色
红色
爱乐活——有态度、正能量的品质生活社区。
热爱生活,乐于分享的各类达人聚在这里,分享消费攻略,激发生活灵感,发现城市最IN 的角落。
在这里,有爱,有乐,有生活。
【更多精彩内容尽在爱乐活】
文章来源:/post/f90e4a2a12dad14046f4bbdc?from=wenku/?from=wenku。
使用前請詳細閱讀本說明書,然後正確使用本嬰兒手推車。
閱讀後請妥善保存作日後參考之用。
若將本製品轉讓予他人使用時,請將本說明書也一併移交對方。
將把手上的安全鎖部分向箭頭方向滑動並保持可解除安全鎖。
Slide the safety lock in demonstrated direction to release the safety lock and keep it at almost right position.本產品設計上,不論在前向或後向使用狀態,在轉換把手後,靠近推車者一方的方向輪會自動鎖上,令轉向輪永遠在前方。
This product is designed so that the swivels at the pushing side are always locked no matter which direction the handle is at. The swivels are always at the front side.在平坦路面使用,可使手推車更順暢推動及轉向容易。
在不平路面推行時,建議鎖上轉向輪鎖。
折疊折疊折疊拿著前後車篷車架然後將車篷往前方翻開。
24將鈕扣打開。
Undo the snaps.將車篷上的鈕釦重新扣上。
Secure the snaps on top.解開背部透氣窗蓋布上左右兩邊的刺黏固定貼。
Release the air through cover by Velcro fasteners at the back of upper part pocket.1.上面口袋刺黏固定貼透過使用底座的靠背通風窗,幼兒會舒適地度過炎熱或悶熱的天氣。
Through the use of backrest ventilation window at the base, child keeps comfortable during in hot or muggy weather.打開靠背透氣窗 Open the air through system (backrest ventilation window)疊疊疊疊112115依箭咀方向解除安全鎖。
葛莱GRACO 豪华婴儿手推车
座椅最大可调约170 度倾角,适合新生儿使用。
流线型超轻铝合金车身框架,经久耐用;。
配有宝宝托盘,且托盘可开合,方便宝宝进出。
多角度倾角座椅。
宽敞座椅设计,柔软坐垫专为初生婴儿设计;。
宽大遮阳棚,可向前遮挡,顶部设有观察窗口;。
本款推车面料为100%聚酯纤维棉,具有阻燃性能及较好的透气性,不退色;。
塑料部分为原生塑料材料(原生塑料为一级塑料,不易变型,耐高温,坚固,手感光滑,较一般塑料略沉);。
带有脚刹、有收车锁、两轮减震,购物篮最大承重5千克;。
专为婴儿设计的头枕和深度侧翼给宝宝睡眠时额外的支撑;。
超大储物篮便于父母外出购物使用, 豪华欧式3段遮阳蓬带天窗, 遮阳篷可整体向前放置,能够在宝宝进食时挡住前面的风沙。
#母婴良品##童车童床#。
爱乐活母婴用品。
爱乐活——有态度、正能量的品质生活社区。
热爱生活,乐于分享的各类达人聚在这里,分享消费攻略,激发生活灵感,发现城市最IN 的角落。
在这里,有爱,有乐,有生活。
【更多精彩内容尽在爱乐活】
文章来源:/post/8731a2116957d82378b99574?from=wenku/?from=wenku。