[GPM]飞机飞行员纸模型图纸
- 格式:pdf
- 大小:2.39 MB
- 文档页数:2
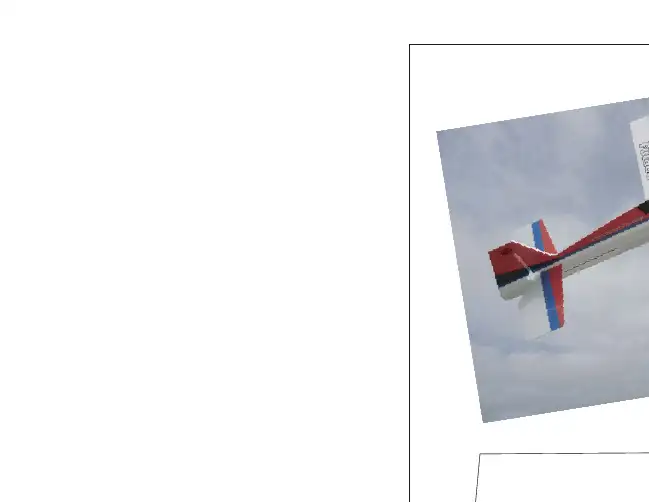
民航纸模飞机图纸这份大纲将介绍民航纸模飞机图纸的主要内容和组成部分。
图纸样式和规格尺寸要求: 长度、宽度、比例等图纸标准: 线条粗细、颜色等标注要求: 零件名称、编号等零件图纸机翼、机身、尾翼等零件的详细图纸每个零件的尺寸、形状和装配关系装配图纸各零件之间的装配关系和连接方式组装顺序和步骤标注和注释标注重点零件信息和规格提供飞机组件的注释和说明细节和修饰图纸其他细节零件的图纸,如发动机、起落架等飞机的外部修饰和标识封面:包括飞机的名称、设计者等基本信息目录:列出图纸的序号和名称图纸内容页:包括详细的图纸内容和图示图纸标准页:介绍图纸样式和标准说明页:提供图纸使用和装配的说明附录:包括相关的技术数据和参考资料以上是民航纸模飞机图纸的大纲,希望对您有帮助!如需更详细内容,请参考具体的飞机图纸设计标准和要求。
段落一:引言以上是民航纸模飞机图纸的大纲,希望对您有帮助!如需更详细内容,请参考具体的飞机图纸设计标准和要求。
段落一:引言民航纸模飞机图纸是指专门为纸模飞机设计和制作的图纸。
纸模飞机是一个受欢迎且有趣的娱乐方式,无论是对儿童还是成年人而言,都具有极大的吸引力。
而民航纸模飞机图纸则是为了满足航空爱好者对飞机模型的需求而设计的。
民航纸模飞机图纸是指专门为纸模飞机设计和制作的图纸。
纸模飞机是一个受欢迎且有趣的娱乐方式,无论是对儿童还是成年人而言,都具有极大的吸引力。
而民航纸模飞机图纸则是为了满足航空爱好者对飞机模型的需求而设计的。
民航纸模飞机图纸的制作需要一定的技术和知识,包括一些航空学基础知识和模型制作技巧。
通过研究和制作民航纸模飞机图纸,人们可以更好地了解飞机的结构和原理,培养对航空事业的兴趣和热爱。
此外,民航纸模飞机图纸也有助于发展人们的动手能力和空间想象力。
制作纸模飞机需要精确的测量、剪裁和折叠,培养了人们的细致观察和手工操作的能力。
同时,通过将平面图纸变成立体模型,人们需要将平面图像转化为三维空间的形象,这对培养空间想象力和创造力非常有益。

纸模型飞机的制作作者:admin 来源:我要航模网发布时间:2010-11-19 02:30:48教学目标:1、学会简单模型飞机的制作。
2、让学生在成功的喜悦中产生对航空航天的兴趣。
教学过程:1、阅读与讲解纸模型飞机是航模飞机里最简单的,它用料少、构造简单,对放飞场地的要求不高,而且容易放飞成功。
最简单的纸模型飞机只要一张纸,一把剪刀,几分钟的时间就能做成,因此,深受大家喜爱。
纸模型飞机选择合适的纸非常重要。
纸用得不合适,纸模型飞机就不能飞好。
对制作模型飞机的纸一般要求“平”、“挺”、“轻”。
“平”是指没有折过的纸,卷过的纸也要压平以后再用,这样制作出来的模型平直,容易调整。
“挺”是指纸要有刚性,不能软绵绵的。
“轻”是指纸的重量要轻。
一般用来制作纸模型飞机的纸有绘图纸、卡片纸、白板纸、书披纸等。
不同类型的模型飞机,要用不同的纸制作,较薄的纸多用来制作较小的模型。
2、实践制作先画出一架三角翼纸模型飞机的图纸,我们就以这架模型为例,介绍纸模型飞机的制作方法。
制作材料:16开绘图纸一张,纸要平整,不能卷曲或有折痕。
制作步骤:(1)按图纸上的尺寸外形,用剪刀沿外轮廓实线准确地剪下每一个零件。
(2)把零件a沿中线对折,再沿两边的虚线向外翻出两个边。
(3)把零件b和d沿点划线分别粘在零件a的AB和CD上。
(4)在零件c的虚线下面剪开两个小口,把虚线下面的三个部分沿虚线交错着向左右分开,粘在零件的中部。
粘好的模型应该和图纸上立体图所示的样子相同。
(5)在零件b上沿EF剪开两个小口,然后沿虚线把这两部分向下弯一点。
(6)在零件d上沿GH剪开两个小口,并沿虚线把这两部分向上弯一点。
(7)对照图纸检查各部分安装是否正确。
还要检查这架模型飞机的重心位置,应该在O点附近。
如果重心靠后,可以在模型机头上夹一个回形针配重。
3、试飞调整:纸模型飞机的试飞不用很大的场地,在操场上,甚至在教室内都可以。
纸模型一般很小(翼展大约在200毫米以下),重量轻,不能在大风中飞行。

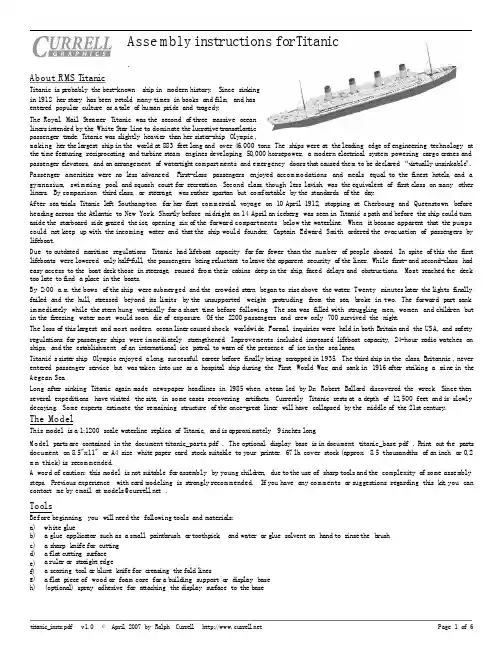
Asse m bly inst ruct ions forT i tan icAbout R MS T i tan i cTi tanic i s p robably the bes t-known sh ip in modern hi s tory. S ince s ink ingin 1912 her s to ry has been re to ld many t imes in books and f i lm, and hasente red popula r cul tu re a s a t a le o f human pr ide and t r agedy.The Royal Mai l S teamer T i tan ic was the second o f th ree mass ive oceanl ine rs in tended by the White S ta r L ine to domina te the lucra t ive t ransa t lan t icpassenger t r ade. T i tan ic was s l ight ly heav ie r than her s i s te r-ship Olympic,making he r the la rges t sh ip in the wor ld a t 883f ee t long and over 46,000tons. The sh ips were a t the lead ing edge of engineer ing t echnology a t the t ime fea tur ing rec ip roca t ing and tu rbine s t eam engines develop ing 50,000 horsepower,a modern e lec t r i ca l sys tem power ing cargo c ra nes and passenger e l eva tors,and an ar rangement o f wate r t igh t compar tments and emergency doors tha t caused them to be dec la red“v i r tua l ly uns inkable”. Passenger ameni t i es were no l es s advanced. F i r s t-c la ss passengers enjoyed accom modat ions and mea ls equa l to the f ines t ho te l s,and a gymnasium,swim ming poo l and squash cour t fo r r ec rea t ion. Second c las s,though le ss lav ish, was the equiva len t o f f i r s t c l ass on many o ther l ine rs. By compar ison th i rd c l ass, o r s t ee rage, was ra ther spar t an but comfor tab le by the s tandards o f the day.After sea t r ia l s T i tan ic l e f t Southampton fo r he r f i r s t com merc ia l voyage on 10 Apri l 1912,s topping a t Cherbourg and Queens town be fore head ing across the At lant i c to New York. Shor t ly before midn igh t on 14 Apr i l an iceberg was seen in T i tanic’s pa th and before the sh ip could turn as ide the s ta rboard s ide g razed the ice, opening s ix o f the fo rward compartments be low the water l ine. When i t became apparen t tha t th e pumps could no t keep up wi th the incoming wa ter and tha t the sh ip would founder, Capta in Edward Smith o rdered the evacuat ion o f passengers by l i f eboat.Due to outda ted mar i t ime r egula t ions T i tan ic had l i feboa t capac i ty fo r fa r f ewer than the number o f people aboard.In sp i te o f th i s the f i r s t l i f eboat s were lowered only ha l f-ful l,the passengers be ing re luctan t to l eave the apparen t secur i ty o f the l iner. While f i r s t- and second-c l ass had easy access to the boat deck those in s t eerage,roused f rom thei r cabins deep in the sh ip,f aced de lays and obs t ruct ions. Most r eached t he deck too la te to f ind a p l ace in the boat s.By 2:00 a.m.the bows o f the ship were submerged and the c rowded s t e rn began to r i se above the wa ter. Twenty minutes l a te r the l ight s f ina l ly fa i l ed and the hul l,s t r essed beyond i t s l imi ts by the unsuppor ted weigh t p ro t ruding f rom the sea, b roke in two. The fo rward par t sank im media te ly whi le the s te rn hung ve r t i ca l ly fo r a shor t t ime before fo l lowing. The sea was f i l l ed with s t rugg l ing men, women and ch i l dren but in the f r eez ing wate r mos t would soon d ie o f exposure. Of the 2200 passenger s and c rew on ly 700 survived the n igh t.The loss o f th i s l a rges t and most modern ocean l ine r caused shock wor ldwide. Formal inqu i r ies were he ld in both Br i ta in and the USA, and sa fe ty regula t ions fo r passenger sh ips were im media te ly s t r eng thened.Improvements inc luded inc reased l i f eboat capac i ty, 24-hour r adio wat ches on sh ips,and the es t abl i shment o f an in te rnat ional i ce pa t ro l to warn of the presence o f i ce in the sea lanes.Ti tanic’s s i s t e r sh ip Olympic en joyed a long,success ful ca reer be fore f ina l ly be ing sc rapped in 1935. The th i rd sh ip in the c l ass, Br i tanni c, never ente red passenger se rv ice bu t was t aken in to use a s a hospi t a l sh ip dur ing the F i r s t Wor ld War,and sank in 1916 a f te r s t r ik ing a mine in the Aegean Sea.Long af t e r s inking T i tan ic again made newspaper head l ines in 1985 when a team led by Dr. Rober t Ba l la rd d i scovered the wreck. S i nce then severa l exped i t ions have v is i t ed the s i t e,in some cases recover ing a r t i f ac t s. Cur ren t ly T i tan ic r es t s a t a dep th o f 12,500fee t and i s s lowly decay ing. Some exper t s e s t imate the r emaining s t ruc tu re o f the once-grea t l ine r wi l l have co l lapsed by the middle o f the 21s t century.The ModelThis model i s a 1:1200sca le wa ter l ine r ep l ica o f T i tan ic, and i s approx imate ly 9inches long.M odel par t s a re con ta ined in the document t i tanic_parts.pdf. The op t iona l d i splay base i s in document t i tan ic_base.pdf. P r in t ou t t he par t s document on 8.5"x11" o r A4 s i ze whi t e paper card s tock su i tab le to your p r in te r. 67lb.cover s tock(approx. 8.5thousand ths o f an inch o r 0,2 m m th ick)i s r ecom mended.A word of cau t ion:th i s model i s not su i t able fo r assembly by young chi ld ren, due to the use of sharp too ls and the complexi ty o f some assembly s teps. Prev ious exper i ence wi th ca rd model ing i s s t rongly recom mended.I f you have any com ments o r sugges t ions regard ing th i s k i t,you can contac t me by emai l a t model s@curre l l.ne t.Too lsBefore beg inning, you wi l l need the fo l lowing too ls and mater ia l s:a) b) c) d) e) f)whi te g luea glue appl i ca tor such as a smal l pa in tbrush o r toothp ick, and wate r o r g lue so lvent on hand to r inse theb rush a sharp kni fe fo r cut t inga f la t cu t t ing su r facea rule r o r s t r a igh t edgea scor ing too l o rb lun t kn i fe forc reas ing the fo ld l inesa f la t p iece of wood or foam core fo r a bu i ld ing suppor t o r d i sp lay base(op t iona l)spray adhes ive fo r a t tach ing the d i sp lay su r face to the baseg)h)t i t an i c_i n s t r.pd f v1.0© Apr i l2007by Ra lph Cur r e l l h t tp://ww w.cur r e l l.ne t Page1o f6Hintsa) b) c) d) e)Selec t a we l l -l i t , comfor tab le work a rea tha t wi l l r emain und is tu rbed when you a re not the re . Keep your hands and too ls c lean when work ing , to avo id ge t t ing g lue on vi s ib le par t s o f the model . I t ’s ea s ie r to s tay organ ized i f you only cu t out those par t s you need for each s tep . M ake sure your kni fe i s sharp . When cu t t ing s t r a igh t l ines , u se a s t r a igh t -edge . Study the d iagrams ca refu l ly , and a lways te s t -f i t the pa r t s before apply ing g lue .Asse m blyPortAft (Stern)Forward(Bow)StarboardIn these ins t ruc t ions , the t e rms fo rward (bow) and a f t (s t e rn) r e fer to the f ron t and rear ends of the ship . Por t and s t a rboard r e fe r to the le f t and r ight s ides . Scor ing o f pa r t s i s ind ica ted by th in b lack l ines ou ts ide the pa r t ’s ou t l ine , and by dashed or shaded l ines on the par t ’s su r face . For smal l pa r t s such as the deckhouses and c ranes i t i s r ecom mended tha t ou ts ide corners (‘mounta in ’ fo lds ) a re scored b y gen t ly scr ib ing t he score l ine wi th a kn i fe re sul t ing in a sharp corner when fo lded . Score par t s be fore cu t t ing them out . In the d iagrams , subassembl ies a re ident i f i ed by a number wi th in a c i rc le (e .g . ), cor responding to the s tep in which i t was assembled . Step 1: Lamina te the la t e ra l fo rmers to heavy ca rd s tock , such tha t the combined th i ckness i s abou t 1m m or 0.04 inches . Cut ou t the formers af te r lamina t ing . Assemble the l eng thwise fo rmer (s tep 2) t aking ca re to on ly g lue the cent ra l (b lue shaded) a rea and a l lowing the f l a ps a t the bot tom to fo ld ou tward . Cu t the upper p rof i l e a f t e r g lu ing and fold as shown in the d iagrams . Assemble the in t e rna l s t ruc ture by g l uing the la t e ra l fo rmers in to s lo t s in the leng thwise fo rmer (s tep 3). Some p ieces must be o r ien ted such tha t the p r in ted s ide f aces a f t ; these a re l abe l led as such . At tach the we l l deck s t i f feners (s tep 4) in to the appropr ia t e s lo t s . At th i s s tage the model should be a t t ached to e i ther a temporary work base (s tep 5) o r to the opt ional d i sp lay base (s tep 6). Th is p revent s the f rame f rom warping dur ing subsequen t s teps . I f us ing a t emporary base , app ly on ly a smal l amount o f g lue so the sh ip may be la t e r d etached eas i ly . At tach the fo recas t l e and poop decks to the f r ame (s tep 7). The fo rward t ip o f the fo recas t l e wi l l p ro t rude s l ight ly beyond the f ron t o f the f rame.The shap ing and a t tach ing o f the hu l l su r faces a re some what cha l leng ing . Dry-f i t t ing and ca refu l a t t ent ion to the d rawings wi l l he lp . At t ach the connec t ing s t r ips to the main and s t e rn sec t ions o f the s t a rboard hul l sur face (s tep 8). To avo id gaps , bend the par t s as c lose ly as poss ib le to match the contour o f the f rame before g lu ing the s te rn sec t ion to the main sec t ion . Repea t for the por t hul l pa r t s and g lue por t and s t arboard toge ther a t the rudder on ly (s tep 9). S l ide the hul l p ieces a round the f rame f rom the s t e rn , such tha t the rudder i s pos i t ioned undernea th t he s te rn overhang (s tep 10). The rear edge of the hu l l p l a t ing shou ld a l ign wi th the cen t re o f the r earmost la t e ra l fo rmer . Beginn ing a t the s t ern and working fo rward , g lue the hul l sur face to the f r ame. The wel l deck cu tout s on the top o f the hu l l should match the fo re and a f t bulkheads o f the well decks . F inal ly , jo in the por t and s t a rboard su r faces where they meet a t the bow. Form the coun te r p la t ing in to shape (s tep 11) and a t t ach over the s t e rn f ramework . I f you a re us ing a temporary work base , the sh ip may be de tached now. Fold and a t tach the decks and bulkheads jus t beh ind the fo rward we l l deck (s tep 12) and in f ront o f the a f t wel l deck (s tep 13). The a f t promenade deck B48 has a somewhat complex shape and requi res p rec i se scor ing and ca re ful fo ld ing . At tach the boat deck (s tep 14) so tha t the top of the longi tud ina l fo rmers p rot rude th rough the ho les in the deck . Steps 15 through 20 show the as sembly o f the va r ious deckhouses to the boat deck , beg inn ing a f t and work ing fo rward . Severa l o f these requi re care fu l fo ld ing , so c lose a t ten t ion to the d rawings i s recom mended. Blue loca t ing marks a re pr in ted on the boa t deck indica t ing the pos i t ion o f the deckhouses .Bend the wheelhouse bu lwark B14 to shape (s tep 21) and a t t ach to the f ront o f the boa t deck , add ing the wing roofs B13. Bu i ld and a t tach the off ice rs quar te r s and whee lhouse to the boa t deck (s tep 22) such tha t the f ron t o f the wheelhouse abu ts the f ron t f ace of the bu lwark added in the p rev ious s t ep . I t may be necessa ry to t r im s l igh t ly the rea r edge o f pa r t B51 to ach ieve a snug f i t aga inst the deckhouse a f t . At t ach the promenade deck s ides (s tep 23), wi th the r a i sed bulwarks p rot rud ing above the boa t deck and the f ron t edge nes t ed beneath the br id ge wing overhangs a s shown in the d iagram. A typ ica l e l ec t r ic c rane as sembly i s shown in s tep 24. At t ach the c ranes and cargo ha tches as shown in the d iagram (s tep 25). Fold and a t t ach the dock ing b r idge to the s t e rn (s tep 26). The forward ca rgo ha tch , b reakwater and anchor c rane a re added in s tep 27. Step 28 shows a typica l funne l a ssembly . Note tha t the funnel s a re no t iden t ica l in s ize . A l e t t e r i s p r in ted on the connec t ing s t r ip , cor responding with the le t te r a t the funnel ’s loca t ion on the deckhouse roof . Also , the funne l cap for the a f t funne l i s d i f fe r en t f rom the o ther th ree f unnel s . Attach the funne ls (s tep 29) wi th the seam fac ing the s t e rn , so tha t the funne ls s lope af t s l ight ly . Build and a t t ach the compass p l a t form (s tep 30). For g rea ter r ea l i sm you may rep lace the bo t tom suppor t B42 with four l egs made f rom wire . A t emplate fo r shap ing the two mast s i s shown on the par t s shee t . Too thp icks whi t t l ed o r sanded to s i ze , o r s t re t ched p l as t i c sprue , a re recom mended fo r these par t s . Bu i ld and a t t ach the c row ’s nes t and inse r t the mast s in to the ho les in the deck (s tep 31). The base of th e mas ts shou ld res t in no tches cu t in to the in t e rna l fo rmer . I f des i r ed , shrouds (suppor t ing cab les fo r the mast s ) can be made f rom f ine wi re o r ny l on l ine . Attach the upper ends o f the shrouds to the mast and the lower ends to the ou ter edge o f the we l l deck . Const ruct the l i f eboa ts as shown (s tep 32). There a re th ree s izes o f l i feboa t , a t tached to the upper decks as indica ted in the d iagram.t i t an i c_i n s t r .pd f v1.0 © Apr i l 2007 by Ra lph Cur r e l l h t tp ://ww w.cur r e l l .ne t Page 2 o f 61La minate la tera l formers toheavycardstock2LengthwiseformerA20Glueonly inarea ind icatedbyblueshading(o ther areaswi l l fo ldou tward).C ut formerlayout f ro mpartssheet 'A '. C o m binedth icknessshouldbe approx imate ly1m m or0.04inches.C utupperpro f i leands lotsa f terglu ing.ABCNOPDEFGHIJKLMAft ForwardBo w a ndsternf lapsfo ldouthor izontal l y . C entref laps fo ld outwardasshown.3Latera l formers4W el ldeck st i f feners5O pt ional temporarybase(So me partso mit ted forc lar i ty .) A17facesfwdE Tokeepthef ra mefro m w arp ingat tachtoaf la tp ieceofwood orplast ic .Useon lyas mal l a m ou ntofg luesothe basecanbelater A5A4 af tdetached.Bo wfwdA3A2 A18DA1Su ggestedglu ingpoints indicatedby 'x '.CC2af tA BAaf tAt tachre main ingformersA6-A16 in thesa me m ann er .Stern6O pt ionald isp laybase7Forecast leandpoopdeckO p enholeformast .Thebasesurface is inf i le t i tan ic_base.pd f .At tachtoaf la tp ieceofwood, plast i cor foa mcore.Bo wB62Stern8Starboardhul lsur faceA19(inkeds idefac ingdo wn)9Joinportandstarboardhul lsur faces A21,26-28Asse m bleas mir ror A23+A24(inkeds idefac ingdo wn)imageofs tarboardhu l l .A23A24A25U pperf lapbendsoutwardtowards ternToped gel inesupwi thb lack/whi te de m arkat iononhul l .Glueatrudderon ly .R e m aindero fhu l lspreadsto cover fra me.Be ndsur faceparts tom atchf ra mesha peatstern.8t i t an i c_i n s t r .pd f v1.0 © Apr i l 2007 by Ra lph Cur r e l l h t tp ://ww w.cur r e l l .ne tPage 3 o f 610 Attachhul lsur facetof rameopenslotaf tW el ldeckcu tou tshoulda l ignwi th foreandaf tbu lkheadsof thewel ldeck.Be ging lu ingat thesternand work forward.Al ignrearedgeofhu l lp la tewi ththecent reof therearmost la tera l former.Joinhul lp la teswheretheym eetatbow.Posit ionrudderunderoverhangingcounter.Stern Bo w11 Counter 12 Forwardbr idgeandpromenadedecksA22B12B1113 Aftbr idgeandpromenadedecks B48Scoreandfo ldasshown.(Unders idev iew)Foldf laps tocrea tewal lsB58O p enholeformast.14 Boatdeck 15 SecondclassentranceB38 B15 B36 B35B37B39Foldtodoubleth icknessandcuttoshape16 S m okeroo mandfunneldeckhouse 17 Tankroo mandskyl ightsB50 B41dB40B40 FwdopenslotB49B34(Unders ide)Foldf lapsassho wntocreatewal lst i t an i c_i n s t r.pd f v1.0© Apr i l2007by Ra lph Cur r e l l h t tp://ww w.cur r e l l.ne t Page4o f618 No.3funneldeckhouse19 LoungeroofB76Foldtodoubleth ickness andcuttoshapeFwdccB80Scoreand fo ldasshown.B79(inkeds ideshow nfac ingdo wn) Scoreand fo ldasshownB7720 No.2funneldeckhouseandskyl ight21 W heelhousebulwarksB65 B14Scoreandshapeassho wnB67 Frontands idesofB14at tachtoedgeofboatdeckasshow n.B68bB13B66B64(inkeds ideshow nfac ingdo wn) Scoreand fo ldasshown22 Off icers 'quar tersand wheelhouse23 Pro m enadesidesB60B52Foldtodoubleth ickness andcuttoshapeB17aB61Theseed gesare f lushwiththetopof theboatdeck .B51B16Tr imrearedge i fnecessaryto achieveasnugf i t .24 Elect r iccranes25 Locat ionofcranesandcargohatchesB74B59+B72 B63+B70B59+B28H atchesB6,7,8,9,10 Foldtot r ip le th ickness andcuttoshape.24B10 B9 B8B7 B6At tachtoblue locat ing marks ondeck.B59(inkeds ideshow n facingdown)B59+B75B59+B73 B63+B71 B59+B29t i t an i c_i n s t r .pd f v1.0 © Apr i l 2007 by Ra lph Cur r e l l h t tp ://ww w.cur r e l l .ne tPage 5 o f 626 Dockingbr idge 27 Forecast ledeta i ls28 No.1funnelB2aaB78Scoreand fo ldasshown.B20B21Inkedsur face B3B4B19Lineup wi th funne lsea mB46B18sho wnfacingdownB5B18,B19and B 46fo ld todouble th ickness andcuttoshapeAt tachto locat ing m arksondeck.At tachtoblue locat ing marks ondeck.funne l sea m29 AttachfunnelsB22-25,B46Funnelsea ms faceaf t2830 Co mpasspla t formB26,27,30,31,46O pt ional ly ,rep laceB42with suppor t legs mad efrom wire.B43 B42B32,33,44,45,47N o.4funne lcapAt tachto loungeroo fbe tween funne ls3and4.sea mLetterpr in tedonfunne lconnect ingst r ip correspondsto let terondeckhouseroof .31 M astsandcrow'snestCreate mastsus ingtoothp icksorst retchedInser tmasts in toholes indeck plast i csprueus ingthete mplateonthepar ts sheet fors ize.Mastsareround incross- sect ionandco loureddarkbrown. (baseofmastrests innotch in in ternal former).Mastss lopeto reara tsa mea ngleasfunne ls (approx .9°f romver t ica l). Shrouds(i fused)maybe m ade f ro mf inewireorny lonl ine.At tachlowerendsofshroudsto outeredgeofwel ldeck .B53O pt ionalshrouds (suppor tcab les)Bo wSternD eckleve laf tforward32 Li feboatsB81 B54+B5525ftcut terontopofco l laps ible27ftcol laps ib le30ft l i feboat27foot col laps ib le l i feboat(4boats)69B56+B5730foot l i feboat (14boats)25footcu t ter (2boats)t i t an i c_i n s t r .pd f v1.0 © Apr i l 2007 by Ra lph Cur r e l l h t tp ://ww w.cur r e l l .ne t Page 6 o f 6。

航空作品手工制作最简单的方法我折腾了好久航空作品手工制作这事儿,总算找到点门道。
说实话一开始我也是瞎摸索,走了不少弯路。
咱先说做飞机模型吧。
我最开始尝试的是用普通的A4纸折飞机,这应该算是超级简单的航空手工了。
先把A4纸横着放,然后从一头折个小三角,这个小三角的角度还挺有讲究的。
我最开始随便折了下,飞机飞起来就歪歪扭扭的。
后来我试了好多回,发现这个小三角的斜边差不多和纸的短边呈大概45度角的时候,飞机飞起来就比较稳。
接着把纸对折,两边再对称折出机翼,机翼的宽度也是有讲究的。
要是机翼太宽了,飞机就跟个大胖子一样,飞不高还乱晃悠;要是机翼太窄了,又感觉像是营养不良的瘦子,飞一小段就栽下去了。
我就失败了好多次才找到一个比较合适的比例,大概机翼宽度占整个纸张宽度的三分之一就行。
我还试过用吸管和彩色纸做直升机模型。
首先得找一根比较直而且粗点的吸管作为核心。
然后用彩色纸剪出像螺旋桨一样的形状,这个形状可不好剪,我第一次剪的时候,剪得歪七扭八的,完全不像螺旋桨。
剪好之后就把螺旋桨的中心部分粘到吸管的一头,这里我用的是胶水,但是胶水不能用太多了,不然很容易溢出来把螺旋桨粘毁了。
就像有次我搞得满手都是胶水,还把螺旋桨弄得皱巴巴的。
粘好螺旋桨之后,可以用小珠子或者小纸片等坠在吸管的另一头做配重,这样可以让直升机模型在空中保持平衡。
不过这个配重的重量要调试好多次,我之前试过一个大珠子,结果头重脚轻,根本飞不起来。
只能慢慢的试,轻了就加点,重了就减点。
还有一个就是用泡沫板做一些简单的飞机机身。
从泡沫板上剪出飞机的形状可不容易,我是先照着一些飞机的图片画下来形状然后才去剪的,这样不容易出错。
但是在切割泡沫板的时候要小心,我就不小心伤到过手,所以一定要用比较钝头的工具,沿着痕迹慢慢切割。
前几天我又试了个新方法来做纸飞机。
就是在原来折法的基础上,把飞机的尾部稍微向上弯曲一点,就像给它按了个小翘臀一样,没想到这样飞起来更加稳,距离也更远。