思科交换机基本配置
- 格式:ppt
- 大小:3.13 MB
- 文档页数:28
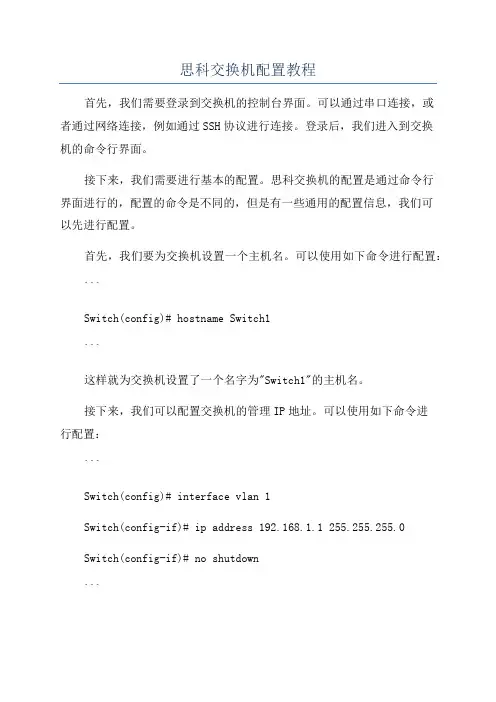
思科交换机配置教程首先,我们需要登录到交换机的控制台界面。
可以通过串口连接,或者通过网络连接,例如通过SSH协议进行连接。
登录后,我们进入到交换机的命令行界面。
接下来,我们需要进行基本的配置。
思科交换机的配置是通过命令行界面进行的,配置的命令是不同的,但是有一些通用的配置信息,我们可以先进行配置。
首先,我们要为交换机设置一个主机名。
可以使用如下命令进行配置:```Switch(config)# hostname Switch1```这样就为交换机设置了一个名字为"Switch1"的主机名。
接下来,我们可以配置交换机的管理IP地址。
可以使用如下命令进行配置:```Switch(config)# interface vlan 1Switch(config-if)# ip address 192.168.1.1 255.255.255.0Switch(config-if)# no shutdown```这样就为交换机的VLAN1接口配置了一个IP地址为192.168.1.1,子网掩码为255.255.255.0,并且启用了这个接口。
除了基本配置信息,我们还需要进行一些其他的配置,例如VLAN的配置。
VLAN是虚拟局域网的意思,可以将交换机的端口划分到不同的VLAN中,实现不同VLAN之间的隔离。
可以使用如下命令进行VLAN的配置:```Switch(config)# vlan 10Switch(config-vlan)# name VLAN10Switch(config-vlan)# exitSwitch(config)# interface fastEthernet 0/1Switch(config-if)# switchport access vlan 10Switch(config-if)# exit```这样就创建了一个编号为10的VLAN,名称为"VLAN10"。

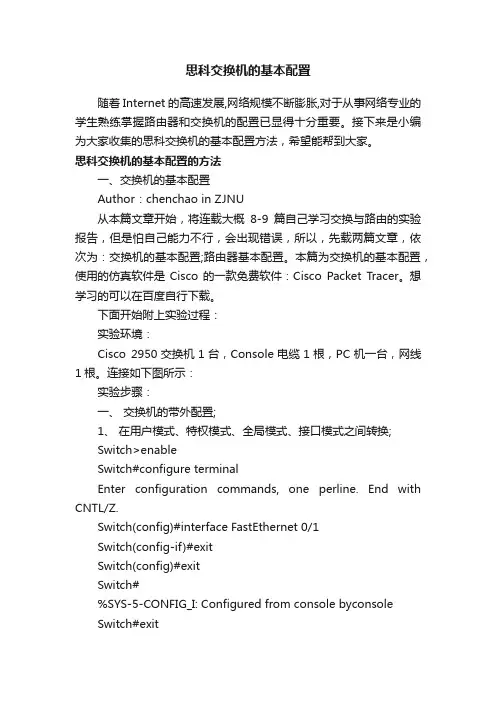
思科交换机的基本配置随着Internet的高速发展,网络规模不断膨胀,对于从事网络专业的学生熟练掌握路由器和交换机的配置已显得十分重要。
接下来是小编为大家收集的思科交换机的基本配置方法,希望能帮到大家。
思科交换机的基本配置的方法一、交换机的基本配置Author:chenchao in ZJNU从本篇文章开始,将连载大概8-9篇自己学习交换与路由的实验报告,但是怕自己能力不行,会出现错误,所以,先载两篇文章,依次为:交换机的基本配置;路由器基本配置。
本篇为交换机的基本配置,使用的仿真软件是Cisco的一款免费软件:Cisco Packet Tracer。
想学习的可以在百度自行下载。
下面开始附上实验过程:实验环境:Cisco 2950交换机1台,Console电缆1根,PC机一台,网线1根。
连接如下图所示:实验步骤:一、交换机的带外配置;1、在用户模式、特权模式、全局模式、接口模式之间转换;Switch>enableSwitch#configure terminalEnter configuration commands, one perline. End with CNTL/Z.Switch(config)#interface FastEthernet 0/1Switch(config-if)#exitSwitch(config)#exitSwitch#%SYS-5-CONFIG_I: Configured from console byconsoleSwitch#exitSwitch con0 is now availablePress RETURN to get started.Switch>2、将交换机的名称改为“student”;Switch(config)#hostname studentstudent(config)#3、为交换机各个模式设置密码“cisco”;特权模式下的密码保护student#enablestudent#configure tEnter configuration commands, one perline. End with CNTL/Z.student(config)#enable password ciscostudent(config)#enable secret cisco1远程登录口令设置student#configure tEnter configuration commands, one perline. End with CNTL/Z.student(config)#line console 0student(config-line)#line vty 0 4student(config-line)#password cisco2student(config-line)#loginstudent(config-line)#student#4、为交换机制定一个IP地址10.10.10.X/24;student#configConfiguring from terminal, memory, ornetwork [terminal]?Enter configuration commands, one perline. End with CNTL/Z.student(config)#interface vlan 1student(config-if)#ip address 10.10.10.1255.0.0.05、开启交换机的Telnet服务功能,建立Telnet用户admin,口令cisco,并制定只能从10.10.10.y/24登录Telnet服务器;student#student#configure tEnter configuration commands, one perline. End with CNTL/Z.student(config)#user admin password 0 ciscostudent(config)#6、查看配置情况;student>enablePassword:student#show running-cBuilding configuration...hostname student!enable secret 5$1$mERr$q.MA2tj.WFptzvbifq/1i.enable password cisco!!username admin password 0 ciscointerface Vlan1ipaddress 10.10.10.1 255.0.0.0!!line con 0!line vty 0 4password cisco2loginline vty 5 15login!!End二、交换机的端口配置:1、配置接口的描述、关闭借口、启动接口、配置接口的速度为100Mbps、配置接口工作模式为全双工、配置接口的流程控制;student#configure terminalEnter configuration commands, one perline. End with CNTL/Z.student(config)#interface FastEthernet0/1student(config-if)#shutdown%LINK-5-CHANGED: Interface FastEthernet0/1,changed state to administratively down%LINEPROTO-5-UPDOWN: Line protocol onInterface FastEthernet0/1, changed state to down%LINEPROTO-5-UPDOWN: Line protocol onInterface Vlan1, changed state to downstudent(config-if)#student(config-if)#exitstudent(config)#interface FastEthernet0/1student(config-if)#no shutdown%LINK-5-CHANGED: Interface FastEthernet0/1,changed state to up%LINEPROTO-5-UPDOWN: Line protocol onInterface FastEthernet0/1, changed state to up%LINEPROTO-5-UPDOWN: Line protocol onInterface Vlan1, changed state to upstudent(config-if)#speed 100student(config-if)#duplex full%LINK-5-CHANGED: Interface FastEthernet0/1,changed state to down%LINEPROTO-5-UPDOWN: Line protocol onInterface FastEthernet0/1, changed state to down%LINEPROTO-5-UPDOWN: Line protocol onInterface Vlan1, changed state to downstudent(config-if)#2、配置接口FastEthernet0/10为Access口;student#student#configure terminalEnter configuration commands, one perline. End with CNTL/Z.student(config)#interface FastEthernet0/10student(config-if)#switchport mode accessstudent(config-if)#3、配置接口FastEthernet0/12为Trunk口;student#student#configure tEnter configuration commands, one perline. End with CNTL/Z.student(config)#interface fastethernet0/12student(config-if)#switchport mode Trunkstudent(config-if)#end4、查看配置情况;!interface FastEthernet0/1duplex fullspeed100!!interface FastEthernet0/9!interface FastEthernet0/10switchport mode access!interface FastEthernet0/11!interface FastEthernet0/12switchport mode trunk!student#show running-cBuilding configuration...Current configuration : 1275 bytes!version 12.1no service timestamps log datetime msecno service timestamps debug datetime msec no service password-encryption!hostname student!enable secret 5$1$mERr$q.MA2tj.WFptzvbifq/1i. enable password cisco!!username admin password 0 cisco!!duplex fullspeed 100!interface FastEthernet0/2 !interface FastEthernet0/3 !interface FastEthernet0/4 !interface FastEthernet0/5 !interface FastEthernet0/6 !interface FastEthernet0/7 !interface FastEthernet0/8 !interface FastEthernet0/9 !interface FastEthernet0/10 switchport mode access !interface FastEthernet0/11 !interface FastEthernet0/12 switchport mode trunk!interface FastEthernet0/13 !!interface FastEthernet0/15!interface FastEthernet0/16!interface FastEthernet0/17!interface FastEthernet0/18!interface FastEthernet0/19!interface FastEthernet0/20!interface FastEthernet0/21!interface FastEthernet0/22!interface FastEthernet0/23!interface FastEthernet0/24!interface GigabitEthernet1/1 !interface GigabitEthernet1/2 !interface Vlan1ipaddress 10.10.10.1 255.0.0.0 !!line con 0!line vty 0 4password cisco2loginline vty 5 15login!!end看了“思科交换机的基本配置”还想看:。

思科交换机基本配置命令Switch#conf tEnter configuration commands, one per line. End with CNTL/Z.Switch(config)#vlan 2 创建VLAN2Switch(config-vlan)#exiSwitch(config)#vlan 3 创建VLAN3Switch(config-vlan)#exiSwitch(config)#vlan 4 创建VLAN4Switch(config-vlan)#exitSwitch(config)#int fa0/1 将我们的fa0/1添加到VLAN2中Switch(config-if)#sw mo acSwitch(config-if)#sw ac vlan 2Switch(config-if)#exitSwitch(config)#int fa0/2 将我们的FA0/2添加到VLAN3中Switch(config-if)#sw mo acSwitch(config-if)#sw ac vlan 3Switch(config-if)#exitSwitch(config)#int fa0/3 将我们的FA0/3添加到VLAN4中Switch(config-if)#sw mo acSwitch(config-if)#sw ac vlan 4Switch(config-if)#exitSwitch(config)#int vlan 2 给我们的VLAN2添加一个IP地址,用于不同网段之间互相访问Switch(config-if)#ip add 192.168.1.1 255.255.255.0Switch(config-if)#exitSwitch(config)#int vlan 3 给我们的VLAN3添加一个IP地址Switch(config-if)#ip add 192.168.2.1 255.255.255.0Switch(config-if)#exitSwitch(config)#int vlan 4给我们的VLAN4添加一个IP地址Switch(config-if)#ip add 192.168.3.1 255.255.255.0Switch(config-if)#no shutSwitch(config-if)#exit以下几行是用给给我们不同的VLAN内的主机自动分配我们的IP地址。

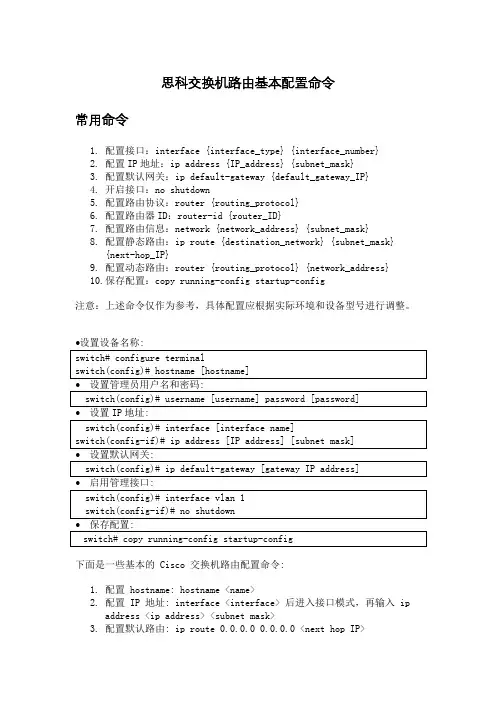
思科交换机路由基本配置命令常用命令1.配置接口:interface {interface_type} {interface_number}2.配置IP地址:ip address {IP_address} {subnet_mask}3.配置默认网关:ip default-gateway {default_gateway_IP}4.开启接口:no shutdown5.配置路由协议:router {routing_protocol}6.配置路由器ID:router-id {router_ID}7.配置路由信息:network {network_address} {subnet_mask}8.配置静态路由:ip route {destination_network} {subnet_mask}{next-hop_IP}9.配置动态路由:router {routing_protocol} {network_address}10.保存配置:copy running-config startup-config注意:上述命令仅作为参考,具体配置应根据实际环境和设备型号进行调整。
下面是一些基本的 Cisco 交换机路由配置命令:1.配置 hostname: hostname <name>2.配置 IP 地址: interface <interface> 后进入接口模式,再输入 ipaddress <ip address> <subnet mask>3.配置默认路由: ip route 0.0.0.0 0.0.0.0 <next hop IP>4.启用路由协议: router <protocol> (例如: router rip)5.配置路由连接: network <network address> (例如: network192.168.1.0)6.查看路由表: show ip routeCisco 交换机路由配置步骤1.进入配置模式:configure terminal2.配置 IP 地址和子网掩码:interface [interface-name] ; ip address[ip-address] [subnet-mask]3.配置默认路由:ip route 0.0.0.0 0.0.0.0 [next-hop-IP-address]4.启用路由协议:router [protocol-name] (如:router ospf)5.配置路由协议参数: [protocol-name] [process-id] (如:ospf 1)6.配置路由连接:network [network-address] [wildcard-mask] area[area-id] (如:network 192.168.1.0 0.0.0.255 area 0)7.保存配置:copy running-config startup-config8.退出配置模式:exit。


思科交换机的基本配置思科交换机的基本配置H3C每年将销售额的15%以上用于研发投入,在中国的北京、杭州和深圳设有研发机构,在北京和杭州设有可靠性试验室以及产品鉴定测试中心。
下面店铺整理一些思科交换机的基本配置,希望大家认真阅读!CISCO交换机基本配置:Console端口连接用户模式hostname# ;特权模式hostname(config)# ;全局配置模式hostname(config-if)# ;交换机口令设置:switch>enable ;进入特权模式switch#config terminal ;进入全局配置模式switch(config)#hostname csico ;设置交换机的主机名switch(config)#enable secret csico1 ;设置特权加密口令switch(config)#enable password csico8 ;设置特权非密口令switch(config)#line console 0 ;进入控制台口switch(config-line)#line vty 0 4 ;进入虚拟终端switch(config-line)#login ;虚拟终端允许登录switch(config-line)#password csico6 ;设置虚拟终端登录口令csico6switch#exit ;返回命令交换机VLAN创建,删除,端口属性的设置,配置trunk端口,将某端口加入vlan中,配置VTP:switch#vlan database ;进入VLAN设置switch(vlan)#vlan 2 ;建VLAN 2switch(vlan)#vlan 3 name vlan3 ;建VLAN 3并命名为vlan3switch(vlan)#no vlan 2 ;删vlan 2switch(config)#int f0/1 ;进入端口1switch(config)#speed ? 查看speed命令的子命令switch(config)#speed 100 设置该端口速率为100mb/s (10/auto)switch(config)#duplex ? 查看duplex的子命令switch(config)#duplex full 设置该端口为全双工(auto/half)switch(config)#description TO_PC1 这是该端口描述为TO_PC1 switch(config-if)#switchport access vlan 2 ;当前端口加入vlan 2switch(config-if)#switchport mode trunk ;设置为trunk模式(access模式)switch(config-if)#switchport trunk allowed vlan 1,2 ;设置允许的vlanswitch(config-if)#switchport trunk encap dot1q ;设置vlan 中继switch(config)#vtp domain vtpserver ;设置vtp域名相同switch(config)#vtp password ;设置发vtp密码switch(config)#vtp server ;设置vtp服务器模式switch(config)#vtp client ;设置vtp客户机模式交换机设置IP地址,默认网关,域名,域名服务器,配置和查看MAC地址表:switch(config)#interface vlan 1 ;进入vlan 1switch(config-if)#ip address 192.168.1.1 255.255.255.0 ;设置IP地址switch(config)#ip default-gateway 192.168.1.6 ;设置默认网关switch(config)#ip domain-name 设置域名switch(config)#ip name-server 192.168.1.18 设置域名服务器switch(config)#mac-address-table? 查看mac-address-table 的子命令switch(config)#mac-address-table aging-time 100 设置超时时间为100msswitch(config)#mac-address-table permanent 0000.0c01.bbcc f0/3 加入永久地址在f0/3端口switch(config)#mac-address-table restricted static 0000.0c02.bbcc f0/6 f0/7 加入静态地址目标端口f0/6源端口f0/7 switch(config)#endswitch#show mac-address-table 查看整个MAC地址表switch#clear mac-address-table restricted static 清除限制性静态地址交换机显示命令:switch#write ;保存配置信息switch#show vtp ;查看vtp配置信息switch#show run ;查看当前配置信息switch#show vlan ;查看vlan配置信息switch#show interface ;查看端口信息switch#show int f0/0 ;查看指定端口信息switch#show int f0/0 status;查看指定端口状态switch#dir flash: ;查看闪存Cisco路由器配置命令大全网络2010-06-26 06:43:44 阅读657 评论0 字号:大中小订阅 .(1)模式转换命令用户模式----特权模式,使用命令"enable"特权模式----全局配置模式,使用命令"config t"全局配置模式----接口模式,使用命令"interface+接口类型+接口号"全局配置模式----线控模式,使用命令"line+接口类型+接口号"注:用户模式:查看初始化的信息.特权模式:查看所有信息、调试、保存配置信息全局模式:配置所有信息、针对整个路由器或交换机的所有接口接口模式:针对某一个接口的配置线控模式:对路由器进行控制的接口配置(2)配置命令show running config 显示所有的配置show versin 显示版本号和寄存器值shut down 关闭接口no shutdown 打开接口ip add +ip地址配置IP地址secondary+IP地址为接口配置第二个IP地址show interface+接口类型+接口号查看接口管理性show controllers interface 查看接口是否有DCE电缆show history 查看历史记录show terminal 查看终端记录大小hostname+主机名配置路由器或交换机的标识config memory 修改保存在NVRAM中的启动配置exec timeout 0 0 设置控制台会话超时为0service password-encryptin 手工加密所有密码enable password +密码配置明文密码ena sec +密码配置密文密码line vty 0 4/15 进入telnet接口password +密码配置telnet密码line aux 0 进入AUX接口password +密码配置密码line con 0 进入CON接口password +密码配置密码bandwidth+数字配置带宽no ip address 删除已配置的IP地址show startup config 查看NVRAM中的配置信息copy run-config atartup config 保存信息到NVRAM write 保存信息到NVRAMerase startup-config 清除NVRAM中的配置信息show ip interface brief 查看接口的谪要信息banner motd # +信息 + # 配置路由器或交换机的描素信息description+信息配置接口听描素信息vlan database 进入VLAN数据库模式vlan +vlan号+ 名称创建VLANswitchport access vlan +vlan号为VLAN为配接口interface vlan +vlan号进入VLAN接口模式ip add +ip地址为VLAN配置管理IP地址vtp+service/tracsparent/client 配置SW的VTP工作模式vtp +domain+域名配置SW的VTP域名vtp +password +密码配置SW的密码switchport mode trunk 启用中继no vlan +vlan号删除VLANshow spamming-tree vlan +vlan号查看VLA怕生成树议2. 路由器配置命令ip route+非直连网段+子网掩码+下一跳地址配置静态/默认路由show ip route 查看路由表show protocols 显示出所有的被动路由协议和接口上哪些协议被设置show ip protocols 显示了被配置在路由器上的路由选择协议,同时给出了在路由选择协议中使用的定时器等信息router rip 激活RIP协议network +直连网段发布直连网段interface lookback 0 激活逻辑接口passive-interface +接口类型+接口号配置接口为被动模式debug ip +协议动态查看路由更新信息undebug all 关闭所有DEBUG信息router eigrp +as号激活EIGRP路由协议network +网段+子网掩码发布直连网段show ip eigrp neighbors 查看邻居表show ip eigrp topology 查看拓扑表show ip eigrp traffic 查看发送包数量router ospf +process-ID 激活OSPF协议network+直连网段+area+区域号发布直连网段show ip ospf 显示OSPF的进程号和ROUTER-IDencapsulation+封装格式更改封装格式no ip admain-lookup 关闭路由器的域名查找ip routing 在三层交换机上启用路由功能show user 查看SW的在线用户clear line +线路号清除线路3. 三层交换机配置命令配置一组二层端口configure terminal 进入配置状态nterface range {port-range} 进入组配置状态配置三层端口configure terminal 进入配置状态interface {{fastethernet | gigabitethernet} interface-id} | {vlan vlan-id} | {port-channel port-channel-number} 进入端口配置状态no switchport 把物理端口变成三层口ip address ip_address subnet_mask 配置IP地址和掩码no shutdown 激活端口例:Switch(config)# interface gigabitethernet0/2Switch(config-if)# no switchportSwitch(config-if)# ip address 192.20.135.21 255.255.255.0Switch(config-if)# no shutdown配置VLANconfigure terminal 进入配置状态vlan vlan-id 输入一个VLAN号, 然后进入vlan配态,可以输入一个新的VLAN号或旧的来进行修改。
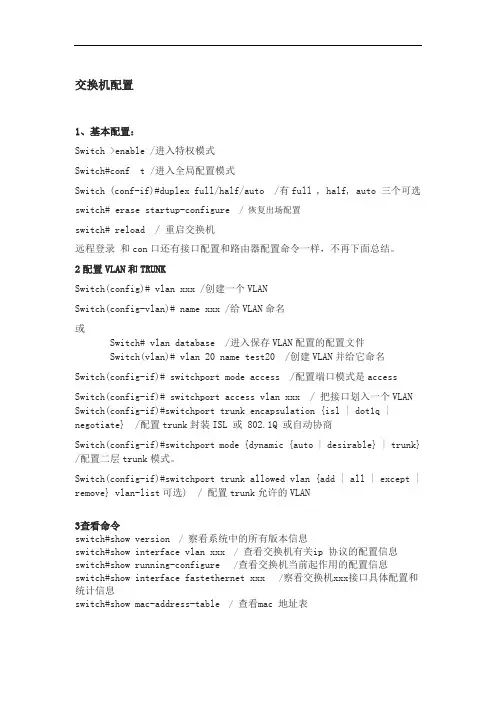
交换机配置1、基本配置:Switch >enable /进入特权模式Switch#conf t /进入全局配置模式Switch (conf-if)#duplex full/half/auto /有full , half, auto 三个可选switch# erase startup-configure / 恢复出场配置switch# reload / 重启交换机远程登录和con口还有接口配置和路由器配置命令一样,不再下面总结。
2配置VLAN和TRUNKSwitch(config)# vlan xxx /创建一个VLANSwitch(config-vlan)# name xxx /给VLAN命名或Switch# vlan database /进入保存VLAN配置的配置文件Switch(vlan)# vlan 20 name test20 /创建VLAN并给它命名Switch(config-if)# switchport mode access /配置端口模式是accessSwitch(config-if)# switchport access vlan xxx / 把接口划入一个VLAN Switch(config-if)#switchport trunk encapsulation {isl | dot1q | negotiate} /配置trunk封装ISL 或 802.1Q 或自动协商Switch(config-if)#switchport mode {dynamic {auto | desirable} | trunk} /配置二层trunk模式。
Switch(config-if)#switchport trunk allowed vlan {add | all | except | remove} vlan-list可选) / 配置trunk允许的VLAN3查看命令switch#show version /察看系统中的所有版本信息switch#show interface vlan xxx /查看交换机有关ip 协议的配置信息switch#show running-configure /查看交换机当前起作用的配置信息switch#show interface fastethernet xxx /察看交换机xxx接口具体配置和统计信息switch#show mac-address-table /查看mac 地址表switch#show mac-address-table aging-time / 查看mac 地址表自动老化时间4 cdp 相关命令switch#show cdp / 查看设备的cdp 全局配置信息switch#show cdp interface fastethernet xxx /查看xxx 端口的cdp 配置信息switch#show cdp traffic / 查看有关cdp 包的统计信息switch#show cdp nerghbors / 列出与设备相连的cisco 设备VTP配置switch# vlan databaseswitch(vlan)# vtp domain xxx / 配置VTP名字Switch(vlan)#vtp server / 配置VTP模式为serverSwitch(vlan)#vtp client / 配置VTP模式为clientSwitch(vlan)#vtp password xxx / 配置VTP密码switch(vlan)# vtp pruning / 开启VTP剪裁switch#show vtp domain /显示管理域的VTP 参数还有没总结的,我会抓紧时间完善。

思科交换机基本配置命令思科交换机相关配置⼀、基础操作进⼊交换机界⾯为⼀般⽤户模式 switch>输⼊命令 enable进⼊特权⽤户模式 switch#输⼊命令config terminal进⼊全局配置模式 switch(config)#输⼊命令int xxx可进⼊端⼝或者vlan的全局配置⼦模式switch(config-if)#特权⽤户模式可输⼊show命令查看相关设置,命令后输⼊?可查询帮助可⽤no 命令撤销已经设置的配置⼆、Telnet远程登录设置1.交换机配置IP地址进⼊vlan 1 //int vlan 1启⽤ //no shutdown设置ip地址 ///ip address ip地址⼦⽹掩码2.设置交换机⽤户名和密码useename xxxpassword/secret xxx设置enable密码enable password xxx3.设置访问数量line vty 0 x(x是数量,最⼩为1)password xxxlogin也可以直接调⽤上⾯设置的本地⽤户名密码line vty 0 xlogin local4.console⼝的密码设置也相似line console 0login local三、SSH远程登录1.基础设置与Telnet类似2.设置访问数量line vty 0 x3.选择ssh⽅式transport input ssh4.更改hostnamehostname xxx5.设置域名ip domain-name 6.设置rsa加密密钥crypto key generate rsa[512]:在360-2048中选择即可7.PC端登录命令ssh -l username ip地址四、交换机中划分vlan1.创建vlanvlan x(数字)可以使⽤name命令改名2.进⼊端⼝,分配vlanint f0/1switchport access vlan x3.交换机之间相连需要在连接端⼝做trunk进⼊连接端⼝int f0/24创建trunkswitchport mode trunk五、核⼼交换机中划分vlan1.创建vlanvlan x1vlan x2…2.vlan 中设置⽹关,vlan下的pc终端也要设置相同⽹关int vlan xip address xxx xxx3.三层交换机与交换机相连端⼝做trunk封装dot1q协议switchport trunk encapsulation dot1q创建trunkswitchport mode trunk4.如有需要,可以开启路由功能ip routing六、本地端⼝镜像1.设置源端⼝monitor session 1 source int f0/12.设置⽬的端⼝monitor session 1 destination f0/2七、远程端⼝镜像1.设置远程专⽤vlanvlan 100开启远程端⼝镜像功能remote-span2.被监视交换机中设置源端⼝monitor session 1 source int f0/1设置⽬的端⼝monitor session 1 destination remote vlan 100 reflector-port f0/1 3.另⼀台监视交换机同上,创建vlan,开启远程镜像设置源端⼝monitor session 2 source remote vlan 100设置⽬的端⼝monitor session 2 destination int f0/3⼋、PVST配置,负载均衡1.打开pvst功能spanning-tree mode pvst2.进⼊交换机全局配置模式配置主根spainning-tree vlan x1 priority 4096配置次根spanning- tree vlan x2 priority 81923.进⼊另⼀个交换机配置主根spainning-tree vlan x2 priority 4096配置次根spanning- tree vlan x1 priority 81923.进⼊另⼀个交换机九、链路聚合lacp1.进⼊需要配置的端⼝int range f0/21-242.选择lacp协议channel-protocol lacp2.开启channel-group 1 mode active3.如果链路聚合需要做trunk,可以执⾏以下操作int port- channel 1switchport mode trunk。
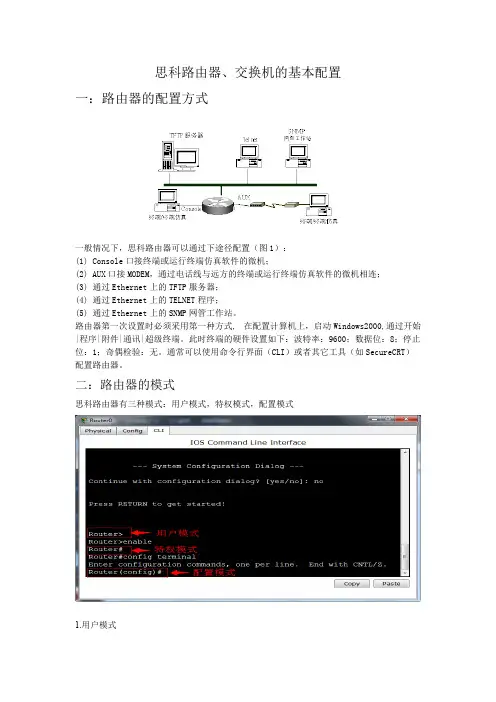
思科路由器、交换机的基本配置一:路由器的配置方式一般情况下,思科路由器可以通过下途径配置(图1):(1)Console口接终端或运行终端仿真软件的微机;(2)AUX口接MODEM,通过电话线与远方的终端或运行终端仿真软件的微机相连;(3)通过Ethernet上的TFTP服务器;(4)通过Ethernet上的TELNET程序;(5)通过Ethernet上的SNMP网管工作站。
路由器第一次设置时必须采用第一种方式, 在配置计算机上,启动Windows2000,通过开始|程序|附件|通讯|超级终端。
此时终端的硬件设置如下:波特率:9600;数据位:8;停止位:1;奇偶检验:无。
通常可以使用命令行界面(CLI)或者其它工具(如SecureCRT)配置路由器。
二:路由器的模式思科路由器有三种模式:用户模式,特权模式,配置模式1.用户模式当登录路由器后,系统自动进入用户EXEC命令模式。
例如:Router>在用户模式状态下,用户只能查看路由器的连接状态和基本信息,访问其他网络和主机,但是不能对路由器进行配置,不能看到更改路由器的设置内容。
2.特权模式在用户EXEC模式下,键入“enable”命令,即可进入特权EXEC模式。
例如:Router>enableRouter#Router#exit 退回到用户模式Router>特权模式可以执行用户模式下的所有命令,还可以看到更改路由器的设置内容,能够运行用于测试网络、检查系统的命令。
可以使用“configure”命令进入其他的配置模式。
3.全局配置模式在全局配置模式下可以配置路由器的全局性参数,更改已有配置。
要进入全局配置模式,必须首先进入特权模式,然后使用“configure”命令进入全局配置模式。
Router#configure terminal 也可使用命令缩写Router#conf tRouter(config)#可以使用“exit”、“end”命令或者键入“Ctrl-Z”返回特权模式状态。
思科交换机的常用配置思科交换机的常用配置1、交换机的端口2、端口:以太网端口(e0、e1)、快速以太网端口(fast0、fast0/1[第一个模块的第一端口、fast1、fast1/1)、光纤接口(Tx、Rx)2、交换机的配置方法a、通过CONSOLE端口利用配置第一次安装使用交换机时,只能通过配置口(Console)进行配置。
配置电缆连接第一步:将配置电缆的DB-9(或DB-25)孔式插头接到要对交换机进行配置的微机或终端的串口上。
第二步:将配置电缆的RJ-45一端连到交换机器的配置口(Console)上。
设置微机或终端的参数第一步:打开微机或终端。
如果使用微机进行配置,需要在微机上运行终端仿真程序,如Windows 3.1的Terminal、Windows95/Windows98/Windows NT的超级终端。
第二步:设置终端参数。
参数要求:设置波特率为9600,数据位为8,奇偶校验为无,停止位为1,流量控制为无,Windows98超级终端参数设置方法如下:(1) 在图5-2所示的超级终端窗口中,单击其[属性]按钮,出现图5-3所示的超级终端属性对话框。
(2) 在超级终端属性对话框中[连接时使用]一栏选择连接的串口。
(3) 在串口的属性对话框中设置波特率为9600,数据位为8,奇偶校验为无,停止位为1,流量控制为无。
单击[确定]按钮交换机上电确认交换机与配置终端的连接正确,确认已经完成配置终端参数的设置后,即可对交换机上电。
随后交换机出现自检内容。
启动完毕,回车,超级终端里显示字样(旧命令行提示的是router>)。
即可进行下一步的配置。
备注要进行配置,具体配置情况以后再讲b、命令输入时的技巧?、TAB、↑、CTrl+d(删除光标所在位置的字附)、CTRL+C的使用。
3、交换的日常维护A、交换机的几种工作状态a、用户命令状态(switch>)b、特权状态(switch #)在用户命令状态下输入enablec、全局配置状态[switch (config)#]在特权状态下输入config命令B、查看交换机的版本(show version)C、查看交换机正在运行的文件(show run)D、查看交换机的备份文件(show star)E、设置交换机的密码F、查看闪存内的信息(show flash 显示的是交换机的IOS软件信息)G、exit返回到上一步2950常用配置a、设置从用户命令状态到特权状态的密码switch (config)#enable password abc(密码设为abc)switch (config)#enable secret abc(密码设为abc,但密码已被加密)switch (config)#hostname ipkh(将交换机的名字改为ipkh)switch#reload(重新启动交换机)b、置利用TELNET进行远程登录router>enablerouter#config trouter(config)#enable password abc(设置一个密码)router(config)#line vty 0 4(设置4条虚拟线路)router(config-line)#login(让路由器显示输入口令的提示)router(config-line)#password 123router(config-line)#exit(返回一步)备注:如果不设置密码,远程用户无法进行TELNET登录siwtchVlan1Vlan2Vlan3交换机的VLAN配置Switch#conf tSwitch(config)#inter vlan1Switch(config-if)#ip add 192.168.1.1 255.255.255.0(VLAN1是用来管理交换机的,VLAN1的地址也就是交换机的地址)Switch(config)#no shutdownSwitch(config)#ip default-gateway 192.168.1.2(设置交换机的缺省网关)Switch(config-if)#exitSwitch(config)#exitSwitch#vlan dataSwitch(vlan)#vlan 2 name cwSwitch(vlan)#vlan 3 name rsSwitch(vlan)#exitSwitch#conf tSwitch(config)#int range fa0/1 –3Switch(config-if)# switchport mode access(将此端口设置为访问模式,属于默认方式)Switch(config-if)#switchport access vlan 1Switch(config)#int range fa0/4 –6Switch(config-if)# switchport access vlan 2Switch(config)#int range fa0/7 –10Switch(config-if)#switchport access vlan 3Switch(config)#int fa0/11Switch(config-if)#switchport mode trunkSwitch(config-if)#duplex fullSwitch(config-if)#speed 1002950Aserver2950BclientVlan1Vlan2Vlan1Vlan2主干道配置2950ASwitch#conf tSwitch(config)#inter vlan1Switch(config-if)#ip add 192.168.1.1 255.255.255.0(VLAN1是用来管理交换机的,VLAN1的地址也就是交换机的地址)Switch(config)#no shutdownSwitch(config)#ip default-gateway 192.168.1.2(设置交换机的缺省网关)Switch(config-if)#exitSwitch(config)#exitSwitch#vlan dataSwitch(vlan)# vtp serverSwitch(vlan)#vtp domain ipkhSwitch(vlan)#vlan 2 name cwSwitch(vlan)#vlan 3 name rsSwitch(vlan)#exitSwitch#conf tSwitch(config)#int range fa0/1 –3Switch(config-if)# switchport mode accessSwitch(config-if)#switchport access vlan 1Switch(config)#int range fa0/4 –6Switch(config-if)# switchport mode accessSwitch(config-if)# switchport access vlan 2Switch(config)#int range fa0/7 –10Switch(config-if)#switchport access vlan 3Switch(config-if)# switchport mode accessSwitch(config)#int fa0/11Switch(config-if)#switchport mode trunkSwitch(config-if)#duplex fullSwitch(config-if)#speed 1002950BSwitch#conf tSwitch(config)#inter vlan1Switch(config-if)#ip add 192.168.1.1 255.255.255.0(VLAN1是用来管理交换机的,VLAN1的地址也就是交换机的地址,必须与2950A相同)Switch(config)#no shutdownSwitch(config-if)#exitSwitch(config)#exitSwitch#vlan dataSwitch(vlan)# vtp clientSwitch(vlan)#vtp domain ipkhSwitch(vlan)#exitSwitch#conf tSwitch(config)#int range fa0/1 –3Switch(config-if)# switchport mode accessSwitch(config-if)#switchport access vlan 1Switch(config)#int range fa0/4 –6Switch(config-if)#switchport mode accessSwitch(config-if)# switchport access vlan 2Switch(config)#int range fa0/7 –10Switch(config-if)# switchport mode accessSwitch(config-if)#switchport access vlan 3Switch(config)#int fa0/11Switch(config-if)#switchport mode trunkSwitch(config-if)#duplex fullSwitch(config-if)#speed 100单臂路由器与交换机之间的合作组网(路由器的以太网口必须为快速以太网接口):实现1、各VLAN间相互通信,2、局域网内部的各计算机能与INTERNET 通信fa0RswitchVlan1Vlan2fa1E0:192.168.1.1E1:192.168.2.1R的配置Router(config)#int fa0/1Router(config-if)#ip add 192.168.2.1 255.255.255.0Router(config-if)#no shutdownRouter(config-if)#ip nat outsideRouter(config)#access-list 1 permit anyRouter(config)#ip route 0.0.0.0 0.0.0.0 fa0/1Router(config)#ip nat inside source list 1 interface fa0/1 overloadRouter(config-if)#exitRouter(config)#int fa0/0Router(config-if)#duplex fullRouter(config-if)#speed 100Router(config-if)#no shutdownRouter(config-if)#exitRouter(config)#int fa0/0.1(vlan 1的子接口)Router(config-subif)# encap isl 1/encap dot1q 1(路由器与交换机之间的互联协议为ISL/802.1q)Router(config-subif)#ip add 192.168.1.1 255.255.255.0Router(config-subif)#ip nat inside(此接口作为NAT内接口)Router(config)#int fa0/0.2(vlan 2的子接口)Router(config-subif)# encap isl 1(路由器与交换机之间的互联协议为ISL)Router(config-subif)#ip add 192.168.2.1 255.255.255.0Router(config-subif)#ip nat insideRouter(config)#int fa0/0.3(vlan 2的子接口)Router(config-subif)# encap isl 1(路由器与交换机之间的互联协议为ISL)Router(config-subif)#ip add 192.168.3.1 255.255.255.0Router(config-subif)#ip nat insideSwitch的配置Switch(config)#int fa0/0Switch(config-if)#switch mode trunkSwitch(config-if)#switch trunk encap isl/dot1q(要与路由器保持一致)Switch(config-if)#speed 100Switch(config-if)#duplex fullSwitch(config)#int vlan1Switch(config-if)#ip add 192.168.1.2 255.255.255.0Switch(config-if)#exitSwitch(config)#ip default-gateway 192.168.1.1Switch(config)#exitSwitch#vlan dataSwitch(vlan)#vlan 2 name cwSwitch(vlan)#vlan 3 name rsSwitch(vlan)#vtp serverSwitch(vlan)#vtp domain ipkhSwitch(vlan)#exitSwitch#conf tSwitch(config)#int range fa0/1 –3Switch(config-if)#switchprot access vlan 1Switch(config-if)spanning-tree portfastSwitch(config)#int range fa0/4 –7Switch(config-if)#switchprot access vlan 2Switch(config-if)spanning-tree portfastSwitch(config)#int range fa0/8 –10Switch(config-if)#switchprot access vlan 3Switch(config-if)spanning-tree portfastCisco6509交换机设置DHCP实例一位客户想把DHCP SERVER迁移到6509交换机的MSFC上,要求还挺复杂:1.同时为多个VLAN的客户机分配地址2.VLAN内有部分地址采用手工分配的方式3.为客户指定网关、Wins服务器等4.VLAN 2的地址租用有效期限为1天,其它为3天5.按MAC地址为特定用户分配指定的IP地址最终配置如下:ip dhcp excluded-address 10.1.1.1 10.1.1.19 //不用于动态地址分配的地址ip dhcp excluded-address 10.1.1.240 10.1.1.254ip dhcp excluded-address 10.1.2.1 10.1.2.19!ip dhcp pool global //global是pool name,由用户指定network 10.1.0.0 255.255.0.0 //动态分配的地址段domain-name //为客户机配置域后缀dns-server 10.1.1.1 10.1.1.2 //为客户机配置dns服务器netbios-name-server 10.1.1.5 10.1.1.6 //为客户机配置wins服务器netbios-node-type h-node //为客户机配置节点模式(影响名称解释的顺利,如h-node=先通过wins服务器解释...)lease 3 //地址租用期限: 3天ip dhcp pool vlan1network 10.1.1.0 255.255.255.0 //本pool是global的子pool, 将从global pool继承domain-name等optiondefault-router 10.1.1.100 10.1.1.101 //为客户机配置默认网关!ip dhcp pool vlan2 //为另一VLAN配置的poolnetwork 10.1.2.0 255.255.255.0default-router 10.1.2.100 10.1.2.101lease 1!ip dhcp pool vlan1_john //总是为MAC地址为...的机器分配...地址host 10.1.1.21 255.255.255.0client-identifier 010050.bade.6384 //client-identifier=01加上客户机网卡地址!ip dhcp pool vlan1_tomhost 10.1.1.50 255.255.255.0client-identifier 010010.3ab1.eac8相关的DHCP调试命令:no service dhcp //停止DHCP服务[默认为启用DHCP服务sh ip dhcp binding //显示地址分配情况show ip dhcp conflict //显示地址冲突情况debug ip dhcp server {events | packets | linkage} //观察DHCP服务器工作情况如果DHCP客户机分配不到IP地址,常见的原因有两个。
思科交换机基本配置命令目录1、基本概念介绍 (2)2、密码、登陆等基本配置 (2)3、CISCO设备端口配置详解 (4)4、VLAN的规划及配置 (6)4.1核心交换机的相关配置 (6)4.2接入交换机的相关配置 (8)5、配置交换机的路由功能 (9)6、配置交换机的DHCP功能 (9)7、常用排错命令 (10)1、基本概念介绍IOS: 互联网操作系统,交换机和路由器常用操作系统VLAN: 虚拟lanVTP: VLAN TRUNK PROTOCOLDHCP: 动态主机配置协议ACL:访问控制列表三层交换机:具有三层路由转发能力的交换机2、密码、登陆等基本配置本节介绍cisco路由器或者交换机的基本配置,本教程用的是cisco的模拟器做的介绍,一些具体的端口显示可能与实际的设备不符,但并不影响基本配置命令的执行。
Router># 显示稳定后,出现最初的提示符,提示符“>”表示目前所处的状态为用户模式。
Router>Router>en# 如果在当前状态下没有重复的命令,可以用“TAB”键来补齐命令Router>enable# 从用户模式(user mode)进入到特权模式(exec mode),提示符变为“#”Router#configure terminal#在特权模式下输入configure terminal进入全局配置模式(global configuration mode),在这之下输入的命令叫做全局命令,一旦输入,将对整个router产生即时影响。
*Mar 1 00:44:26.491: %SYS-5-CONFIG_I: Configured from console by console t # 在输入命令的过程中,IOS会出现一些即时提示。
Enter configuration commands, one per line. End with CNTL/Z.Router(config)#exit # 退出当前模式Router(config)#hostname test# 更改当前设备的名字,主要是为了便于区分设备。
cisco交换机基本配置1.Cisco IOS简介Cisco Catalyst系列交换机所使用的操作系统是IOS(Internetwork Operating System,互联网际操作系统)或COS (Catalyst Operating System),其中以IOS使用最为广泛,该操作系统和路由器所使用的操作系统都基于相同的内核和shell。
IOS的优点在于命令体系比较易用。
利用操作系统所提供的命令,可实现对交换机的配置和管理。
Cisco IOS操作系统具有以下特点:(1)支持通过命令行(Command-Line Interface,简称CLI)或Web界面,来对交换机进行配置和管理。
(2)支持通过交换机的控制端口(Console)或Telnet会话来登录连接访问交换机。
(3)提供有用户模式(user level)和特权模式(privileged level)两种命令执行级别,并提供有全局配置、接口配置、子接口配置和vlan数据库配置等多种级别的配置模式,以允许用户对交换机的资源进行配置。
(4)在用户模式,仅能运行少数的命令,允许查看当前配置信息,但不能对交换机进行配置。
特权模式允许运行提供的所有命令。
(5)IOS命令不区分大小写。
(6)在不引起混淆的情况下,支持命令简写。
比如enable通常可简约表达为en。
(7)可随时使用?来获得命令行帮助,支持命令行编辑功能,并可将执行过的命令保存下来,供进行历史命令查询。
1.搭建交换机配置环境在对交换机进行配置之前,首先应登录连接到交换机,这可通过交换机的控制端口(Console)连接或通过Telnet登录来实现。
(1)通过Console口连接交换机对于首次配置交换机,必须采用该方式。
对交换机设置管理IP地址后,就可采用Telnet登录方式来配置交换机。
对于可管理的交换机一般都提供有一个名为Console的控制台端口(或称配置口),该端口采用RJ-45接口,是一个符合EIA/TIA-232异步串行规范的配置口,通过该控制端口,可实现对交换机的本地配置。
1、交换机安全设置S1>enable ;进入特权模式S1#config terminal ;进入全局配置模式S1(config)#hostname <hostname> ;设置交换机的主机名S1(config)#enable secret xxx ;设置特权加密口令为xxxS1(config)#enable password xxx ;设置特权非密口令为xxxS1(config)#line console 0 ;进控制台口(Rs232)初始化S1(config-line)#line vty 0 4 ;进入虚拟终端S1(config-line)#login ;允许登录S1(config-line)#password xxx ;设置登录口令xxxS1h#exit ;返回命令MAC和端口绑定S1(config)#interface fa0/1S1(config-if)#switchport mode accessS1(config-if)#switchport port-securityS1(config-if)#switchport port-security mac-address <主机的mac地址> S1(config-if)#switchport port-security maximum 1S1(config-if)#switchport port-security violation shutdown用户模式:无法改变相关设备的配置,只能查看十分有限的信息命令提示符是:switch>特权模式:可以使用所有的命令,可以查看更为详细的信息命令;是进入其它配置模式的前提命令提示符:switch#全局配置模式:在这里所做的改变会影响整个设备的全局性能;从全局配置模式下可以进入很多特定的配置模式;命令提示符:switch(config)#2、复制操作:S1#copy running-config startup-config ;复制当前的配置到NVRAM S1#copy running-config tftp ;将当前的配置复制到tftp服务器上S1#copy startup-config tftp 复制启动配置文件到tftp服务器上S1#copy tftp flash: ;特权模式下升级IOSS1r#copy tftp startup-config ;下载配置文件到nvram3、交换机vlan配置VLAN(虚拟局域网)配置S1(config)#interface fa0/1S1(config-if)#switchport trunk encapsulation dot1q 接口封装S1(config-if)#switchport mode trunk 将接口转为trunk模式S1(config)#vtp domain syh 创建VTP域S1(config)#vlan 10 创建VLANS1(config-vlan)#name ay1 为VLAN取名S1(config)#interface fa0/1S1(config-if)#switchport mode accessS1(config-if)#switchporti access vlan 10 将端口加入到相应VLAN S1(config)#vtp mode server 配置VTP的模式S1(config)#vtp mode clientS1#show vlan 查看vlan不同VLAN通信S1(config)#ip routing 开启三层交换机的路由功能S1(config)#interface vlan 10S1(config-if)#ip address 192.168.10.1 为VLAN配置IP地址,即各VLAN的网关默认时CISCO交换机不传播VLAN信息,必须配置VTP域。
思科交换机基本配置命令综述思科交换机基本配置命令目录1、基本概念介绍 (2)2、密码、登陆等基本配置 (2)3、CISCO设备端口配置详解 (4)4、VLAN的规划及配置 (6)4.1核心交换机的相关配置 (6)4.2接入交换机的相关配置 (8)5、配置交换机的路由功能 (9)6、配置交换机的DHCP功能 (9)7、常用排错命令 (10)1、基本概念介绍IOS: 互联网操作系统,交换机和路由器常用操作系统VLAN: 虚拟lanVTP: VLAN TRUNK PROTOCOLDHCP: 动态主机配置协议ACL:访问控制列表三层交换机:具有三层路由转发能力的交换机2、密码、登陆等基本配置本节介绍cisco路由器或者交换机的基本配置,本教程用的是cisco的模拟器做的介绍,一些具体的端口显示可能与实际的设备不符,但并不影响基本配置命令的执行。
Router># 显示稳定后,出现最初的提示符,提示符“>”表示目前所处的状态为用户模式。
Router>Router>en# 如果在当前状态下没有重复的命令,可以用“TAB”键来补齐命令Router>enable# 从用户模式(user mode)进入到特权模式(exec mode),提示符变为“#”Router#configure terminal#在特权模式下输入configure terminal进入全局配置模式(global configuration mode),在这之下输入的命令叫做全局命令,一旦输入,将对整个router产生即时影响。
*Mar 1 00:44:26.491: %SYS-5-CONFIG_I: Configured from console by console t # 在输入命令的过程中,IOS会出现一些即时提示。
Enter configuration commands, one per line. End with CNTL/Z.Router(config)#exit # 退出当前模式Router(config)#hostname test# 更改当前设备的名字,主要是为了便于区分设备。