使用TeX做幻灯片
- 格式:doc
- 大小:56.50 KB
- 文档页数:10

一、CTeX中文套装的下载、安装和测试目前国内用户大多是在windows下用CTeX中文套装。
MiKTEX是Windows 下的TeX系统, CTeX中文套装(下文简称套装)是把MiKTEX 和一些常用的相关工具包装在一起制作的一个简易安装程序,安装后马上就可以使用。
下载地址是,点击“2.9.2 full”,即可下载。
将这个文件放在任何路径下双击默认安装即可,如果安装过程中提示错误, 回车继续不影响使用。
本文的操作是在windows XP下用完成的。
WinEdt是套装里的编辑器,2.9.2中用的是。
安装结束后,如果桌面上有WinEdt的图标双击它可以打开这个编辑器,如果图标不在桌面上,可以通过点击“开始-程序-CteX-WinEdt”打开,WinEdt界面的工具栏有与Word界面相同的文件新建、打开和保存的图标。
测试方法如下:首先,点击新建文件的图标,在工具栏下面会出现一个标签Doc1,再下面原本灰色的窗口会变成白色,将下面代码\documentclass{beamer}\begin{document}Hello!\end{document}粘贴在里面。
然后,点击保存文件的图标,要给文件命名,比如命名为“ceshi”,这时在文件夹(最好事先单独建一个文件夹)中生成了文件,这是tex源文件。
最后,在键盘按键Shift+Ctrl+P ,这是用PDFTeXify编译的快捷键,PDFTeXify的图标在工具栏中回收站图标的右侧,也可以点击那个图标执行操作。
编译完成后会弹出套装用的PDF阅读器SumatraPDF的窗口,显示的是一张幻灯片。
再看文件夹,多了很几个文件,其中包括,这就是SumatraPDF的窗口显示的文件,这个文件也可以用其它PDF阅读器打开。
如果上面操作一切正常,说明安装成功。
二、用LATEX制作多媒体课件的一般步骤下面举例说明用LATEX制作多媒体课件的一般步骤,为了明了起见这里选择尽可能简单的内容,不涉及更多的修饰。


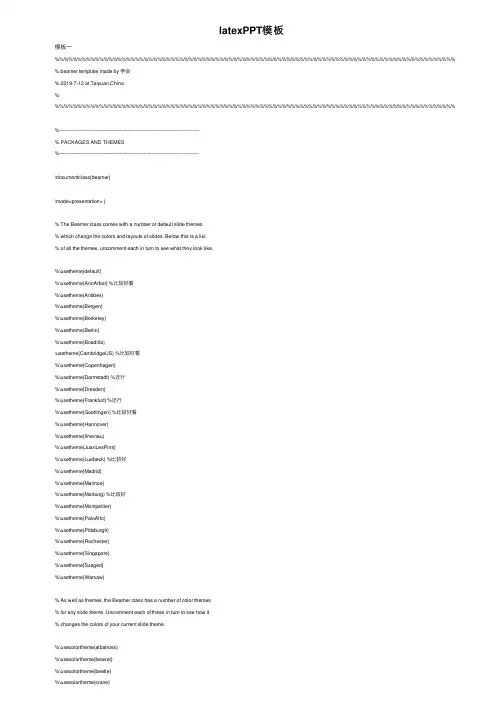
latexPPT模板模板⼀%%%%%%%%%%%%%%%%%%%%%%%%%%%%%%%%%%%%%%%%%%%%%%%%%%%%%%%%%%%%%%%%%%%%%%%%%%%%%%%%%%%%%%%%%% % beamer template made by 李会% 2019-7-12 at Taiyuan,China% %%%%%%%%%%%%%%%%%%%%%%%%%%%%%%%%%%%%%%%%%%%%%%%%%%%%%%%%%%%%%%%%%%%%%%%%%%%%%%%%%%%%%%%%%%%----------------------------------------------------------------------------------------% PACKAGES AND THEMES%----------------------------------------------------------------------------------------\documentclass{beamer}\mode<presentation> {% The Beamer class comes with a number of default slide themes% which change the colors and layouts of slides. Below this is a list% of all the themes, uncomment each in turn to see what they look like.%\usetheme{default}%\usetheme{AnnArbor} %⽐较好看%\usetheme{Antibes}%\usetheme{Bergen}%\usetheme{Berkeley}%\usetheme{Berlin}%\usetheme{Boadilla}\usetheme{CambridgeUS} %⽐较好看%\usetheme{Copenhagen}%\usetheme{Darmstadt} %还⾏%\usetheme{Dresden}%\usetheme{Frankfurt} %还⾏%\usetheme{Goettingen} %⽐较好看%\usetheme{Hannover}%\usetheme{Ilmenau}%\usetheme{JuanLesPins}%\usetheme{Luebeck} %⽐较好%\usetheme{Madrid}%\usetheme{Malmoe}%\usetheme{Marburg} %⽐较好%\usetheme{Montpellier}%\usetheme{PaloAlto}%\usetheme{Pittsburgh}%\usetheme{Rochester}%\usetheme{Singapore}%\usetheme{Szeged}%\usetheme{Warsaw}% As well as themes, the Beamer class has a number of color themes% for any slide theme. Uncomment each of these in turn to see how it% changes the colors of your current slide theme.%\usecolortheme{albatross}%\usecolortheme{beaver}%\usecolortheme{beetle}%\usecolortheme{crane}%\usecolortheme{dolphin}%\usecolortheme{dove}%\usecolortheme{fly}%\usecolortheme{lily}%\usecolortheme{orchid}%\usecolortheme{rose}%\usecolortheme{seagull}%\usecolortheme{seahorse}%\usecolortheme{whale}\usecolortheme{wolverine}%\setbeamertemplate{footline} % To remove the footer line in all slides uncomment this line%\setbeamertemplate{footline}[page number] % To replace the footer line in all slides with a simple slide count uncomment this line%\setbeamertemplate{navigation symbols}{} % To remove the navigation symbols from the bottom of all slides uncomment this line}\usepackage{graphicx} % Allows including images\usepackage{booktabs} % Allows the use of \toprule, \midrule and \bottomrule in tables\usepackage[UTF8,noindent]{ctexcap} %使⽤中⽂输⼊及显⽰%\usepackage[bookmarks=true,colorlinks,linkcolor=black]{hyperref} %pdf显⽰书签\usepackage[bookmarks=true]{hyperref}%----------------------------------------------------------------------------------------% TITLE PAGE%----------------------------------------------------------------------------------------\title[Short title]{Full Title of the Talk} % The short title appears at the bottom of every slide, the full title is only on the title page\author{李会} % Your name\institute[CIRP] % Your institution as it will appear on the bottom of every slide, may be shorthand to save space{China Institute of Radiation Protection \\ % Your institution for the title page\medskip\textit{hrbeulh@} % Your email address}\date{\today} % Date, can be changed to a custom date\begin{document}\begin{frame}\titlepage % Print the title page as the first slide\end{frame}\begin{frame}\frametitle{Overview} % Table of contents slide, comment this block out to remove it\tableofcontents % Throughout your presentation, if you choose to use \section{} and \subsection{} commands, these will automatically be printed on this slide as an overview of your presentation\end{frame}%----------------------------------------------------------------------------------------% PRESENTATION SLIDES%----------------------------------------------------------------------------------------%------------------------------------------------\section{First Section} % Sections can be created in order to organize your presentation into discrete blocks, all sections and subsections are automatically printed in the table of contents as an overview of the talk%------------------------------------------------\subsection{Subsection Example 1} % A subsection can be created just before a set of slides with a common theme to further break down your presentation into chunks\begin{frame}\frametitle{Paragraphs of Text}Sed iaculis dapibus gravida. Morbi sed tortor erat, nec interdum arcu. Sed id lorem lectus. Quisque viverra augue id sem ornare non aliquam nibh tristique. Aenean in ligula nisl. Nulla sed tellus ipsum. Donec vestibulum ligula non lorem vulputate fermentum accumsan neque mollis.\\~\\Sed diam enim, sagittis nec condimentum sit amet, ullamcorper sit amet libero. Aliquam vel dui orci, a porta odio. Nullam id suscipit ipsum. Aenean lobortis commodo sem, ut commodo leo gravida vitae. Pellentesque vehicula ante iaculis arcu pretium rutrum eget sit amet purus. Integer ornare nulla quis neque ultrices lobortis. Vestibulum ultrices tincidunt libero, quis commodo erat ullamcorper id.\end{frame}%------------------------------------------------\subsection{Subsection Example 2}\begin{frame}\frametitle{Bullet Points}\begin{itemize}\item Lorem ipsum dolor sit amet, consectetur adipiscing elit\item Aliquam blandit faucibus nisi, sit amet dapibus enim tempus eu\item Nulla commodo, erat quis gravida posuere, elit lacus lobortis est, quis porttitor odio mauris at libero\item Nam cursus est eget velit posuere pellentesque\item Vestibulum faucibus velit a augue condimentum quis convallis nulla gravida\end{itemize}\end{frame}%------------------------------------------------\begin{frame}\frametitle{Blocks of Highlighted Text}\begin{block}{Block 1}Lorem ipsum dolor sit amet, consectetur adipiscing elit. Integer lectus nisl, ultricies in feugiat rutrum, porttitor sit amet augue. Aliquam ut tortor mauris. Sed volutpat ante purus, quis accumsan dolor.\end{block}\begin{block}{Block 2}Pellentesque sed tellus purus. Class aptent taciti sociosqu ad litora torquent per conubia nostra, per inceptos himenaeos. Vestibulum quis magna at risus dictum tempor eu vitae velit.\end{block}\begin{block}{Block 3}Suspendisse tincidunt sagittis gravida. Curabitur condimentum, enim sed venenatis rutrum, ipsum neque consectetur orci, sed blandit justo nisi ac lacus.\end{block}\end{frame}%------------------------------------------------\begin{frame}\frametitle{Multiple Columns}\begin{columns}[c] % The "c" option specifies centered vertical alignment while the "t" option is used for top vertical alignment\column{.45\textwidth} % Left column and width\textbf{Heading}\begin{enumerate}\item Statement\item Explanation\item Example\end{enumerate}\column{.5\textwidth} % Right column and widthLorem ipsum dolor sit amet, consectetur adipiscing elit. Integer lectus nisl, ultricies in feugiat rutrum, porttitor sit amet augue. Aliquam ut tortor mauris. Sed volutpat ante purus, quis accumsan dolor.\end{columns}\end{frame}%------------------------------------------------\section{Second Section}%------------------------------------------------\begin{frame}\frametitle{Table}\begin{table}\begin{tabular}{l l l}\toprule\textbf{Treatments} & \textbf{Response 1} & \textbf{Response 2}\\\midruleTreatment 1 & 0.0003262 & 0.562 \\Treatment 2 & 0.0015681 & 0.910 \\Treatment 3 & 0.0009271 & 0.296 \\\bottomrule\end{tabular}\caption{Table caption}\end{table}\end{frame}%------------------------------------------------\begin{frame}\frametitle{Theorem}\begin{theorem}[Mass--energy equivalence]$E = mc^2$\end{theorem}\end{frame}%------------------------------------------------\begin{frame}[fragile] % Need to use the fragile option when verbatim is used in the slide\frametitle{Verbatim}\begin{example}[Theorem Slide Code]\begin{verbatim}\begin{frame}\frametitle{Theorem}\begin{theorem}[Mass--energy equivalence]$E = mc^2$\end{theorem}\end{frame}\end{verbatim}\end{example}\end{frame}%------------------------------------------------\begin{frame}\frametitle{Figure}Uncomment the code on this slide to include your own image from the same directory as the template .TeX file.%\begin{figure}%\includegraphics[width=0.8\linewidth]{test}%\end{figure}\end{frame}%------------------------------------------------\begin{frame}[fragile] % Need to use the fragile option when verbatim is used in the slide\frametitle{Citation}An example of the \verb|\cite| command to cite within the presentation:\\~This statement requires citation \cite{p1}.\end{frame}%------------------------------------------------\section{Third Section}%------------------------------------------------%------------------------------------------------\begin{frame}\frametitle{References}\footnotesize{\begin{thebibliography}{99} % Beamer does not support BibTeX so references must be inserted manually as below\bibitem[Smith, 2012]{p1} John Smith (2012)\newblock Title of the publication\newblock \emph{Journal Name} 12(3), 45 -- 678.\end{thebibliography}}\end{frame}%------------------------------------------------%\begin{frame}%\frametitle{Figure}%\begin{center}%\includegraphics[width=0.5\linewidth]{Fig10} %插⼊图⽚%\includegraphics[width=1.0\linewidth]{Fig10}%\end{center}%\end{frame}%------------------------------------------------\begin{frame}\Huge{\centerline{The End. Any advice?}}\end{frame}%----------------------------------------------------------------------------------------\end{document}--------------------------------------------------------------------------------------------------------------------------------------------------------------------------------------------------------------------------------------------------------------------------------模板⼆% !Mode:: "TeX:UTF-8"%% 使⽤ XeLaTeX 编译.\documentclass[notheorems,mathserif,table]{beamer}\useoutertheme[height=0.1\textwidth,width=0.15\textwidth,hideothersubsections]{sidebar}\usecolortheme{dolphin} % Outer color themes, 其他选择: whale, seahorse, dolphin . 换⼀个编译看看有什么不同.\usecolortheme{lily} % Inner color themes, 其他选择: lily, orchid\useinnertheme[shadow]{rounded} % 对 box 的设置: 圆⾓、有阴影.\setbeamercolor{sidebar}{bg=blue!50} % sidebar的颜⾊, 50%的蓝⾊.\setbeamercolor{background canvas}{bg=cyan!9} % 背景⾊, 9%的蓝⾊. 去掉下⼀⾏, 试⼀试这个.\setbeamertemplate{background canvas}[vertical shading][bottom=white,top=structure.fg!25] %%背景⾊, 上25%的蓝, 过渡到下⽩. \usefonttheme{serif} % 字体. 个⼈偏好有轮廓的字体. 去掉这个设置编译, 就看到不同了.\setbeamertemplate{navigation symbols}{} %% 去掉页⾯下⽅默认的导航条.\usepackage{ragged2e}\justifying\let\raggedright\justifying%%------------------------常⽤宏包---------------------------------------------------------------------%%注意, beamer 会默认使⽤下列宏包: amsthm, graphicx, hyperref, color, xcolor, 等等\usepackage[UTF8]{ctex}\hypersetup{CJKbookmarks=true}\usepackage{subfigure} %%图形或表格并排排列\usepackage{colortbl,dcolumn} %% 彩⾊表格\usepackage{xcolor}\usepackage{lineno}% amsmath package, useful for mathematical formulas%\usepackage{multirow}\usepackage{amsmath}\usepackage{xcolor}\usepackage{bm}% amssymb package, useful for mathematical symbols\usepackage{amssymb}\usepackage{subfigure}% graphicx package, useful for including eps and pdf graphics% include graphics with the command \includegraphics\usepackage{graphicx}%\graphicspath{{note/figure/}{note/image}{./image/}}\graphicspath{{figures/}} %% 图⽚路径. 本⽂的图⽚都放在这个⽂件夹⾥了.%\usepackage{epstopdf}\usepackage{multirow}\usepackage{url}% cite package, to clean up citations in the main text. Do not remove.%\usepackage{cite}\usepackage{color}%\usepackage{lineno}% Use doublespacing - comment out for single spacing\usepackage{setspace}%\doublespacing\usepackage[square, comma, sort&compress, numbers]{natbib}%\usepackage{ulem}\usepackage{color}\usepackage{algorithm}\usepackage{algorithmicx}\usepackage{algpseudocode}\usepackage{amsmath}\floatname{algorithm}{Algorithm}\renewcommand{\algorithmicrequire}{\textbf{Input:}}\renewcommand{\algorithmicensure}{\textbf{Output:}}\newcommand{\tabincell}[2]{\begin{tabular}{@{}#1@{}}#2\end{tabular}}% correct bad hyphenation here\hyphenation{op-tical net-works semi-conduc-tor}\logo{\includegraphics[height=0.09\textwidth]{SCUEC.png}}%% 民⼤校徽, MetaPost ⽂件.%\renewcommand{\raggedright}{\leftskip=0pt \rightskip=0pt plus 0cm}%\raggedright %% 中⽂对齐\def\hilite<#1>{\temporal<#1>{\color{blue!35}}{\color{magenta}}{\color{blue!75}}}%% ⾃定义命令, 源⾃ beamer_guide. item 逐步显⽰时, 使已经出现的item、正在显⽰的item、将要出现的item 呈现不同颜⾊.\newcolumntype{H}{>{\columncolor{blue!20}}c} %% 表格设置%==================================参考⽂献==============================================================\newcommand{\upcite}[1]{\textsuperscript{\cite{#1}}} %⾃定义命令\upcite, 使参考⽂献引⽤以上标出现\bibliographystyle{plain}%%%%%%%%%%%%%%%%%%%%%%%%%%%%%%%%%%%%%%重定义字体、字号命令%%%%%%%%%%%%%%%%%%%%%%%%%%%%%%%%%%%%%%%%%%%%%%%%%%%%%%%%%%%%%%%%%%%%%%%%%%%%%%%%%%%%%%%%%%%%%%%%%%%%%%%%%%%%%%%%%%%%%%%%%%%%%%%%%%%%%%%%%%%%%%%%%%% \begin{document}%%----------------------- Theorems ---------------------------------------------------------------------\newtheorem{theorem}{定理}\newtheorem{definition}{定义}\newtheorem{lemma}{引理}\newtheorem{corollary}{推论}\newtheorem{proposition}{性质}\newtheorem{example}{例}\newtheorem{remark}{注}\renewcommand\figurename{\rm 图}\renewcommand\tablename{\bf 表}%%----------------------------------------------------------------------------------------------------\title{\heiti Latex制作ppt}\author[\textcolor{white}{\songti 作者~胡怀飞}]{\songti 作者~~\textcolor{olive}{胡怀飞}}\institute{\zihao{5} \lishu \textcolor{violet}{中南民族⼤学~~⽣物医学⼯程学院}}\date{\today}%%---------------------------------------------------------------------------------------------------\section*{⽬录}\frame{\frametitle{⽬录}\tableofcontents}%%===================================================================================================\section{简介}%%---------------------------------------------------------------------------------------------------\begin{frame}\frametitle{这是latex制作的ppt}latex与word,ppt是⽬前⽤得最多得排版⼯具。
用Latex做学术PPT一知识和软件准备•知识准备•软件准备•基础知识学习途径与方法•软件安装与配置步骤详解目•幻灯片制作流程梳理•常见问题解答与技巧分享录熟悉常用宏包掌握一些常用的Latex 宏包,如amsmath 、graphicx 等,以便在PPT 中插入复杂的数学公式和高质量的图片。
学会使用编辑器选择一个适合自己的Latex 编辑器,如TeXstudio 、Visual Studio Code 等,并熟悉其基本操作和快捷键。
了解Latex 的基本语法和命令学习如何使用Latex 编写文档,包括文本格式、数学公式、图表等。
Latex 基础知识内容简洁明了结构清晰图表规范配色和排版美观学术PPT制作要点每张幻灯片应只包含一个主要观点或结论,避免过多文字和复杂图表。
使用规范的图表和符号,避免引起观众误解或混淆。
PPT应有明确的目录和过渡页,以便观众能够快速了解演讲内容和结构。
选择合适的配色方案和排版方式,使PPT看起来美观大方。
一致性原则整个PPT应保持风格一致,包括字体、颜色、排版等。
对比原则通过对比突出重要内容,如使用不同颜色或字体大小区分标题和正文。
对齐原则幻灯片中的元素应对齐,避免出现歪斜或错位现象。
空白原则适当留白可以突出重要内容,同时使PPT看起来更加简洁明了。
幻灯片设计原则Latex发行版选择TeX Live适用于多种操作系统,包含大量宏包和文档,更新及时。
MiKTeX适用于Windows系统,轻量级,可根据需要安装宏包。
MacTeX适用于macOS系统,基于TeX Live,包含针对Mac的优化和额外工具。
编辑器与插件推荐Visual Studio Code支持Latex语法高亮、自动补全、错误检查等功能,可配合LatexWorkshop插件使用。
TeXstudio专为Latex设计的编辑器,支持语法高亮、自动补全、代码折叠等功能,适用于多种操作系统。
Overleaf在线Latex编辑器,支持实时协作和版本控制,适合团队项目。
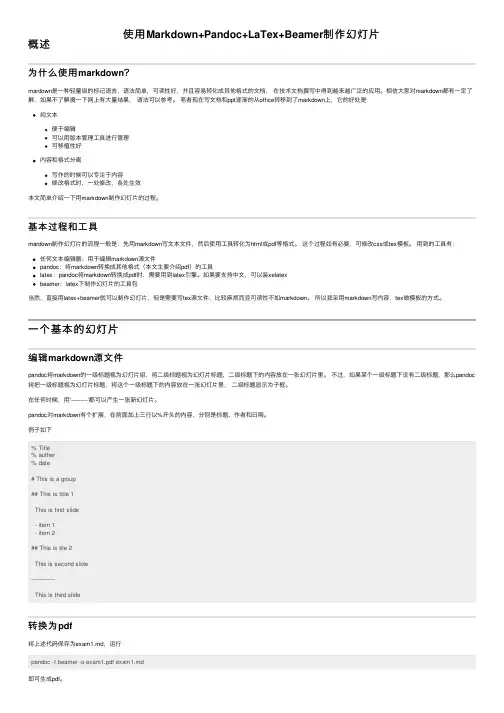
使⽤Markdown+Pandoc+LaTex+Beamer制作幻灯⽚概述为什么使⽤markdown?mardown是⼀种轻量级的标记语⾔,语法简单,可读性好,并且容易转化成其他格式的⽂档,在技术⽂档撰写中得到越来越⼴泛的应⽤。
相信⼤家对markdown都有⼀定了解,如果不了解搜⼀下⽹上有⼤量结果,语法可以参考。
笔者现在写⽂档和ppt逐渐的从office转移到了markdown上,它的好处是纯⽂本便于编辑可以⽤版本管理⼯具进⾏管理可移植性好内容和格式分离写作的时候可以专注于内容修改格式时,⼀处修改,各处⽣效本⽂简单介绍⼀下⽤markdown制作幻灯⽚的过程。
基本过程和⼯具mardown制作幻灯⽚的流程⼀般是:先⽤markdown写⽂本⽂件,然后使⽤⼯具转化为html或pdf等格式。
这个过程如有必要,可修改css或tex模板。
⽤到的⼯具有:任何⽂本编辑器:⽤于编辑markdown源⽂件pandoc:将markdown转换成其他格式(本⽂主要介绍pdf)的⼯具latex:pandoc将markdown转换成pdf时,需要⽤到latex引擎。
如果要⽀持中⽂,可以装xelatexbeamer:latex下制作幻灯⽚的⼯具包当然,直接⽤latex+beamer就可以制作幻灯⽚,但是需要写tex源⽂件,⽐较⿇烦⽽且可读性不如markdown。
所以我采⽤markdown写内容,tex做模板的⽅式。
⼀个基本的幻灯⽚编辑markdown源⽂件pandoc将markdown的⼀级标题视为幻灯⽚组,将⼆级标题视为幻灯⽚标题,⼆级标题下的内容放在⼀张幻灯⽚⾥。
不过,如果某个⼀级标题下没有⼆级标题,那么pandoc 将把⼀级标题视为幻灯⽚标题,将这个⼀级标题下的内容放在⼀张幻灯⽚⾥,⼆级标题显⽰为⼦框。
在任何时候,⽤‘---------’都可以产⽣⼀张新幻灯⽚。
pandoc对markdown有个扩展,在前⾯加上三⾏以%开头的内容,分别是标题、作者和⽇期。
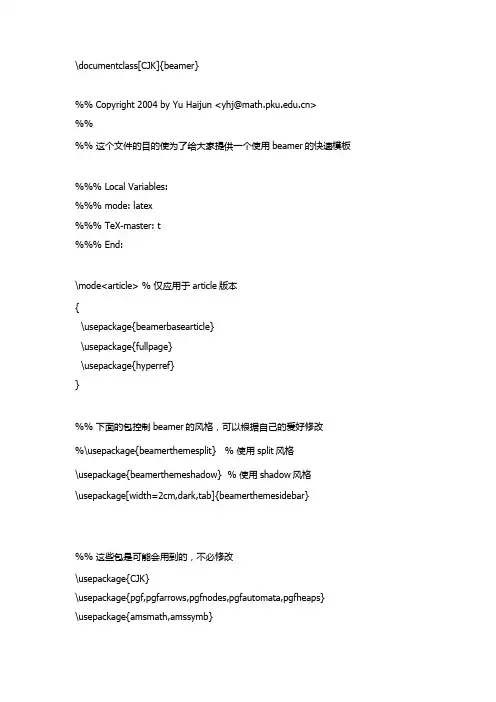
\documentclass[CJK]{beamer}%%Copyright2004byYuHaijun<************>%%%% 这个文件的目的使为了给大家提供一个使用beamer的快速模板%%% Local Variables:%%% mode: latex%%% TeX-master: t%%% End:\mode<article> % 仅应用于article版本{\usepackage{beamerbasearticle}\usepackage{fullpage}\usepackage{hyperref}}%% 下面的包控制beamer的风格,可以根据自己的爱好修改%\usepackage{beamerthemesplit} % 使用split风格\usepackage{beamerthemeshadow} % 使用shadow风格\usepackage[width=2cm,dark,tab]{beamerthemesidebar}%% 这些包是可能会用到的,不必修改\usepackage{CJK}\usepackage{pgf,pgfarrows,pgfnodes,pgfautomata,pgfheaps}\usepackage{amsmath,amssymb}\usepackage{graphicx}\usepackage{multimedia}%% 下面的代码用来读入Logo图象\pgfdeclaremask{logomask}{pku-tower-lake-mask}\pgfdeclareimage[mask=logomask,width=1.8cm]{logo}{pku-tower-lake}\pgfdeclaremask{beidamask}{beida-mark-mask}\pgfdeclareimage[mask=beidamask,totalheight=0.25cm]{beida}{beida-mark}\pgfdeclaremask{titlemask}{pku-lake2-mask}\pgfdeclareimage[mask=titlemask,height=2.5cm]{title}{pku-lake2}\logo{\vbox{\hbox{\pgfuseimage{logo}\hfill}}} %设置logo图标%% 定义一些自选的模板,包括背景、图标、导航条和页脚等,修改要慎重\beamertemplateshadingbackground{red!10}{structure!10}%\beamertemplatesolidbackgroundcolor{white!90!blue}\beamertemplatetransparentcovereddynamic\beamertemplateballitem\beamertemplatenumberedballsectiontoc%\beamertemplatelargetitlepage\beamertemplateboldpartpage%% \makeatletter%% \usefoottemplate{ %重新定义页脚,加入作者,单位,单位图标,和文档标题%% \vbox{\tiny%%% \hbox{%%% \setbox\beamer@linebox=\hbox to\paperwidth{%%% \hboxto.5\paperwidth{\hfill\tiny\color{white}\textbf{\insertshortauthor\quad\insertshortins titute}\hskip.1cm\lower 0.35em\hbox{\pgfuseimage{beida}}\hskip.3cm}%%% \hboxto.5\paperwidth{\hskip.3cm\tiny\color{white}\textbf{\insertshorttitle}\hfill}\hfill}% %% \ht\beamer@linebox=2.625ex%%% \dp\beamer@linebox=0pt%%% \setbox\beamer@linebox=\vbox{\box\beamer@linebox\vskip1.125ex}% %% \color{structure}\hskip-\Gm@lmargin\vrule width.5\paperwidth%% height\ht\beamer@linebox\color{structure!70}\vrule width.5\paperwidth %% height\ht\beamer@linebox\hskip-\paperwidth%%% \hbox{\box\beamer@linebox\hfill}\hfill\hskip-\Gm@rmargin}%% }%% }%% \makeatother%\beamersetuncovermixins% 改变遮挡部分在遮挡前后的透明程度%{\opaqueness<1>{15}\opaqueness<2>{10}\opaqueness<3>{85}\opaqueness<4->{2}}%%{\opaqueness<1->{15}}%%%%% 自己的预定义命令和宏放在这里%%%%%% 文档从这里正式开始%% 使用\part,\section,\subsection等命令组织文档结构%% 使用\frame命令制作幻灯片%%\begin{document}\begin{CJK*}{GBK}{fs}\defverbatim\beamerEX{\begin{verbatim}\documentclass{beamer}\usepackage{beamerthemesplit}\title{Example Presentation Created with Beamer}\author{Till Tantau}\date{\today}\begin{document}\frame{\titlepage}\section*{Outline}\frame{\tableofcontents}\section{Introduction}\subsection{Overview of the Beamer Class}\frame {\frametitle{Features of the Beamer Class}\begin{itemize}\item<1-> Normal LaTeX class.\item<2-> Easy overlays.\item<3-> No external programs needed.\end{itemize}}\end{document}\end{verbatim}}%%%% 填写作者,单位,日期,标题等文档信息%%\title{使用Beamer制作Slide入门}\subtitle{Beamer - The~\LaTeX~Document~Class}\author{于海军}\institute[DSEC, CCSE, at PKU]{Department of Science and Engineering Computing\\School of Mathematics School\\Peking University}\date[ND,2004]{Development in National Day, 2004}\subject{Computer Tools, TeX, Slide}\titlegraphic{\pgfuseimage{title}}%%%% 定义框架页%%\AtBeginSection[]{ % 在每个Section前都会加入的Frame \frame<handout:0>{\frametitle{框架}\tableofcontents[current,currentsubsection]}}\AtBeginSubsection[] % 在每个子段落之前{\frame<handout:0> % handout:0 表示只在手稿中出现 {\frametitle{框架}\tableofcontents[current,currentsubsection] % 显示在目录中加亮的当前章节 }}\frame{\titlepage}\section*{提纲} % section后面加*表示不收录到目录中\frame{\frametitle{\secname}\tableofcontents % 使用这个命令自动生成目录}\section{Slide的基本概念}\frame{\frametitle{\secname}\begin{description}\item[何谓幻灯片]所谓Slide就是幻灯片的意思,是一种类似照片底片的透明胶片 \item[幻灯片的作用]帮助演讲者向听众传达文字、图片甚至动画、声音等信息\item[幻灯片的优点]省去演讲者抄写时间\\表达更准确,更直观\\采用计算机,能传达更丰富的内容\end{description}}\subsection{Slide的实现方式}\frame{\frametitle{\subsecname}\begin{itemize}\item<+-> 所见即所得的工具\begin{enumerate}\item Powerpoint\item Magick Point\end{enumerate}\item<+-> 基于\TeX 和PDF的实现\begin{enumerate}[<+->]\item Beamer\item Foiltex\item ConTeXt\item prosper\item pdfscreen\end{enumerate}\end{itemize}}\subsection{\TeX Slide实现的特点}\frame<1-4>[<+-| alert@+>][label=math]{\frametitle{\subsecname}\begin{enumerate}\item 基于PDF文件格式,不需要专门放映工具,流通性强\item<+-| alert@2,5> 使用\TeX,处理数学公式方便\begin{equation}\label{eq1}\frac{1}{\sqrt{2\pi}}\int_{-\infty}^{\infty}e^{- {x^2} \over 2}\,dx = 1 \end{equation}\only<5>{\hyperlink{jumptofifth}{\beamerreturnbutton{返回}}}\item 足够用的动态效果\item 纯文本文件,便于处理和传播\end{enumerate}}\section{Beamer文件的框架}\subsection{逻辑和内容的独立}\frame{\frametitle{\secname}\begin{itemize}\item 使用part,section,subsection等命令组织逻辑结构 \item 使用frame命令组织内容\end{itemize}}\subsection{内容和显示效果的独立}\frame{\frametitle{\subsecname}\begin{itemize}\item 使用themes,template,logo改变缺省风格\item 使用overlay选项控制临时效果\item 通过文档类选项控制输出格式等\end{itemize}}\section{Beamer效果演示}\subsection{逐行显示的实现}\frame{\frametitle{\subsecname}\begin{itemize}[<+-| alert@+>]\item 这一段在第一个Slide上显示,并被加亮\item 这一段在第二个Slide上显示,并被加亮\item 这一段在第三个Slide上显示,并被加亮\end{itemize}}\subsection{字体和色彩的演示}\frame{\frametitle{\subsecname}{\textbf<1> 1. \alt<1>{\CJKfamily{hei}这是黑体在第一张上}%可以为中文的字体变换定义一个宏{\CJKfamily{fs}这是黑体在第一张上} \\}{\textit<2> 2. \CJKfamily{song}这是斜体,在第二张上\\}{\color<3>[rgb]{1,0,0} 3. 这些文字是在第3张幻灯片上是红色的,其它是黑色的。



contents •引言•LaTeX基础语法•科技文档排版实例•自定义样式与宏包使用•常见问题解决方案•LaTeX进阶技巧分享目录01引言LaTeX简介与历史LaTeX 提供了丰富的排版命令和宏包,可以生成高质量的科技文档,满足学术出版的要求。
专业的排版效果强大的数学公式排版能力可定制性强跨平台性LaTeX 内置了大量的数学符号和公式排版命令,可以方便地排版各种复杂的数学公式。
LaTeX 允许用户根据需要自定义命令、环境和样式,实现个性化的排版需求。
LaTeX 可以在多种操作系统上运行,如Windows 、Linux 和macOS 等,具有良好的跨平台性。
LaTeX 特点与优势应用领域及发展趋势应用领域发展趋势02LaTeX基础语法文档结构与基本命令文档类与宏包标题、作者和日期章节和段落目录和索引1 2 3特殊字符符号和数学符号字体和格式字符与符号输入方法行内公式和独立公式公式环境和数学模式符号和函数矩阵和方程组数学公式排版技巧图表插入与编辑方法图片插入表格制作图表组合图表标注03科技文档排版实例学术论文排版规范及实例技术报告撰写要点与实例技术报告的结构及撰写要图表、公式、算法的排版技巧幻灯片制作技巧及实例01020304其他科技文档排版需求科技宣传册的排版要点及实例04自定义样式与宏包使用样式文件(.sty)编写方法宏包(package)介绍及选用建议常用宏包介绍01宏包选用建议02宏包冲突解决03自定义命令和环境定义方法自定义命令使用newcommand命令定义新的命令,可以指定命令名称、参数个数和默认参数值,以及命令的具体实现。
自定义环境使用newenvironment命令定义新的环境,可以指定环境名称、开始和结束代码,以及环境中的默认样式。
命令和环境的使用示例给出一些自定义命令和环境的示例,如定义一个新的定理环境、添加自定义的章节标题等。
模板制作与分享途径模板制作模板分享途径模板使用注意事项05常见问题解决方案错误信息查看在编译过程中,LaTeX会输出错误信息,包括错误类型、行号等,需仔细查看并定位错误。
01引言Chapter目的和背景目的背景适用范围和使用方法适用范围使用方法02 LaTeXChapterLaTeX概述LaTeX安装与配置编辑器选择及使用技巧03PPT制作要素与规范Chapter01020304统一使用相同的字体、字号、行间距等排版元素,确保整体风格一致。
保持一致性避免过多的文字和图片,突出关键信息,保持页面整洁。
简洁明了通过标题、副标题、正文等层次结构,使内容条理清晰,易于理解。
层次感合理安排页面元素的位置和大小,保持页面平衡和谐。
对齐与平衡页面布局与排版原则色彩搭配与视觉效果提升色彩选择对比度背景与前景图片与图标01020304图表类型选择简洁明了数据准确性数据可视化技巧图表制作及数据可视化方法04 LaTeXChapter主题突出背景简洁Logo 和标题030201封面设计目录结构设置层次分明导航清晰链接跳转正文内容编排技巧图文并茂文字简练结合图片、图表等可视化元素展示数据和信息,提高观众理解度。
突出重点图表插入与编辑方法选择合适图表类型根据数据特点选择合适的图表类型,如柱状图、折线图、饼图等。
数据编辑与格式化在LaTeX中编辑数据,设置图表标题、坐标轴标签等,使图表更加直观易懂。
图表美化调整图表颜色、线条粗细等样式,提升图表美观度。
05常见问题解决方案及优化建议Chapter编译错误处理策略确保LaTeX代码语法正确,特别是命令、环境、括号等。
编译错误时,查看LaTeX编译器提供的错误提示信息,定位问题所在。
将代码分块,逐步排查问题,缩小错误范围。
利用在线LaTeX编辑器或排错工具,检查并修正代码错误。
检查语法错误查看错误提示逐步排查使用在线工具保持一致性在整篇文档中保持字体、字号的一致性,避免过多的样式变化。
字体选择使用`usepackage{fontspec}`命令加载字体包,通过`setmainfont{FontName}`设置主字体。
字号调整使用`fontsize{size}{baselineskip}`命令设置字号和行间距,其中`size`为字号大小,`baselineskip`为行间距。
LaTex幻灯片制作技巧与演示实践LaTeX是一种功能强大的排版系统,被广泛用于制作各种文档,包括幻灯片。
在本文中,我将介绍一些LaTeX幻灯片制作的技巧和实践经验。
一、选择合适的文档类和主题在开始制作幻灯片之前,我们需要选择合适的文档类和主题。
LaTeX中有许多针对幻灯片制作的文档类,如beamer、powerdot等,它们提供了丰富的幻灯片制作功能。
在选择文档类时,可以根据需要考虑内容布局、字体风格和颜色等因素。
此外,还可以选择适用于演示的主题,来为幻灯片增添一些独特的风格和视觉效果。
二、组织内容结构在编写幻灯片内容时,我们需要良好的组织结构,以便于观众理解和跟随演示。
一个好的内容结构可以使幻灯片更具条理性和逻辑性。
LaTeX提供了多种方式来组织内容结构,如使用section、subsection等命令来创建章节和子章节,使用itemize和enumerate环境来创建项目列表和编号列表等。
三、使用合适的字体和颜色字体和颜色在幻灯片制作中起到重要的作用,它们可以增强幻灯片的视觉效果和吸引力。
在LaTeX中,我们可以使用不同的字体命令来更改文字的样式和大小。
例如,\textbf命令可以使文字加粗,\textit命令可以使文字倾斜。
此外,LaTeX还提供了各种颜色命令和宏包,使我们能够使用不同的颜色来突出显示幻灯片中的重要信息和要点。
四、插入图形和表格图形和表格可以使幻灯片更具可视化效果和表达力。
在LaTeX中,我们可以使用graphicx宏包来插入图片,并设置大小、位置和其他属性。
同时,LaTeX还提供了多种方法来插入表格,如使用table环境和tabular环境来创建表格,并设置列数、行数和内容。
五、运用动画效果和多媒体为了增加幻灯片的吸引力和交互性,我们可以增添一些动画效果和多媒体元素。
在LaTeX中,我们可以使用beamer宏包提供的各种动画命令和选项来实现动态效果,如淡入淡出、缩放和滑动等。
使用TeX做幻灯片(Slide)使用TeX做幻灯片(Slide)使用TeX做幻灯片(Slide)这篇文章转自星夜论坛。
对于一个经常与数学公式打交道的研究人员,TeX是做Slide的首选。
虽然说同 PowerPoin t 和 MagicPoint 这样的商业软件相比,TeX 的编写要略微复杂一些,需要很多预备知识。
但是T eX 作出的Slide对数学公式的处理绝对具有专业水平,并且TeX 文件的模板写成之后可以重用,在制作大量文档时,TeX完全胜于PowerPoint 、MagicPoint 等商业软件。
TeX制作Slide的方法制作用 TeX 做 Slide 主要方法是定义各种样式扩展,用pdflatex编译(dvi文件不支持Slide 的各种效果:-(), 有的样式扩展还需要运行后处理程序来生成pdf中的各种特殊效果,比如pdfslide.sty 和 pp4slide.sty 样式。
演示使用Adobe公司的Acrobat Reader演示,这个程序不大,并且是免费的。
现在的 Acro bat Reader 能够处理大部分的幻灯片演示需要的效果。
可以说正是由于Adobe公司 Reader 程序的免费政策,才使得PDF格式成为网上交流的首选格式。
top常用的样式扩展1. beamer一个用来做Slide的Latex扩展,其特点是保留Latex的\section 等层次结构,能够自动生成框架索引,在beamer的安装包中还包括了一些模拟其它T eX扩展的例子。
要求: LaTeX, pgf( LaTeX Portable Graphics Format)* 主页: -archive/macros/latex/contrib/beamer/* 文档: -archive/macros/latex/contrib/beamer/doc/beameruserguide.pdf* 安装指导: 1. CTAN上分别下载beamer,pgf,xcolor,也可以到.cn:27/下载三个软件包的压缩文件;2. 把解压后的beamer,pgf,xcolor这三个目录拷贝到texmf/tex/latex/ 下面(具体目录可能根据LaTeX 的安装不同而改变);3. 如果是Linux系统运行texhash或mktexlsr命令,安装即完成,如果是windows转步4;4. 在winedit里菜单项"Accessories"里点击"MiKTex Options"项,点击其中的"Refresh Now",完成。