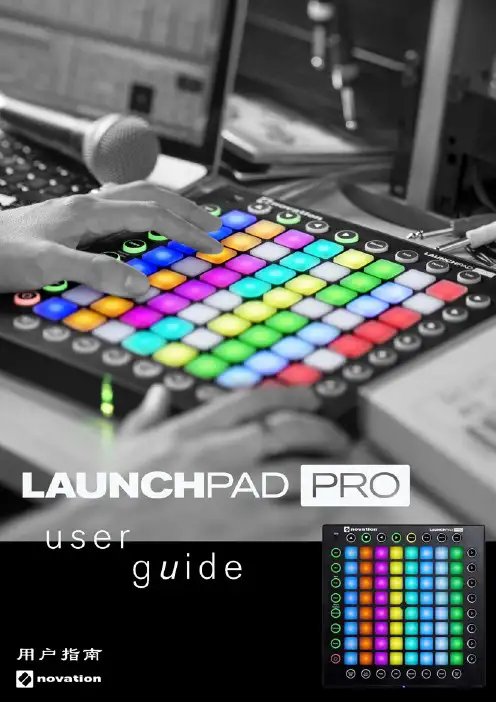
Launchpad_Pro中文说明书
- 格式:pdf
- 大小:2.82 MB
- 文档页数:20
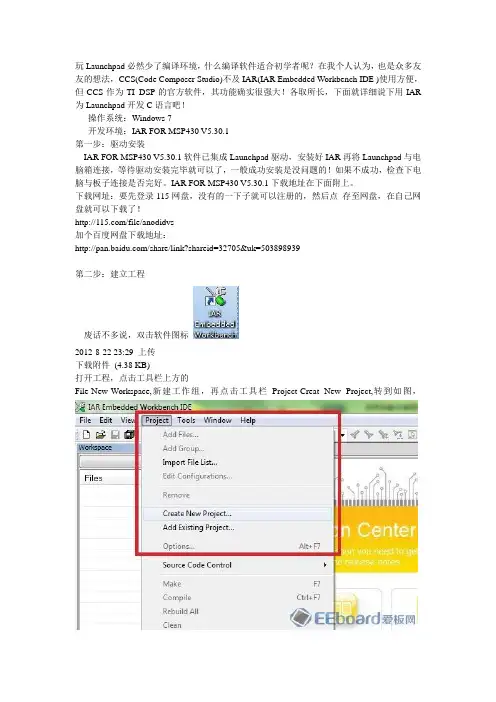
玩Launchpad必然少了编译环境,什么编译软件适合初学者呢?在我个人认为,也是众多友友的想法,CCS(Code Composer Studio)不及IAR(IAR Embedded Workbench IDE )使用方便,但CCS作为TI DSP的官方软件,其功能确实很强大!各取所长,下面就详细说下用IAR 为Launchpad开发C语言吧!操作系统:Windows 7开发环境:IAR FOR MSP430 V5.30.1第一步:驱动安装IAR FOR MSP430 V5.30.1软件已集成Launchpad驱动,安装好IAR再将Launchpad与电脑箱连接,等待驱动安装完毕就可以了,一般成功安装是没问题的!如果不成功,检查下电脑与板子连接是否完好。
IAR FOR MSP430 V5.30.1下载地址在下面附上。
下载网址:要先登录115网盘,没有的一下子就可以注册的,然后点存至网盘,在自己网盘就可以下载了!/file/anodidvs加个百度网盘下载地址:/share/link?shareid=32705&uk=503898939第二步:建立工程废话不多说,双击软件图标2012-8-22 23:29 上传下载附件(4.38 KB)打开工程,点击工具栏上方的File-New-Workspace,新建工作组,再点击工具栏Project-Creat New Project,转到如图,下载附件(44.98 KB)接着点击如图所示,2012-8-22 22:51 上传下载附件(28.69 KB)接着会提示你保存工程文件,存在事先建好的文件夹内.下载附件(59.97 KB)选择 C - main,这里也可以选择Empty project,但选择 C -main的话,它会自己帮你新建一个main.c文件,并且把它加入到工程中。
给指定一个文件,并且把它加入到工程中。
给指定的工程名称msp430中。
无锡职业技术学院翻译要求:英文-小四号字,单倍行距,首行缩进2个字符,不能定义文档网格,约3000英文单词中文-小四号字,单倍行距,首行缩进2个字符,不能定义文档网格MSP430 Value LineLaunchPad Development KitIntroductionAs applications continue to advance, 8-bit microcontrollers are struggling to meet the growing demand for higher performance and ultra-low power to support evolving product designs. Texas Instruments introduced the affordable 16-bitMSP430™ MCU V alue Line to meet the changing market dynamics and requirements faced by typical low-cost 8-bit MCU developers. Taking the next step in providing a low-cost solution to the shortcomings of 8-bit MCUs, TI created the MSP430 MCUV alue Line LaunchPad development kit to jump start application designs and provide a low-cost tool for developers of all experience levels. This overview will provide an introduction to the features and functionality of LaunchPad as well as everything included in the $4.30 kit.As the number of competitors grow and the time for taking products to market shrinks, the microcontroller (MCU) industry is being stretched by two opposing, but equally strong vectors. The growing demand for higher performance and ultra-low power functionality is matched only by an aggressive need for lower and lower price points. This is especially clear in low-cost applications that utilize 8-bit MCUs. To increase performance without breaking the bank, developers of low-cost 8-bit MCUs must migrate to higher performance 16-bit MCUs that are available at affordable price points.In high volume and quick turnover markets such as consumer and personal electronics, the need for a highly differentiated MCU, while maintaining aggressive price points, is a constant struggle. For instance, the market for 3D glasses has exploded in the recent months, both on the big and small screen. As this market trend moves up and to the right, developers are hard at work in creating technological solutions that provide a unique and immersive experience while remaining affordable. By providing more affordable solutions, developers hope to minimize the risks and barriers associated with new and fast moving markets.For many, this barrier to success is prohibited by a limited MCU core. Many developers of 8-bit MCUs have completely exhausted the full capabilities of their MCU due to limited data throughput and inefficient interfacing with higher resolution analog and digital peripherals. To enable increased functionality and improve feature sets of existing projects, developers must migrate to higher performance 16-bit MCUs.The MSP430 MCU V alue Line series provides a migration path for many of these constrained 8-bit MCU developers. At no additional cost, the affordableMSP430 MCU V alue Line devices offer a 16-bit architecture, higher precision timers and improved peripheral integration and interfacing, enabling improved performance and lower power consumption. The implementation of 16-bit MCUs enable up to 10 times improved performance and 10 times lower power when compared to manylow-cost 8-bit applications. Currently, the MSP430 MCU V alue Line series offers 27 ultra-low power 16-bit devices that offer varying levels of analog integration, communication modules and package types. At 100K unit volumes, MSP430 MCUV alue Line devices start at just $0.25 USD, ensuring that developers do not have to sacrifice price for improved performance. Additionally, the MSP430 MCU V alue Line series will continue to grow to more than 100 devices through the second half of 2011.This roadmap will introduce higher memory sizes, more package options and additional integrated analog and digital peripherals.To make the transition from 8- to 16-bit MCUs more seamless, Texas Instruments (TI) listened to the requirements of developers and created the newMSP430 MCU V alue Line LaunchPad development kit. Furthering the commitment to add performance and value to MCU designs with the MSP430 MCU V alue Line, TI introduced LaunchPad to lower the barrier of entry for developers new to 16-bit architectures, or those new to MCU design, in general. The LaunchPad kit is TI’s simple, yet thorough, introduction to 16-bit MCU development, offering all of the hardware and software a developer needs to get started for just $4.30 USD. Within minutes of opening the LaunchPad kit, users can begin interfacing with pushbuttons, LEDs and the on-chip peripherals of the MSP430 MCU V alue Line devices. See Figure 1 below:△Figure 1For just $4.30, the LaunchPad kit includes a development board with an integrated USB-powered flash emulation tool for programming and debugging any of the existing MSP430 MCU V alue Line devices. Any MSP430G2xx MCU in a DIP package can be dropped into the DIP target socket of LaunchPad, which allows easy evaluation of any MSP430 MCU V alue Line device. The flexible target socket allowsdevelopers to remove their freshly programmed and debugged MSP430G2xx MCU to be plugged into a custom breadboard or PCB so that customers are not constrained to the form factor of the LaunchPad board. Alternatively, developers can use LaunchPad as a standalone system, by leaving the MSP430G2xx device plugged into the board to leverage on-board and programmable push buttons and LEDs. Additionally, every pin of the MSP430G2xx device is fully accessible, allowing easy interfacing of external components or custom daughter cards.Also provided in the kit are free, downloadable software compilers and debuggers including TI’s own eclipse-based Code Composer Studio™ version 4 and IAR Embedded Workbench Kickstart. These independent development environments (IDEs) are full featured and are completely compatible with LaunchPad and theMSP430 MCU V alue Line devices available today. This complements the hardware features of the LaunchPad board by providing a complete software component as well. Using either IDE, users can then leverage MSP430 MCU code examples, open source projects and other free online resources, which can be accessed on LaunchPad’s Wiki page, /launchpadwiki.The unlimited access to the LaunchPad Wiki promotes collaboration and simple sharing of solutions and ideas, making LaunchPad a complete development environment. This active and growing online community supplements the hardware and software components of the LaunchPad package and provides instant support, projects and helpful hints that will be shared through the Wiki pages and E2E™ forums.To fully benefit from 16-bit architecture and ultra-low power performance, the MSP430 MCU V alue Line series and LaunchPad development kit offers a complete and simple introduction to quicken developers’ time to market. By providing 16-bit performance at 8-bit price points, and complete development tools for just $4.30, TI would like to welcome both new and experienced users to the world of high performance and affordable MCU development.△Figure 2. $4.30 LaunchPad kit offers the hardware and software needed to start developing applications, and is backed by an active online community to quicken time to market.MSP430价值链LaunchPad开发工具包引言随着应用程序的持续发展,8位微控制器难以满足日益增产的需求更高的性能和低功耗的支持不断变化的产品设计。
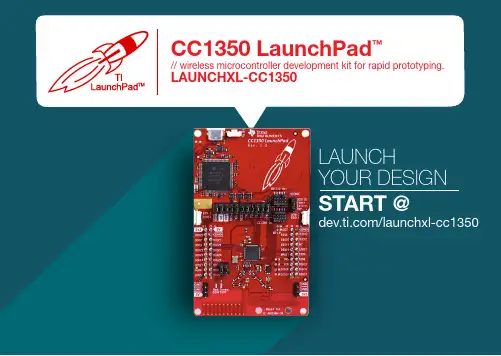
CC1350 LaunchPad™// wireless microcontroller development kit for rapid prototyping. LAUNCHXL-CC1350LAUNCHYOUR DESIGNSTART @/launchxl-cc1350CC1350 LaunchPad// wireless microcontroller development kit for rapid prototyping.LAUNCHXL-CC1350Launch Your Design @ /launchxl-cc1350The platform bar, MSP430, SimpleLink and LaunchPad are trademarks of Texas Instruments. © 2018 Texas Instruments Incorporated. SWRU478bIMPORTANT NOTICE FOR TI DESIGN INFORMATION AND RESOURCESTexas Instruments Incorporated(‘TI”)technical,application or other design advice,services or information,including,but not limited to, reference designs and materials relating to evaluation modules,(collectively,“TI Resources”)are intended to assist designers who are developing applications that incorporate TI products;by downloading,accessing or using any particular TI Resource in any way,you (individually or,if you are acting on behalf of a company,your company)agree to use it solely for this purpose and subject to the terms of this Notice.TI’s provision of TI Resources does not expand or otherwise alter TI’s applicable published warranties or warranty disclaimers for TI products,and no additional obligations or liabilities arise from TI providing such TI Resources.TI reserves the right to make corrections, enhancements,improvements and other changes to its TI Resources.You understand and agree that you remain responsible for using your independent analysis,evaluation and judgment in designing your applications and that you have full and exclusive responsibility to assure the safety of your applications and compliance of your applications (and of all TI products used in or for your applications)with all applicable regulations,laws and other applicable requirements.You represent that,with respect to your applications,you have all the necessary expertise to create and implement safeguards that(1) anticipate dangerous consequences of failures,(2)monitor failures and their consequences,and(3)lessen the likelihood of failures that might cause harm and take appropriate actions.You agree that prior to using or distributing any applications that include TI products,you will thoroughly test such applications and the functionality of such TI products as used in such applications.TI has not conducted any testing other than that specifically described in the published documentation for a particular TI Resource.You are authorized to use,copy and modify any individual TI Resource only in connection with the development of applications that include the TI product(s)identified in such TI Resource.NO OTHER LICENSE,EXPRESS OR IMPLIED,BY ESTOPPEL OR OTHERWISE TO ANY OTHER TI INTELLECTUAL PROPERTY RIGHT,AND NO LICENSE TO ANY TECHNOLOGY OR INTELLECTUAL PROPERTY RIGHT OF TI OR ANY THIRD PARTY IS GRANTED HEREIN,including but not limited to any patent right,copyright,mask work right,or other intellectual property right relating to any combination,machine,or process in which TI products or services are rmation regarding or referencing third-party products or services does not constitute a license to use such products or services,or a warranty or endorsement e of TI Resources may require a license from a third party under the patents or other intellectual property of the third party,or a license from TI under the patents or other intellectual property of TI.TI RESOURCES ARE PROVIDED“AS IS”AND WITH ALL FAULTS.TI DISCLAIMS ALL OTHER WARRANTIES OR REPRESENTATIONS,EXPRESS OR IMPLIED,REGARDING TI RESOURCES OR USE THEREOF,INCLUDING BUT NOT LIMITED TO ACCURACY OR COMPLETENESS,TITLE,ANY EPIDEMIC FAILURE WARRANTY AND ANY IMPLIED WARRANTIES OF MERCHANTABILITY,FITNESS FOR A PARTICULAR PURPOSE,AND NON-INFRINGEMENT OF ANY THIRD PARTY INTELLECTUAL PROPERTY RIGHTS.TI SHALL NOT BE LIABLE FOR AND SHALL NOT DEFEND OR INDEMNIFY YOU AGAINST ANY CLAIM,INCLUDING BUT NOT LIMITED TO ANY INFRINGEMENT CLAIM THAT RELATES TO OR IS BASED ON ANY COMBINATION OF PRODUCTS EVEN IF DESCRIBED IN TI RESOURCES OR OTHERWISE.IN NO EVENT SHALL TI BE LIABLE FOR ANY ACTUAL,DIRECT,SPECIAL, COLLATERAL,INDIRECT,PUNITIVE,INCIDENTAL,CONSEQUENTIAL OR EXEMPLARY DAMAGES IN CONNECTION WITH OR ARISING OUT OF TI RESOURCES OR USE THEREOF,AND REGARDLESS OF WHETHER TI HAS BEEN ADVISED OF THE POSSIBILITY OF SUCH DAMAGES.You agree to fully indemnify TI and its representatives against any damages,costs,losses,and/or liabilities arising out of your non-compliance with the terms and provisions of this Notice.This Notice applies to TI Resources.Additional terms apply to the use and purchase of certain types of materials,TI products and services. These include;without limitation,TI’s standard terms for semiconductor products /sc/docs/stdterms.htm),evaluation modules,and samples(/sc/docs/sampterms.htm).Mailing Address:Texas Instruments,Post Office Box655303,Dallas,Texas75265Copyright©2018,Texas Instruments Incorporated。


IMPORTANT NOTICETexas Instruments Incorporated and its subsidiaries(TI)reserve the right to make corrections,enhancements,improvements and other changes to its semiconductor products and services per JESD46,latest issue,and to discontinue any product or service per JESD48,latest issue.Buyers should obtain the latest relevant information before placing orders and should verify that such information is current and complete.All semiconductor products(also referred to herein as“components”)are sold subject to TI’s terms and conditions of sale supplied at the time of order acknowledgment.TI warrants performance of its components to the specifications applicable at the time of sale,in accordance with the warranty in TI’s terms and conditions of sale of semiconductor products.Testing and other quality control techniques are used to the extent TI deems necessary to support this warranty.Except where mandated by applicable law,testing of all parameters of each component is not necessarily performed.TI assumes no liability for applications assistance or the design of Buyers’products.Buyers are responsible for their products and applications using TI components.To minimize the risks associated with Buyers’products and applications,Buyers should provide adequate design and operating safeguards.TI does not warrant or represent that any license,either express or implied,is granted under any patent right,copyright,mask work right,or other intellectual property right relating to any combination,machine,or process in which TI components or services are rmation published by TI regarding third-party products or services does not constitute a license to use such products or services or a warranty or endorsement e of such information may require a license from a third party under the patents or other intellectual property of the third party,or a license from TI under the patents or other intellectual property of TI.Reproduction of significant portions of TI information in TI data books or data sheets is permissible only if reproduction is without alteration and is accompanied by all associated warranties,conditions,limitations,and notices.TI is not responsible or liable for such altered rmation of third parties may be subject to additional restrictions.Resale of TI components or services with statements different from or beyond the parameters stated by TI for that component or service voids all express and any implied warranties for the associated TI component or service and is an unfair and deceptive business practice. TI is not responsible or liable for any such statements.Buyer acknowledges and agrees that it is solely responsible for compliance with all legal,regulatory and safety-related requirements concerning its products,and any use of TI components in its applications,notwithstanding any applications-related information or support that may be provided by TI.Buyer represents and agrees that it has all the necessary expertise to create and implement safeguards which anticipate dangerous consequences of failures,monitor failures and their consequences,lessen the likelihood of failures that might cause harm and take appropriate remedial actions.Buyer will fully indemnify TI and its representatives against any damages arising out of the use of any TI components in safety-critical applications.In some cases,TI components may be promoted specifically to facilitate safety-related applications.With such components,TI’s goal is to help enable customers to design and create their own end-product solutions that meet applicable functional safety standards and requirements.Nonetheless,such components are subject to these terms.No TI components are authorized for use in FDA Class III(or similar life-critical medical equipment)unless authorized officers of the parties have executed a special agreement specifically governing such use.Only those TI components which TI has specifically designated as military grade or“enhanced plastic”are designed and intended for use in military/aerospace applications or environments.Buyer acknowledges and agrees that any military or aerospace use of TI components which have not been so designated is solely at the Buyer's risk,and that Buyer is solely responsible for compliance with all legal and regulatory requirements in connection with such use.TI has specifically designated certain components as meeting ISO/TS16949requirements,mainly for automotive use.In any case of use of non-designated products,TI will not be responsible for any failure to meet ISO/TS16949.Products ApplicationsAudio /audio Automotive and Transportation /automotiveAmplifiers Communications and Telecom /communicationsData Converters Computers and Peripherals /computersDLP®Products Consumer Electronics /consumer-appsDSP Energy and Lighting /energyClocks and Timers /clocks Industrial /industrialInterface Medical /medicalLogic Security /securityPower Mgmt Space,Avionics and Defense /space-avionics-defense Microcontrollers Video and Imaging /videoRFID OMAP Applications Processors /omap TI E2E Community Wireless Connectivity /wirelessconnectivityMailing Address:Texas Instruments,Post Office Box655303,Dallas,Texas75265Copyright©2014,Texas Instruments Incorporated。
Launchpad是什么?Launchpad使⽤教程Launchpad是什么?Launchpad 是⽤来查找和打开Mac系统下的 app 的最快捷⽅式,通过 Launchpad,您可以查看、整理并轻松打开Mac ⾥⾯⼏乎所有的应⽤软件。
下⾯带来Mac基础教程之Launchpad的使⽤教程。
⼀、进⼊ Launchpad要打开 Launchpad 并快速访问 app,请执⾏以下操作:1、点按 Dock 中的 Launchpad 图标。
2、按键盘上的 Launchpad 键(如果有)。
3、在触控板上使⽤拇指和另外三个⼿指合拢⼿势。
⼆、导航 Launchpad在进⼊ Launchpad 后,OS X 会显⽰您的所有 app。
要打开某个 app,只要点按其图标。
默认情况下,Launchpad 中的项⽬按字母顺序排列。
您可以在 Launchpad 上通过拖动操作来按您所需的顺序重新排列图标。
如果⼀个屏幕上没有⾜够的空间来显⽰所有 app,Launchpad 会创建多个页⾯。
Launchpad 屏幕底部的点表⽰存在的 app 页⾯数以及当前显⽰哪个页⾯。
要在页⾯之间移动,请执⾏以下操作:1、通过⿏标滚轮前后滚动。
2、点按 Launchpad 屏幕底部的点。
3、在触控板上⽤两个⼿指向左或向右轻扫。
在 OS X Mountain Lion 及更⾼版本中,您还可以通过在 Launchpad 窗⼝顶部的搜索栏中输⼊ app 名称来搜索 app。
三、Launchpad ⽂件夹在 Launchpad 中,您可以分类整理 app。
只要将⼀个图标拖放到另⼀个位置即可。
要在 Launchpad 中查看某个⽂件夹的内容,只要点按该⽂件夹即可。
其他图标将消失,以便您查看该⽂件夹中的 app。
您也可以通过在此视图中点按其名称来重命名此⽂件夹。
您也可以将项⽬从某个⽂件夹中移回 Launchpad 主屏幕。
只要将图标拖出 Launchpad ⽂件夹然后松⼿即可。
17吋的Razer™ Blade Pro遊戲筆電擁有次世代的超強效能,真正便攜且強大,讓您可以認真工作、認真玩樂。
搭載Intel第四代Core i7處理器、最新NVIDIA GeForce GTX繪圖處理器及前所未有的SSD儲存效能,Blade Pro將為遊戲筆電設下全新標竿。
僅0.88吋超薄機身、2.95公斤重,Razer Blade Pro為同級機型中最佳17吋筆記型電腦。
藉由Switchblade User Interface,您將擁有一個終極工具。
可連續使用的10個動態完全可編程按鍵及革命性的LCD軌跡板,讓您充份利用專業級軟體及遊戲應用程式。
認真工作,認真玩樂目錄1. 包裝內容物 / 註冊 / 技術支援 (2)2. 產品外觀 (4)3. 產品設定 (5)4. 使用您的RAZER BLADE PRO (14)5. 設定您的RAZER BLADE PRO (18)6. 安全與維護 (36)7. 法律條文 (38)1. 包裝內容物 / 註冊 / 技術支援包裝內容物∙Razer Blade Pro∙變壓器∙超細纖維擦拭布∙快速入門指南∙兩片Switchblade UI屏幕保護膜/指南註冊您可以在這裡找到您裝置的產品序號立即申請一個 Razer Synapse 2.0 帳戶,以取得產品保固狀態即時資訊。
欲知更多Razer Synapse 2.0 相關說明及其他功能細節,請造訪:/tw-zh/synapse2。
如您已擁有Razer Synapse 2.0 帳戶,可直接在Razer Synapse 2.0 應用程式中選取您的電子郵件地址,並自下拉選單中選擇保固狀態。
欲進行線上產品註冊,請造訪/registration。
請注意,若您透過網站註冊,將無法在線上檢視產品保固狀態。
技術支援您會獲得:∙1年有限原廠保固∙1年電池保固∙可至取得使用手冊及免費線上技術支援欲取得更多支援,請造訪/contact-us,或撥打以下電話:2. 產品外觀A.網路攝影機指示燈B.2百萬象素攝影機C.內建式麥克風D.17.3吋 Full HD顯示器E.結合第4代杜比®數字+ 家庭影院版F.電源鍵G.背光鍵盤H.動態觸控式可調整按鈕I.多點觸控LCD軌跡板3. 產品設定連接電源供應器:請先確認電源插頭是否穩當地與插座及供應器連結。
LAUNCHXL-F28027C2000Piccolo LaunchPad Experimenter KitUser's GuideLiterature Number:SPRUHH2AJuly2012–Revised January2014Contents 1LAUNCHXL-F28027Overview (4)1.1Overview (4)1.2Kit Contents (5)1.3Revisions (5)2Installation (5)2.1Download the Required Software (5)2.2Install the Software (6)2.3Install the Hardware (6)3Getting Started with the LAUNCHXL-F28027 (6)3.1Getting Started (6)3.2Demo Application,Internal Temperature Measurement (6)3.3Program and Debug the Temperature Measurement Demo Application (6)4Hardware Configuration (6)4.1Power Domain (7)4.2Serial Connectivity (7)4.3Boot Mode Selection (7)4.4Connecting a Crystal (7)4.5Connecting a Satellite Board (7)4.6Device Migration Path (8)5LAUNCHXL-F28027Hardware (8)5.1Device Pin Out (8)5.2Schematics (9)5.3PCB Layout (11)5.4Bill of Materials(BOM) (12)6Suggested Reading (13)7Frequently Asked Questions(FAQ) (14)2Table of Contents SPRUHH2A–July2012–Revised January2014Submit Documentation FeedbackCopyright©2012–2014,Texas Instruments IncorporatedList of Figures1LAUNCHXL-F28027Board Overview (5)2C2000LaunchPad Schematic—Sheet1of2 (9)3C2000LaunchPad Schematic—Sheet2of2 (10)4LAUNCHXL-F28027PCB Layout—Top Layer (11)5LAUNCHXL-F28027PCB Layout—Bottom Layer (11)6LAUNCHXL-F28027PCB Layout—Silkscreen Image (11)List of Tables1C2000LaunchPad Pin Out and Pin Mux Options (8)2LAUNCHXL-F28027Bill of Materials (12)3 SPRUHH2A–July2012–Revised January2014List of Figures Submit Documentation FeedbackCopyright©2012–2014,Texas Instruments IncorporatedUser's GuideSPRUHH2A–July2012–Revised January2014 LAUNCHXL-F28027C2000Piccolo LaunchPad Experimenter Kit1LAUNCHXL-F28027Overview1.1OverviewThe C2000™Piccolo™LaunchPad™,LAUNCHXL-F28027,is a complete low-cost experimenter board for the Texas Instruments Piccolo F2802x devices.The LAUNCHXL-F28027kit features all the hardware and software necessary to develop applications based on the F2802x microprocessor.The LaunchPad is based on the superset F28027device,and easily allows users to migrate to lower cost F2802x devices once the design needs are known.It offers an on-board JTAG emulation tool allowing direct interface to a PC for easy programming,debugging,and evaluation.In addition to JTAG emulation,the USB interface provides a UART serial connection from the F2802x device to the host PC.Users can download an unrestricted version of Code Composer Studio™IDE version5to write,download,and debug applications on the LAUNCHXL-F28027board.The debugger is unobtrusive,allowing the user to run an application at full speed with hardware breakpoints and single steppingavailable while consuming no extra hardware resources.As shown in Figure1,the LAUNCHXL-F28027C2000LaunchPad features include:•USB debugging and programming interface via a high-speed galvanically isolated XDS100v2emulator featuring a USB/UART connection.•Superset F28027device that allows applications to easily migrate to lower cost devices.•Nibble(4-bit)wide LED display.•Two push buttons for user feedback and device reset.•Easily accessible device pins for debugging purposes or as sockets for adding customized extension boards.•Boot selection and USB and UART disconnect switches.C2000,Piccolo,LaunchPad,Code Composer Studio,controlSUITE are trademarks of Texas Instruments.Windows is a registered trademark of Microsoft Corporation in the United States and/or other countries.All other trademarks are the property of their respective owners.4LAUNCHXL-F28027C2000Piccolo LaunchPad Experimenter Kit SPRUHH2A–July2012–Revised January2014Submit Documentation FeedbackCopyright©2012–2014,Texas Instruments IncorporatedUSB ConnectionS4 SerialS1 Boot CPU Reset JTAG EmulatorSerial TX/RX Piccolo TMS320F28027Programmable Push Button:InstallationFigure UNCHXL-F28027Board Overview1.2Kit ContentsThe LAUNCHXL-F28027C2000LaunchPad experimenter kit includes the following items:•C2000LaunchPad Board (LAUNCHXL-F28027)•Mini USB-B Cable,0.5m •Quick Start Guide1.3RevisionsThe first production revision of the LAUNCHXL-F28027C2000Piccolo LaunchPad,version 1.0,was released in July of 2012and is currently the only revision available.2InstallationThe C2000LaunchPad installation consists of three easy steps:1.Download Code Composer Studio and controlSUITE™.2.Install Code Composer Studio and controlSUITE.3.Connect and install the C2000LaunchPad to the PC.Now the LaunchPad is ready to develop applications or run the pre-programmed demo.2.1Download the Required SoftwareCode Composer Studio IDE is available for free without any restriction when used with the XDS100emulator on the C2000LaunchPad.The software can be downloaded from the C2000LaunchPad page at /c2000-launchpad .At this site,you can also download a copy of controlSUITE that includes drivers,examples,and other support software needed to get started.5SPRUHH2A–July 2012–Revised January 2014LAUNCHXL-F28027C2000Piccolo LaunchPad Experimenter Kit Submit Documentation FeedbackCopyright ©2012–2014,Texas Instruments IncorporatedGetting Started with the 2.2Install the SoftwareOnce downloaded,install Code Composer Studio and the controlSUITE package.2.3Install the HardwareAfter Code Composer Studio is installed,plug the supplied USB cable into the C2000LaunchPad board and into an available USB port on your computer.Windows®will automatically detect the hardware and ask you to install software drivers.Let Windows runa search for the drivers and automatically install them.After Windows successfully installs the drivers forthe integrated XDS100v2emulator,your LaunchPad is now ready for use.3Getting Started with the LAUNCHXL-F280273.1Getting StartedThe first time the LAUNCHXL-F28027is used,a demo application automatically starts when the board is powered from a USB host.If your board does not start the demo application,try placing S1in the following positions and resetting the board:UP-UP-DOWN.To start the demo,connect the LAUNCHXL-F28027 with the included mini-USB cable to a free USB port.The demo application starts with the LEDs flashing to show the device is active.3.2Demo Application,Internal Temperature MeasurementThe LAUNCHXL-F28027includes a pre-programmed TMS320F28027device.When the LaunchPad is connected via USB,the demo starts with an LED flash sequence that points toward S3.Press S3to start the temperature measurement mode.A reference temperature is taken at the beginning of this mode and the LEDs of the LaunchPad are usedto display any difference between the current temperature and the reference temperature.Initially,theLED connected to GPIO3is lit to indicate an8in binary,which corresponds to the current temperature being equal to the reference temperature.As the temperature drifts away from the reference,thedifference is displayed as a binary increment or decrement of the nibble wide LED display.For instance,if the reference temperature was30ºC and the current temperature is33ºC,the LEDs would be(from left to right)ON,OFF,ON,and ON which would be11in binary(33-30=3and11-8=3).A new referencetemperature may be set at any time by pressing S3again.In addition to the LED display,temperature information is also displayed on your PC through theUSB/UART connection.To view the UART information on your PC,first figure out the COM portassociated with the LaunchPad.To do this in Windows,right click on My Computer and click onProperties.In the dialog box that appears,click on the Hardware tab and open Device Manager.Look for an entry under Ports(COM&LPT)titled"USB Serial Port(COMX)",where X is a number.Remember this number for when you open a serial terminal.The demo applications UART data was written and debugged using PuTTY,and for the best user experience we recommend you use PuTTY to view the UART data.Open your serial terminal program and open the COM port you found previously in device manager with the following settings:115200Baud,8data bits,no parity,1stop bit.After opening the serial port in your serial terminal,reset the Launchpad with the reset push button and observe the serial terminal for asurprise.3.3Program and Debug the Temperature Measurement Demo ApplicationThe project and associated source code for the C2000Piccolo LaunchPad demo is included in thecontrolSUITE software package and should automatically be found by the TI Resource Explorer in Code Composer Studio v5.In the resource explorer,open the controlSUITE folder and then the Development Tools entry and look for the C2000LaunchPad line item.Expand this item and LAUNCHXL-F28027,then select the LaunchPad Demo Application.Follow the steps in the main pane of the resource explorer to import,build,debug,and run this application.4Hardware ConfigurationThe C2000LaunchPad gives users several options as to how to configure the board.6LAUNCHXL-F28027C2000Piccolo LaunchPad Experimenter Kit SPRUHH2A–July2012–Revised January2014Submit Documentation FeedbackCopyright©2012–2014,Texas Instruments Incorporated Hardware Configuration 4.1Power DomainThe C2000LaunchPad has two separate power domains for the purpose of allowing JTAG isolation.Jumpers JP1,JP2,and JP3configure whether the USB power is passed to the target device.Jumper Power DomainJP1 3.3VJP2GroundJP35V4.2Serial ConnectivityThe LAUNCHXL-F28027has a USB to UART adapter built in.This makes it easy to print debuginformation back to the host PC even in isolated environments.However,in some cases the user maywish to connect the Piccolo SCI peripheral(C2000UART peripheral)to a BoosterPack or other hardware via the header pins.If the SCI pins are connected to both the header pins,the XDS100UART channel contention would exist and the pins would not be driven to the correct voltage levels.To solve this issue we have included a switch to allow the user to disconnect the Piccolo serial pins from the XDS100UART connection.When S4is in the up position,the Piccolo device's SCI is connected to the XDS100and you are able to receive and send serial information from or to the board.When S4is in the down position,the Piccolo device's SCI is disconnected from the XDS100and BoosterPacks,which use serialcommunication,and can communicate with the Piccolo device.4.3Boot Mode SelectionThe LaunchPad's F28027device includes a boot ROM that performs some basic start-up checks andallows for the device to boot in many different ways.Most users will either want to perform an emulation boot or a boot to flash(if they are running the application standalone).S1has been provided to allowusers to easily configure the pins that the bootROM checks to make this decision.The switches on S1 correspond to:Switch Function1GPIO342GPIO373TRSTnKeep in mind that the debugger does not connect if the device is not in the emulation boot mode(TRST switch in the up position).More information about boot mode selection can be found in theTMS320x2802x Piccolo Boot ROM Reference Guide(SPRUFN6).4.4Connecting a CrystalAlthough the Piccolo device present on the LAUNCHXL-F28027has an internal oscillator—and for most applications this is sufficient—the LaunchPad offers a footprint for surface mount or through-hole HC-49 crystals for users who require a more precise clock.If you wish to use an external crystal,solder thecrystal to the Q1/Q2footprint and appropriate load capacitors to the C3and C4footprints.You also need to configure the device to use the external oscillator in software.4.5Connecting a Satellite BoardThe C2000LaunchPad is the perfect experimenter board to start hardware development with the F2802x devices.Connectors J1,J2,J5,and J6and the power supply at J3are aligned in a0.1-in(2.54-mm)grid to allow an easy and inexpensive development of a breadboard extension module.These satellite boards can access all of the GPIO and analog signals.The alignment of the connectors and the pin out can be found in Section5.7 SPRUHH2A–July2012–Revised January2014LAUNCHXL-F28027C2000Piccolo LaunchPad Experimenter Kit Submit Documentation FeedbackCopyright©2012–2014,Texas Instruments IncorporatedLAUNCHXL-F28027Hardware 4.6Device Migration PathApplications developed on the LAUNCHXL-F28027can easily be migrated to any of these lower costdevices in the F2802x family:Part Number DescriptionTMS320F28027(1)32-bit Real Time Microcontroller,60MHz,32K Flash,6K RAM,4HRPWMTMS320F2802632-bit Real Time Microcontroller,60MHz,16K Flash,6K RAM,4HRPWMTMS320F2802332-bit Real Time Microcontroller,50MHz,32K Flash,6K RAM,4HRPWMTMS320F2802232-bit Real Time Microcontroller,50MHz,16K Flash,6K RAM,4HRPWMTMS320F2802132-bit Real Time Microcontroller,40MHz,32K Flash,5K RAMTMS320F2802032-bit Real Time Microcontroller,40MHz,16K Flash,3K RAMTMS320F28020032-bit Real Time Microcontroller,40MHz,8K Flash,3K RAM(1)This device is present on the LAUNCHXL-F28027.5LAUNCHXL-F28027Hardware5.1Device Pin OutTable1lists the pin out and pin mux options for the C2000LaunchPad.Table1.C2000LaunchPad Pin Out and Pin Mux OptionsMux Value Mux Value 3210J1Pin J5Pin0123+3.3V11+5VADCINA622GNDTZ2SDAA SCIRXDA GPIO2833ADCINA7TZ3SCLA SCITXDA GPIO2944ADCINA3Rsvd Rsvd COMP2OUT GPIO3455ADCINA1ADCINA466ADCINA0SCITXDA SPICLK GPIO1877ADCINB1ADCINA288ADCINB3ADCINB299ADCINB7ADCINB41010NC3210J6Pin J2Pin0123Rsvd Rsvd EPWM1A GPIO011GNDCOMP1OUT Rsvd EPWM1B GPIO122GPIO19SPISTEA SCIRXDA ECAP1Rsvd Rsvd EPWM2A GPIO233GPIO12TZ1SCITXDA RsvdCOMP2OUT Rsvd EPWM2B GPIO344NCRsvd Rsvd EPWM3A GPIO455RESET#ECAP1Rsvd EPWM3B GPIO566GPIO16/32SPISIMOA/Rsvd/TZ2/SDAA EPWMSYNCI ADCSOCATZ2/Rsvd/SPISIMOA/GPIO16/3277GPIO17/33SPISOMIA/Rsvd/TZ3/ADCSOCA EPWMSYNCI SDAA SCLA EPWMSYNCO ADCSOCBTZ3/Rsvd/SPISOMIA/GPIO17/3388GPIO6EPWM4A EPWMSYNCI EPWMSYNCO ADCSOCB EPWMSYNCO SCLANC99GPIO7EPWM4B SCIRXDA RsvdNC1010ADCINB68LAUNCHXL-F28027C2000Piccolo LaunchPad Experimenter Kit SPRUHH2A–July2012–Revised January2014Submit Documentation FeedbackCopyright©2012–2014,Texas Instruments Incorporated LAUNCHXL-F28027Hardware 5.2SchematicsFigure2and Figure3show the C2000LaunchPad schematics sheets.Figure2.C2000LaunchPad Schematic—Sheet1of29 SPRUHH2A–July2012–Revised January2014LAUNCHXL-F28027C2000Piccolo LaunchPad Experimenter Kit Submit Documentation FeedbackCopyright©2012–2014,Texas Instruments IncorporatedLAUNCHXL-F28027Hardware Figure3.C2000LaunchPad Schematic—Sheet2of210LAUNCHXL-F28027C2000Piccolo LaunchPad Experimenter Kit SPRUHH2A–July2012–Revised January2014Submit Documentation FeedbackCopyright©2012–2014,Texas Instruments Incorporated LAUNCHXL-F28027Hardware 5.3PCB LayoutFigure4,Figure5,and Figure6show the LAUNCHXL-F28027PCB layout.UNCHXL-F28027PCB Layout—Top LayerUNCHXL-F28027PCB Layout—Bottom LayerUNCHXL-F28027PCB Layout—Silkscreen Image11 SPRUHH2A–July2012–Revised January2014LAUNCHXL-F28027C2000Piccolo LaunchPad Experimenter Kit Submit Documentation FeedbackCopyright©2012–2014,Texas Instruments IncorporatedLAUNCHXL-F28027Hardware 5.4Bill of Materials(BOM)Table2lists the LAUNCHXL-F28027bill of materials.UNCHXL-F28027Bill of MaterialsQuantityperReference Board DescriptionR12,R13,R14,R15,R26,R276RES330Ω1/10W5%0402SMDR1,R4,R5,R174RES820Ω1/10W5%0402SMDR22,R232RES1.0KΩ1/10W5%0402SMDR6,R8,R9,R10,R315RES2.2KΩ1/10W5%0402SMDR11,R292RES10KΩ1/10W5%0402SMDR241RES12KΩ1/16W.5%0402SMDR71RES1.0MΩ1/10W5%0402SMDR16,R18,R19,R20,R21,R25,R28,R30,9RES0.0Ω1/4W1206SMDR32L1,L22FERRITE BEAD600Ω0402L31FERRITE BEAD220Ω0402L41FERRITE CHIP60Ω1.5A0402C9,C12,C13,C14,C165CAP.10µF16V CERAMIC Y5V0402C71CAP CER1.0µF6.3V X5R20%0402C5,C6,C19,C20,C215CAP CER2.2µF6.3V20%X5R0402C151CAP CER3.3µF4.0V X5R0402C10,C112CAP CER4.7µF4V X5R0402C3,C42CAP CER36PF50V C0G0402C17,C182CAP CER36PF50V C0G0402C81CAP TANTALUM100µF6.3V10%SMDF11PTC RESETTABLE.50A15V1812S11SWITCH DIP3POS TOP SLIDE SMTS41SWITCH DIP DPST1POS SMTS2,S32SW TACT SPST-NO MOM160GF SMDQ1,Q21CrystalQ31CRYSTAL12.0000MHZ18PF SMDD61LED RED HIGH BRIGHT ESS SMDD11LED GREEN HIGH BRIGHT ESS SMDD2,D3,D4,D5,D7,D86LED BLUE HIGH BRIGHT ESS SMDJP1,JP2,JP33BERGSTIK II.100"SR STRAIGHTJ1and J5,J2and J62CONN HEADER.100DUAL STR20POSJ31CONN HEADER.100SNGL STR3POSCON11CONN RECEPT MINI-USB TYPE B SMTU41IC LDO REG800MA3.3V SOT223-4U2,U32IC BUFF/DVR DL NON-INV SOT236U51ISOLAT DGTL2.5KVRMS4CH16-SOICU71ISOLAT DGTL3KVRMS3CH16-SOICU61IC USB HS DUAL UART and FIFO64-QFNU81IC EEPROM2KBIT3MHZ SOT23-6U11IC MCU32BIT64KB FLASH48LQFP12LAUNCHXL-F28027C2000Piccolo LaunchPad Experimenter Kit SPRUHH2A–July2012–Revised January2014Submit Documentation FeedbackCopyright©2012–2014,Texas Instruments Incorporated Suggested Reading 6Suggested ReadingThe following documents describe the C2000devices.Copies of these documents are available on the Internet at /c2000and /c2000-launchpad,or click on the links below:•TMS320F28027/28026/28023/28022/28021/28020/280200Piccolo Microcontrollers Data Manual (SPRS523)•TMS320F28027/28026/28023/28022/28021/28020/2802x0Piccolo MCU Silicon Errata(SPRZ292)•TMS320x2802x,2803x Piccolo Analog-to-Digital Converter(ADC)and Comparator Reference Guide (SPRUGE5)•TMS320x2802x,2803x Piccolo High Resolution Pulse Width Modulator(HRPWM)Reference Guide (SPRUGE8)•TMS320x2802x,2803x Piccolo Inter-Integrated Circuit(I2C)Reference Guide(SPRUFZ9)•TMS320x2802x,2803x Piccolo Enhanced Pulse Width Modulator(ePWM)Module Reference Guide (SPRUGE9)•TMS320x2802x/TMS320F2802xx Piccolo System Control and Interrupts Reference Guide(SPRUFN3)•TMS320x2802x Piccolo Boot ROM Reference Guide(SPRUFN6)•TMS320x2802x,2803x Piccolo Serial Communications Interface(SCI)Reference Guide(SPRUGH1)•TMS320x2802x,2803x Piccolo Enhanced Capture(eCAP)Module Reference Guide(SPRUFZ8)•TMS320C28x Instruction Set Simulator Technical Overview(SPRU608)•TMS320C28x Optimizing C/C++Compiler v6.1User's Guide(SPRU514)•TMS320C28x Assembly Language Tools v6.1User's Guide(SPRU513)13 SPRUHH2A–July2012–Revised January2014LAUNCHXL-F28027C2000Piccolo LaunchPad Experimenter Kit Submit Documentation FeedbackCopyright©2012–2014,Texas Instruments IncorporatedFrequently Asked Questions(FAQ)7Frequently Asked Questions(FAQ)1.Can other programming and debug tools(such as an XDS510emulator)be used with the C2000LaunchPad?While a user could potentially connect an external emulator to the F28027device present on theLaunchPad,it would require some rework of the board.It is recommended that users who want to usean external emulator purchase a controlCard and docking station that includes an external JTAGconnector.2.What versions of Code Composer Studio can be used to develop software for the C2000LaunchPad?It is highly recommend that novice users develop applications with Code Composer Studio v5.Thedrivers,examples,and other associated software are tailored to make the user experience as smoothas possible in Code Composer Studio v5.However,there is nothing to prevent a user from creatingprojects in Code Composer Studio v3or v4with the source files available in controlSUITE.Keep inmind that all the projects for the C2000LaunchPad are Code Composer Studio v5projects and will not import into Code Composer Studio v3or v4.Only expert users should attempt to use the LaunchPadwith Code Composer Studio v3or v4.3.Why can’t I connect to the LaunchPad in Code Composer Studio?There are a number of things that could cause this and they all have an easy fix.•Is S1switch3in the down position?This is the TRST pin that enables and disables JTAG functionality on the chip.This switch must bein the up position for the emulator to be able to connect.•Are both power LEDs lit?The board has two power domains because of the isolated JTAG interface.For low-voltageapplication development,JTAG isolation is not needed and the power domains can be combined toallow for convenience(that is,the board can be powered completely through the USB).Ensure thatjumpers are placed on the posts of JP1,JP2,and JP3.•Are drivers correctly installed for the XDS100v2present on the LaunchPad?Right click on My Computer and select properties.Navigate to the Hardware tab in the dialog boxand open the device manager.Scroll to the bottom of the list and expand the USB Serial Buscontrollers item.Are there two entries for TI XDS100Channel A/B?If not,try unplugging andreplugging in the board.Does Windows give you any messages in the system tray?In DeviceManger,do either of the entries have a yellow exclamation mark over their icon?If so,tryreinstalling the drivers.4.Why is the serial connection not working?There are a few things that could cause this and they are easy to fix.•Is S4in the up position?S4connects the F28027device serial peripheral to the XDS100serial port,so this switch must beturned on(up)for serial connectivity to function.•Are you using the correct COM port?Right click on My Computer and select properties.Navigate to the Hardware tab in the dialog boxand open the device manager.Scroll to Ports(COM&LPT)and expand this entry.Is there a USBSerial Port listed?If so,read the COM number to the right of the entry;this is the COM number youshould be using.•Are you using the correct baud rate?Most,if not all,of the examples are configured for a baud rate of115200when the CPU is runningat60MHz.If you have changed the PLL settings or written your own application you may have torecalculate the baud rate for your specific application.For information on how to do this,see theTMS320x2802x,2803x Piccolo Serial Communications Interface(SCI)Reference Guide(SPRUGH1).14LAUNCHXL-F28027C2000Piccolo LaunchPad Experimenter Kit SPRUHH2A–July2012–Revised January2014Submit Documentation FeedbackCopyright©2012–2014,Texas Instruments IncorporatedIMPORTANT NOTICETexas Instruments Incorporated and its subsidiaries(TI)reserve the right to make corrections,enhancements,improvements and other changes to its semiconductor products and services per JESD46,latest issue,and to discontinue any product or service per JESD48,latest issue.Buyers should obtain the latest relevant information before placing orders and should verify that such information is current and complete.All semiconductor products(also referred to herein as“components”)are sold subject to TI’s terms and conditions of sale supplied at the time of order acknowledgment.TI warrants performance of its components to the specifications applicable at the time of sale,in accordance with the warranty in TI’s terms and conditions of sale of semiconductor products.Testing and other quality control techniques are used to the extent TI deems necessary to support this warranty.Except where mandated by applicable law,testing of all parameters of each component is not necessarily performed.TI assumes no liability for applications assistance or the design of Buyers’products.Buyers are responsible for their products and applications using TI components.To minimize the risks associated with Buyers’products and applications,Buyers should provide adequate design and operating safeguards.TI does not warrant or represent that any license,either express or implied,is granted under any patent right,copyright,mask work right,or other intellectual property right relating to any combination,machine,or process in which TI components or services are rmation published by TI regarding third-party products or services does not constitute a license to use such products or services or a warranty or endorsement e of such information may require a license from a third party under the patents or other intellectual property of the third party,or a license from TI under the patents or other intellectual property of TI.Reproduction of significant portions of TI information in TI data books or data sheets is permissible only if reproduction is without alteration and is accompanied by all associated warranties,conditions,limitations,and notices.TI is not responsible or liable for such altered rmation of third parties may be subject to additional restrictions.Resale of TI components or services with statements different from or beyond the parameters stated by TI for that component or service voids all express and any implied warranties for the associated TI component or service and is an unfair and deceptive business practice. TI is not responsible or liable for any such statements.Buyer acknowledges and agrees that it is solely responsible for compliance with all legal,regulatory and safety-related requirements concerning its products,and any use of TI components in its applications,notwithstanding any applications-related information or support that may be provided by TI.Buyer represents and agrees that it has all the necessary expertise to create and implement safeguards which anticipate dangerous consequences of failures,monitor failures and their consequences,lessen the likelihood of failures that might cause harm and take appropriate remedial actions.Buyer will fully indemnify TI and its representatives against any damages arising out of the use of any TI components in safety-critical applications.In some cases,TI components may be promoted specifically to facilitate safety-related applications.With such components,TI’s goal is to help enable customers to design and create their own end-product solutions that meet applicable functional safety standards and requirements.Nonetheless,such components are subject to these terms.No TI components are authorized for use in FDA Class III(or similar life-critical medical equipment)unless authorized officers of the parties have executed a special agreement specifically governing such use.Only those TI components which TI has specifically designated as military grade or“enhanced plastic”are designed and intended for use in military/aerospace applications or environments.Buyer acknowledges and agrees that any military or aerospace use of TI components which have not been so designated is solely at the Buyer's risk,and that Buyer is solely responsible for compliance with all legal and regulatory requirements in connection with such use.TI has specifically designated certain components as meeting ISO/TS16949requirements,mainly for automotive use.In any case of use of non-designated products,TI will not be responsible for any failure to meet ISO/TS16949.Products ApplicationsAudio /audio Automotive and Transportation /automotiveAmplifiers Communications and Telecom /communicationsData Converters Computers and Peripherals /computersDLP®Products Consumer Electronics /consumer-appsDSP Energy and Lighting /energyClocks and Timers /clocks Industrial /industrialInterface Medical /medicalLogic Security /securityPower Mgmt Space,Avionics and Defense /space-avionics-defense Microcontrollers Video and Imaging /videoRFID OMAP Applications Processors /omap TI E2E Community Wireless Connectivity /wirelessconnectivityMailing Address:Texas Instruments,Post Office Box655303,Dallas,Texas75265Copyright©2014,Texas Instruments Incorporated。
LaunchPad 官方例程(无修改)一切皆为2012TI杯电子设计大赛1.//************************************************************************* // LaunchPad Lab2 - Software Toggle P1.0,软件切换的P1.0,// MSP430G2xx2// -----------------// /|\| XIN|-// | | |// --|RST XOUT|-// | |// | P1.0|-->LED//************************************************************************* #include <msp430g2553.h>void main(void){WDTCTL = WDTPW + WDTHOLD; //停止看门狗定时器if (CALBC1_1MHZ == 0xFF || CALDCO_1MHZ == 0xFF){while(1); //如果校准常数擦除,捕获的CPU!!}// Configure Basic ClockBCSCTL1 = CALBC1_1MHZ; //设置范围DCOCTL = CALDCO_1MHZ; //集检查官步+调制BCSCTL3 |= LFXT1S_2; // 设置LFXT1P1DIR = BIT6; //P1.6输出(绿色LED)P1OUT = 0; // LED 关IFG1 &= ~OFIFG; //清除OSCFault标志BCSCTL2 |=SELM_1 + DIVM_0; //设置的MCLKfor(;;){P1OUT = BIT6; // P1.6输出(绿色LED)_delay_cycles(100);P1OUT = 0; //绿色LED关闭_delay_cycles(5000);}}2.//************************************************************************* // LaunchPad Lab3 - Software Port Interrupt Service软件端口的中断服务// MSP430G2xx2// -----------------// /|\| XIN|-// | | |// --|RST XOUT|-// /|\ | |// --o--|P1.3 P1.0|-->LED// \|/////************************************************************************* #include <msp430g2553.h>void main(void){WDTCTL = WDTPW + WDTHOLD; //停止看门狗定时器P1DIR |= BIT0; //设定的P1.0输出方向P1IES |= BIT3; //P1.3可高/低边P1IFG &= ~BIT3; // P1.3 IFG 清除P1IE |= BIT3; // P1.3可中断启用_BIS_SR(LPM4_bits + GIE); //进入LPM4中断}// Port 1 interrupt service routine端口1中断服务程序#pragma vector=PORT1_VECTOR__interrupt void Port_1(void){if (P1IFG & BIT3){P1OUT ^= BIT0; // P1.0切换P1IFG &= ~BIT3; // P1.3 IFG清除}}3.//************************************************************************* // LaunchPad Lab5 - ADC10, Sample A10 Temp and Convert to oC and oF ADC10,样品A10的温度和转换// MSP430G2452// -----------------// /|\| XIN|-// | | |// --|RST XOUT|-// | |// |A10 |//************************************************************************* #include "msp430g2553.h"long temp;long IntDegF;long IntDegC;void main(void){WDTCTL = WDTPW + WDTHOLD; // Stop WDT//Configure ADC10ADC10CTL1 = INCH_10 + ADC10DIV_3; // 选择ADC通道温度传感器ADC10CTL0 = SREF_1 + ADC10SHT_3 + REFON + ADC10ON + ADC10IE; //选择ADC号源__enable_interrupt(); //使能中断。