WRF模式和WRFDA模式安装
- 格式:pdf
- 大小:32.15 KB
- 文档页数:2

WRF安装手册--给所有挣扎在安装WRF泥淖中的朋友们作者:SJ modified by Jiangzq网上有很多指导安装WRF及其组件的文章,也有很多帮助解决安装过程中各种困难的帖子,但大多分散且不系统,下面我就以过来人的身份把我在PC上安装WRF的步骤及遇到的各种问题和答案放在模式联盟论坛上,希望能帮助那些正在挣扎于安装WRF泥淖中的各位,同时也纪念下我之前所经历的这种痛苦。
1、安装平台fedora82、所需的各种组件:1)PGI 7.15 + netcdf4.0 +NCL(==ncarg) !其实ifort的性能比PGI更好,但是其他的都过了,只在安装WRFDA的过程中一直编译不过去,因此暂不介绍ifort编译WRF的过程。
2)WRFV3.1 + WPSV3.0.1 + WRFDA V3.0.1(if needed)3)RIP43、安装PGI1)解PGI压缩包$cd /home/name/Model$mkdir PGI$tar -xvf pgilinux-715.tar.gz -C PGI$cd PGI$./install !出现提示信息Do you accept these terms? [accept,decline]accept1,Sinle system install2,Network install1Install the ACML? [y/n]nInstallation directory?[/opt/pgi]/home/name/Program/pgiDo you wish to install MPICH1? [y/n]nDo you want the files in the install directory to be read-only?[y/n]ninstall complete$cp license.dat /home/name/Program/PGI !把与安装版本相适应的license.dat拷贝到你安装的目录下配置.bashrc里的环境变量export PGI=/home/name/program/pgi/linux86/7.1-5/export MANPATH=$MANPATH:$PGI/manexport LM_LICENSE_FIEL=/home/name/program/pgi/license.datexport PATH=$PATH:$PGI/bin$source .bashrc为了试验pgi是否安装成功,可以打如下命令$pgf90如果有如下提示信息,说明已安装成功$pgf90 –warning-No files to process***************************************************************************在Fedora11下安装pgi_9.0-1高版本的fedora下同样需要安装高版本的pgi,但其安装步骤基本一样,只是它里面有一个patcher需要安装罢了。


自己的WRF安装总结3、3安装记录、pdf WRF-WPS-WRFDA安装、pdf wrf模式学习_从linux安装开始、pdf WRF安装手册--给所有挣扎在安装WRF 泥淖中的朋友们、doc一、CentOS5 Linux 安装图解即设置安装图解参考 wrf模式学习_从linux安装开始、pdf二、相关软件安装1、准备工作1)通过rpmqa |grep samba有以下显示:samba-common-3、0、33-3、14、el5samba-client-3、0、33-3、14、el5若缺文件,则从安装光盘中安装。
如下[root@numerca ~]# cd /media/CentOS_5、4_Final/CentOS/[root@numerca CentOS]# ls * |grep sambasamba-3、0、33-3、14、el5、i386、rpmsystem-config-samba-1、2、41-5、el5、noarch、rpm[root@numerca CentOS]# rpm3、0、33-3、14、el5、i386、rpm warning: samba-3、0、33-3、14、el5、i386、rpm: Header V3 DSA signature: NOKEY, key ID eerror: Failed dependencies:perl(Convert::ASN1) is needed by samba-3、0、33-3、14、el5、i386[root@numerca CentOS]# ls * |grep perlperl-Convert-ASN1-0、20-1、1、noarch、rpm[root@numerca CentOS]# rpmConvert-ASN1-0、20-1、1、noarch、rpm[root@numerca CentOS]# rpm3、0、33-3、14、el5、i386、rpm[root@numerca CentOS]# rpmconfig-samba-1、2、41-5、el5、noarch、rpm[root@numerca CentOS]# cd[root@numerca ~]# ntsysv选中smb[root@numerca ~]# cd /media/CentOS_5、4_Final/CentOS/然后,查看gcc 是否安装:[root@numerca CentOS]# rpm4、1、2-46、el5gcc-c++-4、1、2-46、el5gcc-4、1、2-46、el5compat-gcc-34-g77-3、4、6-4gcc-gfortran-4、1、2-46、el5compat-libgcc-296-2、96-138compat-gcc-34-c++-3、4、6-4compat-gcc-34-3、4、6-4gcc-java-4、1、2-46、el5最后,查看Xlib、h,Intrinsic、h 是否安装[root@numerca CentOS]# cd /usr/include/X11[root@numerca X11]# lsXlib、h,Intrinsic、h 存在则不需安装2)设置共享用户public (方便window 和linux 系统间复制文件,也可装个Ext2Fsd- 0、51、zip软件,详细见硬盘安装CentOS6、0)[root@numerca ~]# useradd public[root@numerca ~]# chmod777 /home/public[root@numerca ~]# smbpasswd2、0、a8-bin-i686-pc-linux-gnu、tar、gz、lib、tar、data、tar、Z 三个文件[root@numerca X11]# cd/home/public[root@numerca public]# tar2、0、a8-bin-i686-pc-linux-gnu、tar、gz[root@numerca public]# mv grads-2、0、a8 /usr/local/[root@numerca public]# mv lib、tar data、tar、Z /usr/local/grads-2、0、a8[root@numerca public]# mv /usr/local/grads-2、0、a8 /usr/local/grads(更名)[root@numerca public]# cd /usr/local/grads[root@numerca grads]# mkdir dat[root@numerca grads]# gunzip data、tar、Z[root@numerca grads]# tarC 、/dat[root@numerca grads]# tar901[1]、tar、gz、pgi_9、0-1_linux32、tar、bz2 以及license、dat[root@numerca ~]# cd/home/public[root@numerca public]# tar901[1]、tar、gz[root@numerca public]# tar1_linux32、tar、bz2[root@numerca public]# 、/installDo you accept these terms?[accept,decline]accept1、Single system install2、 Network installPlease choose install option(1-2):1sea121 整理于xx 年4 月,如有疑问,请发E-mail 至sea121@126ZZZ。
WRF 模式运⾏行⼿手册⼆二○⼀一○年⼋八⽉月⼆二⼗十四⽇日⽬目 录第⼀一部分 WRF模式介绍3第⼆二部分模式运⾏行环境搭建31、所需的各种组件32、Linux操作系统(略)43、安装PGI44、安装netcdf55、安装ncl6第三部分模式的编译安装71、编译安装WRF模式主体72、编译WPS83、安装WRFDA94、安装RIP410第四部分模式的运⾏行11⼀一、运⾏行WPS,进⾏行数据前处理11⼆二、运⾏行WRF 模式主体13附录1 WRF模式参数配置说明15附录2 Linux/UNIX常⽤用命令速查⼿手册31附录3 ⽹网络资源40第⼀一部分 WRF模式介绍WRF(Weather Research Forecast)模式系统是由许多美国研究部门及⼤大学的科学家共同参与进⾏行开发研究的新⼀一代中尺度预报模式和同化系统。
WRF模式系统的开发计划是在1997年由NCAR中⼩小尺度⽓气象处、NCEP的环境模拟中⼼心、FSL的预报研究处和奥克拉荷马⼤大学的风暴分析预报中⼼心四部门联合发起建⽴立的,并由国家⾃自然科学基⾦金和NOAA共同⽀支持。
现在,这项计划,得到了许多其他研究部门及⼤大学的科学家共同参与进⾏行开发研究。
WRF模式系统具有可移植、易维护、可扩充、⾼高效率、⽅方便的等诸多特性,将为新的科研成果运⽤用于业务预报模式更为便捷,并使得科技⼈人员在⼤大学、科研单位及业务部门之间的交流变得更加容易。
交流变得更加容易。
WRF模式系统将成为改进从云尺度到天⽓气尺度等不同尺度重要天⽓气特征预报精度的⼯工具。
重点考虑1-10公⾥里的⽔水平⽹网格。
模式将结合先进的数值⽅方法和资料同化技术,采⽤用经过改进的物理过程⽅方案,同时具有多重嵌套及易于定位于不同地理位置的能⼒力。
它将很好的适应从理想化的研究到业务预报等应⽤用的需要,并具有便于进⼀一步加强完善的灵活性。
第⼆二部分模式运⾏行环境搭建1、所需的各种组件:(1)⼀一般的32位或64位PC均可,当然也可以是集群或⾼高性能计算机(2)⼀一般的Linux操作系统或类Unix操作系统(3)基本的编译环境,例如gcc 、perl、 BourneShell、 CShell、make、m4、sed、awk等等以及相应的库(4)Fortran编译器,⼀一般⽤用PGI或Intel的(5) NetCDF (Because most of the WRF post-processing packages assume that the data from the WRF model, the WPS package, or the WRF-Var program is using the netCDF libraries)(6) 如果是要跑并⾏行的,⼀一般就可以装mpich或openmpi(7)后处理⼀一般可以使⽤用GrADS 、NCL 、RIP4、Vis5D(8) ⼀一般安装完上述软件后都要把相对的可执⾏行程序的路径设到环境变量中。
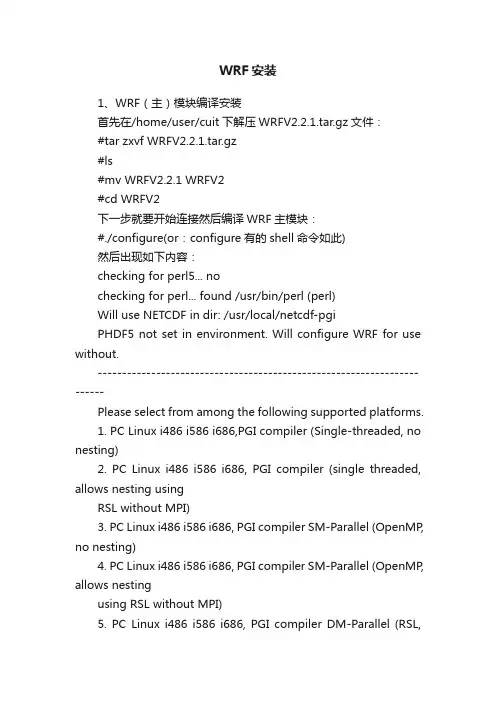
WRF安装1、WRF(主)模块编译安装首先在/home/user/cuit下解压WRFV2.2.1.tar.gz文件:#tar zxvf WRFV2.2.1.tar.gz#ls#mv WRFV2.2.1 WRFV2#cd WRFV2下一步就要开始连接然后编译WRF主模块:#./configure(or:configure有的shell命令如此)然后出现如下内容:checking for perl5... nochecking for perl... found /usr/bin/perl (perl)Will use NETCDF in dir: /usr/local/netcdf-pgiPHDF5 not set in environment. Will configure WRF for use without.------------------------------------------------------------------------Please select from among the following supported platforms.1. PC Linux i486 i586 i686,PGI compiler (Single-threaded, no nesting)2. PC Linux i486 i586 i686, PGI compiler (single threaded, allows nesting usingRSL without MPI)3. PC Linux i486 i586 i686, PGI compiler SM-Parallel (OpenMP, no nesting)4. PC Linux i486 i586 i686, PGI compiler SM-Parallel (OpenMP, allows nestingusing RSL without MPI)5. PC Linux i486 i586 i686, PGI compiler DM-Parallel (RSL,MPICH, Allowsnesting)6. PC Linux i486 i586 i686, PGI compiler DM-Parallel (RSL_LITE, MPICH, Allowsnesting)7. Intel xeon i686 ia32 Xeon Linux, ifort compiler (single-threaded, nonesting)8. Intel xeon i686 ia32 Xeon Linux, ifort compiler (single threaded, allowsnesting using RSL without MPI)9. Intel xeon i686 ia32 Xeon Linux, ifort compiler (OpenMP)10. Intel xeon i686 ia32 Xeon Linux, ifort compiler SM-Parallel (OpenMP, allowsnesting using RSL without MPI)11. Intel xeon i686 ia32 Xeon Linux, ifort+icc compiler DM-Parallel (RSL,MPICH,allows nesting)12. Intel xeon i686 ia32 Xeon Linux, ifort+gcc compiler DM-Parallel (RSL,MPICH,allows nesting)13. PC Linux i486 i586 i686, PGI compiler, ESMF (Single-threaded, ESMFcoupling, no nesting)Enter selection[1-13]我们选择2,使用单机,允许嵌套,但不并行运算:Enter selection [1-13] : 2----------------------------------------------------------Configuration successful. To build the WRF, type: compile----------------------------------------------------------#./compile 编译安装开始Usage:compile wrf compile wrf in run dir (Note, noreal.exe, ndown.exe or ideal.exe generated)test cases (see README_test_cases for details):compile em_b_wavecompile em_grav2d_xcompile em_hill2d_xcompile em_quarter_sscompile em_realcompile em_squall2d_xcompile em_squall2d_ycompile –h help message我们选择real模拟,则输入#./compile em_real >& compile.log接下来就等待主模块的编译安装如果编译安装成功,在/home/user/WRFV2/run路径下生成real.exe和wrf.exe可执行文件,在终端上显示为蓝色的即可(红色表示没有安装成功,需重新编译)。
摘要:本文档简要介绍在曙光HPC集群上部署WRF/ARPS气象模式时软件环境的准备及模式安装的方法步骤。
1 曙光集群基础软件环境1.1 操作系统所有节点统一安装Red Hat Enterprise Linux Server release 6.2 64位操作系统1.2 编译器要求安装GNU、Intel、PGI三套编译器。
默认情况下,推荐使用Intel编译器,运行效率较高。
1.2.1 GNU编译器备注:GNU编译器为Red Hat Linux系统自带。
1.2.2 Intel编译器Intel编译器环境变量脚本:/public/software/profile.d/intel-env.sh1.2.3 PGI编译器PGI编译器环境变量脚本:/public/software/profile.d/pgi-env.sh1.3 MPI并行环境1.3.1 mvapich2MVAPICH2是基于MPICH2的一个MPI拓展实现,提供了对IB,iWARP,RcCE,PSM,uDAPL等新型高性能通信设备和协议的支持,同时也支持TCP/IP协议和共享内存,还支持Nvidia GPU并行任务。
MVAPICH2支持的通信接口(10种)如下图所示:MVAPICH2由美国俄亥俄大学开发,最新版本已到MVAPICH2 1.9+,基于MPICH2-1.5+开发,支持MPI-1和MPI2.2标准,并已初步支持MPI-3标准。
官方网站为:/overview/mvapich2/。
1.3.1.1 Intel编译器版本(默认MPI)版本:mvapich2-1.8安装路径:/public/software/mpi/mvapich2-18-intel环境变量脚本:/public/software/profile.d/mvapich2-intel-env.shMPI编译器:MPI运行方式:#mpirun –f hostfile –n 32 ./mpi_exec其中hostfile格式如下:node1:16node2:16从源码安装mvapich2方法:#tar zxvf mvapich2-1.8.tar.gz#cd mvapich2-1.8#./configure --prefix=/public/software/mpi/mvapich2-18-intel --with-device=ch3:nemesis:ib,tcp CC=icc CXX=icpc FC=ifort F77=ifort #make#make install1.3.1.2 GNU编译器版本版本:mvapich2-1.8安装路径:/public/software/mpi/mvapich2-18-gnu环境变量脚本:/public/software/profile.d/mvapich2-gnu-env.shMPI编译器:MPI运行方式:#mpirun –f hostfile –n 32 ./mpi_exec其中hostfile格式如下:node1:16node2:16从源码安装mvapich2方法:#tar zxvf mvapich2-1.8.tar.gz#cd mvapich2-1.8#./configure --prefix=/public/software/mpi/mvapich2-18-gnu --with-device=ch3:nemesis:ib,tcp CC=gcc CXX=g++ FC=gfortranF77=gfortran#make#make install1.3.2 OpenMPIOpenMPI是一个免费的、开源的MPI实现,兼容MPI-1和MPI-2标准。
WRF模式系统在PC机上的安装及运行李建华,崔宜少,张灿,单宝臣(威海市气象局,山东威海 264200)摘要:介绍了WRF模式的概况以及在PC机上运行该模式需要的硬件和软件环境,介绍了PGI编译器、netCDF库以及图形处理软件包的获得和安装方法;着重介绍了WRF模式在PC机上的安装和运行要点。
关键词:WRF模式; PGI编译器; Linux系统中图分类号:P456.7 文献标识码:B 文章编号:1005-0582(2006)-03-0008-03引言WRF (Weather Research and Forecast ) 模式是由美国研究部门及大学的科学家共同参与开发研究的新一代中尺度天气预报模式及同化系统。
WRF模式系统开发的目标是建立一个具有可移植、易维护、可扩充、高效率等诸多特性、用户界面友好的模式。
模式采用全可压、非静力方程和ArakawaC网格,以便在高分辨率模拟中提高计算精度,并提供了多种物理方案供选择。
模式主要包括WRFSI(WRF Standard Initialization)模块、 WRF处理模块和后处理绘图模块。
目前WRF模式已经在各国的气象研究部门得到广泛的试用,WRF模式的安装以及运行也得到越来越广泛得关注。
本文以WRF模块第二个版本为例,说明了WRF模式在PC机上的安装和运行要点。
1 在PC机上运行WRF所需的环境在PC机上运行WRF模式,除了对机器硬件配置有一定的要求外,还需要安装Linux操作系统,FORTRAN 编译器,netCDF库,以及相应的图形软件包。
下面对如何建立工作环境做简要介绍。
1.1 对机器的配置要求硬盘要求至少有大于10G的空间,如果需要安装GUI图形库,则显示器分辨率至少为1024*768,内存应该在128M以上。
1.2 FORTRAN 编译器的获取和安装WRF模式系统是采用Fortran 90、Fortran 77及c++编译语言进行编译与测试的,所以,运行WRF 必须先安装编译软件,目前运用的编译软件主要有PGI和INTEL。
W R F模式简易操作中文指南The pony was revised in January 2021WRF 模式操作指南The Institute of Atmospheric Physics, Chinese Academy of Sciences Northeast Institute of Geography and Agroecology, Chinese Academy of Sciences中国科学院大气物理研究所中国科学院东北地理与农业生态研究所二○一七年三月二十日目录1. WRF模式简介 (1)2. WRF模式的安装 (2)安装环境 (2)模式源程序 (2)NetCDF函数库的安装 (2)标准初始化(SI)的安装 (6)WRF模式的安装 (9)3. WRF模式与T213模式嵌套 (17)嵌套方案 (17)嵌套程序设计 (17)编译嵌套程序 (21)嵌套的实现 (22)4. WRF模式系统的运行 (29)理想大气方案 (29)真实大气方案 (32)5. WRF模式系统作业卡 (47)源程序 (47)真实大气方案 (48)6. 模式结果的显示处理 (61)Vis5D格式 (61)MICAPS格式 (62)GrADS格式 (65)附录1. WRF模式参数配置说明 (68)附录2. T213场库参数表 (78)WRF模式系统安装/调试技术报告1. WRF模式简介WRF(Weather Research Forecast)模式系统是由许多美国研究部门及大学的科学家共同参与进行开发研究的新一代中尺度预报模式和同化系统。
WRF模式系统的开发计划是在1997年由NCAR中小尺度气象处、NCEP的环境模拟中心、FSL的预报研究处和奥克拉荷马大学的风暴分析预报中心四部门联合发起建立的,并由国家自然科学基金和NOAA共同支持。
现在,这项计划,得到了许多其他研究部门及大学的科学家共同参与进行开发研究。
WRF安装运行入门指南WRF(Weather Research and Forecasting Model)是一种广泛用于天气和气候数值模拟的软件平台,它可以帮助使用者进行气象预报、气候研究以及其他相关领域的模拟和预测工作。
以下是WRF的安装和运行入门指南的详细步骤。
一、准备工作1.确保你的计算机系统满足WRF的硬件要求。
通常建议使用一台具有足够内存、硬盘空间和处理能力的计算机。
二、安装WRF和WPS1.打开终端窗口,并进入WRF的目录。
2. 运行"./configure"命令以配置WRF。
你可以选择不同的选项和设置根据你的需求。
运行"./configure -help"命令可以查看所有可用选项的详细说明。
4. 进入WPS的目录,并运行"./configure"命令以配置WPS。
三、准备WRF模拟运行所需的输入数据1. 打开WPS目录,并修改namelist.wps文件中的配置参数,以便指定你所需要的输入数据集(例如,地形数据、气象观测数据等)。
2. 运行"./geogrid.exe"命令以生成地理网格。
3. 运行"./ungrib.exe"命令以解压和转换气象观测数据。
4. 运行"./metgrid.exe"命令以进行水平插值,生成模型输入文件。
四、设置WRF模拟运行参数五、运行WRF模型1. 运行"./real.exe"命令进行模拟的初始化。
这个命令将使用插值过的输入数据集和你在namelist.input文件中设置的参数。
2. 运行"./wrf.exe"命令以开始模拟运行。
这个命令将生成WRF的输出文件,如预测的气象变量和诊断数据。
六、分析和可视化WRF模拟结果2.导入WRF模拟输出文件到你选择的分析工具中,并使用合适的命令和脚本对数据进行处理和绘图。
模式学习从LINUX安装开始——WRF入门中文教程1 CentOS 5 Linux安装图解CentOS即Community Enterprise Operating System。
CentOS的最新版本是CentOS5.2,是RHEL 5.2的再编译版本,于2008年6月26日发布,可以在网上/下载的安装光盘映像,大约3.4GB 左右。
图一 安装菜单及安装选项,按下回车键直接开始安装(这里可以选择文本界面和图形界面两种形式的安装,按ENTER键直接进行图形界面的安装,如果敲写linux text 再按ENTER则进行文本界面的安装,强烈建议直接回车安装) 图二 为安装进行初始化:加载必要的文件系统等图三 是否检测安装光盘,通常选择跳过(检测安装光盘需要花费大量时间,你也可以选择OK进行安装光盘的检测)图四 出现图形化安装界面,单击“Next”按钮,安装开始图五 选择安装的语言:简体中文图六 选择适当的键盘,按默认图七接着进入到磁盘分区设置界面,你可以为所需安装的CENTOS系统建了默认的磁盘分区,也可以手动进行磁盘分区;这里我使用手动分区,所以我选在【建立自定义的分区结构】,点击【下一步】进入具体的分区配置窗口;图八进入分区界面,当然这里的分区情况人人不同,找到你安装linux得空闲空间,这里的大小仅作为示例,为安装模式使用,空闲空间一般要有50G左右。
图九 创建swap交换分区,点击“新建”,出现上图,大小(MB)的设置按实际情况而定,一般机器内存大于1G的,建议设为2048M B图十 创建根挂载点,把剩余的空闲空间选中,然后点击“编辑”,出现上图,大小为你剩下的所有空闲空间的大小图十一 创建好的分区装好的系统,如windowsXP),在前面的小框打钩代表默认启动的系统,然后下一步windows下,开始菜单->附件->命令提示符->ipconfig,得到你自己的IP地址、子网掩码以及网关信息。
WRF_V3.4环境搭建及安装.bashrc (单独用户) 单用户全局变量gedit .bashrc(linux系统的桌面命令框) 或者vi .bashrc(纯命令框)gedit /etc/sysconfig/selinux设置为:SELINUX=disable或命令setenforce 0注意:安装的编译器主要为intel编译器,所有的库文件基本都是最新、基于intel编译器的。
(基于pgi编译器的安装原理和intel编译器的基本一样)黑体字为主要的命令或者环境变量步骤一:Intel编译器用新版本:Intel® C++ Composer 和Intel® Fortran Composer/en-us/articles/non-commercial-software-download/./install.sh环境变量设置(下同):gedit .bashrc 或者vi .bashrcexport INTEL_LICENSE_FILE=/opt/intel/licensesexport INTEL_COMPILER_TOPDIR="/opt/intel/composerxe-2011.3.174". $INTEL_COMPILER_TOPDIR/bin/ifortvars.sh intel64. $INTEL_COMPILER_TOPDIR/bin/iccvars.sh intel64export LD_LIBRARY_PATH="/opt/intel/lib/intel64:${LD_LIBRARY_PAT H}"export MANPATH=$MANPATH:/opt/intel/man/en_US/man1:/opt/intel/man/en_ US/man3注意,上面的语句中点号之后有空格。
然后重新登录或执行下面的命令source .bashrc或source /opt/intel/bin/iccvars.sh intel64source /opt/intel/bin/ifortvars.sh intel64验证安装:ifort –version步骤二:pgi安装(可不安装)安装:./installDo you accept these terms?[accept,decline] accept1,single system install 2,Network install 1Install the ACML?[y/n] nInstallation directory?[/opt/pgi] /opt/pgiDo you wish to install MPICH1?[y/n] nDo you want the files in the install to be read-only?[y/n] n环境变量设置:gedit .bashrc 或者vi .bashrcexport PATH=/opt/pgi/linux86-64/10.1/bin:$PATHexport MANPATH=$MANPATH:/opt/pgi/linux86-64/10.1/manexport LM_LICENSE_FILE=/opt/pgi/license.datexport PGI=/opt/pgiexport LD_LIBRARY_PATH="$PGI/linux86-64/10.1/lib:${LD_LIBRARY_PAT H}"步骤三:安装mpich2./configure --with-device=ch_p4 --prefix=/opt/mpichmakemake install设置环境变量:export MPICH_ROOT=/opt/mpichexport PATH=$PATH:$MPICH_ROOT/binexport LD_LIBRARY_PATH="$MPICH_ROOT/lib:${LD_LIBRARY_PATH}" MANPATH=$MANPATH:$MPICH_ROOT/man测试MPICH:mpif77 -o test test.fmpif90 -o test test.f90mpirun -np 2 pi3步骤四:安装jasperhttp://www.ece.uvic.ca/~mdadams/jasper/./configure --prefix=/opt/jaspermakemake install环境变量设置:export JASPER=/opt/jasperexport JASPERLIB=/opt/jasper/libexport JASPERINC=/opt/jasper/include步骤五:安装grads解压放入:/opt/grads即可环境变量设置:GRADS=/opt/gradsexport GRADSexport PATH=$GRADS/bin:$PATHexport GADDIR=$GRADS/dataexport GASCRP=$GRADS/lib步骤六:jpeg 安装jpeg-8c安装:./configure --prefix=/opt/jpegCFLAGS="-O3 -fPIC" ./configure #如果64位处理器需要CFLAGS="-O3 -fPIC"makemake install步骤七:libpng 安装./configure --prefix=/opt/libpngcp scripts/makefile.linux makefile修改makefile的安装路径makemake install步骤八:perl-5安装(系统自带,可不安装)./configure.gnu --prefix=/opt/perl --with -fPICmakemake install步骤九:安装zlib/ftp:///lib-external/zlib/./configure --prefix=/opt/zlibCFLAGS="-O3 -fPIC" ./configure --prefix=/opt/zlib//使用64位元的方法进行编译makemake installlib/libz.a: could not read symbols: Bad value一般是64 位电脑才会出现步骤十:安装szip./configure --prefix=/opt/szipmake >make.log &make check >check.log &make install步骤十一:安装hdf5./configure --prefix=/opt/hdf5 --with-szlib=/opt/szipmake >make.log &make check >check.log &(20 分钟)make install >install.log &步骤十二:安装netcdf/en-us/articles/performance-tools-for-software-developers-bui lding-netcdf-with-the-intel-compilers/#2/software/netcdf/安装步骤:./configure --prefix=/opt/netcdf_intel --with-zlib=/opt/zlib --with-hdf5=/opt/hdf 5 --with-szlib=/opt/szip--disable-netcdf-4 --disable-dap-remote-testsmakemake checkmake install环境变量设置:export FC=ifortexport SFC=ifortexport CC=iccexport SCC=iccexport CXX=icpcexport CPP='icc -E'export CXXCPP='icpc -E'export NETCDF=/opt/netcdf_intelexport NETCDF_LIB=$NETCDF/libexport NETCDF_INC=$NETCDF/includeexport PATH=$PATH:$NETCDF/binexport MANPATH=$MANPATH:$NETCDF/share/man/man1:$NETCDF/shar e/man/man3export LD_LIBRARY_PATH="/opt/netcdf_intel/lib/:${LD_LIBRARY_PATH} "试验netcdf安装是否成功ncdump NetCDF安装成功!步骤十三:Ncview安装./configure --prefix=/opt/ncview --x-libraries=/usr/lib64 --with-netcdf_incdir=/o pt/netcdf_intel/include --with-netcdf_libdir=/opt/netcdf_intel/lib --enable-netcdf -4makemake install步骤十四:ncl_ncarg 安装在安装ncl之前,需要装四个外部库(yum安装):先安装openssl,再安装libdap,然后是libnc-dap,最后是compat-libf2c环境变量设置:export NCARG_ROOT=/opt/ncl_ncarg_intelexport NCARG_LIB=$NCARG_ROOT/libexport NCARG_INC=$NCARG_ROOT/includeexport PATH=$PATH:$NCARG_ROOT/binexport NCL=/opt/ncl_ncarg_intelexport NCL_LIB=$NCL/libexport NCL_INC=$NCL/includeexport LIB_NCL=$NCL/libexport INC_NCL=$NCL/include安装步骤:cp ./config/LINUX.64.INTEL ./config/LINUXgedit ./config/LINUX 修改define ArchRecLibSearch -L/lib -L/usr/lib -L/usr/lib64 -L/opt/hdf5/lib -L/opt/ szip/lib -L/opt/zlib/lib -L/opt/X11R6/libdefine ArchRecIncSearch -I/usr/include -I/usr/include/X11 -I/opt/hdf5/include -I/opt/szip/include -I/opt/zlib/include -I/opt/X11R6/includegedit ./config/Project 修改\define HDFlib -lmfhdf -ldf -ljpeg -lz -lsz./Configure 安装路径:/opt/ncl_ncarg_intelmake Everything >& make-outputtail -f make-output测试:ncargex cpex08ctrans -d X11 cpex08.ncgmncl如进入程序就说明已经成功如果编译器为Pgi则需修改:$ cp ./config/LINUX.64.PGI ./config/LINUX步骤十五:安装WRFV3下载最新版:/wrf/users/download/get_sources.html检查环境变量是否有如下设置:ulimit -s unlimitedexport WRFIO_NCD_LARGE_FILE_SUPPORT=1export NETCDF=/opt/netcdf4.1export JASPERLIB=/opt/jasper/libexport JASPERINC=/opt/jasper/includeexport LD_LIBRARY_PATH="/opt/intel/lib/:${LD_LIBRARY_PATH}" export INCLUDE="/opt/intel/include/:${INCLUDE}"export WRFIO_NCD_LARGE_FILE_SUPPORT=1export DM_FC=mpiifortexport DM_CC=mpiicc./compile em_real(安装时间大概15分钟左右)如果/WRFV3/test/em_real里有ndown.exe、real.exe、wrf.exe说明WRF安装成功步骤十六:安装WPS安装WPS前要先安装三个外部库,在以后识别GRIB2格式的数据时会用到:jasper-1.701.0.tar.gz libpng-1.2.12.tar.gz zlib-1.2.3.tar.gz常见问题:1 jasper、zlib和png的安装位置最好相同,可以在各自的configure时通过--prefix 制定,这样会方便指定COMPRESSION_LIBS和COMPRESSION_INC(不相同需要详细指定)。
WRF和WRFDA安装过程一、WRF安装设置环境变量export FC=ifortexport SFC=ifortexport CC=iccexport SCC=iccexport CXX=icpcexport CPP='icc -E'export CXXCPP='icpc -E'注:需要安装netcdf,对于4.0以上版本,需要先安装hdf51.安装HDF库configure --prefix=/path/to/hdf CC=icc FC=ifort --enable-fortran --enable-cxx2.安装netcdf首先安装netcdf 的C库(./configure --prefix=/SWFIS/zhangxz/netcdf CC=icc FC=ifort CPPFLAGS=-I/SWFIS/zhangxz/hdf/include LDFLAGS=-L/SWFIS/zhangxz/hdf/lib --enable-hdf4 LIBS=-L/SWFIS/zhangxz/hdf)为了安装支持hdf4./configure --prefix=/SWFIS/zhangxz/netcdf CC=icc FC=ifort CPPFLAGS=-I/SWFIS/zhangxz/hdf/include LDFLAGS=-L/SWFIS/zhangxz/hdf/lib 正常安装方法如果编译出现错误,make clean也是解决方法之一安装netcdf_fortran安装本fortran时,一定要,先设置环境变量###############NETCDF############export NETCDF=/SWFIS/HOME/tswfis/wrflib/netcdfexport NETCDF_LIB=$NETCDF/libexport NETCDF_INC=$NETCDF/includeexport LD_LIBRARY_PATH=${NETCDF_LIB}:${LD_LIBRARY_PATH}configure --prefix=/SWFIS/zhangxz/netcdf CPPFLAGS=-I/pathtonetcdf/include LDFLAGS=-L/pathtonetcdf/lib二、WPS安装注意:geog文件需要zlib,jasper,png如果需要处理grib2数据1.安装zlib安装libpng前一定要先安装zlibzlib安装中可能会遇到无法复制到include中因此编译完成后需要手动安装libz.a和.h2.安装jasperconfigure --prefixmake && make install##########################WRF JASPER########################export JASPER=/SWFIS/WRF_AUX/jasperexport JASPERLIB=/SWFIS/WRF_AUX/jasper/libexport JASPERINC=/SWFIS/WRF_AUX/jasper/includeexport LD_LIBRARY_PATH="${JASPERLIB}:${LD_LIBRARY_PATH}"3.安装png下载了高版本的1.6.21configure --prefixmake && make install三、WRFDA安装export BUFR=1export WRF_DA_CORE=1./configure wrfda选择dmpar./compile all_wrfvar。
WRF和WRFDA安装过程
一、WRF安装
设置环境变量
export FC=ifort
export SFC=ifort
export CC=icc
export SCC=icc
export CXX=icpc
export CPP='icc -E'
export CXXCPP='icpc -E'
注:需要安装netcdf,对于4.0以上版本,需要先安装hdf5
1.安装HDF库
configure --prefix=/path/to/hdf CC=icc FC=ifort --enable-fortran --enable-cxx
2.安装netcdf
首先安装netcdf 的C库
(./configure --prefix=/SWFIS/zhangxz/netcdf CC=icc FC=ifort CPPFLAGS=-I/SWFIS/zhangxz/hdf/include LDFLAGS=-L/SWFIS/zhangxz/hdf/lib --enable-hdf4 LIBS=-L/SWFIS/zhangxz/hdf)为了安装支持hdf4
./configure --prefix=/SWFIS/zhangxz/netcdf CC=icc FC=ifort CPPFLAGS=-I/SWFIS/zhangxz/hdf/include LDFLAGS=-L/SWFIS/zhangxz/hdf/lib 正常安装方法
如果编译出现错误,make clean也是解决方法之一
安装netcdf_fortran
安装本fortran时,一定要,先设置环境变量
###############NETCDF############
export NETCDF=/SWFIS/HOME/tswfis/wrflib/netcdf
export NETCDF_LIB=$NETCDF/lib
export NETCDF_INC=$NETCDF/include
export LD_LIBRARY_PATH=${NETCDF_LIB}:${LD_LIBRARY_PATH}
configure --prefix=/SWFIS/zhangxz/netcdf CPPFLAGS=-I/pathtonetcdf/include LDFLAGS=-L/pathtonetcdf/lib
二、WPS安装
注意:geog文件
需要zlib,jasper,png如果需要处理grib2数据
1.安装zlib
安装libpng前一定要先安装zlib
zlib安装中可能会遇到无法复制到include中
因此编译完成后需要手动安装libz.a和.h
2.安装jasper
configure --prefix
make && make install
##########################WRF JASPER########################
export JASPER=/SWFIS/WRF_AUX/jasper
export JASPERLIB=/SWFIS/WRF_AUX/jasper/lib
export JASPERINC=/SWFIS/WRF_AUX/jasper/include
export LD_LIBRARY_PATH="${JASPERLIB}:${LD_LIBRARY_PATH}"
3.安装png
下载了高版本的1.6.21
configure --prefix
make && make install
三、WRFDA安装
export BUFR=1
export WRF_DA_CORE=1
./configure wrfda
选择dmpar
./compile all_wrfvar。