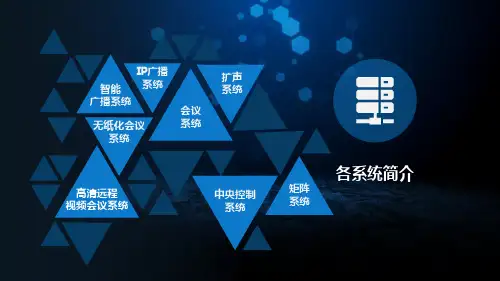
YAMMA-音视频解决方案 PPT课件
- 格式:pptx
- 大小:19.62 MB
- 文档页数:54
音视频解决方案引言概述:随着互联网的迅猛发展,音视频应用在我们的生活中扮演着越来越重要的角色。
无论是在线教育、视频会议还是直播平台,都需要稳定高效的音视频解决方案来保证用户体验。
本文将介绍一种完整的音视频解决方案,包括音频处理、视频处理、实时传输和播放等方面的内容。
一、音频处理1.1 音频编解码算法音频编解码算法是音频处理的核心,它负责将原始音频信号转换为数字信号,并进行压缩和解压缩。
常用的音频编解码算法有AAC、MP3、Opus等,它们在音质和压缩比方面有所不同,选择合适的算法可以根据具体应用场景来决定。
1.2 音频增强技术音频增强技术可以提高音频的质量和清晰度,使用户在听音乐、语音通话等场景中获得更好的体验。
常用的音频增强技术包括回声消除、噪声抑制、自适应增益控制等,它们可以有效地改善音频信号的可听性。
1.3 音频混音与分离音频混音与分离是指将多个音频信号混合在一起或将混合的音频信号分离出来。
在音乐制作、电视广播等领域中,音频混音与分离技术起到了重要的作用。
通过合理的混音与分离处理,可以实现不同音频信号的平衡与协调。
二、视频处理2.1 视频编解码算法视频编解码算法是视频处理的核心,它负责将原始视频信号转换为数字信号,并进行压缩和解压缩。
常用的视频编解码算法有H.264、H.265、VP9等,它们在视频质量和压缩比方面有所不同,选择合适的算法可以根据具体应用场景来决定。
2.2 视频增强技术视频增强技术可以提高视频的清晰度和稳定性,使用户在观看视频时获得更好的体验。
常用的视频增强技术包括去噪、去抖动、图像增强等,它们可以有效地改善视频信号的质量。
2.3 视频编码参数调优视频编码参数调优是指根据具体应用场景对视频编码参数进行优化调整,以提高视频的压缩效率和质量。
通过合理的参数设置,可以在保证视频质量的前提下减小视频文件的大小,提高传输效率。
三、实时传输3.1 媒体传输协议媒体传输协议是指在音视频传输过程中,用于控制数据传输和保证数据完整性的协议。
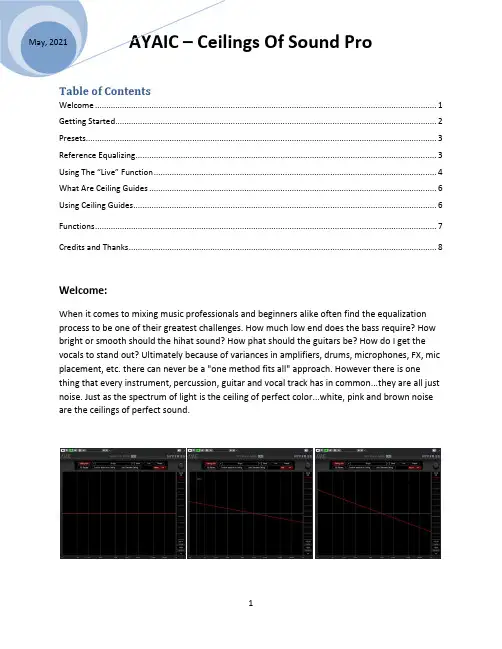
Welcome (1)Getting Started (2)Presets (3)Reference Equalizing (3)Using The “Live” Function (4)What Are Ceiling Guides (6)Using Ceiling Guides (6)Functions (7)Credits and Thanks (8)Welcome:When it comes to mixing music professionals and beginners alike often find the equalization process to be one of their greatest challenges. How much low end does the bass require? How bright or smooth should the hihat sound? How phat should the guitars be? How do I get the vocals to stand out? Ultimately because of variances in amplifiers, drums, microphones, FX, mic placement, etc. there can never be a "one method fits all" approach. However there is one thing that every instrument, percussion, guitar and vocal track has in common...they are all just noise. Just as the spectrum of light is the ceiling of perfect color...white, pink and brown noise are the ceilings of perfect sound.multiple instances of noise ceilings with any multiple of +/-1.5db tilt you can create the ceiling shape you need to equalize your source material perfectly. In other words you can now simply "EQ along the lines". This is what Ceilings Of Sound is all about. Ceilings Of Sound Pro takes it to the extreme by coupling 15 ceiling bands with the most powerful EQ developed…the 50-band Linear Graphic EQ. Traditionally these types of EQs, although high in detail and musicality, are very difficult to work with but by driving them with our ceilings and a “conform” feature they are now easy, fast and fun to use. If the need should arise where cpu load is an issue we have included a 31-band mode that still gives you detailed EQ power but saves cpu usage.Getting Started: - creating a basic ceilingLoad Ceilings Of Sound Pro into your tracks insert slot. Play your sound source. After the spectrum settles click the “Ceiling Generator” and the ceiling bands will automatically create your ceiling. To adjust the ceiling simply click-n-drag the crossover points or click to select a crossover point then adjust it using its frequency & slope displays. Double-clicking on a crossover point deletes it while double-clicking anywhere on the ceiling creates one. To hear your adjustments click the “Conform spectrum to Ceiling” and the 31-band (default) will automatically adhere to your created ceiling shape. For more detail click the “ceiling edit” button to change to “EQ edit” mode, click the “31 band” button to change to 50-band mode then click “conform” once more. Since the ceiling sl opes are based on integers of noise you can experiment with wild and crazy shapes…no matter things will still remain musical. Ceilings Of Sound Pro allows you to sound-design like never before and sonically fit your tracks together with ease during mix-down. When your song is ready you can Master it with the confidence that your final work will sound great on any speaker you play it on.Crossover settings of 300hrz (low) & 4000hrz (high) are important to remember...”the lead vocal leads the track”. All humans produce sound using the same mechanics soalthough one voice may be full & rich while another bright & thin the overall ceiling will remain basically the same. Use the brown guide for the body of the vocal, follow white noise from 300hrz on downward and use the pink guide from 4000hrz on up. Rollofffrom 80hrz to 120hrz & 12khrz to 14KHrz depending on the singer. Now you’re g ood to go for POP vocals. Follow the pink guide at 5000hrz for a more R&B/JAZZ vocal sound.For ROCK vocals follow the -pink guide at 300hrz to get that rolled-off “in your face”vocal sound. Follow the brown guide all the way up to your rolloff point for backingvocals. Rolling off at 10khrz with 18db slope works great on most vocal styles.Ceilings Of Sound comes loaded with many professional presets to get you started. They are comprised in banks and cover everything from mixing to mastering. If you want to create a preset from a pre-existing sound source simply play the sound source you like and click “Auto Generate Ceiling” to create your preset. You may save any preset you create or alter into the “user” bank. The “user” bank is designed so that you have easy access to your presets for name changing, preset sharing, etc. “Open user presets folder” opens your user preset folder. To audition presets quickly or to change presets quickly during mix-down turn on “enable auto conform”…this automatically conforms the EQ whenever a new preset is selected. You will find a constant supply of presets from both professionals and users alike on the Downloads page of our website - You can also check out our Forum page for more preset tips or sign up to be a member for free to meet, interact with and follow other members of the Ceilings Of Sound community.Reference Equalizing:There are many great “EQ matching” plugins on the market today that can do a wonderful job at making to separate audio files sound very much alike. Unfortunately they are all plagued with one primary problem…subtle harmonic differences that make one element sound great can often be very detrimental to a similar sounding element. When used in mastering if one mix has a snare around 207hrz and another mix has the snare around265hrz things can begin to sound worse rather than better in that frequency range as matching is applied. This is never an issue for Ceilings Of Sound Pro because we are conforming to sound ceilings instead of matching to a frequency capture and since we are dealing with noise slopes the element or full mix you are conforming will always remain musically intact. Simply import the WAV/AIFF file that you like, load Ceilings Of Sound Pro into an insert slot, play/loop the WAV/AIFF file and use the “Auto Generate Ceiling” to create your ceiling shape. When you are finished Save your preset. Then insert Ceilings Of Sound Pro into the insert slot of the track you will be EQing, load your preset, play and allow the spectrum to settle then click “Conform spectrum to Ceiling”. You will find that your sound has conformed without adding any unmusical or destructive artifacts. If you are M/S (mid/side) mastering simply insert an M/S encoder in the insert slot above Ceilings Of Sound Pro and solo the mid material. Once you have created your Mid ceiling preset, solo the side material and create your Side ceiling preset. Now you can EQ your Mid & Side materialUsing The “Live” Function:More and more live-sound mixing is being done on digital mixers these days. Some of these mixers are capable of running VST/AAX plugins. If not the FOH engineer is probably using an outboard plugin processing unit that brings the power of studio plugins to his real-world mixing station. Ceilings Of Sound Pro is designed for that as well. Simply select the “Live” function and the plugin becomes a realtime spectrum analyzer with all the EQ power of the ceilings. You can right-click anywhere on the spectrum window to bring up the Spectrum smoothing and Live Analyzer Average options to set the speed and feel of the analyzer window to your taste. - You can also use Spectrum smoothing as a tool when conforming the EQ. Without changing your ceiling shape experiment with different smoothing integers as you conform the EQ.Live mode)**The ceiling guides in COS Pro & COS Xtended are there to help you equalize your material easily, efficiently and with the utmost confidence. Noise is perfect sound and perfect sound is what the sonic industry is forever chasing whether it is designing recording studios, manufacturing professional sp eakers or mixing and mastering audio…it’s all about white, pink and brown noise.Let’s talk a little bit more about noise. Although you will often hear the audio industry refer to white, pink and brown noise the truth is that there are many colors of noise. Just like visual colors there are primary and secondary colors of noise.Primary noise colors such as white, pink and brown are noise that is tilted by weights of 3db per octave. In other words all numbers divisible by 3.Secondary noise colors are the 1.5db per octave weights in between…1.5, 4.5, 7.5, etc.*Noise weights can be positive or negative integers and still remain perfectly musical. Generally speaking most overall frequency balances, the relationship between high and low content, follow a primary noise color with sections of frequencies following secondary noise colors. However this is not always the case. Warm RnB vocals may follow white noise up to 300hrz, brown noise from 300hrz to 4khrz or 5khrz and pink noise from 4-5khrz on up…of course high and low roll-offs are used as well. Bright Rock vocals may follow inverted pink noise up to 300-500hrz then pink noise to 2.4khrz then brown noise from 2.4khrz and above…again high/low roll-offs are used. As you can see some elements will follow a combination of noise colors. The key is to experiment with different noise colors and combinations. Keep in mind that the steeper the “tilt” the less high end is present and the more an element will “move back” in a mix.Using Ceiling GuidesSelect a ceiling guide then click-n-drag or type in a frequency to move it into position. Adjust your ceiling until it aligns along the guide slope. You may find that you use different guides for different sections of the frequency spectrum. These guides allow you to use COS Xtended in any environment so no matter if you have ear fatigue after a long day, are fighting a flu but on a deadline, working on an airplane through earbuds or mixing in a hotel room during a tour you always will be confident that your frequency balances are right where they should be and none of your hard work is ever in vain.Plugin Functions:CREDITS and THANKS Produced by Ayaic International LLCDSPPulsar Digital SARLSoftwareRonald FroeseGUI DesignMalik Trey – OoecubeRonald FroesePulsar Digital SARLPreset DesignRonald FroeseAYAICWARE。
音视频解决方案一、引言音视频解决方案是指通过技术手段解决音视频传输、处理和展示等方面的问题。
随着科技的发展,音视频在各个领域得到广泛应用,如教育、娱乐、会议等。
为了提供高质量的音视频体验,需要设计和实施一套完整的音视频解决方案。
本文将详细介绍音视频解决方案的标准格式。
二、背景在介绍音视频解决方案的标准格式之前,我们需要了解以下背景信息。
1. 音视频传输:音视频传输是指将音频和视频信号从源设备传输到目标设备的过程。
传输过程中需要考虑信号的稳定性、延迟和带宽等因素。
2. 音视频处理:音视频处理是指对音频和视频信号进行编码、解码、压缩、解压缩、混音、分割等处理操作,以满足不同应用场景的需求。
3. 音视频展示:音视频展示是指将处理后的音频和视频信号通过显示设备和扬声器等设备展示给用户的过程。
展示过程中需要考虑画面的清晰度、音频的音质等因素。
三、标准格式音视频解决方案的标准格式包括以下几个部份。
1. 需求分析:需求分析是指对音视频解决方案的需求进行详细的分析和梳理。
包括应用场景、用户需求、技术要求等方面的内容。
例如,教育领域需要实现在线教学,要求音视频传输稳定、延迟低,画面清晰,音质优良等。
2. 技术选型:技术选型是指根据需求分析的结果,选择适合的技术方案。
包括音视频编解码器、传输协议、网络设备、显示设备等方面的选择。
例如,选择H.264编码器、RTP传输协议、高带宽网络设备、高清显示设备等。
3. 系统设计:系统设计是指根据需求和技术选型的结果,设计音视频解决方案的整体架构和模块划分。
包括音视频采集、编码、传输、解码、展示等模块的设计。
例如,采用摄像头进行音视频采集,使用编码器将音视频信号进行压缩,通过网络传输到目标设备,再通过解码器解码并展示给用户。
4. 实施和测试:实施和测试是指根据系统设计的结果,进行方案的实施和测试工作。
包括设备的安装、配置、调试和性能测试等方面的工作。
例如,安装摄像头、编码器、解码器等设备,配置网络参数,进行音视频传输和展示的测试。

音视频解决方案引言概述:随着互联网的迅速发展,音视频技术在各个领域的应用越来越广泛。
从在线教育到远程会议,从音乐娱乐到智能家居,音视频解决方案已成为现代社会不可或者缺的一部份。
本文将探讨音视频解决方案的重要性,并介绍其中的五个关键部份。
一、音视频编解码技术1.1 压缩算法:音视频数据通常庞大且传输速度要求高,压缩算法能够将数据压缩至更小的体积,提高传输效率。
常见的压缩算法有H.264、H.265、MPEG-4等。
1.2 编码器:编码器是将音视频数据转换为压缩格式的关键组件。
它能够将原始数据进行压缩编码,并生成可传输或者存储的文件。
常用的编码器有FFmpeg、x264等。
1.3 解码器:解码器是将压缩格式的音视频数据还原为原始数据的组件。
它能够解码接收到的音视频文件,并将其还原为可播放的格式。
常见的解码器有VLC、GStreamer等。
二、音视频传输技术2.1 流媒体传输:流媒体传输技术能够将音视频数据以流的形式传输,实现实时播放。
常用的流媒体传输协议有RTMP、HLS、RTSP等。
2.2 网络传输协议:音视频数据的传输需要依赖网络协议,如TCP、UDP等。
TCP协议适合于对数据可靠性要求较高的场景,而UDP协议适合于对实时性要求较高的场景。
2.3 带宽管理:音视频数据传输对网络带宽要求较高,带宽管理技术能够优化带宽使用,提高音视频传输的稳定性和质量。
常见的带宽管理技术有QoS、CDN 等。
三、音视频处理技术3.1 视频处理:视频处理技术能够对视频进行编辑、剪辑、合成等操作,提高视频的质量和欣赏性。
常用的视频处理软件有Adobe Premiere、Final Cut Pro等。
3.2 音频处理:音频处理技术能够对音频进行降噪、混音、均衡等处理,提高音频的清晰度和音质。
常见的音频处理软件有Adobe Audition、Audacity等。
3.3 实时处理:实时处理技术能够对音视频数据进行实时的采集、编解码、传输和处理,满足实时通信和互动的需求。

音视频解决方案一、背景介绍随着互联网技术的飞速发展,音视频应用在各个领域中的重要性日益凸显。
无论是在线教育、远程会议、视频直播还是在线游戏,都需要稳定高效的音视频解决方案来保障用户体验。
本文将详细介绍一种完善的音视频解决方案,以满足不同领域的需求。
二、解决方案概述本音视频解决方案基于先进的网络传输技术和音视频编解码算法,旨在提供高质量、低延迟的音视频传输和处理能力。
该解决方案包括以下几个关键模块:1. 音视频采集与编码模块:通过专业的音视频采集设备,如摄像头、麦克风等,获取音视频信号,并通过高效的编码算法将其转换为数字信号。
2. 网络传输模块:采用先进的传输协议,如UDP、TCP等,保证音视频数据的快速、稳定传输。
同时,结合网络拓扑和带宽状况进行智能路由选择,以提供最佳的传输效果。
3. 音视频解码与播放模块:通过高效的解码算法将接收到的音视频数据转换为可播放的格式,并通过音频设备和视频显示设备进行播放。
4. 云端服务器模块:提供云端音视频处理能力,包括音视频转码、混流、录制等功能。
通过云端服务器的支持,可以实现更加灵便、高效的音视频处理。
三、解决方案特点本音视频解决方案具有以下几个特点,以满足不同领域的需求:1. 高质量音视频传输:采用先进的音视频编解码算法,保证音视频传输的高清晰度和低失真。
2. 低延迟传输:通过优化传输协议和智能路由选择,实现音视频数据的快速传输,降低传输延迟。
3. 稳定可靠传输:采用网络拓扑优化和错误纠正技术,保证音视频数据传输的稳定性和可靠性。
4. 灵便可扩展:支持多种音视频设备的接入,如摄像头、麦克风等,同时支持多种音视频格式的编解码。
5. 云端处理能力:通过云端服务器的支持,实现音视频的转码、混流、录制等功能,提供更加灵便、高效的音视频处理能力。
四、应用场景本音视频解决方案适合于各种领域的音视频应用,包括但不限于以下几个方面:1. 在线教育:通过音视频解决方案,实现教师和学生之间的实时互动,提供高清晰度、低延迟的在线教育体验。
