Laravel 5.5 入门教程4
- 格式:pdf
- 大小:161.61 KB
- 文档页数:8
Laravel框架实战开发教程第一章:概述Laravel框架是一个功能强大、易于使用的PHP开发框架。
它提供了一套丰富的工具和功能,帮助开发人员快速构建高质量的Web应用程序。
本教程将介绍Laravel框架的基本概念和特性,并教授如何在实战项目中使用它。
第二章:安装与配置在本章中,我们将学习如何安装Laravel框架,并进行必要的配置。
我们将介绍如何使用Composer来安装Laravel,并配置数据库连接和其他基本设置。
我们将深入研究Laravel的目录结构,并了解每个目录和文件的作用。
第三章:路由与控制器本章将介绍Laravel框架中的路由和控制器的概念。
我们将学习如何定义和使用路由,以及如何定义和使用控制器来处理请求。
我们将深入研究路由参数、路由模型绑定以及各种常见路由技巧。
第四章:视图与模板在本章中,我们将探讨Laravel的视图和模板功能。
我们将学习如何创建和使用Blade模板,如何传递数据到视图以及如何在视图中使用控制结构和变量。
我们还将介绍视图的布局和部件,并讨论如何使用包含和继承来共享视图。
第五章:数据库操作本章将介绍Laravel框架中的数据库操作。
我们将学习如何定义和使用模型来操作数据库表,如何创建和执行查询以及如何使用Eloquent ORM进行高级查询和关联。
我们还将介绍数据库迁移和填充,并讨论数据库事务和性能优化的技巧。
第六章:表单验证与用户认证在本章中,我们将学习如何使用Laravel框架进行表单验证和用户认证。
我们将介绍验证规则和错误消息,并介绍如何在控制器和视图中处理验证。
我们还将探讨如何使用Laravel内置的身份验证功能来构建安全的用户注册、登录和注销流程。
第七章:缓存与会话本章将介绍Laravel框架中的缓存和会话管理。
我们将学习如何使用缓存来提高应用程序的性能,如何配置和使用不同的缓存驱动程序,并介绍会话的概念和用法。
我们还将讨论如何使用Laravel的闪存消息来显示一次性的会话消息。
PHP框架Laravel的基本使用指南第一章:引言PHP框架Laravel是一个成熟且流行的开发框架,它提供了许多方便、高效的功能和工具,使开发者能够更快速地构建功能强大、可扩展的Web应用程序。
本文将为读者介绍Laravel的基本使用,包括安装和配置、路由和控制器、模型和数据库操作、视图和模板等方面。
第二章:安装和配置Laravel的安装非常简单,只需在命令行中运行composer create-project --prefer-dist laravel/laravel projectName即可完成。
安装完成后,需要对Laravel进行一些配置,如数据库连接、缓存设置和应用程序密钥等。
这些配置位于项目根目录下的.env文件中,可以根据具体需求进行修改。
第三章:路由和控制器Laravel的路由系统允许开发者定义URL与相应的处理逻辑之间的映射关系。
通过在routes/web.php文件中定义路由,可以将请求路由到相应的控制器方法。
控制器是处理请求的逻辑代码,它可以返回数据或者渲染视图,并与模型进行交互以获取或存储数据。
第四章:模型和数据库操作模型是Laravel中用于与数据库交互的重要组件。
通过定义模型,可以方便地执行数据的增删改查操作。
Laravel提供了Eloquent ORM(对象关系映射)工具,简化了与数据库的交互。
通过定义模型类并与数据表进行关联,我们可以通过简单的代码实现复杂的数据库操作。
第五章:视图和模板Laravel的视图系统允许开发者定义和渲染页面模板,使输出内容与应用逻辑分离。
通过使用Blade模板引擎,开发者可以轻松地创建动态和可重用的视图组件。
Blade提供了丰富的模板语法,可以方便地进行条件判断、循环处理和变量输出等操作。
第六章:中间件和认证Laravel的中间件是一种特殊的过滤器,用于在请求到达控制器之前或之后执行某些操作。
中间件可用于实现身份验证、权限检查、日志记录等功能。
Laravel框架学习教程Chapter 1: Introduction to Laravel FrameworkLaravel is a PHP web application framework that follows the Model-View-Controller (MVC) architectural pattern. It provides a robust set of tools and features that make web development faster and more efficient. In this chapter, we will explore the key concepts and features of the Laravel framework.1.1 Installation and SetupTo get started with Laravel, you need to install it on your local development environment. Laravel can be installed either via Composer or by downloading the Laravel installer. Once installed, you can create a new Laravel project using the command line interface. We will also cover the configuration process and explain how to set up a local development server.1.2 Routing and MVCLaravel offers a powerful routing system that allows you to define the URLs and endpoints for your web application. We will explain how to create routes for different HTTP methods and how to handle dynamic parts of the URL. Furthermore, we will dive into the MVC pattern and discuss how Laravel separates the application logic into controllers, models, and views.1.3 Blade Templating EngineBlade is the built-in templating engine of Laravel, which provides a convenient and expressive way to create views. We will explore the syntax and features of Blade, including template inheritance, control structures, and loops. Additionally, we will discuss how to pass data from the controller to the view and how to use Blade directives for conditional rendering and form input handling.Chapter 2: Database and Eloquent ORMIn this chapter, we will focus on database management and the Eloquent ORM, which is Laravel's database abstraction layer. We will cover various aspects of database operations and demonstrate how to interact with the database using Eloquent models.2.1 Database ConfigurationBefore working with databases in Laravel, you need to configure the database connection settings. We will explain how to set up the database configuration file and specify the connection parameters. Additionally, we will discuss different database management systems supported by Laravel, such as MySQL, SQLite, and PostgreSQL.2.2 Migrations and SeedingLaravel provides a convenient way to handle database schema changes through migrations. We will illustrate how to create, run, and rollback migrations to keep the database schema in sync with the application code. Moreover, we will explain the concept of seeding the database with predefined data using Laravel's seeder classes.2.3 Eloquent ORMThe Eloquent ORM makes database interactions effortless by enabling you to work with database records as objects. We will demonstrate how to define Eloquent models, establish relationships between models, and perform common database operations, including querying, inserting, updating, and deleting data. Furthermore, we will discuss advanced features like eager loading, scopes, and mutators.Chapter 3: Authentication and AuthorizationSecuring web applications is essential for protecting user data and ensuring access control. In this chapter, we will explore Laravel's built-in authentication and authorization features, which simplify the implementation of user registration, login, and access control.3.1 User AuthenticationLaravel provides a comprehensive authentication system that supports various authentication methods, such as email and password, socialite integration, and API token authentication. We will explain how to set up the authentication configuration, create authentication routes, and implement user registration, login, and password reset functionality.3.2 User AuthorizationLaravel's authorization features allow you to define fine-grained access control for different user roles and permissions. We will discusshow to define authorization policies, authorize actions in controllers, and perform role-based access control. Additionally, we will explore how to use gates and policies for more complex authorization scenarios.3.3 MiddlewareLaravel's middleware mechanism enables you to apply logic before or after the execution of a request. We will explain how to create custom middleware and register them in the application. Moreover, we will discuss how to use middleware for various purposes, such as authentication, authorization, form validation, and request transformation.Chapter 4: Testing and DebuggingTesting and debugging are crucial parts of the development process to ensure the quality and reliability of the application. In this chapter, we will cover Laravel's testing and debugging tools, including unit testing, feature testing, logging, and debugging techniques.4.1 Testing FundamentalsLaravel provides a robust testing framework that facilitates unit testing and feature testing. We will explain the basics of writing tests in Laravel, including creating test cases, defining assertions, and running tests. Moreover, we will discuss different testing approaches, such as test-driven development (TDD) and behavior-driven development (BDD).4.2 Unit TestingUnit testing focuses on testing individual units or components of the application in isolation. We will demonstrate how to write unit tests for Laravel's models, controllers, and services using PHPUnit, the default testing library integrated into Laravel. We will also discuss mocking and dependency injection techniques to isolate dependencies in unit tests.4.3 Feature TestingFeature testing helps ensure that the application behaves correctly from a user's perspective. We will show how to write feature tests that simulate user interactions, such as filling out forms and clicking buttons. Additionally, we will discuss testing APIs and handling HTTP requests and responses in feature tests.4.4 Logging and DebuggingLaravel provides a flexible logging system that allows you to log events and debug information for troubleshooting purposes. We will explain how to configure the logging channels, write log messages, and retrieve log entries. Furthermore, we will explore Laravel's debugging tools, including the built-in error handling and exception handling mechanisms.Chapter 5: Advanced TopicsIn this final chapter, we will delve into some advanced topics that further extend the capabilities of Laravel. We will cover topics like caching, queuing, event handling, and package development.5.1 CachingCaching is a technique to store frequently accessed data in memory for faster retrieval. Laravel provides a unified API for various caching drivers, such as in-memory caching, file caching, and database caching. We will explain how to use Laravel's caching system to cache query results, HTML fragments, and even entire pages.5.2 Queues and JobsQueues provide a way to defer time-consuming or resource-intensive tasks and process them asynchronously in the background. We will discuss how to configure Laravel's queue system, create and dispatch jobs, and set up workers to process queued jobs. Additionally, we will explore different queue drivers and queue management tools.5.3 Event HandlingLaravel's event system allows you to decouple components and trigger actions based on specific events. We will explain how to define and dispatch events, create listeners to handle events, and implement event subscribers. Furthermore, we will discuss event broadcasting and using third-party event libraries.5.4 Package DevelopmentLaravel's modular architecture makes it easy to develop and distribute reusable packages. We will explore the process of creating Laravel packages, including setting up package structure, defining service providers, registering routes and assets, and publishing package resources. Moreover, we will discuss package testing and versioning considerations.ConclusionIn this comprehensive Laravel tutorial, we have covered various aspects of the Laravel framework, from the basics of installation and setup to more advanced topics like authentication, testing, and package development. By mastering Laravel, you can build robust and scalable web applications with ease. Stay curious, keep learning, and unleash the full potential of Laravel.。
Laravel系列⼊门教程(⼀)热烈庆祝 Laravel 5.5 LTS 发布!实际上 Laravel 上⼀个 LTS 选择 5.1 是⾮常不明智的,因为 5.2 增加了许许多多优秀的特性。
现在好了,⼤家都⽤最新的长期⽀持版本 5.5 吧!Laravel 5.5 中⽂⽂档:默认条件你应该懂得 PHP ⽹站运⾏的基础知识,并且拥有⼀个完善的开发环境。
跟随本教程⾛完⼀遍,你将会得到⼀个基础的包含登录、后台编辑、前台评论的简单 blog 系统。
Tips1. 环境要求:PHP 7.0+,MySQL 5.1+2. 本教程不推荐完全不懂 PHP 与 MVC 编程的⼈学习,Laravel 的学习曲线不仅仅是陡峭,⽽且耗时很长,请先做好⼼理准备。
3. 这不是 “⼀步⼀步跟我做” 教程。
本教程需要你付出⼀定的⼼智去解决⼀些或⼤或⼩的隐藏任务,以达到真正理解 Laravel 运⾏逻辑的⽬的。
4. 我使⽤ Safari 截图是为了好看,你们在开发时记得选择 Chrome 哦~开始学习1. 安装许多⼈被拦在了学习 Laravel 的第⼀步:安装。
并不是因为安装有多复杂,⽽是因为【众所周知的原因】。
在此我推荐⼀个 composer 全量中国镜像:。
启⽤ Composer 镜像服务作为本教程的第⼀项⼩作业请⾃⾏完成哦。
镜像配置完成后,在终端(Terminal 或 CMD)⾥切换到你想要放置该⽹站的⽬录下(如 C:\wwwroot、/Library/WebServer/Documents/、/var/www/html、/etc/nginx/html 等),运⾏命令:composer create-project laravel/laravel learnlaravel5 ^5.5然后,稍等⽚刻,当前⽬录下就会出现⼀个叫 learnlaravel5 的⽂件夹,安装完成啦~2. 运⾏为了尽可能地减缓学习曲线,推荐⼤家使⽤ PHP 内置 web server 驱动我们的⽹站。
laravel框架⼊门本⽂摘⾃⽹络,个⼈感觉写的很不错,决定收藏⼀下纯属本⼈学习之⽤本⽂介绍如何开始使⽤ Laravel。
读完本⽂,你将学到:如何安装 Laravel,新建 Laravel 程序,如何连接数据库;Laravel 程序的基本⽂件结构;MVC(模型,视图,控制器)和 REST 架构的基本原理;如何快速⽣成 Laravel 程序⾻架;1 前提条件本⽂针对想从零开始开发 Laravel 程序的初学者,不需要预先具备任何的 Laravel 使⽤经验。
不过,为了能顺利阅读,还是需要事先安装好⼀些软件:PHP 5.4 及以上版本包管理⼯具 Composer 。
想深⼊了解 Composer,请阅读 Composer 指南。
官⽹:,中⽂⽹:SQLite3 数据库Laravel 是使⽤ PHP 语⾔开发的⽹页程序框架。
如果之前没接触过 PHP,学习 Laravel 可要深下⼀番功夫。
⽹上有很多资源可以学习PHP:2 Laravel 是什么?Laravel 是使⽤ PHP 语⾔编写的⽹页程序开发框架,⽬的是为开发者提供常⽤组件,简化⽹页程序的开发。
只需编写较少的代码,就能实现其他编程语⾔或框架难以企及的功能。
经验丰富的 PHP 程序员会发现,Laravel 让程序开发变得更有乐趣。
Laravel 哲学Laravel 是⼀套富有表达性且具有简洁语法的⽹页应⽤程序框架。
我们认为开发过程应该是愉悦且有创造性的体验。
Laravel 努⼒减少开发过程中的不便,因此我们提供了验证(authentication)、路由(routing)、sessions、缓存(caching)等开发过程中经常⽤到的⼯具或功能。
Laravel ⽬标是给开发者创造⼀个愉快的开发过程,并且不牺牲应⽤程序的功能性。
快乐的开发者才能创造最棒的代码。
为了这个⽬的,我们竭取了各框架的优点集中到 Laravel 中,这些框架包括并不局限于 Ruby on Rails、 MVC 和 Sinatra 等。
LaravelPHP框架进阶教程Laravel PHP框架进阶教程章节一:介绍Laravel PHP框架Laravel是一款流行的PHP Web框架,它采用简洁、优雅的语法和强大的功能来提高开发者的工作效率。
本教程将深入探讨Laravel框架的进阶使用技巧。
1.1 Laravel框架的特点与优势Laravel框架具有以下特点和优势:- 清晰的文件结构:Laravel遵循MVC(模型-视图-控制器)设计模式,拥有清晰的文件结构,提高了代码的可读性和可维护性。
- 强大的路由系统:Laravel的路由系统支持灵活的URL映射和HTTP动词,提供了便捷的路由定义和命名功能。
- 数据库迁移与填充:Laravel提供了数据库迁移和填充功能,简化了数据库结构的变更和初始化过程。
- Eloquent ORM:Laravel的Eloquent ORM(对象关系映射)提供了方便、简洁的数据库操作方法,减少了SQL语句的编写。
- Blade模板引擎:Laravel的Blade模板引擎提供了简便、灵活的模板语法,方便开发者进行视图的渲染和布局。
1.2 环境搭建与项目创建首先,我们需要安装PHP和Composer。
然后,通过Composer 创建一个新的Laravel项目:```composer create-project --prefer-dist laravel/laravel project-name ```接下来,我们将介绍如何通过命令行执行Laravel项目,及相关配置的修改。
章节二:进阶路由与控制器2.1 路由分组和命名空间Laravel支持路由的分组和命名空间,有助于组织和管理路由。
我们将学习如何创建路由分组,并在分组中使用命名空间来提高代码的可维护性。
2.2 控制器的使用与中间件控制器是Laravel中处理请求的核心组件之一。
我们将了解如何创建控制器、定义路由与控制器的绑定关系,并介绍中间件的概念及其在路由处理中的应用。
Laravel5.5官⽅推荐的Nginx配置学习教程前⾔本⽂主要给⼤家介绍了关于Laravel 5.5官⽅推荐的Nginx配置的想内容,分享出来供⼤家参考学习,下⾯话不多说,来⼀起看看详细的介绍把。
Laravel 5.5 版本官⽅放出了 Nginx 服务器的配置,中⽂⽂档:server {listen 80;server_name ;root //public;add_header X-Frame-Options "SAMEORIGIN";add_header X-XSS-Protection "1; mode=block";add_header X-Content-Type-Options "nosniff";index index.html index.htm index.php;charset utf-8;location / {try_files $uri $uri/ /index.php?$query_string;}location = /favicon.ico { access_log off; log_not_found off; }location = /robots.txt { access_log off; log_not_found off; }error_page 404 /index.php;location ~ \.php$ {fastcgi_split_path_info ^(.+\.php)(/.+)$;fastcgi_pass unix:/var/run/php/php7.1-fpm.sock;fastcgi_index index.php;include fastcgi_params;}location ~ /\.(?!well-known).* {deny all;}}⾃⼰并不擅长 Nginx,相信很多朋友跟我⼀样,让我们⼀起学习下 Nginx 的相关知识 : )1. add_header X-Frame-Options "SAMEORIGIN";X-Frame-Options 响应头是⽤来给浏览器指⽰允许⼀个页⾯可否在 <frame>, <iframe> 或者 <object> 中展现的标记。
About the T utorialLaravel is a powerful MVC PHP framework, designed for developers who need a simple and elegant toolkit to create full-featured web applications. Laravel was created by Taylor Otwell. This is a brief tutorial that explains the basics of Laravel framework. AudienceThis tutorial will guide the developers and students who want to learn how to develop a website using Laravel. This tutorial is particularly meant for all those developers who have no prior experience of using Laravel.PrerequisitesBefore you start proceeding with this tutorial, we make an assumption that you are familiar with HTML, Core PHP, and Advance PHP. We have used Laravel version 5.1 in all the examples.Copyright & DisclaimerCopyright 2016 by Tutorials Point (I) Pvt. Ltd.All the content and graphics published in this e-book are the property of Tutorials Point (I) Pvt. Ltd. The user of this e-book is prohibited to reuse, retain, copy, distribute or republish any contents or a part of contents of this e-book in any manner without written consent of the publisher.We strive to update the contents of our website and tutorials as timely and as precisely as possible, however, the contents may contain inaccuracies or errors. Tutorials Point (I) Pvt. Ltd. provides no guarantee regarding the accuracy, timeliness or completeness of our website or its contents including this tutorial. If you discover any errors on our website or inthistutorial,******************************************T able of ContentsAbout the Tutorial (i)Audience (i)Prerequisites (i)Copyright & Disclaimer (i)Table of Contents .................................................................................................................................... i i RAVEL – OVERVIEW (1)Introduction (1)Laravel – Features (1)RAVEL – INSTALLATION (2)RAVEL – APPLICATION STRUCTURE (4)Root Directory (4)App Directory (5)RAVEL – CONFIGURATION (6)Basic Configuration (6)Environmental Configuration (6)Database Configuration (7)Naming the Application (8)Maintenance Mode (8)RAVEL – ROUTING (10)Basic Routing (10)Routing Parameters (13)RAVEL — MIDDLEWARE (16)Define Middleware (16)Register Middleware (17)Middleware Parameters (19)Terminable Middleware (22)RAVEL – CONTROLLERS (27)Basic Controllers (27)Controller Middleware (28)Restful Resource Controllers (33)Implicit Controllers (35)Constructor Injection (38)Method Injection (39)RAVEL — REQUEST (41)Retrieving the Request URI (41)Retrieving Input (43)RAVEL – COOKIE (47)Creating Cookie (47)Retrieving Cookie (47)RAVEL — RESPONSE (51)Basic Response (51)Attaching Headers (51)Attaching Cookies (52)JSON Response (53)RAVEL — VIEWS (54)Understanding Views (54)Passing Data to Views (55)Sharing Data with all Views (55)Blade Templates (57)RAVEL — REDIRECTIONS (61)Redirecting to Named Routes (61)Redirecting to Controller Actions (62)RAVEL — WORKING WITH DATABASE (64)Connecting to Database (64)Insert Records (64)Retrieve Records (67)Update Records (70)Delete Records (74)RAVEL — ERRORS AND LOGGING (78)Errors (78)Logging (78)RAVEL – FORMS (79)RAVEL – LOCALIZATION (85)RAVEL — SESSION (89)Accessing Session Data (89)Storing Session Data (89)Deleting Session Data (89)RAVEL – VALIDATION (93)RAVEL – FILE UPLOADING (98)RAVEL – SENDING EMAIL (102)RAVEL – AJAX (108)RAVEL – ERROR HANDLING (111)HTTP Exceptions (111)Custom Error pages (111)RAVEL – EVENT HANDLING (114)RAVEL – FACADES (122)RAVEL – SECURITY (128)Laravel 6IntroductionLaravel is an MVC framework with bundles, migrations, and Artisan CLI. Laravel offers a robust set of tools and an application architecture that incorporates many of the best features of frameworks like CodeIgniter, Yii, MVC, Ruby on Rails, Sinatra, and others. Laravel is an Open Source framework. It has a very rich set of features which will boost the speed of Web Development. If you familiar with Core PHP and Advanced PHP, Laravel will make your task easier. It will save a lot time if you are planning to develop a website from scratch. Not only that, the website built in Laravel is also secure. It prevents the various attacks that can take place on websites.Laravel – FeaturesLaravel offers the following key features:∙Modularity ∙Testability ∙Routing ∙Configuration management ∙Query builder and ORM (O bject R elational M apper) ∙Schema builder, migrations, and seeding ∙Template engine ∙E-mailing ∙Authentication ∙Redis ∙Queues ∙ Event and command bus1. Laravel – OverviewLaravel 7For managing dependencies, Laravel uses composer . Make sure you have a Composer installed on your system before you install Laravel.Step 1: Visit the following URL and download composer to install it on your system. https:///download/Step 2: After the Composer is installed, check the installation by typing the Composer command in the command prompt as shown in the following screenshot.Step 3: Create a new directory anywhere in your system for your new Laravel project. After that, move to path where you have created the new directory and type the following command there to install Laravel.composer create-project laravel/laravel –prefer-distStep 4: The above command will install Laravel in the current directory. Start the Laravel service by executing the following command.php artisan serve2. Laravel – InstallationLaravel Step 5: After executing the above command, you will see a screen as shown below:Step 6: Copy the URL underlined in gray in the above screenshot and open that URL in the browser. If you see the following screen, it implies Laravel has been installed successfully.8Laravel 9Root DirectoryThe root directory of Laravel contains various folders and files as shown in the following figure.∙ app: This directory contains the core code of the application.∙ bootstrap: This directory contains the application bootstrapping script.∙ config: This directory contains configuration files of application.∙ database: This folder contains your database migration and seeds.∙ public: This is the application’s document root. It starts the Laravel application. It also contains the assets of the application like JavaScript, CSS, Images, etc.3. Laravel – Application StructureLaravel ∙resources: This directory contains raw assets such as the LESS & Sass files, localization and language files, and Templates that are rendered as HTML.∙storage: This directory contains App storage, like file uploads etc. Framework storage (cache), and application-generated logs.∙test: This directory contains various test cases.∙vendor: This directory contains composer dependencies.App DirectoryThis is the application directory. It contains a variety of additional directories, which are described below:∙Console: All the artisan commands are stored in this directory.∙Events: This directory stores events that your application can raise. Events may be used to alert other parts of your application that a given action has occurred, providinga great deal of flexibility and decoupling.∙Exceptions: This directory contains your application's exception handler and is also a good place to stick any exceptions thrown by your application.∙Http: This directory contains your controllers, filters, and requests.∙Jobs: This directory contains the queueable jobs for your application.∙Listeners: This directory contains the handler classes for your events. Handlers receive an event and perform logic in response to the event being fired. For example, a UserRegistered event might be handled by a SendWelcomeEmail listener.∙Policies: This directory contains various policies of the application.∙Providers: This directory contains various service providers.LaravelThe config directory, as the name implies, contains all of your application's configuration files. In this directory, you will find various files needed to configure database, session, mail, application, services etc.Basic Configuration∙After installing Laravel, the first thing we need to do is to set the write permission for the directory storage and bootstrap/cache .∙Generate Application key to secure session and other encrypted data. If the root directory doesn’t contain the .env file then rename the .env.example to .env file and execute the following command where you have installed Laravel. The newly generated key can be seen in the .env file.∙ You can also configure the locale, time zone, etc. of the application in the config/app.phpfile.Environmental ConfigurationLaravel provides facility to run your application in different environment like testing, production etc. You can configure the environment of your application in the .env file of the root directory of your application. If you have installed Laravel using composer, this file will automatically be created.4. Laravel – ConfigurationIn case you haven’t installed Laravel, you can simply rename the .env.example file to .env file. A sample of Laravel.env file is shown below.Notice the text underlined gray in the above image. Local environment variable has been set. It can further be changed to production or testing as per your requirement. Database ConfigurationThe database of your application can be configured from config/database.php file. You can set configuration parameters that can be used by different databases and you can also set the default one to use.Naming the ApplicationThe App Directory, by default, is namespaced under App. To rename it, you can execute the following command and rename the namespace.php artisan app:name <name-of-your-application>Replace the <name-of-your-application> with the new name of your application that you want to give.Maintenance ModeWe need to modify our website on a regular basis. The website needs to be put on maintenance mode for this. Laravel has made this job easier. There are two artisan commands which are used to start and stop the maintenance mode which are described below.Start Maintenance ModeTo start the maintenance mode, simply execute the following command.php artisan downAfter successful execution, you will receive the following output:It will activate the Maintenance mode and all the request to server will be redirected to a single maintenance page as shown in the following screenshot.Stop Maintenance Mode∙After making changes to your website and to start it again, execute the following command.php artisan up∙After successful execution, you will receive the following output:ravel – RoutingLaravelBasic RoutingBasic routing is meant to route your request to an appropriate controller. The routes of the application can be defined in app/Http/routes.php file. Here is the general route syntax for each of the possible request.Route::get('/', function () {return 'Hello World';});Route::post('foo/bar', function () {return 'Hello World';});Route::put('foo/bar', function () {//});Route::delete('foo/bar', function () {//});Let us now understand how to see the Laravel homepage with the help of routing. Exampleapp/Http/routes.php<?phpRoute::get('/', function () {return view('welcome');});resources/view/welcome.blade.php<!DOCTYPE html><html><head><title>Laravel</title><link href="https:///css?family=Lato:100" rel="stylesheet" type="text/css"><style>html, body {height: 100%;}body {margin: 0;padding: 0;width: 100%;display: table;font-weight: 100;font-family: 'Lato';}.container {text-align: center;display: table-cell;vertical-align: middle;}.content {text-align: center;display: inline-block;}.title {font-size: 96px;}</style></head><body><div class="container"><div class="content"><div class="title">Laravel 5</div></div></div></body></html>The routing mechanism is depicted in the following image:Let us now understand the steps in detail:Step 1: First, we need to execute the root URL of the application.∙Step 2: The executed URL will match with the appropriate method in the route.php file. In our case, it will match to get the method and the root (‘/’) URL. This will execute the related function.∙Step 3: The function calls the template file resources/views/welcome.blade.php.The function later calls the view() function with argument ‘welcome’ without using the blade.php. It will produce the following HTML output.Routing ParametersOften in the application, we intend to capture the parameters passed with the URL. To do this, we need to modify the code in routes.php file accordingly. There are two ways by which we can capture the parameters passed with the URL.∙Required Parameters∙Optional ParametersRequired ParametersThese parameters must be present in the URL. For example, you may intend to capture the ID from the URL to do something with that ID. Here is the sample coding for routes.php file for that purpose.Route::get('ID/{id}',function($id){echo 'ID: '.$id;});Whatever argument that we pass after the root URL (http://localhost:8000/ID/5), it will be stored in $id and we can use that parameter for further processing but here we are simply displaying it. We can pass it onto view or controller for further processing.Optional ParametersThere are some parameters which may or may not be present in the URL and in such cases we can use the optional parameters. The presence of these parameters is not necessary in the URL. These parameters are indicated by “?”sign after the name of the parameters. Here is the sample coding for routes.php file for that purpose.Route::get('/user/{name?}',function($name = 'Virat'){echo "Name: ".$name;});Exampleroutes.php<?php// First Route method – Root URL will match this methodRoute::get('/', function () {return view('welcome');});// Second Route method – Root URL with ID will match this methodRoute::get('ID/{id}',function($id){echo 'ID: '.$id;});// Third Route method – Root URL with or without name will match this method Route::get('/user/{name?}',function($name = 'Virat Gandhi'){echo "Name: ".$name;});Step 1: Here, we have defined 3 routes with get methods for different purposes. If we execute the below URL then it will execute the first method.http://localhost:8000Step 2: After successful execution of the URL, you will receive the following output:Step 3: If we execute the below URL, it will execute the 2nd method and the argument/parameter ID will be passed to the variable $id.http://localhost:8000/ID/5Step 4: After successful execution of the URL, you will receive the following output:Step 5: If we execute the below URL, it will execute the 3rd method and the optional argument/parameter name will be passed to the variable $name. The last argument ‘Virat’is optional. If you remove it, the default name will be used that we have passed in the function as ‘Virat Gandhi’http://localhost:8000/user/ViratStep 6: After successful execution of the URL, you will receive the following output:Note: Regular expression can also be used to match the parameters.End of ebook previewIf you liked what you saw…Buy it from our store @ https://。
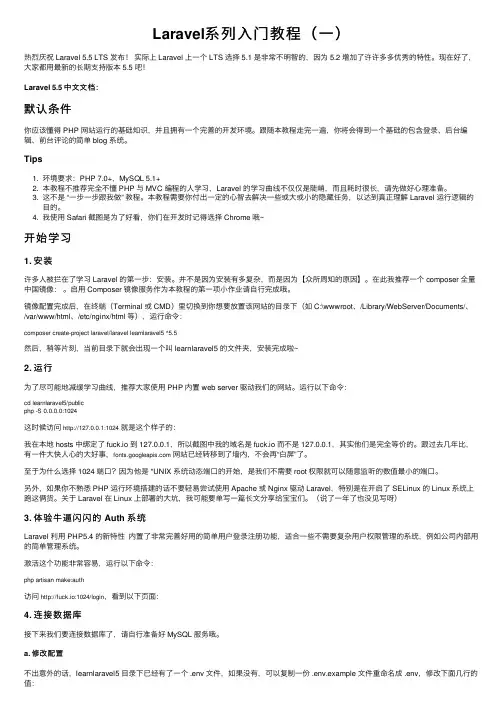
![[原创]Laravel启动流程](https://uimg.taocdn.com/59d2fe5df6ec4afe04a1b0717fd5360cba1a8d79.webp)
[原创]Laravel启动流程⽬录Laravel 5.5请求到响应的整个执⾏阶段归纳为 4 个:程序启动准备阶段⽂件⾃动加载服务容器实例化基础服务提供者的注册核⼼类的实例化请求实例化阶段实例化 Request 实例请求处理阶段准备请求处理的环境将请求实例通过中间件处理及通过路由和控制器的分发控制响应发送和程序终⽌阶段将响应内容返回给客户端记录与客户端有关的信息等1. 程序启动准备程序⼊⼝在 index.php 中require __DIR__.'/../vendor/autoload.php';$app = require_once __DIR__.'/../bootstrap/app.php'; # 获取服务容器实例$kernel = $app->make(Illuminate\Contracts\Http\Kernel::class);$response = $kernel->handle($request = Illuminate\Http\Request::capture());$response->send();$kernel->terminate($request, $response);创建服务容器实例服务容器的创建在 bootstrap\app.php 中进⾏.$app = new Illuminate\Foundation\Application(realpath(__DIR__.'/../'));1.1 容器基础配置容器 Application 的构造函数:public function __construct($basePath = null){if ($basePath) {$this->setBasePath($basePath);}$this->registerBaseBindings();$this->registerBaseServiceProviders();$this->registerCoreContainerAliases();}构造函数主要完成以下基本配置:⽬录路径(绑定到容器中, 并提供类⽅法获取⼦⽬录)public function setBasePath($basePath){$this->basePath = rtrim($basePath, '\/');$this->bindPathsInContainer();return $this;}protected function bindPathsInContainer(){$this->instance('path', $this->path());$this->instance('path.base', $this->basePath());$this->instance('ng', $this->langPath());$this->instance('path.config', $this->configPath());$this->instance('path.public', $this->publicPath());$this->instance('path.storage', $this->storagePath());$this->instance('path.database', $this->databasePath());$this->instance('path.resources', $this->resourcePath());$this->instance('path.bootstrap', $this->bootstrapPath());}绑定容器⾃⾝protected function registerBaseBindings(){static::setInstance($this);$this->instance('app', $this);$this->instance(Container::class, $this);$this->instance(PackageManifest::class, new PackageManifest(new Filesystem, $this->basePath(), $this->getCachedPackagesPath()));基础服务注册( Event, Log, Route)protected function registerBaseServiceProviders(){$this->register(new EventServiceProvider($this));$this->register(new LogServiceProvider($this));$this->register(new RoutingServiceProvider($this));}别名注册多个接⼝名对应⼀个简短别名, 后续在注册服务时只需绑定到别名上即可 (⽽不必绑定到具体接⼝名)public function registerCoreContainerAliases(){foreach (['app' => [\Illuminate\Foundation\Application::class, \Illuminate\Contracts\Container\Container::class, \Illuminate\Contracts\Foundation\Application::class, \Psr\Container\ContainerInterface::class], 'auth' => [\Illuminate\Auth\AuthManager::class, \Illuminate\Contracts\Auth\Factory::class],'auth.driver' => [\Illuminate\Contracts\Auth\Guard::class],'piler' => [\Illuminate\View\Compilers\BladeCompiler::class],'cache' => [\Illuminate\Cache\CacheManager::class, \Illuminate\Contracts\Cache\Factory::class],'cache.store' => [\Illuminate\Cache\Repository::class, \Illuminate\Contracts\Cache\Repository::class],'config' => [\Illuminate\Config\Repository::class, \Illuminate\Contracts\Config\Repository::class],'cookie' => [\Illuminate\Cookie\CookieJar::class, \Illuminate\Contracts\Cookie\Factory::class, \Illuminate\Contracts\Cookie\QueueingFactory::class],'encrypter' => [\Illuminate\Encryption\Encrypter::class, \Illuminate\Contracts\Encryption\Encrypter::class],'db' => [\Illuminate\Database\DatabaseManager::class],'db.connection' => [\Illuminate\Database\Connection::class, \Illuminate\Database\ConnectionInterface::class],'events' => [\Illuminate\Events\Dispatcher::class, \Illuminate\Contracts\Events\Dispatcher::class],'files' => [\Illuminate\Filesystem\Filesystem::class],'filesystem' => [\Illuminate\Filesystem\FilesystemManager::class, \Illuminate\Contracts\Filesystem\Factory::class],'filesystem.disk' => [\Illuminate\Contracts\Filesystem\Filesystem::class],'filesystem.cloud' => [\Illuminate\Contracts\Filesystem\Cloud::class],'hash' => [\Illuminate\Contracts\Hashing\Hasher::class],'translator' => [\Illuminate\Translation\Translator::class, \Illuminate\Contracts\Translation\Translator::class],'log' => [\Illuminate\Log\Writer::class, \Illuminate\Contracts\Logging\Log::class, \Psr\Log\LoggerInterface::class],'mailer' => [\Illuminate\Mail\Mailer::class, \Illuminate\Contracts\Mail\Mailer::class, \Illuminate\Contracts\Mail\MailQueue::class],'auth.password' => [\Illuminate\Auth\Passwords\PasswordBrokerManager::class, \Illuminate\Contracts\Auth\PasswordBrokerFactory::class],'auth.password.broker' => [\Illuminate\Auth\Passwords\PasswordBroker::class, \Illuminate\Contracts\Auth\PasswordBroker::class],'queue' => [\Illuminate\Queue\QueueManager::class, \Illuminate\Contracts\Queue\Factory::class, \Illuminate\Contracts\Queue\Monitor::class],'queue.connection' => [\Illuminate\Contracts\Queue\Queue::class],'queue.failer' => [\Illuminate\Queue\Failed\FailedJobProviderInterface::class],'redirect' => [\Illuminate\Routing\Redirector::class],'redis' => [\Illuminate\Redis\RedisManager::class, \Illuminate\Contracts\Redis\Factory::class],'request' => [\Illuminate\Http\Request::class, \Symfony\Component\HttpFoundation\Request::class],'router' => [\Illuminate\Routing\Router::class, \Illuminate\Contracts\Routing\Registrar::class, \Illuminate\Contracts\Routing\BindingRegistrar::class],'session' => [\Illuminate\Session\SessionManager::class],'session.store' => [\Illuminate\Session\Store::class, \Illuminate\Contracts\Session\Session::class],'url' => [\Illuminate\Routing\UrlGenerator::class, \Illuminate\Contracts\Routing\UrlGenerator::class],'validator' => [\Illuminate\Validation\Factory::class, \Illuminate\Contracts\Validation\Factory::class],'view' => [\Illuminate\View\Factory::class, \Illuminate\Contracts\View\Factory::class],] as $key => $aliases) {foreach ($aliases as $alias) {$this->alias($key, $alias);}}}1.2 核⼼类绑定$app->singleton(Illuminate\Contracts\Http\Kernel::class,App\Http\Kernel::class);$app->singleton(Illuminate\Contracts\Console\Kernel::class,App\Console\Kernel::class);$app->singleton(Illuminate\Contracts\Debug\ExceptionHandler::class,App\Exceptions\Handler::class);绑定重要接⼝:Http 核⼼类命令⾏核⼼类异常处理类1.3 实例化 Http 核⼼类$kernel = $app->make(Illuminate\Contracts\Http\Kernel::class);Http 核⼼类的构造函数public function __construct(Application $app, Router $router){$this->app = $app;$this->router = $router;$router->middlewarePriority = $this->middlewarePriority;foreach ($this->middlewareGroups as $key => $middleware) {$router->middlewareGroup($key, $middleware);}foreach ($this->routeMiddleware as $key => $middleware) {$router->aliasMiddleware($key, $middleware);}}上述过程主要做的事是将中间件赋值给路由中间件顺序优先级列表中间件组中间件别名核⼼类 app/Http/Kernel.phpnamespace App\Http;use Illuminate\Foundation\Http\Kernel as HttpKernel;class Kernel extends HttpKernel{// 全局中间件,最先调⽤protected $middleware = [// 检测是否应⽤是否进⼊『维护模式』// 见:https:///docs/5.5/configuration#maintenance-mode\Illuminate\Foundation\Http\Middleware\CheckForMaintenanceMode::class,// 检测请求的数据是否过⼤\Illuminate\Foundation\Http\Middleware\ValidatePostSize::class,// 对提交的请求参数进⾏ PHP 函数 `trim()` 处理\App\Http\Middleware\TrimStrings::class,// 将提交请求参数中空⼦串转换为 null\Illuminate\Foundation\Http\Middleware\ConvertEmptyStringsToNull::class,// 修正代理服务器后的服务器参数\App\Http\Middleware\TrustProxies::class,];// 定义中间件组protected $middlewareGroups = [// Web 中间件组,应⽤于 routes/web.php 路由⽂件'web' => [// Cookie 加密解密\App\Http\Middleware\EncryptCookies::class,// 将 Cookie 添加到响应中\Illuminate\Cookie\Middleware\AddQueuedCookiesToResponse::class,// 开启会话\Illuminate\Session\Middleware\StartSession::class,// 认证⽤户,此中间件以后 Auth 类才能⽣效// 见:https:///docs/5.5/authentication\Illuminate\Session\Middleware\AuthenticateSession::class,// 将系统的错误数据注⼊到视图变量 $errors 中\Illuminate\View\Middleware\ShareErrorsFromSession::class,// 检验 CSRF ,防⽌跨站请求伪造的安全威胁// 见:https:///docs/5.5/csrf\App\Http\Middleware\VerifyCsrfToken::class,// 处理路由绑定// 见:https:///docs/5.5/routing#route-model-binding\Illuminate\Routing\Middleware\SubstituteBindings::class,],// API 中间件组,应⽤于 routes/api.php 路由⽂件'api' => [// 使⽤别名来调⽤中间件// 请见:https:///docs/5.5/middleware#为路由分配中间件'throttle:60,1','bindings',],];// 中间件别名设置,允许你使⽤别名调⽤中间件,例如上⾯的 api 中间件组调⽤protected $routeMiddleware = [// 只有登录⽤户才能访问,我们在控制器的构造⽅法中⼤量使⽤'auth' => \Illuminate\Auth\Middleware\Authenticate::class,// HTTP Basic Auth 认证'auth.basic' => \Illuminate\Auth\Middleware\AuthenticateWithBasicAuth::class,// 处理路由绑定// 见:https:///docs/5.5/routing#route-model-binding'bindings' => \Illuminate\Routing\Middleware\SubstituteBindings::class,// ⽤户授权功能'can' => \Illuminate\Auth\Middleware\Authorize::class,// 只有游客才能访问,在 register 和 login 请求中使⽤,只有未登录⽤户才能访问这些页⾯ 'guest' => \App\Http\Middleware\RedirectIfAuthenticated::class,// 访问节流,类似于『1 分钟只能请求 10 次』的需求,⼀般在 API 中使⽤'throttle' => \Illuminate\Routing\Middleware\ThrottleRequests::class,];}2. 请求实例化以处理 Http 请求为例index.php ⼊⼝⽂件$response = $kernel->handle($request = Illuminate\Http\Request::capture());请求是通过 Illuminate\Http\Request::capture() 实例化的, 主要是将请求信息以对象形式表现出来3. 请求处理⼊⼝⽂件:$response = $kernel->handle($request = Illuminate\Http\Request::capture());$kernel->handle(...) 处理请求过程Illuminate\Foundation\Http\Kernelpublic function handle($request){try {$request->enableHttpMethodParameterOverride();$response = $this->sendRequestThroughRouter($request);} catch (Exception $e) {$this->reportException($e);$response = $this->renderException($request, $e);} catch (Throwable $e) {$this->reportException($e = new FatalThrowableError($e));$response = $this->renderException($request, $e);}$this->app['events']->dispatch(new Events\RequestHandled($request, $response));return $response;}protected function sendRequestThroughRouter($request){$this->app->instance('request', $request);Facade::clearResolvedInstance('request');$this->bootstrap(); # 核⼼类初始化return (new Pipeline($this->app))->send($request)->through($this->app->shouldSkipMiddleware() ? [] : $this->middleware)->then($this->dispatchToRouter());}protected function dispatchToRouter(){return function ($request) {$this->app->instance('request', $request);return $this->router->dispatch($request);};}实际处理请求逻辑主要在 sendRequestThroughRouter ⽅法中, 它主要做了:核⼼类的初始化经由中间件过滤后将请求最终交由 Router 处理对于 Http 请求处理, 中间件包括:protected $middleware = [\Illuminate\Foundation\Http\Middleware\CheckForMaintenanceMode::class,\Illuminate\Foundation\Http\Middleware\ValidatePostSize::class,\App\Http\Middleware\TrimStrings::class,\Illuminate\Foundation\Http\Middleware\ConvertEmptyStringsToNull::class,\App\Http\Middleware\TrustProxies::class,];该中间件数组定义在 Http 核⼼类中, 同时在核⼼类的构造函数中传递给 Router 类3.1 请求处理环境初始化核⼼类的初始化 bootstrap()protected $bootstrappers = [\Illuminate\Foundation\Bootstrap\LoadEnvironmentVariables::class,\Illuminate\Foundation\Bootstrap\LoadConfiguration::class,\Illuminate\Foundation\Bootstrap\HandleExceptions::class,\Illuminate\Foundation\Bootstrap\RegisterFacades::class,\Illuminate\Foundation\Bootstrap\RegisterProviders::class,\Illuminate\Foundation\Bootstrap\BootProviders::class,];# 初始化public function bootstrap(){if (! $this->app->hasBeenBootstrapped()) {$this->app->bootstrapWith($this->bootstrappers());}}protected function bootstrappers(){return $this->bootstrappers;}在服务容器 Application 类中public function bootstrapWith(array $bootstrappers){$this->hasBeenBootstrapped = true;foreach ($bootstrappers as $bootstrapper) {$this['events']->fire('bootstrapping: '.$bootstrapper, [$this]);$this->make($bootstrapper)->bootstrap($this);$this['events']->fire('bootstrapped: '.$bootstrapper, [$this]);}}该步骤主要是主要是对核⼼类中定义的 $bootstrappers 数组元素(引导类)初始化.bootstrap 过程具体是在服务容器来中进⾏, 由核⼼类调⽤并传⼊待初始化的类Http 核⼼类默认包含以下 6 个启动服务:1. 环境监测 \Illuminate\Foundation\Bootstrap\LoadEnvironmentVariables::class从 .env ⽂件中解析环境变量到 getevn(), $_ENV, $_SERVER依赖 vlucas/phpdotenv 扩展包2. 配置加载 \Illuminate\Foundation\Bootstrap\LoadConfiguration::class载⼊ config ⽬录下所有 php 配置⽂件, 并将⽣成的配置存储类绑定到服务容器 $app['config']同时配置时区及多字节格式(utf8)3. 常处理 \Illuminate\Foundation\Bootstrap\HandleExceptions::class报告所有错误 error_report(E_ALL)提供对未捕获的异常, 错误的全局处理 set_error_handler, set_exception_handler, register_shutdown_function 4. 外观注册 \Illuminate\Foundation\Bootstrap\RegisterFacades::class从 app.aliases 中读取外观配置数组'aliases' => ['App' => Illuminate\Support\Facades\App::class,'Artisan' => Illuminate\Support\Facades\Artisan::class,'Auth' => Illuminate\Support\Facades\Auth::class,'Blade' => Illuminate\Support\Facades\Blade::class,'Broadcast' => Illuminate\Support\Facades\Broadcast::class,'Bus' => Illuminate\Support\Facades\Bus::class,'Cache' => Illuminate\Support\Facades\Cache::class,'Config' => Illuminate\Support\Facades\Config::class,'Cookie' => Illuminate\Support\Facades\Cookie::class,'Crypt' => Illuminate\Support\Facades\Crypt::class,'DB' => Illuminate\Support\Facades\DB::class,'Eloquent' => Illuminate\Database\Eloquent\Model::class,'Event' => Illuminate\Support\Facades\Event::class,'File' => Illuminate\Support\Facades\File::class,'Gate' => Illuminate\Support\Facades\Gate::class,'Hash' => Illuminate\Support\Facades\Hash::class,'Lang' => Illuminate\Support\Facades\Lang::class,'Log' => Illuminate\Support\Facades\Log::class,'Mail' => Illuminate\Support\Facades\Mail::class,'Notification' => Illuminate\Support\Facades\Notification::class,'Password' => Illuminate\Support\Facades\Password::class,'Queue' => Illuminate\Support\Facades\Queue::class,'Redirect' => Illuminate\Support\Facades\Redirect::class,'Redis' => Illuminate\Support\Facades\Redis::class,'Request' => Illuminate\Support\Facades\Request::class,'Response' => Illuminate\Support\Facades\Response::class,'Route' => Illuminate\Support\Facades\Route::class,'Schema' => Illuminate\Support\Facades\Schema::class,'Session' => Illuminate\Support\Facades\Session::class,'Storage' => Illuminate\Support\Facades\Storage::class,'URL' => Illuminate\Support\Facades\URL::class,'Validator' => Illuminate\Support\Facades\Validator::class,'View' => Illuminate\Support\Facades\View::class,],使⽤ spl_autoload_register(...) 处理类加载, 配合 class_alias() 提供类的别名调⽤Facade外观类基类依赖__callStatic` 调⽤⽅法( 使⽤服务容器实例化对应类)5. 服务提供者注册 \Illuminate\Foundation\Bootstrap\RegisterProviders::class从 app.providers 中读取所有服务提供者'providers' => [/** Laravel Framework Service Providers...*/Illuminate\Auth\AuthServiceProvider::class,Illuminate\Broadcasting\BroadcastServiceProvider::class,Illuminate\Bus\BusServiceProvider::class,Illuminate\Cache\CacheServiceProvider::class,Illuminate\Foundation\Providers\ConsoleSupportServiceProvider::class,Illuminate\Cookie\CookieServiceProvider::class,Illuminate\Database\DatabaseServiceProvider::class,Illuminate\Encryption\EncryptionServiceProvider::class,Illuminate\Filesystem\FilesystemServiceProvider::class,Illuminate\Foundation\Providers\FoundationServiceProvider::class,Illuminate\Hashing\HashServiceProvider::class,Illuminate\Mail\MailServiceProvider::class,Illuminate\Notifications\NotificationServiceProvider::class,Illuminate\Pagination\PaginationServiceProvider::class,Illuminate\Pipeline\PipelineServiceProvider::class,Illuminate\Queue\QueueServiceProvider::class,Illuminate\Redis\RedisServiceProvider::class,Illuminate\Auth\Passwords\PasswordResetServiceProvider::class,Illuminate\Session\SessionServiceProvider::class,Illuminate\Translation\TranslationServiceProvider::class,Illuminate\Validation\ValidationServiceProvider::class,Illuminate\View\ViewServiceProvider::class,/** Package Service Providers...*//** Application Service Providers...*/App\Providers\AppServiceProvider::class,App\Providers\AuthServiceProvider::class,// App\Providers\BroadcastServiceProvider::class,App\Providers\EventServiceProvider::class,App\Providers\RouteServiceProvider::class, # 路由表⽣成],服务提供者经过解析后分为 3 种类型的服务提供者:eager 类型马上调⽤ register 注册deferred 类型记录下来, 当服务容器解析对应服务时, 才注册对应的服务提供者when 类型记录下来, 当对应 event 触发时在注册对应服务提供者6. 启动提供者 \Illuminate\Foundation\Bootstrap\BootProviders::class调⽤服务容器的 boot() ⽅法, 依次调⽤在服务容器中 register 的所有服务提供者的 boot() ⽅法3.2 路由处理请求在内核处理请求, 将请求实例通过中间件处理后, 将请求的处理交给路由 Router 进⾏控制器的分发.Http Kernelprotected function dispatchToRouter(){return function ($request) {$this->app->instance('request', $request);return $this->router->dispatch($request);};}路由表存储结构说明Illuminate\Routing\Route 存储单条路由Illuminate\Routing\RouteCollection 保存所有 Route 实例, 形成路由表Illuminate\Routing\Router 类实例持有 RouteCollection 路由表实例.即, ⼀个 Router 持有⼀个 RouteCollection, ⽽ RouteCollection 拥有 N 个 Route在 Router 中对请求的处理同样经过⼀系列的路由中间件# 路由处理请求的⼊库public function dispatchToRoute(Request $request){return $this->runRoute($request, $this->findRoute($request));}# 根据请求的 url 和 method 查找对应的 routeprotected function findRoute($request){$this->current = $route = $this->routes->match($request);$this->container->instance(Route::class, $route);return $route;}# 根据对应的请求和路由条⽬, 返回相应的 $responseprotected function runRoute(Request $request, Route $route){$request->setRouteResolver(function () use ($route) {return $route;$this->events->dispatch(new Events\RouteMatched($route, $request));return $this->prepareResponse($request,$this->runRouteWithinStack($route, $request));}# 请求经过路由中间件过滤后, 交由 route 的 run() ⽅法处理protected function runRouteWithinStack(Route $route, Request $request){$shouldSkipMiddleware = $this->container->bound('middleware.disable') &&$this->container->make('middleware.disable') === true;$middleware = $shouldSkipMiddleware ? [] : $this->gatherRouteMiddleware($route);return (new Pipeline($this->container))->send($request)->through($middleware)->then(function ($request) use ($route) {return $this->prepareResponse($request, $route->run());});}route 的 run() ⽅法最终将请求转给 Illuminate\Routing\ControllerDispatcher::dispatch 处理public function dispatch(Route $route, $controller, $method){$parameters = $this->resolveClassMethodDependencies($route->parametersWithoutNulls(), $controller, $method);if (method_exists($controller, 'callAction')) {return $controller->callAction($method, $parameters);}return $controller->{$method}(...array_values($parameters));}剩下的事情就是 Controller控制器的事了.3.3 处理返回的 Response在 Router 中有⼀个⽅法, ⽤于对返回的 $response 进⾏处理public function prepareResponse($request, $response){return static::toResponse($request, $response);}/*** @return \Illuminate\Http\Response|\Illuminate\Http\JsonResponse*/public static function toResponse($request, $response){if ($response instanceof Responsable) {$response = $response->toResponse($request);}if ($response instanceof PsrResponseInterface) {$response = (new HttpFoundationFactory)->createResponse($response);} elseif (! $response instanceof SymfonyResponse &&($response instanceof Arrayable ||$response instanceof Jsonable ||$response instanceof ArrayObject ||$response instanceof JsonSerializable ||is_array($response))) {$response = new JsonResponse($response);} elseif (! $response instanceof SymfonyResponse) {$response = new Response($response);}if ($response->getStatusCode() === Response::HTTP_NOT_MODIFIED) {$response->setNotModified();}return $response->prepare($request); # 最后的处理}上述过程中, 在返回 $response 之前进⾏了最后的处理 $response->prepare($request)该过程是在 Symfony\Component\HttpFoundation\Response::prepare() 中进⾏对响应的封装是通过 Illuminate\Http\Response 类完成, 该类底层是 Symfony 框架的 Response 类即, Symfony\Component\HttpFoundation\Responsepublic function prepare(Request $request){$headers = $this->headers;if ($this->isInformational() || $this->isEmpty()) {$this->setContent(null);$headers->remove('Content-Type');$headers->remove('Content-Length');} else {// Content-type based on the Requestif (!$headers->has('Content-Type')) {$format = $request->getRequestFormat();if (null !== $format && $mimeType = $request->getMimeType($format)) {$headers->set('Content-Type', $mimeType);}// Fix Content-Type$charset = $this->charset ?: 'UTF-8';if (!$headers->has('Content-Type')) {$headers->set('Content-Type', 'text/html; charset='.$charset);} elseif (0 === stripos($headers->get('Content-Type'), 'text/') && false === stripos($headers->get('Content-Type'), 'charset')) { // add the charset$headers->set('Content-Type', $headers->get('Content-Type').'; charset='.$charset);}// Fix Content-Lengthif ($headers->has('Transfer-Encoding')) {$headers->remove('Content-Length');}if ($request->isMethod('HEAD')) {// cf. RFC2616 14.13$length = $headers->get('Content-Length');$this->setContent(null);if ($length) {$headers->set('Content-Length', $length);}}}// Fix protocolif ('HTTP/1.0' != $request->server->get('SERVER_PROTOCOL')) {$this->setProtocolVersion('1.1');}// Check if we need to send extra expire info headersif ('1.0' == $this->getProtocolVersion() && false !== strpos($this->headers->get('Cache-Control'), 'no-cache')) {$this->headers->set('pragma', 'no-cache');$this->headers->set('expires', -1);}$this->ensureIEOverSSLCompatibility($request);return $this;}4. 响应发送和程序终⽌4.1 响应的发送在 index.php ⼊⼝⽂件的最后是将响应返回给客户端$response->send();Symfony\Component\HttpFoundation\Responsepublic function send(){$this->sendHeaders();$this->sendContent();if (function_exists('fastcgi_finish_request')) {fastcgi_finish_request();} elseif (!\in_array(PHP_SAPI, array('cli', 'phpdbg'), true)) {static::closeOutputBuffers(0, true);}return $this;}public function sendHeaders(){// headers have already been sent by the developerif (headers_sent()) {return $this;}// headersforeach ($this->headers->allPreserveCase() as $name => $values) {foreach ($values as $value) {header($name.': '.$value, false, $this->statusCode);}}// statusheader(sprintf('HTTP/%s %s %s', $this->version, $this->statusCode, $this->statusText), true, $this->statusCode);return $this;}public function sendContent(){echo $this->content;return $this;}4.2 请求中⽌在 index.php ⼊⼝⽂件的最后:$kernel->terminate($request, $response);依旧以 Http Kernel 为例:public function terminate($request, $response){$this->terminateMiddleware($request, $response); # 中间件中⽌处理$this->app->terminate(); # 服务容器的中⽌处理函数}protected function terminateMiddleware($request, $response){$middlewares = $this->app->shouldSkipMiddleware() ? [] : array_merge($this->gatherRouteMiddleware($request),$this->middleware);foreach ($middlewares as $middleware) {if (! is_string($middleware)) {continue;}list($name) = $this->parseMiddleware($middleware);$instance = $this->app->make($name);if (method_exists($instance, 'terminate')) {$instance->terminate($request, $response);}}}此处的中间件指的是定义在 Kernel 中的 $middleware 中间件数组列表, 不包含路由中间件. Laravel 5.1 注: 默认只有会话中间件包含 terminate() 函数Application 服务容器的中⽌处理函数public function terminate(){foreach ($this->terminatingCallbacks as $terminating) {$this->call($terminating);}}。
Laravel入门教程1.poser,然后使用它来实现包管理。
可以在poser。
安装完成后,创建一个名为newlaravel的laravel项目,可以通过以下命令完成:mkdir newlaravelcd newlaravelXXX --prefer-dist2.接下来,需要修改数据库配置文件app/config/database.php,将其修改为以下内容:mysql' =。
array(driver'。
=。
'mysql'。
host'。
=。
'127.0.0.1'。
database'。
=。
'newlaravel'。
username'。
=。
'root'。
password'。
=。
''。
charset'。
=。
'utf8'。
n' =。
'utf8_unicode_ci'。
prefix'。
=。
''。
3.n,可以使用以下命令:php artisan --table="user" CreateUserTable上述命令会在app/database/n文件。
其中,--table user的意思是创建一个名为user的table。
4.n文件,以便在创建数据库表时可以直接填入字段。
可以使用以下代码:public n up()XXX::create('user'。
n(Blueprint $table){table->increments('id');table->string('username')->nullable()->default(null);table->string('password')->nullable()->default(null);table->string('email')->nullable()->default(null);table->dataTime('created_at')->nullable->default(null);table->dataTime('updated_at')->nullable->default(null);6.处理User Model对象Laravel默认会创建一个User Model对象。
laravel⼊门(4)视图Laravel 视图概述在实际开发中,除了 API 路由返回指定格式数据对象外,⼤部分 Web 路由返回的都是视图,以便实现更加复杂的页⾯交互return view('以.分隔的视图模板路径');视图是 MVC 模式中的 View 部分,⼤部分视图都应该是 HTML 格式⽂本,在 Laravel 中,⽀持三种格式的视图⽂件解析:CSS ⽂件,原⽣PHP 和 Blade 模板。
从⽂件名扩展就可以区分它们,CSS ⽂件后缀是 .css,通过⽂件引擎解析,原⽣ PHP ⽂件后缀是 .php,通过 PHP 引擎解析,Blade 模板⽂件后缀是 .blade.php,通过 Blade 引擎解析(底层实现逻辑可参考vendor/laravel/framework/src/Illuminate/View/ViewServiceProvider.php 中的 registerEngineResolver ⽅法)。
视图返回与参数传递Laravel 提供了多个语法糖在路由中返回视图,如辅助函数 view 或 View::make ⽅法,还可以注⼊ Illuminate\View\View Factory 类(最底层实现),通常我们使⽤辅助函数 view,因为最简洁:// 使⽤ view 辅助函数Route::get('/', function () {// 该函数会在 resources/views ⽬录下查找 home.blade.php 或 home.php 视图⽂件,// 加载⽂件内容并解析 PHP 变量或语句,然后传递给响应,最终呈现给⽤户return view('home');});如果要传递数据给视图,可以这么做(多个数据以数组⽅式传递),这样就可以将 tasks 数据变量传递到视图以便在视图中进⾏引⽤:return view('home')->with('tasks', Task::all());还可以这么做:return view('home', ['tasks' => Task::all()]);推荐使⽤后者,因为简单。
laravel教程Laravel 是一个流行的 PHP 框架,被广泛用于开发 Web 应用和网站。
它提供了许多功能强大且易于使用的工具和功能,使开发过程更加高效和便捷。
以下是一个简单的 Laravel 教程,帮助你入门这个框架。
步骤一:安装 Laravel首先,你需要在本地环境中安装 Laravel。
你可以通过Composer,一个 PHP 的包管理工具,来安装 Laravel。
打开命令行工具,输入以下命令来全局安装 Composer:```composer global require laravel/installer```安装完成后,你可以使用 `laravel new` 命令来创建一个新的Laravel 项目:```laravel new myproject```这将创建一个名为 `myproject` 的新文件夹,并下载 Laravel 的核心文件和依赖项。
步骤二:配置数据库接下来,你需要配置数据库连接。
在Laravel 项目的根目录下,找到 `.env` 文件,将其中的数据库相关配置改为你自己的配置,如下所示:```DB_CONNECTION=mysqlDB_HOST=127.0.0.1DB_PORT=3306DB_DATABASE=mydatabaseDB_USERNAME=myusernameDB_PASSWORD=mypassword```将 `DB_DATABASE`、`DB_USERNAME` 和`DB_PASSWORD` 替换为你自己的数据库名称、用户名和密码。
保存并关闭文件。
步骤三:创建路由在 Laravel 中,路由用于定义 URL 和相应的操作。
在 Laravel 项目的 `routes` 目录下,找到 `web.php` 文件。
在该文件中,你可以定义各种路由规则。
下面是一个简单的示例,定义一个 `/hello` 路由来返回 "Hello, Laravel!" 字符串:```phpRoute::get('/hello', function () {return 'Hello, Laravel!';});```保存并关闭文件。
Laravel入门中文手册Laravel实用型文档,想学习laravel的推荐看一看!Laravel中文手册前言欢迎阅读Laravel文档。
这份文档既可以作为入门指南,也可以作为Laravel功能特色的参考手册。
如果你迫不及待想要开始Laravel之旅的话,可以直接跳到你想看的章节,不过,我们还是强烈建议你按顺序阅读这份文档,这样能让你循序渐进的打好基础,而且,每一章节都是后后续章节的基础。
使用Laravel将是一种享受!Laravel是一套功能强大的PHP开发框架,并且着重于灵活性和语法的表现力。
对于初学者,Laravel像其他流行、轻量级框架一样易学、易用;对于经验丰富的同学,Laravel能让你体验代码模块化的好处。
Laravel的灵活性能让你随心所欲的更新、重构你用应用;Laravel富于表现力的语法能让你或你的团队的代码简洁、容易阅读。
Laravel优于其它PHP框架Laravel在很多方面优于其它框架,以下列出的就是其中的一部分:Bundle是Laravel的扩展包组织形式或称呼。
Laravel的扩展包仓库已经相当成熟了,可以很容易的帮你把扩展包(bundle)安装到你的应用中。
你可以选择下载一个扩展包(bundle)然后拷贝到bundles目录,或者通过命令行工具“Artisan”自动安装。
在Laravel中已经具有了一套高级的PHP ActiveRecord实现 -- Eloquent ORM。
它能方便的将“约束(constraints)”应用到关系的双方,这样你就具有了对数据的完全控制,而且享受到ActiveRecord的所有便利。
Eloquent原生支持Fluent中查询构造器(query-builder)的所有方法。
应用逻辑(Application Logic)可以在控制器(controllers)中实现,也可以直接集成到路由(route)声明中,并且语法和Sinatra框架类似。
Laravel5.5源码详解--Auth中间件Laravel5.5源码详解 – Auth中间件为了体现全貌,前⾯的代码部分没有做太多删减,重点关注特别加⼊的注释部分。
原⽂的注释删除,以减少阅读篇幅。
本⽂重点在后⾯的流程讲解,这些⽐较详细。
如果光看官⽅的⽂档,碰到问题的时候往往还是不知所云。
所以,熟练的运⽤,应该建⽴在对源码的深刻了解的基础上。
⽽其流程是了解源码的第⼀步。
了解这些,开发时才能游刃有余。
在App\Http\Kernel中注册的<?phpnamespace App\Http;use Illuminate\Foundation\Http\Kernel as HttpKernel;class Kernel extends HttpKernel{// 全局Http中间件protected $middleware = [\Illuminate\Foundation\Http\Middleware\CheckForMaintenanceMode::class,\Illuminate\Foundation\Http\Middleware\ValidatePostSize::class,\App\Http\Middleware\TrimStrings::class,\Illuminate\Foundation\Http\Middleware\ConvertEmptyStringsToNull::class,\App\Http\Middleware\TrustProxies::class,];// 路由中间件protected $middlewareGroups = ['web' => [\App\Http\Middleware\EncryptCookies::class,\Illuminate\Cookie\Middleware\AddQueuedCookiesToResponse::class,\Illuminate\Session\Middleware\StartSession::class,// \Illuminate\Session\Middleware\AuthenticateSession::class,\Illuminate\View\Middleware\ShareErrorsFromSession::class,\App\Http\Middleware\VerifyCsrfToken::class,\Illuminate\Routing\Middleware\SubstituteBindings::class,],'api' => ['throttle:60,1','bindings',],];// 可能需要分组或单独使⽤的中间件protected $routeMiddleware = ['auth' => \Illuminate\Auth\Middleware\Authenticate::class,'auth.basic' => \Illuminate\Auth\Middleware\AuthenticateWithBasicAuth::class,'bindings' => \Illuminate\Routing\Middleware\SubstituteBindings::class,'can' => \Illuminate\Auth\Middleware\Authorize::class,'guest' => \App\Http\Middleware\RedirectIfAuthenticated::class,'throttle' => \Illuminate\Routing\Middleware\ThrottleRequests::class,];}可见,Auth中间件属于可能需要分组或单独使⽤的中间件,当然你也可以根据需要调整。
LaravelPHP框架基本使用教程Laravel PHP框架基本使用教程第一章:介绍Laravel PHP框架Laravel是一款基于PHP语言开发的现代化Web应用框架。
它提供了一套简洁、优雅的语法和高效的开发工具,让开发者可以更快速、更高效地构建各种类型的Web应用。
第二章:安装和配置Laravel在本章中,我们将介绍如何在本地开发环境中安装和配置Laravel框架。
首先,我们需要确保服务器环境满足Laravel的要求,如PHP版本、扩展等。
接下来,我们可以通过Composer(PHP依赖管理工具)来安装Laravel。
第三章:创建路由和视图在这一章节,我们将学习如何创建路由和视图。
Laravel提供了一种简单且直观的方式来定义应用程序的路由,同时也可以很方便地创建和渲染视图。
我们可以通过Laravel的路由定义文件来配置应用程序的URL路由,并在对应的控制器中调用相应的视图。
第四章:使用数据库和模型在这一章节中,我们将了解如何使用Laravel框架的数据库和模型功能。
Laravel提供了一种简单、直观的方式来配置数据库连接,并支持多种数据库系统(如MySQL、SQLite等)。
通过Laravel的模型功能,我们可以轻松地对数据库进行操作,实现数据的增删改查功能。
第五章:引入中间件和表单验证在这一章节,我们将介绍如何使用Laravel的中间件和表单验证功能。
中间件是Laravel框架提供的一种处理HTTP请求的机制,通过中间件,我们可以在请求到达控制器之前或之后进行一些自定义的处理。
而表单验证则可以帮助我们验证用户输入的数据,确保数据的有效性和合法性。
第六章:使用Laravel的认证和授权功能本章我们将介绍Laravel框架的认证和授权功能。
Laravel提供了一套简单且强大的身份认证系统,可以帮助我们快速实现用户的注册、登录、登出等功能。
同时,Laravel也提供了一种简单的授权机制,通过精确控制用户的权限,保证系统的安全性。
laravel 教程Laravel 是一种流行的 PHP 框架,具有易于使用、灵活和功能丰富的特点。
它提供了许多强大的功能,如路由、数据库操作、队列、缓存等,使开发人员可以更轻松地构建高效的 Web 应用程序。
本教程将带您逐步了解 Laravel 的基本概念和使用方法。
**安装 Laravel**首先,您需要在本地环境中安装 Laravel。
请按照 Laravel 官方文档中的指南进行安装。
安装完成后,您可以使用 Laravel 的命令行工具来创建新的 Laravel 项目。
**创建项目**要创建一个新的 Laravel 项目,打开命令行工具并导航到您想要创建项目的目录中。
然后运行以下命令:```laravel new 项目名```这将在指定目录中创建一个新的Laravel 项目。
运行该命令后,Laravel 将下载所需的文件并自动配置项目。
**设置数据库**在开始开发之前,您需要设置一个数据库以存储数据。
在Laravel 中,您可以通过编辑 `.env` 文件来配置数据库。
请确保在该文件中填写正确的数据库连接信息。
**创建路由**Laravel 使用路由来定义 URL 与控制器方法之间的映射关系。
要创建一个简单的路由,请打开 `routes/web.php` 文件并添加以下代码:```phpRoute::get('/', 'WelcomeController@index');```上述代码定义了一个根路径的路由,并将其映射到`WelcomeController` 控制器的 `index` 方法。
该路由表示访问根路径时,将执行 `WelcomeController` 的 `index` 方法。
**创建控制器**在 Laravel 中,控制器用于处理应用程序的业务逻辑。
要创建一个控制器,请打开命令行工具并导航到您的 Laravel 项目目录中。
然后运行以下命令:```php artisan make:controller WelcomeController```上述命令将在 `app/Http/Controllers/` 目录下创建一个名为`WelcomeController` 的新控制器。
《Laravel框架开发实战》课程教学大纲(课程英文名称)课程编号:学分:学分课时:76课时(其中:讲课47课时上机29课时)先修课程:计算机基础、计算机网络、网页制作、PHP基础、MySQL基础适用专业:信息技术及其计算机相关专业开课部门:计算机系一、课程的性质与目标Laravel是一款使用PHP语言开发的框架,它具有开源、代码简洁、语法优雅等特点,在Web开发领域非常受欢迎。
本课程面向具有PHP语言和MySQL数据库基础的人群,详细讲解了Laravel框架的使用。
本课程中将知识点和实用案例结合,帮助读者理解知识点并能在以后的实际开发中运用。
本课程共8章,第1、2章讲解Laravel框架的基础知识;第3章讲解表单安全和用户认证;第4章讲解数据库操作;第5章讲解Laravel框架的常用功能,如文件上传、数据分页等;第6章讲解Web前后端数据交互的知识;第7、8章讲解实战项目“内容管理系统”。
本课程遵循知识点先易后难的顺序排列章节。
在讲解每个知识点时,不仅介绍基本概念,还将抽象的概念具体化,让学生明白这个知识点具体可以用来解决什么问题,围绕知识点进行动手实践,加深对书中所讲内容的理解。
最后,通过项目实战将所学内容全部串连起来,培养学生分析问题和解决问题的能力。
二、课程设计思路和教学要求课程设计理念:高职教育的集中实践教学环节需明确必要的理论知识的升华与知识层面的拓展,不能局限于单纯的技能训练。
单纯的技能训练不是提高高等职业教育的理想课程。
以能力的培养为重点,以就业为导向,培养学生具备职业岗位所需的职业能力,职业生涯发展所需的能力和终身学习的能力,实现一站式教学理念。
课程设计思路:基于工作过程开发课程内容,以行动为导向进行教学内容设计,以学生为主体,以案例(项目)实训为手段,设计出理论学习与技能掌握相融合的课程内容体系。
教学整体设计“以职业技能培养为目标,以案例(项目)任务实现为载体、理论学习与实际操作相结合”。
Laravel 5.5 入门教程
By IT崖柏图
Mail 973714522@
出自布尔教育PHP高端教育培训
18章投资功能
18.1 首页展示
路由: Route::get('/','IndexController@index');
view:
span
18.2 投标页展示
路由:Route::get('pro/{pid}',"ProController@pro");
控制器:
public function pro($pid){
view:
18.3 投资表及迁移文件
投标表 :bids
字段类型说明
bid primary key 主键
uid integer用户 uid
pid integer项目 pid
title string项目名称
money integer投标金额
pubtime integer投标时间
创建迁移文件:php artisan make:migration create_table_bids --create=bids
执行迁移命令: php artisan migrate
18.4 在线投标
view:
</
路由:Route::post('touzi/{pid}',"ProController@touzi");
生成Model: php artisan make:model Bid
//按照约定修改
class Bid extends Model
{
写入数据到投资表:
写入成功,再次修改 touzi方法,
投资的钱,不能大于项目剩余可投的钱,
一旦项目的钱,等于已招标的钱,修改状态为2,还款中,
状态大于1的项目,不能再投钱,停止招标;
18.5 还款表与收益表
投标完成后 , 借款人每月要还 "本 + 息", 投资人每天要收利息.因此,我们再建2张表.
还款表 :hks
字段类型说明
hid primary key 主键
uid integer用户 uid
pid integer项目 pid
title string项目名称
amount integer每月还款金额
paydate date账单日
status tinyint是否已还
生成迁移文件:
php artisan make:migration create_table_hks --create=hks
执行迁移命令: php artisan migrate
18.6 生成月账单
** 为借款者生成还款记录 **
当投资完成的瞬间,由 projects 中的借款金额/借款周期/利率,
算出借款人每月几号应还多少钱?
18.7 生成预期收益
投资完成后,生成用户预期收入表,做定时任务,
根据预期收益表 ** 每天 ** 给投资者产生利息收益,写入收益表;
预期收益表 tasks:
字段类型说明
tid primary key 主键
uid integer用户 uid
pid integer项目 pid
title string项目名称
amount integer每天应收的利息
enddate date收利息截止日
生成迁移文件: php artisan make:migration create_table_tasks --create=tasks
执行迁移命令: php artisan migtate
18.8 生成收益
每天收益表 :grows
字段类型说明
gid primary key主键
uid integer用户 uid
pid integer项目 pid
title string项目名称
amount integer每天的利息
paytime date收益日期
生成控制器文件: php artisan make:controller GrowController --plain
添加路由: Route::get('payrun','GrowController@run');
18.9 借款者还款账单
18.10 我的投资
写路由:
18.11 我的收益。