阿里云AppDeploy使用手册
- 格式:pdf
- 大小:1.37 MB
- 文档页数:19
CLI Python VersionUser GuideUser GuideAlibaba Cloud Python SDKsSee the Python SDKs of different Alibaba Cloud products and the commands for installing the SDKs in SDK document Python SDK.Scripts usage samplesUse Shell scriptAlibaba Cloud CLI is a tool for the unified management and configuration of Alibaba Cloud resources. After you install and configure Alibaba Cloud CLI, you can use it to manage multiple Alibaba Cloud products and services simultaneously.To facilitate your use of Alibaba Cloud CLI, we have compiled a script integrating common operations. This document shows how to run the sample Shell script in the Linux operating system.Install and configure Alibaba Cloud CLI.For more information about the installation and configuration procedures, see AlibabaCloud CLI installation guide (Linux/UNIX/Mac OS) and Configuration of Alibaba Cloud CLI.Click here to download the script.Run the following command to extract the downloaded script package.tar zxvf ecs.tar.gzsh ecs.shSelect the operation that you want to perform:The following figure shows the operations that you can select in the first directory:The following figure shows the operations that you can select in the seconddirectory:Query information of the subscribed image market imagesYou can run the following script in Alibaba Cloud CLI to query information (image IDs and names) of all subscribed image market images. You can download or edit the script.Click to download the script: querySubscribedImageId.zipThe script is as follows:`#!/bin/bashtcount=`aliyuncli ecs DescribeImages --ImageOwnerAlias marketplace --output json --filter TotalCount`pageNum=1cat /dev/null >/tmp/imageids.txtwhile ((tcount>0))doaliyuncli ecs DescribeImages --ImageOwnerAlias marketplace --filter Images.Image[*].ImageId --PageSize 100 --PageNumber $pageNum --output json --filter Images.Image[*].ImageId | sed '1d' | sed '$d' | sed 's/,//g' | sed's/"//g'| sed 's/ //g'>>/tmp/imageids.txtlet pageNum++let tcount-=100donecat /tmp/imageids.txt | while read linedoisSubscribed=`aliyuncli ecs DescribeImages --ImageOwnerAlias marketplace --ImageId $line --filterImageIds.Image[*] --filter Images.Image[*].IsSubscribed --output json | sed '1d' | sed '$d' | sed 's/ //g'`if [[ $isSubscribed = "true" ]];thenecho $line `aliyuncli ecs DescribeImages --ImageOwnerAlias marketplace --ImageId $line --filter ImageIds.Image[*] --filter Images.Image[*].ImageName --output json | sed '1d' | sed '$d' | sed 's/ //g'` >>imagesInfo.txtfidonenative2ascii -encoding UTF-8 -reverse imagesInfo.txt imagesInfoCN.txtrm -rf imagesInfo.txtcat imagesInfoCN.txt`After editing or downloading the script and granting the permission (by running the chmod + x command), you can run the script in the following format to generate an imagesInfoCN.txt file containing information of subscribed image market images in the directory storing the script.Example:./querySubscribedImageId.shSample output:# ./querySubscribedImageId.shm-23917oqoi "ASP/.NET runtime environment (Windows 2008 64-bit|IIS7.0) V1.0"m-23n2589vc "Java runtime environment (Centos 64-bit|OpenJDK1.7) V1.0"m-23u9mjjtk "PW website construction system (Centos 64-bit) V1.0"Query all instance IDs in a specified region and export them to a fileYou can run the script below in Alibaba Cloud CLI to query all instance IDs in a specified region, and export them to a file. You can choose to download or edit the script.Click to download the script: getVmList.zipThe script is as follows.#!/bin/bashtcount=`aliyuncli ecs DescribeInstances --RegionId $1 --output json --filter TotalCount`pageNum=1cat /dev/null >vmList.txtwhile ((tcount>0))doaliyuncli ecs DescribeInstances --RegionId $1 --PageSize 100 --PageNumber $pageNum --output json --filter Instances.Instance[*].InstanceId | sed '1d' | sed '$d' | sed 's/,//g' | sed 's/"//g'| sed 's/ //g'>>vmList.txtlet pageNum++let tcount-=100donecat vmList.txtAfter you edit or download the script and grant the permission (by running the chmod + x command), you can run the script in the following format to generate a vmList.txt file containing required instance IDs in the directory storing the script.Format:./getVmList.sh <Region ID>Note: You can obtain the Region ID through the DescribeRegions interface.Example:./getVmList.sh cn-hangzhouSample output:#./getVmList.sh cn-hangzhoucn-hangzhou sg-227f611sscn-hangzhou sg-22esa2s7sQuery the VPC instance ID list with no VSwitch created in all regionsYou can run the following script in Alibaba Cloud CLI to query the VPC instance ID list with no VSwitch created in all regions. You can download or edit the script.Click to download the script: getNoVSWitchVpcIds.zip.The script is as follows:#!/bin/bashfor RegionId in `aliyuncli ecs DescribeRegions --filter Regions.Region[*].RegionId --output json | sed '1d' | sed '$d' | sed 's/,//g' | sed 's/"//g'| sed 's/ //g'`docat /dev/null >/tmp/vpcIDs.txtpageNum=1tcount=`aliyuncli ecs DescribeVpcs --RegionId $RegionId --output json --filter TotalCount`while ((tcount>0))doaliyuncli ecs DescribeVpcs --RegionId $RegionId --filter Vpcs.Vpc[*].VpcId --PageSize 50 --PageNumber $pageNum --output json | sed '1d' | sed '$d' | sed 's/,//g' | sed 's/"//g'| sed 's/ //g'>>/tmp/vpcIDs.txtlet pageNum++let tcount-=50donecat /tmp/vpcIDs.txt | while read linedovSwitchCount=`aliyuncli ecs DescribeVSwitches --VpcId $line --output json --filter TotalCount`if [[ $vSwitchCount -eq 0 ]];thenecho $RegionId $linefidonedoneAfter editing or downloading the script and granting the permission (by running the chmod + x command), you can run the script in the following format to export the VPC instance IDs (in pairs) with no VSwitch created in all regions in the Region ID VpcId format by region.Format:./getNoVSWitchVpcIds.shSample output:[root@AliyunTest]# ./getNoVSWitchVpcIds.shcn-hangzhou vpc-23vyarrssQuery IDs of security groups not associated with any instances in all regionsYou can run the following script in Alibaba Cloud CLI to query security groups not associated withany instances in all regions and perform operations (such as DELETE) on the security groups. You can download or edit the script.Click to download the script: getUnUsedSecurityGroupId.zip.The script is as follows:#!/bin/bashfor RegionId in `aliyuncli ecs DescribeRegions --filter Regions.Region[*].RegionId --output json | sed '1d' | sed '$d' | sed 's/,//g' | sed 's/"//g'| sed 's/ //g'`docat /dev/null >/tmp/UnUsedSecurityGroupIds.txtpageNum=1tcount=`aliyuncli ecs DescribeSecurityGroups --RegionId $RegionId --output json --filter TotalCount`while ((tcount>0))doaliyuncli ecs DescribeSecurityGroups --RegionId $RegionId --filter SecurityGroups.SecurityGroup[*].SecurityGroupId --PageSize 100 --PageNumber $pageNum --output json | sed '1d' | sed '$d' | sed 's/,//g' | sed 's/"//g'| sed 's///g'>>/tmp/UnUsedSecurityGroupIds.txtlet pageNum++let tcount-=100donecat /tmp/UnUsedSecurityGroupIds.txt | while read linedousedVMCount=`aliyuncli ecs DescribeInstances --RegionId $RegionId --SecurityGroupId $line --output json --filter TotalCount`if [[ $usedVMCount -eq 0 ]];thenecho $RegionId " " $linefidonedoneAfter editing or downloading the script and granting the permission (by running the chmod + x command), you can run the script in the following format to export IDs of security groups (in pairs) not associated with any instances in all regions by region and security group.Format:./getUnUsedSGInfo.shSample output:[root@AliyunTest]# ./getUnUsedSGInfo.shcn-qingdao sg-227f61ltscn-shenzhen sg-22esa0f7sStructure and parameters of the command lineOnline help commandFor ease of use, Alibaba Cloud CLI provides online help commands. You can use the help commands to query valid operations supported by Alibaba Cloud products.For instance, if you want to query all the operations supported by ECS, run aliyuncli ecs help command and the query result is shown as follows.If you want to query the parameters of an ECS operation, run aliyuncli ecs <operation name> help. Taking the DescribeRegions operation as an example, the query result is shown as follows.Alibaba Cloud CLI command structureThe Alibaba Cloud CLI command structure is as follows.aliyuncli <command> <subcommand> [options and parameters]aliyuncli: Alibaba Coud CLI, the tool name of Alibaba Cloud.command: a top-layer command which represents an Alibaba Cloud basic service supported by Alibaba Cloud CLI (such as ECS/RDS/SLB/OSS), or a command of Alibaba Cloud CLI (such as “help” and “configure”).subcommand: a subcommand that specifies an operation to be executed, that is, a specificoperation.options and parameters: the parameter list corresponding to the operation specified insubcommand. The ordering of the parameters has no impact on the use of commands.Various types of input values can be used, such as numbers, strings, lists, mappings, andJSON structures.Examples:aliyuncli rds DescribeDBInstances --PageSize 50aliyuncli ecs DescribeRegionsaliyuncli rds DescribeDBInstanceAttribute --DBInstanceId xxxxxxParameter value input requirementsWhen you are calling Alibaba Cloud CLI, you must input the required values according to the following instructions to avoid errors.In most cases, you are required to input a string or numeric value to Alibaba Cloud CLI.Example:$ aliyuncli ecs DescribeInstanceAttribute --InstanceId myInstanceIdIf your inputs contain spaces, use single quotation mark (‘) to include the value. This manner is applicable to Windows PowerShell, Mac OS, and Linux.Example:$ aliyuncli ecs DescribeInstanceAttribute --InstanceId 'my instance id'For Windows Command Processer, use double quotation marks (“) to include the value.Example:> aliyuncli ecs DescribeInstanceAttribute --InstanceId "my instance id"Use JSON format to input parameters. JSON format is allowed in Alibaba Cloud CLI. Especially, when you query information of multiple instances or multiple disks, you can input multiple ID values in JsonArray format. It requires that you strictly edit data in JSON format and perform special processing on double quotation marks (“) in JSON format.To query information of multiple instances, you can input values with double quotation marks (“), like [“my-intances-id1”, “my-instances-id2”]. However, in Python, the double quotation marks (“) are filtered out by default, so special processing is required.On Linux and Mac OS systems, use single quotation mark (‘) to include the entireJSON value.Example:$ aliyuncli ecs DescribeInstances --InstanceIds '["my-intances-id1", "my-instances-id2"]'In Windows Command Processer, use a backslash ( \ ) to represent the doublequotation mark (“), and use double quotation marks (“) to include the entireJSON value.Example:> aliyuncli ecs DescribeInstances --InstanceIds "[\"my-intances-id1\", \"my-instances-id2\"]"In Windows PowerShell, use a backslash ( \ ) to represent the double quotationmark (“), and then use single quotation mark (‘) to include the entire JSON value.Example:> aliyuncli ecs DescribeInstances --InstanceIds '[\"my-intances-id1\", \"my-instances-id2\"]' Command output formatOutput formatTo meet different output format requirements of different users, Alibaba Cloud CLI supports three output formats.JSON (json)JSON format is the default output format of Alibaba Cloud CLI. Most languages have theinternal function or open JSON parser library to parse JSON strings easily. JSON format ismainly used with other scripts or any programming language to facilitate developers’parsing and use. An example is shown as follows.Text separated by Tab (text)In text format, outputs of Alibaba Cloud CLI are arranged into lines separated by Tab. This format is appropriate for traditional UNIX text tools (such as sed, grep, and awk) and Windows PowerShell. The text output format complies with the basic structure shown in the following example. The columns are sorted alphabetically by key names of bottom-layerJSON objects.In table format, data is arranged in an easy-to-read manner. An example is shown as follows.Set the output formatThe output format can be specified in two ways.Method 1: Modify the config file.Use the output option in the config file. The following example shows how to set the output formatto text.Method 2: Use command line.Use the output option in Alibaba Cloud CLI. The following example shows how to set the output format to table.Global parameter descriptionWhen you are using Alibaba Cloud CLI, you can set temporary settings for global parameters. You canadjust the parameters as needed. Currently, the supported global parameters are as follows:AccessKeyId: Specifies the AccessKeyId in the API request for executing the currentcommand. If no value is specified or the value is null, the default global AccessKeyId is[default] output=text $ aliyuncli ecs DescribeInstanceAttribute --InstanceId i-23rjh06vf --output tableapplied.AccessKeySecret: Specifies the AccessKeySecret in the API request for executing the current command. If no value is specified or the value is null, the default global AccessKeySecret isapplied.RegionId: Specifies the region corresponding to the API request for executing the currentcommand. If no value is specified, the global RegionId is applied.output: Specifies the display format for executing the current command.profile: Specifies the account used for executing the current command. If the specifiedaccount does not exist, the default account is used. In addition, if profile appears togetherwith other global parameters, its priority is lower. For example, if profile appears togetherwith AccessKeyId, AccessKeyId is selected as the AccessKey preferentially.version: Specifies the open API version used for executing the current command. If no value is specified, the latest version installed in the system is used.Note: If the parameter directly follows Alibaba Cloud CLI, the current version of AlibabaCloud CLI is displayed.Multi-account useMulti-account useNotices: This feature is useful for users who need to manage many accoutns and many devices. If you only need to manage an accout, ignore this feature.Alibaba Cloud CLI supports multi-account systems. You can configure multiple access keys and secret values, region and output as needed, to meet your different requirements more flexibly. For the information about how to configure accouts in Alibaba Cloud CLI, refer to Configuration of Alibaba Cloud CLI (for Alibaba Cloud users).Basic command structureThe basic command structure of multi-accout management is shown as follows:aliyuncli configure [set/get/list] --profile profilename --key value --key1 value1configure: Manage configurations.set: Set a configuration value. Optional.get: Display a configuration value. Optional.list: List all values of a profile. Optional.profile: Profile used in the current operation, which is a global parameter. For details, refer to the description of profile in Global parameter description. If this option is not included, adefault account is used.key: Specific key for configuring a profile.Value: Value being configured, which is behind key.Accout typeThere are two kinds of accounts in the config file: [default] account and [profile profilename] account. In Alibaba Cloud CLI, if the option profile is not included, the [default] account is used; if the option profile profilename is included, [profile profilename] is used.The following shows the examples of profile:aliyuncli configure ←Configure [default] account quicklyaliyuncli configure --profile test ←Configure [profile test] account quicklyThe following shows the examples of set:aliyuncli configure set --output table --region cn-qingdao ←Set [default] account, output=table, region=cn-qingdaoaliyuncli configure set --output json --region cn-hangzhou --profile test1 ←Set [profile test1] account, output = json, region = cn-hangzhouThe following shows the examples of get:Output: region = cn-hangzhouOutput:output = jsonregion = cn-hangzhouThe following shows the examples of list:The output is as follows:Advanced filter functionNote : This feature is used for users who have many instances. If you have only one instance, ignorethis feature.Data returned upon Alibaba Cloud API calls can be presented in different formats, but it is alsocomplex. Alibaba Cloud CLI further provides the data filter function, allowing you to filter data usingfilters. The filter function can help you obtain the expected value from the result, and can be used tohandle results easily and quickly in use or secondary development.Data returned upon API calls is in JSON format by default. Therefore, when using Alibaba Cloud CLI,aliyuncli configure get region ←Get the region of [default] accountaliyuncli configure get output region ←Get the output and region values of [default] accountaliyuncli configure get region --profile profile1 ←Get the region under [profile profile1] accountaliyuncli configure list ←List information under [default] accountaliyuncli configure list --profile profile1 ←List information under [profile profile1] accountyou can use the filter function according to JSON characteristics to obtain your expected results.Taking ECS DecribeRegions for example, run the following command, and the original JSON format output is shown as follows.aliyuncli ecs DescribeRegions --output jsonFilter 1You can enter a key value for filtering. Run the following command, and the filter output is shown as follows.aliyuncli ecs DescribeRegions –output json –filter RegionsFilter 2If the JSON value is an array, the array subscript format is supported. Run the following command,and the filter output is shown as follows.Especially, Alibaba Cloud CLI also supports ‘*’, representing the set of all results. Multiple filterresults are returned as an array. Run the following command, and the filter output is shown as follows.Filter 3 Filter one value from the returned data. Run the following command, and the filter output is shown asaliyuncli ecs DescribeRegions –output json –filter Regions.Region[0]aliyuncli ecs DescribeRegions –output json –filter Regions.Region[*].RegionIdfollows.aliyuncli ecs DescribeRegions –output json –filter Regions.Region[3].RegionId。
阿里云操作手册(实用版)目录1.阿里云操作手册概述2.手册的内容3.手册的使用方法4.手册的优点5.总结正文阿里云操作手册是一款为阿里云用户提供操作指南的工具,旨在帮助用户更方便、快捷地使用阿里云服务。
本文将详细介绍阿里云操作手册的内容、使用方法以及优点。
一、阿里云操作手册概述阿里云操作手册是一款实用的工具,旨在帮助用户了解阿里云的各种服务和使用方法。
该手册包含了阿里云服务的详细介绍、操作步骤以及注意事项等内容,适用于所有阿里云用户。
二、手册的内容阿里云操作手册主要包括以下几个方面的内容:1.阿里云服务介绍:对手册中涉及的阿里云服务进行简要介绍,包括服务类型、功能特点等。
2.服务操作指南:详细说明如何使用阿里云服务,包括注册、登录、购买、配置、管理等各个环节的操作步骤。
3.常见问题解答:针对用户在使用过程中可能遇到的问题,提供相应的解决方案和建议。
4.安全与合规:介绍阿里云服务的安全保障措施以及合规要求,帮助用户更好地了解和遵守相关规定。
三、手册的使用方法1.查阅手册:用户可以通过阿里云官方网站下载操作手册,也可以在线浏览。
2.搜索关键词:用户可以根据需要搜索相关服务或操作,快速定位到相应的内容。
3.收藏与分享:用户可以将操作手册的内容收藏到本地,也可以分享给其他同事或朋友。
4.反馈与建议:用户可以就手册中的内容提出反馈和建议,以便我们不断完善和更新。
四、手册的优点1.实用性:阿里云操作手册的内容紧密围绕用户实际需求,具有很高的实用性。
2.易用性:手册采用简洁明了的文字和图片,使得操作步骤一目了然,用户可以轻松上手。
3.及时更新:阿里云操作手册会根据服务更新和用户需求及时进行更新,确保内容始终与最新版本保持一致。
4.多平台支持:手册支持多种平台,包括 PC 端、移动端等,方便用户随时随地查阅。
五、总结阿里云操作手册是一款非常实用的工具,可以帮助用户更轻松、高效地使用阿里云服务。
用户可以通过查阅手册、搜索关键词、收藏与分享等方式充分利用手册的内容。
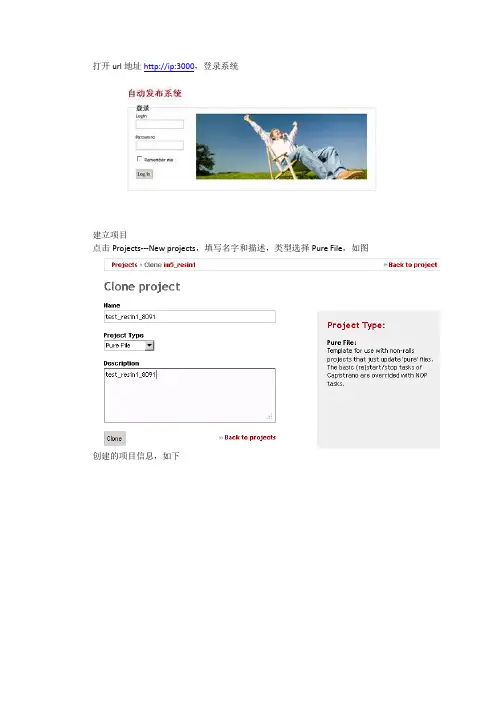
打开url地址http://ip:3000,登录系统
建立项目
点击Projects---New projects,填写名字和描述,类型选择Pure File,如图
创建的项目信息,如下
配置项目,可以点击New configuration或编辑已存在的项目配置
接下来建立一个stage
填写你的环境(Prod,Test,Dev分别代表生产、测试和开发环境)和邮件信息
然后建立主机,填写ip地址,点击创建
接下来需要建立一个recipe,填写名字,把发布的代码贴到body里
然后点击创建即可
应用stage,点击Projects - - 你的项目- - Prod - - Manage stage recipes
选择要应用的recipe,点击update used recipes
管理发布主机,点击添加主机
选择角色和主机,点创建即可
发布
点击Projects - - 你的项目- - Prod ,点击右边的Setup
在弹出的发布对话框中,可以看到执行的发布动作以及关联的主机,也可以填写注释
然后点击Start deployment,预配置成功后的状态显示
接下来我们开始正式发布代码
这次我们选择Deploy动作,然后点击Start deployment
发布成功的状态显示
回滚
点击右侧发布动作的下拉列表框,选择deploy:rollback,然后点击Execute
然后点击Start deployment,回滚成功后的状态显示
如需重启应用,可以执行deploy:restart指令,如图
然后点击Start deployment,restart成功后的状态显示。
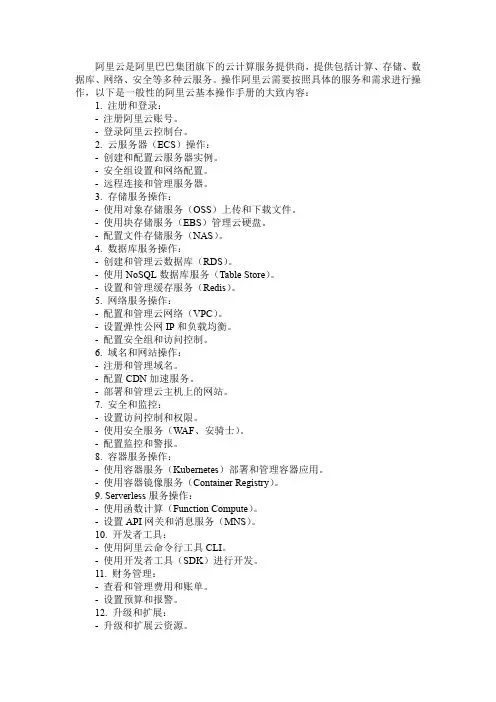
阿里云是阿里巴巴集团旗下的云计算服务提供商,提供包括计算、存储、数据库、网络、安全等多种云服务。
操作阿里云需要按照具体的服务和需求进行操作,以下是一般性的阿里云基本操作手册的大致内容:1. 注册和登录:-注册阿里云账号。
-登录阿里云控制台。
2. 云服务器(ECS)操作:-创建和配置云服务器实例。
-安全组设置和网络配置。
-远程连接和管理服务器。
3. 存储服务操作:-使用对象存储服务(OSS)上传和下载文件。
-使用块存储服务(EBS)管理云硬盘。
-配置文件存储服务(NAS)。
4. 数据库服务操作:-创建和管理云数据库(RDS)。
-使用NoSQL数据库服务(Table Store)。
-设置和管理缓存服务(Redis)。
5. 网络服务操作:-配置和管理云网络(VPC)。
-设置弹性公网IP和负载均衡。
-配置安全组和访问控制。
6. 域名和网站操作:-注册和管理域名。
-配置CDN加速服务。
-部署和管理云主机上的网站。
7. 安全和监控:-设置访问控制和权限。
-使用安全服务(WAF、安骑士)。
-配置监控和警报。
8. 容器服务操作:-使用容器服务(Kubernetes)部署和管理容器应用。
-使用容器镜像服务(Container Registry)。
9. Serverless服务操作:-使用函数计算(Function Compute)。
-设置API网关和消息服务(MNS)。
10. 开发者工具:-使用阿里云命令行工具CLI。
-使用开发者工具(SDK)进行开发。
11. 财务管理:-查看和管理费用和账单。
-设置预算和报警。
12. 升级和扩展:-升级和扩展云资源。
-了解和使用阿里云市场的服务。
请注意,以上是一般性的操作手册大纲,具体的操作步骤和细节可能会因服务类型和版本的不同而有所变化。
建议查阅阿里云官方文档,以获取最准确和最新的操作指南。


vAPV安装手册(阿里云平台)版权声明版权声明本文档受版权保护,未经Array Networks许可,任何人不得以任何理由和形式使用、复制、传播和编辑本文档,除非是在版权法的许可范围内。
本手册所涉及的案例均是当前情况,Array Networks有权利随时更改,恕不提前通知。
对于本手册内容,包括但不限于隐含的商业性能和特定用途适应性说明,Array Networks不承担任何责任。
Array Networks对于因本手册的提供造成的设备性能、使用和按键错误而导致的相关事故或因之引起的损害不承担任何责任。
警告:未经Array Networks许可,任何人不得对Array APV设备进行任何改动,否则将无权继续使用该设备。
商标声明本手册中所涉及的产品名称仅作识别之用。
手册中涉及的其他公司的注册商标或版权属各商标注册人所有,恕不逐一列明。
合格声明Array Networks自主声明Array APV系列产品符合FCC规定第15条。
操作本设备需要满足下面条件:(1)本设备不会产生有害干扰,(2)本设备不屏蔽任何干扰,其中有些干扰可能会造成不良影响。
警告:Array APV系列设备属于FCC(美国联邦通讯委员会)规定第十五条定义的A 类数据设备。
该条例旨在合理保护关于设备的商业行为,以避免生产生活环境受到不良影响。
本设备会产生、使用并且放射无线电磁波,如果不按照用法说明来使用,将有可能对无线电通讯产生影响。
在居住区和家庭中使用本设备有可能造成有害影响,为此使用者可能需要采取一定保护措施。
关于Array Networks 联系Array Networks请通过以下方式联系Array Networks:网站:/电话:总机(付费):(408)240-8700总机(免费):1-866-692-7729 (1-866-MY-ARRAY)技术支持:1-877-992-7729 (1-877-99-ARRAY)传真:(408)240-8754电话联系时间:周一至周五早9点至晚5点(太平洋标准时间)电子邮箱:**********************地址:1371 McCarthy BoulevardMilpitas, California 95035, USA修订记录修订记录日期描述2016-05-27 首次发布。

--App SDK 手册Android SDK手册使用前必读:移动推送名词解释&约束1. 创建应用到阿里云移动推送控制台创建应用,应用创建完成以后,进入移动推送相关模块进行设置,具体操作请参见 创建APP 。
在应用中完成应用配置,请注意PackageName务必和App的包名一致,否则推送将无法正确初始化。
【注意】使用Gradle构建App时,PackageName的查看:查看AndroidManifest.xml中根元素package属性;查看工程build.gradle中applicationId设置,默认AndroidManifest.xml中的package属性保持一致,如果不一致,以applicationId为准。
2. SDK下载和集成2.1 SDK下载2.2 SDK目录结构OneSDK|-- AndroidManifest.xml|-- build.gradle|-- libs--2.3 SDK集成:请在工程中添加android-support-v4.jar支持包(v2.3.0以上),关于v4支持包的说明请参考:https:///topic/libraries/support-library/features.html#v4;手动拷贝下载SDK中的libs目录,手动拷贝后需要在APP工程的build.gradle中配置jniLibs的目录:3. 配置AndroidManifest.xml3.1 appkey和appsecret配置com.alibaba.app.appkey和com.alibaba.app.appsecret为您App的对应信息,在推送控制台APP列表页的应用证书中获取。
| |-- armeabi| | |-- libcocklogic.so -网络连接库及幽灵进程的辅助lib| | |-- libtnet.so| |-- armeabi-v7a| | |-- libcocklogic.so| | |-- libtnet.so| |-- arm64-v8a| | |-- libcocklogic.so| | |-- libtnet.so| |-- x86| | |-- libcocklogic.so| | |-- libtnet.so| |-- arm64| | |-- libcocklogic.so| | |-- libtnet.so| |-- alicloud-android-push-sdk.jar -移动推送主功能包| |-- alisdk-ut.jar -UT基础包| |-- utdid4all.jar -设备Id生成包|-- project.properties|-- srcandroid {...sourceSets {main {jniLibs.srcDirs = ['libs']}}}<meta-data android:name="com.alibaba.app.appkey" android:value="*****"/> <!-- 请填写你自己的- appKey --><meta-data android:name="com.alibaba.app.appsecret" android:value="****"/> <!-- 请填写你自己的appSecret -->--3.2 Permission 的配置将以下uses-permission片段拷贝进你manifest中的Permission申明区域中:3.3 Service 的配置将以下service片段拷贝进你Manifest中的service申明区域中:<!--阿里移动推送相关权限--><!--Android 6.0版本可去除,用于选举信息(通道复用)的同步--><uses-permission android:name="android.permission.WRITE_SETTINGS" /><!--进行网络访问和网络状态监控相关的权限声明--><uses-permission android:name="android.permission.INTERNET" /><uses-permission android:name="android.permission.ACCESS_NETWORK_STATE" /><uses-permission android:name="android.permission.ACCESS_WIFI_STATE" /><!--允许对sd卡进行读写操作--><uses-permission android:name="android.permission.WRITE_EXTERNAL_STORAGE" /><!--网络库使用,当网络操作时需要确保事务完成不被杀掉--><uses-permission android:name="android.permission.WAKE_LOCK" /><!--用于读取手机硬件信息等,用于机型过滤--><uses-permission android:name="android.permission.READ_PHONE_STATE" /><!--选举使用,当应用有删除或者更新时需要重新选举,复用推送通道--><uses-permission android:name="android.permission.BROADCAST_PACKAGE_CHANGED" /><uses-permission android:name="android.permission.BROADCAST_PACKAGE_REPLACED" /><uses-permission android:name="android.permission.RESTART_PACKAGES" /><!--补偿通道小米PUSH使用,不用可去除--><uses-permission android:name="android.permission.GET_TASKS" /><!--补偿通道GCM使用,不使用可去除--><uses-permission android:name="android.permission.GET_ACCOUNTS" /><!--允许监听启动完成事件--><uses-permission android:name="android.permission.RECEIVE_BOOT_COMPLETED" /><!--允许访问震动器--><uses-permission android:name="android.permission.VIBRATE" /><!-- 通道保持服务 --><service android:name="com.alibaba.sdk.android.push.ChannelService"android:exported="true" android:process=":channel"><intent-filter><action android:name="com.taobao.accs.intent.action.SERVICE"/></intent-filter><intent-filter><action android:name="org.agoo.android.intent.action.PING_V4" /><category android:name="taobao" /></intent-filter></service><!-- 消息接收服务 --><service android:name="com.alibaba.sdk.android.push.MsgService"android:exported="false"><intent-filter><action android:name="com.taobao.accs.intent.action.RECEIVE" /></intent-filter>3.4 Receiver 的配置将以下receiver片段拷贝进你manifest中的receiver申明区域中:4. Proguard配置 <intent-filter><action android:name="com.alibaba.sdk.android.push.NOTIFY_ACTION" /></intent-filter></service><!-- 连接心跳保持监听器 --><receiver android:name="anet.channel.heartbeat.HeartbeatManager$Receiver" ><intent-filter><action android:name="MAND" /></intent-filter></receiver><!--消息接收监听器--><receiver android:name="com.alibaba.sdk.android.push.MessageReceiver"><intent-filter><action android:name="com.alibaba.push2.action.NOTIFICATION_OPENED"/></intent-filter><intent-filter><action android:name="com.alibaba.push2.action.NOTIFICATION_REMOVED"/></intent-filter><intent-filter><action android:name="MAND" /></intent-filter><intent-filter><action android:name="MAND" /></intent-filter><intent-filter><action android:name="org.agoo.android.intent.action.RECEIVE" /></intent-filter><intent-filter><action android:name=".conn.CONNECTIVITY_CHANGE" /></intent-filter><intent-filter><action android:name="ER_PRESENT" /></intent-filter><intent-filter><action android:name="android.intent.action.BOOT_COMPLETED"/></intent-filter><intent-filter><action android:name="android.intent.action.PACKAGE_REMOVED"/><data android:scheme="package"/></intent-filter></receiver>5. 在应用中注册和启动移动推送首先通过PushServiceFactory获取到CloudPushService,然后调用register()初始化并注册云推送通道,并确保Application上下文中进行初始化工作。
阿里云操作手册
【最新版】
目录
1.阿里云操作手册概述
2.手册的主要内容
3.如何使用阿里云操作手册
4.阿里云操作手册的优势
正文
阿里云操作手册概述
阿里云操作手册是一本详细的指南,它提供了阿里云服务的全面操作方法。
无论是初学者还是有经验的用户,都可以通过这本手册来学习和了解如何更有效地使用阿里云服务。
手册的主要内容
阿里云操作手册主要包括以下内容:
1.阿里云服务的基本概念和原理;
2.各种阿里云服务的操作方法,包括云服务器、数据库、网络、存储等;
3.阿里云服务的优化和安全策略;
4.阿里云服务的故障排除和问题解决方法。
如何使用阿里云操作手册
使用阿里云操作手册非常简单,只需按照以下步骤进行:
1.首先,从阿里云官网下载操作手册;
2.阅读手册的目录,确定需要了解的内容;
3.根据目录找到相关章节,仔细阅读并理解其中的内容;
4.如果有疑问,可以参考手册中的实例或者向阿里云客服咨询。
阿里云操作手册的优势
阿里云操作手册有以下几个优势:
1.权威性:阿里云操作手册是由阿里云官方编写的,内容权威可靠;
2.详细性:手册中包含了各种阿里云服务的详细操作方法,用户可以轻松找到需要的信息;
3.易用性:手册的编写风格简洁明了,用户即使没有任何专业知识也能轻松理解;
4.更新及时:阿里云会定期对手册进行更新,确保用户使用的是最新的操作方法。
总的来说,阿里云操作手册是一本非常实用的指南,可以帮助用户更好地理解和使用阿里云服务。

阿里云App的使用流程1. 下载并安装阿里云App首先,用户需根据自身设备的操作系统选择相应的应用商店,如苹果App Store或安卓应用商店等,搜索并下载阿里云App。
下载完成后,点击安装并等待安装过程完成。
2. 注册账号打开阿里云App后,用户需要进行账号注册。
点击注册按钮,输入个人邮箱或手机号码,并设置密码。
根据提示完成验证码的验证步骤,最后点击注册完成账号创建过程。
3. 登录阿里云App在注册成功后,用户可使用刚才注册的账号信息登录阿里云App。
输入注册时设置的邮箱或手机号码以及密码,点击登录按钮。
若登录成功,App将进入用户的个人主页。
4. 浏览云产品阿里云App的主页上展示了各类云产品的推荐和热门内容。
用户可以通过滑动屏幕浏览或通过搜索功能查找感兴趣的云产品。
5. 选择云产品当用户找到感兴趣的云产品后,点击该产品进入详细信息页面。
在该页面上,用户可以查看产品的功能特性、定价方案等相关信息。
用户可根据需求选择适合自己的云产品。
6. 添加并配置云产品用户在选择云产品后,可以点击添加至购物车按钮。
根据页面提示,选择相应的配置选项,如地域、CPU、内存等。
用户还可以根据自己的需求进行附加配置,如购买SSL证书、设置安全组规则等。
7. 确认订单并支付当用户完成云产品的配置后,点击确认订单按钮。
在确认订单页面,用户可以查看订单的详细信息,并核对配置。
若配置无误,用户可以选择支付方式,如支付宝、微信支付等。
根据页面提示完成支付操作。
8. 管理云产品用户在购买并完成支付后,可以在阿里云App中管理已购买的云产品。
用户可以查看已购买的云产品列表,了解各个产品的使用情况。
同时,用户还可以对云产品进行相应的操作,如启动、停止、重启等。
9. 监控云产品阿里云App提供了云产品的监控功能,用户可以通过App查看自己的云产品的监控指标。
用户可以选择查看某个特定产品的监控情况,如CPU使用率、网络流量等。
用户还可以根据需要设置告警规则,当监控指标超出设置阈值时,阿里云App将发送通知给用户。

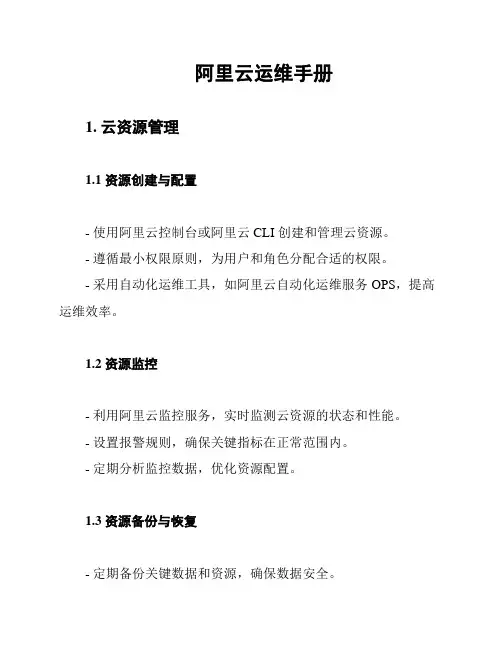
阿里云运维手册1. 云资源管理1.1 资源创建与配置- 使用阿里云控制台或阿里云 CLI 创建和管理云资源。
- 遵循最小权限原则,为用户和角色分配合适的权限。
- 采用自动化运维工具,如阿里云自动化运维服务 OPS,提高运维效率。
1.2 资源监控- 利用阿里云监控服务,实时监测云资源的状态和性能。
- 设置报警规则,确保关键指标在正常范围内。
- 定期分析监控数据,优化资源配置。
1.3 资源备份与恢复- 定期备份关键数据和资源,确保数据安全。
- 熟悉各类备份策略,如全量备份、增量备份等。
- 掌握云盘快照技术,方便快速恢复数据。
1.4 资源安全配置- 启用安全组和网络 ACL,控制入站和出站流量。
- 配置 WAF,防范常见网络攻击,如 SQL 注入、跨站脚本攻击等。
- 定期检查系统漏洞,及时更新安全补丁。
2. 自动化运维2.1 自动化部署- 使用阿里云容器服务 ACK,实现容器化部署。
- 掌握阿里云应用部署服务 AS,简化应用部署流程。
2.2 自动化运维任务- 利用阿里云任务调度服务 CronJob,执行定时任务。
- 通过阿里云 OPS 集成运维工具,实现自动化运维流程。
2.3 脚本编写与存储- 编写运维脚本,提高运维效率。
- 使用阿里云代码仓库托管和管理运维脚本。
3. 监控与报警3.1 监控工具使用- 熟悉阿里云监控服务,了解各类监控指标。
- 使用阿里云日志服务,收集、存储和分析日志数据。
3.2 报警设置与处理- 设置合理的报警规则,确保关键指标异常时能及时响应。
- 制定报警处理流程,确保问题得到及时解决。
4. 数据安全与合规4.1 数据加密- 使用阿里云密钥管理服务 KMS,管理加密密钥。
- 对敏感数据进行加密存储,确保数据安全。
4.2 数据脱敏- 掌握数据脱敏技术,保护用户隐私。
- 在数据存储和传输过程中实现数据脱敏。
4.3 合规审查- 遵循国家相关法律法规,确保运维活动合规。
- 定期进行合规审查,提高运维安全管理水平。
阿里云操作手册
摘要:
1.阿里云操作手册概述
2.手册的内容
3.使用阿里云的建议
正文:
阿里云操作手册概述
阿里云操作手册是一本详细的指南,它为使用阿里云服务的用户提供了全面的操作指导。
该手册包含了各种实用的技巧和方法,可以帮助用户更轻松、更高效地使用阿里云。
无论是初学者还是有经验的用户,都可以从这本手册中获益。
手册的内容
阿里云操作手册主要包括以下几个方面的内容:
1.阿里云服务的介绍:包括阿里云的使命、愿景、核心价值观,以及阿里云服务的特点和优势。
2.阿里云服务的使用方法:包括如何注册阿里云账号、如何购买阿里云服务、如何使用阿里云控制台和管理台等。
3.阿里云服务的操作技巧:包括如何创建和管理云服务器、如何使用和配置云数据库、如何设置和监控云网络等。
4.阿里云服务的安全保障:包括如何设置安全组和防火墙、如何进行数据备份和恢复、如何保障云服务器的安全等。
使用阿里云的建议
使用阿里云服务,可以参考以下建议:
1.了解阿里云服务的特点和优势:这样可以更好地选择和使用阿里云服务,提高工作效率和质量。
2.熟悉阿里云操作手册:这样可以更轻松、更高效地使用阿里云服务,避免一些不必要的错误和问题。
3.注重安全保障:使用阿里云服务时,要注重安全保障,避免因为安全问题而导致数据丢失或者服务中断。
4.定期进行数据备份和恢复:这样可以更好地保障数据的安全,避免因为数据丢失而导致的工作中断或者数据丢失。
阿里云操作手册是一本实用的指南,可以帮助用户更好地使用阿里云服务。
无论是初学者还是有经验的用户,都可以从这本手册中获益。
产品使用手册域名操作添加域名万网域名万网域名无需添加,购买后将直接出现在云解析域名列表中。
非万网域名添加单个域名登录阿里云管理控制台,找到【云解析】- 【域名解析列表】,选择"添加域名"。
添加批量域名批量添加域名的入口为:或者点击后,进入到批量添加域名界面:qqqqq添加规则合法字符长度为1-63个字符(域名主体),合法后缀请参考附件《域名后缀列表》,不合法后缀则提示不合法;如果合法后缀后面有".",则允许客户添加,成功后可不显示".";英文域名合法字符为a-z,0-9, "-"(不能在开头和结尾,以及同时在第三和第四字符位置);中文域名除英文域名合法字符外,必须含有至少一个汉字(简体或繁体),计算中文域名字符长度以转换后的punycode码为准;不支持"xn-开头"的输入,提示:不支持此格式。
如为punycode码,请输入中文域名。
对输入域名进行判断,如果www.后是已知顶级域名,则将www.作为域名主体处理。
添加域名流程删除域名万网域名万网域名不允许删除。
非万网域名删除单个域名选择【操作】-【删除】功能,会弹出提示信息如下:点击"确认"后,域名连同其解析记录全部删除。
删除多个域名点击列表下方批量操作"删除"按钮后,弹出提示如下:【注意】因为万网域名不允许删除,因此在批量删除中如果存在万网域名,则提示用户,相应数量的万网域名无法删除。
域名找回一个域名只能存在于一个账户中,当一个账户添加已经存在于其他账户中的域名时,需要通过"域名找回",将域名功能找回域名。
"域名找回"功能针对非万网域名。
如图,在添加域名时,会提示域名找回:qqq 通过whois邮箱找回用户可以通过whois邮箱找回域名。
如图所示:点击发送邮件后,用户的whois邮箱将收到一封验证邮件。
Cloud APP User GuideAPP Download and InstallationScan the QR code for downloading and installing APP, there will be APP shown on your phone. Please refer to the QR code picture.QR codeAPP iconMake sure device IoT function enabledOpen device setting web UI to check IoT function enabled.About how to know the device IP, please refer to <InnovaUnity IOT Firmware & Local Web Upgrade Guide.pdf>Log inIf user has already an account, please log in with the account name and password.Login interfaceIf user hasn’t an account, please register an account at first, after register successfully, user can log in APP with the account name and password.Register pagePlease note:User should register with email account, APP will send verification code to the email address, please make sure you can access the email to get the verification code as soon as possible.Add deviceLog in APP, APP shows all devices added, with phone default language. Click the top right icon to go "Add Device" page. There are two ways to add device, one is scan bar code, the other is input bar code manually.User can find the bar code of device on chassis.Bar codeAdd device pageClick scan bar code or input bar code, then fill device information, such as device name, description, location, and choose or create site, click the top right icon to add device.Please note : If there is no site existed, user should create a site first. If the device is added OK, the device will be shown in device list on "My Device" page. If the device can't be added successfully, there will be information "the parameter sn is invalid" or "Device is already registered" to remind user.device pageDevice detail informationLogin APP, APP shows all devices, with phone default language. Click “Device List”, all the devices added will be shown in the list, then click device row to enter device detail information page.The detail information includes battery icon (a circle with color and a little icon), battery capacity, battery remaining time, device status with icon, load percent with icon, load W/VA, output voltage/frequency/current, input voltage/frequency, load segment status, device name, device description, device location, device UUID, and device event logs.Device information pageUser can edit device name, description and location in the device information section of the device information page.Remove deviceLogin APP, APP shows all devices, with phone default language. Click “Device List”, all the devices added will be shown in the list, then click device row to enter device detail information page. User can click the top right icon, select "remove", then the device will be deleted in device list. If user cancels, the device won't be removed.Remove device 1Long press device row on "My devices" page, there will be "Remove Device" page shown, select the device user wants to remove, and click the top right icon to remove devices. If user cancels, devices won't be removed.Remove device 2Add scheduleLogin APP, APP shows all devices. Click the top left icon to open Navigation drawer, and then click "Schedules" to go "Schedules" page, click the top right icon to add schedule, set schedule name, start time, occur frequency and test type, select device, then click the top right icon to save the schedule setting. New schedule will be shown on "Schedules" page.Add schedule pageAll schedules will be shown on "Schedules" page.Schedule pageClick the schedule row on "Schedules" page, user can view or edit the schedule.Remove scheduleLong press schedule row on "Schedules" page, there will be "Remove Schedule" page shown, select the schedule user wants to remove, and click the top right icon to remove. If user cancels, schedules won't be removed.Remove scheduleOther SettingsLogin APP, APP shows all devices, with phone default language. Click the top left icon to open Navigation drawer, then click "Settings" to go "Setting" page.User can change APP language from "My account setting" sectionUser can change “Email Notifications” level setting.User can change “Push Notifications” level setting.User can click the site name row and select "Remove" to delete site, and the site will be deleted on "Setting" page.User can invite an account registered to manage or view the device of a site.Settings。
阿里云使用方法
阿里云是中国最大的云计算服务提供商之一,提供各种云计算产品和服务。
以下是使用阿里云的常见步骤和方法:
1. 注册阿里云账号:首先需要在阿里云官方网站注册一个账号。
2. 购买云产品:登录阿里云账号后,选择需要的云产品,并根据需求进行购买。
3. 配置云产品:根据你购买的云产品类型,设置相应的配置参数。
例如,如果购买的是云服务器ECS,需要选择操作系统、实例规格、磁盘大小等。
4. 网络配置:根据需要配置网络相关的内容,如VPC、弹性IP等。
5. 数据存储:根据需要选择合适的存储服务,如对象存储OSS、关系型数据库RDS等。
6. 资源监控:提供相应的监控工具和服务,可以帮助你实时监控云产品的状态和性能。
7. 安全设置:提供各种安全功能和服务,如DDoS防护、访问控制等,保障你的云产品数据和系统的安全。
8. 帮助与支持:阿里云提供详细的帮助文档和技术支持,可以通过阿里云官方网站、论坛、客户支持等渠道获取技术支持和解决问题。
以上是使用阿里云的基本方法和步骤,具体操作和配置会根据你购买的云产品和个人需求而有所不同。
建议在使用前仔细阅读阿里云的文档和指南,了解每个产品的使用方法和最佳实践。
阿⾥云专有云企业版Apsara Stack控制台⽤⼾指南产品版本:V3.10.0⽂档版本:20191122Apsara Stack控制台⽤⼾指南 / 法律声明法律声明阿⾥云提醒您在阅读或使⽤本⽂档之前仔细阅读、充分理解本法律声明各条款的内容。
如果您阅读或使⽤本⽂档,您的阅读或使⽤⾏为将被视为对本声明全部内容的认可。
1.您应当通过阿⾥云⽹站或阿⾥云提供的其他授权通道下载、获取本⽂档,且仅能⽤于⾃⾝的合法合规的业务活动。
本⽂档的内容视为阿⾥云的保密信息,您应当严格遵守保密义务;未经阿⾥云事先书⾯同意,您不得向任何第三⽅披露本⼿册内容或提供给任何第三⽅使⽤。
2.未经阿⾥云事先书⾯许可,任何单位、公司或个⼈不得擅⾃摘抄、翻译、复制本⽂档内容的部分或全部,不得以任何⽅式或途径进⾏传播和宣传。
3.由于产品版本升级、调整或其他原因,本⽂档内容有可能变更。
阿⾥云保留在没有任何通知或者提⽰下对本⽂档的内容进⾏修改的权利,并在阿⾥云授权通道中不时发布更新后的⽤⼾⽂档。
您应当实时关注⽤⼾⽂档的版本变更并通过阿⾥云授权渠道下载、获取最新版的⽤⼾⽂档。
4.本⽂档仅作为⽤⼾使⽤阿⾥云产品及服务的参考性指引,阿⾥云以产品及服务的“现状”、“有缺陷”和“当前功能”的状态提供本⽂档。
阿⾥云在现有技术的基础上尽最⼤努⼒提供相应的介绍及操作指引,但阿⾥云在此明确声明对本⽂档内容的准确性、完整性、适⽤性、可靠性等不作任何明⽰或暗⽰的保证。
任何单位、公司或个⼈因为下载、使⽤或信赖本⽂档而发⽣任何差错或经济损失的,阿⾥云不承担任何法律责任。
在任何情况下,阿⾥云均不对任何间接性、后果性、惩戒性、偶然性、特殊性或刑罚性的损害,包括⽤⼾使⽤或信赖本⽂档而遭受的利润损失,承担责任(即使阿⾥云已被告知该等损失的可能性)。
5.阿⾥云⽂档中所有内容,包括但不限于图⽚、架构设计、⻚⾯布局、⽂字描述,均由阿⾥云和/或其关联公司依法拥有其知识产权,包括但不限于商标权、专利权、著作权、商业秘密等。
阿里云服务器使用教程阿里云服务器使用教程阿里云服务器是一种云计算产品,可以提供稳定可靠的云计算服务。
它具有灵活性强、安全性高、成本低等特点,是个人和企业在互联网上搭建网站、应用程序等的首选。
以下是阿里云服务器的使用教程:第一步:购买阿里云服务器1. 打开阿里云官网,登录账号。
2. 进入产品界面,选择云服务器ECS。
3. 选择适合自己需求的服务器配置,并添加到购物车。
4. 确认订单并进行支付。
第二步:配置阿里云服务器1. 在购买成功后,进入控制台。
2. 在实例列表中,选择已购买的服务器实例。
3. 点击“管理”按钮,进入服务器管理页面。
4. 在服务器管理页面中,可以进行网络设置、安全设置、存储设置等。
5. 根据实际需求配置服务器参数。
第三步:登录阿里云服务器1. 在实例列表中,找到已购买的服务器实例。
2. 在服务器实例详情页中,找到公网IP地址。
3. 使用SSH工具(如PuTTY)连接服务器:在工具中输入公网IP地址、用户名和密码,点击连接。
4. 成功连接后,即可通过终端进行服务器的操作和管理。
第四步:部署网站或应用程序1. 通过SSH连接服务器后,可以使用命令行工具进行相关操作,如安装软件、配置环境等。
2. 将网站或应用程序的文件上传至服务器。
3. 配置域名解析,将域名指向服务器的公网IP地址。
4. 安装Web服务器软件(如Nginx、Apache)。
5. 配置Web服务器,将域名与网站或应用程序进行绑定。
6. 测试访问网站或应用程序,确保正常运行。
第五步:监控和维护1. 阿里云服务器提供了监控服务,可以查看服务器的运行状态、网络流量等。
2. 根据实际需求设置告警规则,及时获得服务器异常情况的通知。
3. 定期对服务器进行维护,如更新操作系统、软件补丁等。
4. 配置定期备份,以防数据丢失。
总结:以上就是阿里云服务器的基本使用教程。
购买、配置、登录和部署是使用阿里云服务器的关键步骤。
在使用过程中,可以根据需要进行进一步的设置和优化,以提高服务器的性能和安全性。
阿里云AppDeploy使用手册阿里云– CTO Office –开发者效率团队2015.08版权所有侵权必究目录1 介绍 (3)2 功能 (3)3 安装 (4)4 使用说明 (6)4.1 获取、设置Access Key (7)4.2 环境变量 (8)4.3 执行命令 (9)4.4 并发执行 (10)4.5 文件传输&远端执行&一键更新源 (11)4.6 Web环境安装、应用打包部署 (12)5 最佳实践 (13)5.1 Hello World (14)5.2 Nginx 远程部署 (15)5.3 Shell脚本文件执行 (17)5.4 一键环境安装、应用编译打包发布 (18)6 常见问题 (19)1 介绍阿里云AppDeploy是一个通过SSH实现的流式命令行工具,可用于完成应用部署和远程系统管理,其工作于python2.5-2.7平台上,具有良好的可移植性;AppDeploy将本地应用软件上传到远端服务器,并通过执行用户预定义的产品部署命令,灵活的、便捷的、高效的为阿里云用户实现应用远程部署提供稳定的工作环境。
AppDeploy使用自然语言对部署任务进行描述,通过简单的编辑规则,您可以像书写自然语言一样描述您的部署任务,AppDeploy将依据您写的自然语言描述文件部署、管理您的应用。
2 功能1)远程应用部署:用户可以使用AppDeploy将本地应用软件安装部署到远程云服务器上,软件包可以在本地编译打包好,也可以选择在云服务器编译安装。
2)远程服务管理:您可以使用AppDeploy远程执行shell脚本,让远程机器的操作命令感觉在本地执行一般,大大的提高开发者的工作效率。
3)文件上传下载:您可以在本地主机和远程服务器间实现上传、下载文件的功能。
4)同时控制多台服务器:基于大型软件的部署场景,AppDeploy提供同时在多台服务器部署软件的功能,且可以选择顺序执行或者并发执行的运行模式。
5)一键环境安装:一键安装Web运行环境,支持JDK、Nginx、Apache、Tomcat、PHP、Mysql等多版本,您可以根据业务选择安装;6)一键应用部署:可以一键编译、打包、部署常见的应用,支持Maven、Ant等打包部署的安装方式;7)一键式更新源:执行AppDeploy自定义命令更新系统源,支持Ubuntu、Centos、Redhat、Opensuse、Debian等系统的主流版本;8)账号密码管理:基于用户复杂的应用场景,为用户提供灵活、易用的账号密码管理功能,用户可以设置免密码输入运行,且可为不同主机设置不同密码。
3 安装Linux系统平台安装:预先安装好python2.7(一般在/usr/local/lib/python2.7);1.通过阿里云市场下载AppDeploy源码安装包:AppDeploy-1.0.1.tar.gz;解压压缩包得到:AppDeploy-1.0.1-Linux.tar.gz;2.解压:$ tar –zvxf AppDeploy-1.0.1-Linux.tar.gz;3.执行:$ cd appdeploy-1.0.1 && sudo python setup.py install 安装appdeploy;4.执行:$apde命令,若果能找到命令说明安装完成;Windows系统安装:预先安装好python2.7(一般安装在C:/Python27);1.通过阿里云市场下载AppDeploy windows安装包:AppDeploy-1.0.1.zip;2.解压压缩包,得到AppDeploy-1.0.1-Windows.zip;解压压缩包可以发现一个安装文件setup.exe;3.双击setup.exe(确定预先安装python2.7),出现如下AppDeploy的安装视图,安装目录应该选择Python2.7的安装目录下的Lib\site-packets子目录;4.根据向导直到安装完成;5.设置环境变量:环境变量一般为自动设置,不过这里您可以确认一下,以保证正常运行;右键“计算机”–选择属性–选择“高级系统设置”–选择高级–选择“环境变量”:添加环境变量,名字(APPDEPLOY)值(C:\Python27\Lib\site-packages);在path系统变量中添加“C:\Python27; %APPDEPLOY%;”,为AppDeploy和Python2.7的安装目录;6.验证:打开cmd命令行工具,输入:python,如果能运行,则说明python安装成功;输入:adep,如果显示下面日志,则说明安装成功;Mac系统安装:(请预先安装好python2.7)1.下载AppDeploy-1.0.1.tar.gz,解压可以得到AppDeploy-1.0.1-Mac.zip 的压缩包,解压AppDeploy-1.0.1-Mac.zip,得到pycrypto-2.6.1.tar.gz & AppDeploy-1.0.1.tar.gz;2.若您系统中尚未安装pycrypto-2.6.1.tar.gz,解压后进入pycrypto-2.6.1,执行$ sudo pythonsetup.py install;若已经安装,直接进入步骤3;3.解压AppDeploy-1.0.0.tar.gz,进入appdeploy-1.0.1后执行$ sudo python setup.py install;4.进入命令行执行$ adep,出现如下视图说明安装成功:4 使用说明AppDeploy是一个基于Python实现的命令行工具,通过SSH通道自动执行部署命令、远程管理、传输文件。
执行AppDeploy前您需要准备:应用的安装包、部署脚本、配置文件等。
AppDeploy是根据您当前工作目录下的纯文本描述文件(默认appdeploy.txt)作为执行依据工作的。
AppDeploy有两种使用方式:●通过命令行,执行一条命令,格式:$ adep [options] -- [shell command]Option为命令选项,“--”为分割符,后面的字符都会当做shell命令在远端执行;例如:查看远程机器nginx运行情况$ adep -H '101.200.184.144' -u root -p xxxx -- ps -aux | grep nginx还可以通过命令行格式执行文件传输和远程命令,详见4.3节;PS:这种方式使用方便,可以灵活、快速的执行您想执行的命令,但实现的功能相对简单,大部分情况下,您可以使用下面的方式实现您的具体任务;●通过编辑描述文件(appdeploy.txt)文件,在文件中定义任务(任务的实现细节),并在命令行执行$ adep task1 task2(文件中定义的任务名)的方式执行定义的任务;任务描述文件(默认为./appdeploy.txt)的编写规则:下面分别介绍AppDeploy定义的环境变量、操作命令、并发执行等细节:4.1 获取、设置Access Key第一步:登录阿里云首页,并登录账号;第二步:点击进入管理控制台和Access keys页面;第三步:读取Access Key ID和Access Key Secret的值,如果没有则需要先创建一个。
得到的Access Key ID和Access Key Secret通过以下方式配置到AppDeploy中。
在Appdeploy.py描述文件中设置ak_id(Access Key ID)和ak_sec(Access Key Secret)变量;4.2 环境变量Hosts变量详细说明:用来定义需要连接的服务器集合,在执行appdeploy.txt中任务时会在Hosts定义的每个服务器上运行一遍;也可以定义为:hosts = ['host1', 'user2@host2', 'host3'],表示一共三个远端服务器host1、host2、host3,其中host2使用user2登录,host1和host3使用user定义的值;例如:在appdeploy.txt中定义:hosts = ['host1', 'host2']@ task1run(‘ls’)则执行:$ adep task1时,会在host1、host2上分别执行ls命令;User详细说明:定义远程服务器的登录名,如果没有定义,则默认为当前机器的用户名;例如:user = 'user1'Password & Passwords详细说明:首先推荐使用SSH提供的密钥管理机制来实现免密码输入模式,可查阅相关资料;AppDeploy提供了两层管理密码的机制:如果您的servers的密码都相同,可以通过在password中设置统一默认密码;如果每个server的密码不同,可以在passwords中设置host:password对应表,对每个server 设置单独的密码;host的格式:user@host:port;例如:password=’xxxxx’passwords={'root@101.200.184.144:22':’xxx’, 'root@123.57.228.240:22':’yyy’}parallel详细说明:详见并发执行章节;4.3 执行命令您可以通过一些常用的命令集快速书写您的部署描述文件;Get命令详细说明:Put命令详细说明:Prompt命令详细说明:4.4 并发执行Appdeploy默认是串行执行所有命令的。
其本身不是线程安全的,所以它用多进程的方式为每个任务启动一个新进程。
AppDeploy有两种方式执行并发执行任务:1)在命令行执行任务时添加-P 选项,则执行的所有任务都会在不同的服务器之间并发执行,但不同任务之间依然按照顺序执行进行;例如:$ adep -P -H host1,host2 update reload执行结果update on host1 and host2reload on host1 and host22)通过在appdeploy.txt文件中设置parallel=True来表明任务会被并行执行;例如:parallel=True@ task1pass@ task2pass$ adep -H host1,host2,host3 task1 task2结果:Task1 on host1, host2, and host3Task2 on host1, host2, and host34.5 文件传输&远端执行&一键更新源AppDeploy通过两种方式实现文件的上传、下载,以及shell命令在远端执行;1)通过命令行类似shell命令的方式实现:具体操作的哪些服务器、用户名、密码信息由appdeploy.txt文件定义;文件上传命令格式:$ adep put:localfile,remoteFolder“put”、”:”、”localFile”、”,”、”remoteFolder”之间都没有空格;LocalFile:本地上传文件路径及名字,RemoteFolder:上传到服务器的具体目录;文件下载命令格式:$ adep get:remoteFile,localFolder”get”、”:”、”remoteFile”、”,”、”localFolder”之间都没有空格;RemoteFile:从服务器上下载的文件名,localFolder:下载文件本地存放目录;命令远程执行格式:$ adep run:shellCommand“run”、”:”、”shellCommand”之间都没有空格;ShellCommand:指远端执行的命令,有空格时要用引号引起来;下面以文件上传为例:appdeploy.txt中变量定义为:user = 'root' # userpassword= 'xxx' # passwordhosts = ['101.200.184.144','123.57.228.240'] # hosts执行$ adep put:./install.sh,/root/执行结果:adep把install.sh分别上传到两台服务器上的/root目录下;2)通过在描述文件中put、get、run命令实现,具体实现细节参考“4.2 执行命令”;一键更新源功能可以执行命令:$ adep update_source可以更新服务器端的源配置,支持Ubuntu、Centos、Redhat、Opensuse、Debian等系统的多个版本源更新功能;4.6 Web环境安装、应用打包部署AppDeploy可以实现一键Web环境安装和应用打包部署的功能。