bit fiield in C Prrogramming
- 格式:doc
- 大小:34.50 KB
- 文档页数:6
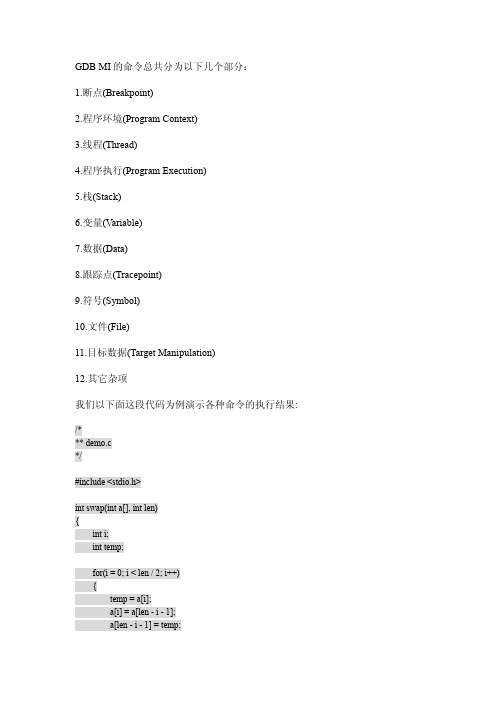
GDB MI的命令总共分为以下几个部分:1.断点(Breakpoint)2.程序环境(Program Context)3.线程(Thread)4.程序执行(Program Execution)5.栈(Stack)6.变量(Variable)7.数据(Data)8.跟踪点(Tracepoint)9.符号(Symbol)10.文件(File)11.目标数据(Target Manipulation)12.其它杂项我们以下面这段代码为例演示各种命令的执行结果:/*** demo.c*/#include <stdio.h>int swap(int a[], int len){int i;int temp;for(i = 0; i < len / 2; i++){temp = a[i];a[i] = a[len - i - 1];a[len - i - 1] = temp;}return 0;}int main(){int array[10];int i;for(i = 0; i < 10; i++)array[i] = i;printf("swap before:");for(i = 0; i < 10; i++)printf("%d ", array[i]);printf(" \n");swap(array, 10);printf("swap after:");for(i = 0; i < 10; i++)printf("%d ", array[i]);printf(" \n");return 0;}执行gcc -g demo.c -o demo.exe编译。
具体详细的命令还请大家看gdb手册,下面一一介绍:1.断点-break-after用法:-break-after number count语义:第number个断点在被执行count次后有效-break-condition用法:-break-condition number expr语义:第number个断点在表达式expr为true时有效-break-delete用法:-break-delete ( breakpoint number )+语义:删除指定number 的多个断点-break-disable用法:-break-disable ( breakpoint number)+语义:使指定number的多个断点失效-break-enable用法:-break-enable ( breakpoint number)+语义:使指定number的多个断点起效-break-info用法:-break-info breakpoint语义:得到指定断点的信息-break-insert用法:-break-insert [ -t ] [ -h ] [ -r ][ -c condition ] [ -i ignore-count ][ -p thread ] [ line | addr ]语义:-t 插入一个临时断点-h 插于一个硬件端点-r 插入一个正则断点,当函数名匹配正则表达式时有效-c 插入一个条件断点-i 插入一个指定无效次数的断点如果指定了line选项,可以使用如下格式:函数文件名:行号文件名:函数地址-break-list用法:-break-list语义:先是已插入断点的列表-break-watch用法:-break-watch [ -a | -r ] variable语义:创建一个观察点,-a表示对variable读写时有效,-r表示只读时有效运行效果:(gdb)-break-insert main^done,bkpt={number="1",type="breakpoint",disp="keep",enabled="y",addr="0x0040 10f6",func="main",file="demo.c",line="23",times="0"}(gdb)-break-insert 28^done,bkpt={number="2",type="breakpoint",disp="keep",enabled="y",addr="0x0040 1108",func="main",file="demo.c",line="28",times="0"}(gdb)-break-list^done,BreakpointTable={nr_rows="2",nr_cols="6",hdr=[{width="3",alignment="-1", col_name="number",colhdr="Num"},{width="14",alignment="-1",col_name="type",col hdr="Type"},{width="4",alignment="-1",col_name="disp",colhdr="Disp"},{width="3",ali gnment="-1",col_name="enabled",colhdr="Enb"},{width="10",alignment="-1",col_na me="addr",colhdr="Address"},{width="40",alignment="2",col_name="what",colhdr="W hat"}],body=[bkpt={number="1",type="breakpoint",disp="keep",enabled="y",addr="0x0 04010f6",func="main",file="demo.c",line="23",times="0"},bkpt={number="2",type="br eakpoint",disp="keep",enabled="y",addr="0x00401108",func="main",file="demo.c",lin e="28",times="0"}]}(gdb)-exec-run^running(gdb)*stopped,reason="breakpoint-hit",bkptno="1",thread-id="1",frame={addr="0x004010 f6",func="main",args=[],file="demo.c",line="23"}(gdb)-exec-continue^running(gdb)*stopped,reason="breakpoint-hit",bkptno="2",thread-id="1",frame={addr="0x004011 08",func="main",args=[],file="demo.c",line="28"}(gdb)-break-delete 1^done(gdb)2.程序环境-exec-arguments用法:-exec-arguments args语义:设置程序命令行参数-exec-show-arguments用法:-exec-show-arguments语义:显示命令行参数-environment-cd用法:-environment-cd pathdir语义:设置GDB的工作目录-environment-directory用法:-environment-directory [ -r ] [ pathdir ]+语义:添加一个或多个pathdir到源文件的搜索路径,如果"-r"被指定,pathdir将被设为缺省的搜索路径-environment-path用法:-environment-path [ -r ] [ pathdir ]+语义:添加一个或多个pathdir到目标文件的搜索路径,如果"-r"被指定,pathdir 将被设为GDB启动时的搜索路径-environment-pwd用法:-environment-pwd语义:显示当前工作目录3.线程-thread-info语义:-thread-list-ids用法:-thread-list-ids语义:产生一个GDB当前已知线程的链表-thread-select用法:-thread-select threadnum语义:使threadnum成为当前线程效果如下:(gdb)-thread-list-ids^done,thread-ids={thread-id="3",thread-id="1"},number-of-threads="2"(gdb)-thread-select 1^done,new-thread-id="1",frame={level="0",func="main",args=[],file="demo.c",line= "27"},line="27",file="demo.c"(gdb)4. 程序执行这些命令都是异步命令-exec-continue用法:-exec-continue语义:继续执行程序,直到有断点或者程序退出-exec-finish用法:-exec-finish语义:将当前函数执行完毕-exec-interrupt用法:-exec-interrupt语义:中止正在执行的程序-exec-next用法:-exec-next语义:执行一行源代码-exec-next-instruction用法:-exec-next-instruction语义:执行一条机器指令-exec-return用法:-exec-return语义:中止当前函数的执行,立即返回-exec-run用法:-exec-run语义:开始执行程序,直到遇到断点或退出-exec-step用法:-exec-step语义:执行到下一个源代码行,如果此行是函数调用,则停留在调用函数的开始处-exec-step-instruction用法:-exec-step-instruction语义:执行一条机器指令-exec-until用法:-exec-until [ location ]语义:一直执行,直到达到location5. 栈-stack-info-frame尚没实现-stack-info-depth用法:-stack-info-depth [ max-depth ]语义:显示栈深度,如果指定了max-depth,超过max-depth的帧不会被计算-stack-list-arguments用法:-stack-list-arguments show-values[ low-frame high-frame ]语义:显示帧参数,show-values为0只显示参数名称,为1显示名称和值,如果指定了low-frame,high-frame则只显示它们之间的参数-stack-list-frames用法:-stack-list-frames [ low-frame high-frame ]语义:列举所有帧,如果指定low-frame和high-frame则只显示它们之间的帧-stack-list-locals用法:-stack-list-locals print-values语义:显示当前帧的本地变量,如果print-values为0,只显示变量名称,为1显示名称和值-stack-select-frame用法:-stack-select-frame framenum语义:选择framenum帧为当前帧效果如下:6.变量-var-create用法:-var-create {name | "-"} {frame-addr | "*"} expression语义:创建一个变量对象name表示变量名,如果指定"-",变量名将被自动创建frame-addr表示创建变量所在帧的基址expression可以有三种:地址,地址块,寄存器-var-delete用法:-var-delete name语义:删除名为name的变量对象-var-set-format用法:-var-set-format name format-spec语义:设置名为name的变量的输出格式format-spec ==>{binary | decimal | hexadecimal | octal | natural}-var-show-format用法:-var-show-format name语义:查看名为name的变量的输出格式,格式只有上面format-spec指定的几种-var-info-num-children用法:-var-info-num-children name语义:查看名为name的变量的子变量数目-var-list-children用法:-var-list-children [print-values] name语义:查看名为name的变量的子变量,如果print-values为0或者--no-values 则只显示子变量名,如果为1或--all-values显示子变量名和值-var-info-type用法:-var-info-type name语义:查看名为name的变量的类型-var-info-expression用法:-var-info-expression name语义:查看名为name的变量的表达式,可返回的表达式语言之有三种:C,C++,JA V A-var-show-attributes用法:-var-show-attributes name语义:查看名为name的变量的属性,属性为{ { editable | noneditable } | TBD }-var-evaluate-expression用法:-var-evaluate-expression name语义:计算名为name的变量的表达式-var-assign用法:-var-assign name expression语义:将一个新的表达式赋给名为name的变量-var-update用法:-var-update name语义:更新名为name的变量值,即根据当前的内存或寄存器重新计算变量值效果如下:(gdb)-var-create i 1 2^done,name="i",numchild="0",type="int"(gdb)-var-create - 1 3^done,name="var2",numchild="0",type="int"(gdb)-var-delete var2^done,ndeleted="1"(gdb)-var-show-format i^done,format="natural"(gdb)-var-list-children 1 i^done,numchild="0"(gdb)-var-info-type i^done,type="int"(gdb)-var-info-expression i^done,lang="C",exp="2"(gdb)-var-show-attributes i^done,attr="editable"(gdb)-var-evaluate-expression i^done,value="2"(gdb)-var-update i^done,changelist=[{name="i",in_scope="true",type_changed="false"}] (gdb)7.数据-data-disassemble用法:-data-disassemble[ -s start-addr -e end-addr ]| [ -f filename -l linenum [ -n lines ] ]-- mode语义:反汇编某一块内存区,可以按以下两种方式指定内存区:1). 指定开始和结束地址,start-addr, end-addr2). 指定源文件名和行范围mode是显示格式,0显示反汇编代码,1混合显示反汇编和源代码-data-evaluate-expression用法:-data-evaluate-expression expr语义:计算表达式expr的值-data-list-changed-registers用法:-data-list-changed-registers语义:显示值有变化的寄存器列表-data-list-register-names用法:-data-list-register-names [ ( regno )+ ]语义:显示指定了号码的寄存器名字,如果没指定regno,则显示所有的寄存器名字列表-data-list-register-values用法:-data-list-register-values fmt [ ( regno )*]语义:显示寄存器的内容,fmt是值的显示格式,如下:de> xde> Hexadecimalde> ode> Octalde> tde> Binaryde> dde> Decimalde> rde> Rawde> Nde> Natural-data-read-memory用法:-data-read-memory [ -o byte-offset ]address word-format word-sizenr-rows nr-cols [ aschar ]语义:address指定开始地址,byte-offset指定从开始地址的偏移值,word-format每个字的显示格式,word-size每个字的长度nr-rows,nr-cols指定输出格式为几行几列效果如下:(gdb)-data-disassemble -s $pc -e "$pc + 20" -- 0^done,asm_insns=[{address="0x004010f6",func-name="main",offset="37",inst="call 0x401250<__main>"},{address="0x004010fb",func-name="main",offset="42",inst="movl$0x0,0xffffffc4(%ebp)"},{address="0x00401102",func-name="main",offset="49", inst="cmpl$0x9,0xffffffc4(%ebp)"},{address="0x00401106",func-name="main",offset="53",inst="jg 0x401119 <main+72>"},{address="0x00401108",func-name="main",offset="55",inst="mov 0xffffffc4(%ebp),%edx"}](gdb)-data-evaluate-expression &i^done,value="0x22eeac"(gdb)-data-list-register-values x 1 2 3 4^done,register-values=[{number="1",value="0x0"},{number="2",value="0x4c"},{nu mber="3",value="0x4"},{number="4",value="0x22ee70"}](gdb)-exec-next^running(gdb)*stopped,reason="end-stepping-range",thread-id="1",frame={addr="0x004010fb",fun c="main",args=[],file="demo.c",line="27"}(gdb)-data-list-changed-registers^done,changed-registers=["0","2","8","9"](gdb)-data-read-memory $pc x 2 3 2^done,addr="0x004010fb",nr-bytes="12",total-bytes="12",next-row="0x004010ff",pr ev-row="0x004010f7",next-page="0x00401107",prev-page="0x004010ef",memory=[{ addr="0x004010fb",data=["0x45c7","0x00c4"]},{addr="0x004010ff",data=["0x0000","0x83 00"]},{addr="0x00401103",data=["0xc47d","0x7f09"]}](gdb)以后的8、9等命令GDB大部分尚没实现,或很少使用,不再解释。

Primeros pasosNETGEAR Armor™, con tecnología Bitdefender®, proporciona la mejor protección de ciberseguridad de su clase para sus dispositivos inteligentes, smartphones y ordenadores.Toque el icono de Seguridad en su Orbi App para explorar su prueba gratuita.¡Descubra todo lo que puede hacer en la aplicación Orbi! Detenga la conexión a Internet, ejecute una prueba develocidad, configure el control parental inteligente y mucho más.Compruebe si el control parental inteligente está disponible en su zona: / NETGEAR-SPC-availabilityEn su teléfono móvil, descargue la aplicación Orbi y siga las instrucciones de configuración que aparezcan.Proteja sus dispositivos con NETGEAR Armor2Operaciones adicionales con la aplicación3Contenido Descripción generalNETGEAR, Inc.350 East Plumeria DriveSan Jose, CA 95134 (EE. UU.)© NETGEAR, Inc., NETGEAR y el logotipo de NETGEAR son marcas comerciales registradas de NETGEAR, Inc. Cualquier marca comercialdistinta a NETGEAR que se utilice, se usa únicamente a modo de referencia.NETGEAR INTERNATIONAL LTD Floor 1, Building 3,University Technology Centre Curraheen Road, Cork, T12EF21, Irlanda1Botón de sincronización 2Puerto de Internet 3Puertos Ethernet4Conector de alimentación 5Botón de reinicio6Indicador de alimentaciónAsistencia técnica y comunidadVisite /support para obtener todas las respuestas a sus preguntas y acceder a las descargas más recientes.También podrá echar un vistazo a los útiles consejos de nuestra comunidad de NETGEAR en .Para consultar la declaración de conformidad de la UE, visite https:///about/regulatory/.Consulte el documento de cumplimiento normativo antes de conectar la fuente de alimentación.Reglamentario y legalSolución de problemasSi tiene problemas con la instalación, pruebe lo siguiente:•Apague el módem y el Orbi Router y desconéctelos. Reinicie el módem. Vuelva a conectar el Orbi Router al módem e intente instalarlo de nuevo con la Orbi App.• Si sigue sin poder instalar el Orbi Router con la Orbi App,instálelo manualmente mediante la interfaz web de este.Visite para acceder a la interfaz web del router.Si ya tiene otro Orbi Router y ha utilizado la Orbi App anteriormente, vaya al panel y toque > NUEVA CONFIGURACIÓN para instalar el nuevo Orbi Router.Para obtener más información, visite /orbihelp.Router Orbi Cable EthernetFuente de alimentación (varía según laregión)Adaptadores de enchufe tipo C (para la mayor parte de Europa)Adaptadores de enchufe tipo G (para Reino Unido)Diciembre de 2021。

记账凭证的纸张尺寸推荐文章用友记账凭证纸张规格热度:记账凭证纸张规格热度:贷款还款凭证范本热度:如何编制出纳记账凭证热度:冲销记账凭证适用范围是哪些热度:原始凭证必须具备的基本要素,原始凭证的分类;记账凭证必须具备的内容,记账凭证的分类,记账凭证的更正方法;原始凭证和记账凭证的关系。
下面店铺就为大家解开记账凭证的纸张尺寸,希望能帮到你。
记账凭证的纸张尺寸在卖办公用品的地方就有卖的,都是统一标准。
纸张规格是横宽;21厘米,高12厘米。
记账凭证的填制具体要求1.除结账和更正错误,记账凭证必须附有原始凭证并注明所附原始凭证的张数。
所附原始凭证张数的计算,一般以原始凭证的自然张数为准。
与记账凭证中的经济业务记录有关的每一张证据,都应当作为原始凭证的附件。
如果记账凭证中附有原始凭证汇总表,则应该把所附的原始凭证和原始凭证汇总表的张数一起计入附件的张数之内。
但报销差旅费等的零散票券,可以粘贴在一张纸上,作为一张原始凭证。
一张原始凭证如涉及到几张记账凭证的,可以将该原始凭证附在一张主要的记账凭证后面,在其他记账凭证上注明该主要记账凭证的编号或者附上该原始凭证的复印件。
2.一张原始凭证所列的支出需要由两个以上的单位共同负担时,应当由保存该原始凭证的单位开给其他应负担单位原始凭证分割单。
原始凭证分割单必须具备原始凭证的基本内容,包括凭证的名称、填制凭证的日期、填制凭证单位的名称或填制人的姓名、经办人员的签名或盖章、接受凭证单位的名称、经济业务内容、数量、单价、金额和费用的分担情况等。
3.记账凭证编号的方法有多种,可以按现金收付、银行存款收付和转账业务三类分别编号,也可以按现金收入、现金支出、银行存款收入、银行存款支出和转账五类进行编号,或者将转账业务按照具体内容再分成几类编号。
各单位应当根据本单位业务繁简程度、人员多寡和分工情况来选择便于记账、查账、内部稽核、简单严密的编号方法。
无论采用哪一种编号方法,都应该按月顺序编号,即每月都从1号编起,顺序编至月末。

AD7705/AD7706Rev. C | Page 19 of 44CLOCK REGISTER (RS2, RS1, RS0 = 0, 1, 0); POWER-ON/RESET STATUS: 05 HEXADECIMALThe clock register is an 8-bit register from which data can be read or to which data can be written.Table 18 outlines the bit designations for the clock register. Table 18. Clock RegisterZERO (0) ZERO (0) ZERO (0) CLKDIS (0) CLKDIV (0) CLK (1) FS1 (0) FS0 (1) Table 19. Clock Register DescriptionRegister DescriptionZERO Zero. A zero must be written to these bits to ensure correct operation of the AD7705/AD7706. Failure to do so might result inunspecified operation of the device.CLKDIS Master Clock Disable Bit. Logic 1 in this bit disables the master clock, preventing it from appearing at the MCLK OUT pin. Whendisabled, the MCLK OUT pin is forced low. This feature allows the user the flexibility of either using the MCLK OUT as a clocksource for other devices in the system, or turning off the MCLK OUT as a power-saving feature. When using an external master clock on the MCLK IN pin, the AD7705/AD7706 continue to have internal clocks and convert normally with the CLKDIS bitactive. When using a crystal oscillator or ceramic resonator across Pin MCLK IN and Pin MCLK OUT, the AD7705/AD7706 clocks are stopped, and no conversions take place when the CLKDIS bit is active.CLKDIV Clock Divider Bit. With this bit at Logic 1, the clock frequency appearing at the MCLK IN pin is divided by 2 before being usedinternally by the AD7705/AD7706. For example, when this bit is set to Logic 1, the user can operate with a 4.9152 MHz crystal between Pin MCLK IN and Pin MCLK OUT, and internally the part operates with the specified 2.4576 MHz. With this bit atLogic 0, the clock frequency appearing at the MCLK IN pin is the frequency used internally by the part.CLK Clock Bit. This bit should be set in accordance with the operating frequency of the AD7705/AD7706. If the device has a masterclock frequency of 2.4576 MHz (CLKDIV = 0) or 4.9152 MHz (CLKDIV = 1), this bit should be set to Logic 1. If the device has amaster clock frequency of 1 MHz (CLKDIV = 0) or 2 MHz (CLKDIV = 1), this bit should be set to Logic 0. This bit sets up theappropriate scaling currents for a given operating frequency and, together with FS1 and FS0, chooses the output update rate for the device. If this bit is not set correctly for the master clock frequency of the device, the AD7705/AD7706 might notoperate to specification.FS1, FS0 Filter Selection Bits. Along with the CLK bit, FS1 and FS0 determine the output update rate, the filter’s first notch, and the −3 dBfrequency, as outlined in Table 20. The on-chip digital filter provides a sinc 3 (or (sinx/x)3) filter response. In association with thegain selection, it also determines the output noise of the device. Changing the filter notch frequency, as well as the selected gain, impacts resolution. Table 5 through Table 8 show the effects of filter notch frequency and gain on the output noise and effective resolution of the part. The output data rate, or effective conversion time, for the device is equal to the frequency selected for the first notch of the filter. For example, if the first notch of the filter is selected at 50 Hz, a new word is available at a 50 Hz output rate, or every 20 ms. If the first notch is at 500 Hz, a new word is available every 2 ms. A calibration should be initiated whenany of these bits are changed. The settling time of the filter to a full-scale step input is worst case 4 × 1/(output data rate). For example, with the filter-first notch at 50 Hz, the settling time of the filter to a full-scale step input is 80 ms maximum. If the firstnotch is at 500 Hz, the settling time is 8 ms maximum. This settling time can be reduced to 3 × 1/(output data rate) bysynchronizing the step input change with a reset of the digital filter. In other words, if the step input takes place with theFSYNC bit high, the settling time is 3 × 1/(output data rate) from the time when the FSYNC bit returns low. The −3 dBfrequency is determined by the programmed first notch frequency according to the relationship:frequencynotch first filter frequency filter -262.0dB 3×=−Table 20. Output Update RatesCLK 1FS1 FS0 Output Update Rate −3 dB Filter Cutoff 00020Hz 5.24Hz 00125Hz 6.55Hz 010100Hz 26.2Hz 011200Hz 52.4Hz 10050Hz 13.1Hz 10160Hz 15.7Hz 110250Hz 65.5Hz 111500Hz 131Hz 1 Assumes correct clock frequency on MCLK IN pin with the CLKDIV bit set appropriately.AD7705/AD7706Rev. C | Page 20 of 44DATA REGISTER (RS2, RS1, RS0 = 0, 1, 1)The data register is a 16-bit, read-only register that contains themost up-to-date conversion result from the AD7705/AD7706. Ifthe communication register sets up the part for a writeoperation to this register, a write operation must take place toreturn the part to its default state. However, the 16 bits of datawritten to the part will be ignored by the AD7705/AD7706. TEST REGISTER (RS2, RS1, RS0 = 1, 0, 0); POWER-ON/RESET STATUS: 00 HEXADECIMAL The part contains a test register that is used when testing the device. The user is advised not to change the status of any of the bits in this register from the default (power-on or reset) status of all 0s, because the part will be placed in one of its test modes and will not operate correctly. ZERO-SCALE CALIBRATION REGISTER (RS2, RS1, RS0 = 1, 1, 0); POWER-ON/RESET STATUS: 1F4000 HEXADECIMAL The AD7705/AD7706 contain independent sets of zero-scale registers, one for each of the input channels. Each register is a24-bit read/write register; therefore, 24 bits of data must bewritten, or no data is transferred to the register. This register isused in conjunction with its associated full-scale register toform a register pair. These register pairs are associated withinput channel pairs, as outlined in Table 12 and Table 13.While the part is set up to allow access to these registers overthe digital interface, the parts themselves can no longer accessthe register coefficients to scale the output data correctly. As aresult, the first output data read from the part after accessingthe calibration registers (for either a read or write operation)might contain incorrect data. In addition, a write to thecalibration register should not be attempted while a calibrationis in progress. These eventualities can be avoided by taking theFSYNC bit in the mode register high before the calibrationregister operation, and taking it low after the operation iscomplete. FULL-SCALE CALIBRATION REGISTER (RS2, RS1, RS0 = 1, 1, 1); POWER-ON/RESET STATUS: 5761AB HEXADECIMAL The AD7705/AD7706 contain independent sets of full-scale registers, one for each of the input channels. Each register is a 24-bit read/write register; therefore, 24 bits of data must be written, or no data is transferred to the register. This register isused in conjunction with its associated zero-scale register toform a register pair. These register pairs are associated withinput channel pairs, as outlined in Table 12 and Table 13.While the part is set up to allow access to these registers overthe digital interface, the part itself can no longer access theregister coefficients to scale the output data correctly. As aresult, the first output data read from the part after accessingthe calibration registers (for either a read or write operation)might contain incorrect data. In addition, a write to thecalibration register should not be attempted while a calibrationis in progress. These eventualities can be avoided by takingFSYNC bit in the mode register high before the calibrationregister operation, and taking it low after the operation iscomplete. Calibration Sequences The AD7705/AD7706 contain a number of calibration options, as previously outlined. Table 21 summarizes the calibration types, the operations involved, and the duration of the operations. There are two methods for determining the end of a calibration. The first is to monitor when DRDY returns low at the end of the sequence. This technique not only indicates when the sequence is complete, but also when the part has a valid new sample in its data register. This valid new sample is the result of a normal conversion that follows the calibration sequence. The second method for determining when calibration is complete is to monitor the MD1 and MD0 bits of the setup register. When these bits return to 0 following a calibration command, the calibration sequence is complete. This technique can indicate the completion of a calibration earlier than the first methodcan, but it cannot indicate when there is a valid new result inthe data register. The time that it takes the mode bits, MD1 andMD0, to return to 0 represents the duration of the calibration.The sequence when DRDY goes low includes a normalconversion and a pipeline delay, t P , to scale the results of thisfirst conversion correctly. Note that t P never exceeds 2000 ×t CLKIN . The time for both methods is shown in Table 21.。


MANUAL PROTAPER FILESC LINICALD IRECTIONS F OR U SEB ACKGROUND:ProTaper nickel titanium rotary files have patented, progressively tapered and advanced flute designs providing the flexibility and efficiency to achieve consistently successful cleaning and shaping results. Importantly, precurved manual ProTaper files are the instruments of choice for managing canals that exhibit difficult anatomy, as an example a sharp apical curve, an iatrogenic mishap, such as a ledge, or a pathological defect resulting from internal resorption.G UIDELINES FOR U SE:•Establish straightline access•Preflare the orifice(s) with the X-Gates or SX•Use #10 and #15 hand files to create a glide path and secure canals•Negotiate and secure canals with a viscous chelator•Shape canals with an aqueous intracanal reagent•Clean flutes frequently and inspect for signs of distortion•Use instruments with recommended motion•Pre-curve manual ProTaper files when there is not a smooth, reproducible glide pathT HE M ANUAL P RO T APER T ECHNIQUE:1)Fill the pulp chamber with either Glyde or Sodium Hypochlorite (NaOCl) for all initialnegotiation procedures. Explore the coronal two-thirds of the canal with stainless steel Nos. 10 and 15 hand files, using a reciprocating back and forth motion. Work those instruments passively and progressively until they are loose.2)Start the ProTaper sequence with S1 (purple). The apical extent of S1 will passively followthe portion of the canal secured with hand files. S1 is designed to cut dentin, in a crown down manner, with its bigger, stronger and more active blades. Irrigate, recapitulate with the 10K File to break up debris, then re-irrigate.3)Manual ProTaper Handle Motion:e a clockwise motion and gently rotate the handle until it is just snug. When thehandle is snug, the flutes of the file are lightly engaging dentin.b.Cut dentin by rotating the handle clockwise while simultaneously withdrawing the file.c.If over-engaged, disengage the file by rotating the handle counterclockwise 45-90degrees while concomitantly withdrawing the instrument to prevent any given file from inadvertently advancing deeper into the canal.d.Repeat the handle motions until desired length is achieved.e.Depending on the length, curvature, and diameter of any given canal, it may require oneor more passes to carry a file to the desired depth.4)In more difficult canals, one, two or three recapitulations with S1 may be necessary to pre-enlarge the coronal two-thirds of the canal. Frequently clean the blades, then continue using this file until it reaches the depth of the 15 hand file. Irrigate, recapitulate and then re-irrigate.5)Once the pre-enlargement procedure is finished, use a precurved No. 10K File in thepresence of NaOCl or Glyde to negotiate the rest of the canal and to establish patency.Determine working length with No. 15K File.6)When a smooth glide path to the terminus is verified, sequentially carry first S1 then S2 tothe full working length. Remember to irrigate, recapitulate and re-irrigate after each ProTaper instrument.7)With the canal flooded with irrigant, work the F1 (yellow 20/07) to length in one or morepasses. If the F1 ceases to advance deeper into the canal, remove the file, clear its blades, then continue with its use until it reaches length. Irrigate, recapitulate and re-irrigate.8)Following the use of F1 to length, gauge the foramen with a 20 hand file. If the 20 hand fileis snug at length, the canal is shaped and ready to fill. If the 20 hand file is loose at length, proceed to the F2 and, when necessary, the F3, gauging after each Finisher with the 25 and30 hand files, respectively.。
DEFORM二次开发编译工具最新介绍DEFORM是一款非常强大、成熟的金属成型及热处理工艺仿真软件。
软件现用的功能可以满足大部分用户的需求,针对于某些特殊需求的用户或特定功能,软件提供了相应的子程序可供用户进行二次开发实现功能的扩展。
图1 Absoft Fortran编译器DEFORM v13.1版本开始,软件二次开发将支持两种编译器:1)Absoft Fortran compiler编译用户子程序,并链接DEF_SIM_LIB_Absoftv110.lib文件,生成FEM引擎程序(DEF_SIM_64.EXE)。
2)Intel Fortran compiler(Deform v13.1版本开始支持)用户子程序被编译成动态链接库(DLLs)。
求解计算时,动态链接库DLLS与FEM引擎程序(DEF_SIM_64.EXE)之间建立链接。
DEFORM v13.1安装过程中,软件提供了两类FEM引擎可供用户选择,如下图所示:图2 FEM引擎选择(DEFORM v13.1软件安装)DEFORM软件Intel Fortran二次开发操作流程如下:1)编辑FEM用户子程序;2)用户子程序编译成DLLs文件;3)不需替换已安装的DEFORM FEM引擎程序;4)替换DEF_SIM_64.EXE所在文件夹中的DLLs文件。
Absoft & Intel Fortran两种编译器编译的FEM引擎计算效率的对比:案例一:Spike forging–120K tet 和 FourTee forging–1M tet该案例在Windows 10、AMD 5900X CPU环境下进行计算对比,不同求解器计算效率如下图所示:图2 FEM引擎计算效率对比由上图可知:Intel Fortran相比Absoft编译器编译的FEM引擎CG 求解器计算速度提高了20 ~ 130%;MUMPS求解器计算速度提高了10~30%;Spooles求解器计算速度提高了约5%。
小峙代掛繩蓝牙音箱总长693*75mmMINISOUSER MANUAL使用貌明菩使用轰品前罚仔衄隅埭本使用泣阴害,壶馈妥兽保管。
PlfASE READ THIS MANUAI.CAAEFULLYBEFORE USING THEPROOUCT AND KEEP IT PROPERLY每页63*75mm_ Thank you for using Miniso WiMless Speaker. Pl斡睬啦d this manual ceretully before use. Using I t prope什y fur best product pertoema ce. MINISO Wireless Speaker has styl飞h appearance, true-to-life sound ond multlple扣心a s.The如Ole沁ees ha屯the pate t ot app蚐ra oe d..ign. The sy tem adopting the indust”-妇di g tech ol匀y enabl .. you lo enjoy the excellent oound e油ct,enytime at home. outdoors. duri g a trip or during沁rk.II provides pertect experience咘en you pl y mus忙o your laptops. digi切I music playe飞and other a心o-visual p oyers. !adi g you to a better l fe w lh beautiful叩s c!- 1 Stone and u貊it at room temperature 2. Do ot .叩怔•it to rain or mo如...3. Do ot throw the product to avoid damage caused by dropping4. Do ot disassemble, modifY or repair the p roduct y ourself.5. This product is equipped with an irreplaoeable built-I n I曲ium batter .Do no discard I t心oss in fins to avoid dang釭6. T o p函enl its performanoe from b..ng inlerfer&d, k 碑pIt awey from stro g mag etic objects.7. If you are ot goi g to use 11 ror a long time, charge the speal<er once every 3 mo ths to extend the lifespa of battery._.UJETOOTHC叩GING INP\11 CMAROINO PORT贼U仔IC PLAYB心T1'淝.V5.15V-1AMICRO u se Am心3HBLUETOOTH PAlRINGHAfllE BAlIUh叩N印IISSIONDISTANCE《”“叩m,..E MINISO-LTBT2219 3.7VI,,心归如~5叩吐h Aroood 10mAO25H_ 勹\....===-/I 2' I31. Power B如n2. LED I d cator L ght3. Charg ng Port- Funct;on Instruction霍P y P 叩笠Sh rt pres s pc沁N buttonNext T ra kD ub l!! pr e s power buttonP�,au , Tra k P志power butt n t h ree t e:oiL叩Ba tt ery lertpm pt咘e,lhe b叽e"村""Pa l S ng h uldT 叩eoutt u f r n h Q "� n, t h e p n •u 1 w i U t r , m 10 l ut l l n Q诅lo r n o h t 加刃r e I h t i 3t u c mm .ta na U 铲011,fu w h e 心ett i 如_ Speaker, C ha屯"9Cable, U sar Manuel_ 1. T he w ireless sp<边ker Is unable to be paired w ith the cell phone. Solution: Confirm if the wirelo...P的ker is i pairin mode, a nd if tho Bluelooth on your pho叩io tumed on. T匝n delete lho product in the list, p air I t with汗x ,r phone again a"心rding to the User Manual 2. Tho w ir•I.. •叮叩h辱r cannot lo泗tumod on.Solution: Confirm the battery level. Charge the speaker if ii� n七七d叫3. Can the battery or the w lreleu speaker心repla..d?Solu廿on:No, th心,s ithium po ymer battery,叫叱h is irrep aceab e.4. Can I use the w lreless speaker at a high volume伈r a long time? Solution: T o extend the lifespan of the wireles$$函ke r ,!is ot recom吓叹ied to play,口a high volume釭a l叩time.5. Tho link凶h“mth.wiml....puk.-1111d tho叫l pho心h..h叩dioc“”“贝回within 10n..“' .. Solution: Bluetoath I s w1rel妇•so that n I s very s ens化ve to obj的它谗妞砌the.pea尥r and the oo nnec;妇1device O记ck w there are any metal or叩r 叶hj可+slhat may志cl心m矶ction wihin the effective distance.6. Cannot妇ar audio playing w h..the .p..ker i• conn叱d to tha comp啦r or phon..Solution: Check咘ether the computer's audb output I s alraady oo ne也to wirele岱device and凶lei归the Bluetoo1h in the oo mpu心如pports A2DP protocol. Ma尥su"'the volume is up on you『phone可oo m pu的r 7. Con I ope...比如Apps ofmy phone through th..优吵”“归p霍iring tho谝巾..1...引沁R缸rwRh th.phone?Anowa,Some ap困may not support being operatoo thmugh the sp..ker due 1o theirsetting-T his device oompl邮with Part t 5 of the FCC Rulee, Operation is 叩bjec:t to the伈llowi g two conditions: This devtce may ot cause harmful I nterference, a dThis device must accept any interference received, i cluding intarf<lrenco that may cause u d..ired oparati o n.Caution: Changes or mod1f i catione ot expra..ly apprnved by the party 冗spons『ble for compliance could void the user's authority to operate the equipment.NOTE: Th s equ pment has b..n test的and found to comply w th the limits fo r a Glass B digital device, pursua t fo Pan 15 of the FCC RulesThese limHs are designed to p『ovide啦sonab e protect on against harmful interfere oe in a 戊sidential installation. This equipment扣七I从es,uses and can radi啦rado氐ue叨e ergy a d 甘not installed and u蕊din ac=元al109With Ihe in呻udion•, may cause沺rmfulint呻面ce to radio commu�calions. H<-『,then,� no guarantae that i叩erenre will not o氏ur i a四rtirular i 如lation. If this eq"ipment does cause harmful I哗心七n to radk> o氓le书记Ion re七eplon,wNch ca be &妇mi咄切印ming the equipment off and on, l he user is en oou叨ed to lryto江叮虹妇iI心1「111"心by o e or mo"'of the fo!owing m...ures: 4祜"缸I or n,locate t匡匝龙订Ing丛N田11出一Ina出lhe seperation 叫讯儿n Ille equipment a d沦ceive『. -Co ooct Ille equipn妇1l into an outlet on a circuit dllle r 印t from th a t to which the re也ver lsoonnec尽 如嘘lhe d泌er or an e 知边叫io/TV但加i心n for help_ Nous vous心m矶心1s d'e\IOir u廿lis�le haut-pa心ur sens 111 Mi 心Veuill眨1ita比nt,vement oe manuel avant rut仇迎tion.U训sez�e oom立m七nt pour 咖nir les meilleu咚阳「UlI旦l吐s du produtt_ Le haut俘r1eur笠•filMINISO吓une心d ,dlced的a心u so f>d 七le et deSm 切ons mu灼µ社r i e enti�re a le brevet de la co ception de「apparence.Le sys泊me 叫平ant la吵nologie de pc;切de l'i du劝ie VOUS pe,met de p rooter d'exoellenla ell啦双m叩3a血momen\ii le maison, ii re如eur,en 口归ge ou au lraval. Le produtt ollre u e e叩erience pa中心lo卤ue心心1ouez de a mu�que sur火巧ord nateurs portables, vos ecleur, de musique num拉ue et a叩le氓,.,.audic,,i和啦叨JS oondui..t�une vie moi,如f"OIM!Cde la归<>m氓iquel_ 1. Consorvez-le et u引lsoz-lea tern凶rature amblarrte2. tvitez de l'exp函r A la plule ou合un envioonnement humde3. Ne pas jeter le prodult pour eviter I..dommeges caus丘"汜r une chu妇4. Ne pas d�mo 忙r.modifier ou reparer le produit vous-m!me5. Ce prodult est的ulpo d'avec u o batte什o au lithium Int的飞e,叩mpl的able.Ne pas jeter le produit et心p的le je沁r dans le feu pour eviler tout danger.6 PourOVItor que ses p.rformanc.s n. SC,e t p叭urt,的s,meintenir a10,gne des objets magnetiques pui..ants.7. Lo心que vous 'utmsez pas le haut-perteur pendant une longue伐riode,chargez-la tous les 3 mois pour prolonger la du伶e de vie de la 仄如ri._ BLUETOOTH EN"伍...CHAROE鼠ENTPORTDEMCROusa CHARGEMENTDUR!E D E LECTU ..DE LA M U81QUE V5.1SV=1A0d.“', 3HNOM D 'APr合JR BLUETO叩...TTERJEDISTANCE D E TRAN叩lSSIONTEMPS D E CHARGEMENTMINISO-LTBT2219 氐如心·all t 闷um 3,7V 500m心Ee,i 心10mE的巾n 2 5H_ 丿勺1. Bouto d'Alimentation 2. Voyant L umineux LEDS. Port de Chargement_ FonCion Inst八,ction戛L ed"兀Pa u eAppu归z br 如een飞ur e加,u lon 油e祖P ste Su i v antl!!pp叩zeux f s u r le bouton 'l ent t P teP元口只允nte 如沪Im记fn ur k'! boulan 'lm e l2!.t B e 创n F e ,b Un够Sgge 吓ie r ait l rsque e batterie e t fo ble'A ti D m�g e 'S 'II c y叱1e p a s p ro u n ,如,1nt u p 心1so t q u e u . ent . V �C h 由Lu m e neu x te 心u 巾e l .『•• t u t 9,. 6 .. t e t l u 蚧o o . n 飞b h l ”口m沁n p t I B r a h 台e _ Haut-parleur, C的le de Chargeme t, Manuel d'Utilisation_ 1.Le haut-1>■11eur san• ftl no parvlent pa■金·`ppad.r aw兀lomobile.Sotuuon : Cooflrmez sl rencelnte sens fll est en mode d'appaJrage, e t si le Bluetooth de votre tel七pho爬est active. Suppnmez e suite le produit de la liste, p ui, appairez-le � nouv..u avec votre比lepho e en sulvant l..Instructio s du manual d"uHllsallon. 2. lmpo••lble d'allume, le hout-padeur ..•• fllSolution : Confinnez e niveau de a batter心Ch叩ez � haut-parteur si eoes 吁咋3. La b叩rle du haut-parleur sons fl! pout会lie ftre remplac妇?Solution : Non, ii s'agit d'u e pile au lithium pol仰虹,qui ..I 而mpla伴blo.4. Puis•j.utiliHr lo h•u�严rlour..,.fil • un volumo olevo pendant une longue p6rtode ?Solutlon. Pour p『olonger la durl>e de vie du haut-parleur sans fil, ii 'a,t pas recommanda de l'ut1liser白u volume aleva pendant una longue p,ricde.5. La liaison ontro le haul-parlour sans fil et lo mobile •妞啦connoct6e dans un rayon de 10 m杜兀..Solutlon, La technologie Bluetoolh est •a s fil. Elle eot done I志sensible aux cbjets s�ueo e叩le haut-parleur et l'appa"'ii ccnne啦V如fiez s'l y a d es objets metall qves ov au呤Qu peuvent affecter la connexion d•n• la distance effective. 6. Imp<遠芯Ible d'ontend,. la loctu.. a udio lo..qu.1.haut-parl.ur ..t connocti古l'ordinateur ou au蚀I合phone.Solutlon : VMflez SI la的rtle audio de l'ordlnateu『est d仑J a conne啦ea un沁riph七rique san$介I el si le Bluetoolh de l'ordinateur pre d en charge le pnotocole A2DP. A岱Umz.vous qu.l.叩ume es ol酌o su『VO四lelephona ou vot戊ordinateur.7. Puis-j• utilisor las applications do mon血phono via I•haut·归rteur ap啦avolr ap贮'r1610 naut-parleur sans Ill aveo le 岭liphone ?R`pon.e • II ...peut que c.心ines applic;atio心o pui•..nt pas otre util1s妇par lo haut-part印心raiso do I矶』n;param�tres.—户__玑l 少i斗己,一J,J,社i,;,.,,,丑~”“匕山l少I....JI�,匕,沪~屯llJI9严Jl 一扫I J<..,己也心l产一心-",心斗泸冲心一托片l o中心心也..WI ..一一边叩土_,.,,“J炉右S'J ·“4心尸少乒托......“'七-l 3.斗!,I 心力-勺还气心l心l扣心心心心心斗,.切i己心,,,心沁归心心山;;.J JJ也.:..J .-,.la产3....,I-尸上斗~山”扣1if I J仑一~已七斗,�.,.,也l也立心上,心J泸凸,切心切""'— 也只心P心)人}巳l “'P,立L,,,1勺心,1卢J己,.,...,.,.,..,_2匕正4u己U 上1匕&h..,;;;y 3一一贮1e 止1,IJ,心$上?心认4... -,,1产J l .,,i_,,c .J l '°'"'llJ<l,心户一心心匕少沪,心.5少干UI己,叫少五:U一己七夕11.......,"--J ,.C.少'"'---•土心叫J“以正U炉13.J<七i....JI 斗,心卢心心,也"'止立7— MINISO-LT.BT221. “心~...心IJ.500J”“卢10.JbJ卢`'尸'仕血1J心},动 5.1 J口乙夕5少.11_,.._MICRO USB吐炉,,,,...,心,�心压心心1丛心l.,2.5.,1夕“心1今|心匕3J I,,1~~一女_ 正心J l ii.l..3庄少,".o.2J.已..11�i (1)— _1..l-.I I上~斗,...上止o上已d I C也a ..,七.,.匕“'",,IJ.o,;,J �li.llj,..:.,_,JW ;l...JI.,,.,\I;J,>..ll e l.u i..-, 扎K妇lJL已.3-...,上一~J一七l l 夕心,10,-,Ji.o;I SCi>人,,,1,1J吐少已上~心l ”比1J心1....-..-丿,心1.,.,....乒户讥气产2心l心巳1L心l丘·十a个ll欠心斗,... J兑``卢Jt.,I """''-"'少."心_ ,心.JI心·口已J IJ,匕....,,_ J牡认必J少见心社~Jl1,'.J,a,..J,心一`心勺也u阳玑吵·吵汹1�,..)ocl..Jl.:....011....rb:a,团,心儿从J,人心一打儿vi夕沁o止:K,,,.心,,心IJ:,..,,._.;1,心心少l,Jlbl让i...,1.,...,"'lb,11应b 奾:"句,......心心凸王心.2寸s匕屯J'-1.,<.,少3JI`',心l吵少一虫心出心坠.Y斗的l口王心沪尸--扛匕心l立..,心JJl4叫少印K山让少知d吐户一夕”~气"'L....JIJ,心山心吵'.斗汛J ,上七,._,,J叫10,J心4心U肛斗....Jl JLA消上卢_;安…尸l 心心!勺凶..,.比“'凶还心J t...也少心”从1:女切一心3S 夕lo也l ,I U』出JIJ谥心S I 斗匕.心心汕沪b心匕叫�IAAJI句匕心J匕心l心..,,1力妒”“$......,,心,,皿"....e.....-,.6还l 习匕,心正心心夕玉j玫I心沪》亡少1让9-心尸'SJL..产·斗习JI ,心中,少-卢心一;也一灶应D P 心心户兰丸心lIJ一心�,夕心心,,.,沁书也......,心正斗心_,上__..,.,,..,,._.,,..i,..:.占Ja .7,..,,,�1-还L...IIJ心J.a.:,.J .,I 心b.JI._,...卢上,心心心1_笠屯s por usar MINISO AJtavoz lna�bri己Lea.. tema.,.,al如呻ente antes de心a的Util�andolo OOITT戏叩en访para oble er el meJor re叫rnenlD det pl<Jdudo. AJtavoz lnalambrtco de MINISO Ile e una apar面也elegante,u 切叩llooom p acto, u n的ni心飞叭sla y m雌ipl.. 扣n改}罕Toda la..ne tie e la patente怎disel\o de apanenaa.El s1stema Que adopta la托cno切ia lider e la indus�la le戊m a .di叶utar de los O心Ion如引矶乒de sonido on 111刁IQuier mome 比en也扫,al a西l,如,dura te un �•j• o dura te al tr,也ajo.Brinda u氓切心1妇cia perfecta cua do rep1<Jdure musica en s1氐commt刁叩蕊"咽les,叩戍ucto啦de mos,笠dig回y如s阳pro d uclDI飞s audiovisuaes, l o que lo lleva a una ,;da me;,,con m的C8h臼mosa._ 1. Gu6rdelo y utilloelo a tern凶ratura ambiante.2.Eviteae,扣业i6n a la luvia o al ambi..,te humedo.3. No a叨e el pnxlucto pa..evitlrd对ios臼ll.9巾,poroaf d as.4. No d部m还modi几1-1e ni repa闯·1叩ducto usted mismo5. E啦produ心v o n .oon una扫brlado tion叩coda i心uslilu blo.No lo dE斗,ct,e ni k> arroje al fu e go pera evilac el严ig10.6. Para e,,itar Que的in 七rf氐ra en su funcionamiento, ma咄切galo alejado de ob;血mag,心icosluertes.7. Cua do no .. 的en u 的duran归mucho tiempo, cargue el altavoz cada 3 叩蕊spara p心叩尹r laWda切Id85ba妇ria._.LUETOOTH ·Nnt心ADE CARGA PUERTO D E CARGATlEMPO D EREPROOU心1心I凡d~Jde3H DE MOSICAV515V=1AMICRO USSHfl帕REDE EMPARF_,AMIFNTO BWETOOTHBATE川A DISTANC八DE TRANSMISIONTIEMPO D E CARGAMNI的LT.BT2219,.,.,.,.''"'"3,7V 500mAh 斗,趴比dor de10m ",七山士比,如2,5H_2' II I 乙1. Bo论n de Allmentacl的2.lndlcado『Lumlnoso LED3. Puerto do Carga一FuncI ..lntmcclone8Rep 中rI P u ga r P u e breve ent兮elb啦 e ent 如P飞P S g u论`eP ul e vece e b t6n e e Ien扫dOP 又a 八1”UI P ul e e b l 6n e l enla c 6n tres vece A e中eBa t erf Ba j Unm旧o ctJa le b t erle. e 啦b aieE p ,T 吧•J po e Es A 叫ra µ,h· S o h $e OO n n e x 6n ul t 点r n r t c u ducio n 沿n te 1e .0 p 叩心fe e 血lcadora e C 叩.L e Iu z ,m -,•.• 啦p 叩o g 蚊e n sp l •u ,,.,..的,O.. i U 2O p ,0. _ Alta血Cable de Ca屯a,Manual de Usuario_ 1. El altav立inal知bri0的妇puede emparejar con el吵ii.Soluci6n: Co fione si el altavo z inal�ml>ricc es泊en mode de emparajamie to y el Bluetooth de su tel七fono e函activado.L哗90elimine el e沺"'to en le lists, v uelve e vinoolerlo con su telefo o de 一寸句寸c co •I Ma ual dol usuario. 2. El Oltavoz I 心1.mbrlo no又:pued· ·nmn心r.Soluci如:Co firme el ivel de la bi妇由Cargue et alta中Z3..l巳上一心3. LS• pu心e正empr立ar l·b..eria de1al.. v oz l nal�mMco? Solucl6n: No se pu忒..u氓batorla呻pol「moro de Ii廿o,que e8 insustiluibte.4. 1,Puedo usar el altavoz i natlimbrico a un volumen alto du巾nte mucho tiompo?So1uc16n: Para prolongar ta Vida util del altavoz inal�mbnco. no se recomienda 『eprodudrlo a un v吨ume alto duranle m心ho liempo 5. El enlo...nt...l .“avomn叩叩rlco y..m如,....dooconectado on 10 motroa.Soluci6n: Bluetooth es in必mbrico,por lo quo es muy sons;blo • los objetos entre el a归voz y el dispositivo conectado. Com pruebe si hay algu me扫I u otro, objetos que puedan afectar la conex论n dentro de la 叩anda el氏加a6. No H puade oscuchor la reproduccl6n de audio cu111do el altavoz.式`”“ectado • la compu比dora o •I切1如no.Saluci6n: Compruebe si la salida de audio de la compu妇dora ya es饿conectada al dispositivo inalambnco y si el Bluetooth de la compu白dora es oompatibie con el p『otDcolo A2DP. A扫1urese de que el volumen de su telefono o oomputadora e啦alto.7. lPuodo utiliz■r I..霆plicacionH do mi totofono" ..呾del 旦ltavozd..pu妇中ompa"'jar oI ..tavozinal血mbrico con ■I tololfono?Re.PU的红Es posible que elgunes epli顷扣es no admi归el funcK>namiento a trav的del allav立debido a su confi g uraci扣_非常感谢您使用M INISO 蓝牙音箱崖品,使用前精样细团阮本饼明番,芷璋噪作使用,更好疫撑壹品倡越性枪。
循序渐进系统轮廓所有系统网络和设备的设置都是通过在系统轮廓(System Profile)下进行。
在完成网络和设备的设置之后,您最终要以图象的方式来表现您的楼宇控制系统。
在您的楼宇系统所定义的每一个设备和网络都可以用一个图标来表示,并显示在系统树中。
您可以对该系统树进行扩展或收缩。
启动系统轮廓在Insight主菜单中选择System profile(系统轮廓)按钮。
屏幕显示系统轮廓(System Profile)窗口。
系统设置的定义系统树最上层的图标代表管理层网络(MLN),它是在Insight的安装过程中自动以隐含名增加上去的。
您可以对该隐含名进行修改,以便更直接地反映您的楼宇系统;您可以设定您自己的每周起始日;您还可以设定在系统活动日志(System Activity log)中Insight事件的保留时间长度。
定义系统设置1. 在System(系统)菜单中选择Settings(设置)。
屏幕显示System Settings Definition(系统设置定义)对话框。
2.完成System Settings Definition(系统设置定义)对话框中的字段设置:●Job Site Name(工程地点名称):表示工程地点的名称。
在这里键入工程地点的名称。
名称的最大长度为30个字符,它可以由大小写字母、数字和空格的任意组合构成。
随后,该名称将显示在系统轮廓树中;●Scheduler(时间表):定义每周时间表的起始日期。
它可以是周日,也可以是周一。
这里所选择的起始日期也同时作为时间表应用中日历的起始日期。
●History Logging(历史日志):定义Insight系统活动日志中所记录的系统活动情况的保留天数,超过这个时间的记录将被新的记录所覆盖。
您可以在该字段直接输入数字,或利用上下箭头键来选择数字。
历史记录的最大保留天数为999天。
3. 选择确定。
如果您对工程地点名称进行了修改,则新的名称将显示在系统树的MLN图标的旁边。
今天看K&R的书的时候顺便温习了C的另一重要数据结构bit-fields,我想bit-fields在编写底层驱动驱动程序的时候应该比较好用,它可以绕开"&"和"|"进行位操作,而且更加节约内存空间。
废话不多说了,还是先来看看它的真面目吧:bit-field来源:bit-field是为了节约存储空间而创造的一种数据结构(to pack several objects into a single machine word)bit-field用途:Externally-imposed data formats,such interfaces to hardware devices,also oftenrequire the ability to get a pieces of a word定义方法:struct (tag) {bit-field list ~~~} bit-field variable list;由定义方法可见,bit-field也是以structure的形式组织起来的数据结构,只不过是以二进制进行分发的而已。
其中bit-field list表示方法:type fieldnamme:width; width:field的宽度,以bit表示,还是举个例子来看吧:struct bf{unsigned int is_keyword:1;unsigned int is_extern:1;unsigned int is static:1;}flags;定义了一个bit-field变量flags,它包括3个1-bit的field,访问bit-field其实和访问一般数据结构的成员一样,例如:flags.is_static=0;在定义bit-field的时候,有以下几点要注意(K&R版本的观点)1、Almost everything about fields is implemention-dependent ! Whether a field mayoverlap a word boundary is implemention-defined.2、Fields can only be declared as intS,for protability,specify signed or unsignedexplicitly.3、unnamed field can be used for padding(没有名字的field可以用来作为填充或者调整用)例如:struct bf{unsigned int a:2;unsigned int :4; /*该4位不能用*/unsigned int b:2;};4、Special width 0 may be used to force alignment at the next word boundary.(如果width=0的话,那么下一个field就被强制存放在下一个内存单元里面了),例如:struct bf{unsigned int a:2;unsigned int :0; /*空的field*/unsigned int b:2; /*从下一个单元开始存放*/};5、Bit-field are not arrays and they do not have addresses , so the operator &can not be applied on them.某些国内的教科书上与K&R对field定义规则的描述还是有些不同,比如谭浩强版本写道:1) 一个位域必须存储在同一个字节中,不能跨两个字节。
如一个字节所剩空间不够存放另一位域时,应从下一单元起存放该位域。
2) 由于位域不允许跨两个字节,因此位域的长度不能大于一个字节的长度,也就是说不能超过8位二进位。
总结:这些差别可能是因为编译器对这种数据结构的实现的差异造成的,国内教科书直接将field 的存储单元定义为一个字节了,这个以后还需要继续研究。
理解C语言位域2007-11-25 14:57理解C语言位域这也是在ChinaUnix上看了几篇关于C语言'位域(Bit Fields)'的帖子之后,才想写下这篇文章的。
其实在平时的工作中很少使用到'位域',我是搞服务器端程序设计的,大容量的内存可以让我毫不犹豫的任意'挥霍'^_^。
想必搞嵌入式编程的朋友们对位域的使用应该不陌生吧。
这里我也仅仅是凭着对C语言钻研的兴趣来学习一下'位域'的相关知识的,可能有些说法没有实践,缺乏说服力。
具体也不是很清楚当年C语言的创造者为什么要加入位域这一语法支持,那是太遥远的事情了,我们不需要再回顾了,既然大师们为我们创造了它,我们使用便是了。
毋庸置疑,位域的引入给用户的最大的好处莫过于可以有效的利用'昂贵'的内存和操作bit的能力了。
而且这种操作bit位的能力很是方便,利用结构体域名即可对这些bit进行操作。
例如:struct foo {int a : 1;int b : 2;short c : 1;};struct foo aFoo;aFoo.a = 1;aFoo.b = 3;aFoo.c = 0;通过结构体实例.域名即可修改某些bit得值,这些都是编译器的'甜头'。
当然我们也可以自己通过一些'掩码'和移位操作来修改这些bit,当然如果不是十分需要,我们是不需要这么做的。
位域还提供一种叫'匿名'位域的语法,它常用来'填缺补漏',由于是'匿名',所以你不能像上面那样去访问它。
如:struct foo1 {int a : 1;int : 2;short c : 1;};在foo1的成员a和c之间有一个2 bits的匿名位域。
在foo结构体的定义中,成员a虽然类型为int,但是它仅仅占据着4个字节中的一个bit的空间;类似b占据2个bit空间,但是b到底是占据第一个int的2个bit空间呢还是第二个int的2个bit空间呢?这里实际上也涉及到如何对齐带有'位域'的结构体这样一个问题。
我们来分析一下。
我们再来看看下面两个结构体定义:struct foo2 {char a : 2;char b : 3;char c : 1;};struct foo3 {char a : 2;char b : 3;char c : 7;};我们来打印一下这两个结构体的大小,我们得到的结果是:sizeof(struct foo2) = 1sizeof(struct foo3) = 2显然都不是我们期望的,如果按照正常的内存对齐规则,这两个结构体大小均应该为3才对,那么问题出在哪了呢?首先通过这种现象我们可以肯定的是:带有'位域'的结构体并不是按照每个域对齐的,而是将一些位域成员'捆绑'在一起做对齐的。
以foo2为例,这个结构体中所有的成员都是char型的,而且三个位域占用的总空间为6 bit < 8 bit(1 byte),这时编译器会将这三个成员'捆绑'在一起做对齐,并且以最小空间作代价,这就是为什么我们得到sizeof(struct foo2) = 1这样的结果的原因了。
再看看foo3这个结构体,同foo2一样,三个成员类型也都是char型,但是三个成员位域所占空间之和为9 bit > 8 bit(1 byte),这里位域是不能跨越两个成员基本类型空间的,这时编译器将a和b两个成员'捆绑'按照char做对齐,而c单独拿出来以char 类型做对齐,这样实际上在b和c之间出现了空隙,但这也是最节省空间的方法了。
我们再看一种结构体定义:struct foo4 {char a : 2;char b : 3;int c : 1;};在foo4中虽然三个位域所占用空间之和为6 bit < 8 bit(1 byte),但是由于char和int的对齐系数是不同的,是不能捆绑在一起,那是不是a、b捆绑在一起按照char对齐,c单独按照int对齐呢?我们打印一下sizeof(struct foo4)发现结果为4,也就是说编译器把a、b、c一起捆绑起来并以int做对齐了。
通过上面的例子我们发现很难总结出很规律性的东西,但是带有'位域'的结构体的对齐有条原则可以遵循,那就是:"尽量减少结构体的占用空间"。
当然显式的使用内存对齐的机会也并不多。
^_^或许看到题目时,某些C/C++小鸟们甚至虾米级人物都会怀疑C99规定中有这么一个东东.当学生年代人人捧着本80,90年代红遍大江南北的老潭版<<C语言程序设计>>中曾有过这么一节内容.毕竟现在computer的硬件发展遵循着某某定理成倍增长.内存有64K......,16M,32M,64M,128M,256,512,1G,2G....除非资源还相对有限的嵌入式设备上开发,对于PC,Workstation,Server端,程序员还在乎什么节省内寸,随便就几十个字节的开辟heap,stack 上memory.这也就是为什么90年代后期,基于虚拟机技术的Java,.Net能够得以生存或发展的缘故,试比较在只有几M Ram的年代,光个JVM或framework就能吃光它(JVM本质上就是个Virtual PC,和现在流行的Vmvare,Virtual PC software有异曲同工之处),就更不用说定时GC会在这段没GC的时间内内存消耗膨胀了(这也就是为什么跑Java Application一段时间后会很慢的缘故).哎,我又犯老毛病了,知道的东西太多,说起某点,就联系到某线,然后是某面,呵呵,忽悠么!言归正传:有些信息在存储时,并不需要占用一个完整的字节,而只需占几个或一个二进制位。
例如在存放一个开关量时,只有0和1 两种状态,用一位二进位即可。
为了节省存储空间,并使处理简便,C语言又提供了一种数据结构,称为“位域”或“位段”。
所谓“位域”是把一个字节中的二进位划分为几个不同的区域,并说明每个区域的位数。
每个域有一个域名,允许在程序中按域名进行操作。
这样就可以把几个不同的对象用一个字节的二进制位域来表示。
一、位域的定义和位域变量的说明位域定义与结构定义相仿,其形式为:struct 位域结构名{ 位域列表};其中位域列表的形式为:类型说明符位域名:位域长度例如:struct bs{int a:8;int b:2;int c:6;};位域变量的说明与结构变量说明的方式相同。