LGMAZAK说明书
- 格式:pdf
- 大小:8.55 MB
- 文档页数:28
QT-200数控车床EIA/ISO 编程培训教程:培训日程1. EIA/ISO 编程一二天:培训容1. EIA/ISO编程第一天的容1.1 EIA/ISO编程的基本知识的说明⑴ 机床坐标系和工件坐标系的说明:⑵ 刀补值的说明及工件坐标系的确立:刀补值的说明:几何补偿、磨损补偿工件坐标系的确立:用G50确立通过刀补值确立⑶调用已有程序、创建新程序的操作说明:⑷EIA/ISO编程的构成:辅助功能代码+ G代码⑸T32互换模式和标准模式的说明:参数P16位3 (1—1)1. 2辅助功能代码的使用说明⑴常用M代码的使用说明:辅助功能指令(其他的M代码参阅M代码表)M00 :程序停止M01 :选择程序停止M02 :程序结束(13—55)M03 :主轴正转M04 :主轴反转M05 :主轴停止M08 :冷却开M09 :冷却关M30 :返回程序头部(13—55)M98 :调用子程序(13—48)M99 :返回主程序(13—48)M19 8:程序结束(13—55)M199 :程序结束(13—55)⑵S代码的使用说明:主轴转速设定S2位:换档指令S4/S5位:实际主轴转速⑶T代码的使用说明:Txx xx . *I I——►刀具的ID号(MAZATROL刀具数据)------ 刀具补偿号刀具号Txx 00时,取消刀具补偿。
1. 3编程指令格式:⑴ 绝对值指令和增量值指令:X、Z/U 、W(5-1)开机初始设定为G90⑵ 英制/公制切换指令:G20/G21(5-2)开机初始设定为G21⑶ 小数点输入:参数P9 位 5 (5-3)⑷ 选择程序段跳过(3-4)1.4 进给速度功能:⑴ 快速进给速度:30M(7-1)⑵ 切削快速进给速度: F (7-1)⑶ 非同步/ 同步进给指令:G98/G99 (7-1)开机初始设定为G99 1.5 坐标系设定:⑴ 坐标系设定G50:任意位置处的工件坐标系设定(15- 1)坐标系设定:使用说明及编程格式说明(15-1)坐标系偏移:使用说明及编程格式说明(15-3)⑵坐标系设定G54〜G59:坐标系设定:使用说明及编程格式说明(15-9)工件偏置画面的说明坐标系偏移:使用说明及编程格式说明(15-9)电源接通或复位时选择G54⑶选择MAZATRO工件坐标系G53.5:将工件坐标系G54-G59改变为MAZATROL 工件坐标系(15-7)⑷取消MAZATRO工件坐标系G52.5:取消MAZATRC工件坐标系,恢复为工件坐标系G54〜G5(9 15-5)⑸ 选择机床坐标系G53:(15-11)使用说明及编程格式说明:G 53只对指令程序段有效:⑹ 局部坐标系G52:(15-12)使用说明及编程格式说明:G52局部坐标系以工件坐标系G54〜G59为基础:⑺ 自动返回参考点G28: 使用说明及编程格式说明: (15-13)⑻G29:使用说明及编程格式说明:(15- 13)⑼ 返回参考点检测G27: 使用说明及编程格式说明: (15-18)⑽ 自动返回第二参考点G30:使用说明及编程格式说明: (15-15)1.6 平面选择G16、G17、G18、G19:(6-11)G16: Y-Z 圆柱平面选择G17: X-Y 平面选择G18: Z-X 平面选择G19: Y-Z 平面选择开机初始设定为G181 .7 插补功能:⑴ 快速定位G00:使用说明及编程格式说明:(6-1)⑵ 直线插补G01:使用说明及编程格式说明:(6-4)⑶ 圆弧插补指令G02/G03:使用说明及编程格式说明:(6-6)半径编程的使用说明圆心编程的使用说明⑷ 等螺距螺纹切削G32:使用说明及编程格式说明:(6-24)精密螺纹切削指令:(6-24)参数P9 位7 (6-25)英制螺纹切削指令:(6-27)参数P9 位7 (6-27)连续螺纹加工:⑸ 变螺距螺纹切削G34:使用说明及编程格式说明:(6-29)1.8 其他模式指令:⑴ 暂停指令G04:使用说明及编程格式说明:(8-1)暂停用时间表示(G98G04:参数P10位2= 1 (8- 1)暂停用转数表示(G99)G04:(8-2)需有主轴位置编码器⑵ 精确停止检测指令G09实现精确停止,以便得到最小过渡园角。

LGMazakQUICK TURN SMART 系列 (SG)(LG)说明书编号:HB07HA0020C报警一览表M代码一览表宁夏小巨人机床有限公司3报警1)本章节的范围 本章节介绍了可以在NC装置的显示屏上所显示的所有报警 解除报警需要参阅本章节。
2)本章节相关的注意事项 本章还记述了与各种机械功能、选项功能有关的报警,因此客户购买的机械中也有不显示的 报警。
注意 1:本章节内容随NC系统和机床的改进而有变更时,恕不另行通知。
注意 2:如有疑问请与MAZAK技术服务中心或技术中心联系。
3-1-1 报警显示3-1 概述1. 机床状态指示灯如果发生报警,操作面板上的机床状态指示灯“?ALARM”就会点亮。
2. NC画面显示报警将按下述格式显示在报警画面上:650 无法倒角 (1234,56,78)刀具序列号或程序段号单元号或序列号工件号报警信息报警编号关于报警画面,参见附册《NC装置的操作和自动运转准备》的第10章“10-1报警画面”3. 报警显示色及其解除报警以红色或蓝色显示。
显示色 红 蓝 黄 白报警解除 按RESET键 按CLEAR键 按RESET键或CLEAR键 按CLEAR键3报警3-1-2 注意事项1)如果出现于程序有关的报警,则该部分引起报警的程序位置就会显示在报警信息之后的圆括号内。
报警一览表中圆括号内各代码的含义如下表所示。
代码WNo.UNo.SNo.NNo.含义工件号(MAZATROL或EIO/ISO)单元号(MAZATROL)刀具序列号(MAZATROL)序列号(EIO/ISO)BNo.空白程序段号(EIA/ISO)没有显示,或系统内部报警处理代码2)有些类型的报警停止状态、清除步骤和显示色要根据发生报警的程序是前台运行(在位置 画面上选择的程序)还是后台运行(在程序画面上选择的程序)来决定。
关于后者的上述 三类信息会在报警一览表的圆括号内给出。
3)此表中没有的报警为空格。
4)对于某个特定的机床型号或NC软件的版本而言,某些报警或许会不显示。

(二楼)MAZAK车铣复合机床操作
1.回零:
伺服电源开→HOME回零灯亮→RESET→看机床位置,如果轴处与正向最远处
按轴X+→单轴按MF1→C轴(连接)
C轴连接:→位置(软键)→C轴连接+MF1 再完后再次按(C轴连接+MF1)2.手动
手动(轴选择)→选X /Z /C轴→手脉摇动→选倍率→选C轴时(C轴连接)3.编辑程序:(输入程序,读取程序,程序锁必须打开)
程序→工号→写程序号→INPUT→选G代码(白色界面)或MAZAK指令(黑色界面)→程序输入→程序完成
4.模拟
G代码模拟:程序打开→刀尖路径检查→检查继续
MAZAK模拟:
打开程序→刀尖路径检查→稳固的模式(为实体模型)轮廓→检查步骤→检查继续
5. 刀具设置等
(1)设刀:
刀具资料→移至刀位(空)→编写刀具→切换到(形状)→选形状→配件→外周(内部)
(2)删除刀具:
刀具资料→光标移到删除刀具上→编写刀具号→清除→回车
(3)换刀:MDI→写刀具号。
T××OO→循环启动
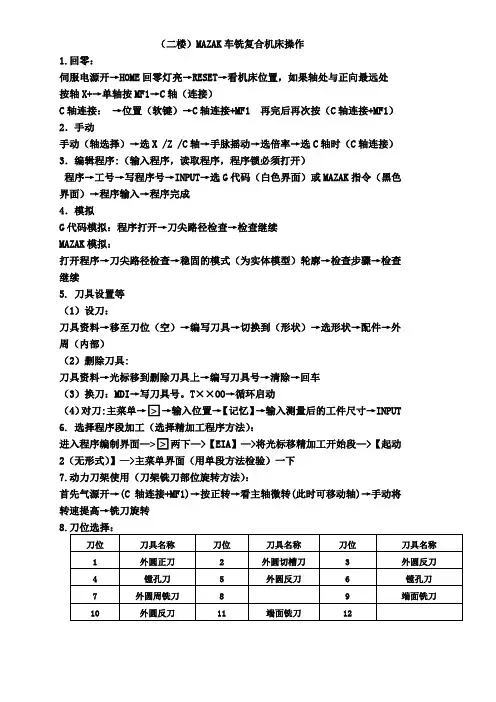
(4)对刀:主菜单→□>→输入位置→【记忆】→输入测量后的工件尺寸→INPUT 6. 选择程序段加工(选择精加工程序方法):
进入程序编制界面—>□>两下—>【EIA】—>将光标移精加工开始段—>【起动2(无形式)】—>主菜单界面(用单段方法检验)一下
7.动力刀架使用(刀架铣刀部位旋转方法):
首先气源开→(C轴连接+MF1)→按正转→看主轴微转(此时可移动轴)→手动将转速提高→铣刀旋转。

MAZATROL640串口通信操作说明WIN2K/XP版 LGMazak技术一部2005-09-25目录串口通信条件――――――――――――――――――――――――― 3 MAZATROL640串口通信操作过程说明机床端设置及操作过程篇―――――――――――――――――――― 5 电脑端设置过程篇―――――――――――――――――――――――18使用篇――――――――――――――――――――――――――――24附页:串口通信线的连接图―――――――――――――――――――30串口通讯条件硬件要求确认NC系统中CF21/22 插头的位置:机床出厂一般接在CMT用的插槽CF21上。
进行DNC通讯时使用的是CF22接口,所以,将CF21/22 插头更换到CF22接口上。
CF21/CF22接头接在CF21接口上,供CMT 使用。
供DNC使用的CF22接口(COM1)请将CF21/22接头转换到CF22接口上,下图为其完成图。
然后直接将DNC 连线将电脑和操作面板的串口连接(通常选电脑的COM1 口)。
CF21接口 CF21/22接头CF22接口MAZATROL640串口通信操作过程说明〔机床端设置及操作过程篇〕1、先打开WINDOWS2000系统的“网路及拨号连接”;2、〔网路及拨号连接〕中打开“建立新的连线”;3、“您目前所在位置的区码”中填入您工场所在位置的电话区号:如银川时0951,然后点击“确定”;4、点击确定;5、点击“下一步”;6、选中“直接连线到领一台电脑”,点击“下一步”;7、选中“主机”,点击“下一步”;8、在“这个连线所要使用的装置”中选择〔通讯连接口(COM1)〕,然后点击“下一步”;9、勾选〔NCUSER(NCUSER)〕,然后点击“下一步”;10、点击“完成”;11、进入〔连入连接〕12、确认〔一般〕选项卡COM1的〔内容〕中连接速度是“115200”bps,然后进入〔使用者〕选项卡13、确认“永远允许掌上型电脑直接连接装置可以不提供密码就进行连线”没有被选中;14、进入〔网络功能〕选项卡,添加“NETBUI”协议;15、设定TCP/IP,使用与将要进行连接电脑在同一段的IP,设置完成后“确定”;16、选择〔通信协定〕,点击“新增”;17、选中“NetBEUI”协议,点击“确定”;18、重新启动;19、进入〔控制台〕20、选择〔电话和数据机选项〕21、选择〔数据机〕选项卡中的〔内容〕项22、在〔一般〕选项卡中的〔连接口速度〕:选择“115200”项目,然后确定23、设置机床主机的共享目录:MC_Direct Model Programs,用来交换文件;24、设置成完全共享〔电脑端设置过程篇〕1、先打开WINDOWS2000(WIN XP系统类似)系统的“网路及拨号连接”;2、选择〔新建连接〕,点击“下一步”3、选择〔直接连接到另一台计算机〕,点击“下一步”;4、选择〔来宾〕,点击“下一步”;5、选择〔所有用户使用此连接〕,点击“下一步”;6、点击“完成”;7、选择〔直接连接〕,在用户名处输入“NCUSER”,密码处空值,勾选“保存密码”,选择〔属性〕进入属性选项卡;8、在〔常规〕选项卡中的选择设备处选择“两台计算机见的通讯电缆(COM1)”,然后选择〔配置…〕项目;9、确认最高的连接速度是“115200”bps,然后确定。
LGMazakQUICK TURN SMART 系列 (SG)(LG)说明书编号:HB07HA0020C报警一览表M代码一览表宁夏小巨人机床有限公司3报警1)本章节的范围 本章节介绍了可以在NC装置的显示屏上所显示的所有报警 解除报警需要参阅本章节。
2)本章节相关的注意事项 本章还记述了与各种机械功能、选项功能有关的报警,因此客户购买的机械中也有不显示的 报警。
注意 1:本章节内容随NC系统和机床的改进而有变更时,恕不另行通知。
注意 2:如有疑问请与MAZAK技术服务中心或技术中心联系。
3-1-1 报警显示3-1 概述1. 机床状态指示灯如果发生报警,操作面板上的机床状态指示灯“?ALARM”就会点亮。
2. NC画面显示报警将按下述格式显示在报警画面上:650 无法倒角 (1234,56,78)刀具序列号或程序段号单元号或序列号工件号报警信息报警编号关于报警画面,参见附册《NC装置的操作和自动运转准备》的第10章“10-1报警画面”3. 报警显示色及其解除报警以红色或蓝色显示。
显示色 红 蓝 黄 白报警解除 按RESET键 按CLEAR键 按RESET键或CLEAR键 按CLEAR键3报警3-1-2 注意事项1)如果出现于程序有关的报警,则该部分引起报警的程序位置就会显示在报警信息之后的圆括号内。
报警一览表中圆括号内各代码的含义如下表所示。
代码WNo.UNo.SNo.NNo.含义工件号(MAZATROL或EIO/ISO)单元号(MAZATROL)刀具序列号(MAZATROL)序列号(EIO/ISO)BNo.空白程序段号(EIA/ISO)没有显示,或系统内部报警处理代码2)有些类型的报警停止状态、清除步骤和显示色要根据发生报警的程序是前台运行(在位置 画面上选择的程序)还是后台运行(在程序画面上选择的程序)来决定。
关于后者的上述 三类信息会在报警一览表的圆括号内给出。
3)此表中没有的报警为空格。
4)对于某个特定的机床型号或NC软件的版本而言,某些报警或许会不显示。
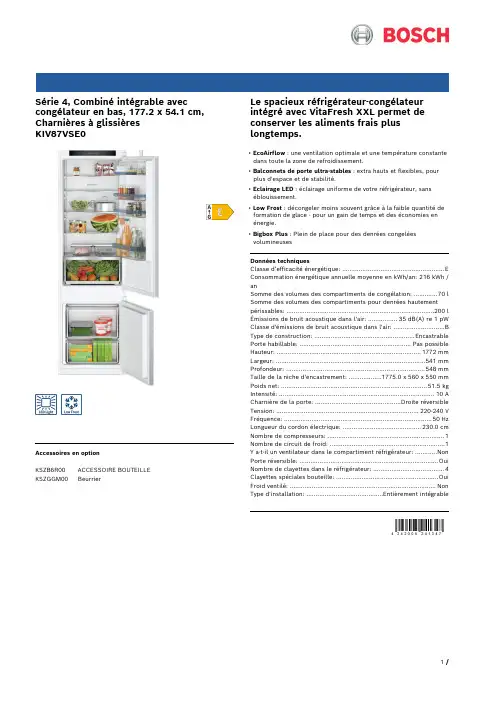
Série 4, Combiné intégrable avec congélateur en bas, 177.2 x 54.1 cm, Charnières à glissièresKIV87VSE0Accessoires en optionKSZB6R00 ACCESSOIRE BOUTEILLEKSZGGM00 Beurrier Le spacieux réfrigérateur-congélateurintégré avec VitaFresh XXL permet de conserver les aliments frais plus longtemps.• EcoAirflow : une ventilation optimale et une température constante dans toute la zone de refroidissement.• Balconnets de porte ultra-stables : extra hauts et flexibles, pour plus d'espace et de stabilité.• Eclairage LED : éclairage uniforme de votre réfrigérateur, sanséblouissement.• Low Frost : décongeler moins souvent grâce à la faible quantité de formation de glace - pour un gain de temps et des économies enénergie.• Bigbox Plus : Plein de place pour des denrées congelées volumineusesDonnées techniquesClasse d’efficacité énergétique: ........................................................E Consommation énergétique annuelle moyenne en kWh/an: 216 kWh / anSomme des volumes des compartiments de congélation: .............70 l Somme des volumes des compartiments pour denrées hautementpérissables: .................................................................................200 l Émissions de bruit acoustique dans l'air: ................35 dB(A) re 1 pW Classe d'émissions de bruit acoustique dans l'air: ............................B Type de construction: .......................................................Encastrable Porte habillable: .............................................................Pas possible Hauteur: ...............................................................................1772 mm Largeur: ..................................................................................541 mm Profondeur: ............................................................................548 mm Taille de la niche d'encastrement: ..................1775.0 x 560 x 550 mm Poids net: ................................................................................51.5 kg Intensité: .....................................................................................10 A Charnière de la porte: ...............................................Droite réversible Tension: ..............................................................................220-240 V Fréquence: .................................................................................50 Hz Longueur du cordon électrique: ...........................................230.0 cm Nombre de compresseurs: . (1)Nombre de circuit de froid: (1)Y a-t-il un ventilateur dans le compartiment réfrigérateur: ............Non Porte réversible: ............................................................................Oui Nombre de clayettes dans le réfrigérateur: (4)Clayettes spéciales bouteille: ........................................................Oui Froid ventilé: ................................................................................Non Type d'installation: ..........................................Entièrement intégrableSérie 4, Combiné intégrable aveccongélateur en bas, 177.2 x 54.1 cm, Charnières à glissièresKIV87VSE0Le spacieux réfrigérateur-congélateurintégré avec VitaFresh XXL permet de conserver les aliments frais plus longtemps.Informations générales- KIV87VSE0Puissance / Consommation- Classe d'efficacité énergétique Classe énergie_Eu19: E sur uneéchelle allant de A à G- Consommation énergétique : 216 kWh/an- Volume total : 270 l- Volume réfrigérateur : 200 l- Volume congélateur : 70 l- Niveau sonore : 35 DB (Classe sonore_Eu19: B)Equipement- Réglage électronique de la température, lisible via LED- Alarme sonore pour porte ouverte- Eclairage LEDPartie réfrigérateur- 5 clayettes en verre incassable, dont 4 réglables en hauteurSystème fraîcheur- 1 compartiment VitaFresh avec contrôle de l'humidité - les fruits et légumes restent frais et riches en vitamines plus longtempsPartie congélateur- LowFrost - dégivrage rapide et moins fréquent- Capacité de congélation en 24h : 3.2 kg- SuperCongélation- Commutateur de supercongél.: manual activation- Autonomie en cas de coupure électrique : 12 h- 2 tiroirs de congélation transparents, dont 1 BigBoxDimensions- Dimensions de l'appareil (H x L x P): 177.2 x 54.1 x 54.8 cm- Dimensions de la niche (H x L x P): 177.5 x 56 x 55 cm Informations techniques- Charnières de porte à droite, réversibles- Classe climatique : SN-ST- Tension 220 - 240 VAccessoires- casier à oeufs, bac à glaçonsInstallationSérie 4, Combiné intégrable avec congélateur en bas, 177.2 x 54.1 cm, Charnières à glissièresKIV87VSE0。

面板介绍之马矢奏春创作1电源打开按钮 2电源关闭按钮3 主菜单4 扩展键5 菜单键 6光标键7 翻页键(PAGE) 8 数据取消键(CANCEL)9 EOB键 10 字母/数值键11上档键(SHIFT) 12 确定键(INPUT)13 删除键(CLEAR) 14 复位键(RESET)15 手轮倍率键 16 快速进给键(RAPID)17 回零点键(HOME) 18 自动运行键(MEMORY)19 单段键(SINGLE BLOCK) 20 MDI键21 执行外部程序键(TAPE) 22 冷却液停止键(COOLANT STOP)23 G00速度修调键(RAPID) 24 S转速修调键(SPINDLE)25 G01速度修调键(FEED) 26 VFC键(加工时用于修调S和F,人机对话有效)27切换键(TAB) 28辅助键(MF1)41 主轴启动键(SPINDLE START) 42 主轴停止键(SPINDLE STOP)43 刀具选择按键(TOOL SELECT) 44 轴移动按键45 选择XZC键(AXIS SELECT) 46 手轮47 尾座主轴用按键(TAIL SPINDLE) 48 进给停止按钮(红色)(FEED HOLD)49 启动按钮(绿色)(CYCLE START) 50 开门操纵(MACHINE SETUP)51 排屑器启动键(CHIP CONVEYOR) 52 程序改写开关(带钥匙)53 门开锁按键 (DOOR UNLOCK) 54 GL/CF 切换按键卡爪的设置至于卡爪夹持直径的调整,需手动调节卡爪的啮合齿的位置。
通常卡爪与卡盘外圆齐平时,夹持棒料外圆为40mm,根据此基准调节啮合齿的位置,注意每齿啮合位置要一致,否则工件转动起来为偏心状态。
提示:在卡爪夹持好工件后,将脚踏开关置于脚不容易踩踏处,防止走动过程中误操纵尾座的操纵Quick Turn100M车削中心简要操纵说明:一律假设工件静止不动,刀具相对运动。
PLEASEREAD THIS OWNER'S MANUAL THOROUGHLY BEFORE OPERATING AND KEEP IT HANDY FOR REFERENCE AT ALL TIMES.OWNER'S MANUALREFRIGERATOR-FREEZERSVP ,Lisez attentivement ce manuel avant de faire fonctionner l'appareilet conservez-le pour de futures r f rences.R FRIG RATEUR -CONG TEURMANUEL DE L'UTILISATEURLEA ESTE MANUAL DE INSTRUCCIONES DETENIDAMENTE Y GUçRDELO COMO REFERENCIA PARA EL FUTURO.MANUAL DE INSTRUCCIONESFRIGORIFICO -CONGELADORIN STALLATION (4)FEATURE CHART (5)OPERATION (6)StartingTemperature ControlChilled CompartmentDefrostingDeodorizerVitamin Kit (optional)SUGGESTIONS ON FOOD STORAGE (9)CLEAN IN G (10)GENERAL INFORMATION (10)LAMP REPLACEMENT (11)IMPORTANT WARNINGS (3)BEFORE CALLING FOR SERVICE .........11CONTENTSTHIS REFRIGERATOR IS MANUFACTURED WITH GREAT CARE AND UTILIZES THE LATEST IN TECHNOLOGY.WE ARE CONFIDENT THAT YOU WILL BE FULLY SATISFIED WITH ITS PERFORMANCE AND RELIABILITY.BEFORE USING YOUR REFRIGERATOR, PLEASE READ THIS BOOKLET CAREFULLY. IT PROVIDES EXACT INSTRUCTIONS FOR INSTALLATION, OPERATION, AND MAINTENANCE, AND ALSO SUPPLIES SOME USEFUL HINTS.VERY DANGEROUS ATTRACTION An empty refrigerator can be a dangerous attraction to children. Remove either gaskets, latches, lids or the entire door from your unused appliance,or take some other action to make it harmless.This appliance must be grounded (earthed).DON'T WAIT! DO IT NOW!Do not store inflammable materials, explosives, or chemicals in the refrigerator.DO NOT USE AN EXTENSION CORD If possible, connect the refrigerator to its own individual electrical outlet to prevent it and other appliances or household lights from causing an overload that could cause a power outage.ACCESSIBILITY OF SUPPLY PLUG The refrigerator-freezer should be so positioned that the supply plug is accessible for quick disconnection when accident happens.SUPPLY CORD REPLACEMENTIf the supply cord is damaged, it must be replaced by the manufacturer or its service agent or a similarly qualified person in order to avoid a hazard.ABOUT GROUNDING(EARTHING)In the event of an electric short circuit, grounding (earthing) reduces the risk of electric shock by providing an escape wire for the electric current.In order to prevent possible electric shock, this appliance must be grounded.Improper use of the grounding plug can result in an electric shock. Consult a qualified electrician or service person if the grounding instructions are not completely understood, or if you have doubts on whether the appliance is properly grounded.DO NOT MODIFY OR EXTEND THEIt will cause electricshock or fire.SELECT A GOOD LOCATION1. Place your refrigerator where it is easy to use.2. Avoid placing the refrigerator near heatsources, direct sunlight or moisture.3.4. To avoid vibrations, the refrigerator must belevel. If necessary, adjust the leveling screw(s) to compensate for unevenness of the floor.To close the doors easily, the front should be slightly higher than the rear. Leveling screw(s) can be turned easily by tipping the cabinetslightly. Turn the leveling screw(s) clockwise to raise the refrigerator, counterclockwise tolower it.NEXT1. Wipe off all dust accumulated during shippingand clean your refrigerator thoroughly.2. Install accessories such as the ice cube box,evaporating tray cover, etc., in their properplaces. They are packed together to prevent possible damage during shipping.3. Connect the power supply cord (or plug) to theoutlet. Don't double up with other appliances on the same outlet.4. Prior to use, let the refrigerator run for 2-3hours. Check the flow of cold air in the freezer compartment to ensure proper cooling hastaken place.Your refrigerator is now ready for use.To ensure proper air circulat ion around the fridge-freezer, please maintain sufficient space on both the sides as well as top and maintain at least 2 inches (5 cm) from the rear wall.N OT E All parts shown may not be included with every model.Twisting Ice Serve (Option) or GeneralType Ice Tray Freezer TemperatureControl DialFreezer ShelfRefrigerator TemperatureControl KnobChilled Compartment Cover Lower (Optional)FREEZERCOMPARTMENTREFRIGERATOR COMPARTMENTFreezer Door RackEgg Storage Rack Shelves Movable RackRefrigerator Door RackLeveling ScrewsVegetable Drawer Used to keep fruits and vegetables, etc.fresh and crisp.Lamp(Optional)Deodorizer6STARTINGWhen your refrigerator is first installed, allow it 2-3 hours to stabilize at normal operating temperatures prior to filling it with fresh or frozen foods.If operation is interrupted, allow 5 minutes delay before restarting.BEFORE SETTING THE TEMPERATURECONTROLS FOR REFRIGERA TOR COMP ARTMENTCONTROLS FOR FREEZER COMP ARTMENTFor colder temperatures, adjust the control knob to MAX , and for warmer temperatures, adjust the control knob to MIN positionhas a tendency to warm up.For colder refrigerator, turn the TEMP . CONTROL to "2"~"4" to direct more cold air into the refrigerator compartment.Setting at "6"~"7" of the TEMP . CONTROL, the refrigerator compartment will not be cold enough.In hot weather or to put much foods in the refrigerator compartment, the refrigerator compartment . CONTROL - 1, 2, 3, 4, 5, 6, 7But the refrigerator compartment becomes warmer because less cold air flows into the refrigerator compartment.the unit operates less and the freezer compartment has a For colder freezer, turn the TEMP . CONTROL to "6"~"7"., its . CON-TROL dial between 6 and 7 to cool it. Return the TEMP . CONTROL dial tothe original position to cut down the consumption of energy.Ice TraysIce Cube BoxIce Trays Ice Cube BoxFrameICE MAKINGDetermine which type ice-making system you have.General TypeTo make ice cubes, fill the ice tray with water and place it on the ice cube box. Then insert the ice cube box in the freezer compartment.To remove ice cubes, hold the tray at its ends and twist gently.Twisting Ice Serve TypeTo make ice cubes, fill the ice tray with water and insert in its position.To remove ice cubes, hold the knob of the tray and turn gently. Then, ice cubes drop in the ice cube box.You can remove the Twisting Ice Serve to make the freezer compartment larger.You should remove the ice Trays and Ice Cube Boxfirst, then pull the frame out toword the right side.8CHILLED COMPARTMENTWhen the door is opened, the warmer air doesn't influence the fresh meat. You can keep food fresher in it.DEFROSTINGDefrosting takes place automatically .The defrosted water flows down to the evaporating tray which is located in the lower back side of the refrigerator and is evaporated automatically .How to usepassed on to other foods.DEODORIZERVITAMIN KIT (OPTIONAL)It contains anti-oxydant that is able to avoidoxidation process in order to make the fruits and vegetables fresh for longer time.Opening and closing the door too much often can reduce its lifetime.STORING FOODG Store fresh food in the refrigerator compartment. How food is frozen and thawed is an important factorin maintaining its freshness and flavor.G Do not store food which goes bad easily at low temperatures, such as bananas, pineapples, and melons.G Allow hot food to cool prior to storing. Placing hot food in the refrigerator could spoil other food and lead to higher electric bills!G When storing, cover food with vinyl wrap or store in a container with a lid. This prevents moisture from evaporating and helps food to keep its taste and nutrients.G Do not block air vents with food. Smooth circulation of chilled air keeps refrigerator temperatures even.G Do not open the door frequently. Opening the door lets warm air enter the refrigerator, causing temperatures to rise.FREEZER COMPARTMENTG Do not store bottles in the freezer compartment - they may break when frozen.G Do not refreeze food that has been thawed. This deteriorates taste and nutrition.G When storing frozen food like ice cream for a long period, place it on the freezer shelf,not in the door rack.G Avoid storing any food close to the bottom area of the freezer shelf to keep efficient air circulation. REFRIGERATOR COMPARTMENTG Avoid placing moist food deep inside refrigerator shelves, it could freeze upon direct contactwith chilled air.G Always clean food prior to refrigeration. Vegetables and fruits should be washed and wiped,and packed food should be wiped clean to prevent adjacent food from spoiling.G When storing eggs in their storage rack, ensure that they are fresh. Always store them in a upright position, which keeps them fresh longer.It is important that your refrigerator be kept clean to prevent undesirable odors. Spilled food should be wiped up immediately, since it may acidify and stain plastic surfaces if allowed to settle.Never use metallic scouring pads, brushes, coarse abrasive cleaners, or strong alkaline solutions on any surface.Before you clean, remember that damp objects will stick or adhere to extremely cold surfaces. Do not touch frozen surfaces with wet or damp hands. EXTERIOR -Use a lukewarm solution of mild soap or detergent to clean the durable finish of your refrigerator. Wipe with a clean, damp cloth and then dry.INTERIOR -Regular cleaning of the interior and interior parts is recommended. If you have the No Frost model which defrosts automatically, leave both doors open during the entire cleaning process. Disconnect the power supply, and remove food and all compartment shelves, storage trays etc.Wash all compartments with a baking soda solution. Rinse and dry.INTERIOR PARTS -Wash compartment shelves, door racks, storage trays, and magnetic door seals etc. with the baking soda solution or a mild detergent and warm water. Rinse and dry.VACATION TIMEDuring average length vacations, you will probably find it best to leave the refrigerator in operation. Place freezable items in freezer for longer life. When you plan to be away for an extended period, remove all food, disconnect the power cord, clean the interior thoroughly, and leave each door OPENto prevent odor formation.POWER FAILUREMost power failures are corrected in an hour or two and will not affect your refrigerator temperatures. However, you should minimize the number of door openings while the power is off. During power failures of longer duration, place a block of dry iceon top of your frozen packages.DRY ICE WARNINGWhen using dry ice, provide adequate ventilation. Dry ice is frozen carbon dioxide (CO2).When it vaporizes, it can displace oxygen, causing dizziness, light-headedness, unconsciousness, and death by suffocation.Open a window and do not breathe the vapors.IF YOU MOVEIf you move, empty the refrigerator (freezer) completely and wash a mild solution of baking soda and water. (2 TBS soda to 1 quart water) Be sure the soda is completely dissolved to avoid scratching the inside of the refrigerator (freezer). Secure any loose items, such as racks, bins, ice trays, etc. Do not try to move a loaded refrigerator. ANTI-CONDENSATION PIPEThe outside wall of the refrigerator cabinet may sometimes get warm,especially just afterinstallation.Don't be alarmed.This is due to theanti-condensation pipe,which pumps hot refrigerantto prevent sweating on theouter cabinet wall.WARNINGAlways remove power cord from the wall outlet prior to cleaning in the vicinity of electricalparts (lamps, switches, controls, etc.).Wipe up excess moisture with a sponge orcloth to prevent water or liquid from getting into any electrical part and causing a electricshock. Do not use flammable or toxic cleaning liquids.111. Unplug the power cord from the outlet.2. Remove refrigerator shelves.under hole of the lamp cover and pull it out forwards.4. Turn the lamp counterclockwise.5. Assemble in reverse order of disassembly.SERVICE CALLS CAN OFTEN BE AVOIDED!IF YOU FEEL YOUR REFRIGERATOR IS NOT OPERATING PROPERLY, CHECK THESE POSSIBLE CAUSES FIRST :P/NO : MFL41481106。


MAZAK 机床操作培训一、机床简介MAZAK 机床是一部数控机床。
设有X 、Y、Z 三根轴,三轴可联动;设有一个刀库,刀库有30 个刀盒,可装30 把刀具;主轴采用立式安装,可进行铣、钻、铰、镗、攻丝等多种工艺加工要求。
系统分辩率为0.001, 有较高的加工精度。
二,面板di SI一⑥§4 Z£ ---------4CD-QDMoot am I MM OU»_______ 0 VW 仁倉13妙您回-" 严e| a禺昶O€Z> •—££ 9€S€8t •rwt OlO ---------& SO o]-------- XI三操作说明3 . 1开机前注意事项(1)检查液压油、主轴油、润滑油是否足够,冷却液是否足够3. 2开机 (1) 接通电源;(2) 按下机床启动键,等待“ REDAY ”指示灯亮后(绿色),再进行下一步 工作。
(期间约 一分钟)〈屏幕鬼示 ^ZFRORFTtlRX^L 按下 ^HOME 1” 礎;C O 按下主菜犀谴,宜到出现“LIGim (灯)菜轼 再按LIGHT,憾明灯退即亮:诃丰m 二苣="宀1».干诗沖吏嗔竿DS -I 匸垃至“仏X. \\上轴回零。
依次按下EOES趾机床自动旦到零点;注:如果机床关机时不在零点位置「卄机也零点时,应先依秋下 使各毎偏雲零点一疋距离.然后冉一賣按下| *z] | ~Y j | ~x ][ZlLZltZ]1「直主各轴回到零点;立AIJTOALCLAMPT :m、rp按下"JOG"按提・将(ZQ 打到 “MANUAL"一边,将(1 打到"CLAXiy一边.则夹具实宾,*\ 2>C7)将(§)打到"AUTO" 一边”按WV RAPO—Th SPT?<DAI.VW rrFI>fflffl按® 阿S萱、零占住豐的标志绘:屏幕上机乐坐标X 、 ¥、£前面堆小圆產交我小MUN,AI TO:vt ANU ATcry PUT )键.则斫运行程字显不在屏幕右上角,⑼ 按下"START"自动馆环启或铸「呑丰樺作)”机昧开始运存CYCLE STLRTG 0注:本机未面板上的 二|爵戟说胃为无栽-工3装、卸刀3.3 1装刀刀」刀直核到建为二C2)打幵訪护门.向下隹装、却刀手衙.〔加趋洁刀稱和刀盒:并把刀具放入刀盒" 〔4 把刀具世好峙别妥注意刀具妊口问前斥下C5)向上拉手柄,刀具自动装入刀盒。
QT-200数控车床EIA/ISO编程培训教程:培训日程1. EIA/ISO 编程一二天:培训内容1. EIA/ISO编程第一天的内容1.1 EIA/ISO编程的基本知识的说明⑴ 机床坐标系和工件坐标系的说明:⑵ 刀补值的说明及工件坐标系的确立:刀补值的说明:几何补偿、磨损补偿工件坐标系的确立:用G50确立通过刀补值确立⑶调用已有程序、创建新程序的操作说明:⑷EIA/ISO 编程的构成:辅助功能代码+ G代码⑸T32互换模式和标准模式的说明:参数P16位3 (1—1)1. 2辅助功能代码的使用说明⑴ 常用M代码的使用说明:辅助功能指令(其他的M代码参阅M代码表)M00程序停止M01选择程序停止M02程序结束(13—55)M03主轴正转M04主轴反转M05主轴停止M08冷却开M09冷却关M30返回程序头部(13—55)M98调用子程序(13 —48)M99返回主程序(13 —48)M198:程序结束(13—55)M199:程序结束(13—55)⑵S代码的使用说明:主轴转速设定S2 位:换档指令S4/S5 位:实际主轴转速⑶T代码的使用说明:Txx xx . *I I I——> 刀具的ID号(MAZATRO刀具数据)'刀具补偿号刀具号Txx 00 时,取消刀具补偿。
1. 3编程指令格式:⑴ 绝对值指令和增量值指令:X、Z/U、W( 5—1)开机初始设定为G90⑵ 英制/ 公制切换指令:G20/G21(5-2)开机初始设定为G21⑶小数点输入:参数P9位5 (5- 3)⑷ 选择程序段跳过( 3-4)1.4 进给速度功能:⑴ 快速进给速度:30M( 7- 1)⑵ 切削快速进给速度: F ( 7 - 1 )⑶ 非同步/ 同步进给指令:G98/G99 ( 7- 1) 开机初始设定为G99 1.5 坐标系设定:⑴ 坐标系设定G50任意位置处的工件坐标系设定(15—1) 坐标系设定:使用说明及编程格式说明( 15- 1) 坐标系偏移:使用说明及编程格式说明( 15—3)⑵坐标系设定G54〜G59:坐标系设定:使用说明及编程格式说明( 15—9) 工件偏置画面的说明坐标系偏移:使用说明及编程格式说明( 15—9) 电源接通或复位时选择G54⑶选择MAZATRO工件坐标系G53.5:将工件坐标系G54-G59改变为MAZATROL 工件坐标系( 15—7) ⑷ 取消MAZATRO工件坐标系G52.5:取消MAZATRO T件坐标系,恢复为工件坐标系G54〜G59( 15—5)⑸ 选择机床坐标系G53:(15—11)使用说明及编程格式说明:G 53只对指令程序段有效:⑹ 局部坐标系G52:(15—12)使用说明及编程格式说明:G52局部坐标系以工件坐标系G54〜G59为基础:⑺ 自动返回参考点G28:使用说明及编程格式说明: (15—13)⑻G29:使用说明及编程格式说明:(15—13)⑼ 返回参考点检测G27:使用说明及编程格式说明: (15—18)⑽ 自动返回第二参考点G30:使用说明及编程格式说明: (15—15)1.6 平面选择G16、G17、G18、G19: (6—11)G16: Y-Z 圆柱平面选择G17: X-Y 平面选择G18: Z-X 平面选择G19: Y-Z 平面选择开机初始设定为G181 .7 插补功能:⑴ 快速定位G00:使用说明及编程格式说明: (6—1)⑵ 直线插补G01:使用说明及编程格式说明:(6-4)⑶ 圆弧插补指令G02/G03:使用说明及编程格式说明:(6-6)半径编程的使用说明圆心编程的使用说明⑷ 等螺距螺纹切削G32:使用说明及编程格式说明:(6-24)精密螺纹切削指令:(6-24)参数P9 位7 (6-25)英制螺纹切削指令:(6-27)参数P9 位7 (6-27)连续螺纹加工:⑸ 变螺距螺纹切削G34:使用说明及编程格式说明:(6-29)1.8 其他模式指令:⑴ 暂停指令G04:使用说明及编程格式说明:(8-1)暂停用时间表示(G98G04:参数P10位2= 1 (8- 1)暂停用转数表示(G99)G04:(8-2)需有主轴位置编码器⑵ 精确停止检测指令G09实现精确停止,以便得到最小过渡园角。
MAZAK 机床操作说明书操作说明书 MAZATROL MATRIX (INTEGREX IV 规格) NC 单元的操作和自动运行准备说明书编号: H740S30030C 机械编号: 在使用本机之前,请充分掌握本说明书内容,进行正确的操作或作业。
如果有任何疑问之处,请与就近的MAZAK 技术服务中心或技术中心联系。
重要说明 1. 务必遵守说明书内的安全事项,以及贴在机械上的安全铭牌的内容。
如果没有遵从这些内容,可能会造成重大的人身事故或物品损害。
如果需要交换用的安全铭牌,请向MAZAK 技术服务中心或技术中心订购。
2. 切忌擅自进行影响机械安全性的任何改造。
如果希望进行改造,请与MAZAK 技术服务中心或技术中心联系。
3. 为说明细节部分,本说明书中部分例图以卸下护罩或门的状态画出。
请注意,为安全起见,在实际运转时必须装好。
4. 本说明书根据最新材料编写,然而因为不断的技术革新而万一在所购买的机械与本说明书内容有所不同,请与MAZAK 技术服务中心或技术中心联系。
MAZAK 技术服务中心或技术中心将会提供正确的资料。
5. 请将本使用说明书保管在机械附近,以便随时查阅。
6. 要重新订购说明书时,请与说明书编号(或机械名称、机械编号、说明书名称)一并与就近的 MAZAK 技术服务中心或技术中心联系。
说明书制作: YAMAZAKI MAZAK CORP. 说明书编辑科02. 2006 第3 部NC 单元的操作和自动运行准备INTEGREX IV 规格H740S30030C 安全注意事项S-1 安全注意事项前言为进一步安全使用安装有CNC(电脑数控)装置(以下简称NC)的本机,下面说明有关NC 的安全注意事项。
为此,不仅是进行程序设计的人员,而且是进行机械操作等的人员也需要充分掌握本说明书内容后进行作业。
另外,根据所使用的NC 不同,由于没有对应的功能、任选装置,因此会有不符合的注意事项,但希望通读一下。