阿里斯顿JSQ26-Hi7、Ei7+说明书
- 格式:pdf
- 大小:6.06 MB
- 文档页数:18
林内智家APP二维码本设备包含型号核准代码为:CMIIT ID:2016DP4490 无线电发射模块。
上海林内有限公司
Shanghai Rinnai Co., Ltd.公司地址:上海市奉贤区团青公路4500号 电话:(021)67583500 传真:(021)67583555 邮编:201411上海林内有限公司售后服务中心地址:上海市奉贤区团青公路4500号 传真:(021)67583555 邮编:201411
上海林内有限公司展示厅地址:上海市南京西路499号 电话:(021)63590262 邮编:200003全国服务热线:4006990606 SU176-902×012022年10月版SX 敬告: 由于产品的改进,本说明书中的某些内容,插图可能与产品不完全一致,恕不另行通知,产品规格以器具铭牌为准,请谅解。
扫描此二维码获取林内官网扫描此二维码获取林内官方微信服务号扫描此二维码获取售后网点。
HOT WATER I HEATING I RENE WABLE I AIR CONDITIONING用户手册燃气采暖热水炉CLAS X 24/28/32CLAS X SYSTEM 24/28/32周经理13338777561 周经理 13338777561 周经理 133******** 周经理 133******** 周经理 133******** 周经理 133******** 周经理 133********用户手册尊敬的顾客:非常感谢您选购我们阿里斯顿的燃气采暖热水炉(以下简称热水炉)。
我们承诺已向您提供了一个技术合格的产品。
本手册用于告知您关于正确安装、使用和保养的方法和各种建议。
请您妥善保存本手册,以备以后查阅。
我们的地区技术服务中心将随时为您提供服务。
本装置的保修将从第一次点火之日起生效,第一次点火应由我们指定的人员实施。
在核实了热水炉已正确安装并进行第一次点火之后,您的热水炉才能正式使用。
至于对燃气回路、水路以及电气回路的维修,请与当地指定的技术服务中心联系。
保修在中国市场销售的热水炉的数据和操作以中文技术说明书为准本产品执行以下中国产品标准:GB25034 燃气采暖热水炉GB20665 家用燃气快速热水器和燃气采暖热水炉 能效限定值及能效等级产品标准产品寿命依据GB17905相关规定,采暖热水炉从出售之日起,使用天然气的采暖热水炉的使用年限为8年,为了保证您的舒适安全使用,请严格遵守。
处理和回收热水炉我们的热水炉设计制造成大部分组件为可回收材料热水炉和它的附件必须尽可能地充分处理、材料分类。
热水炉运输的包装必须有安装工或经销商处理。
注意!!热水炉和附件的回收和处理必须按照法规要求执行。
自动周经理13338777561 周经理 13338777561 周经理 133******** 周经理 133******** 周经理 133******** 周经理 133******** 周经理 133********用户手册安全守则关键符号不遵守本警告会有损坏的风险,在某些情况对财产、动植物甚至很严重。
4.3 向浴缸内注水4.3.1使用前准备¥ 关闭浴缸的放水栓;¥ 如果有浴缸盖请盖上。
(注水时请打开)4.3.2 通过面板操作器注水时请按照以下的方法进行A. 初次使用时,按下面板操作器的电源开关,面板显示器闪烁显示标准模式的水温"42℃",3秒钟后显示实际出水温度。
标准模式下的水温(例42℃)标准模式下的水温(例42℃)优先显示亮¥ 热水器的设定温度范围为35℃-70℃,在温度范围35℃-48℃区间内,按下温度设定按键以1℃为单位上升或下降,而 且设定完温度时,会闪烁显示3秒设定温度,随后显示实际水温;在温度范围50℃-70℃区间,按下温度设定按键是以 5℃为单位上升或下降,且设定温度完成后会闪烁10秒显示设定温度,随后显示实际水温。
¥ 为了使机器在进水温度较低的情况下,也能达到更好的恒温使用性能,在部分额定热负荷较小的机型上特设水量调节 旋钮。
当出现出水温度低于设定温度时,请将水量调节旋钮适当关小, 使得到最佳的恒温调节范围.”¥ 当超出机器使用范围而无法达到设定温度,不属于产品质量问题,可通过调节进水量达到设定温度.4.2 水温调节¥ (热水器同时连接面板操作器和浴室有线遥控器时)正在使用热水时¥ 无法从35~48℃的温度设定改变为高温(50℃,55℃,60℃,65℃,70℃)。
¥ 设定为高温(50℃,55℃,60℃,65℃,70℃)时,无法升高温度。
Hi7机型:Ei7+/Ei6+机型:¥ Hi7系列通过按auto 按键,使LCD 上的"浴缸模式"闪烁,同时显示屏会闪烁显示水量设定值,此时可通过上下键设定水 量。
¥ 对Ei7+和Ei6+系列按下水量设定开关,LCD 显示屏会闪烁显示水量设定值时,按触上下按键进行水量设定。
¥ 设定水量范围为10~990升(每10升为1单位),用户可根据自己需求任意设定。
User’ manualCondensing wall hung system boilerG.C.N : 47-116-51 (24 kW) G.C.N : 47-116-52 (30 kW)G.C.N : 47-116-53 (38 kW)CLAS HECLAS HE 24CLAS HE 30CLAS HE 38The code of practice for the installation,commissioning & servicing of central heating systemsuser’ manualDear Customer,Thank you for choosing an ARISTON boiler.We guarantee that your boiler is a reliable and technically sound product.This manual provides detailed instructions and recommendations for proper installation, use and maintenance.Remember to keep this manual in a safe place for future reference i.e. by the gas meter.Your local MTS Servicing Centre is at your complete disposal for all requirements.The installation and first ignition of the boiler must be performed by qualified personnel in compliance with current national regulations regarding installation, and in conformity with any requirements established by local authorities and public health organisations.After the boiler has been installed, the installer must ensure that the end user receives the declaration of conformity and the operating manual, and should provide all necessary information as to how the boiler and the safety devices should be handled.This appliance is designed to produce hot water for domestic use. It should be connected to a heating system and anetwork for domestic hot water, both of which must be compatible with its performance and power levels.The use of the appliance for purposes other than those specified isstrictly forbidden. The manufacturer cannot be held responsible for any damage caused by improper, incorrect and unreasonable use of the appliance or by the failure to comply with the instructions given in this manual.Installation, maintenance and all other interventions must be carriedout in full conformity with the governing legal regulations and the instructions provided by the manufacturer. Incorrect installation can harm persons,animals and possessions; the manufacturinga result.In theevent of any maintenance or otherstructural work inimmediate vicinity of the ductsor flue gas exhaust devices andtheir accessories, switch the appliance off by switching the external bipolar switch to the “OFF” position and shutting off the gas valve. When the work has been completed, ask a qualified technician to check the efficiency of the ducting and the devices.If the boiler should be out of use for a prolonged period, it is recommended that the electrical power supply be disconnected and that the external gas cock be closed. If low temperatures are expected, the boiler and system pipe work should be drained in order to prevent frost damage.Turn the boiler off and turn the external switch “OFF” to clean theexterior parts of the appliance.Do not allow children or inexperienced persons to use the appliance without supervision.CE labellingThe CE mark guarantees that the appliance conforms to the follow-ing directives:- 90/396/CEErelating to gas appliances - 2004/108/CEErelating to electromagnetic compatibility - 92/42/CEErelating to energy efficiency - 2006/95/CEErelating to electrical safetyGUARANTEEThe appliance is guaranteed for 4 months from the date of purchase.Aristons only obligation under the guarantee will be to repair or repla-ce the faulty appliacnce at Aristons discretion. This will be carried out where the fault arises from within defects in the appliance, caused either by material or workmanship of the manufacturer.This guarantee does not protect malfunction or damage arising from incorrect installation, commissioning or maintenance procedures as laid out in the installation and servicing manual, inefficient flue system, poor or incorrect electricicty, wrong gas supply or pressure, tampering by inexperienced persons and any other cause not directly due to manufac-ture.MTS (GB) Limited cannot accept responsibility for any cost arising from repair or maintenance carried out by any third party.Service under the guarantee does not affect the expiry date of the gua-rantee. The guarantee on parts and appliances which are exchanged ends when the guarantee on the original appliance expires.This guarantee does not affect your statutory rights.You must have your boiler serviced at the end of the first year to validate your guarantee for the second year.Safety regulationsKey to symbols:Failure to comply with this warning implies the risk of personal injury, in some circumstances even fatalFailure to comply with this warning implies the risk of damage, in some circumstances even serious, to property, plants or animals.Do not perform operations which involve opening the ap-pliance.Electrocution from live components.Personal injury caused by burns due to overheated components, or wounds caused by sharp edges or protrusions.Do not perform operations which involve removing the ap-pliance from its installation space .Electrocution from live components.Flooding caused by water leaking from disconnected piping.Explosions, fires or intoxication caused by gas leaking from discon-nected piping.Do not damage the power supply cable.Electrocution from live uninsulated wires.Do not leave anything on top of the appliance.Personal injury caused by an object falling off the appliance as a result of vibrations.Damage to the appliance or items underneath it caused by the object falling off as a result of vibrations.Do not climb onto the appliance.Personal injury caused by the appliance falling.Damage to the appliance or any objects underneath it caused by the appliance falling away from its installation space.Do not climb onto chairs, stools, ladders or unstable supports to clean the appliance.Personal injury caused by falling from a height or cuts (step ladders shutting accidentally).Do not attempt to clean the appliance without first switching it off and turning the external switch to the OFF position.Electrocution from live components.Do not use insecticides, solvents or aggressive detergents to clean the appliance.Damage to plastic and painted parts.Do not use the appliance for any use other than normal dome-stic use.Damage to the appliance caused by operation overload.Damage caused to objects treated inappropriately.Do not allow children or inexperienced individuals to operate the appliance.Damage to the appliance caused by improper use.If you detect a smell of burning or smoke coming from the appliance, discon-nect it from the electricity supply, turn off the main gas valve, open all windows and call for assistance.Personal injury caused by burns, smoke inhalation, intoxication.If there is a strong smell of gas, turn off the main gas valve, open all windows and call for assistance.Explosions, fires or intoxication.user’ manualControl PanelInitial operating proceduresIf the boiler is installed inside the apartment, make sure that all provisions relating to the air inlet and room ventilation (in compliance with current legislation) are respected.Check the water pressure on the display regularly and make sure that the figure is between 0.6 and1.5 bar when the system is cold. If the pressure is just under the minimum value the display will request a filling procedure.Re-establish the correct pressure by filling loop.If the pressure drops very frequently, there may be a water leak at some point in the system. If this is the case a plumber should be contacted.Ignition procedurePress the ON/OFF button on the control panel to switch on the boiler. The display shows:C - Central heating request c - Heating post-circulation d - Domestic hot water request H - Hot water post-circulation F - Circulation pump anti-freeze protection enabled - burner anti-freeze protection enabledThe second and third figures indicate:- the flow temperature when no heating requests have been made - the flow temperature in central heating mode- the temperature of the hot water in domestic hot water mode - the flow temperature in anti-freeze mode.Auto FunctionThe AUTO function serves to optimise boiler performance, while maintaining an optimum radiator temperature and maximum user comfort. It ensures the building stays at the ideal temperature, whilst saving energy.The principle is that the water temperature at the boiler outlet is automatically adjusted, depending on the interior ambient temperature.Legend :1. Display . R eset button. R ed indicator locking light4. O range indicator C OmfORt fonction5. Pressure gauge6. Heating temperature regulation knob7. button _8. m enu /O k button (Programming key) 9. e sC button 10. button +11. Domestic Hot Water adjustment knob 1 . Time clock1 . ON/OFF button14. Blue indicator burner ON15. Y ellow indicator A utO fonction16. A utO button (To active Thermoregulation) 17. C OmfORt buttonuser’ manualWinter or summer functionTurn the heating button 6to select the desired operating mode (winter or summer). In winter mode every heating is shown on the display by the heating temperature.Summer mode is set by putting the button 6 in position (hea-ting off).Adjusting the heatingIt is possible to set the temperature of the heating water by adjusting the knob 6. By placing the indicator somewhere between min. and max. a temperature may be obtained which varies from about 0°C to about 45°C (low temperature) and about 5°C to about 8 °C (high temperature).adjusting the knob 11The value set previously will flash on the display.user’ manual COMFORT functionTo activate the comfort mode it is necessary to press the comfortbutton 17, this will be indicatd by a yellow light 4. The comfortmode has priority over any other heating request.There are two settings for the comfort mode (they can be adjustedin the parameters menu):1. As soon as DHW is drawn, the secondary heat exchanger is keptwarm for 0 mins.. As soon as DHW is drawn, the secondary heat exchanger is keptwarm permanently.Switching off the heating. The boiler switches in sanitary mode only and indicating theset temperature.Stand byClose the gas tap.user’ manualAppliance shut-off conditionsThe boiler is protected from malfunctions by means of internal checks performed by the electronic P.C.B., which stops the boiler from operating if necessary. In the event of the boiler being shut off in this manner, a code appears on the control panel display which refers to the type of shut-off and the reason behind it.Two types of shut-off may occur:Safety shut-offThis type of error is “volatile”, which meansthat the boiler starts up again automaticallyas soon as the problem which caused theshut-off is removed. The display will flash”Err” and the error code.In fact, as soon as the cause of the shut-off disappears, the boiler starts up again and continues to operate normally.While the boiler is shut off for safety reasons, it is possible to attempt to restore normal operation by switching the appliance off and on again using the ON/OFF button on the control panel.If the boiler still indicates a safety shut-off, switch it off. Make sure the external electric switch is in the OFF position, close the gas tap and contact a qualified technician.Safety shut-off due to insufficient water pressureIf the water pressure inside the heating circuit is insufficient, the boiler will perform a safety shut-off. (See table).To re-pressurise the boiler, it will be necessary to connectthe silver flexible hose supplied to the two isolating points underneath the boiler, once the hose is connected, open up both of the black quarter turn handles, once the pressure reads 1.5 bar on the display, close both handles and disconnect the hose .If the pressure drops very frequently, there may be a water leakat some point in the system. If this is the case please contact your installer and ask them to check it.Operation shutdownThis type of error is “non volatile”, which means that it is notErr and the errorcodeIn this case the boiler does not restart automatically, but it maybe reset by pressing the button. If the problem manifestsitself again after several attempts to reset the appliance, contact aqualified technician.IMPORTANTIF THIS SHUTDOWN OCCURS FREQUENTLY, CONTACT ANAUTHORISED SERVICE CENTRE FOR ASSISTANCE. FOR SAFETYREASONS, THE BOILER WILL ALLOW A MAXIMUM OF 5 RESETOPERATIONS TO TAKE PLACE IN 15 MINUTES (INDIVIDUALPRESSES OF THE BUTTON).Operation shutdown error tableAnti-frost Device.The anti-frost function acts on the central heating flow temperature probe,independently from other settings, when the electrical supply is turnedon.If the primary circuit temperature falls below 8°C the pump will run forminutes.After the two minutes of circulation (fixed) the boiler will check the fol-lowing:a) if the central heating flow temperature is > 8°C, the pump stops;b) if the central heating flow temperature is between 4 and 8°C, the pumpwill run for another two minutes;c) if the central heating flow temperature is < 4°C, the burner will fire(heating position) at minimum power until the temperature reaches°C, the burner will go off and the pump will continue to run for twominutes.The anti-frost device activates only when (with the boiler operating cor-rectly):- the system pressure is correct,- the boiler is electrically powered,- there is a supply of gas.Display Description1 01Overheating5 01No flame detection1 0Insufficient circulation1 041 051 061 0705P.C.B error06P.C.B error07P.C.B erroruser’ manual Auto button - Temperature adjustment activationThe AUTO function enables boiler operation to be adapted toenvironmental conditions and to the type of system it is installedon.Comfortable temperature is reached inside the room in the quickestway possible, without wasting money, energy or efficiency, whilesubstantially reducing the amount of wear experienced by thecomponents.Your installer will advise you on the devices connectable tothe boiler and will program it according to the system.In normal boilers the water temperature inside the heating elementsis usually set to a high value (70-80°C), thereby ensuring effectiveheating during the few really cold winter days. It then becomesexcessive on less cold days (of which there are many) more typicalof the autumn and winter seasons. This leads to excessive roomheating after the thermostat has been switched off, resulting inenergy waste and uncomfortable conditions inside the room.The AUTO function “takes control” of the boiler and selects the bestoperating regime based on environmental conditions, externaldevices connected to the boiler and the performance required. Itconstantly decides at which power level to operate based on theenvironmental conditions and the room temperature required.Change of gas typeOur boilers are designed to function either with Natural Gas (meth-ane) or L.P.G. gas. If you need to change from one gas to the other,one of our Authorised Service Centres must be contacted to con-vert the appliance.MaintenanceSchedule an annual maintenance check-up for the boiler with acompetent person.Correct maintenance always results in savings in the cost ofrunning the system.Failure to arrange an annual service for the appliance will invalidatethe second year of the manufacturers guarantee.0010096900 - 1 / 007Commercial subsidiaries: MTS (GB) Limited Professional Team Limited MTS BuildingSuites 9 & 10, Plaza 56Hughenden Avenue Blanchardstown Corporate Park High Wycombe Ballycoolin Bucks HP1 5FTDublin 15Telephone: (01494) 755600 Telephone: (01) 810 7 Fax: (01494) 459775Fax: (01) 810 7 7Internet: /uk Internet: /ie E-mail:****************.com E-mail:****************.com Technical Advice: 0870 41 8180 Technical Advice: (01) 4 7 01 1 CustomerService************Customer Service: (01) 4 7 01 1。
5
23
7
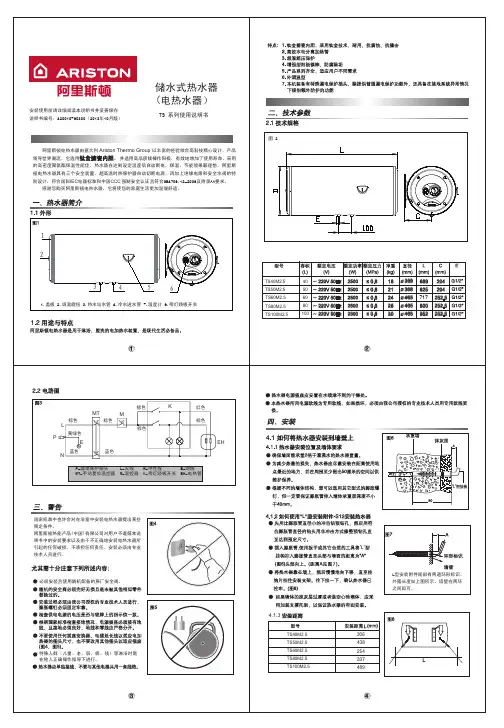
阿里斯顿舒心系列电热水器是供家庭、企事业单位和服务业等用于淋浴、盥洗的电加热水装置,是现代生活必备品。
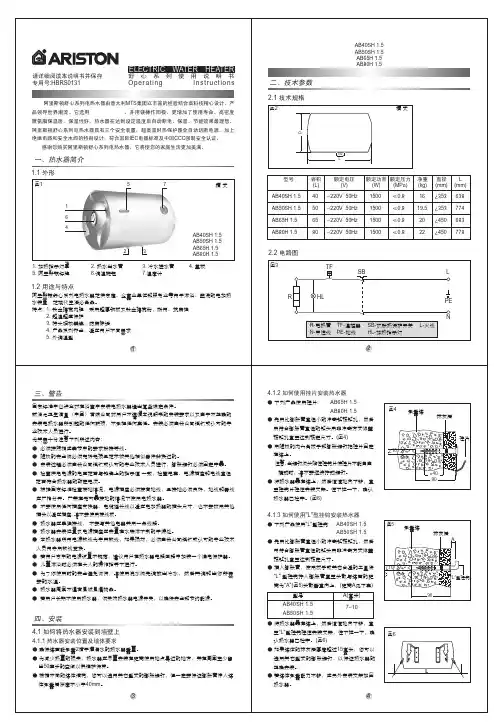
钛金搪瓷内胆,采用超厚钢板及钛金搪瓷粉,耐用、抗腐蚀超温超压保护特大阳极镁棒,防腐除垢产品系列齐全,适应用户不同需求12. 热水出水管 3. 冷水进水管 6.调温旋钮 7.温度计
国家标准中也许会对在浴室中安装电热水器提出某些限定条件。
默洛尼卫生洁具(中国)有限公司对用户不遵循本说明书的安装要求以及由于不正确的安装电热水器所引起的任何破损,不承担任何责任。
安装必须由我公司授权或认可的专尤其需十分注意下列所述内容:
必须按照相应章节中的要求联接导线。
随机的安全阀必须完好无损且是未被其他相似零件替换过的。
安装过程必须由我公司授权或认可的专业技术人员进行,膨胀螺钉必须固定牢靠。
检查供电电源的电压是否与铭牌上的指示值 一致,检查电表、电源插座和电线直径 是否符合热水器的额定电流。
根据国家标准检查接地情况,电源插座必须接有地线,且接地必须良好,地线和零线 应严格分开。
严禁在无可靠接地的情况下使用电热水器。
不要使用任何插座变换器、电缆延长线以适应电加热器的插头尺寸,也不要改用其他请不要使用接线板。
图7
图8
F
A
D
B
C
横式。

ARISTON GAS WATER HEATER INFORMATION SHEETCORRECT INSTALLATIONThe appliance may only be installed by a gas installer registered with the SAQCC, and installed in accordance with the requirements of SANS 10087-1 for the use with LPG, SANS 827 for the use with NG. All gas appliances must be verified to ensure LP Gas appliances conform LP Gas appliances conform with the SANS 1539specification.LOCATION OF INSTALLATIONAriston gas instantaneous water heaters gives you the flexibility to install on virtually any wall inside or outside your home.MINIMUM CLEARANCESIn order to allow easy access to appliances formaintenance operations. The appliance must be installed in accordance with the clearances stated below.INSTALLATION POSITIONRefer to the requirements of SANS 10087-1, SANS 827, local firedepartment and/or local by-laws for the correct placement of your gas equipment and appliances.2 YEAR WARRANTY ITALIAN DESIGNBATTERYPOWERED IGNITION EXTRA SAFETY SIMPLE INSTALLATION EASY TEMPERATURECONTROL UNIT MUST BE INSTALLED WITH A FLUEFLUE DIMENSIONS (mm)Ø1a1b1c1dFast R 11L 112500100080600Fast R 14L132Fast Evo 16L1321a1c1bIndoorWhen unit is installed indoors, the room must be ventilated as per SANS 10087-11dOutdoorIf the unit is installed outside, it must be covered with aweather box**************************************WHAT SIZE DO I NEEDWith gas instantaneous water heaters it doesn’t really matter how many people there are in your house. What matters more is how many ofthem are going to use hot water at the same time. GIWH provide endless hot water on demand, but is limited to the flow rate of the unit. A unit with 16l/min would only be able to supply hot water at a flowrate of 16l/min, which would be sufficient for most showers. For any additional shower you open, the 16l/min would have to be shared among the shower, which will result in a reduced flow and user experience at each shower. Therefore it is extremely important to understand the peak flow required at any given time. We recommend using Low Flow fittings in showers and on taps to get the best results from your water heater.HOW DOES A GAS INSTANTANEOUS WATER HEATER WORK?A Gas Instantaneous Water Heater does not store any water, it heats up cold water as it flows through the unit. Once a tap is opened and the water starts flowing, the unit picks up that there is flow through a sensor (5). As this happens the gas valve (4) opens and the Ignition electrode ignites the gas (a ticking will be heard as a spark is created by the electrode). The cold water then runs through the Heat Exchanger (1) and gets heated to the selected setting. The unit has many sensors for increased safety. If the unit gets too hot, it will be shut off by the sensors (7) or (8). If the flame is extinguished, the electrode (6) will shut off the gas supply.TECHNICAL INFORMATIONFAST RFAST EVO1. Heat exchanger2. Burner3. Hot water temperaturesensor 4. Gas valve5. Water flow switch6. Ignition and detectionelectrode7. Overheat thermostat 8. Fume sensor9. Cold water inlet filter B. Hot water outlet 1/2”C. Gas Inlet 1/2”D. Cold water inlet 1/2”9678154321. Heat exchanger 2. Burner 3. -4. Gas valve 5. Water valve6. Ignition and detectionelectrode7. Overheat thermostat 8. Fume sensor9. Cold water inlet filter B. Hot water outlet 1/2”C. Gas Inlet 1/2”D. Cold water inlet 1/2”96781542FAST ROVERALL DIMENSIONSØa b cde f g h i j k l m 11L 11255044.5109.3215.832544.3111.4210223.725.728111.424.514L1325807013223837028.893.9210.8225.511.42592.820.1A. Hot water outlet G1/2”B. Gas inlet G1/2”C.Cold water inlet G1/2”FAST EVOOVERALL DIMENSIONSØa b c d e f g h i j k l m 16L132580701172643704858.8131.52302502311.222.5B. Hot water outlet 1/2”C. Gas Inlet 1/2”D.Cold water inlet 1/2”。
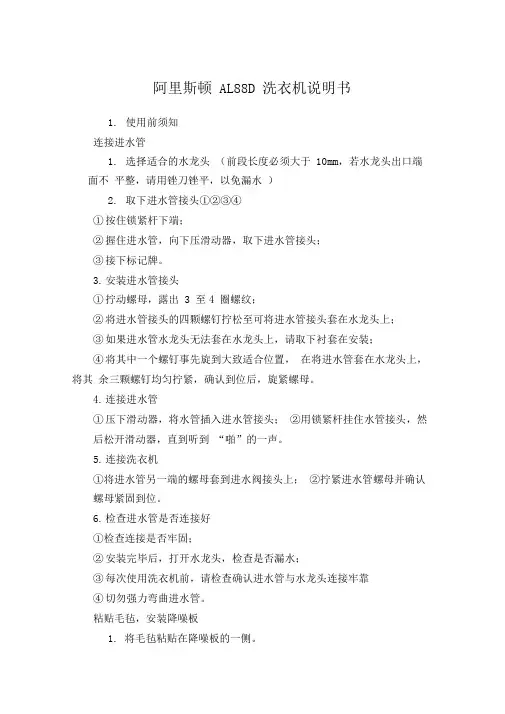
阿里斯顿AL88D 洗衣机说明书1.使用前须知连接进水管1.选择适合的水龙头(前段长度必须大于10mm,若水龙头出口端面不平整,请用锉刀锉平,以免漏水)2.取下进水管接头①②③④①按住锁紧杆下端;②握住进水管,向下压滑动器,取下进水管接头;③接下标记牌。
3.安装进水管接头①拧动螺母,露出3 至4 圈螺纹;②将进水管接头的四颗螺钉拧松至可将进水管接头套在水龙头上;③如果进水管水龙头无法套在水龙头上,请取下衬套在安装;④将其中一个螺钉事先旋到大致适合位置,在将进水管套在水龙头上,将其余三颗螺钉均匀拧紧,确认到位后,旋紧螺母。
4.连接进水管①压下滑动器,将水管插入进水管接头;②用锁紧杆挂住水管接头,然后松开滑动器,直到听到“啪”的一声。
5.连接洗衣机①将进水管另一端的螺母套到进水阀接头上;②拧紧进水管螺母并确认螺母紧固到位。
6.检查进水管是否连接好①检查连接是否牢固;②安装完毕后,打开水龙头,检查是否漏水;③每次使用洗衣机前,请检查确认进水管与水龙头连接牢靠④切勿强力弯曲进水管。
粘贴毛毡,安装降噪板1. 将毛毡粘贴在降噪板的一侧。
2.将洗衣机向后倾斜,卸下四个底脚。
3.降噪板附有毛毡的一面朝内,将将底脚螺栓穿过四个孔装在壳体上旋紧,重新放平机器。
排水管排水管出水端高度必须大于80cm,最高点必须小于100cm,为防止排水管脱落,可将排水管固定在机器后的排水管卡上或使用排水支架固定,建议不要加长排水管,加长部分若超过2.5m,易出现边进水边排水现象。
延长排水管,请联系本公司售后服务部门。
调整底脚使用之前应先调节四个底脚,使洗衣机处于平衡状态。
底脚调节完毕后,要把底脚支撑螺母旋至紧贴壳体位置处,以支撑洗衣机。
分配器盒(每次只放入一次洗涤所需的洗涤剂)预洗洗涤剂投入室主洗洗涤剂投入室软化剂,漂白剂投入室选择预洗的功能时,在预洗室投入洗涤剂预先洗涤衣物;洗涤剂的用量请参照洗涤剂的使用说明,过量的洗涤剂会产生大量泡沫,易溢出,且影响洗涤剂的溶解;应使用滚筒洗衣机专用低泡洗涤剂,若洗涤合成或羊毛织物时,则应该用为其特制得洗涤剂软化剂或漂白剂的最高液面不要超过分配器盒的MAX 标识。
ARISTONHOW TO USE YOUR OVEN这款多功能的烤箱将传统对流烤箱的优势与新式风扇结合到一起.它所特别具备的多种功能能让您轻松而安全地选择5种烹烤模式.这些不同的功能可以通过烤箱上的选择旋钮B和恒温控制C来实现.注意事项:第一次使用时,我们建议您将恒温按钮设置到最高温度,内部空置关闭烤箱门,运行半小时.然后打开烤箱门换气.这种气味通常在一开始使用时出现,它来自烤箱内存在的一种蒸汽,这种蒸汽是在安装前的存储过程保护烤箱的。
注意事项:当使用烧烤功能和旋转式烤炉时,请将接油盘放到烤箱内支架的最底层,这样是为了防止调味汁或者油脂滴到烤箱底部.(主要适用于某种特定模式).任何一种烹饪模式时,都请注意不要使用烤箱底部支架,并且不要放任何东西在烤箱底部,因为这样将有可能导致烤箱底部的涂层被破坏.使用时注意把您的烤具(盘子,铝箔等),放在烤箱本身设定的插入格上。
对流模式恒温按钮“C”的位置:60℃与MAX之间。
如此设置时,烤箱顶部与底部的热量将会循环。
此模式是烤箱传统而经典的模式,其性能优越,能够出色的分配热量并且阻止能量流失。
但是对流模式不能用于烧烤盘里的食物混搭的情况,比如卷心菜和肋条,西班牙式鳕鱼,Ancona式鱼汤,小牛肉烩米饭,等等。
当用来烹调小牛肉或牛肉打底的菜肴(比如炖肉,炖菜,匈牙利红烩牛肉,野味,火腿等)需要慢烤,涂油或者加水,才能获得不错的效果。
对流模式还是烤蛋糕或者水果的最佳模式,它也用于在烤箱中用瓦锅烹制的菜肴。
当使用对流模式烹饪时,一次只能用一个接油盘或烹调架,否则热量的分配就会不平均。
使用不同的烤架高度,就能平衡烤箱顶部到底部的热量。
选择不同的烤架高度取决于菜肴需要从顶部散发的热量的多少。
风扇辅助模式恒温按钮“C”的位置:60℃与MAX之间。
加热元件以及风扇,将会启动。
由于热量持续不变地通过烤箱,热空气会对食物的整个表面持续地烘烤和上色。
使用这种模式,你也可以同时烘烤不同的菜,只要它们的预期温度是一样的。
Halsey Taylor Owners ManualUSES HFC-134A REFRIGERANTFIG. 132 (SEE FIG. 5)SEE FIG. 3743128, 9, 10, 14(SEE FIG. 4)41161339, 4020, 21, 22, 23, 243011(SEE FIG. 6) 31281715, 18271926292542FIG . 2FINISHED FLOOR PISO ACABADO PLANCHER FINILEGEND/LEYENDA/LÉGENDEA = RECOMMENDED WATER SUPPLY LOCATION 3/8 O.D. UNPLATED COPPER TUBE CONNECT STUB 1-1/2" (38mm) OUT FROMWALL SHUT OFF BY OTHERSSE RECOMIENDA UBICAR EL TUBO DE CONEXIÓN AL TUBO DE COBRE SIN CHAPAR DE 3/8" DE DIAM. EXT. A 1-1/2" (38mm) FUERA DE LA LLAVA DE PASO EN LA PARED COLOCADA POR TERCEROS.EMPLACEMENT RECOMMANDÉ D ALIMENTATION EN EAU PAR TUBE EN CUIVRE NON PLAQUÉ DE 3/8 PO. (9,5mm) D.E.CONNECTANT UNE TUYAUTERIE DE 1-1/2 PO. (38mm) DEPUIS LE ROBINET D'ARRET FOURNI PAR D'AUTRES.B = RECOMMENDED LOCATION FOR WASTE OUTLET 1-1/4 O.D. DRAINUBICACIÓN RECOMENDADA PARA EL DRENAJE DE SALIDA DE AGUA, DE 1-1/4" DE DIÁMETRO.EMPLACEMENT RECOMMANDÉ POUR LE DRAIN DE D.E. 1-1/4" DE SORTIE D EAU.C = 1-1/4 TRAP NOT FURNISHEDPURGADOR DE 1-1/4 NO PROPORCIONADO SIPHON 1-1/4 NON FOURNID = INSURE PROPER VENTILATION BY MAINTAINING 4" (102mm) (MIN.) CLEARANCE FROM CABINET LOUVERS TO WALL.ASEGURE UNA VENTILACIÓN ADECUADA MANTENIENDO UN ESPACIO E 4" (102mm) (MÍN.) DE HOLGURA ENTRE LA REJILLA DE VENTILACIÓN DEL MUEBLE Y LA PAREDASSUREZ-VOUS UNE BONNE VENTILATION EN GARDANT 4" (102mm) (MIN.) ENTRE LES ÉVENTS DE L ENCEINTE ET LE MUR.E = POWER CORD 4 FEET (1219mm) LONGCABLE ELÉCTRICO DE 4 PIE (1219mm), DE LARGO CORDON D ALIMENTATION 4' (1219mm)Stream height is factory set at 35 PSI. If supply pressure varies greatly from this, remove Items 1 & 2 and adjust screw on Item 4. Clockwise adjustment will raise stream and counter-clockwise adjustment will lower stream. For best adjustment,stream should hit basin approximately 6-1/2" (165mm) from bubbler.BASINFIG. 3FIG. 4BASIN9108, 14431562WIRING DIAGRAMThis Drawing is merely for illustrating the components of the electrical system.FIG. 5333436383537HOT TANK ASSEMBLY3917728456A5473170793C A5472930511C 50226C 28365C 70606C 70302C 70836C 28369C123456789NSPART. NO.DESCRIPTIONITEM NO.HOT TANK PARTS LISTHot Tank Weldment Assy. 115V 1/4 Elbow Thermostat Hot ControlHot Control Insulator Thermostat Bracket Drain PlugScrew #6-32 x 3/16" PHTC 3/8 x 1/4 ElbowHot Tank Assy. Mntg. BracketFIG . 6PRINTED IN U.S.A.*REPLACE WITH SAME COMPRESSOR USED IN ORIGINAL ASSEMBLY .NOTE: All correspondence pertaining to HALSEY TAYLOR watercoolers or orders for repair parts MUST include Model No. and Serial No.of cooler, name and part number of replacement part.DESCRIPTION40089C 40048C 15005C 61313C 40169C 50986C 28444C 51544C 56159C 10032274056031513C 36133C 66303C 60291C 31490C 30664C 20282C 70018C 66201C 35787C 36158C 35768C 19424390155036163C 56092C 70682C 66301C 66505C 55832C 36101C 36154C 45786C 40597C 92712C 51543C 40596C 70921C 3365900050144C 70418C 21239C 28195C 20460C 27359C 55996C1234567891011121314151617181920*2122232425262728293031323334353637383940414243P ART NO.Cover ButtonRegulator Retaining Nut Regulator Hex NutRegulator Holder Basin & Drain Assy Bubbler - Chrome Nipple - BubblerGasket - Bubbler (upper & lower)Cold Control Power Cord Condenser Screen Fan Motor Fan Blade Fan Bracket Fan Blade Nut DrierCompressor Serv. Pak PW4.5HK11OverloadCover - Relay Electrical Shield RelayTubing - Poly (Cut to Length)Fitting - Tee 1/4Heat Exchanger EvaporatorFlow Regulator Assy.Hot Tank Switch Hot Tank Assy Hot Valve Assy Gooseneck Hot Valve Kit Handle ShroudMounting Nut Body GasketGrommet-Compressor Washer-Compressor Cabinet-Stainless Steel Cabinet-Platinum Vinyl Front Panel-Stainless Steel Front Panel-Platinum Vinyl StrainerITEM NO.PARTS LIST 115V2222 CAMDEN COURT OAK BROOK, IL 60523630.574.3500。
5 规格·装箱单外观及部件介绍装箱单检查电表,电线直径是否符合热水器的额定电流,必要时请有资质的电工师傅检查一下。
该热水器使用交流220V/50Hz电源,使用独立插座(禁止使用多功能插座)并进行可靠接地,严禁在无可靠接地的情况下使用热水器。
请不要使用受损的电源线和电源插座及插头十分松弛的电器产品。
否则会引起触电、短路、火灾等事故。
应该确认电源插头能够与电源插座严密结合。
插座质量要符合国家标准,并且要及时擦拭电源插头上的金属片,防止金属片上沾有污渍而引起火灾等事故。
安装好后,首次使用必须先注满水后再接通电源。
若在容器水不满的情况下通电,加热管过热会造成故障。
寒冷地区冬季若长期不使用请掀动安全阀手柄,将水排空以防结冰损坏热水器。
热水器电源插座应安置在水喷淋不到的干燥处,请勿湿手插拔电源插头。
否则会出现触电、受伤等事故。
当电热水器被水严重浸湿后,再次使用前须经本公司认可的技术人员检验。
请您在开关水阀时,不要将喷头朝向人体,以免被一小股热水烫伤(50℃以上的水可能导致烫伤)。
如果电热水器的电源线损坏,必须由售后人员用专用线缆进行更换(厂家提供)。
除专门技术维修人员外其他人不得拆卸、维修。
此不要放置在太冷能够结冰的环境中,如果结冰,容器和水管就会破裂,造成烫伤和漏水。
不要安装在室外。
不要落地安装。
应挂于坚实、牢固的墙壁上。
不要安装在无法排水的地方。
若连接排水管,应将排水管接于下水道口处,以免将室内溅污。
检查电表、电线电源线及插座要求机器使用前长期不使用热水器时当电源线损坏时儿童淋浴时必须在大人的操作指导下进行!小心烫伤放置环境外不要将汽油等易燃物品放置在热水器附近,否则可能会引起火灾。
关于安全阀的使用关于机配管路的使用本电热水器配有安全阀,为了使用安全,不可私自改动其安装位置,严禁堵塞其出口。
安全预警专家注意防水本产品的机配管路是“防电墙”产品的有机组成部分,切勿随意拆除,否则由此带来的安全隐患所造成的伤害,本公司不予承担。
4.3 向浴缸内注水
4.3.1
使用前准备
¥ 关闭浴缸的放水栓;
¥ 如果有浴缸盖请盖上。
(注水时请打开)
4.3.2 通过面板操作器注水时请按照以下的方法进行
A. 初次使用时,按下面板操作器的电源开关,面板显示器闪烁显示标准模式的水温"42℃",3秒钟后显示实际出水温度。
标准模式下的水温(例42℃)
标准模式下的水温(例42℃)
优先显示亮
¥ 热水器的设定温度范围为35℃-70℃,在温度范围35℃-48℃区间内,按下温度设定按键以1℃为单位上升或下降,而 且设定完温度时,会闪烁显示3秒设定温度,随后显示实际水温;在温度范围50℃-70℃区间,按下温度设定按键是以 5℃为单位上升或下降,且设定温度完成后会闪烁10秒显示设定温度,随后显示实际水温。
¥ 为了使机器在进水温度较低的情况下,也能达到更好的恒温使用性能,在部分额定热负荷较小的机型上特设水量调节 旋钮。
当出现出水温度低于设定温度时,请将水量调节旋钮适当关小, 使得到最佳的恒温调节范围.”¥ 当超出机器使用范围而无法达到设定温度,不属于产品质量问题,可通过调节进水量达到设定温度.
4.2 水温调节
¥ (热水器同时连接面板操作器和浴室有线遥控器时)
正在使用热水时
¥ 无法从35~48℃的温度设定改变为高温(50℃,55℃,60℃,65℃,70℃)。
¥ 设定为高温(50℃,55℃,60℃,65℃,70℃)时,无法升高温度。
Hi7机型:
Ei7+/Ei6+机型:
¥ Hi7系列通过按auto 按键,使LCD 上的"浴缸模式"闪烁,同时显示屏会闪烁显示水量设定值,此时可通过上下键设定水 量。
¥ 对Ei7+和Ei6+系列按下水量设定开关,LCD 显示屏会闪烁显示水量设定值时,按触上下按键进行水量设定。
¥ 设定水量范围为10~990升(每10升为1单位),用户可根据自己需求任意设定。
¥ 设定完注水水量后,LCD 显示屏会闪烁显示目前设定水量值,3秒后,显示注水温度。
B. 通过设定开关调节注水水量。
浴室有线遥控器及无线遥控器的安装请详见线控器及无线遥控器的安装说明书。
7.1 开箱检查
a. 针对JSQ48-Hi7/JSQ48-Hi7S/JSQ40-Hi7/JSQ40-Hi7S/JSQ32-Hi7/JSQ32-Hi7S/JSQ26-Hi7/JSQ26-Hi7S/JSQ22-Hi7/ JSQ22-Hi7S/JSQ40-Ei7+/JSQ40-Ei6+/JSQ32-Ei7+/JSQ32-Ei6+/JSQ26-Ei7+/JSQ26-Ei6+/JSQ22-Ei7+/JSQ22-Ei6+ JSQ20-Ei7+/JSQ20-Ei6+机型,热水器随机附件有下列物品,安装前请清点。
b. 针对JSG32-Hi7/JSG32-Hi7S/JSG22-Hi7/JSG22-Hi7S 机型,热水器随机附件有下列物品,安装前请清点。
a. 针对JSQ48-Hi7/JSQ48-Hi7S/JSQ40-Hi7/JSQ40-Hi7S 机型:
b. 针对JSQ32-Hi7/JSQ32-Hi7S/JSQ26-Hi7/JSQ26-Hi7S/JSQ22-Hi7/JSQ22-Hi7S
机型:
7.2 外形尺寸图
7.14 安装后的检查和确认
与可燃物的距离及防火上的处理是否充分? 热水器安装的地点和环境是否适当? 是否保留检查、维修保养的必要空间? 是否符合安装条件?
请打开冷水开关及热水龙头,确认水流出后,再关闭热水龙头,短时间放置一段时间后,检查是否漏水,此时电源
插头请不要插入插座。
打开燃气开关,并于各连接处涂上肥皂水,检查燃气是否漏气?
7.13 电源插头的安装
本热水器使用的电源为AC220V/50Hz。
电源线长1.5m。
电源插座应安装在干燥、不易被水淋湿的地方。
为了您的安全,三眼插座必须配备有效可靠的接地线。
9.1 检查时注意事项
开始运行时,因燃气管路内有空气,故应反复开关热水龙头,直到热水器点燃火焰为止。
试运行不正常时,请按照“使用方法”进行分析处理,如不能解决请联系公司服务部门。
试运行后请按照“排放热水器内部积水的方法”进行泄水,防止机器冻结。
请不要拆解燃气通路及安全装置。
热水器外观是否异常?
使用过程中,查看火焰是否正常,或有异常声音。
热水器周围及排烟口,排气管附近是否有易燃物? 热水器周围是否有良好的通风? 管路是否漏水、漏气?
热水器本体是否贴有安全之相关标贴。
为了能够使用的更安心,请每年进行一次安全检查。
有关定期检查请向我公司售后服务中心联系。
热水器脏污时,请用布或海绵粘上中性清洁剂擦拭。
请勿用香蕉水、酒精等擦拭。
燃气通路检漏:用毛笔沾热肥皂水涂于燃气管路各连接处,如发现有气泡产生为漏气部位。
请关闭进水阀,卸下进水滤网,将进水滤网清洗干净,保证水路畅通。
针对带进气过滤网机型,请将进气过滤网从机器上拆下,清洗干净并待水晾干后装入机器,保证空气流入畅通。
9.2 保养方法
10.1 非故障状况
现象 连续使用45分钟,自动熄火
排气口会冒白烟
打开热水龙头也不能立即出热水
初次使用时,很难点着
关闭热水龙头,短时间内,送风机也会转动
热水龙头开得太小而变成冷水
从泄压阀流出水来
热水器使用过程中有时会发生啸叫声
原因及处理方法
超时安全安置起作用,重新关闭热水器龙头数秒后再 开启即可。
因排出烟气中有很多水蒸气,遇外部之冷空气就可以看到白色气体。
从热水器到热水龙头有一段距离,因水管内残留有水,故需要一段时间
因燃气配管中有空气,请重复关闭热水龙头,再打开之动作。
因为要排出燃烧室内的废气,送风机有延迟停机功能设计。
热水开得太小(启动水量以下)时会熄火而变成冷水,故使用时热水不宜开得太小。
为使热交换器内的压力不会太高,而让过高的压力泄放掉。
燃气是否用完或减压阀输出压力太低。
10.2 使用中面板操作器上火苗图案消失时
使用过程中,面板操作器上火苗图案消失时,是因为安全装置已作动所致。
显示器闪烁显示故障代码E1-E8可知其发 生故障、异常的原因。
故障原因
确认及故障处理方法
E1 点火不成功 燃气开关是否打开。
燃气罐是否没
气了。
关水,重新启动。
E2 意外熄火或烟道堵塞 燃气是否用完,水压太低,排气是
通畅。
关水,重新启动。
E3
出水温度过高或空烧 关水,重新启动。
E4 温度传感器故障 关水,重新启动。
E5 45分钟定时动作 关水,重新启动
E6 假火焰 关水,重新启动,如还有问题请联
络本公司服务人员 E7 风机故障或转速异常 请联络本公司服务人员
E8 通讯故障 关水,重新启动,如还有问题请联
络本公司服务人员
故障代码显示状态
按下面板操作器的电源开关而显示器不亮时,请拔掉电源插头重新试一次。
若显示器仍不亮,请联络本公司服 务人员。
b. 针对JSQ40-Ei7+/JSQ40-Ei6+/JSQ32-Ei7+/JSQ26-Ei7+/JSQ22-Ei7+/JSQ20-Ei7+/JSQ32-Ei6+/JSQ26-Ei6+/ JSQ22-Ei6+/JSQ20-Ei6+机型:
液化石油气2.8KPa
使用燃气种类 额定燃气压力 热负荷
产热水能力(温升25℃) 排气方式 热效率 点火方式 最低启动水压 适用水压
人工煤气1.0KPa
强制给排气式
≥88%水动式电脉冲点火
0.02MPa 0.04MPa~0.4MPa
燃气电子比例阀+电子火力分段阀(智能变频)+水量比例阀控制方式
软体启动方式
R1/2"
R3/4”,16L (含)以下天然气机型R1/2”
Φ100/Φ60mm AC220V/50HZ
DC 电机1.5m 156W 563x350x130mm
电加热功率(防冻机型) 外形尺寸
电源电压/频率 额定电功率 鼓风机
电源线
进出水管 进气管
排气管 热水温控制方式 缓点火方式 控
制 方
式 连 接 管 方 式
电
气 特
性 型号
32KW 16L/min
22KW 11L/min
JSG32-Hi7/JSG32-Hi7S
JSG22-Hi7/JSG22-Hi7S
c. 针对JSG32-Hi7/JSG32-Hi7S/JSG22-Hi7/JSG22-Hi7S 机型:
由于各地燃气种类繁多, 上述数据也不尽相同,以机器铭牌为准。
由于各地燃气种类繁多, 上述数据也不尽相同,以机器铭牌为准。
天然气2.0KPa
48 W
42 W
※ 北方地区附带防冻电加热装置。
※ 北方地区附带防冻电加热装置。
a. Hi7系列:
b. Ei7+及Ei6+
系列:。