BES8.x快速入门手册
- 格式:docx
- 大小:2.23 MB
- 文档页数:19

CoolMIR v2 BlackBerry TM KeyboardQuick Start GuideCongratulations on your purchase of the CoolMIR keyboard for the RIM BlackBerry. This sophisticated keyboard is the culmination of 2 years of research and development. Each team member at Man & Machine proudly stands behind our company’s coolest innovation. Don’t be surprised when all your friends and colleagues say to you “That’s cool” and you can reply, “No, it’s the CoolMIR”. Be sure to check out all the cool keyboards and mice at .• IF YOUR BLACKBERRY IS CONNECTED TO A BLACKBERRY ENTERPRISE SERVER (BES), PERMISSION MUST BE OBTAINED FROM THE BESADMINISTRATOR TO RUN THE COOLMIR SOFTWARE. The BES must be 4.0 or higher. For instructions on how to allow the CoolMIR driver on the BES please refer to the“BES Setup Instructions” (pages 11-15). For instructions provided by RIMBlackBerry visit /knowledgecenterpublic (Search for “KB-04219”).• PLEASE CHARGE THE COOLMIR KEYBOARD BATTERY FOR AT LEAST TWO HOURS BEFORE USE.CoolMIR uses the same charger cable as the BlackBerry. To charge the battery, plug the USB cable B-mini connector to the Mini USB Input Port on the CoolMIR and the A connector of the USB cable to your PC or AC adaptor. The CoolMIR will have 15 hours continuous usable battery life when it is fully charged.• You will need to have your BlackBerry software and the BlackBerry Desktop Manager loaded on your PC. You will need to download software to yourBlackBerry using the RIM Desktop Manager in order to enable the CoolMIRKeyboard.Quick Installation Guide1. Go to /coolmir.htm and download the latest CoolMIR driver and the user manual. Unzip the file and saveit on your computer. Refer to the “Installation Guide” in the manual for step-by-step instruction on how to install the software or follow the steps below.2. Save any important information from the handheld to the PC using the Backup and Restore tool before installing the software onyour handheld. (Open the Desktop Manager. Connect your handheld to your PC. Double-click “Backup and Restore” in the Desktop Manager. To backup everything on your handheld, click the “Backup” button. In the “Select File for Full Backup”window, select the name and location of the file as desired and click “Save”.)3. In the Desktop Manager, double-click “Application Loader”. The “Welcome to Application Wizard” window appears. Thehandheld must be connected before you can load new software.4. Click “Next” to start the process of loading new software onto your handheld. A “Retrieving Handheld Configuration” windowappears on your PC to indicate that the Application Loader is connecting to your handheld and is reading your handheld’s configuration. Wait until initialization is complete and the dialog box disappears. The “Handheld Application Selection” window appears, displaying the applications that you can choose to download to your handheld.5. Click on the “ADD” button. Drop down the “LOOK IN BOX” and select the folder where the CoolMIR program is located andDouble-click on the file “CoolMIR.ALX”.6. Select the check boxes next to the names of the applications you want to load and click “Next”. Any applications that do not havea checkmark beside them will be erased from the handheld (even if you have them currently loaded).7. The “Completing The Application Loader Wizard” window appears, displaying the application that will be downloaded to yourhandheld. Verify that the information is correct and click “Finish”.8. The “Load Progress” dialog box appears and the new files are added to your handheld. When loading is complete, the “LoadingOperation Was Successful” box will indicate whether loading was successful. Click “Close” to return to the Desktop Manager. Ifloading was not successful, make sure that your handheld is in the cradle and the cradle is connected to your PC properly. Then, repeat the above steps.9. Go to your BlackBerry; unplug the Mini USB cable from the handheld.10. To enable the CoolMIR software, select the icon for the CoolMIR driver using the roller, then click. The CoolMIR page willcome up. Click the roller and select “Turn On” from the menu then click the roller to turn on the software.11. Plug the CoolMIR keyboard Mini USB cable into your handheld and turn the keyboard on by pressing the button on the leftbottom of the keyboard. You will see a green light on the keyboard when the keyboard is turned on.12. If the BlackBerry is running operating system 4.1 and higher, you need to perform the following additional steps. If not, go to step13.Go to:• Settings, Options on the BlackBerry, then choose Advanced Options• Next select Applications• Click to select the CoolMIR keyboard• Click the roller and choose Edit Permissions• Scroll to the middle section of permissions, called Interactions• Click the roller and choose Expand to expand the listing• Highlight Keystroke Injection and click the roller• Change the option from Deny to AllowNote: If you are not able to change this option to Allow, it means that thesoftware configuration policy change has not taken place yet on theBES server.• Click the roller once again and choose Save• Continue to press the Cancel key to exit the application.• In some cases, it was found to be necessary to reboot the BlackBerry (byremoving the battery for a few seconds) for the change to be completed.13. You can now use your CoolMIR keyboard.DO NOT FOLD THE KEYBOARD, doing so could damage the unit. When transporting the CoolMIR in it’s carrying pouch make certain to roll it loosely. The one-year warranty does not cover damage due to folding or misuse. For long-term storage, please lay the keyboard flat.Technical Specifications• BlackBerry requirements:OS version 4.0 or higher BlackBerry 6210,6220, 6230, 6280, 6510, 7100g, 7100r,7100t, 7100v, 7100x, 7100i, 7105t, 7130e,7210, 7230, 7270, 7280, 7290, 7510, 7520,8700r and 8700c.• Number of keys:72 US Layout keys with 18 shortcut keysto your favorite programs includingCalendar, Search, Phone, Email, Internet,Menu, Escape, etc…• WeightApproximately 170 g (0.4 lb.)• Dimensions30 mm x 114 mm x 13 mm13” x 4.5” x 0.5”• Power:Rechargeable Battery Included.• Warranty period:One year limited warranty.DO NOT FOLD THE KEYBOARDFor technical support and questions: ********************* BlackBerry is a registered trademark of Research In Motion Limited.Federal Communications Commission (FCC) StatementThis equipment has been tested and found to comply with the limits for a Class B digital device, pursuant to Part 15 of the FCC Rules. These limits are designed to provide reasonable protection against harmful interference in a residential installation. This equipment generates, uses, and can radiate radio frequency energy and, if not installed and used in accordance with the instructions, may cause harmful interference to radio communications. However, there is no guarantee that interference will not occur in a particular installation. If this equipment does cause harmful interference to radio or television reception, which can be determined by turning the equipment off and on, the user is encouraged to try to correct the interference by one or more of the following measures:Reorient or relocate the receiving antenna.Increase the separation between the equipment and receiver.Connect the equipment into an outlet on a circuit different from that to which the receiver is connected. Properly shielded and grounded cables and connectors must be used in order to meet FCC emission limits. Man & Machine, Inc. is not responsible for any radio or television interference caused by using other than recommended cables and connectors or by unauthorized changes or modifications to this equipment. Unauthorized changes or modifications could void the user's authority to operate the equipment.This device complies with Part 15 of the FCC Rules. Operation is subject to the following two conditions: (1) this device may not cause harmful interference, and (2) this device must accept any interference received, including interference that may cause undesired operation.Responsible Party:Man & Machine, Inc3706 West St.Landover, MD 20785Telephone: 1-301-341-4900Copyright Man & Machine, Inc. 2005。
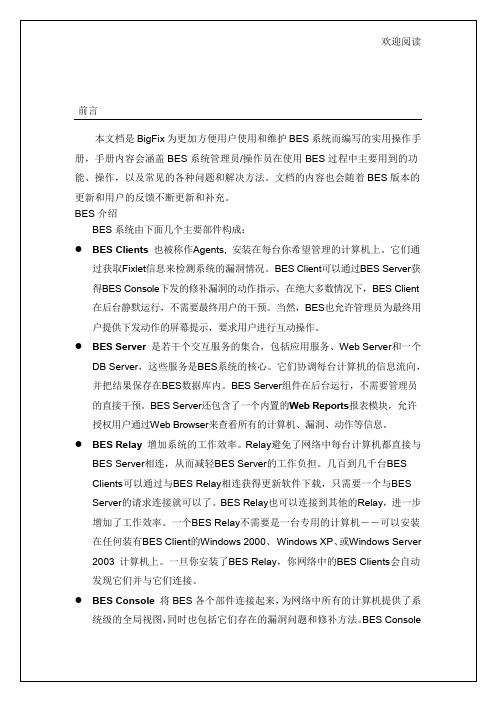
BES 8.0安装手册BES Software and Service Corporation.北京宝兰德软件技术服务有限公司All rights reserved版权所有侵权必究本文档是BES 8.0的安装手册,详细介绍如何在多种平台上安装BES 8.0产品。
本手册适合的对象本手册主要适用于使用BES系统的系统管理员和基于其开发Java EE应用的应用开发人员。
本手册假定您已经具备如下技能:●操作系统的基础操作;●JDK的安装。
约定BES定义了一些变量来表示BES目录等信息,本文档中涉及到的有:产品文档集BES为您提供了文档集中包含的文档有:●安装手册:详细介绍如何在各个操作系统上安装BES,以及产品的注册过程。
●用户手册:详细介绍BES的配置和管理。
●开发手册:详细介绍基于BES的应用开发及部署过程。
技术支持BES产品将为您提供全方位的技术支持,您可以通过以下方式获得技术支持:网址:Support Email:support@Support Tel:400 650 1976您在取得技术支持时,请提供如下信息:●您的姓名●您的公司信息●您的联系方式●操作系统及其版本●BES版本号●日志等错误的详细信息BES 8.0安装手册 (1)第1章产品介绍 (3)1.1关于BES8.0 (3)1.2产品特性 (3)1.3支持的平台环境 (4)1.4支持的规范 (5)第2章产品安装 (6)2.1安装前准备 (6)2.1.1 获取安装程序 (6)2.1.2 系统需求 (6)2.1.3 安装前检查 (6)2.2安装程序介绍 (7)2.3W INDOWS平台上的安装步骤 (7)2.3.1 GUI方式 (7)2.3.1.1 安装域管理服务器 (7)2.3.1.2 安装受管服务 (13)2.3.2 命令行方式 (20)2.3.3 静默 (20)2.3.4 安装日志 (21)2.4UNIX/L INUX平台上的安装步骤 (22)第3章产品注册 (23)第4章产品的启动和停止 (25)4.1启动域管理服务器 (25)4.2访问管理控制台 (25)4.3停止域管理服务器 (25)第5章产品卸载 (26)5.1在W INDOWS平台上卸载 (26)5.2在UNIX/L INUX平台上卸载 (26)第6章常见问题解答 (27)第1章产品介绍1.1 关于BES 8.0BES应用服务器是一款遵循Java EE 5.0规范的应用服务器,支持最新的行业标准,如EJB 3.0、JMS 1.1、Servlet 2.5、JSP 2.1、JSTL 1.2、JSF 1.2、JavaMail 1.4等。


8XE家庭智能化系统用户手册上海宝路电子系统有限公司目录1. 系統概述2. 操作指南2.1 键盘2.1.1 指示灯2.1.2 单触发键2.1.3 功能键2.1.4 紧急键2.1.5 音量控制和蜂鸣声2.2 密码2.2.1 更新密码2.2.2 设置用户密码2.2.3 密码的保护与求救2.3 保安系統2.3.1 保安系统的设防2.3.2 保安系統的撤防2.3.3 电话及网络报警2.3.4 无线按钮设防和撤防及报警2.3.5 警报联动2.3.6 系統自测2.4 对讲与监听2.4.1 鍵盘与鍵盘2.4.2 电话与鍵盘2.4.3 门禁与鍵盘3. 语音引导菜单3.1 第一层菜单3.2 第二层菜单4. 故障及注意事项4.1 系统安全的环境4.2 系统检测4.3 故障及技术支持5. 系统附表1. 系统槪述欢迎使用8XE家庭智能化系统。
8XE家庭智能化系统是上海宝路电子系统有限公司,结合当今国际计算机、通讯、控制、互联网等领域的最新科技,针对智能化家庭和信息化小区的实际需求而推出的产品,具有网络化的监控与管理,人性化的语音键盘,个性化的嵌入式软件和智能化综合保安、自动化与通讯网络功能。
8XE家庭智能化系统能对盗贼、失火等发出警报,而且同时可让你监听家中的情况,以及家用电器的自动化控制。
并可通过目前所有的通讯方式:如电话、手机、传呼机、互联网浏览器,将家庭信息传递给你,你也可以通过上述通讯方式控制家用电器设备。
-8XE系统具有人机交互式的语音菜单。
你可以用语音键盘或住所内外的任何电话,通过语音菜单的提示对系统进行任何操作。
所以你不必象用其他系统那样要记住所有动作和功能代码。
-8XE提供自动化控制系统。
对灯、空调机等电器均可通过电话、互联网进行监控,也可以通过时间编程和事件触发来自动化控制电器设备。
-8XE的语音键盘不仅有单键设防功能,还有一些简化功能键。
甚至还可以利用语音键盘在住所内进行双向对讲。
-当主人在时,客人按门铃后,系统会使家中的电话振铃。
使用入门感谢您选择Creative Sound BlasterAxx SBX8-采用强劲的SB-Axx1声音和语音处理器的新一代Sound Blaster®。
它具有音箱和麦克风功能,可满足聆听和会议需求。
SBX8(SB1380)型号设计在不影响您的音频体验的前提下提高了便携性并降低了能耗。
Sound BlasterAxx SBX8在单个塔式结构中融入了左右两个喇叭单元。
此系统具有以下功能:l小巧和高便携造型使其成为笔记本电脑的理想搭配l高品质音频®8、Windows7、Windows Vista®和Mac®OS。
l无缝兼容多种操作系统,包括Windowsl低功耗放大器技术保证了低能耗以及环保l具有多种音箱增强效果和配置的专门软件l Sound BlasterAxx Pro Studio(SBX Pro Studio™)音频增强l高质量内置麦克风以及CrystalVoice™技术包装清单Sound BlasterAxx SBX8包装盒内附带以下配件l Sound BlasterAxx SBX8l微型USB连接线系统需求l Intel®Core™2Duo处理器2.2GHz、AMD®Athlon™64x2双核或同等的处理器l以下任意一种操作系统:Microsoft®Windows864-bit或32-bit、Windows764-bit或32-bit、Windows Vista64-bit或32-bit、Macintosh OS10.5或以上l自备电源USB2.0端口注册您的产品注册您的产品,获得最贴心的服务和产品支持。
您可以在安装时注册产品,也可以访问/register进行注册。
请注意,无论您注册产品与否,都将享有保修服务。
更多帮助请访问,获取有关Sound Blaster的最新资讯和产品信息。
该网站还有关于购物、技术支持和软件更新方面的信息。
8-Piece Electronic Drum Set with 123 Sounds, 15 Drum Sets and USB Interface#8-piece electronic drum set with HDS110USB sound module #Ships ready to rock with everything you need to start immediately #10 factory presets plus5 user-programmable drum sets #USB interface to connect with any virtual instrument and drum software (not included)#HDS (High Defi nition Sampling) technology provides an authentic drumming experience#123 studio-grade drum, cymbal and percussion sounds#Realistic-feeling, natural playing trigger pads and cymbals#Dual-zone snare pad for drum head and rim playing techniques #Audio input to play along with your iPod*, iPhone*, iPad*, or MP3 player#Built-in sequencer for play-along practice and performance #Professionally composed tracks cover a wide variety of musical styles#All sounds are velocity-sensitive for natural dynamic response #3-Year Warranty Program*#Conceived and designed by BEHRINGER GermanyThe XD8USB 8-piece electronic drum set comes with everything you need to lay down the groove including a professional-grade kick pedal with trigger pad; dual-zone snare for standard head and rim play; 3 x 8" single-zone pads; 3 x 12" cymbals; and a hi-hat control pedal. The accompanying drum rack is easy to assemble, and comes withall mounting hardware – plus the multi-pin cable makes quick work of connecting all your pads to the incredible HDS110USB sound module. With 15 drums sets and 123 sounds to choose from, every time you sit down at your XD8USB – your creativity will instantly be unleashed!Ready to Rock Right Out-of-the BoxWe know how much you love to play, so we designed the XD8USB drum kit for fast and easy, tool-free setup. Just pull the kit out of the box, position the drum and cymbal pads the way you like ’em and plug in; it’s just that simple. The XD8USB also comes pre-loaded with music tracks in a variety of styles, so you can sharpen your skills, or if you’re just getting started – learn to play to real music. There’s even an Aux Input, so you can play along with your favorite songs and practice tracks. And when you’re fi nished playing, just fold up the kit and stash it behind the couch or underneath the bed. Now your signifi cant other will still respectyou in the morning!8-Piece Electronic Drum Set with 123 Sounds, 15 Drum Sets and USB Interface#Includes:-HDS110USB sound module-Kick pedal, pad and stand- 1 x 8" dual-zone snare pad- 3 x 8" single-zone pads- 3 x 12" cymbals-Hi-hat trigger pedal-Drum rack withmounting hardware-Multi-pin breakout cable foreasy setup-Pair of drumsticks-Drum tool-Quick start guide andassembly instructions*iPod, iPhone, and iPad are trademarks of Apple Inc. All third-party trademarks are the property of their respective owners. Their use neither constitutes a claim of the trademark nor affi liation of the trademark owners with MUSIC Group. Product names are mentioned solely as a reference for compatibility, eff ects and/or components. Warranty details can be found at .True-to-Life FeelThe way drums “feel” is one of the mostimportant factors, especially for drummerswho use electronic drums for practiceand then return to an acoustic kit for liveperformance. So we gave our pads a naturalrubber surface, which mimics the feel ofreal skins and minimizes false triggering.The XD8USB features a sturdy, extrudedaluminum frame, which provides a solidfoundation for the drum and cymbal pads.You’ll really appreciate this added stabilitywhen you’re rockin’ out full-tilt.USB Audio InterfaceOne of the XD8USB’s coolest features is thebuilt-in USB audio interface, which allowsyou to connect directly to your computer.This incredible functionality lets you tap intoyour virtual instruments, drum software andDAW (Digital Audio Workstation) recordingsoftware (not included). Such fl exibility openstremendous opportunities for fi le sharingwith your band mates – especially whenyou need to collaborate on songwriting andrecording projects.8-Piece Electronic Drum Set with 123 Sounds, 15 Drum Sets and USB InterfaceSound QualityEasy setup and feel are important, but how does the XD8USB sound? Thanks to our HDS (High Defi nition Sampling) technology you get top-notch studio drum, percussion and cymbal sounds, all of which are velocity sensitive for your most-nuanced performance. The factory-preset kits and sounds are programmed to give you an amazing range of professional-grade sounds for the ultimate versatility – plus you can program and store your own kits for instant recall.The Brain Behind the SoundYears of engineering went into the design of the XD8USB’s incredible HDS110USB sound module. Once the sounds were created and tweaked, we turned our attention to making the sound module’s user interface extremely fl exible, functional, and most importantly – easy to use. All controls are laid out in a very logical format, and stepping through setup parameters is highly intuitive, so you canspend less time reading a manual – and more time playing!Performance and ValueThe XD8USB is a great-sounding electronic drum kit designed by drummers – for drummers! Featuring rock-solid construction, studio-grade drum, percussion and cymbal sounds, plus loads of professional features that will enhance your drumming experience – and take you performance to the next level, the highly-aff ordable XD8USB plays and sounds like a million bucks! Stop by your local BEHRINGER dealer and check out the XD8USB, or order yours online today.When you take the throne behind your XD8USB, you’ll feel like rock ‘n’ roll royalty!8-Piece Electronic Drum Set with 123 Sounds, 15 Drum Sets and USB InterfaceYou Are CoveredWe always strive to provide the best possible Customer Experience. Our products are made in our own MUSIC Group factory using state-of-the-art automation, enhanced production workfl ows and quality assurance labs with the most sophisticated test equipment available in the world. As a result, we have one of the lowest product failure rates in the industry, and we confi dently back it up with a generous 3-Year Warranty program.Compose. Record. Mix. Share.Tracktion is one of the world’s fastest and easiest Digital Audio Workstations (DAW) for composing, recording, editing, mixing and sharing your music with the world. Featuring a single-screen interface, and pushing the envelope in design elegance, Tracktion brings together outstanding Pro DAW features, such as dynamic automation, unlimited track count, MIDI recording and support for VST and AU plug-ins. This powerful music production software gives you all the tools of an entire professional-grade recording studio. Learning a DAW has never been easier, thanks to their vast and readily available library of resources.As our way of saying “Thank You” when you register your XD8USB at , we’ll reward you with a complimentary download code for the full version of Tracktion. Recording and editing couldn’t be easier. To learn more about Tracktion, visit /support/videos .Share the Love. Visit for more.8-Piece Electronic Drum Set with 123 Sounds, 15 Drum Sets and USB Interface8-Piece Electronic Drum Set with 123 Sounds, 15 Drum Sets and USB Interface8-Piece Electronic Drum Set with 123 Sounds, 15 Drum Sets and USB Interface8-Piece Electronic Drum Set with 123 Sounds, 15 Drum Sets and USB InterfaceEuropeM USIC Group Services UKUSA/CanadaM USIC Group Services NV Inc.JapanM USIC Group Services JP K.K.8-Piece Electronic Drum Set with 123 Sounds, 15 Drum Sets and USB InterfaceFor service, support or more information contact the BEHRINGER location nearest you:。
第1章Cimatron E8.0基本操作实例●Cimatron E8.0的启动和退出●Cimatron E8.0的文件操作●Cimatron E8.0零件界面●鼠标和键盘的使用●屏幕显示操作●特征树操作●工作环境设定掌握Cimatron E8.0的启动和退出,文件操作、鼠标与键盘的操作,了解平面显示、特征树和工作环境的设定。
1.1 软件的启动与退出1.1.1 目的掌握Cimatron E8.0的启动和退出方法。
1.1.2 操作步骤(1) 启动软件双击桌面上Cimatron E8.0图标即可启动软件。
软件启动界面如图1-1所示。
刚启动的Cimatron E8.0主界面是空的,图形区显示Cimatron 字样。
标题栏 主菜单工具条特征树 图形区图1-1软件的启动也可以通过选择【开始】→【所有程序】→Cimatron E8.0→Cimatron8.0,如图1-2所示。
在已存放的Cimatron E 文件里,双击选中的文件,可以启动Cimatron E 并打开文件。
图1-2(2) 退出软件单击【文件】菜单,在弹出的下级菜单中,选择【退出】选项。
如果尚未新建或编辑任何文件,软件即会关闭,若新建了文件或打开并修改文件后,软件会弹出如图1-3所示的提示框。
单击【是】按钮保存文件并关闭Cimatron E ,单击【否】按钮不保存文件且关闭Cimatron E ,单击【取消】按钮不关闭软件。
图1-31.2 Cimatron E8.0的文件操作1.2.1 目的掌握文件的新建、打开和选择以及文件保存和关闭的操作。
1.2.2 操作步骤(1) 新建文件单击工具条上的【新建文件】图标,或者选择菜单中的【文件】→【新建文件】命令,弹出【新建文件】对话框。
【单位】一般选择【毫米】,文件的【类型】选择【零件】,单击【确定】按钮,即可进入对应的零件设计模块。
新建文件后,标题栏显示的文件名称为“零件0”,如图1-4所示。
图1-4新建Cimatron文件时,无须输入文件名。
BES快速入门及常见问题处理2011-4-7北京宝兰德软件技术服务有限公司目录目录 (2)1.简述 (3)2.名词术语 (3)3.产品体系结构 (3)3.1.集群体系结构 (3)3.2.应用服务器实例体系结构 (3)4.BES的管理架构和基本操作 (4)5.BES安装说明 (5)6.添加补丁 (6)7.产品激活 (6)8.公共配置文件、基础库部署 (7)9.数据源管理 (7)9.1.数据库连接池管理 (7)9.2.JDBC资源管理(JNDI) (8)9.3.JNDI客户端配置 (9)10.Web集群管理 (11)10.1.创建集群 (11)10.2.创建集群实例 (11)10.3.创建Apache服务 (12)10.4.配置apache服务 (12)10.5.实例属性配置 (13)11.应用部署 (14)11.1.集群部署 (14)11.2.独立实例部署 (16)12.常见问题处理 (16)12.1.Web应用乱码常见解决办法 (16)12.2.WAS上EJB迁移 (18)12.3.WEB应用(war)部署不成功 (19)1.简述本文为BES快速入门手册,旨在帮助BES用户进行安装、简单的配置和部署管理应用。
本文将按照需要而进行更新。
2.名词术语DMS:域管理控制器Domain:域Node:节点Node Agent:节点代理Instance:实例Cluster:集群Cluster Instance:集群实例3.产品体系结构3.1.集群体系结构BES集群的体系结构图:一个集群下的所有集群实例可以分属于不同的节点(Node),但是必须同属于一个域(Domain),它们具有相同的配置并且部署相同的应用。
HTTP(S)客户端的负载均衡可以采用四层交换实现,也可以采用BES内部Apache实现。
3.2.应用服务器实例体系结构应用服务器实例就是在单个Java 虚拟机(JVM)进程中运行的应用服务器。
可以使用iastool命令或者管理控制台对服务器实例进行配置管理。
应用服务器实例的体系结构:4.BES的管理架构和基本操作BES的管理架构图如下:由域控制器→节点代理→实例构成了BES的3层管理架构,基于该架构上的域内节点和实例可以灵活地构成应用所需要的集群。
每个节点都有一个节点代理进程,节点代理进程负责管理此节点下所有实例。
域管理控制器(DMS)负责管理所有节点。
命令行工具和管理控制台通过与域管理控制器的信息交互,来配置管理DMS下面的所有实例。
常见的操作和管理命令包括:详细信息可以参考《BES用户手册》5.BES安装说明字符界面安装:在Windows下,通过命令行执行:BES8.1.0.7590-WINDOWS32.exe -i console在Unix下执行:./BES8.1.0.7590-HPUX_V3.bin –i console安装完成后便可以使用上节描述的创建域控制器、节点等命令创建所需要的域、控制器,然后在管理控制台创建、配置实例和集群。
注意:1.操作系统必须具备JDK1.5或更高的Java环境,此外需要在PATH环境变量中引入java 目录。
2.同一个域里面的主机的主机名配置最好包含全部域里面主机的配置,在unix的/etc/hosts,windows的C:\WINDOWS\system32\drivers\etc\hosts文件里面添加上其他主机的域名(主机名)、IP地址配置。
比如,需要在主机136.192.24.162,136.192.24.201上部署相同功能的应用,可以将这2台主机安装成一个管理域。
这时候需要调整2台主机/etc/hosts文件如下:136.192.24.162 jstest2136.192.24.201 rx8640安装完成后,默认情况下可以通过http://localhost:1900来登录(登录用户名/密码:admin/admin)管理控制台,对所创建的域进行管理和配置。
详细信息可以参考《BES Installation Guide》。
注:在AIX平台上安装BES时,有时候会因为IBM JDK里面的jre/lib/security下相关配置文件是链接文件,其指向的目标文件不存在,而导致安装失败。
推荐下载的IBM JDK是直接解开就可用的,而不是使用smit安装的JDK。
6.添加补丁根据产品运行过程中出现的功能和性能相关问题,BES中间件会及时提供相应的补丁来解决使用过程中遇到的各种可能问题。
BES8.x的补丁为非累积补丁,一般情况下需要将最新的我们推荐的补丁列表包含的补丁都添加上。
添加补丁的方法如下:1)转到$BES_HOM/bin目录下,执行./patch –jar <path_to_patch_file>比如:patch -jar c:\BES8.1.0.7763.005.zip7.产品激活BES在完成安装后,自带试用license,72小时停止一次系统,180天失效,可以测试和学习使用。
对于生产环境而言,需要使用所购买序列号来激活产品,激活后的产品具有无限期使用、不会自动重启、无连接和用户数限制。
BES产品激活步骤如下:1)转到$BES_HOM/bin目录下。
使用./lmadm gen-regcode,按照提示,将生成的注册码文件和从销售拿到的序列号发给我们。
2)我们会按照提供的(序列号、注册码文件)生成激活文件,发送给您。
3)使用./lmadm import-lic –sourcepath=<path_to_bes_lic.txt> 将激活文件导入。
4)导入激活文件成功后,可以通过 ./lmadm view-lic查看license情况。
注:前期版本的BES使用的注册命令是registerationtool, 而不是lmadm8.公共配置文件、基础库部署BES的classloader提供了丰富的类加载办法,可以将不同位置下的类进行加载。
对于在一台主机上所有的实例都需要使用到的配置文件和公共使用的基础库,可以放到BES的lib 子目录(比如/home/bes/BES/lib)下,这些类库会被自动加载。
对于放到BES的lib目录下的配置文件,因为目前的BSS应用使用InputStream input = ClassLoader.getSystemResourceAsStream(filePath);这样的接口来加载配置文件,这种方式下需要调整BES实例启动的classpath。
因此需要修改$BES_HOME/config/process.config如9.数据源管理在BES上,如果要通过BES的连接池管理来访问数据库,需要配置合适的JNDI资源。
这包括2个步骤:首先建立数据库连接池;然后使用该连接池创建部署到实例上的JDBC源(JNDI资源)。
9.1.数据库连接池管理通过下述接口可以管理BES的连接池。
指定访问连接池的名称, 连接到的数据库IP地址,用户名,密码,数据库名称,驱动类型.等参数。
对于RAC方式访问oracle数据库,可以直接添加自定义的URL属性。
9.2.JDBC资源管理(JNDI)通过下述接口可以对BES上的JDBC源(JNDI资源)进行管理。
创建JNDI 时,可以同时指定连接池的名称,需要部署到集群、实例的名称. 如添加数据源“jdbc/oracle/sm” 将其部署到SM集群下.9.3.JNDI客户端配置JNDI是J2EE规范中,应用用于查找资源(ejb home对象、Datasource、JCA、JMS资源等)和服务(Security、JTS资源)的重要接口。
在BES里,jndi的提供了丰富的实现,这里我们仅对常用的spark方式使用jndi进行介绍。
Spark客户端配置属性名称说明默认值com.bes.jndi.spark.lb.enabled 指定客户端是否启用负载均衡合法值:true/falsetruecom.bes.jndi.spark.checktime 指定客户端检查线程的时间间隔(单位:秒)120秒com.bes.jndi.sparkHTTP.endpoints 指定客户端使用Spark协议通讯的服务器终端空com.bes.jndi.sparkTCP.endpoints 指定客户端使用SparkTCP协议通讯的服务器终端空java.naming.provider.url 指定客户端使用Spark协议通讯的服务器终端空com.bes.jndi.spark.lb.policy BES提供3种Spark协议的负载均衡和故障转移算法:会话轮询算法(session-round-robin)请求轮询算法(request-round-robin)权重算法(request-weight)request-weight对于如下图所示的运行ejb应用的实例相关端口的配置Properties props = new Properties();props.put("java.naming.factory.initial", "com.bes.jndi.CtxFactory"); props.put("com.bes.jndi. spark.checktime","30000");props.put("com.bes.jndi.spark.lb.policy","request-round-robin");// SparkHTTPprops.put("java.naming.provider.url ", "sparkHTTP://192.168.0.1:18080,192.168.0.2:18080");// 或者使用如下设置私有属性的形式//props.put(“com.bes.jndi.sparkHTTP.endpoints”, "192.168.0.1:8080,192.168.0.2:18080");// SparkTCPprops.put("java.naming.provider.url ", "sparkTCP://192.168.0.1:1s3000,192.168.0.2:13000");// 或者使用如下设置私有属性的形式//props.put(“com.bes.jndi.sparkTCP.endpoints”, "192.168.0.1:3000,192.168.0.2:3000");10.Web集群管理BES内置了对web集群功能的支持。