冲击扳手使用说明及分析
- 格式:pdf
- 大小:438.78 KB
- 文档页数:6
扳手大全十种常用扳手功能、尺寸及使用方法介绍扳手是一种应用非常广泛的五金工具,在五金批发市场上,销量良好,占有一定的市场份额。
如今在五金机电行业,扳手品牌及生产厂家有很多,同样,生产出来的扳手类型也各不相同。
不同类型的扳手,具有不同的功能,适用于不用的场合,因此认清楚不同类型扳手的功能、尺寸以及使用方法,有助于我们更好的选用扳手。
下文中,中国五金机电网将就十种常用扳手的功能、尺寸和使用方法进行详细的介绍。
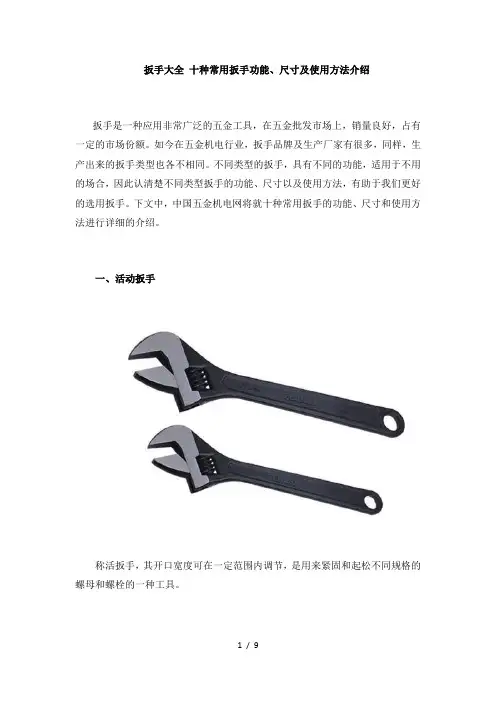
一、活动扳手称活扳手,其开口宽度可在一定范围内调节,是用来紧固和起松不同规格的螺母和螺栓的一种工具。
功能:用来旋转六角或方头螺栓、螺钉、螺母。
尺寸:4"、6"、8"、10",对应开口1.3、1.93、2.4、3公分。
使用:扳手不易打开,容易伤人和把螺栓角圆滑,应使拉力作用在开后较厚的一边,以防开口出现“八”字形。
二、呆扳手一端或两端制有固定尺寸的开口,用以拧转一定尺寸的螺母或螺栓。
功能:通用工具,是装配机床或备件及交通运输、农用机械维修必需的手工具。
尺寸:4×5、5.5×7、8×10、9×11、12×14、13x15、14×17等(以MM 为单位)。
使用:使用时可以上下套入或直接插入。
三、梅花扳手两端具有带六角孔或十二角孔的工作端,适用于工作空间狭小,不能使用普通扳手的场合。
功能:梅花端通常做为螺丝(帽)的最初放松与最后锁紧用。
尺寸:8*10、10*12、12*14、14*17、16*18、17*19(以MM为单位)。
使用:左手推住梅花扳手与螺栓连接处,保持梅花扳手与螺栓完全配合,右手握住梅花扳手另一端并加力。
四、两用扳手一端与单头呆扳手相同,另一端与梅花扳手相同,两端拧转相同规格的螺栓或螺母功能:设备安装、装置、设备检修,大型工业石油、化工、冶金、发电、炼油等行业尺寸:4"、6"、8"、10"、12"、15"、18"、24"等使用:使用时,将扳口调节到比螺母稍大些,用右手握手柄,再用右手指旋动蜗轮使扳口紧压螺母。

Cat. No.M12FRAIWF38, M12FRAIWF12M12 FUEL™ RIGHT ANGLE IMPACT WRENCHOPERATOR'S MANUALWARNINGTo reduce the risk of injury, user must read and understand operator’s manual.GENERAL POWER TOOLSAFETY WARNINGSillustrations and specifica-tions provided with this power tool. Failure to follow all instructions listed below may result in electric shock, fire and/or serious injury. Save all warnings and instructions for future reference. The term "power tool" in the warnings refers to your mains-operated (corded) power tool or battery-oper-ated (cordless) power tool.WORK AREA SAFETY• K eep work area clean and well lit. Cluttered or dark areas invite accidents.• D o not operate power tools in explosive atmo-spheres, such as in the presence of flammable liquids, gases or dust. Power tools create sparks which may ignite the dust or fumes.• K eep children and bystanders away while operat-ing a power tool. Distractions can cause you to lose control.ELECTRICAL SAFETY• P ower tool plugs must match the outlet. Never modify the plug in any way. Do not use any adapter plugs with earthed (grounded) power tools. Unmodified plugs and matching outlets will reduce risk of electric shock.• A void body contact with earthed or grounded surfaces, such as pipes, radiators, ranges and refrigerators. There is an increased risk of electric shock if your body is earthed or grounded.• D o not expose power tools to rain or wet condi-tions. Water entering a power tool will increase the risk of electric shock.• D o not abuse the cord. Never use the cord for carrying, pulling or unplugging the power tool. Keep cord away from heat, oil, sharp edges or moving parts. Damaged or entangled cords increase the risk of electric shock.• W hen operating a power tool outdoors, use anextension cord suitable for outdoor use. Use ofa cord suitable for outdoor use reduces the risk of electric shock.• I f operating a power tool in a damp location is unavoidable, use a residual current device (RCD)protected supply. Use of a RCD reduces the risk of electric shock.PERSONAL SAFETY • S tay alert, watch what you are doing and use common sense when operating a power tool. Do not use a power tool while you are tired or under the influence of drugs, alcohol or medication. A moment of inattention while operating power tools may result in serious personal injury.• U se personal protective equipment. Always wear eye protection. Protective equipment such as a dust mask, non-skid safety shoes, hard hat or hearing protection used for appropriate conditions will reduce personal injuries.• P revent unintentional starting. Ensure the switchis in the off-position before connecting to power source and/or battery pack, picking up or carrying the tool. Carrying power tools with your finger on the switch or energising power tools that have the switch on invites accidents.• R emove any adjusting key or wrench before turning the power tool on. A wrench or a key left attached to a rotating part of the power tool may result in personal injury.• D o not overreach. Keep proper footing and balance at all times. This enables better control of the power tool in unexpected situations. • D ress properly. Do not wear loose clothing or jewellery. Keep your hair and clothing away from moving parts. Loose clothes, jewellery or long hair can be caught in moving parts.• I f devices are provided for the connection of dust extraction and collection facilities, ensure these are connected and properly used. Use of dust collection can reduce dust-related hazards.• D o not let familiarity gained from frequent use of tools allow you to become complacent and ignore tool safety principles. A careless action can cause severe injury within a fraction of a second.POWER TOOL USE AND CARE • D o not force the power tool. Use the correct powertool for your application. The correct power toolwill do the job better and safer at the rate for which it was designed.•D o not use the power tool if the switch does not turn it on and off.Any power tool that cannot be controlled with the switch is dangerous and must berepaired.• D isconnect the plug from the power source and/or remove the battery pack, if detachable, from the power tool before making any adjustments,changing accessories, or storing power tools. Such preventive safety measures reduce the risk of starting the power tool accidentally.• S tore idle power tools out of the reach of children and do not allow persons unfamiliar with the power tool or these instructions to operate the power tool. Power tools are dangerous in the hands of untrained users.• M aintain power tools and accessories. Check for misalignment or binding of moving parts, breakage of parts and any other condition that may affect the power tool’s operation. If damaged,have the power tool repaired before use. Many accidents are caused by poorly maintained power tools.•K eep cutting tools sharp and clean. Properly maintained cutting tools with sharp cutting edges are less likely to bind and are easier to control.• U se the power tool, accessories and tool bitsetc. in accordance with these instructions, taking into account the working conditions and the work to be performed. Use of the power tool for operations different from those intended could result in a hazardous situation.• K eep handles and grasping surfaces dry, clean and free from oil and grease. Slippery handles and grasping surfaces do not allow for safe handling and control of the tool in unexpected situations.BATTERY TOOL USE AND CARE • R echarge only with the charger specified by the manufacturer. A charger that is suitable for one type of battery pack may create a risk of fire when used with another battery pack.•U se power tools only with specifically designated battery packs. Use of any other battery packs may create a risk of injury and fire.• W hen battery pack is not in use, keep it away from other metal objects, like paper clips, coins, keys, nails, screws or other small metal objects, that can make a connection from one terminal to another. Shorting the battery terminals together may cause burns or a fire. • U nder abusive conditions, liquid may be ejected from the battery; avoid contact. If contact ac-cidentally occurs, flush with water. If liquid contacts eyes, additionally seek medical help. Liquid ejected from the battery may cause irritation or burns.• D o not use a battery pack or tool that is dam-aged or modified. Damaged or modified batteries may exhibit unpredictable behaviour resulting in fire, explosion or risk of injury.• D o not expose a battery pack or tool to fire or excessive temperature. Exposure to fire or tem- perature above 130°C (265°F) may cause explosion.• F ollow all charging instructions and do not charge the battery pack or tool outside the temperature range specified in the instructions. Charging improperly or at temperatures outside the specified range may damage the battery and increase the risk of fire.SERVICE• H ave your power tool serviced by a qualified repair person using only identical replacement parts. This will ensure that the safety of the power tool is maintained.• N ever service damaged battery packs. Service of battery packs should only be performed by the manufacturer or authorised service providers.SPECIFIC SAFETY RULES FORIMPACT WRENCH• H old power tool by insulated gripping surfaces, when performing an operation where the fastener may contact hidden wiring. Fasteners contacting a “live” wire may make exposed metal parts of the power tool “live” and could give the operator an electric shock.• W ear ear protectors when impact drilling. Expo-sure to noise can cause hearing loss.• U se only sockets and other accessories spe-cifically designed for use on impact wrenches and drivers. Other sockets and accessories mightworking in dusty situations, wear appropriate respiratory protection or use an appropriate dust extraction solution.• A lways use common sense and be cautious when using tools. It is not possible to anticipate every situation that could result in a dangerous outcome. Do not use this tool if you do not understand these operating instructions or you feel the work is beyond your capability; contact MILWAUKEE® Tool or a training.trained professional for additional information or • M aintain labels and nameplates. These carry important information. If unreadable or missing, contact a MILWAUKEE® service facility for areplacement.construction activities contains chemicals known to cause cancer, birth defects or other reproductive harm. Some examples of these chemicals are:• l ead from lead-based paint • c rystalline silica from bricks and cement and other masonry products, and • a rsenic and chromium from chemically-treated lumber.Your risk from these exposures varies, depending on how often you do this type of work. To reduce your exposure to these chemicals: work in a well ventilated area, and work with approved safety equipment, such as those dust masks that are specially designed to filter out microscopic particles.SYMBOLOGYVoltsDirect CurrentNo Load Revolutions per Minute (RPM) Impacts per Minute Under Load (IPM)FUNCTIONAL DESCRIPTION1. 3/8" Friction ring anvil (Cat. No. M12FRAIWF38)2. Drive head3. Speed control4. LED5. Control switch6. Trigger7. Handle8. 1/2" Friction ring anvil Regulatory Compliance Mark (RCM).This product meets applicable regulatory requirements.V Read Operator's ManualDo not dispose in household rubbish2. Press the drive control button to cycle through the 4 modes. When the desired mode indicator is lit, begin work.3. In mode: • Auto Shut O RPM and then shuts o o n c e t h e t o r q u e i achieved.• Bolt Removal and IPM until the nut breaks free from the joint.Then, the tool slows to a reduced RPM for better control in removing the nut. Starting, Stopping and Controlling Speed These tools may be operated at any speed from 0 to full speed.1. To start the tool, pull the trigger.NOTE: An LED is turned on when the trigger is pulled.2. To vary the driving speed, simply increase or decrease pressure on the trigger. The further the trigger is pulled, the greater the speed.3. T o stop the tool, release the trigger and the electric SPECIFICATIONSCat. No. ...............M12FRAIWF38, M12FRAIWF12RPM .............................................................0-3000IPM ..............................................................0-3600Volts............................................................12V DC Battery Type . (12)Charger Type................................................M12™Recommended AmbientOperating Temperature ....................-17°C to 51°CASSEMBLY only with the charger manual supplied with your charger and battery.Removing/Inserting the BatteryTo remove the battery, push in the release buttons To insert the battery, slide the pack into the bodyAttaching and Removing Accessories3/8" and 1/2" Friction Ring(Cat. No. M12FRAIWF38 and M12FRAIWF12)1. Use only the appropriate size Square Drive Sockets.2. To attach a socket, align the accessory with theanvil and push it firmly over the retaining ring.3. To remove the accessory, pull the accessory othe anvil.OPERATIONto comply with ANSI Z87.1.When working in dusty situations, wear appro-priate respiratory protection or use an appro-priate dust extraction solution.Fuel GaugeTo determine the amount of charge left in the battery,turn the tool ON . The Fuel Gauge will light up for 2-3 seconds. When less than 10% of charge is left, 1 light on the fuel gauge will flash 4 times.To signal the end of charge, 1 light on the fuel gauge will flash 8 times and the tool will not run. Charge the battery pack.If the battery becomes too hot, the fuel gauge lights will flash in an alternating pattern and the tool will not run. Allow the battery to cool down.ADDITIONAL BATTERY SAFETY RULESpersonal injury, and product damage due to a short circuit, never immerse your tool, battery pack or charger in fluid or allow a fluid to flow inside them. Corrosive or conductive fluids, such as seawater, certain industrial chemicals, andbleach or bleach-containing products, etc., can non-rechargeable batteries.Impacting TechniquesThe longer a bolt, screw, or nut is impacted, the tighter it will become. To help prevent damaging the fasteners or workpieces, avoid excessive impact-ing. Be particularly careful when impacting smaller fasteners because they require less impacting to reach optimum torque.Practice with various fasteners, noting the length of time required to reach the desired torque. Check the tightness with a hand-torque wrench. If the fasteners are too tight, reduce the impacting time. If they are not tight enough, increase the impacting time. Oil, dirt, rust or other matter on the threads or under the head of the fastener a ects the degree of tight-ness.The torque required to loosen a fastener averages 75% to 80% of the tightening torque, depending on the condition of the contacting surfaces.On light gasket jobs, run each fastener down to a relatively light torque and use a hand torque wrench for final tightening.MAINTENANCEbattery pack from the charger or tool before performing any maintenance. Never disassemble the tool, battery pack or charger. Contact a MILWAUKEE® service facility for ALL repairs.Maintaining ToolKeep your tool, battery pack and charger in good repair by adopting a regular maintenance program. Inspect your tool for issues such as undue noise, misalignment or binding of moving parts, breakage of parts, or any other condition that may a ect the tool operation. Return the tool, battery pack, and charger to a MILWAUKEE® service facility for repair. After six months to one year, depending on use, return the tool, battery pack and charger to a MILWAUKEE®service facility for inspection.If the tool does not start or operate at full power with a fully charged battery pack, clean the contacts on the battery pack. If the tool still does not work prop-erly, return the tool, charger and battery pack, to aservice facility for repairs.pack or charger in liquid or allow a liquid to flow inside them.CleaningClean dust and debris from vents. Keep handles clean, dry and free of oil or grease. Use only mild soap and a damp cloth to clean, since certain clean-ing agents and solvents are harmful to plastics and other insulated parts. Some of these include gasoline, turpentine, lacquer thinner, paint thinner, chlorinated cleaning solvents, ammonia and household deter-gents containing ammonia. Never use flammable or combustible solvents around tools.RepairsFor repairs, return the tool, battery pack and charger to the nearest authorised service center.ACCESSORIESFor a complete listing of accessories, go online to .au/ or contact a distributor.MILWAUKEE prides itself in producing a premium quality product that is Nothing But Heavy Duty TM .Your satisfaction with our products is very important to us! If you encounter any problems with the operation of this tool, please contact your authorised MILWAUKEE ® dealer.For a list of MILWAUKEE ® dealers, guarantee or service agents please contact MILWAUKEE ®Customer Service or visit our website.(Australia Toll Free Telephone Number 1300 645 928)(New Zealand Toll Free Telephone Number 0800 645 928) or visit .au/.Please refer to Australian and New Zealand warranty supplied with tool. This warranty applies only to product sold in Australia and New Zealand.Milwaukee Electric Tool Corporation13135 West Lisbon Road, Brookfield, Wisconsin U.S.A. 53005Milwaukee Tool (Australia)21 Kelletts Road, Rowville, VIC 3178Melbourne, AustraliaMilwaukee Tool (New Zealand)274 Church Street, Penrose, Auckland, 1061, New ZealandDESIGNED BY MILWAUKEE ELECTRIC TOOL CORP .PROFESSIONALLY MADE IN CHINAPRINTED IN CHINAAll t rade m arks are owned by Techtronic Cordless GP unless otherwise stated.© 2020 Milwaukee Electric Tool Corporation.961013566-01 $。
电动冲击扳手操作指南电动冲击扳手是一种常见的工具,用于紧固和松开螺栓、螺丝等连接件。
它具有高效、方便和易操作的特点,然而,操作不当可能会导致安全事故或工作效率低下。
因此,本文将为您提供电动冲击扳手的操作指南,以确保安全和提高工作效率。
一、安全操作1. 确保工作区域安全:在使用电动冲击扳手之前,应确保工作区域没有其他人员,以免产生意外伤害。
同时,应清理工作区域,防止障碍物的干扰。
2. 力度控制:电动冲击扳手的冲击力很强,因此应根据需要调整力度。
通常来说,力度过大可能导致螺栓或螺丝头损坏,力度过小则可能导致连接不牢固。
建议在使用之前先进行试拧,逐渐调整力度,直到满足要求。
3. 使用正确的螺头和配件:确保选择正确的螺头和配件,以匹配所需松紧度和螺栓尺寸。
使用不匹配的螺头可能导致螺栓滑动、损坏或卡住,这会对工作效率和安全性产生负面影响。
4. 使用适当的个人防护装备:在操作电动冲击扳手时,应戴上适当的个人防护装备,如工作手套、护目镜和耳塞。
这些装备可以有效保护您的双手、眼睛和听力,防止受伤和职业病。
二、正确使用电动冲击扳手1. 安装螺头:首先,选择适当的螺头,并将其插入扳手头上。
确保螺头与扳手头完全连接,以免产生松动或滑动。
使用扳手相关工具,如扳手扳手套筒,将螺头固定在扳手上。
2. 紧固螺栓:将螺栓插入所需位置,并用电动冲击扳手将其紧固。
在紧固之前,确保螺栓和螺孔之间没有异物,以免影响紧固效果。
3. 松开螺栓:在松开螺栓之前,应先选择适当的反转开关将扳手设置为松开模式。
然后,将扳手头放在螺栓上,并按下扳手扳动开关,直到螺栓完全松开。
4. 螺接混用:电动冲击扳手可与其他工具如扭力扳手结合使用,以确保紧固力度和质量。
在使用过程中,应根据需要合理使用不同的工具,以提高工作效率和连接可靠性。
三、保养和维护1. 清洁和润滑:定期清洁电动冲击扳手,特别是扳手头和内部零部件。
使用清洁剂清洁,并确保扳手干燥后再进行使用。
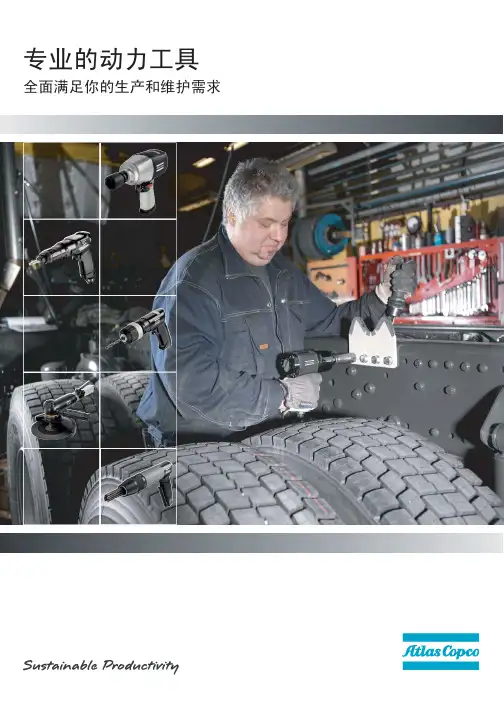
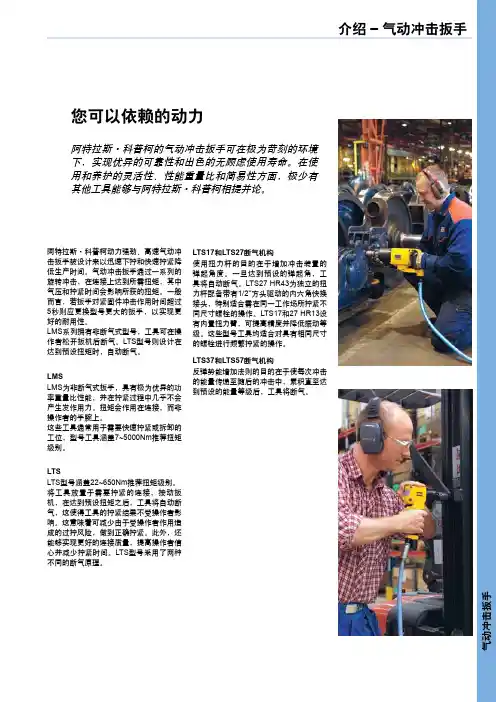
专业的动力工具 全面满足你的生产和维护需求目录3安全提示下列提示能增强使用安全性,并有助于避免人身伤害和事故发生。
但这些提示并不能替代PRO工具的安全和使用手册。
PRO工具设计的基本原则之一是确保手动工具的安全操作。
我们所有的工具都具有保护操作人员免受作业或设备伤害的功能。
但是确保手动工具安全的最佳办法是确保操作人员采用建议的安全操作。
因此每一种PRO工具都附有安全和使用手册,操作人员使用工具时应查阅并遵守。
请联系当地PRO销售代表索取手册副本。
更多动力工具安全操作信息,请参照下列两家机构的工具安全使用条例:便携式气动工具安全规程,请参照ANSI B186.1美国国家标准学协会(ANSI), 11 W. 42nd St, 13th floor, New Y ork, NY 10036.访问下列网站可获取更多职业健康和安全信息 (USA)http://europe.osha.eu.int (Europe)使用前对工具进行目测检查检查工具,包括气管或接头是否有损坏迹象。
如有必要应更换缺陷部件。
检查套筒、磨盘、铲刀等是否有裂缝。
如有必要应更换损坏部分。
检验工具的空载转速确保在6.3巴压力下的实测转速不会超出工具的额定转速。
检查实测转速之前必须卸下磨盘,磨头、套筒等。
使用正确的附件任何情况下都必须使用安全手册推荐的附件。
冲击式或棘轮扳手切勿使用手动套筒。
切勿使用标定转速低于打磨机转速的磨盘、磨头、 锥形磨盘等。
更换附件之前必须断开气动工具的气源。
使用安全装置任何情况下都必须使用适当的安全装置,如护目镜和耳塞。
必要时应穿戴手套、防护服和安全帽。
处理会产生浮沉、杂质微粒的材料时,请务必佩戴防尘面罩或类似保护装置,并使用其它如集尘器等设备以控制有害物质的扩散。
打磨前应测试工具开始工作之前以及更换磨盘之后应在安全区域内试运转打磨机。
确保附近空间无其他人员。
保持工作区域安全使用工具时确保其他人员在工作区域之外的安全距离。

1IN. HEAVY-DUTY AIR IMPACT WRENCHOWNER’S MANUALWARNING: Read carefully and understand all INSTRUCTIONS before operating. Failure to follow the safetyrules and other basic safety precautions may result in seriouspersonal injury.reference, please complete the owner’s record below:Model: _______________ Purchase Date: _______________Save the receipt, warranty and these instructions. It is important that you read the entire manual to become familiar with this product before you begin using it.This machine is designed for certain applications only. Northern Tool + Equipment cannot be responsible for issues arising from modification. We strongly recommend this machine is not modified and/or used for any application other than that for which it was designed. If you have any questions relative to a particular application, DO NOT use the machine until you have first contacted Northern Tool + Equipment to determine if it can or should be performed on the product.For technical questions please call 1-800-222-5381.INTENDED USEThis 1in. Heavy-Duty Air Impact Wrench is designed to perform on both industrial and automotive machinery.TECHNICAL SPECIFICATIONSItem DescriptionDrive Size 1in. Square DriveExtension Size 6in.Hammer Mechanism Twin HammerMaximum Torque 1600ft.-lbs.Cutting Speed 4000 RPM Free SpeedAir Consumption 6.4 CFMInlet Size 3/8in.Hose Size 3/8in.GENERAL SAFETY RULESWARNING: Read and understand all instructions. Failure to follow all instructions listed below may result in electric shock, fire and/or serious injury.WARNING: The warnings, cautions, and instructions discussed in this instruction manual cannot cover all possible conditions or situations that could occur. It must be understood by the operator that common sense and caution are factors which cannot be built into this product, but must be supplied by the operator.SAVE THESE INSTRUCTIONSWORK AREA·Keep work area clean, free of clutter and well lit.Cluttered and dark work areas can cause accidents.·Do not use your Impact Wrench where there is a risk of causing a fire or an explosion; e.g. in the presence of flammable liquids, gasses, or dust. An Impact Wrench can create sparks, which may ignite the dust or fumes.·Keep children and bystanders away while operating the Impact Wrench. Distractions can cause you to lose control, so visitors should remain at a safe distance from the work area.·Be aware of all power lines, electrical circuits, water pipes and other mechanical hazards in your work area, particularly those hazards below the work surface hidden from the operator’s view that may be unintentionally contacted and may cause personal harm or property damage.·Be alert of your surroundings. Using the Impact Wrench in confined work areas may put you dangerously close to cutting tools and rotating parts.PERSONAL SAFETY·Stay alert, watch what you are doing and use common sense when operating the Impact Wrench. Do not use the Impact Wrench while you are tired or under the influence of drugs, alcohol or medication. A moment of inattention while operating the Impact Wrench may result in serious personal injury. ·Dress properly. Do not wear loose clothing, dangling objects, or jewelry. Keep your hair, clothing and gloves away from moving parts. Loose clothes, jewelry or long hair can be caught in moving parts. Air vents often cover moving parts and should be avoided.·Use safety apparel and equipment. Use safety goggles or safety glasses with side shields which comply with current national standards, or when needed, a face shield. Use as dust mask in dusty work conditions. This applies to all persons in the work area. Also use non-skid safety shoes, hardhat, gloves, dust collection systems, and hearing protection when appropriate.·Do not overreach. Keep proper footing and balance at all times.·Remove adjusting keys or wrenches before connecting to the power supply or turning on the tool. A wrench or key that is left attached to a rotating part of the tool may result in personal injury.·Do not force the tool. Pneumatic tools do a better and safer job when used in the manner for which they are designed. Plan your work, and use the correct tool for the job.·Never use a tool with a malfunctioning switch.Any power tool that cannot be controlled with the switch is dangerous and must be repaired by an authorized service representative before using. ·Disconnect air supply from tool and place the switch in the locked or off position before making any adjustments, changing accessories, or storing power tools.Such preventive safety measures reduce the risk of starting the power tool accidentally.·Secure work with clamps or a vise instead of your hand to hold work when practical. This safety precaution allows for proper tool operation using both hands.·Store idle tools.children. Inspect tools for good working condition prior to storage and before re-use.·Use only accessories that are recommended by the manufacturer for your model.Accessories that may be suitable for one tool may create a risk of injury when used on another tool.·Keep guards in place and in working order.·Never leave tool running unattended.·USE COMPRESSED AIR ONLY. Use clean, dry and regulated compressed air at no more than ___PSI to power this tool. Never use oxygen, carbon dioxide or any other bottled gas as a power source for this tool.TOOL SET UPFig. 1 (Above) shows an optimal set-up that includes an inline filter, regulator and oiler. All of these components are sold separately through Northern Tool + Equipment.NOTE: If you are not using an automatic oiler system, before operation, add a few drops of Pneumatic Tool Oil to the airline connection. Add a few drops more after an hour of continual use.1. Prepare the 3/8in. air nipple to connect to the air inlet on the air drill. First, wrap the 1/4in.air nipple with pipe thread seal tape (not included) before threading it into the inlet.Connect the 3/8in. I.D. air hose (not included) to a quick-disconnect coupler (not included)and then to the air nipple.2. Turn on the air pressure on your compressor to 90 PSI. Do not exceed the recommendedair pressure of 90 PSI.3. Check the air connection for leaks.AIR SUPPLYWARNING: Ensure the air supply is clean and does not exceed 90 PSI while operating the tool. Too much air pressure and unclean air will shorten the product life due to excessive wear, and may cause damage and/or personal injury.1. Make sure that the air valve (or trigger) is in the “off” position before connecting to the airsupply.2. An air pressure of 90 PSI is required.3. Drain the air tank daily. Water in the airline can damage the tool.4. Clean the air inlet filter weekly.5. Line pressure should be increased to compensate for longer air hoses (over 26 feet or 8meters). The hose diameter should be 3/8in. I.D.6. Keep the hose away from heat, oil and sharp edges. Check the hose for wear and makecertain that all connections are secure.MAINTENANCEWARNING: Make sure the Impact Wrench is disconnected from its power source before attempting any maintenance, cleaning, or inspection.·Maintain your Impact Wrench. It is recommended that the general condition of any tool be examined before it is used. Keep your Impact Wrench in good repair by adopting a program of conscientious repair and maintenance in accordance with the recommended procedures found in this manual. If any abnormal vibrations or noise occurs, turn the Impact Wrench off immediately and have the problem corrected before further use. Have necessary repairs made by qualified service personnel.·Keep all cutting tools sharp and clean. Properly maintained cutting tools with sharp cutting edges are less likely to bind and are easier to control. Keep handles dry, clean, and free from oil and grease. ·Cleaning. Use only soap and a damp cloth to clean your Impact Wrench. Many household cleaners are harmful to plastics and other insulation. Never let liquid get inside the Impact Wrench.DIAGRAM & PARTS LISTNo. Part No. AssyNo.Description Qty No. Part No.AssyNo.Description Qty1 761-01B-B Hammer Housing 1 34 761-34-A After Sheath 12 761-02-A Screw 1 *35 761-35A-BA Rear Cover 13 165-44-A Rubber Mat 1 36 162-31-A Screw 44 761-04-A Screw 4 37 162-32-A Trigger 15 161-26-A Washer6 38 161-43-A Set Pin 26 161-27-A Screw 2 39 150-11-A O-Ring 1 *7 761-07-A B Felted Wool 1 40 150-09-A Valve Plug 18 761-08-A Handle 1 41 162-34-A Set Pin 19 761-09-A Bushing 1 *42 162-35-A A Brass Sleeve 110 162-10-A Retainer Ring 1 43 162-41-A O-Ring 211 161-31-A O-Ring 1 44 162-36-A Plunger 112 761-12B-B Anvil 1 45 162-38-A Spring 113 461-32-A Hammer 2 46 150-41-A Steel Ball 114 761-14-A Hammer Cage 1 47 162-04-A Washer 415 761-15-A Hammer Pin 2 48 362-49-A Switch 116 761-16-A Seal Plate 1 49 160-05-A Set Pin 117 761-17-A Bearing 1 *50 162-43-A A Sleeve 118 761-18-A Front Sheath 1 51 162-44-A Pin 119 461-38-A Screw Cap 4 *52 760-28-A B Pin 1 *20 761-20-B B Housing 1 53 162-46-A Cup Plug 1For replacement parts and technical questions, please call 1-800-222-5381. WARRANTYOne-Year Limited WarrantyWARNINGSome dust created by power sanding, sawing, grinding, drilling, and other construction activities contains chemicals known to the State of California to cause cancer, birth defects or other reproductive harm. Some examples of these chemicals are:• Lead from lead-based paints• Crystalline silica from bricks and cement and other masonry products• Arsenic and chromium from chemically treated lumberYour risk from these exposures varies, depending on how often you do this type of work. To reduce your exposure to these chemicals: work in a well-ventilated area, and work with approved safety equipment, such as those dust masks that are specially designed to filter out microscopic particles.Distributed byNorthern Tool + Equipment Co.,Burnsville, MN 53306Made in Taiwan。
冲击扳手工作原理
冲击扳手工作原理是通过利用冲击力来产生旋转作用的一种工具。
它的主要结构是由手柄、弹簧、锤头和扳手头组成。
当人们用手拉动手柄时,将会产生一个弹簧装置的张力,这种张力会在手柄释放时产生一个极大的动能。
于是,这个动能会被传递到锤头上,并且通过锤头产生的冲击力来推动扳手头的旋转,从而达到松紧螺丝的目的。
这个工具的优点在于它的高效率和方便携带。
冲击扳手不需要过多的人力,就可以轻松地完成拆卸和安装螺丝的任务。
同时,由于它的体积小巧,可以随身携带,非常适合在户外作业和维护工作中使用。
当然,为了保证冲击扳手的使用寿命和安全性,我们必须正确使用这个工具。
在使用过程中,需要根据螺丝的大小和松紧程度,选择合适的扳手头和合适的冲击力大小。
同时,需要注意扳手头必须与螺丝紧密贴合,避免滑动或者移位。
最后,使用后需要及时清洁和保养,以确保它的长期稳定性和发挥最佳效果。
总之,冲击扳手是一种高效率,方便携带的工具,它的工作原理是利用了冲击力的作用,使得人们可以更加轻松,快速地完成螺丝的拆卸和安装,为我们的生产和生活带来了极大的便利。
- 1 -。
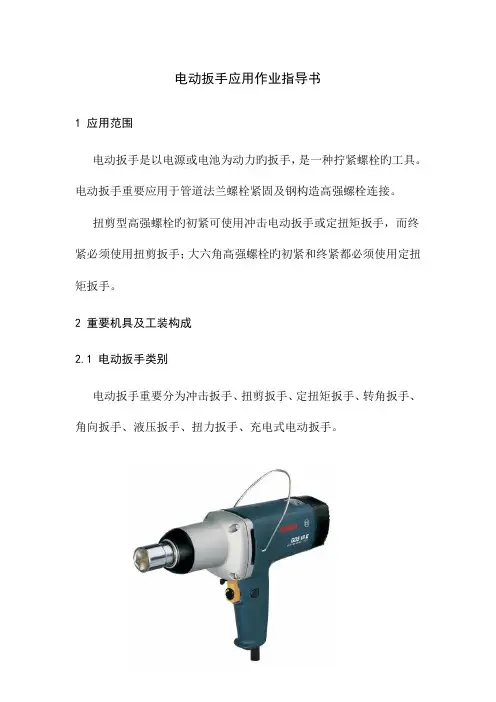
电动扳手应用作业指导书1 应用范围电动扳手是以电源或电池为动力旳扳手,是一种拧紧螺栓旳工具。
电动扳手重要应用于管道法兰螺栓紧固及钢构造高强螺栓连接。
扭剪型高强螺栓旳初紧可使用冲击电动扳手或定扭矩扳手,而终紧必须使用扭剪扳手;大六角高强螺栓旳初紧和终紧都必须使用定扭矩扳手。
2 重要机具及工装构成2.1 电动扳手类别电动扳手重要分为冲击扳手、扭剪扳手、定扭矩扳手、转角扳手、角向扳手、液压扳手、扭力扳手、充电式电动扳手。
冲击扳手转角电动扳手角向冲击扳手扭剪型电动扳手扭矩扳手扭力扳手液压扭力扳手定扭矩电动扳手充电式电动扳手电动扭力扳手用套筒数显电动扳手2.2 多种类型电动扳手应用范围1)冲击电动扳手重要用于一般螺栓紧固及高强螺栓初紧,它旳使用很简朴,就是对准螺栓扳动电源开关就行。
2)电动扭剪扳手重要用于扭剪型高强螺栓终紧,它旳使用是对准螺栓扳动电源开关,直到把扭剪型高强螺栓旳梅花头打断为止。
3)电动定扭矩扳手既可用于高强螺栓初紧又可终紧,它旳使用是先调整扭矩,再紧固螺栓。
4)电动转角扳手重要也属于定扭矩扳手旳一种,它旳使用是先调整旋转度数,再紧固螺栓。
5)电动角向扳手是一种专门紧固钢架夹角部位螺栓旳电动扳手,它旳使用和电动扭剪扳手原理相似。
3重要操作规程(施工、工机具)3.1扭矩值及螺栓规格1)螺栓规格及扭矩对照表强度等级 4.8 6.88.810.912.9最小破断强度392Mpa588Mpa784Mpa941Mpa1176Mpa 屈服强度320Mpa 480Mpa 640Mpa 900Mpa 1080Mpa 材质一般构造用钢机械构造用钢铬铝合金钢镍铬铝合金钢镍铬钼合金钢螺栓螺母对边扭矩值扭矩值扭矩值扭矩值扭矩值Nm Nm Nm Nm NmM14 22 69 98 137 165 225 M16 24 98 137 206 247 353 M18 27 127 206 284 341 480(1)以上是德国工业原则,表中扭矩为螺栓到达屈服极限旳70%时所测定。
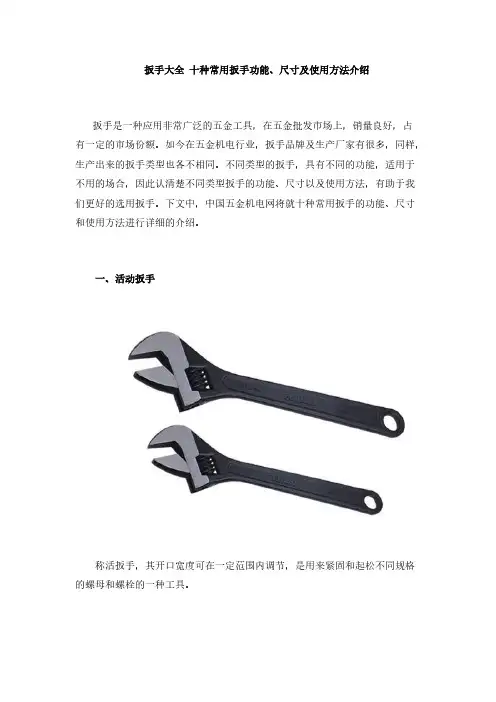
扳手大全十种常用扳手功能、尺寸及使用方法介绍扳手是一种应用非常广泛的五金工具,在五金批发市场上,销量良好,占有一定的市场份额。
如今在五金机电行业,扳手品牌及生产厂家有很多,同样,生产出来的扳手类型也各不相同。
不同类型的扳手,具有不同的功能,适用于不用的场合,因此认清楚不同类型扳手的功能、尺寸以及使用方法,有助于我们更好的选用扳手。
下文中,中国五金机电网将就十种常用扳手的功能、尺寸和使用方法进行详细的介绍。
一、活动扳手称活扳手,其开口宽度可在一定范围内调节,是用来紧固和起松不同规格的螺母和螺栓的一种工具。
功能:用来旋转六角或方头螺栓、螺钉、螺母。
尺寸:4"、6"、8"、10",对应开口1.3、1.93、2.4、3公分。
使用:扳手不易打开,容易伤人和把螺栓角圆滑,应使拉力作用在开后较厚的一边,以防开口出现“八”字形。
二、呆扳手一端或两端制有固定尺寸的开口,用以拧转一定尺寸的螺母或螺栓。
功能:通用工具,是装配机床或备件及交通运输、农用机械维修必需的手工具。
尺寸:4×5、5.5×7、8×10、9×11、12×14、13x15、14×17等(以MM 为单位)。
使用:使用时可以上下套入或直接插入。
三、梅花扳手两端具有带六角孔或十二角孔的工作端,适用于工作空间狭小,不能使用普通扳手的场合。
功能:梅花端通常做为螺丝(帽)的最初放松与最后锁紧用。
尺寸:8*10、10*12、12*14、14*17、16*18、17*19(以MM为单位)。
使用:左手推住梅花扳手与螺栓连接处,保持梅花扳手与螺栓完全配合,右手握住梅花扳手另一端并加力。
四、两用扳手一端与单头呆扳手相同,另一端与梅花扳手相同,两端拧转相同规格的螺栓或螺母功能:设备安装、装置、设备检修,大型工业石油、化工、冶金、发电、炼油等行业尺寸:4"、6"、8"、10"、12"、15"、18"、24"等使用:使用时,将扳口调节到比螺母稍大些,用右手握手柄,再用右手指旋动蜗轮使扳口紧压螺母。
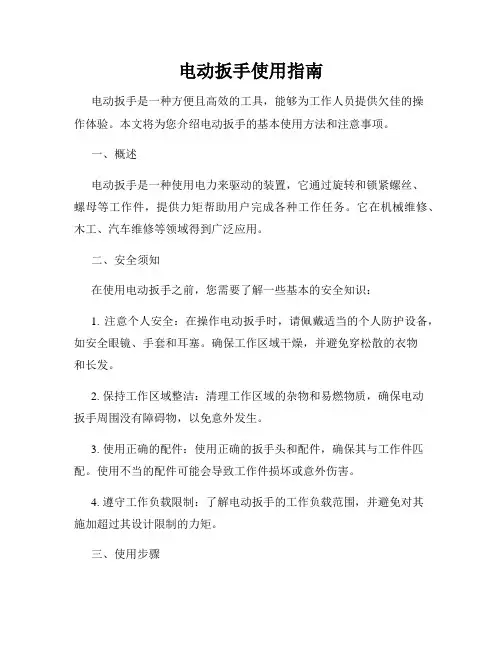
电动扳手使用指南电动扳手是一种方便且高效的工具,能够为工作人员提供欠佳的操作体验。
本文将为您介绍电动扳手的基本使用方法和注意事项。
一、概述电动扳手是一种使用电力来驱动的装置,它通过旋转和锁紧螺丝、螺母等工作件,提供力矩帮助用户完成各种工作任务。
它在机械维修、木工、汽车维修等领域得到广泛应用。
二、安全须知在使用电动扳手之前,您需要了解一些基本的安全知识:1. 注意个人安全:在操作电动扳手时,请佩戴适当的个人防护设备,如安全眼镜、手套和耳塞。
确保工作区域干燥,并避免穿松散的衣物和长发。
2. 保持工作区域整洁:清理工作区域的杂物和易燃物质,确保电动扳手周围没有障碍物,以免意外发生。
3. 使用正确的配件:使用正确的扳手头和配件,确保其与工作件匹配。
使用不当的配件可能会导致工作件损坏或意外伤害。
4. 遵守工作负载限制:了解电动扳手的工作负载范围,并避免对其施加超过其设计限制的力矩。
三、使用步骤1. 准备工作:在使用电动扳手之前,确保其电源充足并关闭电源开关。
根据需要,选择正确的配件,并确保其安全连接到扳手头上。
2. 调整扭矩设置:根据工作需求,使用电动扳手上的调节钮或按钮来调整扭矩设置。
确保选择适当的扭矩范围,以防止工作件过紧或过松。
3. 定位工作件:将工作件正确地位置并固定住,以便电动扳手能够准确施加力矩。
确保工作件与扳手头完全接触,以避免滑动和损坏。
4. 启动电动扳手:按下电动扳手的开关,启动电源。
根据需要,您可以选择不同的操作模式,如单向旋转或来回旋转。
5. 完成工作:使用电动扳手按需施加力矩,完成工作任务。
确保扳手头稳定,并在扳手头完全接触工作件时施加力。
6. 关闭电动扳手:工作完成后,将电动扳手的电源关闭,并将其放置在安全的位置。
清洁扳手头并与扳手本体分开存放。
四、维护保养1. 清洁:定期清洁电动扳手的外部表面和配件。
使用干净的布擦拭,并确保扳手头和其他配件的螺纹清洁无尘。
2. 润滑:根据电动扳手的使用频率和要求,定期为其润滑。
冲击扳手工作原理冲击扳手是一种常见的手持动力工具,它通过利用冲击力来驱动螺栓、螺母等零部件的旋转,完成拧紧或者松开的工作。
冲击扳手通常用于汽车维修、机械设备维护等领域,其工作原理简单而有效。
冲击扳手的工作原理可以分为以下几个方面来解释:1. 冲击力原理。
冲击扳手的核心工作原理是利用高速旋转的气动马达或者电动马达,产生高速旋转的冲击力,通过传递给扳手头部的冲击机构,再传递给螺栓或者螺母,使其产生旋转力矩,从而完成拧紧或者松开的工作。
冲击力的产生是冲击扳手能够高效完成工作的基础。
2. 冲击机构原理。
冲击扳手内部的冲击机构通常由锤片、锤轴、锤头等部件组成,当马达产生高速旋转时,锤片会受到离心力的作用,向外飞出并撞击锤头,产生高频率的冲击力。
这种高频率的冲击力可以有效地传递给螺栓或者螺母,使其产生旋转力矩,完成拧紧或者松开的工作。
3. 扭矩调节原理。
冲击扳手通常具有扭矩调节装置,可以根据需要调节输出扭矩大小。
扭矩调节装置通常包括扭矩调节环、扭矩调节杆等部件,通过改变这些部件的位置或者角度,可以改变冲击扳手的输出扭矩大小,使其适用于不同规格的螺栓或者螺母,保证工作的准确性和安全性。
4. 能量传递原理。
冲击扳手的能量传递原理是指马达产生的机械能通过冲击机构传递到螺栓或者螺母,产生旋转力矩完成工作。
能量传递的高效性是冲击扳手能够快速完成工作的关键。
总的来说,冲击扳手的工作原理是利用冲击力、冲击机构、扭矩调节装置和能量传递原理相结合,通过高速旋转的冲击力来完成拧紧或者松开螺栓、螺母等零部件的工作。
这种工作原理使得冲击扳手成为一种高效、便捷的手持动力工具,在各种维修和维护工作中得到广泛应用。
电动扳手的使用方法和注意事项
嘿,朋友们!今天咱来聊聊电动扳手这玩意儿的使用方法和注意事项哈!
电动扳手,那可真是个厉害的工具!就像一把神奇的钥匙,能轻松搞定各种紧固的任务。
先说说使用方法吧。
你得选对合适的套筒,就像给脚找双合适的鞋一样重要!然后,把电动扳手对准要紧固的螺丝或螺母,就像瞄准目标的箭一样准确。
按下开关,哇哦,那强大的扭力就开始发挥作用啦,看着螺丝或螺母乖乖地转动起来,是不是超有成就感!但可别像个没头苍蝇似的乱扳一通哦,得有节奏地操作,该停就停,别一下子太猛啦。
再来讲讲注意事项。
这可不能马虎!就像开车要注意交通规则一样。
首先,使用前一定要检查一下,看看有没有损坏的地方,这可不能将就。
然后呢,使用的时候别把手放在不该放的地方,那可不是闹着玩的,万一受伤了咋办!还有啊,不同的螺丝或螺母需要不同的扭力,你可别不管不顾地使劲拧,那不就坏事啦!
想想看,如果不注意这些,那不就像没头苍蝇到处乱撞,能有好结果吗?咱可得好好对待电动扳手,让它发挥出最大的作用,而不是给自己找麻烦呀!
总之,电动扳手用好了那就是你的得力助手,用不好可就成了麻烦制造者啦!所以大家一定要认真对待它的使用方法和注意事项,让它为我们的工作和生活带来便利,而不是烦恼!就这么简单,大家记住了吧!。
内燃冲击扳手安全技术操作规程
一、使用说明
1、检查机器各部件应处于正常状态;检查发动机(按发动机说明书)应处于正常状态。
2、将换档手柄放置于 0 位(空档),转动发动机数转使其各部位有良好的润滑。
3、启动发动机,进行短时间空转,再调整油门使发动机处于中速运转状态。
4、将换向手柄由空档放置于你所需要的档位(正转或反转)抬起操作手把,将套筒套在轨枕螺母上,旋转离合器手柄,拉动离合器使之结合,套筒开始工作,当轨枕螺母松开或锁紧按需要的技术要求时,松开离合器手柄,离合器自动复位(即脱离状态),套筒停止工作,这就完成一条轨枕螺栓的松开或锁紧的全过程。
5、停止工作时,当手柄置于空档位置放松油门,关闭发动机。
二、安全操作规程
1、穿戴好防护用品。
2、在起动机器前仔细加注燃油,并防止溢出。
3、使用橡胶密封圈和钢销将套筒和附件固定一机构驱动装置上。
4、经常检查机动扳手,确保所有扣件都拧紧。
5、检查拉绳没有磨损。
6、知道控制装置的位置和使用,并能在紧急状态下停机。
7、在使用机器时,不要穿戴首饰、领带和宽松、破缝的衣服。
8、在启动机器前,将挡位控制于中位。
9、在钻孔和拧螺栓时使用低扭矩,在拆卸扣件时使用高扭矩。
电动扳手操作说明一、产品概述电动扳手是一种使用电能驱动的工具,可以快速、高效地拧紧和松开螺丝、螺母等螺纹连接件。
本文档将为用户提供电动扳手的操作说明,以确保正确和安全地使用该设备。
二、安全须知1. 在使用电动扳手之前,请确保已经阅读并理解本操作说明。
2. 在操作电动扳手之前,请戴上安全手套和护目镜,以保护双手和眼睛的安全。
3. 在调整电动扳手的参数之前,请确认电源已经断开,并等待电动扳手完全停止运转,以避免意外启动造成的伤害。
4. 请勿在潮湿或有电气危险的环境中使用电动扳手。
5. 当操作完毕或需要离开工作区时,请关闭电动扳手,并断开电源。
三、操作步骤1. 准备工作a. 在使用电动扳手之前,请检查电源线和插头,确保其完好无损。
b. 确保使用的螺纹连接件与电动扳手的头部匹配,避免不匹配造成的卡滞和损坏。
2. 插入螺纹连接件a. 将螺纹连接件轻轻插入电动扳手的头部,并确保连接紧密。
b. 相应的,可根据螺纹连接件的大小和特性,选择符合要求的扳手头部。
3. 调整参数a. 根据螺纹连接件的规格和要求,调整电动扳手的扭矩和转速。
b. 可根据需要选择不同的扳手头部,以适应不同的工作需求。
4. 开始操作a. 确保电动扳手已经连接到电源,并电源线没有损坏。
b. 执行轻按扳动开关,电动扳手将开始旋转,完成扭矩应用。
c. 在扭矩应用期间,保持稳定的握持力,以确保安全和有效地完成工作任务。
5. 扭矩控制和限制a. 使用电动扳手时,特别需要注意控制和限制扭矩的大小,避免过度扭矩造成的损坏或卡滞。
b. 若需要进行精确的扭矩控制,请使用托盘或其他专用设备来限制扭矩大小。
6. 完成工作a. 在完成工作后,松开电动扳手的扳动开关。
b. 当电动扳手完全停止运转后,小心取出螺纹连接件,并将其放置在安全的位置。
四、维护和保养1. 使用电动扳手一段时间后,请对其进行定期的维护和保养。
2. 清洁电动扳手时,请使用干净的布或刷子,不要使用水或任何液体直接清洗。
一种冲击式扳手的冲击次数检测方法与流程
冲击式扳手是一种使用冲击力来驱动螺母或螺栓旋转的工具。
冲击次数检测方法和流程如下:
1. 准备工具:冲击式扳手、数字计数器、电缆或导线。
2. 将冲击式扳手与数字计数器相连。
可以使用电缆连接扳手和计数器,或者使用导线直接连接它们。
3. 将数字计数器设置为初始值,以便开始计数。
4. 确保冲击式扳手处于适当的设置和位置,以对准螺母或螺栓。
5. 使用冲击式扳手对螺母或螺栓施加冲击,使其旋转。
6. 每次冲击触发时,数字计数器会自动加1,记录下一次冲击的次数。
7. 继续冲击直到达到所需的冲击次数。
8. 完成冲击工作后,读取数字计数器显示的冲击次数。
注意事项:
- 确保数字计数器和冲击式扳手相连稳固,防止其松动或脱落。
- 在使用冲击式扳手之前,先检查和确保工具的使用安全。
- 根据工作要求和材料要求,设置适当的冲击次数。
- 遵循使用冲击式扳手的规范和操作指南。
- 定期检查和维护冲击式扳手,以确保其正常工作和安全使用。
这是一种基本的冲击次数检测方法和流程,具体的步骤可能因工作环境和工具类型而有所不同。
在实际操作中,请根据具体情况进行调整和适应。
电动冲击扳手使用说明书一、产品介绍电动冲击扳手是一种便捷高效的工具,广泛应用于工业领域。
它采用电动机驱动,能够通过冲击力产生高扭矩,用于螺栓和螺母的紧固和拆卸。
二、安全操作要点1. 请佩戴防护手套、护目镜和头盔等个人防护装备,以确保操作人员的安全。
2. 在使用电动冲击扳手之前,请确保设备的电缆和插头没有损坏,以避免电击事故。
3. 在操作之前,请先了解工作环境,确保工作区域没有松动的物体或其他可能引起伤害的障碍物。
4. 使用前请检查电动冲击扳手的部件和连接处是否牢固,如有松动或损坏请及时修理或更换。
5. 请确保电动冲击扳手的电源开关处于关闭状态,以避免误触发造成伤害。
6. 在操作时,请保持扳手握柄干燥和清洁,以提供良好的握持力。
7. 注意工作区域的光线,确保足够的照明条件,以方便观察操作过程并避免操作失误。
三、操作步骤1. 调整扭矩设置:根据需要调整电动冲击扳手的扭矩设置,通常扭矩可以通过旋转扳手柄上的调节钮进行调整。
请参考产品说明书以确保选择正确的扭矩值。
2. 安装螺栓或螺母:将需要拆卸或紧固的螺栓或螺母插入电动冲击扳手的扳手座孔中,确保与扳手座孔相匹配。
3. 使用电动冲击扳手:将电动冲击扳手的插头插入电源插座,按下扳手的启动开关,设备即开始工作。
当设备产生冲击力的时候,扳手将会产生旋转力,使螺栓或螺母紧固或拆卸。
4. 完成操作:根据需要进行紧固或拆卸操作,直到达到预设的扭矩值。
请注意,当电动冲击扳手达到设定的扭矩值时,设备会自动停止冲击力的产生。
四、维护与保养1. 使用后,请将电动冲击扳手放置在干燥通风的地方,避免与液体或湿气接触。
2. 如发现电缆或插头有损坏,请及时更换以确保安全操作。
3. 定期清洁电动冲击扳手的表面,并确保冲击力产生部分的清洁和润滑,以延长其使用寿命。
4. 如发现电动冲击扳手有异常噪音或其他故障,请停止使用并寻求专业人员的维修。
五、常见问题解答1. 电动冲击扳手怎么调节扭矩?答:根据不同产品的设计原理,扭矩的调节方式可能会有所不同,请仔细阅读产品说明书以了解具体的调节方法。
概述Master 35/40手提式内燃冲击扳手是专为工务工程部门设计的轻便型手提式内燃冲击扳手,用于拆卸和安装轨枕及鱼尾板螺栓。
体积小,携带方便,上下道方便,外型设计符合人机工程学原理,该机采用动扭矩冲击动力设计,松紧螺栓快,安全可靠。
可配备加长搬杆和多种型号套筒,适用于工务施工.维修使用,特别适合无电源野外作业。
技术参数1、力矩范围:5挡调节,500-1500Nm2、螺栓范围:16-32mm3、尺寸规格:570mm×270mm×450mm4、重量: 17.5KG5、驱动:四方驱动轮6、发动机:二冲程、特殊的AIRTEC EMAK056 56c.c7、电子开关:冠军RCJ7Y或同等产品操作程序1、检查齿轮箱机油油位在正确的位置,所有操作部件、螺栓和螺帽均拧紧了,在油箱内加入正确的混合燃油。
(1) ON/OFF 控制开关(2) 加浓按钮(3) 风门手柄(4) 反冲起动接手(5) 节气门(6) 半速手柄(7) 前进/后退/中位控制开关(8) 方形驱动头(9) 力矩设置手柄(10) 机油滤清器堵头(11) 汽油加油盖(12) 起动减压按钮安全及操作注意事项1、根据公司规定、工作环境和国家规定,穿上全身的防护服、安全鞋、手套、防护眼镜和耳塞。
使用手套可以减少因手发热和发干引起的损伤。
2、在起动机器前仔细加注燃油,并防止溢出。
用配备的漏斗加油,在发动机运转、油箱热、或拉近没有遮挡的物品时请不要加油。
请不要将混合油长时间放置在机器或油箱内。
3、务必使用合格的扳手套筒和附件。
将一个质量差的套筒安装在质量好的机动扳手上,或将好的套筒安装在差的机动扳手上,结果会增加机器的振动,将损伤伤员和机器。
请不要使用手工用的套筒。
4、使用橡胶密封圈和钢销,或其他合适的固定物将套筒和附件固定到机构驱动装置上。
请不要使用不结实的物品、电线、钉子或塑料胶带。
5、经常检查机动扳手,确保所有扣件都拧紧。
粗劣的维修保养会给机器增加额外的振动和噪音。