3.Trident系统硬件介绍
- 格式:pptx
- 大小:2.86 MB
- 文档页数:12

X86主板架构及硬件系统介绍一、X86主板架构概述1. 中央处理器(Central Processing Unit,CPU)插槽:用于安装CPU,支持多种类型的X86 CPU,如Intel的Core系列和AMD的Ryzen系列。
2.内存插槽:用于安装系统内存(RAM),支持不同类型和容量的内存模块,如DDR3和DDR43.扩展插槽:用于插入扩展卡,如显卡、声卡、网卡和硬盘控制器等。
4.存储接口:用于连接硬盘驱动器和光盘驱动器,通常包括SATA接口和M.2接口。
5. 输入输出接口:包括USB接口、Ethernet接口、音频接口、视频接口等,用于连接外部设备。
6. BIOS芯片:存储基本输入输出系统(Basic Input/Output System,BIOS)固件,用于启动计算机和管理硬件。
7.电源插槽:用于连接电源供电。
二、X86主板架构的硬件系统1.中央处理器(CPU):X86主板支持多种类型的X86CPU,包括多核处理器。
CPU是计算机的大脑,负责执行指令和处理数据。
2.内存(RAM):内存插槽用于安装系统内存模块。
内存是临时存储器,用于存储正在运行的程序和数据。
X86主板支持不同类型和容量的内存模块,如DDR3和DDR43.扩展插槽:X86主板通常有多个扩展插槽,用于插入扩展卡。
扩展卡包括显卡、声卡、网卡、硬盘控制器等,用于提供额外的功能和性能。
4.存储接口:X86主板通常具有多个存储接口,如SATA接口和M.2接口。
SATA接口用于连接硬盘驱动器和光盘驱动器,而M.2接口用于连接高速存储设备,如固态硬盘(SSD)。
5. 输入输出接口:X86主板提供多种输入输出接口,以连接外部设备。
常见的接口包括USB接口、Ethernet接口、音频接口和视频接口。
USB接口用于连接各种外设,如键盘、鼠标、打印机等,而Ethernet接口用于连接局域网或互联网。
6.BIOS芯片:X86主板上有一个存储BIOS固件的BIOS芯片。

D E S K T O P STrident 3© 2023 Micro-Star Int'l Co.Ltd. MSI is a registered trademark of Micro-Star Int'l Co.Ltd. All rights reserved.Intel, the Intel logo, the Intel Inside logo and Intel Core are trademarks of Intel Corporation or its subsidiaries in the U.S. and/or other countries.SPECIFICATIONSOperating System Windows 10 Home Windows 10 ProCPUIntel ® Core™ i7-7700 ProcessorIntel ®Core™ i5-7400 ProcessorSystem Memory 2 x DDR4 2400MHz SO-DIMMs, up to 32GB VGA MSI GeForce ® GTX 1060 Gaming 6GB/3GB GDDR5MSI GeForce ® GTX 1050Ti 4GB DDR5Sound5.1 Channel HD Audio with Nahimic audio enhancer Storage1 x M.2 SSD*1x 2.5" HDD*BIOS 500 series for PCB 1.0 version support M.2 SATA SSD only and BIOS A00 series for PCB 2.1 version support M.2 SATA / PCIe auto switchI/O (Front)1 x USB 3.1 Gen 1 Type C2 x USB 3.1 Gen 1 Type A (with Super Charger 2)1 x Mic in / 1 x Headphone out 1 x HDMI™ out (VR Link)I/O (Rear)1 x USB 3.1 Gen1 Type A 4 x USB2.01 x HDMI™ out1 x HDMI™ in (connect Graphic card and front VR-Link port)3 x OFC Audio jacks 1 x RJ45LANGigaBit LAN (Intel® WGI219VIntel)Cooling System Fan Cooler Volume4.72L/9.97ptDimension (WxDxH)with stand: 353.73 x 97.56 x 251.35 mm w/o stand: 346.25 x 232.47 x 71.83 mm Accessories2 x Manual1 x Quick guide 1 x Warranty card 1 x Power cord 1 x Gaming DMSoftwareDrivers & MSI Utilities MSI Gaming center Drogan EyeXsplit GamecasterAnti-Virus (60 days trial)Mystic LightMake your build look on fire or cold as ice. You are in control.Customize colors and effects with RGB LED.Silent Storm Cooling 2Exclusive, silent and powerful cooling system that embraces several separated chambers for component cooling.CONNECTIONS1. 1x Mic in / 1x Headset out 3. 1x USB 3.1 Gen 1 Type A 5. 1x VR-Link (Front)7. 1x RJ45 / 1x USB 3.1 Gen 1 Type A 9. 2x USB 2.011. 1x DC in2. 1x USB3.1 Gen 1 Type C4. 1x USB 3.1 Gen 1 Type A 6. 3x Audio jacks8. 2x USB 2.010. 1x HDMI™12. 1x DVI-D / 1x HDMI™ / 1x DP G e n e r a t e d 2023-06-01, c h e c k f o r t h e l a t e s t v e r s i o n w w w .m s i .c o m /d a t a s h e e t . T h e i n f o r m a t i o n p r o v i d e d i n t h i s d o c u m e n t i s i n t e n d e d f o r i n f o r m a t i o n a l p u r p o s e s o n l y a n d i s s u b j e c t t o c h a n g e w i t h o u t n o t i c e .。


Designed for single use but can be autoclaved.Rubber dam isolation is mandatory to avoid the potential for inhalation of parts.Triodent recommends tying floss to the V3 Blue ring as an added precaution. T o ensure complete sterility, autoclave the ring before use.US Federal law restricts this device to sale by or on the order of a dentist.Further Training?More information on the V3 Blue and V3 Sectional Matrix System, includingclinical cases and digital animation, as well as other Triodent products, is available at or by phoning our customer services team.V3 Blue Quick GuideV 3 B l u e Q u i c k G u i d eTriodent Product Return PolicyAll T riodent products come with a 60-day, money-back guarantee. Our experience has shown that more than 95% of product returns relate to incorrect usage. Should you consider returning any product, we strongly recommend that you first read the product guides and website FAQ’s or call our helpful T riodent representatives, who are trained in product trouble-shooting.1After trying V3 Blue, you may wish to upgrade to T riodent’s premier V3 Sectional Matrix System. The key to the system is the long-lasting nickel-titanium V3 Ring, which exerts optimal force to produce ideal tooth separation for predictably tight contacts. The ring comes in two sizes, for large and small teeth.US: 1-800-811-3949CA: 1-866-316-9007UK: 0800-311-2097NZ: 0800 TRIODENTAU: 1800-350-421INT: +64 7 549 56121Wedge before cavity prepPre-wedging prevents bleeding during cavity prep. Push the appropriate sized Wave-Wedge in firmly and proceed with your prep. Now grip a V3 T ab-Matrix with tweezers and fold the tab towards you so you can place the band in an apical direction. 2Slide the matrix into the embrasureInsert the matrix between the wedge andthe cavity, taking care to ensure that theband is in the gingival crevice adjacentto the tooth you are restoring. Adjust toensure the matrix is at the right height.Y ou can place the matrix before thewedge if you prefer.3Carefully place retainer ringHold a V3 Blue ring open in a pair of Triodentor rubber dam forceps and gently place it in alow position so that it straddles the wedge. Donot rush this part; we advise using a finger-restto steady the forceps.4Place ring backwards for DOSometimes it is better to place the V3 Bluering facing backwards, as shown above. Oneexample is an MOD. The ring for the MO isplaced as shown in Step 3 and the ring forthe DO is placed as above.5Wedging from both sidesThe V3 system allows a second wedge tobe placed from the other side. The secondwedge can be fitted underneath the firstwedge as shown above. This feature enablesthe dentist to easily adjust the wedgingwithout starting over.6Use probe to free matrix from compositeT o break the bond between the matrixand the composite, push a probe throughbelow the contact point. Now grab amatrix wing hole with tweezers andwriggle it up and down. If the matrix turnson a single pivotal point, it is free of thecomposite and can be carefully removed.。
【说明】1、北京康吉森自动化公司在安全保护方面用的软件只有一个Tristation1131(各个时期版本不同),但硬件系统有两种:Triconex 和Trident 。
两者之间的主要区别在于:当系统是较大的并要求在实现实时控制的同时兼有ESD(紧急停车)、机组控制等功能时,用Triconex硬件系统来完成;当系统较小并只有ESD(紧急停车)、机组控制等功能时,用Trident硬件系统来完成;相应的软件选择用Tristation 1131开发时用的不同选型(Triocn、Tricon low density、Trident)一、硬件介绍【详见硬件系统概述】二、用Tristation 1131搭建一个硬件系统结构1、启动WindowsXP,进入WindowsXP系统平台的窗口界面。
2、双击桌面(或具体位置的)TriStation 1131图标,进入TriStation1131软件工作环境。
3、选取菜单栏上file项,弹出下拉菜单,选取new project(新建一个硬件系统)或open project(打开一个已建立硬件系统,需要添加硬件时)。
(1)若要添加硬件,选取open project项后,会弹出TriStation1131软件下project文件夹,该文件夹下有已建立好的文件系统,找到你的文件,打开即可。
(2)若要新建一个硬件系统,则选取new project项,会弹出new project 窗口,在“plat for”对话栏处根据你的硬件选取相应的硬件系统(Triocn、Tricon low density、Trident,此处我们选取Triocn)。
按“OK”按钮,弹出file for new project对话框,输入你要起的文件名,点“保存”,此时,会弹出一个“select main Processor”窗口,让你选择MP(控制器)的类型(3006/N,3007或3008/N)(3006/N,3007为Tricon的主处理器,3008/N为Tricon增强型处理器)、同时在Target sstem Version部分让你选择处理器的版本(如果设定处理器的版本与硬件版本不同,你编写的应用程序将无法执行),设定完成后,按“OK”按钮,TriStation1131会自动搭建相应的库结构,并对其进行编译,完成后给出反馈。
trident 9750 参数
Trident 9750是一款早期的图形处理器,常见于上世纪90年代的个人电脑中。
它采用了Trident Microsystems开发的图形处理器芯片组。
以下是Trident 9750的一些参数:
1. 显存容量,Trident 9750通常配备2MB或4MB的显存,这在当时是相当不错的。
2. 显示接口,它支持当时常见的VGA接口,能够输出最高分辨率为1024x768。
3. 支持的功能,Trident 9750支持2D加速和基本的3D渲染功能,能够满足当时主流应用和游戏的需求。
4. 性能表现,虽然Trident 9750在当时被广泛使用,但其性能并不出色,特别是在处理3D图形时表现较为一般。
总的来说,Trident 9750在当时算是一款性能不错的图形处理器,能够满足大部分用户的基本需求,但在高性能游戏或专业图形应用方面表现就显得有些吃力了。
希望这些信息能够帮助到你。
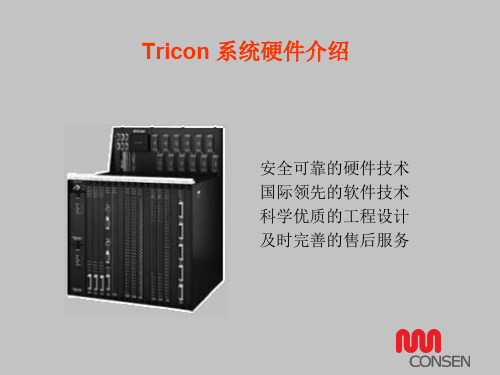
Tricon控制系统硬件结构
1,概念:Tricon是一种可编程逻辑以及过程控制系统,具有高容错能力。
这里的容错能力是指系统自身发生错误,系统还能正常控制生产设备,从而不会引起因系统故障造成的停产。
2,系统结构:Tristation(安装在用户计算机上,通过网线与主机架相连)、主机架、扩展机架、模件(电源、处理器、IO模件以及通讯卡)、端子板、安全栅、继电器、端子排以及配电装置。
一个Tricon 系统最多可以有15个机架,其中1个是主机架。
Tricon系统硬件结构
3,卡件类型:系统主机架安装主处理器以及最多6个IO卡件,扩展机架最多可以安装8个IO卡件。
序号型号类型说明
135xx DI3510和3511卡件是PI卡
236xx DO
337xx AI3706和3708E是热电偶输入卡
438xx AO
583xx电源
63008处理器执行程序并对输入和输出进行表决
4,系统工作过程:Tricon系统出电源卡件是双重冗余外,其它所有卡件内部都是三重冗余的,每个IO卡件内部都有3个独立的分电路,对于输入卡件来说,每个分电路读取过程数据,并将数据传输给各自的处理器进行处理,三个独立处理器通过Tribus总线通讯,最后控制输出卡件,达到控制现场设备的目的。
同时,对于每一个IO卡件,都可以安装一个热备卡件,一旦正在工作的卡件故障,热备卡件可以立即工作,由于主卡件和热备卡件始终自行同步,所以热备卡件投运是无间歇的。