智能交通高清网络摄像机安装手册v3.8.0
- 格式:pdf
- 大小:1.01 MB
- 文档页数:28

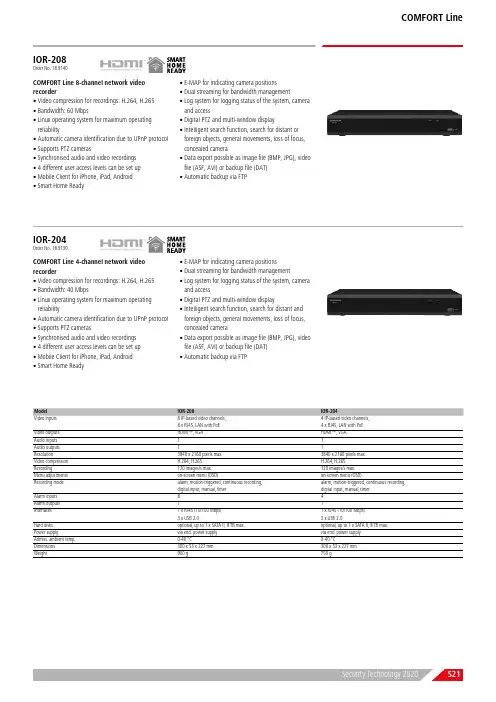
COMFORT LineIOR-208Order No. 18.9140COMFORT Line 8-channel network video recorder• Video compression for recordings: H.264, H.265• Bandwidth: 60 Mbps• Linux operating system for maximum operating reliability• Automatic camera identification due to UPnP protocol • Supports PTZ cameras• Synchronised audio and video recordings • 4 different user access levels can be set up • Mobile Client for iPhone, iPad, Android • Smart Home Ready• E-MAP for indicating camera positions • Dual streaming for bandwidth management• Log system for logging status of the system, camera and access• Digital PTZ and multi-window display• Intelligent search function, search for distant or foreign objects, general movements, loss of focus, concealed camera• Data export possible as image file (BMP, JPG), video file (ASF, AVI) or backup file (DAT)• Automatic backup via FTPIOR-204Order No. 18.9130COMFORT Line 4-channel network video recorder• Video compression for recordings: H.264, H.265• Bandwidth: 40 Mbps• Linux operating system for maximum operating reliability• Automatic camera identification due to UPnP protocol • Supports PTZ cameras• Synchronised audio and video recordings • 4 different user access levels can be set up • Mobile Client for iPhone, iPad, Android • Smart Home Ready• E-MAP for indicating camera positions • Dual streaming for bandwidth management• Log system for logging status of the system, camera and access• Digital PTZ and multi-window display• Intelligent search function, search for distant and foreign objects, general movements, loss of focus, concealed camera• Data export possible as image file (BMP, JPG), video file (ASF, AVI) or backup file (DAT)• Automatic backup via FTPModelIOR-208IOR-204Video inputs 8 IP-based video channels, 8 x RJ45, LAN with PoE 4 IP-based video channels, 4 x RJ45, LAN with PoE Video outputs HDMI™, VGA HDMI™, VGA Audio inputs 11Audio outputs 11Resolution3840 x 2160 pixels max.3840 x 2160 pixels max.Video compression H.264, H.265H.264, H.265Recording120 images/s max.120 images/s max.Menu adjustments on-screen menu (OSD)on-screen menu (OSD)Recording mode alarm, motion-triggered, continuous recording, digital input, manual, timer alarm, motion-triggered, continuous recording, digital input, manual, timer Alarm inputs 84Alarm outputs 11Interfaces1 x RJ45 (10/100 Mbps) 3 x USB 2.01 x RJ45 (10/100 Mbps) 3 x USB 2.0Hard disks optional, up to 1 x SATA II, 8 TB max.optional, up to 1 x SATA II, 8 TB max.Power supplyvia encl. power supply via encl. power supply Admiss. ambient temp. 0-40 °C0-40 °CDimensions 300 x 53 x 227 mm 300 x 53 x 227 mm Weight 900 g 750 g。
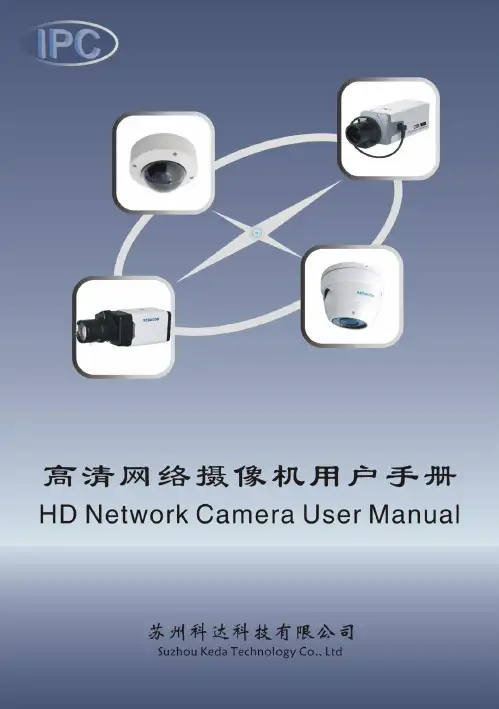
目录/Contents前言 (1)说明 (2)产品简介 (4)设备外观 (5)外观 (5)设备接口 (7)IPC112 (7)IPC110 (9)线缆连接 (9)IPC112 (9)IPC110 (10)IPC212 (11)IPC211 (11)安装及配置 (12)安装环境 (12)安装方法 (12)开始使用 (16)系统配置要求 (16)初始配置 (16)使用客户端IPCC TRL (17)产品功能 (19)视频浏览 (19)云台控制 (19)图像调节 (19)告警联动 (21)移动侦测 (21)并口告警 (22)图像遮蔽 (22)抓拍管理 (23)录像管理 (23)升级管理 (24)常见故障分析 (25)不能登录客户端 (25)登录IPCC TRL后不能正常浏览监控画面 (26)PC设备不能正常注册到NVR或KDM监控平台 (28)性能指标 (32)IPC112 (32)IPC110 (33)IPC212 (34)IPC211 (35)术语表 (36)PREFACE (1)IMPORTANT NOTES (2)INTRODUCTION (4)PRODUCT VIEWS (5)O VERVIEW (5)I NTERFACE &CONNECTOR (7)C ONNECT PERIPHERALS (9)INSTALLATION (12)G ENERAL E NVIRONMENT (12)M OUNTING (12)USING NETWORK CAMERA (16)S YSTEM R EQUIREMENT (16)F IRST C ONFIGURATION (16)U SING THE C LIENT -IPCC TRL (18)PRODUCT FEATURE (19)L IVE V IDEO (19)PTZ C ONTROL (19)A DJUSTING THE CAMERA AND IMAGE (19)A LARM T RIGGER (23)Motion Detection (23)Local Alarm Port (23)I MAGE S HIELD (24)SNAPSHOT MANAGEMENT (24)RECORD MANAGEMENT (25)UPDATE (26)TROUBLESHOOTING (27)C AN NOT ACCESS CLIENT (27)C AN NOT VIEW VIDEO STREAMING ON IPCC TRL (28)IPC CAN NOT BE REGISTERED WITH NVR OR KDM PLATFORM (31)SPECIFICATIONS (33)IPC112 (33)IPC110 (34)IPC212 (35)IPC211 (36)GLOSSARY (37)前言读者对象●工程安装人员●监控产品操作人员适用型号IPC112/IPC110/IPC212/IPC211相关手册《高清网络摄像机快速使用指南》《NVR管理员指南》我们尽最大努力来保证本手册信息的正确性,如因升级等原因发生信息修改,恕不另行通知。

网络视频解码器使用手册尊敬的用户,非常感谢您一直对我公司的产品的关注,假设您在使用过程中按照使用手册无法解决问题时,请致电我公司技术部垂询相关操作方法。
本手册的内容将做不定期的更新,恕不另行通知。
目录1引言 (3)1.1编写目的 (3)1.2使用范围 (3)2产品介绍 (3)2.1产品简介 (3)2.2产品技术规格 (3)3设备说明 (4)3.1运行环境 (4)3.2支持解码设备 (4)4产品使用 (4)4.1装箱清单 (4)4.2产品安装考前须知 (4)4.3连接示意图 (6)4.4设置解码器 (6)搜索解码器 (6)添加解码器 (8)解码器参数设置 (9)设备列表设置 (11)4.4.5系统参数配置 (14)轮巡设置 (14)云台控制 (15)播放任务列表 (16)系统日志查询 (17)版本查询 (17)4.5使用软件DecManage升级 (18)1引言1.1编写目的本手册为商务人员及最终用户了解产品性能、设计方案、合理使用产品而编制。
1.2使用范围本手册使用人员:最终用户、商务人员、技术支持人员。
本手册涉及内容:网络视频解码器的产品介绍、性能参数和使用功能说明。
2产品介绍2.1产品简介网络视频解码器是数字网络产品中的一员。
它无需PC平台,直接将数字视频数据从网络接收解码后直接输出到电视墙,操作方便、简单。
2.2产品技术规格3设备说明3.1运行环境3.2支持解码设备支持7000系列和8000系列设备的解码4产品使用4.1装箱清单4.2产品安装考前须知安装步骤1.拆开包装箱,根据装箱清单核对部件完整性;2.取出安装需要的各部件;3.按照?网络视频解码器使用手册?连接相关部件及线缆;4.取出电源适配器,确认部件及线缆连接无误后接通电源。
考前须知〔考前须知请仔细阅读。
如果有任何疑问,请与经销商联系。
〕1.拆开包装盒时请仔细检查,确认物品与装箱清单一致;2.检查现场电源电压与电源适配器工作电压是否匹配,防止出现电压不匹配导致设备损坏;3.安装环境:请勿在潮湿或高温的环境下使用,注意保持通风良好,防止安装在剧烈震动的环境下;4.网络视频解码器限于室内安装使用;工作温度限于-10℃至50℃之间,工作湿度限于85%以下;5.禁止在易燃、易爆的环境中安装使用;6.如果长时间暴露在日光或其他强光照射的地方,会使外壳加速老化从而缩短使用寿命;7.请将网络视频解码器安装或放置在平安的地方。
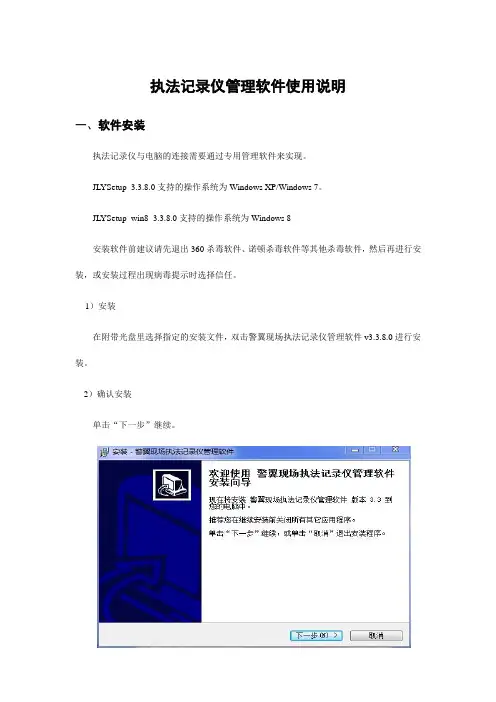
执法记录仪管理软件使用说明一、软件安装执法记录仪与电脑的连接需要通过专用管理软件来实现。
JL YSetup_3.3.8.0支持的操作系统为Windows XP/Windows 7。
JL YSetup_win8_3.3.8.0支持的操作系统为Windows 8安装软件前建议请先退出360杀毒软件、诺顿杀毒软件等其他杀毒软件,然后再进行安装,或安装过程出现病毒提示时选择信任。
1)安装在附带光盘里选择指定的安装文件,双击警翼现场执法记录仪管理软件v3.3.8.0进行安装。
2)确认安装单击“下一步”继续。
3)安装目录选择安装路径,然后单击“下一步”。
4)程序组安装程序组的名称,然后单击“下一步”。
5)快捷方式默认在桌面上创建快捷方式,然后单击“下一步”。
6)正式安装阅读设置内容,单击“安装”。
7)安装完毕安装完成,单击“完成”,结束软件部分安装。
软件安装完后第一次把执法记录仪通过USB线与电脑连接时,电脑将提示发现新硬件,选择自动安装软件,电脑将自动完成驱动程序部分的安装。
如果电脑没有提示发现新硬件,请依次进入“开始”-“控制面板”-“系统”-“硬件”-“设备管理器”,在设备列表中选择黄色问号的“Amba Simple Class”设备,然后点击鼠标右键,在右键菜单中选择“更新驱动程序”,再选择“自动安装软件”,电脑将自动完成驱动程序部分的安装。
二、管理软件使用说明先运行管理软件,然后把执法记录仪通过USB线和电脑连接。
1)验证密码首先在左上方输入密码(出厂默认密码:000000),点“确认密码”,验证成功后,本机时间将与电脑系统时间同步。
设备中的信息显示在指定的文本框内,此时的信息是只读的。
2)设置设备的信息点击“获取设备信息”按钮,文本框内除设备编号外的其它容变为可修改的,修改完之后每个文本框后面都有对应的“设置”按钮,单击“设置”按钮就可以了。
3)设置录像分辨率单击按钮,录像设置成相应分辩率4)设置拍照分辨率单击按钮设置拍照分辨率5)红外类型设置单击按钮设置红外类型,可设置为自动和手动两种模式6)设置是否支持连拍单击按钮设置拍照方式是连拍还是单拍7)设置分段摄像时间点击按钮设置分段摄像时间8)修改密码单击“修改密码”按钮,进行密码修改,输入正确的旧密码,然后输入新密码两次,点击“确认”,提示修改密码成功。
目录1概述···························································································································· 1-1 2设备安装······················································································································ 2-12.2 安装光模块················································································································2-22.2.1 枪机················································································································2-22.2.2 球机················································································································2-32.3 壁装 ························································································································2-32.3.1 支架和安装附件·································································································2-32.3.2 球机壁装··········································································································2-42.3.3 枪机壁装··········································································································2-52.4 吊装 ························································································································2-72.4.1 支架和安装附件·································································································2-72.4.2 球机吊装··········································································································2-82.5 角装 ······················································································································ 2-102.5.1 支架和安装附件······························································································· 2-102.5.2 球机角装········································································································ 2-102.6 立杆式安装·············································································································· 2-122.6.1 球机杆装········································································································ 2-122.7 柱式安装················································································································· 2-132.7.1 支架和安装附件······························································································· 2-132.7.2 球机柱装········································································································ 2-14 3与外接设备连接············································································································· 3-13.1 电缆和转接头·············································································································3-13.1.1 常用电缆和转接头······························································································3-13.1.2 其它安装要求····································································································3-23.2 电缆选型···················································································································3-23.2.1 视频线·············································································································3-23.2.2 音频线·············································································································3-33.2.3 电源线·············································································································3-43.2.4 RS485串口线 ···································································································3-43.2.5 告警线·············································································································3-53.2.6 网线················································································································3-53.2.7 光纤················································································································3-53.2.8 接地线·············································································································3-5i3.3 电缆连接(设备侧)····································································································3-53.3.1 使用RS485的云台控制模式连接云台·····································································3-53.3.2 使用RS485的透明通道模式连接第三方设备····························································3-63.3.3 连接告警输入/输出设备 ·······················································································3-7 4设备防雷和接地要求······································································································· 4-14.1 室外防护罩················································································································4-14.2 设备防雷···················································································································4-14.2.1 直击雷的外部防护······························································································4-14.2.2 传输线路的防护·································································································4-24.2.3 防雷器的内部防护······························································································4-24.2.4 接地要求··········································································································4-4 5常见问题······················································································································ 5-15.1 如何进行后焦调节·······································································································5-15.2 在Windows 7客户端上首次登录时,未提示安装控件·························································5-1ii。

网络摄像机第一次使用,把摄像机和路由器之间用网线连接好,摄像机自带的光盘里面,软件打开,打开查找器工具(此工具使用于局域网内查找和修改摄像机的IP和端口),高级模式进入(要确保电脑和摄像机要在一个路由器下面,这样查找器才可以查找到摄像机的IP地址和端口),摄像机出厂的IP地址是192.168.1.126,端口是81,查找器右下角的内部访问地址后面的打开按钮,直接点打开按钮即可,(第一次使用的时候,会提示您安装一个小的视频安装软件,下载完后,刷新浏览器就可以直接观看监控画面)第一:摄像机无线设置:首先进路由器里面,以TP-LINK的路由器为例,(路由器的IP地址,登陆的用户名和密码,一般路由器下面有贴)地址是http://192.168.1.1左侧的无线参数点开,基本设置如下图所示:广州市汉之升电子路由器的无线设置按照这个设置(使用无线时把无线路由器的信道(也叫频段)改为1-11以内(手动设置)不要用12或13信道,无线的SSID 用字母和数字的组合,不要用汉字或特殊符号!此外,无线加密也手动指定成某种加密的方式,不要用自动选择之类的(比如手动指定为WPA2-PSK、AES模式)!这样,通过有线连接摄像机打开网页后,搜索无线信号就能正常搜索到了!搜索到无线路由器后,选中自己的无线路由器并输入相应的无线密码,然后拔掉网线,再用查找器查找一下,如果可以查找到无线设置完成)广州市汉之升电子下面看摄像机无线设置,打开查找器,从高级模式进入,如下图:内部访问地址,后面的打开按钮打开摄像机,进入到摄像机的观看界面如下图所示:广州市汉之升电子广州市汉之升电子点击设置按钮,,选择网络设置---无线局域网设置打开,出现下面的界面广州市汉之升电子使用无线局域网打勾,搜索2-3次,选择列表中自己的路由器线相对应的SSID号,网络类型选择infra,广州市汉之升电子广州市汉之升电子 安全模式和路由器保持一致,加密类型和路由器一致,密码和路由器的无线密码保持一致,例如下图:点击设置,摄像机会重启30秒,重启完拔掉网线,就可以无不用接网线了。

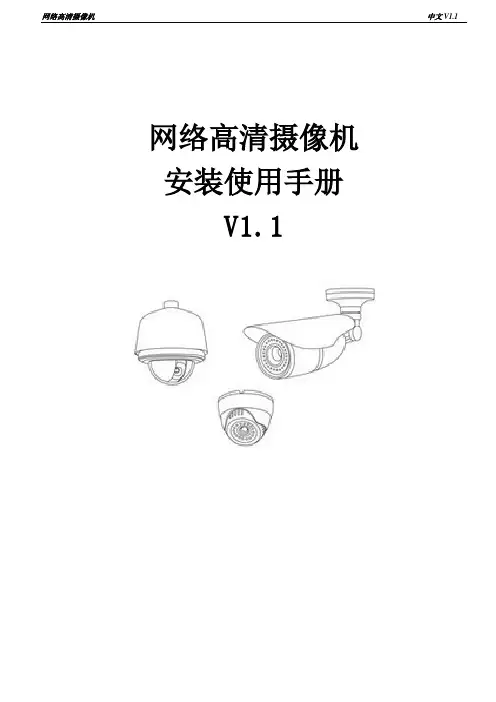
网络高清摄像机中文V1.1网络高清摄像机安装使用手册V1.1非常感谢您购买我公司的产品,如果您有什么疑问或需要请随时联系我们。
本手册为网络高清摄像机通用产品手册,支持功能由于型号不同而有所区别,请以实物为准。
本手册旨在供您作为操作和编程系统时的参考工具。
您可以在本手册中找到有关功能和命令的信息,以及详细的菜单树和快速操作指南。
在安装和使用系统之前,请充分了解本手册中的信息。
本手册可能包含技术上不准确的地方、或与产品功能及操作不相符的地方、或印刷错误。
我公司将根据产品功能的增强而更新本手册的内容,并将定期改进或更新本手册中描述的产品或程序。
更新的内容将会在新版本中加入,恕不另行通知。
在使用视频监控设备时请严格遵守当地的法律法规。
安全使用注意事项此内容的目的是确保用户正确使用本产品,以避免危险或财产损失。
在使用此产品之前,请认真阅读此说明手册并妥善保存以备日后参考。
如下所示,预防措施分为“警告”和“注意”两部分:警告:无视警告事项,可能会导致死亡或严重伤害。
警告在本产品安装使用中,必须严格遵守国家和使用地区的各项电气安全规程。
1.请使用正规厂家提供的电源适配器。
2.请不要将多个网络摄像机连接至同一电源(超过适配器负载量,可能会产生过多热量或导致火灾)。
3.在接线、拆装等操作时请一定要将智能球电源断开,切勿带电操作。
4.在墙壁或天花板上安装本产品时,请牢固地固定住网络摄像机。
5.如摄像机中出现冒烟现象,或产生恶臭,或发出杂音,请立即关掉电源并且将电源线拔掉,并同经销商或服务中心联系。
2 / 706.如果设备工作不正常,请联系购买设备的商店或最近的服务中心,不要以任何方式拆卸或修改设备。
(对未经认可的修改或维修所导致的问题,本公司不承担责任)。
注意1.请不要使物体摔落到设备上或大力震动设备,并使设备远离存在磁场干扰的地点。
避免将设备安装到表面震动或容易受到冲击的地方(忽视此项可能会损坏设备)。
2.请不要将摄像机瞄准强光物体,如太阳、白炽灯等,否则会造成摄像机的损坏。

智能交通高清网络摄像机操作手册智能交通高清网络摄像机•操作手册版权所有© 杭州海康威视数字技术股份有限公司。
非常感谢您购买我司产品,如您有任何疑问或需求请随时联系我们。
本手册适用于以下产品:申明●本手册可能包含技术上不准确的地方、或与产品功能及操作不相符的地方、或印刷错误。
我司将根据产品功能的增强或变化而更新本手册的内容,并将定期改进及更新本手册中描述的软硬件产品。
更新的内容将会在本手册的新版本中加入,恕不另行通知。
●本手册中内容仅为用户提供参考指导作用,不保证与实物完全一致,请以实物为准。
●本手册中提到的部件、组件和附件仅作说明之用,不代表购买机型的配置,详细配置请以装箱清单为准。
前言本节内容的目的是确保用户通过本手册能够正确使用产品,以避免操作中的危险或财产损失。
在使用此产品之前,请认真阅读安装手册并妥善保存以备日后参考。
符号约定对于文档中出现的符号,说明如下所示:符号说明说明类文字,表示对正文的补充及解释。
注意类文字,重要的操作或者防范潜在的伤害和财产损失危险。
警告类文字,严重伤害危险。
安全使用注意事项●产品安装使用过程中,必须严格遵守国家和使用地区的各项电气安全规程。
●请使用正规厂家提供的电源适配器,电源适配器具体要求参见设备参数表。
●为减少火灾或电击危险,请勿让本产品受到雨淋或受潮。
●应该在建筑物安装配线中组入易于使用的断电设备。
●有关在天花板上安装设备的指示:安装后,请确保该连接至少可承受向下50牛顿(N)的拉力。
●如果设备工作不正常,请联系购买设备的商店或最近的服务中心,不要以任何方式拆卸或修改设备。
(对未经认可的修改或维修导致的问题,本公司不承担任何责任)。
●请不要使物体摔落到设备上或大力振动设备,使设备远离存在磁场干扰的地点。
避免将设备安装到表面振动或容易受到冲击的地方(忽视此项可能会损坏设备)。
●请勿直接触碰整机散热部件,以免烫伤。
●激光束可能烧毁图像传感器,在激光装置被使用的情况下,请您一定注意不要让图像传感器的表面暴露于激光束之下。
网络摄像机安装使用说明书网络摄像机安装使用说明书Page 1 of 11目录第1章软件的安装............................................................................................................ (2)第2章网络摄像机使用说明............................................................................................................ ....................... 3 网络摄像机安装使用说明书Page 2 of 11第1章软件的安装运行“MultiViewer.exe”安装程序操作如下第一步选择语言中文、英文可选如图1-1所示图1-1 图1-2 第二步点击“下一步”出现如图1-2所示第三步选择安装目录如图1-3所示第四步继续选择“下一步”出现如图1-4、1-5所示图1-3 图1-4 图1-5 图1-6 第五步点击“安装”安装完成后将会出现如图1-6所示第六步点击“结束”安装完毕。
网络摄像机安装使用说明书Page 3 of 11 第2章Multiviewer流媒体多画面使用说明1 多画面分割是软件是在一台电脑上同时显示不同的多画面用来显示网络摄像机的图像用户根据网络摄像机的IP地址来设置不同和参数从而进行多画面的分割观看。
2 本地、远程分割器的配置第一步安装分割器软件直接将分割器软件放在桌面由用户自己来命名第二步双击分割器软件如图1-1所示图1-1 图1-2 第三步见红线处双击“Multiviewer”多画面分割器出现用户名、密码对话框其用户名是“admin”密码是“123456”点击“确定”如图1-2所示第四步点击“确定”出现如图1-3所示图1-3 图1-4 第五步选择“登陆系统”将会出现“用户名”“密码”用户名是“admin”密码是“123456”如图1-4所示图1-5 图1-6 网络摄像机安装使用说明书Page 4 of 11 第六步选择“用户管理”并双击将出现管理界面有“用户名”“用户组”“用户描述”见红线处admin/ 管理员/管理本地用户允许对系统进行配置在这三处点击“右键”将会出现“密码修改”、“用户名修改”、“更改用户组”可以对这三项来修改具有很高的安全性由用户根据需要来设定同时在空白处单击右键出现一个添加“用户”有“用户名”“密码”“密码确认”“帐号描述”也可由用户自己来根据需要来设定有“管理员”与“一般用户”可供选择用户可添加更多的用户来管理在“管理员和一般用户”中管理员可以控制所要监控的对象一般用户只能观看不能控制如图1-51-6所示第七步选择“视频配置”有“录像保存目录全局”指定一个保存位置它可以将整个图像保存下来“编号”是对所要配置网络摄像机IP地址顺序的排列有148路可填写由于电脑的CPU处理能力有限它只能同时播放16路“视频域名”是网络摄像机或网络球机的IP地址“视频端口”是网络摄像机或网络球机的视频端口“发布点名称”是文本文件填写live.asf“工作模式”有“视频开”“视频关”可供选择“WEB端口”“录像设置”“描述”详见后面详细说明如图1-7所示图1-7 图1-8 在“录像保存时间全局”时有“1天”“7天”“20天”“30天”由用户自己来选取在“循环播放间隔”有“不循环”“1分钟”“2分钟”“4分钟”“8分钟”可选根据用户自己的需要来设定。
1E n g l i s hKeep the Network Camera away from water. If the Network Camera becomes wet, power off immediately.Refer to your user's manual for the operating temperature.Power off the Network Camera as soon as smoke or unusual odors are detected.Do not place the Network Camera around heat sources, such as a television or oven.Keep the Network Camera away from direct sunlight.Do not place the Network Camerain high humidity environments.2Do not place the Network Camera on unsteady surfaces.Do not touch the Network Camera during a lightning storm.Do not disassemble the Network Camera.Do not drop the Network Camera.Do not insert sharp or tiny objectsinto the Network Camera.3E n g l i shCamera Stand CS-mount LensIP7161Warranty CardPower AdapterQuick Installation GuideSoftware CD1Package ContentsL-type Hex Key Wrench4Power Cord SocketRJ45 SocketButtonGeneral I/O Terminal BlockMicrophone In Front PanelBack PanelLens2Physical DescriptionBuilt-in MicrophoneLight SensorStatus LED SD/SDHC Card Slot Lens5E n g l i s h1. Mount the lens by turning it clockwise onto the camera mount until it stops. If necessary, turn the lens counterclockwise slowly until it gets the best attitude.2. Connect the lens cable plug to the camera connector.3Mounting the Lens to the CameraGeneral Connection (without PoE)1. If you have external devices such as sensors and alarms, connect them to the general I/O terminal block.2. Connect the camera to a switch via Ethernet cable.3. Connect the power cable from the Network Camera to a power outlet.1234Network DeploymentEthernet Switch1: Power +12V 2: Digital output 3: Digital input 4: Ground 5: AC 24V 6: AC 24V 7: RS485+8: RS485-6Power over Ethernet (PoE)When using a non-PoE switchUse a PoE power injector (optional) to connect between the Network Camera anda non-PoE switch.When using a PoE-enabled switchThe Network Camera is PoE-compliant, allowing transmission of power and data via a single Ethernet cable. Follow the below illustration to connect the Network Camera to a PoE-enabled switch via Ethernet cable.PoE SwitchNon-PoE SwitchPoE Power Injector(optional)7E n g l i s hMAC:0002D17302025Assigning IP Address1. Install "Installation Wizard 2" from the Software Utility directory on the software CD.2. The program will conduct an analysis of your network environment. After your network is analyzed, please click on the "Next" button to continue the program.3. The program will search for VIVOTEK Video Receivers, Video Servers, and Network Cameras on the same LAN.4. After searching, the main installer window will pop up. Click on the MAC that matches the one labeled on the bottom of your device to connect to the Network Camera via Internet Explorer.8Ready to Use61. Access the Network Camera from the LAN.2. Retrieve live video through a web browser or recording software.3. Unscrew the zoom controller to adjust the zoom factor. Upon completion, tighten the zoom controller.4. Unscrew the focus controller to adjust the focus range. Upon completion, tighten the focus controller.9E n g l i s hFine-tune the Camera Focus7Please follow the steps below to fi ne-tune the camera focus:1. Use the supplied L-type hex key wrench to loosen the ring screw; the adjustment ring will become rotatable.2. Rotate the adjustment ring to fi ne-tune the distance between the sensor and the lens; the IR-cut fi lter and image sensor will move forwards or backwards as the illustration shows below.3. When fi nished, tighten the ring screw to fi x the adjustment ring.c。
中选中设备,点击 ,在弹出的界面中设置235)登录成功后,下载并安装视频插件。
【说明】如果直接通过Web 端首次登录未激活的设备,可在登录界面设置管理员的密码激活设备 ( 如图5 )。
登录前需要先将PC 机设置为与设备在同一网段。
4. 图像调节和镜头调整进入客户端后可以直接浏览图像,界面如图。
【说明】不同型号浏览界面略有差异,请以设备实际界面为主。
更多客户端说明参见客户端帮助文档。
调整设备方向,在Web 客户端上进行参数调整,直到浏览画面达到预定要求。
图 4图53 ) 点击 ,在弹出的界面中配置网络参数 。
静态分配IP 地址时,请选择自定义地址,填写以太网参数。
修改参数配置,需要填写管理员用户用户名(admin )及激活设备时所设置的密码。
完成IP 配置后,设备将自动重启,重启时间约为60秒。
4 ) 在IPCSearch 中双击设备或点击 ,输入用户名和密码 ( 如图4 ),登录Web 客户端。
线缆识别线序1 2 3 4 5 6 7 8 9 10RS485_ARS485_BAUDIO_IN 1AUDIO_IN 2AUDIO_OUTAUDIO_GNDALARM_INALARM_IN_GNDALARM_OUT 1AALARM_OUT 1BRS485串口ARS485串口B音频输入1音频输入2音频输出音频接地告警输入告警输入接地告警输出1,两个端子不分正负黄绿粉红白黑/白浅绿灰红蓝紫标签标示颜色组别 注释一组一组一组附 线缆识别图 61) When use the device for the first time, run the IPCSearch in the attached CD and set camera IP address and gateway. If the network provides DHCP service, DHCP server will assign IP for the camera automatically.2) Select the device and click “Batch processing”. In the popup interface, set admin user’s password and the claim e-mail address to find back the password. Click “Active” and wait for rebooting.Picture 33. L ogin client[Note]:Some models support PoE (Power on Ethernet). Only have to connect RJ45 connector to PoE switch and no other power supply is needed.The tail connector is subject to the actual model. Picture 2 shows the model with most complete connections.Please refer to the appendix for wire connection.System for client installation:Processor: 3.3 GHz CORE®i3 series or other equivalent processorsRAM Memory: 4GB or aboveOperating System: Windows XP or newer versionBrowser: IE7.0 and newer version, Firefox, Google Chrome (41 and lower)DirectX :9.0c[Note]: This Guide will take Windows XP as example to explain client login steps.4. Live view and lens adjustmentAfter login, user can view live video directly, as the picture shows.[Note]: Interface of different models may differ. Please refer to the help file for detailed explanation.Adjust camera direction, configure camera parameters in web client until the live view meets requirement.Picture 4Picture 53) Click “Modify Params” and set the network parameters. When configure a static IP for the camera, please check “Custom device address (Close DHCP)” and fill the Ethernet parameter. During the modification, the user name (admin) and the password set before activation should be entered. After configuration, the camera will reboot automatically and this takes 60s.4) Double click the device in IPCSearch or click “Login”. Enter user name and password (as Picture 4 shows) to login the web client.5) After login, download and install the plug-in.[Note]: If login the nonactivated camera by web client, you can set admin user’s password on the logininterface to activate the device (as in Picture 5). Before setting, set the PC and the device in the same LAN.Picture 6Kedacom Two (2) Year Limited Hardware WarrantyWHAT IS COVERED BY THIS WARRANTY?Kedacom warrants the Kedacom-branded hardware product and accessories contained in the original packaging (hereinafter referred to as "Kedacom Product") against defects in materials and workmanship when used normally in accordance with Kedacom's published guidelines for a period of TWO (2) YEARS from the date of original retail purchase in areas other than mainland China by the end-user purchaser (hereinafter referred to as "Warranty Period"). For the Kedacom Product purchased in mainland China, see the simplified Chinese version of this warranty for details. Kedacom's published guidelines include but are not limited to information contained in technical specifications, user guides, and service communications.The preceding applies unless otherwise agreed in the contract.WHAT IS NOT COVERED BY THIS WARRANTY?This warranty does not apply to any non-Kedacom branded hardware products or any software, even if packaged or sold with Kedacom hardware. Manufacturers, suppliers, or publishers, other than Kedacom, may provide their own warranties to you but Kedacom, in so far as permitted by law, provides their products "AS IS". Software distributed by Kedacom with or without the Kedacom brand (including, but not limited to system software) is not covered by this warranty. Please refer to the licensing agreement accompanying the software for details of your rights with respect to its use. Kedacom does not warrant that the operation of the Kedacom Product will be uninterrupted or error-free. Kedacom is not responsible for damage arising from failures to follow instructions relating to the Kedacom Product's use.This warranty does not apply: (a) to consumable parts, such as batteries, unless failure has occurred due to a defect in materials or workmanship; (b) to cosmetic damage, including but not limited to scratches, dents, and broken plastic on ports; (c) to damage caused by use with another product; (d) to damage caused by acts outside the control of Kedacom, including without limitation acts of God, accidents, abuse, misuse, fire, storms, earthquakes, flood, or other external cause; (e) to damage caused by exposure of the product to heat, bright light, sun, liquids, sand, or other contaminants; (f) to damage caused by operating the Kedacom Product outside Kedacom's published guidelines; (g) to damage caused by service (including upgrades and expansions) performed by anyone other than a representative of Kedacom, Kedacom employee, or authorized Kedacom agent; (h) to an Kedacom Product that has been modified to alter functionality or capability without the written permission of Kedacom; (i) to defects caused by normal wear and tear or otherwise due to the normal aging of the Kedacom Product, or (j) if any serial number has been removed or defaced from the Kedacom Product.YOUR RESPONSIBILITIESIf your Kedacom product is capable of storing data and other information, you should make periodic backup copies of the information contained on the storage media to protect the contents and as a precaution against possible operational failures.Before receiving warranty service, Kedacom or its authorized agents may require that you furnish proof of purchase details, respond to questions designed to assist with diagnosing potential issues, and follow Kedacom's procedures for obtaining warranty service. Before submitting your Kedacom Product for warranty service, you should maintain a separate backup copy of the contents of its storage media, remove all personal information that you want to protect, and disable all security passwords.During warranty service, it is possible that the contents of the Kedacom product's storage media will be lost, replaced or reformatted. In such an event, Kedacom and its authorized agents are not responsible for any loss of data or other information contained on the storage media or any other part of the Kedacom product serviced.Following warranty service, your Kedacom Product or a replacement product will be returned to you as your Kedacom Product was configured when originally purchased, subject to applicable updates. You will be responsible for reinstalling all other data and information. Recovery and reinstallation of other data and information are not covered under this warranty.WHAT WILL KEDACOM DO IF THE WARRANTY IS BREACHED?If during the Warranty Period, you submit a valid claim to Kedacom or an authorized Kedacom agent, Kedacom will, at its option, (i) repair the Kedacom Product using new or previously used parts that are equivalent to new in performance and reliability, or (ii) exchange the Kedacom Product for a refund of your purchase price.A Kedacom replacement part or product, including a user-installable Kedacom part that has been installed in accordance with instructions provided by Kedacom, assumes the remaining warranty of the Kedacom Product or ninety (90) days from the date of replacement or repair, whichever provides longer coverage for you. When a product or part is replaced or a refund provided, any replacement item becomes your property and the replaced or refunded item becomes Kedacom's property.Kedacom reserves the right to refund the purchase price as its exclusive warranty remedy.HOW TO OBTAIN WARRANTY SERVICE?To seek warranty service, please contact a local authorized Kedacom agent. When contacting the agent via telephone, other charges may apply depending on your location.User InformationComplete the form below and keep for ready reference.User Name:Address:Postal Code:Tel:Mobile:Fax:E-Mail:Product Name:Product Model:Date of Purchase:。