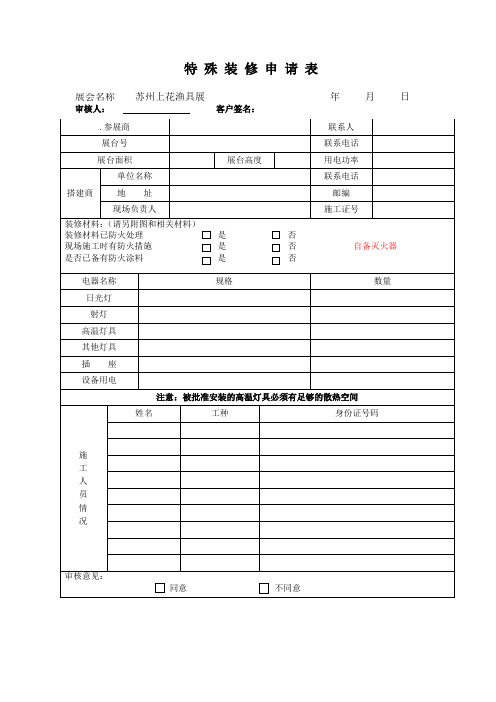
曼西顿全铝橱柜文件特殊分发申请表
- 格式:docx
- 大小:14.33 KB
- 文档页数:1


OWNER'S MANUAL36" X 24" TOOL CHEST AND CABINETM362404CH/M362406TCLIFE ORGANIZEDMontezuma is committed to helping you succeed in both your workand personal life by being organized, prepared and equipped withthe right tools, gear and home supplies at your finger tips.We are here to ensure that your life is organized.Thank you for your purchase of this Montezuma Tool Chest and Cabinet.ATTENTIONTO REDUCE THE RISK OF INJURY, THE USER MUST READ ANDUNDERSTAND THIS INSTRUCTION MANUAL BEFORE USING THIS PRODUCT FOR THE FIRST TIME. SAVE THESE INSTRUCTIONS FOR FUTURE REFERENCE.Fill in the following information and retainthis owner's manual for future reference:MODEL(S):DATE OF PURCHASE:PLACE OF PURCHASE:RECEIPT NO:2SPECIFICATIONSMAXIMUM PRODUCT WEIGHT (INCLUDING CONTENTS): 1,800 lb (816 kg) MAXIMUM DRAWER WEIGHT: 150 lb (68 kg)POWER STRIPMODEL: LTS-04C/CH-04FSURGE PROTECTIVE DEVICESRATING: 120 V AC 15 A 60 Hz 1875 WUSB: TOTAL 2.1 A – Check your device for compatibilityUSB O/P: IT EQUIPMENT ONLYVPR: 500-1000 V (L-N) TYPE 3 SPDCONFORMS TO UL STD. NO 1363 AND ANSI/UL STD. NO. 1449CERTIFIED TO CSA STD. C22.2 NO. 308&8336" x 24" 4-DRAWER TOOL CHESTM362404CHOVERALL DIMENSIONS:36-5/8" W x 24-5/8" D x 25" H(93 cm W x 62.5 cm D x 63.5 cm H)NET WEIGHT: 143.3 lb (65 kg)INSIDE TILL/DRAWER DIMENSIONS:REF DIMENSIONS QTYA 33-5/8" W x 23-3/8" D x 8-1/2" H (85.3 cm W x 59.4 cm D x 21.7 cm H)1B 32-1/2" W x 21-1/8" D x 2-3/8" H(82.5 cm W x 53.8 cm D x 5.9 cm H)436" x 24" 6-DRAWER TOOL CABINET M362406TCOVERALL DIMENSIONS:36-5/8" W x 24-5/8" D x 41-1/8" H(93 cm W x 62.5 cm D x 104.5 cm H)NET WEIGHT: 249.12 lb (113 kg)INSIDE DRAWER DIMENSIONS:REF DIMENSIONS QTYA 32-1/2" W x 21-1/8" D x 2-3/8" H(82.5 cm W x 53.8 cm D x 5.9 cm H)3B 32-1/2" W x 21-1/8" D x 5-1/4" H(82.5 cm W x 53.8 cm D x 13.4 cm H)2C 32-1/2" W x 21-1/8"D x 8-1/4" H(82.5 cm W x 53.8 cm D x 20.9 cm H)1* Dimensions do not include side handles.45CHEST PARTS LISTToorderreplacementparts,*****************************************************(Monday–Friday, 8:00 am–4:30 pm, CST). Have the part number and quantity ready. Replacement keys may be ordered using the code that appears on the face of the lock. Not all parts are covered under warranty. Those parts not covered can be purchased.REF DESCRIPTION PART NUMBERQTY 1Chest Handle30188312M4 x 12 mm Phillips Head Bolt 32008423Gas Strut 30320224Grommet 31402725Power Strip 33305916Till Liner55209317Lock and Key (1201–1204)30416628Drawer Liner 55188449Slide Set 300380–300381410Connector240091211M6 x 12 mm Hex Bolt3210514The keys are taped to the top storage area of the chest.6Toorderreplacementparts,*****************************************************(Monday–Friday, 8:00 am–4:30 pm, CST). Have the part number and quantity ready. Replacement keys may be ordered using the code that appears on the face of the lock. Not all parts are covered under warranty. Those parts not covered can be purchased.REF DESCRIPTION PART NUMBERQTY 1Work Top 57201412Power Strip 33305913Grommet 31402714Cabinet Handle30614225M6 x 12 mm Phillips Head Bolt 320323106Cord Wrap 23687017Slide Set 300380–30038188Swivel Caster 30223129Washer3240021610M8 x 25 mm Hex Bolt 3210471611Drawer Liner 551884612Rigid Caster302232213Lock and Key (1201–1204)3041661They keys are taped to the top of the caster carton, which isplaced in the bottom drawer of the cabinet.HANDLE INSTALLATION NOTE: Assemble the handles first to make iteasier to move the cabinet.Position the handles over the holes in thecabinet and attach with the M6 x 12 mmPhillips head bolts provided. Tightensecurely using a 10 mm socket.CASTER INSTALLATION CAUTION: Two or more people are requiredto lay down or stand up the cabinet. Use theside handles for assistance. DO NOT standin front of or behind the product during thisprocess. Lock drawers before proceeding.Carefully lay the cabinet on its back, with asoft mat underneath for protection.Position the two swivel casters on thecabinet bottom, on either the left or rightside. Insert four M8 x 25 mm hex boltsthrough washers, then through each casterPOWER STRIP INSTALLATION Cut the black strip holding the cord, thencabinet and through the grommet. Tightenthe grommet.CHEST AND CABINET CONNECTIONCAUTION: Two or more people may be Array required to complete this step.NOTE: It is not required to remove theworktop attached to the cabinet. If you dowant remove the worktop, first remove thedrawers, then unbolt the worktop.Place the chest on the cabinet. Attach theconnectors to the chest, making sure thehook head snaps in the square hole on theback of the chest. Fasten the M6 x 12 mmhex bolts to the cabinet.8RAISE AND RELEASE DRAWER FRONTSThese units are equipped with raise andrelease drawer fronts. To open, lift up on thedrawer front while pulling towards you. Toclose, shut the drawer firmly until the latchengages.LiftIf the drawer does not stay closed, the hookmay be bent, or it may be rubbing againstthe drawer slides. To fix this problem, lightlybend the hook until the drawer will engagein the slide.DRAWER REMOVALPull the drawer out so that it’s almost fully extended. Push up on the black release leveron one side, while pushing down on the black release lever on the other side. While holding the levers in these positions, pull the drawer outward until it is released from the drawer slide.ONE SIDE – PUSH UPOTHER SIDE – PUSH DOWNDRAWER REPLACEMENTExtend the drawer slides from the unit. Insert the brackets on each side of the drawerinto the slots in the slides, being careful that they are properly positioned. Once properly inserted, completely close the drawer to set the slides in position.9MAINTENANCEPeriodically clean the drawer fronts, trim, and other surfaces with mild detergent and water.Lubricate the casters with high quality bearing grease (annually/yearly).Lubricate the slides (twice a year) with a product like WD40 or other quality lubricant. This is especially important in low temperatures, which can cause the bearing to become stiff.Grease and oil can be removed with most standard cleaning fluids. For safety, use anonflammable cleaning fluid.SAFETYRISK OF ELECTRIC SHOCK. To reduce the risk of electric shock, use indoors in adry location only. Do not plug the power strip into another power strip. Not for use for a permanent installation.Changes or modifications to this unit not expressly approved by the party responsible for compliance could void the user's authority to operate the equipment.Close the cover and lock the drawers before moving this product. The drawers could come open and make the product unstable and tip, which may cause personal injury or product damage.Do not attempt to lift the unit by its side handles using chains, ropes or other liftingdevices. The side handle could fail, which may cause personal injury or damage to the product.DO NOT stand on this product or lean on the drawers or work surface.WEAR SAFETY GLASSES when removing or repositioning the slides. The tool could slip, which may cause personal injury.When moving this product, do not pull it. Push the product to prevent personal injury.USE THE BRAKES when not moving this product. This will prevent the product from rolling, which may cause personal injury or product damage.BE CAREFUL when opening more than one drawer. The product could become unstable and tip, which may cause personal injury or product damage.DO NOT mount this product on a truck bed or any other moving object. This may cause personal injury or product damage, and will void the warranty.Secure this product properly before moving it with a forklift.DO NOT tow with power equipment. The product could tip, which may cause personal injury or product damage.Keep the product on level surfaces. The product could become unstable and tip if stored or moved on an uneven surface, which may cause personal injury or product damage. 10This product is warranted to be free from defects in materialsand workmanship for a period of five (5) years from the dateof original purchase.Ifthisproductisdefective,*********************************or call 1-800-459-4409 (Monday–Friday, 8:00 am–4:30 pm, CST). If the product is defective, we will replace the defective part at no cost to you.Please do not ship your product back to the store or to usunless we send you written instructions for return.In the event it becomes necessary for your productto be returned, we will notify you how to proceed.A copy of your original purchase receipt must accompanythe returned product.WARNINGCancer and Reproductive Harm – 11Manufactured by:QUALITY CRAFTRomeoville, IL, USA 60446****************************1-800-459-4409(Monday to Friday, 8:00 am–4:30 pm, CST)Made in ChinaM362404CH/M362406TC_05/20。

尊敬的采购部领导:
您好!
我谨代表厨房管理部门,就近期厨房柜门更换事宜,向贵部门提交以下购买申请书。
现将具体原因、所需物品及预算情况说明如下:
一、申请原因
1. 现有厨房柜门使用年限已久,部分柜门已出现破损、褪色等问题,影响厨房整
体美观及使用效果。
2. 部分柜门因长时间使用,密封性不佳,导致厨房内部环境潮湿,影响食材储存
及厨房卫生。
3. 随着厨房设施的更新换代,原有柜门与整体厨房风格不协调,影响厨房整体形象。
二、所需物品及数量
1. 橱柜柜门:50扇,尺寸为900mm600mm,颜色要求为白色烤漆。
2. 柜门配件:50套,包括合页、铰链、密封条等。
三、预算情况
根据市场调研,本次厨房柜门更换预计总预算为人民币XX万元。
具体预算如下:
1. 橱柜柜门:人民币XX万元,单价为每扇XX元。
2. 柜门配件:人民币XX万元,单价为每套XX元。
四、采购要求
1. 供应商需具备良好的信誉和售后服务,保证产品质量及安装质量。
2. 供应商需提供符合国家环保标准的产品,确保厨房环境安全。
3. 供应商需在合同约定的时间内完成供货及安装工作。
五、申请部门意见
厨房管理部门认为,更换厨房柜门对于提升厨房整体形象、改善厨房环境具有重要意义。
因此,特向贵部门申请采购厨房柜门及配件,望予以批准。
敬请领导审批,期待贵部门的支持与协助。
如有任何疑问,请随时与我们联系。
特此申请!
厨房管理部门
申请日期:____年__月__日。

尊敬的单位领导:您好!我谨以此书面向贵单位申请对单位房衣柜进行改造。
近年来,随着单位规模的不断扩大,员工人数的增加,单位房衣柜的使用需求也日益增长。
为了提高员工的生活品质,满足大家的储物需求,我们特提出以下改造申请。
一、改造原因1. 现有衣柜数量有限,无法满足全体员工的储物需求。
部分员工需要共享衣柜,严重影响了员工的生活品质和工作心情。
2. 现有衣柜的设计和布局不合理,使用空间利用率较低。
部分衣柜内部空间浪费,导致储物空间紧张。
3. 现有衣柜的材质和做工较为简单,耐用性较差。
经常出现损坏、脱落等情况,不仅影响了美观,还存在安全隐患。
4. 随着时代的发展,员工对生活品质的要求不断提高。
改造衣柜不仅能够提高员工的满意度,也有利于提高单位形象,吸引和留住人才。
二、改造方案1. 增加衣柜数量:根据单位实际情况,合理规划衣柜布局,适当增加衣柜数量,以满足全体员工的储物需求。
2. 优化衣柜设计:重新设计衣柜内部结构,提高空间利用率,增加储物空间。
同时,考虑员工的身高和储物习惯,优化衣柜门板高度和抽屉布局。
3. 提升衣柜品质:选用优质材料,注重做工细节,提高衣柜的耐用性和安全性。
同时,注重衣柜的环保性能,选用符合国家标准的材料。
4. 注重美观与实用相结合:在保证储物功能的前提下,注重衣柜的外观设计,使其既美观又实用。
可以考虑增加一些人性化的设计,如镜子、挂钩等。
5. 改造预算:根据改造方案,初步估算整体改造预算为XXX元。
我们将积极争取外部资金支持,尽量降低单位负担。
三、改造意义1. 提高员工生活品质:改造后的衣柜将更好地满足员工的储物需求,提高员工的生活品质,使员工能够更好地专注于工作。
2. 提升单位形象:优化后的衣柜设计将提升单位整体形象,有利于树立良好的单位品牌,吸引更多优秀人才加入。
3. 促进内部和谐:改善员工生活环境,提高员工满意度,有利于增进员工之间的沟通与交流,促进内部和谐。
4. 节约资源:通过优化衣柜设计,提高空间利用率,减少资源浪费,符合国家节能减排的要求。
特殊交易系统申请单本申请单必须是客户本人/本单位或是具有指令下达权限的客户委托人填写方可有效。
带*项为申请人必填项,否则视为申请无效。
提示:1、客户应知晓:各交易系统中已附带系统的使用说明,客户也可在本公司网站(或各系统提供商网站)进行相关查询,各系统若有更新本公司不负责另外单独通知客户,客户在使用各系统前应详细阅读使用说明。
若因系统使用导致的任何风险及其造成的损失,本公司不承担任何责任。
2、客户应知晓:a)综合交易平台主席系统为默认开通的交易系统;b)交易时客户只能选择一套交易系统,若客户需要切换目前正在使用的交易系统,须按期货公司规定的方式(电话或书面申请)通知公司进行切换操作,切换系统只能在交易日当日结算后进行。
c)特殊交易系统不能使用银期转账进行出入金,若需使用银期转账,须电话通知本公司,将系统切换至综合交易平台主席系统后进行出入金操作。
出入金切换操作只能在交易日休盘时进行。
d)客户销户时,客户所选特殊交易系统交易权限将同时关闭。
e)传真:******** 客服中心电话:******** 结算部电话:********特殊交易系统风险揭示书尊敬的客户:根据中国证监会的有关规定,针对本公司提供的特殊网上交易系统,现向您提供风险说明书,并揭示有关风险。
我公司默认的交易系统(以下简称“主席交易系统”)是综合交易平台(CTP),由上海期货信息技术有限公司开发运营,提供主要的交易、结算、风控、银期转账等功能。
特殊交易系统是指其他所有非我公司默认提供的交易系统。
目前我公司特殊交易系统包括易盛、飞鼠、飞马、胜期等几种(以上系统名称均为简称)。
我公司保留新增特殊交易系统的权利,已经签署过特殊交易系统风险揭示书,后又申请开通新增特殊交易系统的客户,不再另行签署风险揭示书。
我公司已经尽可能采取有效措施保护特殊交易活动的安全,尽管如此,本着对您负责的态度,在您使用特殊交易系统前,应知晓:(一)您已确认并了解特殊交易系统软件的使用方法。
尊敬的物业管理部门:
您好!我是xx小区xx栋xx单元的业主,户号xx。
在此,我向您提交一份关于在
我家阳台上安装衣柜的申请,请您予以审批。
首先,我想简要说明一下申请安装衣柜的原因。
随着生活水平的不断提高,我家的衣物、杂物等物品逐渐增多,原有的衣柜已无法满足我们的存储需求。
为了更好地整理家居环境,提高生活质量,我希望在阳台上增设一个衣柜,以解决衣物存放空间不足的问题。
关于衣柜的尺寸和设计,我已经进行了充分的考虑。
根据我家阳台的实际空间情况,我计划安装一个长2米、宽1.5米、高1.8米的衣柜。
在设计上,我将选择简洁大方的款式,以与我家整体家居风格相协调。
同时,为了确保衣柜的稳定性和安全性,我将聘请专业的安装工人进行施工,并按照相关规范进行固定和加固。
在此,我想向您保证,衣柜的安装将严格按照我国相关法律法规和物业管理规定进行,不占用公共空间,不影响其他业主的合法权益。
同时,在安装过程中,我将积极配合物业管理部门的工作,确保施工顺利进行。
安装衣柜的费用预计为xx元,我将自行承担这笔费用,不会向物业管理部门提出
任何费用要求。
在衣柜安装完成后,我也会认真维护和保养,确保衣柜的使用寿命。
最后,请您审慎考虑我的申请,给予批准。
在得到您的同意后,我将尽快安排施工,以免影响其他业主的生活。
在此,我向您表示衷心的感谢!
此致
敬礼!
申请人:xx
联系方式:xx
申请日期:xx年xx月xx日
附件:衣柜设计效果图及相关施工方案。