PHP框架之YII开发模型,计划及规范
- 格式:doc
- 大小:52.50 KB
- 文档页数:1
高性能的PHP框架:Yii PHP FrameworkYii是什么Yii是一个基于组件、用于开发大型Web应用的高性能PHP框架。
它将Web编程中的可重用性发挥到极致,能够显著加速开发进程。
Yii(读作“易”)代表简单(easy)、高效(efficient)、可扩展(extensible)。
需求要运行一个基于Yii开发的Web应用,你需要一个支持PHP5.1.0(或更高版本)的Web服务器。
对于想使用Yii的开发者而言,熟悉面向对象编程(OOP)会使开发更加轻松,因为Yii 就是一个纯OOP框架。
信用Yii的很多想法来自其他著名Web编程框架和应用程序。
下面是一个简短的清单。
Prado:这是Yii的主要思想来源。
Yii采用了基于组件和事件驱动编程模式,数据库抽象层,模块化的应用架构,国际化和本地化,和许多它的其他特点和功能。
Ruby on Rails:Yii继承它的配置的思想。
还引用它的Active Record的ORM设计模式。
jQuery:这是集成在Yii为基础的JavaScript框架。
Symfony:Yii引用它的过滤设计和插件架构。
Joomla:Yii引用其模块化设计和信息翻译方案。
许可Yii的发布是遵循BSD License的。
这意味着您能免费使用它开发开源或私有的Web 应用程序。
Yii适合做什么?Yii是一个通用Web编程框架,能够开发任何类型的Web应用。
它是轻量级的,又装配了很好很强大的缓存组件,因此尤其适合开发大流量的应用,比如门户、论坛、内容管理系统(CMS)、电子商务系统,等等。
Yii和其它框架比起来怎样?和大多数PHP框架一样,Yii是一个MVC框架。
Yii以性能优异、功能丰富、文档清晰而胜出其它框架。
它从一开始就为严谨的Web应用开发而精心设计,不是某个项目的副产品或第三方代码的组合,而是融合了作者丰富的Web应用开发经验和其它热门Web编程框架(或应用)优秀思想的结晶。
Yii开发框架详解Yii是一款高效、简单、灵活、可扩展的PHP开发框架。
自诞生以来,Yii 就备受开发者们的喜爱。
下面,我们来详细探讨一下Yii框架的优点、使用方法以及开发流程。
一、Yii框架的优点1. 高效Yii的核心追求一直是高效。
Yii具有轻量级的特性,可以快速的启动,从而提高了开发效率。
Yii框架还提供了许多优化和缓存机制,以实现高性能的Web应用程序。
2. 简单Yii框架具有丰富的文档和示例,读者仅需要几个小时即可轻松上手。
Yii 支持ORM(对象关系映射),它允许开发者使用PHP代码来查询和操作数据库,而不是使用直接的SQL语句。
3. 灵活Yii框架遵循“松散耦合”的原则,允许系统组件之间的独立。
Yii提供了用于处理不同需求的Web应用程序开发的工具和接口,如处理RESTful架构、WebSocket、国际化和本地化、验证和授权等。
4. 可扩展Yii允许开发者通过扩展自定义应用程序和框架的功能。
Yii的扩展机制可以让开发者方便地安装和使用不同的模块,这些模块也可以独立地工作。
二、Yii框架的使用方法1. 安装和配置Yii的安装十分简单。
可以通过Composer安装Yii2,也可以手动下载Yii2的压缩包并解压缩。
安装完成后,在框架根目录的configs\/文件夹中找到db.php文件,设置数据库连接参数。
默认情况下,Yii会自动通过db.php文件找到数据表,如果没有,则需要手动创建。
2. 创建应用程序使用Yii创建应用程序的方法简单。
需要在命令行中输入以下命令:php .\/yii2-app-basic\/web\/index.php gii这会将您带到Gii Code Generator,它是Yii中内置的代码生成器。
它可以帮助您生成控制器和视图,以便您能够更快地创建应用程序。
在Gii Code Generator中,用户需要输入名称和描述来生成相应的控制器和视图。
3. 配置路由路由是Yii框架中的一个重要概念。

PHP框架Yii编码规范文件方法命名文件名即类名类名称:驼峰式首字母大字class PointControllerclass PointRatioController公共成员方法:驼峰式首字母小写public function getPointById()私有成员方法:驼峰式首字母小写private function _getPointById()公共成员变量:public $userspublic $userName私有成员变量:private $_userprivate $_userName常量:所有字母大写,单词间用下划线分隔const POS_HEAD = 0;代码编写规范1.多使用配置文件,避免硬编码2.多采用设计模式(工厂模式,单例模式等)3.使用注释a)对类名进行注释b)方法名进行注释(包括每个方法的参数与返回值)c)对常量进行注释d)对成员属性进行注释(public $userName; // 用户名)e)配置文件进行注释Yii框架MVC模式:model:与数据持久层的交互必要方法:model(); // 静态方法返回模型的实例tableName(); // 返回数据库表名rules(); // 表单的各种验证规则(用户名,email) relations(); // 表关系配置(n:1 or 1:1 or n:n) attributeLabels(); // 表字段国际化处理search(); // 默认搜索方法…其他增删改查验证方法controller:主要处理用户的请求与响应必要方法:filters(); // 方法过滤accessRules(); // 动作访问控制actions(); // 动作action配置…其他处理请求与响应的方法view:采用Yii自带的组件模块service:对于业务逻辑比较复杂的系统,在增加业务逻辑层(service);程序员自由发挥的地方;主要处理比较复杂的业务逻辑命名规范:UsersService执行流程:[注:service层用于逻辑比较复杂的时候]views->controller->service->model →用户请求model->service->controller->views →系统响应数据库访问1. 数据访问对象(DAO)复杂sql语句查询时使用$user = Yii::app()->db->createCommand()->select('id, username, profile')->from('tbl_user u')->join('tbl_profile p', 'u.id=er_id')->where('id=:id', array(':id'=>$id))->queryRow();2. ActiveRecord简单sql语句查询及添加修改删除时使用Admin::model()->find(‘id=:id’, array(‘:id’=>id));注:查询条件使用占位符的方式需求整理???Yii常用方法CHtmlStatic MethodsFor CActiveRecords:activeCheckbox($m, $a);activeCheckboxList($m, $a, $data);activeDropDownList($m, $a, $data);activeFileField($m, $a);activeHiddenField($m, $a);activeId($m, $a);activeLabel($m, $a);activeLabelEx($m, $a);activeListBox($m, $a, $data);activePasswordField($m, $a);activeRadioButton($m, $a);activeRadioButtonList($m, $a, $data);activeTextArea($m, $a);activeTextField($m, $a);CFormModelPropertiesattributes, errors, safeAttributeNames, scenario, validatorsPublic Methods EventsaddError($a, $error);afterValidate($scenario);attributeLabels();beforeValidate($scenario);hasErrors($a);rules();validate($s='', $a=NULL);onAfterValidate($e);onBeforeValidate($e);CDbConnectionPropertiesactive, autoCommit, autoConnect, charset, commandBuilder, connectionStatus, connectionString, currentTransaction, lastInsertId, password, schema, schemaCachingDuration, timeout, username For CFormcheckbox($n, $v);checkboxList($n, $v, $data);dropDownList($n, $c, $data);fileField($n, $v);hiddenField($n, $v);label($n, $v);listBox($n, $v, $data);passwordField($n, $v);radioButton($n, $c);radioButtonList($n, $m, $data);textArea($n, $v);textField($n, $v);Yii (extends YiiBase)Static Methodsapp() /*gets the application instance */t($category, $message, $params=array ( ),$source=NULL, $language=NULL); import(string $alias, boolean $forceInclude=false);log($msg, $level='info', $category='application');CController (extends CBaseController)Propertiesaction, defaultAction, id, layout, module, pageTitleMethodsactions(); /*list of external actions*/beginClip($id, $properties=array ( ));endClip($idclip=’’);beginWidget($className, $properties=array ( ));endWidget(string $id='');missingAction(string $actionID);redirect($url, $terminate=true, $statusCode=302);refresh($terminate=true,$anchor='');render($view, $data=NULL, $return=false);renderPartial($v, $d=NULL,$r=false, $processOutput=false);widget( $className, $properties=array ( ));CWebApplication (extends CApplication)Core application componentserrorHandler, securityManager, statePersister,cache, messages, coreMessagesPropertiescache, charset, components, db, language, locale,name, modules, securityManager, sourceLanguageMethodsgetNumberFormatter(); getDateFormatter();CWidget (extends CBaseController)Propertiescontroller, id, owner, viewPathMethodsinit(); run(); render($view, $data=NULL, $return=false); Public MethodsbeginTransaction();createCommand($sql);open();close();init();quoteColumnName($name);quoteTableName($name);quoteValue($name);CHttpRequestPropertiesbaseUrl, browser, cookies, hostInfo, isAjaxRequest, isPostRequest, isSecureConnection, pathInfo, preferredLanguage, queryString, requestUri, serverName, serverPort, url, urlReferrer, userAgent, userHost, userHostAddressMethodssendFile($fn, $c, $mime=NULL, $t=true);CActiveRecordPropertiesattributes, errors, isNewRecord, primaryKey, scenario Static Methodsmodel($className='CActiveRecord');Public Methods Eventscount($c=’’, $p=arr ay ( ));delete();deleteAll($c='', $p=array ( ));find($c='', $p=array ( ));findAll($c='', $p=array ( ));findBySql($sql, $p=array ( ));hasErrors($a);update($a=NULL);updateAll($a, $c='', $p=array ( ));updateByPk($pk, $a, $c='', $p=array ( ));validate();onAfterDelete($e);onAfterInsert($e);onAfterSave($e);onAfterValidate($e);onBeforeDelete($e);onBeforeSave($e);onBeforeValidate($e);CDbCommandPropertiesconnection, textPublic MethodsbindParam($n, $v, $dt=NULL, $length=NULL); bindValue($n, $v, $dataType=NULL); execute();query();queryAll($fetchAssociative=true); queryColumn();queryRow($fetchAssociative=true); queryScalar();。

yii教程Yii是一款高性能的开源PHP框架,它提供了丰富而强大的功能,能够帮助开发者快速构建稳定、安全、高效的WEB应用程序。
本教程将介绍Yii框架的基本概念、安装步骤以及常用功能的使用。
一、基本概念及安装1.1 Yii框架的概述Yii是“Yes It Is”的简称,它是一个基于组件开发的框架,采用了MVC(Model-View-Controller)的设计模式,使得开发过程更加模块化和灵活化。
1.2 Yii框架的优势Yii框架具有以下几个优势:- 高性能:Yii框架采用了一系列的性能优化措施,如缓存、延迟加载等,能够处理大量的并发请求。
- 安全性:Yii框架提供了丰富的安全功能,包括输入验证、数据过滤、跨站脚本攻击(XSS)防护等。
- 可扩展性:Yii框架支持插件机制,开发者可以根据需求自由扩展框架功能。
- 易用性:Yii框架提供了简洁而强大的API,能够快速开发高质量的WEB应用。
1.3 安装Yii框架安装Yii框架非常简单,只需按照以下步骤进行操作:- 下载Yii框架的最新版本,并解压到指定目录。
- 配置Web服务器(如Apache)的虚拟主机,设置网站根目录指向Yii框架的入口文件。
- 访问Yii框架的入口文件,进行配置和安装。
二、常用功能的使用2.1 创建Controller和Action在Yii框架中,Controller负责处理用户请求,并调用相应的Action进行处理。
我们可以通过以下步骤来创建Controller和Action:- 在controllers目录下创建一个新的类文件,继承自\yii\base\Controller类。
- 在该类文件中,定义一个或多个公共函数作为Action,函数的名称即为Action的名称。
- 在Action中编写具体的业务逻辑。
2.2 创建Model和数据操作在Yii框架中,Model负责与数据库进行交互,进行数据的增删改查等操作。
我们可以通过以下步骤来创建Model和进行数据操作:- 在models目录下创建一个新的类文件,继承自\yii\db\ActiveRecord类。
php配置yii框架yii具有很多当今web2.0开发所需要的特性。
下边是一个简短列表。
MVC设计模式:yii在WEB设计中采用经过验证的技术,可以较好的把显示与逻辑分离。
DAO,活动记录:yii充许在对象方面建立数据库模型,保存长而重复语句。
整合jquery:最流行的javascript框架之一,苦于jquery可以定屈非常高效并且多功能的javascript接口表单输入验证:yii可以很简单啊安全的采集表单输入。
具有一整套验证方法确保输入数据的正确,还有辅助的方法与组件,在验证失败时,提示错误信息。
WEB2.0组件:jquery提供的一套web2.0组件,可以自动完成输入域,树形视图等等。
验证与授权:yii内置验证。
通过分级的基本角色访问控制提供授权。
主题:可以立即更改yii应用的主题。
WEB服务:yii支持自动复杂的WSDL服务说明的产生和服务请求处理的管理.国际化和本地化:yii支持信息翻译,日期时间格式化,数字格式化和界面本地化。
分层缓存计划:yii支持数据缓存,页面缓存,片断缓存和动态内容。
且缓存的存储介质可以在不改变应用代码下被更改。
错误处理和日志:错误被处理并且很人性化的显示,日志信息可以实现分类,过滤,并可以路由到不同的目的地。
安全:yii提供许多安全措施保证WEB应用阻止网络攻击。
包括:防止跨站脚本,防止伪跨站点请求,防止窜改cookie等等。
遵守xhtml:由yiit组件和命令行工具生成的代码遵守xhtml标准。
自动代码生成:yii提供自动生成所需代码的工具,比如:应用框架,CRUD应用等。
完全的面向对象:yii框架遵守严格的面向对象的程序设计模式。
不定义任何全局函数或变量。
所定义的类层次结构给予最在程度的可用性和可定制性。
支持第三方代码:yii可以很好的支持第三方代码。
例如,可以在YII应用中使用PERA或者zend framework。
详细的文档:每一个方法或者属性都有明确的说明。
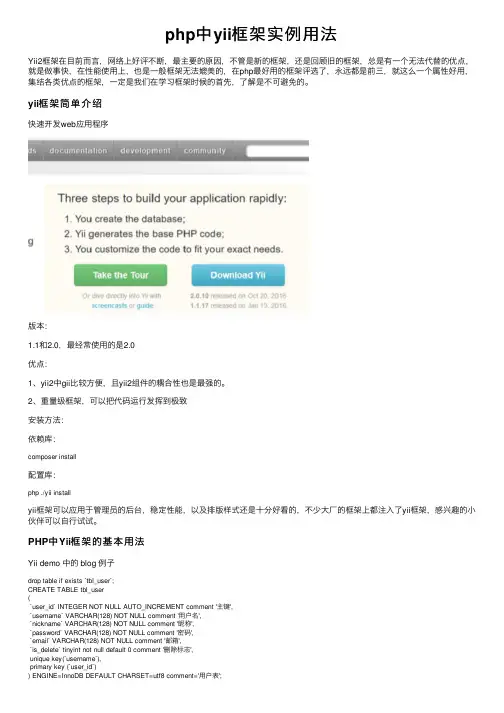
php中yii框架实例⽤法Yii2框架在⽬前⽽⾔,⽹络上好评不断,最主要的原因,不管是新的框架,还是回顾旧的框架,总是有⼀个⽆法代替的优点,就是做事快,在性能使⽤上,也是⼀般框架⽆法媲美的,在php最好⽤的框架评选了,永远都是前三,就这么⼀个属性好⽤,集结各类优点的框架,⼀定是我们在学习框架时候的⾸先,了解是不可避免的。
yii框架简单介绍快速开发web应⽤程序版本:1.1和2.0,最经常使⽤的是2.0优点:1、yii2中gii⽐较⽅便,且yii2组件的耦合性也是最强的。
2、重量级框架,可以把代码运⾏发挥到极致安装⽅法:依赖库:composer install配置库:php ./yii installyii框架可以应⽤于管理员的后台,稳定性能,以及排版样式还是⼗分好看的,不少⼤⼚的框架上都注⼊了yii框架,感兴趣的⼩伙伴可以⾃⾏试试。
PHP中Yii框架的基本⽤法Yii demo 中的 blog 例⼦drop table if exists `tbl_user`;CREATE TABLE tbl_user(`user_id` INTEGER NOT NULL AUTO_INCREMENT comment '主键',`username` VARCHAR(128) NOT NULL comment '⽤户名',`nickname` VARCHAR(128) NOT NULL comment '昵称',`password` VARCHAR(128) NOT NULL comment '密码',`email` VARCHAR(128) NOT NULL comment '邮箱',`is_delete` tinyint not null default 0 comment '删除标志',unique key(`username`),primary key (`user_id`)) ENGINE=InnoDB DEFAULT CHARSET=utf8 comment='⽤户表';drop table if exists `tbl_post`;CREATE TABLE tbl_post(`post_id` INTEGER NOT NULL AUTO_INCREMENT comment '主键',`title` VARCHAR(128) NOT NULL comment '标题',`content` TEXT NOT NULL comment '⽂章内容',`tags` TEXT comment '标签',`status` INTEGER NOT NULL comment '状态,0 = 草稿,1 = 审核通过,-1 = 审核不通过,2 = 发布',`create_time` INTEGER comment '创建时间',`update_time` INTEGER comment '更新时间',`author_id` INTEGER NOT NULL comment '作者',`is_delete` tinyint not null default 0 comment '删除标志',CONSTRAINT `post_ibfk_1` FOREIGN KEY (author_id)REFERENCES tbl_user (`user_id`) ON DELETE CASCADE ON UPDATE RESTRICT,primary key (`post_id`)) ENGINE=InnoDB DEFAULT CHARSET=utf8 comment='⽇志表';到此这篇关于php中yii框架实例⽤法的⽂章就介绍到这了,更多相关php中yii框架怎么⽤内容请搜索以前的⽂章或继续浏览下⾯的相关⽂章希望⼤家以后多多⽀持!。
开源PHP开发框架Yii全方位教程开源PHP开发框架Yii全方位教程(1)应用(Yii::app) (2)开源PHP开发框架Yii全方位教程(2)控制器CController (5)开源PHP开发框架Yii全方位教程(3)模型CModel (9)开源PHP开发框架Yii全方位教程(4)视图View (10)开源PHP开发框架Yii全方位教程(5)组件CComponent (13)开源PHP开发框架Yii全方位教程(6)模块 (16)开源PHP开发框架Yii全方位教程(7)路径别名和命名空间 (19)开源PHP开发框架Yii全方位教程(8)惯例 (21)开源PHP开发框架Yii全方位教程(9)开发流程 (23)开源PHP开发框架Yii全方位教程(11)Active Record(AR) (29)开源PHP开发框架Yii全方位教程(12)片段缓存 (41)开源PHP开发框架Yii全方位教程(13)页面缓存 (44)开源PHP开发框架Yii全方位教程(14)动态内容 (45)开源PHP开发框架Yii全方位教程(15)使用扩展 (46)开源PHP开发框架Yii全方位教程(16)创建扩展 (52)开源PHP开发框架Yii全方位教程(17)使用第三方库 (57)开源PHP开发框架Yii全方位教程(18)定义fixture (58)开源PHP开发框架Yii全方位教程(19)单元测试 (60)开源PHP开发框架Yii全方位教程(20)功能测试 (62)开源PHP开发框架Yii全方位教程(21)自动生成代码 (64)开源PHP开发框架Yii全方位教程(22)URL管理 (71)开源PHP开发框架Yii全方位教程(1)应用(Yii::app)应用代表了整个请求的运行过程。
其主要任务是解析用户请求,并将其分配给相应的控制器以进行进一步的处理。
它同时也是保存应用级配置的核心。
因此,应用一般被称为“前端控制器”。
在入口脚本中,应用被创建为一个单例。

Table of ContentsAbout1 Chapter 1: Getting started with yii2 Remarks2 Versions2 Examples4 Installation or Setup4 API5 Chapter 2: Setting in your main.php file6 Examples6 How to set main.php file in YII Framework V1.6 How to remove index.php in url.6 Chapter 3: Yii Booster8 Examples8 Installation8 Credits9AboutYou can share this PDF with anyone you feel could benefit from it, downloaded the latest version from: yiiIt is an unofficial and free yii ebook created for educational purposes. All the content is extracted from Stack Overflow Documentation, which is written by many hardworking individuals at Stack Overflow. It is neither affiliated with Stack Overflow nor official yii.The content is released under Creative Commons BY-SA, and the list of contributors to each chapter are provided in the credits section at the end of this book. Images may be copyright of their respective owners unless otherwise specified. All trademarks and registered trademarks are the property of their respective company owners.Use the content presented in this book at your own risk; it is not guaranteed to be correct nor accurate, please send your feedback and corrections to ********************Chapter 1: Getting started with yiiRemarksYii is a high-performance PHP framework best for developing Web 2.0 applications.Yii comes with rich features: MVC, DAO/ActiveRecord, I18N/L10N, caching, authentication and role-based access control, scaffolding, testing, etc. It can reduce your development time significantly.Three steps to build your application rapidly:1.You create the database;Yii generates the base PHP code;2.3.You customize the code to fit your exact needs.VersionsSource: Yii #History - Wikipedia (note: release 2.0.9 is missing from the Wikipedia article on 2016-07-29)ExamplesInstallation or SetupSetup for Yii 1.1Step 1 - downloading YiiDownload the Yii framework bundle from the Yii websiteInside the downloaded bundle there are 3 folders, namely:demosframeworkrequirementsdemos, as the name suggests contains a number of demo Yii applications.framework contains the Yii framework. This is the main folder we will use for the setup requirements contains code to check if a server meets the requirements for running YiiCopy the framework folder to your local server. It's recommended to keep the framework folder in the root directory of your application. In this setup guide we will be using localhost/yii-setup/ as our root project directoryStep 2 - the command lineOpen the command line and enter the framework folder. For this example we would go to c:\wamp\www\yii-setup\framework\We will now use yiic to generate a skeleton application. We do this by entering the command: yiic webapp path\to\root\directoryWhere path/to/root/directory will be the path to your root directory, so in our example the command would be:yiic webapp c:\wamp\www\yii-setup\If you receive an error at this point, your command line is not configured to execute php. You will need to enable php execution from the command line to continue. Otherwise, you will be prompted if you would like to create a new application at the entered path. Press y and hit the return key Your Yii skeleton application will be created under the specified pathAPIClass Reference - API v1.0••Class Reference - API v1.1Read Getting started with yii online: https:///yii/topic/1029/getting-started-with-yiiChapter 2: Setting in your main.php file ExamplesHow to set main.php file in YII Framework V1.In the versions of YII Framework Version 1.You will set your main.php File.File Path : application_name/protected/config/main.php<?phpreturn array(// Set Application Name'name' => "Applicaiton Name",// Set Default Controller'defaultController' => 'site/login',// Set Language'language' => 'in',// Set Language for messages and views'sourceLanguage' => 'en',// Set Time Zone'timeZone' => 'Asia/Calcutta',//Charset to use'charset'=>'utf-8',// preloading 'log' component'preload'=>array('log'),//application-level parameters that can be accessed'params'=> array($documentUrl = $baseUrl, // Document URL$documentPath = $_SERVER['DOCUMENT_ROOT'] . '/', // Document Path),);>List of Supported Time Zones - PHPHow to remove index.php in url.Removed the commented lines for rewrite in httpd.conf file.LoadModule rewrite_module modules/mod_rewrite.soYou can modify .htaccess file your application folder.RewriteEngine on# if a directory or a file exists, use it directlyRewriteCond %{REQUEST_FILENAME} !-fRewriteCond %{REQUEST_FILENAME} !-d# otherwise forward it to index.phpRewriteRule . index.phpafter you can change your main.php file code.<?phpreturn array(// application components'components'=>array(// uncomment the following to enable URLs in path-format'urlManager'=>array('urlFormat'=>'path','showScriptName'=>false,'rules'=>array('<controller:\w+>/<id:\d+>'=>'<controller>/view','<controller:\w+>/<action:\w+>/<id:\d+>'=>'<controller>/<action>','<controller:\w+>/<action:\w+>'=>'<controller>/<action>',),'urlSuffix'=>'.html','caseSensitive'=>false),),);>Read Setting in your main.php file online: https:///yii/topic/6143/setting-in-your-main-php-fileChapter 3: Yii BoosterExamplesInstallationFirst of all download Yii Booster latest end user bundle from here.Download it, unpack its contents to some directory inside your web application. Its recomended to unpack it to the extensions directory. Rename the folder from yiibooster-<version_number> to just yiibooster for convenience.Then we need to configure it. Add below line before return arraybefore return arrayInside components array add:'bootstrap' => array('class' => 'ponents.Booster',),Then preload the yii booster by adding below snippet in the config preload section'preload' => array(... probably other preloaded components ...'bootstrap'),Read Yii Booster online: https:///yii/topic/6369/yii-boosterCreditshttps:///9。

Day01 (1)1、安装 (1)1.2安装yii框架及自动生成project (1)2.目录结构: (1)3.url地址规则: (2)4.控制器编写规则: (2)4.2Controller方法: (2)4.2.2生成url地址 (2)4.2.3跳转提示 (3)《例1.1》添加文章表单分析 (3)《例1.2》NewsController.php----actionAdd() (3)《例1.3》add.php (3)《例1.4》---->数据处理actionSave() (4)《例1.5》actionOper() (4)《例1.6》model (5)Day02 (5)1.C层编写规则:(复习) (5)2.基类提供的方法:(复习) (6)3.V层编写: (6)3.1分组 (6)3.1.1、修改配置文件gii (6)3.1.2、浏览器url地址输入***/index.php?r=gii (6)3.1.3、说明: (6)4.M层 (7)4.1、数据库连接如何实现 (7)4.2、数据模型类封装的规则 (7)4.3学习基类CActiveRecord的方法: (7)4.3.1查询 (7)4.3.1.1例子: (8)4.3.2增 (8)4.3.3删 (9)4.3.4改 (9)Day03 (9)1.分组(复习) (9)2.m层封装: (10)2.1规则 (10)《例2.1》model层News.php (10)2.2基类CActiveRecored的方法: (10)2.2.1增 (10)2.2.2删 (11)2.2.3改 (11)2.2.4查 (11)《例2.2》NewsController.php (12)《例3.1》indexController (14)4表单的生成(助手类CActiveForm): (15)4.1生成表单元素 (15)《例4.1》自动生成注册页面 (16)《例4.2》提示语变成中文:labelEx( (17)5.数据验证: (18)《例5.1》function rules() (18)5.2会员模块实例(会员管理删除屏蔽审核): (19)《例5.2.1》userController (19)《例5.2.2》user-->oper.php (20)Day03 (21)1. 分页 (21)1.1分页(步骤) (21)《例1.1》分页的实现 (22)《例1.2》oper.php (22)2. 验证码 (23)2.1在控制器中加actions方法 (23)《例2.1》 (23)2.2模板上显示: (24)《例2.2》 (24)2.3、比较 (24)3. 图片上传 (24)3.1方法: (24)3.1.1构造方法,指定文件保存的目录,大小,类型 (24)3.1.2保存文件upload() 遍历$_FILES,返回值bool (25)3.1.3获取文件信息 (25)3.1.4获取文件的报错信息 (25)Yii框架:(基于MVC框架)Day011、安装解压使用yiic.php 安装,yiic运行,不是通过url地址。
PHP开发框架YII2前言在Web开发领域中,PHP语言的应用非常广泛,因为它简单易学,而且拥有庞大的开源社区。
PHP开发框架是一种封装技术和设计模式的组合,可以帮助开发人员更有效地构建Web应用程序。
在PHP框架中,Yii是一种流行的选项,它提供了许多有用的工具和功能来简化Web开发。
本文将介绍Yii的主要特点和一些实用的用法,以帮助读者更好地了解Yii。
Yii框架简介Yii是一种高性能的PHP开发框架,它采用了MVC(Model-View-Controller)应用程序设计模式,可以帮助开发人员更有效地构建Web应用程序。
Yii提供了许多功能,如数据库访问对象(DBO)、活动记录、表单验证、页面缓存等,还提供了更高级别的功能,如RBAC(基于角色的访问控制)、AJAX支持和Web服务。
特点:(1)高效性:Yii框架的核心设计目标是高效性。
Yii的运行速度比其他框架要快得多,甚至比一些原生的PHP代码还要快。
这是由于Yii使用了一些优化技巧和缓存机制,并通过避免不必要的代码调用来降低运行时间。
例如,Yii使用了懒加载(lazy-loading)技术,只在需要时才加载对象。
(2)灵活性:Yii框架提供了丰富的配置选项和模块化设计,可以根据需求快速修改和扩展应用程序。
Yii还提供了一些可选的扩展组件和适用于各种应用程序需求的通用模块。
(3)安全性:Yii框架具有强大的安全性功能。
它提供了一些内置的安全手段,如输入验证和输出过滤,以及用于 CSRF(跨站点请求伪造)和XSS(跨站点脚本)漏洞防护的内置防护机制。
(4)可扩展性:Yii框架非常便于扩展,因为很多功能都是基于PHP命名空间组织的,例如控制器、模型、插件等都可以很容易地进行扩展。
(5)易用性:虽然Yii框架提供了很多功能,但它们都是非常易于使用的,并不需要过多的编码经验和知识。
如何使用Yii框架Yii框架可以很容易地安装和配置,安装Yii的步骤如下:(1)在服务器上安装Composer。
面试Yii框架必备知识1. 什么是Yii框架?Yii框架是一款高性能、高扩展性的PHP框架,被广泛应用于Web应用程序的开发中。
Yii框架的设计目标是简单、高效、安全、可扩展,并且尽量减少开发时间和开发成本。
它提供了丰富的功能和组件,使得开发者可以快速构建可靠的Web应用程序。
2. Yii框架的特点•高性能:Yii框架采用了一系列的性能优化策略和机制,包括延迟加载、自动加载、缓存等,以提升Web应用程序的性能和响应速度。
•高扩展性:Yii框架采用了组件化的设计思想,通过组件的方式提供了丰富的功能和扩展点,开发者可以灵活地添加、修改或替换组件,以满足不同项目的需求。
•严谨的安全策略:Yii框架内置了一系列的安全机制,包括输入验证、输出过滤、密码哈希、CSRF防护等,以保障Web应用程序的安全性。
•快速而简洁的开发体验:Yii框架提供了丰富的工具和命令行工具,可以帮助开发者快速生成代码、执行数据库迁移、运行测试等,从而减少开发时间和开发成本。
•优秀的文档和社区支持:Yii框架拥有完善的官方文档和活跃的社区,开发者可以轻松地找到所需的资料和帮助。
3. Yii框架的核心概念3.1 MVC架构模式Yii框架采用了经典的MVC(Model-View-Controller)架构模式,将应用程序分为三个主要部分:模型(Model)、视图(View)和控制器(Controller)。
•模型(Model):模型负责处理数据逻辑,包括数据的读取、存储、验证和处理等。
它通常与数据库表或其他数据源对应。
•视图(View):视图负责展示数据和接收用户输入,通常是通过模板引擎来实现的。
视图只负责展示数据,不处理业务逻辑。
•控制器(Controller):控制器负责处理用户的请求,根据用户的输入调用相应的模型和视图,协调整个应用程序的运行流程。
3.2 组件(Component)Yii框架的组件是一种可重用的对象,它封装了一些通用的功能和逻辑,并通过配置文件或代码进行配置和使用。
php新技术:YII框架YII是目前比较火的框架,框架里面使用了最新的技术和设计,可以说学习了YII 就学习了最新的php技术,本课程主要学习YII如何提升程序运行效率以及开发效率。
导师简介Withy,多年开发老鸟,在大公司养过老,在小公司创过业,在无数个夜晚伴随左右手扣过代码,在技术精进之路有诸多烦恼,愿携手共进。
课程简介YII是目前比较火的框架,框架里面使用了最新的技术和设计,可以说学习了YII 就学习了最新的php技术,本课程主要学习YII如何提升程序运行效率以及开发效率。
你能学到什么?1、YII的延迟加载2、YII的多级缓存3、GII工具的使用大纲一览第1章课程目标第2章 YII的延迟加载2-1 类的延迟加载 (14:28)2-2 类的映射表机制 (07:00)2-3 组件的延迟加载 (04:08)第3章数据缓存的使用3-1 数据缓存之增删改查 (07:30)3-2 缓存数据有效期设置 (02:14)3-3 数据缓存中依赖关系详解 (11:12)第4章片段缓存的使用4-1 片段缓存介绍 (04:45)4-2 片段缓存设置 (05:08)4-3 片段缓存嵌套 (03:38)第5章页面缓存的使用5-1 页面缓存 (09:09)第6章 HTTP缓存的使用6-1 http缓存简介 (06:30)6-2 http缓存位置 (06:24)6-3 http缓存之缓存时机 (04:49)6-4 http缓存之lastmodified (04:51)6-5 http缓存之etag (05:30)6-6 http缓存实例 (08:51)第7章 gii工具简介7-1 gii工具简介 (04:36)7-2 gii工具之模型生成器的使用 (05:18) 7-3 gii工具之模型生成器代码实现 (13:11) 7-4 gii工具之数据模型配置介绍 (07:16) 7-5 gii工具之控制器生成器 (06:27)第8章高效篇总结8-1 总结 (02:21)学习链接:/learn/440。
《YII开发模型及文档》开发说明书
《YII开发模型及文档》是使用YII进行开发的总结,是经验,是精华;同时也是指导开发者如何使用YII进行开发的经典范例和文档。
每个YII开发者都可以为此贡献自己力量,并对自己擅长的模块进行长期的维护升级,以确保其生命力。
本项目的官方网站为。
舰长为总指挥、总协调和总集成。
负责分配任务、集成大家的成果,并协调各方以确保项目顺利进行。
本项目的名字定为Yiidev。
放置在www下面。
具体开发规范如下:为方便移植使用sqlite数据库。
以tbl_为数据表的前缀,建立独立的控制器、模型文件和视图文件夹;在assets文件夹中建立对应的js文件夹;在css中建立自己的文件夹等等。
在对应文档中注明你的项目用到哪些控制器、模型、视图、js、css及其详细用法等等。
并单独提供一个升级说明,以便集成并升级。