Asterisk安装指南
- 格式:doc
- 大小:63.50 KB
- 文档页数:7

asterisk目录及配置说明Asterisk目录及配置文件/etc/asterisk Asterisk主目录,包含其它关于Asterisk的配置文件;*zaptel.conf这个配置文件放在/etc,因为其它软件也可以使用Zaptel这个硬件及其驱动, 所以不是放在/etc/asterisk里./usr/lib/asterisk/modules这个目录包含所有可以加载Asterisk模块(应用程序\编辑器\格式和有用通道),在Asterisk启运时会加载这些模块(可以编辑modules.conf)./var/lib/asterisk比较重要的是astdb文件与agi-bin目录;astdb包含Asterisk当地数据库信息.sounds/所有声音提示的文件在里面,包括Asterisk原代码中的sounds.txt文件mohmp3/如果配置了音乐保持,应用程序会在这个目录下查找mp3(用CBR从文件中去除身份标签).keys/使用公钥和私钥系统认证与一个由RSA数字签名形成的一对等连接.公钥和私钥的扩展名分别为.pub和.keyfirmware/这个目录含了很多Asterisk相兼容的设备固件,它只有iax/这个子目录,其中有Digium的IAXy的二进制固件镜像.images/只有在较多的支持并且利用图解式的图像设备被发布,这个目录将会与相应的目录有更大的关联./var/lib/asterisk/agi-bin agi-bin包含所有脚本,可以通过许多已经建立的AGI应用程序与Asterisk连接.系统的接口,在这里可以写自己的脚本来控制拨打流程。
================配置文件================/etc/asterisk/asterisk.conf主要配置文件,/etc/zaptel.conf硬件接口的基本层.修改这个配置文件要用modprobe装载LinuxKernel使用模块./etc/asterisk/zapata.conf为硬件配置Asterisk的接口./etc/asterisk/extensions.conf拨号方案./etc/asterisk/sip.conf SIP协议配置文件/etc/asterisk/iax.conf呼入和呼出IAX通道/etc/asterisk/extensions.conf拨号方案配置文件================extensions.conf(四部分:context,extension,priorities,application)context:用于对extensions组命名,把拨号方案的不同部分进行分离,免得交织在一起.表示方法是把名字放在[]的中间,名字只能用a~z,A~Z,0~9,以及连字号和下划线组成.如:[context1],[incoming];所有放在context定义的之后的指令都是这个context一部分,直到下一个context定义的开始.context的一个重要用途就是加强安全性.如果没有仔细设计拨号方案,可能会造成别人盗用你的系统的不良后果.extensions:extensions是asterisk要执行的指令extension的语法是单词exten后面跟着一个由等号和大于号组成的箭头,如:exten=>extension的名字一个完整的extension由三部分组成:extensions的名字或号码priority(每个extension可以有多个步骤,步骤的编号称作priority)应用(或者命令),针对呼叫完成一些动作这三个部分用英文逗号分开,如:exten=>name,priority,application()priorities:每个extension都可以有几个步骤,称作priorities如:exten=>50001,1,Answer()#编号为1的priority,执行接听电话exten=>50001,2,Hangup()#编号为2的priority,然后挂电话必须确保priority从1开始并且连续的编号Asterisk pbx系统安装配置手册1.0一:系统及安装包选择1.1操作系统:fedora 7。

服务器的安装
所有步骤参考
有以下几点需要注意
∙在开始安装之前,使用root账号来登陆ubuntu
∙严格按照案指导文档的步骤来操作
服务器的配置
在首次登陆配置界面http://sipServerIP/admin ,按系统要求配置登陆账号密码等信息后即可以
登陆进行配置。
账号配置
Applications->Extensions->+Add Extension->Add New PJSIP Extension进入到添加账号页面,
下面几项需要填写。
例如:
User Extension: 500
Display Name:500
Secret: 500
进入Advanced标签页,DTMF Signaling设置,本便设置为In band audio,然后右下角Submit,最后在右上角点击红色Apply按键。
配置完成
配置完成后需要重启系统。
如果SIP客户端经过了路由器,则路由器的SIP ALG要开启。
Asterisk权威指南(第3版)中⽂第07章外线连接第七章外线连接⽬录7.1 ⼲线(Trunking)基础 (2)7.2 ⽤于外线连接的基本Dialplan (3)7.3 PSTN线路 (4)7.3.1 传统PSTN⼲线 (4)7.3.2 安装PSTN⼲线(PSTN Trunks) (6)7.4 VoIP (13)7.4.1 PSTN终结(termination) (13)7.4.2 PSTN再⽣ (14)7.4.3 VoIP to VoIP (15)7.4.4 配置VoIP⼲线(VoIP Trunks) (16)7.5 结论 (22)在之前的章节⾥,我们已经介绍了很多重要知识,这些知识是对于使Asterisk系统能正产⼯作是必不可少的。
然⽽,我们还没有完成⼀件对于任何PBX都必不可少的事情:即,将Asterisk与外部世界连接起来。
在本章中,我们即来讨论这件⼯作。
之所以说Asterisk的软件架构具有重要意义,很⼤程度上是由于这样⼀个事实,Asterisk 平等的对待每⼀个channel。
这⼀点完全不同于传统PBX,在传统PBX中,外线(⽤于连接外部世界)和分机(⽤于连接内部⽤户和资源)是完全不同的。
事实上,Asterisk dialplan⽤相似的⽅法处理所有channel,这意味着你可以在Asterisk系统中⾮常容易的实现⼀些在传统PBX⾮常难以实现(或不可能实现)的⼯作。
然⽽,这种灵活性也是有代价的。
由于系统并不会固有的知道内部资源(例如⼀部内线分机)和外部资源(例如,⼀个电信线路)的不同,Asterisk系统需要你来保证你的dialplan 恰当的处理了每种类型的资源。
7.1⼲线(Trunking)基础⼲线(Trunking)的⽬的是在两个实体间提供⼀个共享连接。
举例来说,公路⼲线是把两个镇⼦连接起来的⾼速公路。
铁路上⼴泛的使⽤术语“⼲线(trunk)”,来指代那些将⽀线铁路连接到⼀起的主要线路。
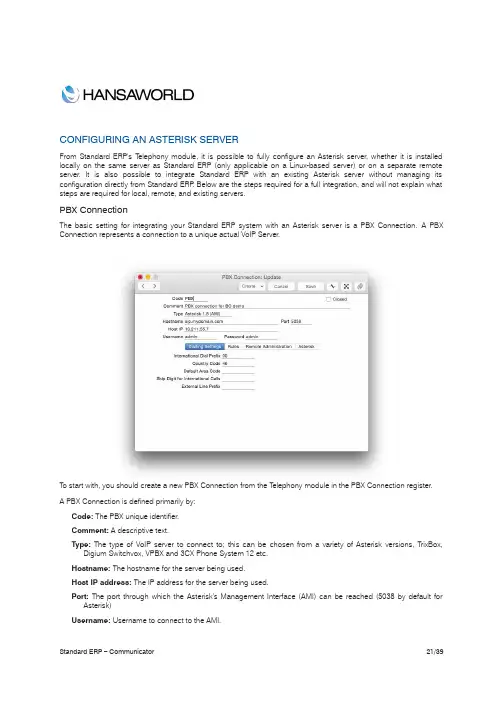
CONFIGURING AN ASTERISK SERVERFrom Standard ERP's T elephony module, it is possible to fully configure an Asterisk server, whether it is installed locally on the same server as Standard ERP (only applicable on a Linux-based server) or on a separate remote server.It is also possible to integrate Standard ERP with an existing Asterisk server without managing its configuration directly from Standard ERP. Below are the steps required for a full integration, and will not explain what steps are required for local, remote, and existing servers.PBX ConnectionThe basic setting for integrating your Standard ERP system with an Asterisk server is a PBX Connection. A PBX Connection represents a connection to a unique actual VoIP Server.T o start with, you should create a new PBX Connection from the T elephony module in the PBX Connection register.A PBX Connection is defined primarily by:Code: The PBX unique identifier.Comment: A descriptive text.Type: The type of VoIP server to connect to; this can be chosen from a variety of Asterisk versions, TrixBox, Digium Switchvox, VPBX and 3CX Phone System 12 etc.Hostname: The hostname for the server being used.Host IP address: The IP address for the server being used.Port: The port through which the Asterisk's Management Interface (AMI) can be reached (5038 by default for Asterisk)Username: Username to connect to the AMI.Password:Password to connect to the AMI.Closed: A PBX Connection can be closed when it is no longer in use or valid.In the case of a locally or remotely installed Asterisk server, the T ype should be Asterisk 1.8 (AMI). The username and password can be freely set as they will be configured in the server for you.In case you are connecting to an existing server, the port, username, and password should match the content of your server's manager.conf file. Here is an example of manager configuration usable with Standard ERP:[general]enabled=yesport=5038bindaddr=0.0.0.0allowmultiplelogin=yesdisplayconnects=yestimestampevents=yes[myadmin]secret=passwordxyzdeny=0.0.0.0/0.0.0.0permit=1.2.3.4read=system,call,originatewrite=system,call,originateIn this case Port would be 5038, username myadmin and password passwordxyz. You should replace 1.2.3.4 by the IP address of your Standard ERP server.A PBX Connection has other fields organised in four tabs, and which are used when managing a local or remote server entirely from Standard ERP. Administrators using an existing server fully managed by some external means should skip over to the Contact records section.Dialling SettingsUnder this tab, you can configure the various telephony prefixes in use in your system.International Dial Prefix: T o dial out of your country.Country Code: T o dial in your country.Default Area Code: T o dial in your local area.External Line Prefix: T o dial out of your organisation.Skip Digit for International Calls:As its name indicates, you may also define digits to skip when dialling internationally.These parameters are used to place and receive calls, and to identify contacts based on their caller ID, including when using IAX (see below).RulesThis T ab allows to define a number of rules from various types:Ignore SIP Channel:In case of an existing server, this will ignore possible intermediary SIP channels to handle calls and instead only care about the end points. The Identifier is the name of the intermediary SIP channel to ignore.No Act For Calls Between Extensions Shorter Than: Disables the automatic Activity creation for internal calls (detected by the short length of internal extensions). This is only applicable for PBX Connections of the T ype Digium SwitchVox. The Identifier is the maximum length.Track number: Not used.Unique callers only: With this option, only one call will be displayed in Communicator even if there is more than one call from or to the number configured in Identifier.Remote AdministrationFrom this tab, you can define the following:Remote User: Linux user that will be used to copy the Asterisk configuration files to a remote serverRemote Configuration Directory: The path where to copy said configuration files. As such, it is important that the directory is writable by the Linux user and that your Standard ERP server has been set up to be able to connect directly to the remote Asterisk server without needing to enter a password (namely set up a Public Key Authentication between both servers).AsteriskFrom this final tab, you can enable the connection of your Asterisk server to other Asterisk server using IAX (Inter-Asterisk eXchange).Enable Inter-Asterisk eXchange(IAX):By ticking this option, you will allow all other PBX Connections configured in Standard ERP and set to use IAX to connect to this particular server as well as allow this server to connect to all other servers enabled for IAX and configured in Standard ERP.IAX Password: The password used by this server to connect to other IAX servers.Sending configuration to the serverThis section only applies to the local and remote servers situations.After completing the above configuration of a PBX Connection, you can already send the configuration to an Asterisk server.If you are running a local server, you can dump the configuration files by using the Local Asterisk Server settings from the T elephony module.First, you will need to install the Asterisk server by selecting Setup Asterisk Server in the Operation Menu. This will give you a warning pop-up reading “Starting download and installation of Asterisk server”. Click OK. This will download the binaries for the Asterisk Server from the HansaWorld servers and install them on your local server. The server will then be started. You should never have to use Setup Asterisk Server again after this.If you close the Local Asterisk Inspect window and reopen it, you will see the path where your server is installed.From the Operation Menu, you can also select “Update Asterisk Server Configuration” (which will dump the current configuration on the Asterisk server configuration directory and restart the Asterisk server so that the configuration is applied), Start Asterisk Server, and Stop Asterisk Server (which should both only rarely be used, for instance for external maintenance purposes).If you are running a remote server which is fully configured using Standard ERP, you should instead head to the Asterisk SIP Configuration Files maintenance in the Routines of the T elephony module.Use Paste Special in the PBX Connection to select the server you want to update, and tick Send Files to Server before running. If you do not tick this option, then the files will only be generated locally on your Standard ERP server.Note that this will only work if you have properly setup your PBX Connection and the Linux environment of your Asterisk server (see above).You can also select from the following other Maintenance Routines:!Asterisk SIP trunks.!Asterisk Users.These routines will generate respectively only the configuration files for the SIP trunks of a PBX Connection, or for its users, instead of regenerating all the files.Note that the files are only sent to the server but not applied. An administrator needs to connect manually to the Asterisk server and reload them. For instance by issuing a 'core reload' command from Asterisk's command line interface.Asterisk usersThe next step in setting up your Asterisk server is to create a number of users.This section is applicable for local and remote servers.From the T elephony module, you can create new Asterisk Users for your employees or partners.For each user, you can define:PBX Connections: One or more servers on which the user will be created and allowed to connect to. Leave blank to create the user on all PBX Connections configured.Name: A descriptive name.Username: Will be used to configure their SIP client.Password:Will be used to configure their SIP client.Group: No longer used.Caller ID number: The display number that might be shown to the party this user is calling. Note that this can easily be overridden by the configuration of a SIP client or SIP trunk. Especially when dialling out to international telephone numbers, Caller ID numbers are likely to get lost.Caller ID name: The display name that might be shown to the party this user is calling. Note that this can easilybe overridden by the configuration of a SIP client or SIP trunk.Especially when dialling out to a mobile or landline telephone number, plain text display names will be lost.Closed: A closed user will simply not be configured on the server and as such, it will not be possible to connect to the server using that user.No Queue Fallback: If an Asterisk User is marked as not being part of Queue Fallback, then that user will not be called when a queue is not staffed but is receiving a phone call.Note that after creating one (or more) Asterisk users, it is necessary to send the configuration to the server, as described above.Contact recordsThis section is applicable for all types of servers: local, remote, and existing.As of now, Asterisk users and Standard ERP users (Persons), and their contact cards are not connected and as such, Contact cards for your users will need to be filled in manually with their SIP contact details.In the SIP field of the contact record pertaining to your Asterisk user should be filled in as username@host name. Where username comes from the Asterisk User record, and hostname from the PBX Connection record.SIP TrunksThis section is applicable for local and remote servers.At this point of the configuration, you can place calls between users of your Asterisk server. T o reach out to the outside world, you will need a SIP trunk or VoIP trunk. Each country usually has several providers that can help you get started. As Asterisk is a commonly used VoIP server platform, it is easy to get help from your provider in general.A simple Internet search should allow you to find a number of SIP providers for your country.Using the information provided by your subscriber, you will be able to fill in the SIP Trunk record necessary for you to place calls to the rest of the world. A SIP provider will usually be able to sell you the usage of one, or more phone numbers that your contacts will be able to call to reach you. In some cases, your SIP provider might also allow you to place outgoing calls. Make sure to carefully select the SIP provider that is able to provide you with the capabilities you need to run your business smoothly.Setting up a SIP trunk comes with a wide array of technical possibilities, a number of which are supported inStandard ERP. We will detail some of those here but it is not possible to list all the possible technical configurations one can encounter.Code: Select a unique code for your SIP trunk.PBX Connection: Paste Special the PBX connection on which you want this SIP trunk to be terminated.Host: Fill in the host name or IP address provided by your SIP provider here. It might be that host and domain have the same value.Domain: Fill in the domain name provided by your SIP provider here. It might be that host and domain have the same value.Username: Fill in the username provided by your SIP provider here.Password: Fill in the information provided by your SIP provider here.Skip Digit for International Calls: This parameters operates similarly to that set in the PBX Connection but will apply to calls using the SIP trunk.Country Code:This parameters operates similarly to that set in PBX Connection but will apply to calls using the SIP trunk.Caller ID: The caller ID of your SIP trunk provider (optional).Allow anonymous calls: Lets the system accept anonymous calls coming from your providers.Allowed IPs: Only incoming calls coming from these IP addresses will be allowed. Please check with your SIP provider to only open the minimum number of addresses. (optional but important security point).Inbound phone numbers: A SIP provider may very well provide you several telephone numbers using the same SIP trunks. In certain cases, you will be given unique identifiers for each one of them. They should be filled in here. It might be that the usernames and passwords are the same as above.Trunk type:Set to Outbound calls only if you intend to input a separate configuration for Inbound Phone Numbers in the matrix as described just above. Set to In- and outbound calls if you do not have a separate configuration for Inbound Phone Numbers.IAX: Select this if your SIP trunk provider is providing you services using an Asterisk IAX trunk.Queues and MenusThis section is applicable for local and remote servers.Most of us are familiar with the telephony lines operated by large companies. A welcome Menu plays when you call into the support line of a company, after pushing a few digits on your phone and listening to a few more voice Menu messages, you are placed in a Queue. Thanks to Standard ERP's integration with Asterisk, your company can easily benefit from such technology.In Standard ERP's terminology, a Menu is used to select between different queues or menus; and a Queue is used to put in relation agents answering calls and external callers. Queues and Menus share a number of settings (Phone Numbers, Opening Times) and capabilities (Playing a sound upon arrival, when closed, etc.).Instructions for users to use queues can be found earlier in the document.A Queue contains the following information:Code: A unique identifier in Standard ERPQueue ID: A unique identifier in Asterisk which will be used by your employees to connect to the queue and start answering calls.SIP Trunk: The SIP trunk from where the calls will be arriving.Description: A free-text comment.Phone Number: (Optional) in the case where you want a direct number for callers to reach the queue without going through a Menu. Note: you can play a greetings message even in the case where callers go straight toa queue. You do not need a Menu to play a welcome message.Fallback number: An optional number to call in the case i) no agent is available in the queue AND ii) no one is logged in to the Asterisk server or everyone who is logged in is marked with “No Queue Fallback”.Open from/until: it is possible to define two sets of opening hours (to include the possibility of a lunch break for instance). In case only one set of opening hours is needed, use the first pair of “Open from”/”Open until”fields and leave the second pair blank.A Menu contains the following information:Code: A unique identifier.SIP Trunk: T he SIP trunk from where the calls will be arriving.Description: A free-text comment.Phone Number: The phone number for your contacts to dial in order to access the Menu. Optional in case the Menu is accessed via another Menu.Open from/until:It is possible to define two sets of opening hours (to include the possibility of a lunch break for instance). In case only one set of opening hours is needed, use the first pair of “Open from”/”Open until”fields and leave the second pair blank.Repeat every (s): The number of seconds between repeats of the message explaining to the caller his or her possible choices.A matrix finally allows you to configure the different Menus and Queues reachable from this Menu:Number: The digit to press for the user to enter the selected Queue or Menu. Note that in the case pressing the digit leads to entering a Queue, the digit need not be the same as the Queue ID defined in the Queue.Queue: Paste Special to an existing Queue (note, if you select this, you should not select a Menu as well).Menu: Paste Special to an existing Menu (note, if you select this, you should not select a Queue as well).Comment: A free-text comment as a reminder of what the selected Queue or Menu might be.Using Menus, you can cascade multiple levels of Menus. However, once a caller has joined a Queue, he or she will not be able to go back to another Queue or Menu.The last remaining part of the configuration is now to assign sound files to be played to guide your callers through your Menus and Queues.Whereas all the previous configuration was done in Registers of the T elephony module, sounds will be configured from the Settings of the T elephony module. More precisely, from the PBX Sounds setting.First, create a new PBX Sound. Then in Event, use Paste Special to select the type of Event that will trigger the sound file to play. The Event you select will affect whether you are selecting a Queue or a Menu in the following field. Available Events are:Initial Queue Message: Played as an initial greeting when a caller reaches a Queue.Line Busy: Played after 30 seconds of a caller waiting in a Queue.Menu Closed: Played whenever a caller arrives to a Menu outside of the defined opening hoursMenu Message: Played as an initial greeting when a caller enters a Menu (should also describes the options available from the Menu and the digits associated with each function).Music on Hold:Music to play while the caller is waiting in a Queue.Queue Closed: Played whenever a caller arrives to a Queue outside of the defined opening hours.Once an Event is selected, use Paste Special to select the Queue/Menu where the sound file should be used. Only one Queue or Menu can be selected. After Saving the Record, you can now attach a file to the Record following the usual way of dragging and dropping the file over the paperclip icon or into the Document Manager window which you can open by double-clicking the paperclip icon.Note: the attached sound file must be a mono.wav file, sampled at 8kHz.Remember to send the configuration to the server once done. The sound files will be copied during that stage a s well.。
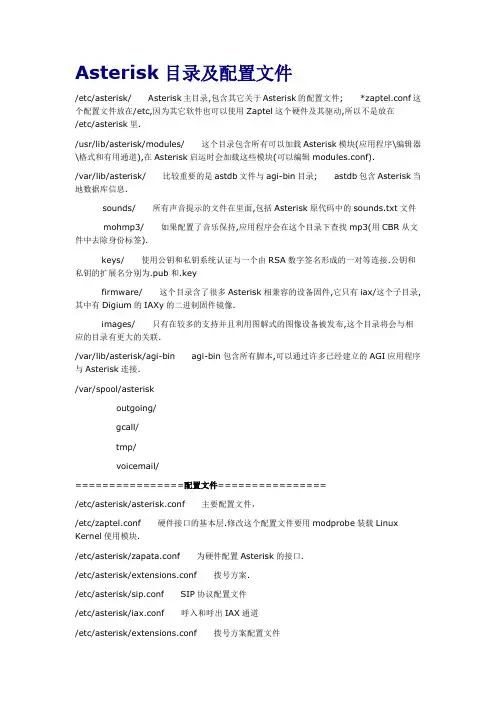
Asterisk目录及配置文件/etc/asterisk/Asterisk主目录,包含其它关于Asterisk的配置文件;*zaptel.conf这个配置文件放在/etc,因为其它软件也可以使用Zaptel这个硬件及其驱动,所以不是放在/etc/asterisk里./usr/lib/asterisk/modules/这个目录包含所有可以加载Asterisk模块(应用程序\编辑器\格式和有用通道),在Asterisk启运时会加载这些模块(可以编辑modules.conf)./var/lib/asterisk/比较重要的是astdb文件与agi-bin目录;astdb包含Asterisk当地数据库信息.sounds/所有声音提示的文件在里面,包括Asterisk原代码中的sounds.txt文件mohmp3/如果配置了音乐保持,应用程序会在这个目录下查找mp3(用CBR从文件中去除身份标签).keys/使用公钥和私钥系统认证与一个由RSA数字签名形成的一对等连接.公钥和私钥的扩展名分别为.pub和.keyfirmware/这个目录含了很多Asterisk相兼容的设备固件,它只有iax/这个子目录,其中有Digium的IAXy的二进制固件镜像.images/只有在较多的支持并且利用图解式的图像设备被发布,这个目录将会与相应的目录有更大的关联./var/lib/asterisk/agi-bin agi-bin包含所有脚本,可以通过许多已经建立的AGI应用程序与Asterisk连接./var/spool/asteriskoutgoing/gcall/tmp/voicemail/================配置文件================/etc/asterisk/asterisk.conf主要配置文件,/etc/zaptel.conf硬件接口的基本层.修改这个配置文件要用modprobe装载Linux Kernel使用模块./etc/asterisk/zapata.conf为硬件配置Asterisk的接口./etc/asterisk/extensions.conf拨号方案./etc/asterisk/sip.conf SIP协议配置文件/etc/asterisk/iax.conf呼入和呼出IAX通道/etc/asterisk/extensions.conf拨号方案配置文件/etc/asterisk/moduprobe.conf加载模块配置文件Asterisk developer\'s documentation 翻译计划by serva今天,Asterisk已经成为一个VOIP业界使用最广泛的一个集成电信级别P BX的工具,IPPBX如今已经成为VOIP商家争夺的一块重要市场,在我们越来越熟悉使用Asterisk的同时,我们希望能够越来越深入的了解asterisk,特别是对于开发人员,如果有自己特定的需求,在复杂的asterisk文件夹和asteri sk的源代码文件中迷失了方向,不知所措。


centos6.4安装Asterisk+freepbx2013-07-26 11:02:36分类: LINUXCentos 6.4 上安装Asterisk 11.3+FreePBX 2.11最近项目需要用asterisk来做一下研究,顺手记录一下安装过程,官方文档都太旧了,地址 https:///wiki/display /AST/Asterisk+Packages现在asterisk版本都已经出到了11.3.0,所以以下记录都是针对最新版本在Centos 6.4上的安装。
1. 安装asteriskasterisk官方为RedHat/Centos/Ubuntu等主流发行版提供好了相应的包,直接用yum/apt就可以完成安装,还是相当方便的。
sudo rpm -Uvh/centos/6/current/x86 _64/RPMS/asterisknow-version-3.0.0-1_centos6. noarch.rpmsudo yum -y update这是目前的最新版本,如果asterisk有更新的版本,可以先去/centos/里找对应的那个包的地址,注意区分centos版本和i386/x86_64架构然后先更新一把系统,重启一下(因为可能会更新内核版本)好了,可以开始装asterisk,目前版本是11.xsudo yum install asterisk asterisk-configs --enablerepo=asterisk-11安装需要的一些模块sudo yum install dahdi-linux dahdi-tools libpri验证安装如果一切正常的话,到这里就安装完成了,可以用以下命令检查dahdi 和asterisk是否已经运行sudo service dahdi statussudo service asterisk status如果没有运行的话,用sudo service dahdi start 和sudo service asterisk start 来启动如果dahdi正常运行,用lsmod|grep dahdi 应该可以看到加载了一些相应的模块如果asterisk正常运行,在命令行下用sudo asterisk -r 可以连接到控制台,到这里验证安装完成。

一步一步安装freepbx1. Ce ntOS5.3系统安装安装时需要注意把所有组件全部安装(在安装系统时选择自定义选项,即可。
)。
此问题主要是为了方便以后安装Asterisk和Pbx需要的软件开发包。
参考:http://blog.si .c n/s/blog_416adf890100aye1.html~type=v5_o ne&label=rela _n extarticle2.安装Tools Linux.iso。
用光驱加载Linux.iso。
把光驱里的文件拷贝到根文件夹,解压缩VMwareTools-5.5334685.tar.gz 文件(tar zxvf文件名),后来进入vmware-tools-distrib 文件夹。
执行./vmware-install.pl 后来一路回车即可。
3.配置虚拟机网络。
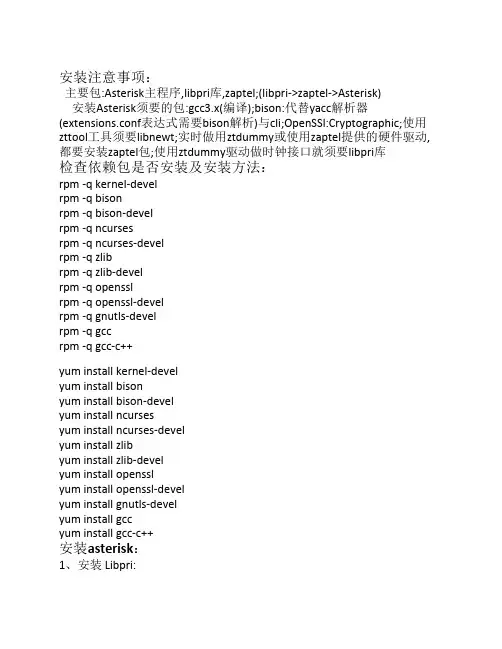
(2安装和3配置,完毕最好从启一下)4.要安装Asterisk 了各位观众请注意!!!/s/blog_416adf890100aydi.html/s/blog_416adf890100aye n.htmlhttp://blog.si .c n/s/blog_416adf890100b819.html/sv n/freeiris2/tru nk/INSTALL.html禁用Selinux,禁用防火墙运行一下包,看看那个不存在就更新安装那个yum in stall (包名)rpm -q 'ker nel-deve l'rpm -q 'httpd'rpm -q 'mysql-server'rpm -q 'mysql'rpm -q 'mysql-devel'rpm -q 'php'rpm -q 'php-mysql'rpm -q 'perl'rpm -q 'libdbi-dbd-mysql'rpm -q 'perl-libwww-perl'rpm -q bis onrpm -q bis on-develrpm -q n cursesrpm -q n curses-develrpm -q zlib-develrpm -q ope nsslrpm -q ope nssl-develrpm -q gnu tls-develrpm -q gccrpm -q gcc-c++以下也是要更新的包yumin stall e2fsprogs-devel keyutils-libs-devel krb5-devel libogg libseli nu x-devel libsepol-devel libxml2-devel libtiff-devel gmpphp-pear php-pear-DB php-gd php-pdo ncurses-devel audiofile-devel libogg-devel zlib-devel perl-DateMa nip sen dmail-cf bind sen dmail php-mbstri ng然后安装Lame 3.97cd /usr/srcwget http://eas yn ews.dl.sourceforge. net/sourceforge/lame/lame-3.97.tar.gztar zxvf lame-3.97.tar.gzcd lame-3.97./con figureMakemake in stall安装dahdi驱动(A1200P板卡用户要自己打patch请咨询openvox公司,如果要安装oslec回音消除也请参考资料):wget"/dow nload/dow n.php?target=asterisk&obj=& file=dahdi-li nux-2.1.0.4.tar.gz"tar zxvf dahdi-li nu x-2.1.0.4.tar.gzcd dahdi-li nux-2.1.0.4makemake in stallcd ..wget"/dow nload/dow n.php?target=asterisk&obj=& file=dahdi-tools-2.1.0.2.tar.gz"tar zxvf dahdi-tools-2.1.0.2.tar.gzcd dahdi-tools-2.1.0.2makemake in stallmake config/etc/i nit.d/dahdi start/etc/i nit.d/dahdi stopcd ..wget"/dow nload/dow n.php?target=asterisk&obj =& file=libpri-1.4.10.tar.gz"tar zxvf libpri-1410.tar.gzcd libpri-1.4.10makemake in stallcd ..安装asterisk软件:wget"/dow nload/dow n.php?target=asterisk&obj =& file=asterisk-1.4.26.tar.gz"tar zxvf asterisk-1.4.26.tar.gzcd asterisk-1.4.26./con figuremakemake in stallmake samplesmake configcd ..wget"/dow nload/dow n.php?target=asterisk&obj =& file=asterisk-add on s-1.4.8.tar.gz"tar zxvf asterisk-addo ns-1.4.8.tar.gzcd asterisk-add on s-1.4.8./con figuremake cdrcp cdr/cdr_addo n_mysql.so /usr/lib/asterisk/modules/ cd ..安装g729 g723的语音编码:请注意这两个语音编码是专利编码,如果你要使用在商业领域,请向编码版权所有者交纳版税•否则请跳过此步骤•wget"http://asterisk.hosti ng.l v/bi n/codec_g723-ast14-gcc4-glibc-pen tium3.sowget"http://asterisk.hosti ng.l v/bi n/codec_g729-ast14-gcc4-glibc-pen tium3.so"cp -avf codec_g72*.so /usr/lib/asterisk/modules/哇塞赛好累好累,休息休息,以上就是asterisk安装的全过程。
asterisk 编译Asterisk 是一个开源的电话交换机,它允许你连接各种电话设备,包括传统的电话线路、VoIP 网关、SIP 设备等。
要编译 Asterisk,你需要遵循以下步骤:1. 安装依赖:在编译 Asterisk 之前,你需要确保你的系统上安装了所有必需的依赖项。
这些依赖项可能因操作系统而异。
以下是在 Ubuntu 系统上的一些常见依赖项:arduinosudo apt-get updatesudo apt-get install build-essential libncurses5-dev libncursesw5-dev libcurl4-openssl-dev libsigc++-2.0-dev unixodbc-dev gcc-sodbc2. 下载源代码:从 Asterisk 的官方网站下载最新的源代码。
你可以从它们的网站上找到最新的版本和下载链接。
将下载的源代码解压到一个目录中。
3. 配置:进入解压后的源代码目录,运行以下命令进行配置:bashcd asterisk-*./configure这将检查你的系统上是否已安装所有必需的依赖项,并生成一些配置文件。
在配置过程中,你可以使用 --prefix 选项指定 Asterisk 的安装目录。
例如:bash./configure --prefix=/usr/local/asterisk4. 编译:运行以下命令开始编译 Asterisk:gomake这将编译 Asterisk 的源代码并生成可执行文件。
5. 安装:运行以下命令将 Asterisk 安装到你的系统中:gosudo make install这将把 Asterisk 可执行文件复制到指定的安装目录。
6. 配置环境变量:为了让系统能够找到 Asterisk 可执行文件,你需要将 Asterisk 的路径添加到 PATH 环境变量中。
例如,如果你将 Asterisk 安装在/usr/local/asterisk 目录下,你可以通过编辑 /etc/profile 文件来添加 PATH 环境变量:bashecho 'export PATH=/usr/local/asterisk/bin:$PATH' >>/etc/profilesource /etc/profile7. 设置权限:运行以下命令为 Asterisk 可执行文件设置适当的权限:bashsudo chmod +x /usr/local/asterisk/bin/asterisk。
Centos6.5上安装Asterisk13记录今天在阿里云上申请了个免费的服务器,操作系统选择了Centos6.5。
尝试安装Asterisk13,几经周折,终于成功。
记录如下。
1 安装前的准备?经确认(rpm -q bison-devel),以下组件没有安装,用yum 命令逐一安装yum install bison-develyum install ncurses-develyum install zlib-develyum install openssl-devel()yum install gnutls-develyum install gcc-c++yum install mysql-devel?2 关闭/SELINUX?sed -i s/SELINUX=enforcing/SELINUX=disabled/g /etc/selinux/config?3 configure 过程中遇到的问题具体安装过程,网上说明很多,仅仅记录中间遇到的问题及解决办法?1)configure 过程中,提示uuid support not found (this typically means the libjansson development package is missing):?解决办法:yum -y install uuid-develyum -y install libuuid libuuid-devel2)configure 过程中,提示: JSON support not found解决:下载:jansson-2.5.tar.gztar -zxf jansson-2.5.tar.gzcd jansson*./configure --prefix=/usr/ && make clean && make && make install && ldconfig3 configure 过程中提示:'libxml2'development package,configure: *** The Asterisk menuselect tool requires the 'libxml2' development package.configure: *** Please install the 'libxml2' development package.下载libxml2-2.6.32.tar.gz:/down.php?id=28493&ResourceI D=6095&site=1解压:tar -zxf libxml2-2.6.32.tar.gz?编译、安装4). configure: error: *** Asterisk now uses SQLite3 for the internal Asterisk database.解决办法:下载sqlite-3.3.5.tar.gz:/down.php?id=19777&ResourceI D=9862&site=1解压:tar -zxf sqlite-3.3.5.tar.gz?编译、安装?至此,可以 configure通过,然后 make,make install, make samples 即可完成安装。
WIN10系统安装ASTER-V7-WIN10⼀拖多安装说明WIN10系统安装ASTER-V7-WIN10⼀拖多安装说明(ASTER-V7-WIN10版本⽀持WIN7WIN8WIN10系统)1、安装好WIN10系统,并且安装所以的驱动程序,查看显卡驱动是否安装好。
(注意:没有安装好显卡驱动的⼀定要安装驱动否则没有办法下⼀步安装ASTER)2、查看显⽰设置⾥的扩展屏的分辨率。
3、调整扩展屏的分辨率(可以根据不同需求来调整分辨率)4、这⾥我是将分辨率调整成⼀样⼤⼩的。
5、将分辨率调整好过后点应⽤。
6、应⽤好后在点保存更改。
那我们可以添加⽤户账户数。
8、选择添加⼀个没有Microsoft帐户的⽤户,点击下⼀步。
9、创建帐户。
10、输⼊账户的名称。
11、帐户就已经创建好了,下⾯将安装ASTER程序。
12、选择安装ASTER-V7-WIN10-SETUP程序13、ASTER-V7-WIN10这是语⾔选择这⾥我选English,点击OK。
14、选择Next。
15、在选择Next。
16、选择I agree to these terms and conditions打勾,在选择Next。
17、选择O打勾在点击Install下⼀步。
18、选择NO,I will restart Windows later不重启电脑,在点击Finish完成19、打开ASTER控制⾯板程序。
20、选择⼀拖多的⼯作的⽤户数,如⼀拖四的那下在要打开四个⽤户数,1-4打开。
21、选择打开。
22、4个⽤户数都打开了。
23、添加每个ASTER⼀拖多⼯作站,⽤不同的WIN账户登录。
24、这⾥我们选择(⼯作站1)⽤U1帐户登录。
24、选择好帐户点击OK应⽤。
25、以上的步骤省略不在说明了,每个⼯作站现在都对应不同的WIN账户登录,选择Automatically run ASTER workplacse on system startup每次开机启动ASTER程序。
Asterisk 入门教程subscriber:加入某个group,从而遵从某一个call restricionsubscriber group:可以使用1种call restriction。
call restriction:将numbering plan中各项取出,各自组成成不同的呼叫限制方案numbering plan:通用,是一个整体的计划,里面包括长途,本地,等各种形式的方案-------------------------------------------------------------以上,用于拨入号码的预处理,实际上是一种过滤,下面才是真正的呼叫处理。
--------------------------------------------------------------route:一种策略,根据号码匹配的模式,选择走哪个trunk。
trunk:实际上做通一个链路,供route选择。
analog的,一个POTS就是一条analog trunkanalog的数量由设备定,ip trunk没有限制数量,并且一个ip trunk连到对方IPPBX后,对方的subscriber 数量是不确定的,由那个IP PBX决定。
Asterisk,开始吧--------------------------------------------------------------什么是asterisk?开源电话平台Asterisk 通过了电话的开源平台。
基本上就是一个软件的PBX。
最初是Digium 公司的Mark Spencer 编写的,这个公司就是他创立的,专门生产并销售Asterisk使用的硬件。
Asterisk 简直就是一场电话的革命。
为什么使用Asterisk?现在电信行业的混乱,因为各种专利技术应用在各种层次的网络上,导致很大的混乱。
Asterisk 就是答案——给电信行业普遍的混乱环境带来秩序的革命。
asterisk下安装H323最好把需要解压得文件放在/usr/src下面1、下载安装OpenH323及支持库PwLib/sourceforge/openh323/pwlib-v1_9_0-src-tar.gztar zxvf pwlib-v1_9_0-src-tar.gzcd pwlib_v1_9_0/./configuremakemake installmake opt/sourceforge/openh323/openh323-v1_17_1-src-tar.gz tar zxvf openh323-v1_17_1-src-tar.gzcd openh323_v1_17_1/./configuremakemake opt2、编译安装Asterisk H.323 channel设置环境变量PWLIBDIR=/usr/src/pwlib_v1_9_0(根据你的这个目录下的pwlib的文件夹名字而定)export PWLIBDIROPENH323DIR=/usr/src/openh323_v1_17_1/(根据你的这个目录下的openh323的文件夹名字而定)export OPENH323DIRLD_LIBRARY_PATH=$PWLIBDIR/lib:$OPENH323DIR/libexport LD_LIBRARY_PATH (此步至关重要,在linux 2.4 中可以不用这一步,但是在linux.2.6中,必须要这一步。
不然ASTERISK 不能启动。
)编译安装cd /usr/src/asterisk-1.2.6(根据你的asterisk文件夹名而定)/chnnels/h323/makemake optcd ..cd ..make install3、安装后步骤把生成的库复制到全局cp /usr/local/lib/* /usr/lib确定channel是否存在,检验安装是否成功ldd /usr/lib/asterisk/modules/chan_h323.so(如果找到了chan_h323.so并且运行则表示成功,如未找到,这表示安装过程出现了问题)4、配置(1)修改extension.conf(2)vi /etc/asterisk/extension.conf在[default]节添加:exten => _1XXX,1,Dial(H323/${EXTEN}) <========这里_1XXX和下面的_1XXX可以替换为你自己想用的号码段,并在稍后h323.conf的设置中注意号码段的命名exten => _1XXX,3,Hangup;假设我们用的号码是以1为起始的四位号码(3)复制h323.conf(4)cp/usr/src/asterisk-1.2.6/chnnels/h323/h323.conf.sample /etc/asterisk/h323.conf(注意,第一个asterisk目录的名字根据你的asterisk名字而定,第二个asterisk的名字则是默认) (3) 修改h323.confvi /etc/asterisk/h323.conf文件最后加上:[1999] <======参考extensions.conf中定义改成自己想用号码type=friendusername=1999host=<你的本机ip,否则在运行asterisk的时候会出错> context=default在[general]修改:加上disallow=all注释去掉allow=all注释5、 启动asteriskasterisk –vvvvvvvvvcg搞定。
Asterisk数据库配置方案Asterisk 之数据库配置方案一:硬件环境二台x86 PC一个Hub 或者 Switch一部外线虚拟电话(电话号码比如:82085471),一部SIP电话(内部设置分机号为:82081001)Asterisk卡(Open Vox A1200p)一条电话线(比如电话号码为82085498)接Asterisk卡二:软件环境二台x86 PC:PC1:安装Windows Xp Sp2。
XP下安装VM-5.5,并在VM中安装Fedora 9,在其中架设Sip Server,本项目使用kamailio。
PC2:安装Centos 5.3,并安装asterisk相关包,作为语音网关。
Asterisk包安装:asterisk-1.4.22.1.tar.gz : asterisk主程序包。
asterisk-addons-1.4.7.tar.gz :asterisk扩展包。
asterisk-sounds-1.2.1.tar.gz :asterisk 语音包。
openvox_zaptel-1.4.11.tar.gz :asterisk 卡驱动包。
libpri-1.4.2.tar.gz :PRI库三:软件安装PC1(192.168.1.199)Kamailio的安装:make clean./configuremake installPC2(192.168.1.200)安装顺序:libpri->openvox_zaptel->asterisk->asterisk-addons->asterisk-sounds安装前最好先把各个包放到/usr/src/目录下解压安装: libpri安装:tar xzvf libpri-1.4.2.tar.gzcd libpri-1.4.2.tar.gzmake cleanmakemake installopenvox_zaptel-1.4.11.tar.gz的安装:tar xzvf openvox_zaptel-1.4.11.tar.gzcd openvox_zaptel-1.4.11make clean./configuremakemake installasterisk-1.4.22.1.tar.gz 的安装:tar xzvf asterisk-1.4.22.1.tar.gzcd asterisk-1.4.22.1make clean./configuremakemake installmake samples //生成默认配置到/etc/asterisk下asterisk-addons-1.4.7.tar.gz 的安装:tar xzvf asterisk-addons-1.4.7.tar.gzcd asterisk-addons-1.4.7make clean./configuremakemake installcp configs/* /etc/asterisk/asterisk-sounds-1.2.1.tar.gz 的安装:tar xzvf asterisk-sounds-1.2.1.tar.gzcd asterisk-sounds-1.2.1make cleanmake install注意:安装完成后,需要先运行genzaptelconf生成默认的Zap通道的配置信息。
Fluxbox.co.uk Asterisk & FreePBX
Installation Guide
Designed and tested on CentOS 4.3
Aaron Smith
Needed Components
• Web Server • Mail Server (Not selected by default) • MySQL Database (Not selected by default) • Development Tools (Not selected by default)
[root@dhcp1 ~]# yum -y update Setting up Update Process Setting up repositories ...etc.... ...etc... Update: gnupg.i386 0:1.2.6-3 python.i386 0:2.3.4-14.2 sendmail.i386 0:8.13.1-3.RHEL4.3 tzdata.noarch 0:2006a-2.EL4 Complete! root[@dhcp1 ~]#
Additional Package Installation
The following packages need to be additionally installed with yum:
[root@dhcp1 ~]# yum install gcc libxml2-devel libtiff-devel mysql-server php-gd php-mysql kernel-devel kernel-smp-devel bison ncurses-devel audiofile-devel subversion libogg-devel openssl-devel mysql-devel
[root@dhcp1 ~]# rpm -ivh http://apt.sw.be/redhat/el4/en/i386/RPMS.dag/lame-3.96.1-2.2.el4.rf.i386.rpm
Asterisk安装指南2010-03-20 10:491、选择操作系统据说Asterisk对大多Linux支持的都比较好,内核版本2.6.9-55.EL安装起来很顺利,2.4的麻烦一些。
注意安装系统的时候选择上开发环境的包。
2、在/usr/src目录中下载Asterisk相关安装包并解压#cd /usr/src/pub/libpri/releases/libpri-1.4.10.tar.gz/pub/zaptel/releases/zaptel-1.4.12.1.tar.gz(dahdiasterisk1.6以后就不用这个,用/pub/telephony/dahdi-linux-complete/releases/dahdi-linux-complete-2.6.1+2.6.1.tar.gz) /pub/asterisk/releases/asterisk-1.6.2.tar.gz/pub/asterisk/releases/asterisk-addons-1.6.2.0.tar.gz/pub/asterisk/releases/asterisk-sounds-1.2.1.tar.gz# tar -xvzf *.tar.gz3.安装libpri# cd libpri-1.4.9# make# make install4.安装zaptel# cd ..# cd zaptel-1.4.12.1# make# make install# make config5.安装asterisk# cd ..# cd asterisk-1.4.24.1# ./configure# make# make install# make samples6.安装asterisk-addons# cd ..# cd asterisk-addons-1.4.7# ./configure# make# make install# make samples7.安装asterisk-sounds# cd ..# cd asterisk-sounds-1.2.1# make# make install8.安装完成,启动服务/usr/sbin/safe_asteriskAsterisk安装指南12010-04-03 9:531. 准备环境1.1 安装前要确定已经安装了以下服务:*DNS Server*Web Server*Mail Server*MySQL Database*Development Toolsgroupadd asteriskuserdel -r asterisk创建用户asterisk到主组asteriskuseradd -g asterisk -d /etc/asterisk/ asterisk修改用户主目录可通过修改“/etc/passwd”文件实现1.2 没有安装的话可以用以下命令安装yum install bindyum install sendmailyum -y updateyum install e2fsprogs-devel keyutils-libs-devel krb5-devel libogg libselinux-devel libsepol-devel libxml2-devel libtiff-devel gmp php-pear php-pear-DB php-gd php-mysql php-pdo kernel-devel ncurses ncurses-devel audi ofile-devel libogg-devel openssl-devel mysql-devel zlib zlib-devel perl-DateManip sendmail-cf sox gcc gcc-c ++ gnutls-devel bison bison-deve1.3 安装完之后用以下命令设为自动启动chkconfig mysqld onchkconfig httpd on2. 在/usr/src目录中下载Asterisk相关安装包并解压2.1 下载#cd /usr/srcwget /sourceforge/lame/lame-3.97.tar.gzwget /pub/libpri/releases/libpri-1.4.10.tar.gzwget /pub/zaptel/releases/zaptel-1.4.12.1.tar.gzwget /pub/asterisk/releases/asterisk-1.6.2.6.tar.gzwget /pub/asterisk/releases/asterisk-addons-1.6.2.0.tar.gzwget /pub/asterisk/releases/asterisk-sounds-1.2.1.tar.gzls *.tar.gz | xargs -n1 tar xzvf2.2 安装lametar zxvf lame-3.97.tar.gzcd lame-3.97./configuremakemake install2.3 安装libpri# cd libpri-1.4.9# make# make install2.4 安装zaptel# cd zaptel-1.4.12.1# ./configure# make# make install# make config2.5 安装asterisk创建用户和用户组:asterisk:asterisk# cd asterisk-1.4.24.1# ./configure# make# make install# make samples2.6 安装asterisk-addons# cd asterisk-addons-1.4.7# ./configure# make# make install# make samples启动asterisk#amportal start2.7 安装asterisk-sounds# cd asterisk-sounds-1.2.1# make# make installchown -R asterisk:asterisk /var/lib/asterisk chown -R asterisk:asterisk /var/run/asterisk chown -R asterisk:asterisk /var/log/asterisk chown -R asterisk:asterisk /var/lib/php/sessionAsterisk安装指南22010-04-03 9:533. 安装FreePBX3.1 下载FreePBX:wget /freepbx-2.7.0.tar.gztar zxvf freepbx-2.7.0.tar.gz3.2 安装数据库cd freepbx-2.7.0cd SQL/usr/bin/mysqladmin -u root password 'root'grant all privileges on *.* to asterisk@localhost identified by ‘asterisk’; grant all pr ivileges on *.* to asterisk@’%’ identified by ‘asterisk’; flush privileges;create database asteriskcreate database asteriskcdrdbsource SQL/newinstall.sqlsource SQL/cdr_mysql_table.sqlflush privileges;\q3.3 安装FREEPBXcd .../start_asterisk start./install_amp --username=asterisk --password=asterisk3.4 修改文件/文件夹权限chown -R asterisk /etc/asteriskchgrp -R asterisk /etc/asteriskchown -R asterisk /var/lib/asteriskchgrp -R asterisk /var/lib/asteriskchown -R asterisk /var/spool/asteriskchgrp -R asterisk /var/spool/asteriskchmod -R 777 /etc/asteriskchmod -R 777 /var/lib/asterisk/chmod -R 777 /var/spool/asteriskchmod -R 777 /var/www/htmlchmod -R 777 /etc/amportal.conf下面是两个重要的配置文件:/etc/amportal.conf/var/lib/asterisk/bin/retrieve_conf4. 安装成功后的配置4.1 中文件支持/var/www/html/admin/header.php中的set_language()中修改默认语言在/var/www/html/admin/views/freepbx_admin.php文件中增加<option value="zh_CN" <?php echo ($_COOKIE['lang']=="zh_CN" ? "selected" : "") ?> >简体中文</option>创立/admin/i18n/zh_CN/LC_MESSAGES的目录,并把翻译化后的amp.po amp.mo复制到这里,注意设置对应权限。
4.2 给FreePBX加登录密码的方法如下:1.编译配置文件,#vi /etc/amportal.conf将AUTHTYPE=none改为AUTHTYPE=database2.使其生效/usr/src/freepbx-2.5.1/apply_conf.sh3.这样/etc/amportal.conf中的AMPDBUSER=adminAMPDBPASS=admin就是登录密码了。
默认的应该是asteriskuser和amp1094.3 将用户(user)与设备(device)区分开来编辑文件 /etc/amportal.conf找到:AMPEXTENSIONS=extensions改为:AMPEXTENSIONS=deviceanduser重启Asteriskamportal restart5. 其他配置让CRM中的记录更全面:extensions.conf文件的628行注释掉;exten => s,n,NoCDR()在cdr.conf中配置unanswered = yesAsterisk的配置文件都在/etc/asterisk目录下,重要的配置文件有: sip.conf sip电话基本配置extensions.conf 拨号规则voicemail.conf 配置语音信箱meetme.conf 会议室http.conf web界面相关manager.conf web界面相关asterisk.conf asterisk目录的配置cdr_mysql.conf 详单数据库res_mysql.conf mysql数据库设置features.conf 自定义按键配置,同时还有一些系统默认的功能键modules.conf 定义系统启动时加载的模块logger.conf 日志6. 解决问题报表不能查看如果查看报表的时候出现如下的错误提示:YOU MUST ACCESS THE CDR THROUGH THE ASTERISK MANAGEMENT PORTAL!发生这个错误的原因可能是httpd进程不能读写php会话的保存路径。