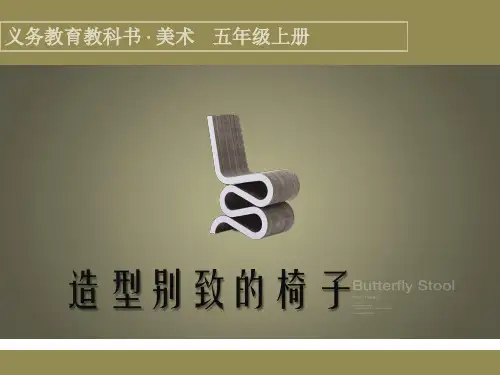
椅子设计说明
- 格式:docx
- 大小:10.89 KB
- 文档页数:2

设计说明(公共座椅设计)成员:前言国家投资建设各种城市文化休闲广场,是改善人民周边生活环境的一个重要举措。
城市文化休闲广场是一个城市提供给市民和游人自由交流的公共空间,并起着向外宣传城市形象的作用。
经过多年发展,城市文化休闲广场对于城市区域空间的分割,促进城市的再发展,带动经济的快速增长等方面起到了巨大的作用.但随着城市文化休闲广场的快速发展,广场设施特别是公共座椅的发展却已渐渐跟不上广场自身的变化,而对于广场来说,广场设施的建设起着至关重要的作用,广场设施的落后将必然降低广场自身功能的发挥,因此,对于城市文化休闲广场公共设施的研究就更有意义。
公共座椅现状分析:在城市的居住区、商业区、公共活动区、旅游区等公共场所为人们提供一些小憩的空间是十分重要的。
它可以让人们拥有一些较私密空间进行一些特殊活动,如休息、小吃、阅读、打盹、编织、下棋、晒太阳、看人、交谈等等.这些富有吸引力的活动,是在室内不可能进行的。
公共座椅的形态大致有两种即长凳和椅子。
长凳不仅可坐、躺.还可供人们下棋等。
可以认为凳是可移动的板面,强调造型的水平面,减弱视觉的抑压感,可随意变动坐的方向,当人们共同坐往一条凳上时,其心理状态也不一样。
椅来源于古代存取物的器具,以“座”这一单一机能为主要目的,附设靠背和扶手。
椅有单座型和连座型两种。
单座型椅使用在公园、广场等场所。
但如今的有些户外座椅存在着坐面脏、不舒适、质量不好等等各方面的缺点,从而导致了给人们的户外活动带来不利影响。
所以我们从座椅的功能,环保、清洁、人机等各个方面进行了对其改进的一个改进设计.问卷调查:资料来源——可问可答网调查统计报告中心(资料出处)公共设施是指由政府或其他社会组织提供的、属于社会公众使用或享用的公共建筑或设备,按照具体的项目特点可分为教育、医疗卫生、文化娱乐、交通、体育、社会福利与保障、行政管理与社区服务、邮政电信和商业金融服务等.下面我们对城市公共座椅做了一份问卷,欢迎大家参与!调查内容:调查1、您和朋友家人外出或逛街一般怎样去根据调查结果显示,表示徒步(其中男性占37%、女性占63%)和骑自行车(其中男性占44%、女性占56%)外出逛街的网友均占30%;有28%的网友表示一般开车外出;表示选择其他方式外出的网友占11%。

一、椅子尺寸标准之座高。
1、座高是指座面至地面的垂直距离;如果座面存在后倾或呈凹面弧形,座高则指座前沿中心点到地面的垂直距离。
座高太高,则两腿悬空会压迫大腿血管;太低则会引起身体疲劳。
2、实践证明,合适的座高为小腿窝至足底高度加上25-35mm的鞋跟厚,再减去10-20mm的活动余量。
即:座高H =小腿窝高度+鞋跟厚度-适当间隙。
3、国家标准GB 3326-1997规定:座高H为400-440mm,尺寸级差为10mm。
软座面的最大高度为460mm(不包含座面下沉量)。
沙发座高可以低一些,使腿向前伸,靠背后倾,有利于脊椎处于自然状态。
沙发的座高一般为360-420mm。
二、椅子尺寸标准之座深。
1、座深是指座面前沿至后沿的距离。
太深太浅,都会令小腿及腰背疲劳不适。
实践证明,座深以略小于坐姿时大腿的水平长度为宜。
即:座深T=坐姿大腿水平长度过60mm(间隙)2、国家标准GB 3326-1997规定:座深T为340-420mm(靠背椅)、或400-440mm(扶手椅)、或340-420mm(折椅),尺寸级差为10mm。
沙发及其他休闲类座具因靠背斜较大,故座深可稍大,为480-560mm。
三、椅子尺寸标准之座宽。
1、座宽应能使臂部完全得到支撑并留有余地为宜,对于扶手椅而言,扶手内宽即座宽,一般以人的平均肩宽尺寸加上适当余量而定。
即:扶手前沿内宽B=人体肩宽+冬衣厚度+活动余量2、国家标准GB 3326-1997规定:扶手椅或折椅座前沿宽B大于等于380mm,尺寸级差为10mm;扶手前沿内宽B大于等于460mm,尺寸级差为10mm。
四、椅子尺寸标准之座倾角、背倾角。
1、座面与水平面之间的夹角称为座倾角α;靠背与水平面之间的夹角称背斜角β。
2、国家标准GB 3326-1997规定:座倾角α为1-4度(靠背椅和扶手椅),或3-6度(折椅),角度级差为1度;背倾角β为95-100度(靠背椅和扶手椅),或100-110度(折椅),角度级差为1度。
藤编椅设计说明
藤是生长在热带森林中的一种多刺的棕榈科攀缘植物由于质地牢固和很强的韧性,藤条被广泛地用于家具和席垫的制造。
天然原藤盛产于东南亚、美和非洲的热带雨林地区。
然而使用作为家居的藤并不多,因为高档家具用藤不仅要求材质良好,且必须资源丰富、产量稳定。
在众多产藤国中,由于印度尼西亚地处赤道热带雨林地区,终年阳光充足、雨水丰沛,肥沃的火山灰质土壤广泛分布于众多岛屿,自然条件相当优越,所以当地出产的藤材不仅品种多、产大,且藤条粗壮、饱满、匀称,品质优异。
因此全世界最好的藤产自印尼。
为了在使用时更加舒适,并粗减少因为不当的坐姿导致的各种不适,工编织藤条椅子最好选购按照人体工程学原理设计而成的款。
弧度枕头设计:
优美弧度设计,可以在使用时更加舒适,在靠背时头部和藤部也有支撑点,让人体更为轻松。
背部透气设计
背部编织成规律小孔,可以让人体在使用时不会因为背部闷热而不舒适。
冬暖夏凉:
因天然藤导热性差,因此使用起来冬暖夏凉,舒适可靠。
腰部凸起设计:
因现代人长期久坐导致弯腰驼背的情况而设计,方便在坐下后给腰部提供支撑点,久坐更舒适且不容易造成腰酸背痛,减少腰间盘突
出的情况。
独特雕花设计:
独特雕花设计,让藤椅更具美感和观赏性,美丽和实用两不误,实用牢靠。
四条藤条加固四肢,实用牢固,在使用过程中更舒适、更安心。
儿童餐椅设计说明书1.使用说明:这把儿童餐椅是一把可以伴随儿童成长的多功能家具。
在婴儿时期可以坐在高座面上面与家长一同在餐桌前吃饭,前面的护栏可以保证她们的安全。
随着年龄的增长,可以降低座面的高度,在椅腿上设有三个高度,可以满足不同时期儿童的需要。
也可以满足她们的舒适度。
这把儿童椅,除作为餐椅之外,还是一把很好的学习椅。
坐在下部的椅面上,高度刚好和儿童学习桌的尺寸相符合,可以满足儿童学习的需要。
此外,该件家具从外形而言就酷似梯子,出作为儿童家具之外,也可满足儿童攀爬运动的天性。
目前多功能家具受到越来越多的消费群体的喜爱,此把儿童餐椅不仅能够一椅两用,更能够随意调节座椅高度,是一把可以伴随儿童成长的贴心家具。
这一独特功能的设计,也为该产品增加其更多的附加值。
2.材料说明:儿童餐椅整体材料选用松木,为速生材。
现在市场上面儿童实木家具多选用松木作为原材料。
实木家具相较板式家具,更加环保。
只是在实木清油涂饰时有少部分甲醛释放,而板式家具内部及表层使用胶黏剂较多,对于儿童较为脆弱的体质而言是极为不利的。
松木在实木家族中属于速生材,原材料生长速度很快。
因儿童家具在家具制造范畴内属于较为特殊的一类家具。
伴随着儿童的成长,更新淘汰的频率较高。
所以选择使用速生木材作为家具原材料是十分必要,十分环保的。
在速生材中,松木纹理鲜明美观,而且其中有松脂的香味。
这也是选择该树种的重要原因。
3.涂料说明:为了能够充分显示松木美丽的纹理,餐椅选用的是清油涂饰,再进行砂光。
当然为了刺激儿童的对于色彩的感知能力,也可以选择混油涂料。
4.结构说明:餐椅整体采用实木榫结合的连接方式,部分衔接采用圆棒榫。
4.1前腿与后退:前腿与后腿在配料时由于造型的缘故采用曲线的锯解方式。
之所以没有选择前后腿整体配料是因为考虑到餐椅的使用强度,整体配料会让椅子的强度变小,很容易从端部裂开。
所以在前后腿衔接的顶端采用圆棒榫的连接方式。
在前后椅腿处各开圆棒榫孔,在装配时,采用两个圆棒榫连接装配。
便携式杆状折叠椅产品设计说明书设计者:胡豹王绍堂陈建强王昌省山东大学机械工程学院2011年11月6日目录:1 封面2 目录3 产品设计的目的和意义4 同类产品概况简介5 设计方案6 设计尺寸7 组装过程8 参考文献3。
产品设计的目的和意义许多世纪以来,折叠椅一直被认为是最重要的家具之一,是社会地位的象征。
在古文明中,折叠椅不只是为了供人就座,还用在了各种正式场合和仪式中。
它轻便、可叠放功能的座椅,既方便搬动,又节省空间。
座面板与背面板一般用原PP塑料在模具内一体注塑成型;椅架与椅脚用静电银色粉末喷塑的方形钢管,方形钢管比圆形钢管更为牢固耐用;一般椅架底部,即与地面接触的位置会加脚垫,起到防滑,防止划伤地板的作用。
使用场合:各类培训机构、各级学校、公共场所、医院、餐厅、酒店、公司、家庭等场所.随着时代的发展人们对家具的要求不单纯是功能需要,更是装饰美观的需要、更是彰现个性的需要。
随着国内经济发展,人民的生活发生了根本性的变化,人们对折叠椅的需要也必然朝着健康、环保、品牌方向发展.未来的折叠椅将要结合更多的功能,会将更多的结构简化,省去笨重的结构,更容易操作和节省空间,简洁,朴素。
而面对当前折叠椅笨重、者的后仍将占用大量空间的问题,设计了本产品.本产品仍将沿用普遍的“X”形增加其牢固性,折叠后可称为一杆状,在登山、旅游等情况下可用作拐杖,将拐杖和折叠椅的功能集于一体,将为生活提供加大的便利。
图一:折叠椅发展史4。
同类产品概况简介较沉重,且功能单一,与人们日益发展的生活需求有一定差距。
5。
设计方案5。
1 整体方案构想如前所述,在现在市场上,传统的折叠椅可折叠成面,但仍占用一定空间,且较为笨重,在户外野足登山过程中难于携带,且可携带的折叠椅功能又较为单一。
故我们将折叠椅与拐杖的功能结合在一起,在使用折叠椅时,可方便的组装成椅子状,达到椅子的功能.而在不使用的时候,可恢复成杆状,即达到了节省空间的目的,又能在野外登山等活动中充当拐杖,从而达到一物多用的目的。
用三种说明方法写一种家具家具是我们生活中必不可少的一部分,可以说是人们的朋友和伙伴。
在这篇文章中,我将用三种说明方法来介绍一种家具——椅子。
方法一:定义解释法椅子是一种为人类提供坐着休息、工作或者用餐的器具。
它由四条腿和一个坐面构成,坐面上通常还配有背面和扶手。
椅子可以是用木材、金属或塑料等材料制成,具有可拆卸和可折叠的特点。
椅子的设计和用途多种多样。
一把舒适的沙发椅可以让人们在家中放松身心,而一把办公椅则可以提供对工作环境的支持和舒适。
此外,椅子还有各种不同的风格和设计,如现代简约风格、古典欧式风格等,以迎合人们对美的需求。
方法二:举例法举个例子,康帕斯椅子是一种现代简约风格的椅子。
它由铝合金和人工纤维材料制成,因其轻巧、耐用和易于清洁而受到了许多人的喜爱。
康帕斯椅子采用了人体工程学设计,具有舒适的坐感和腰部支撑,使人们长时间坐下也不会感到疲劳。
康帕斯椅子的设计简洁大方,线条流畅,适合于各种室内空间,无论是家庭客厅还是办公室,都能为人们提供一个舒适的座椅选择。
方法三:对比法椅子和其他家具相比具有一些独特的特点。
与沙发相比,椅子通常更加简单和紧凑,适合单独使用。
与桌子相比,椅子更注重人体的舒适度和支持性,可以让人们长时间坐下而不会感到不适。
与床相比,椅子更加轻便和灵活,可以随时移动和调整位置。
除了与其他家具的区别外,椅子在不同文化中也有不同的特点。
例如,中国的椅子一般较低,有躺卧的功能,而日本的椅子则更注重地板上的坐姿。
此外,椅子在不同的场合中也有不同的用途和形状。
餐椅、电脑椅、休闲椅等等,每种椅子都具有自己独特的功能和设计。
综上所述,椅子是一种必不可少的家具,可以提供人体的休息和支撑,同时也可以为室内环境增添美感和风格。
无论是什么样的椅子,它都在不同的场合中发挥着重要的作用,为人们带来了舒适和便利。

宜家调研设计草案汇报2012届景观二班姓名:张家溶学号:1211130269宜家儿童椅名称:儿童高脚凳产品信息:宽度58厘米深度62厘米高度90厘米座高55厘米重量2.9kg 座:聚丙烯塑料腿:钢产品优点:1.易于拆卸携带2.高脚凳方便您的孩子和大人们同桌吃饭,锻炼吃饭和社交技巧3.塑料材料容易清理擦拭4.材料环保,可再利用回收5.具有安全带,保护孩子安全缺点:1.塑料材质坐着时舒适度一般2.蹬腿之间没有固定点,实用寿命不长3.美观感不强•名称:儿童书桌椅•产品信息:•宽度53厘米深度52厘米座宽35厘米座深32厘米最小座高38厘米最大座高50厘米•重量4.2kg材料:清漆,成型校合木板,纤维板•框架:钢,聚醚粉末涂层•椅腿:钢,电镀•转轮:塑料•优点:1.书座椅颜色鲜艳种类多,儿童喜欢•2.脚轮是为较柔软的地面设计,转动方便•3.高度可调节,配合儿童身高•4.擦拭清理方便•缺点:1.无扶手,后靠不方便•2.材料较硬,座感不舒适宜家休闲椅名称:单人扶手椅(藤条)产品信息:宽度58厘米深度56厘米高度79厘米座宽43厘米座高:44厘米框架:竹藤,清漆主要材料:去皮藤条,清漆,钢,螺丝钉重量:4,5kg优点:1.保养擦拭方便2.手工编织,外形美观3.椅子与椅子可叠放,省空间4.支腿底部为塑料,如遇潮湿表面接触,可对家具加以保护5.材料环保,可在回收利用6.藤条材质座时更舒适缺点放在散热器或其他的热源附近,材料会干裂损坏•名称:布艺单人沙发(摇椅)•产品信息:•宽度68cm 深度94cm 高度95厘米座宽56厘米座深50厘米座高45厘米•重量8.9kg•摇椅框架:胶合板,桦木贴面,清漆•扶手椅垫:80%棉,20%聚酯纤维•座/靠垫:聚酯纤维•优点:• 1.外罩易于保持清洁,沙发套可拆卸,机洗• 2.有多种颜色外罩可选择,可轻松配合房间外观• 3.高靠背可更好地支撑颈部• 4.摇椅做感舒适,休闲感更好宜家办公椅•名称:办公椅•产品信息:•宽度54厘米深度53厘米高度82厘米座宽44厘米座深42厘米座高46厘米•材料:成型木胶合板,桦木贴面,清漆•框架:钢,树脂涂料•重量2.8kg•优点:• 1.颜色种类多,可供人们选择• 2.椅子可以堆叠放置,节省空间• 3.材料环保,可在回收利用•缺点:• 1.椅子脚无保护包裹,容易踩坏地面,拖动时发出噪音• 2.材料过硬,座时舒适感一般• 3.外观感一般•名称:半圆手扶转椅•产品信息:座宽48厘米座深45厘米最小座高47厘米最大座高55厘米最小高度79厘米最大高度86厘米•重量10.5kg•面料:42%棉,58%聚酯纤维•底架:钢,聚醚粉末涂层•框架:刨花板,塑料•座垫:海绵•衬里:纤维•主要材料:塑料•部件:钢,电镀•优点:1.脚轮可轻松转动,方便活动• 2.方便擦拭及保养• 3.高度可以调节,坐感舒适•4,椅子靠背斜度的松紧可调节,根据活动和重力增加或减少阻力•缺点:无颈部支撑,长期工作易疲劳宜家吧台椅名称:吧台椅产品信息:宽度40厘米深度45厘米高度91厘米座宽40厘米座深40厘米座高63厘米重量8.2kg主要件:实心山毛榉木靠背:纤维板脚搭:钢,粉末涂层优点:1.具有脚蹬,使居座更舒适放松2.实木,结实耐磨的天然材料缺点:1.椅子过高,稳定性差2.脚部无保护垫,容易磨损地板•名称:吧台圆椅•产品信息:•座直径:30厘米•宽度37厘米深度50厘米最小座高63厘米最大座高74厘米•重量4.4kg•框架:实心桦木,清漆•脚搭/安装版:钢,聚酯粉涂料•螺纹柱:钢,塑料•优点:• 1.可根据需要调节高度• 2.实木材料结实耐磨• 3.有脚搭,乘坐时舒适方便•缺点:• 1.椅子无靠背,容易劳累• 2.座板高低需要手动旋转调节• 3.脚部无保护垫,容易磨损地板户外椅•名称:折叠躺椅•产品信息:•宽度48厘米高度89厘米重量5.5kg•框架:实心桉木,上光漆•绳:塑料•优点:• 1.便于折叠,存放• 2.绳子材料,弹性大乘坐舒适•缺点:• 1.绳子材料在户外容易磨损受潮发霉,保存护理要小心得当• 2.椅子无固定装置,稳定性较差•名称:户外折叠椅•产品信息:•宽度60厘米深度54厘米高度86厘米座宽49厘米座深40厘米座高46厘米最大承重量:100kg•重量2.8kg•扶手:100%聚酯纤维,EVA泡沫•面料:100%聚酯纤维•座框架:铝•优点:• 1.便于折叠、存放• 2.由大量硬聚酯纤维制成,经久耐用• 3.本户外家具的用材无需维护• 4. 容易保持清洁;只要用湿布擦拭即可•缺点:• 1.承重量有限• 2.不易保存,应该放在室内凉爽、干燥的地方,放在户外时,请将家具倾斜,并盖上防雨罩。
按摩椅课程设计说明一、按摩椅市场调研资料1.按摩椅市场现状随着经济的不断发展以及人们生活节奏的不断加快,人们越来越重视身心健康。
目前我国的“亚健康”人群的比重已达到70%左右,超过了9亿人,而用推拿按摩进行保健,是我国中华医学的传统项目,因其老幼皆宜,应用范围十分广泛。
随着具有保健功能的各种按摩器具如按摩椅、按摩浴缸、按摩脚盆等产品的出现,也因为在舒缓压力,缓解疲劳等方面的效果显著,而备受处于“亚健康”生活状态的消费者欢迎。
巨大的需求与发展空间,一定会让各种类型的家用按摩器械发展势头强劲,成为健康产业新的增长点。
在丰厚的利润和发展空间的吸引下,我国的不少企业纷纷涉足按摩器具的生产领域,使得近几年我国的按摩器具出口形势大好,目前已成为我国医疗器械及设备行业出口金额最大的产品,其出口市场正在不断扩大,出口前景非常广阔。
从进出口情况来看,2006年,在国内市场需求快速增长、国际贸易环境逐步改善和国家对外政策鼓励的推动下,中国的医疗按摩器具市场进入了快速发展的阶段。
从中国医药保健品进出口商会获悉,按摩器具已经成为医疗器械及设备行业出口金额最大的产品,出口市场不断扩大,出口前景广阔。
医保商会的统计数据显示,2007年上半年,我国按摩椅、跑步机等医疗器械出口量已达36.65亿美元。
从市场销售情况来看,目前国际市场上的按摩产品分主要以日本欧姆龙、松下、傲胜等品牌为代表的高档产品和以台湾、大陆为主要产地的中低档产品。
据统计,2007年国际市场按摩产品的销售已达100多亿美金,每年的增长速度达30%;对国外市场的调研报告表明,日本仅按摩椅市场每年销售量就高达60万台,销售额约80亿人民币,由此可见该类产品的市场需求量之大。
从市场需求情况来看,在欧美等发达的西方国家,休闲康体已经不再是追求时尚,更重要的是获得健康,它已逐渐成为人们生活中的一部分,休闲康体已经被越来越多的人所接受,在美国,每八个人中就有一个在休闲康体,而我国平均100万人还不到一个。
公园、社区休闲椅设计说明书一•公园、社区休闲椅得市场调研分析一、现状调研飞速发展得现代社会,越来越多得人没有时间休闲娱乐,而公园成了最受青睐得地方。
就是儿童、青年、成年、老年都可以活动得场所。
座椅就成了公园必不可少得设备,什么样得座椅能满足所有人群得需求呢? (以下就是我对现代公园座椅得优缺点分析)园座椅耐用不怕分吹日晒,大方简约又时尚硬,儿童会磕破,表面粗糙对衣物损害金属结构单人座椅单人金属座椅有着机械美,让每个人都有独立得空间金属材料造价高且维护花费大,不适合建在多雨得地区简单总结一下现有座椅得优缺点:优点:1双人及多人座椅,实用且美观。
2铁质或木质得材料,防腐蚀,结实,耐用。
3座椅与环境颜色相近,美观,显得十分与谐。
缺点:1座椅高度不适合儿童2座椅坚硬且部分座椅没有扶手,不符合人体曲线3公共座椅有着不卫生等问题4缺少杀菌功能,不卫生、不干净二、市场调查○1您得性别○2您得年龄○3您得职业○4您就是否经常去公园、○5那您一般会选择与谁一起去○6您去公园就是喜欢坐在公园座椅上吗○7您喜欢哪种材料得公园座椅○8您希望公园得座椅倾向于哪种类型○9您喜欢哪种形式得公园座椅○10您喜觉得公园座椅有哪些方面需要改进三、公共桌椅使用分析分类图示坐姿受力方式及座椅高低儿童10岁以下儿童身高早120cm以内,且谷歌发育尚未完成,座椅应该采用适合儿童脊椎骨骼得线条青年人青年人在1218岁,就是学习得阶段,无论去哪里都会有瞧书得习惯,座椅应该就是适合正确坐姿瞧书得老年人老年人骨骼已经退化,身体变得僵硬,通常会出现驼背等现象,公园座椅应该采用较为符合老人身体得构造,采用舒适柔软材料成年人成年人工作繁忙,难得能有时间到公园放松,座椅要采用舒适得材质,符合人机结构,并且能带有音乐播放得功能最好。
四、数据测量五、就坐方式分析(1)、就座方式分析人得行为取向就是复杂得, 根据个人得性格特点, 有人喜欢宁静, 有人喜欢热闹, 有时三五成群, 有时独自伤怀。
Three Legged Stool Randy Cordle / 2016This stool could easily qualify as fine furniture, being equally at home in the living room or featured at the local arts and crafts fair. A few unique construction features allow it to be built quickly and easily enough that you won’t feel bad about making one for your shop.The virtues of three legged stools are widely known; they use less material, are quicker to make, and always set solidly on uneven surfaces. The drawbacks of being considered tippy and appearing to be visually unbalanced are greatly reduced by increasing the leg angles, although excessive leg angles can result in leg ends that project far enough beyond the seat diameter to create a trip hazard. The 14 degree leg splay angle used here is worth the additional leg projection as it ensures an attractive and stable design.This design features a few unique construction details that make it both quick and easy to build, while leaving the casual observer to wonder exactly how they are done. The first detail can be found in what I refer to as a wave joint; easily created with the band saw. Contrasting wood strips replace the band saw kerf width to create a pair of flawlessly joined seat joints across the three piece seat. Another feature are the stretcher ends which appear to pass completely through the legs. This is accomplished by housing the stretcher ends in shallow tenon mortises, the stretchers anchored by using glue and 2” long #8 drywall screws. A tenon mortise is added to the outer side of the legs in line with the stretcher ends and is used to house faux tenon ends which cover the screw heads anchoring the stretchers.All three leg stretchers are offset by 1 inch in height so the stool can be rotated to find the most comfortable position upon which to rest a foot. Although all measurements are provided on the drawing, the design is very easy to adapt for any desired height, seat diameter, leg angle, stretcher positioning, or anything else you may wish to modify. The design is so easy to work with that precise measurement isn’t strictly necessary. Stretcher lengths are determined as the stool is built, thereby making this a truly versatile and easy project.Economical to build, the entire project can be completed from an 8 foot length of 6/4 rough lumber 5-1/2” in width. A small amount of wood selected to contrast the primary wood selection is used to create the filler strip for the wave joint and the wedges for the leg tenons.The building process is divided in four steps, (1) seat, (2) legs, (3) stretchers, and (4) finishing. Let’s get started.SeatThe seat is made by planing rough stock, gluing the overlapping sections together, drawing the wave joint over the lapped areas and cutting the sections apart with the band saw. I use a 1/2” 3 T.P.I. skip tooth blade on my band saw and it results in beautiful joints.(This area intentionally blank)Marking the wave joint:Cutting the wave joint with band saw:The waste pieces created as a result of cutting the overlapped sections apart are trimmed off in preparation of glue up of the seat blank. I cut the bulk of the waste pieces away using the band saw and clean up most of what remains by lightly planing.Cut away the waste areas that remain glued to the seat sections:The secret to successfully joining these sections together lies in creating the contrasting wood filler strips that are sized to perfectly match your band saw kerf cut. Create a short cut in a scrap block to use in sizing the filler strips that will be added between the seat sections. Press the joint edges together to check the fit, but DO NOT sand or otherwise alter the faces of the joints created with your bandsawn cuts. Cover all mating surfaces with glue and clamp the seat blank together for 24 hours.(This area intentionally blank)Creating the filler strip that replaces the width of the saw kerf:Checking the filler strip thickness by using a scrap of wood with a bandsawn kerf:Seat sections and filler strip glued together:The seat blank is cut out slightly oversize and mounted to the lathe faceplate with four screws. Proper mounting protocol is necessary, so make sure the seat blank is securely mounted to the faceplate. The #10 screws used here are sized to make certain there is a full 1/2” of material available to turn the 3/8” deep seat profile with no danger of contacting the screw tips.(This area intentionally blank)Details of seat blank rear profile:Cutting seat blank to approximate finished dimension:The outer diameter is trued, the bottom angle cut, and the outer edges rounded before forming the gently contoured seat top surface. The seat blank is sanded to remove all of the remaining lathe marks using a 220 grit disk on a 5” random orbit sander.Straightedge shows top contour:Sanding seat top contour, easier to do after removing from lathe!Don’t despair if your lathe capacity isn’t large enough to turn the seat diameter. It is perfectly acceptable to cut your seat outline with a band saw and finish the shaping with alternative tool choices. Band sawing the seat profile is also a good option if you would prefer to make an alternative seat shape such as a large triangle. There are various ways of drilling the leg tenon mortise holes, but I prefer using a simple wooden guide clamped to the top of the seat to align and hold the bit at the proper 14 degree angle to create the proper splay for the legs. The guide has a U-shaped wood saddle screwed over the angled end that keeps the bit aligned both side to side and at the correct 14 degree angle. The holes are drilled 4-1/2” from the seat center. The front hole is located mid-way between the wave joint and the remaining two are spaced 4-1/2” from the center and 120 degrees apart using a simple layout guide. I prefer drilling from the top as the hole created by the Forstner bit will have sharp edges with no visible tear-out if the bit is held firmly by the alignment jig. A bit of scrap wood can be clamped against the bottom exit area to minimize the chance for tear-out as the bit exits the seat bottom.(This area intentionally blank)Various jigs (as detailed on construction drawing):Drilling the leg tenons with the Forstner guide:Layout of the two rear leg tenon locations:LegsBasic cylinders are lathe turned to make the leg blanks and the desired dimensions are marked along the length to create three uniformly shaped legs. The 1-1/2” tenon area (immediately behind the drive spur mounting area) is turned to a 1” diameter to match the drilled leg tenon mortise holes in the seat blank. Standard tenon sizing techniques can be used to create the 1” tenon but I use the “sharpened wrench tenon sizing tool” (widely popularized in Youtube videos) to quickly form a close to ideal diameter for tenons. I made my 1” tenon sizer from a 1” combination wrench by grinding back the front 1/4” of the wrench’s top jaw to create a sharpened cutting tip. It is best to rough turn each tenon area about 1/8” oversize and then switch to the tenon sizing tool. The tool is eased over the slightly oversize tenon diameter while the longer bottom portion of the wrench opening is kept pressed up against the bottom of the turning. This sounds tricky, but it’s actually quite easy, with the cutting action of the top of the wrench jaw stopping instantly as the wrench jaw opening width is reached and the wrench slips over the sized tenon. I was dubious about how well these would work until I invested the 8 dollars for the 1” wrench and tried it for myself. The tenon sizer turns the otherwise tedious work of accurately sizing tenons into a quick and easy process. I won’t be other methods of sizing tenons anytime in the near future!(This area intentionally blank)Legs marked to indicated diameter measurement locations from drawing:Using a “sharpened one inch wrench” tenon sizing tool:Sizing tenons in this manner will get you very close, but it is still necessary to fine tune the tenon diameter. I use a simple gage made by boring a hole in a hardwood scrap with the Forstner bit and cutting it exactly in half. Sand the tenon a bit, stop the lathe and check the fit. The test gage will mate with the tenon perfectly when it is sized correctly. After the leg tenon is sized the remaining marked intervals along the leg are turned to the proper diameters and the waste between these areas removed to complete the rough tapered legs. True up the surface profiles and sand them to create a finished leg.When you’re satisfied with the leg you can remove it from the lathe and trim the excess length where the drive spur and live center were used. Leave the excess top tenon length; it will be trimmed when fitting the tenon to the leg mortise in the seat.Checking tenon size with a gage made from scrap drilled with a 1” Forstner bit:The legs are now fitted to the leg tenon mortise holes previously drilled in the seat. Each leg tenon has the excess tenon length marked about 1/8” above the seat surface. The legs are removed and the excess tenon length trimmed away with the band saw. A line is drawn across the top of the leg tenons at 90 degrees to the tenon end grain to indicate the location of the leg tenon wedge. Rotate the front leg so the wedge will exert pressure in the same direction as the wood grain of the top to prevent any chance of the wedge splitting the seat top when it is driven in. The remaining two legs are turned so the wedges point to the center of the seat. Purely an aesthetic decision, the wedges could also be oriented in the same direction as the front leg wedge if desired. Do mark each leg so it can quickly be replaced into the same hole and oriented in the same way.You don’t want to try and figure out how you want the tenon wedge positioned after it glue has been applied and it is inserted in the seat hole. Moving joints around can quickly become difficult once the glue is applied and the tenon is inserted in its corresponding hole.(This area intentionally blank)Leg tenons trimmed so 1/8” protrudes above seat surface:Cut the leg tenon wedge slots as a last detail before adding the legs to the seat. A scrap of 2 by 4 is drilled to hold the leg tenon while cutting a slot for a wooden wedge. The slot width isn’t critical; the blade you have installed on your table saw will do fine. Set the blade height to cut the wedge slot to within 1/8” of the flared area of the leg that will butt against the bottom of the seat.(This area intentionally blank)Cutting the tenon wedge slot with a simple jig and table saw blade:Contrasting wood wedges are cut to match the tenon hole diameter. The wedges are made by cutting a strip of contrasting hardwood to the width of the tenon diameter and about 1/16” thicker than the slot. The strip is sanded to create a long taper length that matches the wedge slot depth, the wedge cut to length, and the procedure repeated two more times so you have three wedges ready to go.Painter’s masking tape is applied to all surfaces that might have the possibility of excess glue contaminating the wood surfaces. A bit of preparation saves a LOT of surface prep work later. Cover the mating surfaces with glue, insert the legs in the seat holes, making sure the wedge slots are aligned correctly, driving in the wedges to tighten the joint. Let the glued tenons dry 24 hours before doing any further work on them.(This area intentionally blank)Gluing leg tenons into seat and locking with tapered wood wedges:The tenons and wedges are carefully brought down close to the seat surface with a 150 grit sanding disk in a 4” right angle grinder. Use a light touch, a new sanding disk, and short intervals of sanding so as not to burn the end grain of the tenon. The tape does double duty here, acting as an aid against getting overzealous when bringing the tenon end down flush with the seat top. A 5” random orbit sander with a 220 grit disk performs the final leveling nicely after the tape has been removed.(This area intentionally blank)Quick and light cuts with a 150 grit disk levels tenon end to seat surface:Final leveling done with a 5” random orbit sander fitted with a 220 grit disc:StretchersWith the legs now solidly glued in position we’ll make up the stretchers that run between the three legs. Each stretcher will be measured for length and lathe-turned, with the taper ending in a 5/8” diameter tenon end that will be housed in the leg mortises.Three sets of blocks are cut to transfer the desired stretcher heights to the correct location on the legs as referenced from floor level. To position the stretchers on approximate 7”, 8”, and 9” centers three marking blocks are cut 6-3/4”, 7-3/4”, and 8-3/4”. Stretcher locations were chosen by determining comfortable foot rest heights and visually balancing the overall design of the stool. Mark the stretcher positions on the legs and drill 3/8” deep tenon mortises with a 5/8” Forstner bit at the 6 marked positions. Exact depth isn’t important; I drill until the Forstner bit body is flush with the surface which comes close to the 3/8” specified depth. One of the blocks matching stretcher height can be positioned at the rear of the drill to visually assist with keeping the drill level as each tenon hole is drilled while visually aligning the drill between the legs as the tenon mortise is drilled. Repeat the process to drill the corresponding tenon mortise in the opposing leg. Follow the same procedure to drill the tenon holes for the remaining two stretchers.Pairs of blocks are used to mark stretcher centers at three different heights:(This area intentionally blank)Drilling pocket mortise for stretcher end; block used to assist with vertical alignment of mortise:Determine the three stretcher lengths needed by measuring the distance between tenon mortise bottoms and lathe turn the stretchers. Make them an inch or two longer than the precise length needed and trim them to length as they are installed. Stretchers are turned to 7/8” diameter at the centers and taper down to the 5/8”diameter tenon ends. Stretcher tenon sizing was again done by using the “sharpened wrench” technique. The tenons will end up being just a tiny bit oversized and are brought down to their final diameter by using sandpaper. A tenon sizing gage as used previously for the leg tenons is made to assist with correctly sizing the stretcher tenons.(This area intentionally blank)Checking tenon diameter on stretcher end:Carefully cut the stretchers to exact length, keeping them in the correct locations since they will all be different lengths. You can save the cut off pieces to use as faux tenon ends if you don’t want to make them separately as outlined later.Before installing the first stretcher we’ll need to add the 3/8” depth stub mortise to the opposite side of the stretcher mortises to house the faux tenon end that covers the screw head. This is done by drilling through the leg to the outside face with a 3/32” bit, using the dimple left at the bottom of the drilled tenon mortise to center the drill. The exit hole at the outside of the leg is used as a guide for the center tip of the 5/8” Forstner bit to create a 3/8” deep stub tenon mortise to house the faux tenon end. Visually align the drill with the stretcher’s location so the faux tenon end will appear to be the extended end of the stretcher tenon. Enlarge each of these 3/32” holes to 11/64” followed with a countersink to create the clearance hole for the #8 by 2” long drywall screw used to secure the stretcher in the leg tenon mortise.Install the first stretcher in its leg tenon mortises, first one end and then carefully tucking the opposite end into its corresponding tenon mortise. I orient the grain of the stretcher vertically for additional strength in that direction. The stretcher end is now pilot drilled with a 1/8” drill bit for the 2” long #8 drywall screw. Mark the exact stretcher orientation by using a couple of pieces of painter’s masking tape at the mating edge of one stretcher end and where it meets the leg tenon mortise. Carefully remove the stretcher, clean out any debris from the mortises, apply glue to the inner walls of the mortises and reposition the stretcher. Lubricate the screw threads with a bit of wax and snug them down to pull the stretcher tightly into the leg tenon mortises. Mask around the joint before assembly if you tend to be ham-handed in your glue application, but in any case clean up any glue squeeze out immediately.Repeat the process for the remaining two stretchers.The last step in stretcher installation is to add the faux tenon ends. If you didn’t choose to use the cut off pieces from trimming the stretchers you can use a 14” length of 1” square stock is used to turn the six 1-1/2” by 5/8”diameter stub tenons. I find it’s easier to make them from a single turning rather than handle the small cut off pieces.After turning, sizing and sanding the stub tenon sections they are ready to be cut to length with the band saw. Each stub tenon is cut to length so the pre-beveled end protrudes slightly beyond the mortise edge and glued in place with a bit of glue placed on the walls of the stub tenon mortise. When the faux tenon ends are in place it looks very much like each stretcher tenon end passes entirely through the leg.“Stub tenons” are turned and sanded, ready to slice off and cover the stretcher mounting screws:FinishingLightly sand any areas that might need attention and apply your finish of choice. I like to use three coats of satin wipe on polyester varnish for a fast and durable finish. Let the finish completely cure for a few days and lightly buff with 0000 steel wool to knock off any surface dust. All that’s left now is to practice your sitting technique!Beautiful as well as practical, once you get a feel for how easy this type of stool is to produce you may end up making more for additional practical seating, plant stands, gifts for friends and relatives, or even as a craft show staple. The laminated wave joint and faux tenon construction will get plenty of admiration and are so quick, easy, and attractive that they are sure to find their way into a wide variety of your woodworking projects in the future.Wave joint in seat top:“Faux” through tenons:The completed stool:I hope you’ve enjoyed this pictorial guide to the construction of the Bluestem Three Legged Stool. Thank you for your interest!Randy Cordle / / 2016No part of this document or images contained herein may be used without the author’s express written permission.。
德州学院折叠椅创新设计系别:机电工程系姓名:赵纪鹏专业:机械设计制造及其自动化班级:08机本一班学号:200801703042指导老师:王志坤目录研制背景 (1)设计方案 (1)一、折叠椅的受力分析 (1)二、三、多功能折叠椅强度条件的建立 (3)四、五、折叠椅的计算 (5)创新点及应用 (8)参考文献 (9)研制背景当代现实中,一些不合理的椅子经常危害人们健康,我们常常看到打字员、会计、司机等因座椅不合人体尺寸而造成别扭的姿式,长期如此造成过度疲劳,脊柱弯曲、腰间盘突出、驼背等职业病;学生因座椅不适而坐姿不正、影响身体发育,使近视率上升;日本办公室的选椅标准:“办事员是旋转椅,组长的椅子有扶手,科长的椅子靠背高,部长的椅子暄腾腾。
”这种标准只从形式上考虑,而未顾及坐者是否舒服。
而折叠椅也在其中,为此,我们有必要对折叠椅进行合理的设计。
设计方案一、折叠椅的受力分析折叠椅的受力分析情况如图2-1-1。
靠近座板前边有载P作用,根据已知条件,可做如下受力分析 。
图2-1-1分别在A 、B 点取距,前、后腿受力公式如下:)cos (1α⨯---⨯=⨯b f c s P s N A ;)cos (1α⨯++⨯=⨯b c f P s N B可得:s P b f c s N A ⨯⨯---=)cos (1α 2.1;P sb fc s N B ⨯⨯+++=1cos α…2.2 分别取各杆件为研究对象,各铰支点摩擦忽略不计,如图2-1-2所示。
计算结果如下:根据座板受力情况,依M 点取距,有P c f N N DY DY ⨯==' 2.3;D Y A CY CY N N N N +=='=P sb fc s c f ⨯⨯---+)cos (1α…2.4 依C 点取距可求出)cos sin ()(cos 211ααα⨯-⨯⨯=+⨯D Y D X A N N P b a NP a s b a b f c s c f N DX ⨯⨯⨯⨯+⨯⨯---+⨯⨯=)sin cos )()cos (sin cos (11111ααααα………………2.5 由图2-1-2可知'''CX CX MX MX D X D X N N N N N N =====……………………2.6若C 点取距可有P cc f N N MY MY ⨯+=='…………………………………2.7a b c d二、多功能折叠椅强度条件的建立前、后腿和座板的强度条件前、后腿和座板是铰链,简化后均可看作是简支梁AC、DG 和BC,三杆所受法向力及弯距如图2-1-3所示。
椅子设计说明
1. 概述
在设计本款椅子时,我们的目标是打造一个外观简约、舒适度高、承重力强的
产品,以满足消费者对舒适度和稳定性的需求。
椅子的设计团队在考虑这些因素的同时,还注重了材质的环保、安全和可持续性。
2. 设计要素
2.1 外观
椅子的外观设计采用了简约的现代风格,以黑色为主色调,椅腿和扶手等部分
则采用了原木材质,增加了一份自然的温馨感。
整个椅子的造型流畅,线条简洁,展现出一种简单却又有质感的美感。
2.2 舒适度
为了确保用户的舒适度,设计团队专门在椅子的坐垫和靠背上进行了设计。
椅
垫选用高弹性海绵,可以有效地缓解长时间坐着所带来的疲劳感,而靠背则有一定的倾斜度,以使用户的脊椎得到更好的支撑。
2.3 承重力
在材质的选择上,我们选用了高质量的钢材,以保证椅子有足够的承重力。
并且,在结构设计上,我们采用了一体成型的钢架,使得整个椅子的稳定性更强,不易发生倾斜或抖动的现象。
3. 环保、安全、可持续性
3.1 环保
椅子的制作过程中,设计团队选择了环保的材料,以尽可能减少对环境的影响。
并且,在椅子的运输和使用过程中,我们还提倡使用公共交通工具和自行车,以降低碳排放。
3.2 安全
椅子的设计考虑到了用户在使用过程中的安全。
我们采用了倒角处理,使椅子
表面更加光滑,不易损伤皮肤。
在结构的设计上,我们也充分考虑了使用者的安全因素,使其不易翻倒或折断。
3.3 可持续性
作为设计师,我们深知环境保护的重要性。
因此,在本款椅子的设计中,我们
充分考虑了可持续性的因素。
在选择材料时,我们尽可能选用了可再生的材料,如天然木材、竹材和纤维板等。
4.
通过本文的介绍,相信大家已经了解了本款椅子的设计特点和优势。
我们相信,这款椅子不仅能够满足用户的各种需求,还具有环保、安全和可持续性的特点,为用户带来最佳的使用体验。