太空人音响2代说明书
- 格式:docx
- 大小:12.53 KB
- 文档页数:1
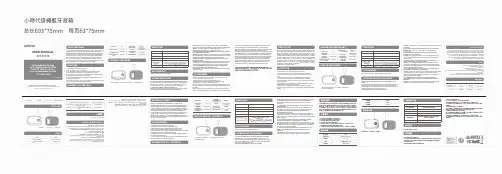
小峙代掛繩蓝牙音箱总长693*75mmMINISOUSER MANUAL使用貌明菩使用轰品前罚仔衄隅埭本使用泣阴害,壶馈妥兽保管。
PlfASE READ THIS MANUAI.CAAEFULLYBEFORE USING THEPROOUCT AND KEEP IT PROPERLY每页63*75mm_ Thank you for using Miniso WiMless Speaker. Pl斡睬啦d this manual ceretully before use. Using I t prope什y fur best product pertoema ce. MINISO Wireless Speaker has styl飞h appearance, true-to-life sound ond multlple扣心a s.The如Ole沁ees ha屯the pate t ot app蚐ra oe d..ign. The sy tem adopting the indust”-妇di g tech ol匀y enabl .. you lo enjoy the excellent oound e油ct,enytime at home. outdoors. duri g a trip or during沁rk.II provides pertect experience咘en you pl y mus忙o your laptops. digi切I music playe飞and other a心o-visual p oyers. !adi g you to a better l fe w lh beautiful叩s c!- 1 Stone and u貊it at room temperature 2. Do ot .叩怔•it to rain or mo如...3. Do ot throw the product to avoid damage caused by dropping4. Do ot disassemble, modifY or repair the p roduct y ourself.5. This product is equipped with an irreplaoeable built-I n I曲ium batter .Do no discard I t心oss in fins to avoid dang釭6. T o p函enl its performanoe from b..ng inlerfer&d, k 碑pIt awey from stro g mag etic objects.7. If you are ot goi g to use 11 ror a long time, charge the speal<er once every 3 mo ths to extend the lifespa of battery._.UJETOOTHC叩GING INP\11 CMAROINO PORT贼U仔IC PLAYB心T1'淝.V5.15V-1AMICRO u se Am心3HBLUETOOTH PAlRINGHAfllE BAlIUh叩N印IISSIONDISTANCE《”“叩m,..E MINISO-LTBT2219 3.7VI,,心归如~5叩吐h Aroood 10mAO25H_ 勹\....===-/I 2' I31. Power B如n2. LED I d cator L ght3. Charg ng Port- Funct;on Instruction霍P y P 叩笠Sh rt pres s pc沁N buttonNext T ra kD ub l!! pr e s power buttonP�,au , Tra k P志power butt n t h ree t e:oiL叩Ba tt ery lertpm pt咘e,lhe b叽e"村""Pa l S ng h uldT 叩eoutt u f r n h Q "� n, t h e p n •u 1 w i U t r , m 10 l ut l l n Q诅lo r n o h t 加刃r e I h t i 3t u c mm .ta na U 铲011,fu w h e 心ett i 如_ Speaker, C ha屯"9Cable, U sar Manuel_ 1. T he w ireless sp<边ker Is unable to be paired w ith the cell phone. Solution: Confirm if the wirelo...P的ker is i pairin mode, a nd if tho Bluelooth on your pho叩io tumed on. T匝n delete lho product in the list, p air I t with汗x ,r phone again a"心rding to the User Manual 2. Tho w ir•I.. •叮叩h辱r cannot lo泗tumod on.Solution: Confirm the battery level. Charge the speaker if ii� n七七d叫3. Can the battery or the w lreleu speaker心repla..d?Solu廿on:No, th心,s ithium po ymer battery,叫叱h is irrep aceab e.4. Can I use the w lreless speaker at a high volume伈r a long time? Solution: T o extend the lifespan of the wireles$$函ke r ,!is ot recom吓叹ied to play,口a high volume釭a l叩time.5. Tho link凶h“mth.wiml....puk.-1111d tho叫l pho心h..h叩dioc“”“贝回within 10n..“' .. Solution: Bluetoath I s w1rel妇•so that n I s very s ens化ve to obj的它谗妞砌the.pea尥r and the oo nnec;妇1device O记ck w there are any metal or叩r 叶hj可+slhat may志cl心m矶ction wihin the effective distance.6. Cannot妇ar audio playing w h..the .p..ker i• conn叱d to tha comp啦r or phon..Solution: Check咘ether the computer's audb output I s alraady oo ne也to wirele岱device and凶lei归the Bluetoo1h in the oo mpu心如pports A2DP protocol. Ma尥su"'the volume is up on you『phone可oo m pu的r 7. Con I ope...比如Apps ofmy phone through th..优吵”“归p霍iring tho谝巾..1...引沁R缸rwRh th.phone?Anowa,Some ap困may not support being operatoo thmugh the sp..ker due 1o theirsetting-T his device oompl邮with Part t 5 of the FCC Rulee, Operation is 叩bjec:t to the伈llowi g two conditions: This devtce may ot cause harmful I nterference, a dThis device must accept any interference received, i cluding intarf<lrenco that may cause u d..ired oparati o n.Caution: Changes or mod1f i catione ot expra..ly apprnved by the party 冗spons『ble for compliance could void the user's authority to operate the equipment.NOTE: Th s equ pment has b..n test的and found to comply w th the limits fo r a Glass B digital device, pursua t fo Pan 15 of the FCC RulesThese limHs are designed to p『ovide啦sonab e protect on against harmful interfere oe in a 戊sidential installation. This equipment扣七I从es,uses and can radi啦rado氐ue叨e ergy a d 甘not installed and u蕊din ac=元al109With Ihe in呻udion•, may cause沺rmfulint呻面ce to radio commu�calions. H<-『,then,� no guarantae that i叩erenre will not o氏ur i a四rtirular i 如lation. If this eq"ipment does cause harmful I哗心七n to radk> o氓le书记Ion re七eplon,wNch ca be &妇mi咄切印ming the equipment off and on, l he user is en oou叨ed to lryto江叮虹妇iI心1「111"心by o e or mo"'of the fo!owing m...ures: 4祜"缸I or n,locate t匡匝龙订Ing丛N田11出一Ina出lhe seperation 叫讯儿n Ille equipment a d沦ceive『. -Co ooct Ille equipn妇1l into an outlet on a circuit dllle r 印t from th a t to which the re也ver lsoonnec尽 如嘘lhe d泌er or an e 知边叫io/TV但加i心n for help_ Nous vous心m矶心1s d'e\IOir u廿lis�le haut-pa心ur sens 111 Mi 心Veuill眨1ita比nt,vement oe manuel avant rut仇迎tion.U训sez�e oom立m七nt pour 咖nir les meilleu咚阳「UlI旦l吐s du produtt_ Le haut俘r1eur笠•filMINISO吓une心d ,dlced的a心u so f>d 七le et deSm 切ons mu灼µ社r i e enti�re a le brevet de la co ception de「apparence.Le sys泊me 叫平ant la吵nologie de pc;切de l'i du劝ie VOUS pe,met de p rooter d'exoellenla ell啦双m叩3a血momen\ii le maison, ii re如eur,en 口归ge ou au lraval. Le produtt ollre u e e叩erience pa中心lo卤ue心心1ouez de a mu�que sur火巧ord nateurs portables, vos ecleur, de musique num拉ue et a叩le氓,.,.audic,,i和啦叨JS oondui..t�une vie moi,如f"OIM!Cde la归<>m氓iquel_ 1. Consorvez-le et u引lsoz-lea tern凶rature amblarrte2. tvitez de l'exp函r A la plule ou合un envioonnement humde3. Ne pas jeter le prodult pour eviter I..dommeges caus丘"汜r une chu妇4. Ne pas d�mo 忙r.modifier ou reparer le produit vous-m!me5. Ce prodult est的ulpo d'avec u o batte什o au lithium Int的飞e,叩mpl的able.Ne pas jeter le produit et心p的le je沁r dans le feu pour eviler tout danger.6 PourOVItor que ses p.rformanc.s n. SC,e t p叭urt,的s,meintenir a10,gne des objets magnetiques pui..ants.7. Lo心que vous 'utmsez pas le haut-perteur pendant une longue伐riode,chargez-la tous les 3 mois pour prolonger la du伶e de vie de la 仄如ri._ BLUETOOTH EN"伍...CHAROE鼠ENTPORTDEMCROusa CHARGEMENTDUR!E D E LECTU ..DE LA M U81QUE V5.1SV=1A0d.“', 3HNOM D 'APr合JR BLUETO叩...TTERJEDISTANCE D E TRAN叩lSSIONTEMPS D E CHARGEMENTMINISO-LTBT2219 氐如心·all t 闷um 3,7V 500m心Ee,i 心10mE的巾n 2 5H_ 丿勺1. Bouto d'Alimentation 2. Voyant L umineux LEDS. Port de Chargement_ FonCion Inst八,ction戛L ed"兀Pa u eAppu归z br 如een飞ur e加,u lon 油e祖P ste Su i v antl!!pp叩zeux f s u r le bouton 'l ent t P teP元口只允nte 如沪Im记fn ur k'! boulan 'lm e l2!.t B e 创n F e ,b Un够Sgge 吓ie r ait l rsque e batterie e t fo ble'A ti D m�g e 'S 'II c y叱1e p a s p ro u n ,如,1nt u p 心1so t q u e u . ent . V �C h 由Lu m e neu x te 心u 巾e l .『•• t u t 9,. 6 .. t e t l u 蚧o o . n 飞b h l ”口m沁n p t I B r a h 台e _ Haut-parleur, C的le de Chargeme t, Manuel d'Utilisation_ 1.Le haut-1>■11eur san• ftl no parvlent pa■金·`ppad.r aw兀lomobile.Sotuuon : Cooflrmez sl rencelnte sens fll est en mode d'appaJrage, e t si le Bluetooth de votre tel七pho爬est active. Suppnmez e suite le produit de la liste, p ui, appairez-le � nouv..u avec votre比lepho e en sulvant l..Instructio s du manual d"uHllsallon. 2. lmpo••lble d'allume, le hout-padeur ..•• fllSolution : Confinnez e niveau de a batter心Ch叩ez � haut-parteur si eoes 吁咋3. La b叩rle du haut-parleur sons fl! pout会lie ftre remplac妇?Solution : Non, ii s'agit d'u e pile au lithium pol仰虹,qui ..I 而mpla伴blo.4. Puis•j.utiliHr lo h•u�严rlour..,.fil • un volumo olevo pendant une longue p6rtode ?Solutlon. Pour p『olonger la durl>e de vie du haut-parleur sans fil, ii 'a,t pas recommanda de l'ut1liser白u volume aleva pendant una longue p,ricde.5. La liaison ontro le haul-parlour sans fil et lo mobile •妞啦connoct6e dans un rayon de 10 m杜兀..Solutlon, La technologie Bluetoolh est •a s fil. Elle eot done I志sensible aux cbjets s�ueo e叩le haut-parleur et l'appa"'ii ccnne啦V如fiez s'l y a d es objets metall qves ov au呤Qu peuvent affecter la connexion d•n• la distance effective. 6. Imp<遠芯Ible d'ontend,. la loctu.. a udio lo..qu.1.haut-parl.ur ..t connocti古l'ordinateur ou au蚀I合phone.Solutlon : VMflez SI la的rtle audio de l'ordlnateu『est d仑J a conne啦ea un沁riph七rique san$介I el si le Bluetoolh de l'ordinateur pre d en charge le pnotocole A2DP. A岱Umz.vous qu.l.叩ume es ol酌o su『VO四lelephona ou vot戊ordinateur.7. Puis-j• utilisor las applications do mon血phono via I•haut·归rteur ap啦avolr ap贮'r1610 naut-parleur sans Ill aveo le 岭liphone ?R`pon.e • II ...peut que c.心ines applic;atio心o pui•..nt pas otre util1s妇par lo haut-part印心raiso do I矶』n;param�tres.—户__玑l 少i斗己,一J,J,社i,;,.,,,丑~”“匕山l少I....JI�,匕,沪~屯llJI9严Jl 一扫I J<..,己也心l产一心-",心斗泸冲心一托片l o中心心也..WI ..一一边叩土_,.,,“J炉右S'J ·“4心尸少乒托......“'七-l 3.斗!,I 心力-勺还气心l心l扣心心心心心斗,.切i己心,,,心沁归心心山;;.J JJ也.:..J .-,.la产3....,I-尸上斗~山”扣1if I J仑一~已七斗,�.,.,也l也立心上,心J泸凸,切心切""'— 也只心P心)人}巳l “'P,立L,,,1勺心,1卢J己,.,...,.,.,..,_2匕正4u己U 上1匕&h..,;;;y 3一一贮1e 止1,IJ,心$上?心认4... -,,1产J l .,,i_,,c .J l '°'"'llJ<l,心户一心心匕少沪,心.5少干UI己,叫少五:U一己七夕11.......,"--J ,.C.少'"'---•土心叫J“以正U炉13.J<七i....JI 斗,心卢心心,也"'止立7— MINISO-LT.BT221. “心~...心IJ.500J”“卢10.JbJ卢`'尸'仕血1J心},动 5.1 J口乙夕5少.11_,.._MICRO USB吐炉,,,,...,心,�心压心心1丛心l.,2.5.,1夕“心1今|心匕3J I,,1~~一女_ 正心J l ii.l..3庄少,".o.2J.已..11�i (1)— _1..l-.I I上~斗,...上止o上已d I C也a ..,七.,.匕“'",,IJ.o,;,J �li.llj,..:.,_,JW ;l...JI.,,.,\I;J,>..ll e l.u i..-, 扎K妇lJL已.3-...,上一~J一七l l 夕心,10,-,Ji.o;I SCi>人,,,1,1J吐少已上~心l ”比1J心1....-..-丿,心1.,.,....乒户讥气产2心l心巳1L心l丘·十a个ll欠心斗,... J兑``卢Jt.,I """''-"'少."心_ ,心.JI心·口已J IJ,匕....,,_ J牡认必J少见心社~Jl1,'.J,a,..J,心一`心勺也u阳玑吵·吵汹1�,..)ocl..Jl.:....011....rb:a,团,心儿从J,人心一打儿vi夕沁o止:K,,,.心,,心IJ:,..,,._.;1,心心少l,Jlbl让i...,1.,...,"'lb,11应b 奾:"句,......心心凸王心.2寸s匕屯J'-1.,<.,少3JI`',心l吵少一虫心出心坠.Y斗的l口王心沪尸--扛匕心l立..,心JJl4叫少印K山让少知d吐户一夕”~气"'L....JIJ,心山心吵'.斗汛J ,上七,._,,J叫10,J心4心U肛斗....Jl JLA消上卢_;安…尸l 心心!勺凶..,.比“'凶还心J t...也少心”从1:女切一心3S 夕lo也l ,I U』出JIJ谥心S I 斗匕.心心汕沪b心匕叫�IAAJI句匕心J匕心l心..,,1力妒”“$......,,心,,皿"....e.....-,.6还l 习匕,心正心心夕玉j玫I心沪》亡少1让9-心尸'SJL..产·斗习JI ,心中,少-卢心一;也一灶应D P 心心户兰丸心lIJ一心�,夕心心,,.,沁书也......,心正斗心_,上__..,.,,..,,._.,,..i,..:.占Ja .7,..,,,�1-还L...IIJ心J.a.:,.J .,I 心b.JI._,...卢上,心心心1_笠屯s por usar MINISO AJtavoz lna�bri己Lea.. tema.,.,al如呻ente antes de心a的Util�andolo OOITT戏叩en访para oble er el meJor re叫rnenlD det pl<Jdudo. AJtavoz lnalambrtco de MINISO Ile e una apar面也elegante,u 切叩llooom p acto, u n的ni心飞叭sla y m雌ipl.. 扣n改}罕Toda la..ne tie e la patente怎disel\o de apanenaa.El s1stema Que adopta la托cno切ia lider e la indus�la le戊m a .di叶utar de los O心Ion如引矶乒de sonido on 111刁IQuier mome 比en也扫,al a西l,如,dura te un �•j• o dura te al tr,也ajo.Brinda u氓切心1妇cia perfecta cua do rep1<Jdure musica en s1氐commt刁叩蕊"咽les,叩戍ucto啦de mos,笠dig回y如s阳pro d uclDI飞s audiovisuaes, l o que lo lleva a una ,;da me;,,con m的C8h臼mosa._ 1. Gu6rdelo y utilloelo a tern凶ratura ambiante.2.Eviteae,扣业i6n a la luvia o al ambi..,te humedo.3. No a叨e el pnxlucto pa..evitlrd对ios臼ll.9巾,poroaf d as.4. No d部m还modi几1-1e ni repa闯·1叩ducto usted mismo5. E啦produ心v o n .oon una扫brlado tion叩coda i心uslilu blo.No lo dE斗,ct,e ni k> arroje al fu e go pera evilac el严ig10.6. Para e,,itar Que的in 七rf氐ra en su funcionamiento, ma咄切galo alejado de ob;血mag,心icosluertes.7. Cua do no .. 的en u 的duran归mucho tiempo, cargue el altavoz cada 3 叩蕊spara p心叩尹r laWda切Id85ba妇ria._.LUETOOTH ·Nnt心ADE CARGA PUERTO D E CARGATlEMPO D EREPROOU心1心I凡d~Jde3H DE MOSICAV515V=1AMICRO USSHfl帕REDE EMPARF_,AMIFNTO BWETOOTHBATE川A DISTANC八DE TRANSMISIONTIEMPO D E CARGAMNI的LT.BT2219,.,.,.,.''"'"3,7V 500mAh 斗,趴比dor de10m ",七山士比,如2,5H_2' II I 乙1. Bo论n de Allmentacl的2.lndlcado『Lumlnoso LED3. Puerto do Carga一FuncI ..lntmcclone8Rep 中rI P u ga r P u e breve ent兮elb啦 e ent 如P飞P S g u论`eP ul e vece e b t6n e e Ien扫dOP 又a 八1”UI P ul e e b l 6n e l enla c 6n tres vece A e中eBa t erf Ba j Unm旧o ctJa le b t erle. e 啦b aieE p ,T 吧•J po e Es A 叫ra µ,h· S o h $e OO n n e x 6n ul t 点r n r t c u ducio n 沿n te 1e .0 p 叩心fe e 血lcadora e C 叩.L e Iu z ,m -,•.• 啦p 叩o g 蚊e n sp l •u ,,.,..的,O.. i U 2O p ,0. _ Alta血Cable de Ca屯a,Manual de Usuario_ 1. El altav立inal知bri0的妇puede emparejar con el吵ii.Soluci6n: Co fione si el altavo z inal�ml>ricc es泊en mode de emparajamie to y el Bluetooth de su tel七fono e函activado.L哗90elimine el e沺"'to en le lists, v uelve e vinoolerlo con su telefo o de 一寸句寸c co •I Ma ual dol usuario. 2. El Oltavoz I 心1.mbrlo no又:pued· ·nmn心r.Soluci如:Co firme el ivel de la bi妇由Cargue et alta中Z3..l巳上一心3. LS• pu心e正empr立ar l·b..eria de1al.. v oz l nal�mMco? Solucl6n: No se pu忒..u氓batorla呻pol「moro de Ii廿o,que e8 insustiluibte.4. 1,Puedo usar el altavoz i natlimbrico a un volumen alto du巾nte mucho tiompo?So1uc16n: Para prolongar ta Vida util del altavoz inal�mbnco. no se recomienda 『eprodudrlo a un v吨ume alto duranle m心ho liempo 5. El enlo...nt...l .“avomn叩叩rlco y..m如,....dooconectado on 10 motroa.Soluci6n: Bluetooth es in必mbrico,por lo quo es muy sons;blo • los objetos entre el a归voz y el dispositivo conectado. Com pruebe si hay algu me扫I u otro, objetos que puedan afectar la conex论n dentro de la 叩anda el氏加a6. No H puade oscuchor la reproduccl6n de audio cu111do el altavoz.式`”“ectado • la compu比dora o •I切1如no.Saluci6n: Compruebe si la salida de audio de la compu妇dora ya es饿conectada al dispositivo inalambnco y si el Bluetooth de la compu白dora es oompatibie con el p『otDcolo A2DP. A扫1urese de que el volumen de su telefono o oomputadora e啦alto.7. lPuodo utiliz■r I..霆plicacionH do mi totofono" ..呾del 旦ltavozd..pu妇中ompa"'jar oI ..tavozinal血mbrico con ■I tololfono?Re.PU的红Es posible que elgunes epli顷扣es no admi归el funcK>namiento a trav的del allav立debido a su confi g uraci扣_非常感谢您使用M INISO 蓝牙音箱崖品,使用前精样细团阮本饼明番,芷璋噪作使用,更好疫撑壹品倡越性枪。
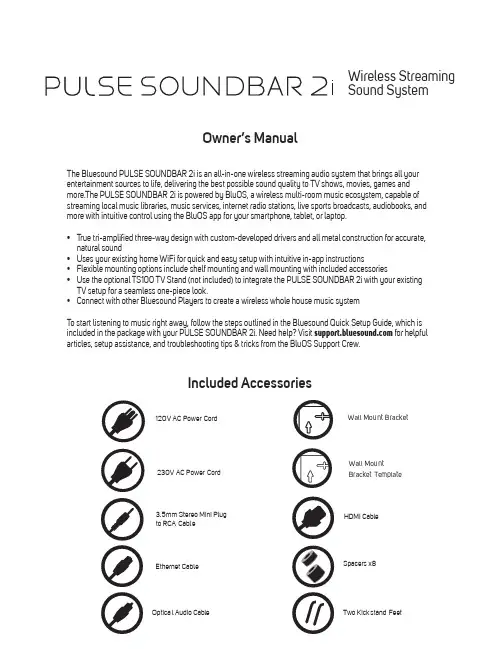
Owner’s ManualIncluded AccessoriesThe Bluesound PULSE SOUNDBAR 2i is an all-in-one wireless streaming audio system that brings all your entertainment sources to life, delivering the best possible sound quality to TV shows, movies, games and more.The PULSE SOUNDBAR 2i is powered by BluOS, a wireless multi-room music ecosystem, capable of streaming local music libraries, music services, internet radio stations, live sports broadcasts, audiobooks, and more with intuitive control using the BluOS app for your smartphone, tablet, or laptop.•T rue tri-amplified three-way design with custom-developed drivers and all metal construction for accurate,natural sound •Uses your existing home WiFi for quick and easy setup with intuitive in-app instructions •Flexible mounting options include shelf mounting and wall mounting with included accessories •Use the optional TS100 TV Stand (not included) to integrate the PULSE SOUNDBAR 2i with your existingTV setup for a seamless one-piece look. • Connect with other Bluesound Players to create a wireless whole house music systemT o start listening to music right away, follow the steps outlined in the Bluesound Quick Setup Guide, which is included in the package with your PULSE SOUNDBAR 2i. Need help? Visit for helpfularticles, setup assistance, and troubleshooting tips & tricks from the BluOS Support Crew.230V AC Power CordOptical Audio Cable Two Kickstand FeetSpacers x8120V AC Power Cord Ethernet Cable3.5mm Stereo Mini Plugto RCA Cable Wireless Streaming Sound SystemSTATUS INDICATOR:Below is a table of the LED blink codes and their corresponding descriptions.LED BLINK CODEDESCRIPTION Short blue flash, then redPowering up, rebooting the unit Solid greenHotspot Mode Flashing greenConnecting to Network White pulseSoftware update available Solid redUpgrade mode Alternate flashing red and green Upgrading… Flashing blueMute mode Solid whiteIndexing Solid blueConnected to Network – ready to use with BluOS App Flashing redFactory reset in progress Solid purple Hotspot timed out 1KICKSTAND LEGS (REMOVABLE): When placing the PULSE SOUNDBAR 2i on its own, attach the supplied Kickstand Legs for support. HDMI ARC: Using the HDMI cable provided, connect one end to the HDMI ARC input of the PULSE SOUNDBAR 2i andthe other end to an ARC-enabled HDMI output on your television. You may be required to enable ARC in your TV settings. Consult your user manual for more information.The HDMI source will appear as HDMI in the NAvigation Drawer of the BluOS App.SUBW OUT: The SUBW OUT connection can be used with a subwoofer cable (not provided). This is an optional connection since the PULSE SOUNDBAR 2i can be connected to a Bluesound PULSE SUB or RT100 wireless adaptor through a built-in wireless connection. For wired subwoofers, use the SUBW OUT port. Connect one end of a subwoofer cable to the SUBW OUT on the PULSE SOUNDBAR 2i and the other end to the corresponding input on the subwoofer.ANALOG AUDIO IN : Using the 3.5mm Stereo Mini Plug to RCA cable provided, connect the 3.5mm end to the Audio In of the PULSE SOUNDBAR 2i and the other end to the corresponding RCA output of a television or other audio source. The source will show as an Analog Input in the Navigation Drawer of the BluOS App.OPTICAL IN: Using the Digital Optical Audio Cable provided, connect one end to the Optical In of the PULSE SOUNDBAR 2i and the other end to the corresponding digital optical output of a television. The source will show as an Optical Input in the Navigation Drawer of the BluOS App.USB (TYPE B) : Use the SERVICE port in conjunction with USB (Type B Mini) to initially load firmware on the Player. This is not for consumer use. Only Authorized Bluesound Service personnel can access this USB port andSERVICE control button.USB (TYPE A) : Connect a USB mass storage device to the USB input. Typical USB mass storage devices compatible with the PULSE SOUNDBAR 2i include portable flash memory devices and external hard drives (FAT32 and NTFS formatted).LAN PORT: The LAN PORT connection can be used with the Ethernet cable provided. This is an optional connection since the PULSE SOUNDBAR 2i can be connected to the network through a Wi-Fi connection to your router. To setup the PULSE SOUNDBAR 2i using the LAN Port a Wired Ethernet connection is required. Using the Ethernet cable provided, connect one end of the Ethernet cable to the LAN port of your wired Ethernet broadband router and the other end to the PULSE SOUNDBAR 2i’s LAN port .SERVICE: Use the SERVICE port in conjunction with USB (Type B Mini) to initially load firmware on the Player. This is notfor consumer use. Only Authorized Bluesound Service personnel can access this USB port and SERVICE control button.STANDBY: Press and hold the standby button for 5 seconds to place the unit in 0.5W Standby or Vacation Mode if thePlayer will not be used for extended periods of time. In Vacation Mode, all network activity will also cease and the Player will not appear in the App or respond to App commands. Press the Standby Button again to restore the Player to Ready Mode. Standby can also be used to restore the Player to Factory Settings or manually place the Player in Upgrade Mode if upgrading using a USB Memory Stick.AC MAINS INPUT: The PULSE SOUNDBAR 2i comes supplied with two separate AC power cords. Select the AC powercord appropriate for your region. Before connecting the plug to the wall outlet, connect firmly the other end of the AC power cord to PULSE SOUNDBAR 2i’s AC Mains input socket. Never force the plug into a wall outlet. An adaptor may be necessary in certain regions. Always disconnect the plug from the wall outlet first, before disconnecting the cable from the PULSE SOUNDBAR 2i’s AC Mains input socket.23457689121110WARNING!THIS IS A FACTORY RESET OF YOUR PLAYER. ALL CUSTOMIZATION INCLUDING WI-FI NETWORK CONFIGURATION, FILE SHARES AND SAVED PLAYLISTS WILL BE LOST. YOU WILL HAVE TO RE-CREATE THESE O NCE C OMPLETE. T HIS P ROCESS I S O NLY R ECOMMENDED I F Y OUR P LAYER I S N OT F UNCTIONING AND AN INTERNET FIRMWARE UPGRADE HAS FAILED. FOR ANY QUESTIONS OR CONCERNS CONTACT AN AUTHORISED BLUESOUND CUSTOMER REPRESENTATIVE BEFORE PROCEEDING!Steps to Factory Reset:1.Disconnect the player from electrical power.2.Wait 30 seconds.3.Reconnect the power.4.Once the LED turns Red, press and hold the Standby button on the back of the player. The LED willimmediately turn Green and then back to Red – continue to hold the button for 30 seconds.5.After 30 seconds, the LED will begin to blink red – then release the button.6.All customization to the Bluesound player will be removed and restored to factory settings. IMPORTANT: Removing your finger from the Standby button at any time before the LED begins flashingred will cancel the factory reset and leave the player in Upgrade Mode. Just start the steps again to factory reset the player.You will know the factory reset is successful if the player returns to Hotspot mode (wireless connection –the LED will turn solid green). If the player is connected to your network through a wired Ethernet connection, it will simply connect as if it was a new player (LED will turn solid blue).© Bluesound International. Bluesound, the stylized wordmark and “B” logotype, the phrase“HiFi for a wireless generation”, PULSE SOUNDBAR 2i and all other Bluesound productnames and taglines are trademarks or registered trademarks of Bluesound International, adivision of Lenbrook Industries Limited. All other logos and services are trademarks or servicemarks of their respective owners.。
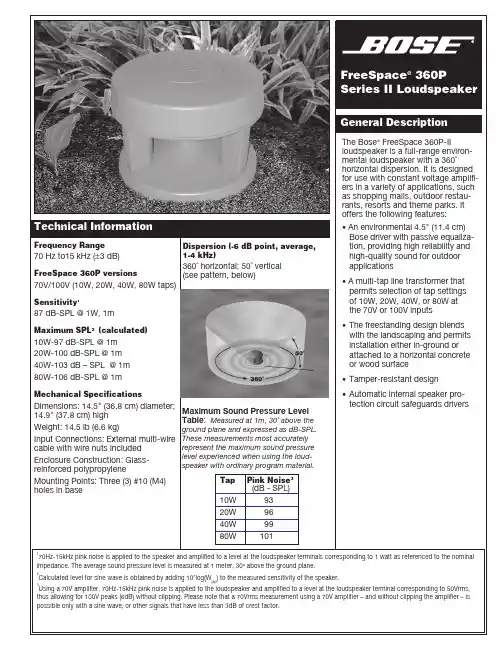
Maximum Sound Pressure Level Table : Measured at 1m, 30˚ above theground plane and expressed as dB-SPL.These measurements most accurately Technical InformationFrequency Range70 Hz to15kHz (±3 dB)Dispersion (-6 dB point, average,1-4 kHz)Engineers’ and Architects’SpecificationsThe loudspeaker shall be a ported loudspeaker system utilizing one 4.5"(11.4 cm) HVC environmental full-range driver mounted in the underside of the top of the loudspeaker enclo-sure. The driver shall have a ratedimpedance of 4Ω and shall be wired in parallel with a line voltage-matching (stepdown) transformer with taps at 10, 20, 40, or 80 watts.The loudspeaker shall have a single-port vented system, with a maximum acoustic output of 101 dB-SPL from 70 Hz to 15 kHz, with measurements referenced with full-bandwidth pink noise at 1 meter at the loudspeaker’s rated power.The input connection shall consist of wires with wire nuts on a cable at-tached to the base of the loudspeaker.The nominal dispersion of the loud-speaker shall be 360˚ horizontal and 50˚ vertical.The loudspeaker shall be theFreeSpace 360P Series II loudspeaker.Warranty InformationThe Bose FreeSpace 360P Series II loudspeaker is covered by a 5-year,transferable limited warranty.Loudspeaker ConfigurationSafety and Regulatory ComplianceThe FreeSpace ® 360P Series II loudspeaker is suitable for general purpose use. It complies with EMC Directive 89/336/EEC and Article 10(1) of the Directive in compliance with EN50081-1, EN50082-1, as signified by the CE mark.©2003 Bose Corporation, The Mountain,Framingham, MA 01701-9168PN263937 AM Rev.01 PC032065 JN31068Subject to change without notice.The FreeSpace ® 360P Series IIloudspeaker is designed for use in a distributed sound system when used with a constant voltage amplifier.The loudspeaker is packaged as one single unit per carton.For linear spacing (for bordering sidewalks, paths or walkways): Use the ratios shown above left, keeping the speaker at least 3 ft (1 m) from the listeners.Direct Field Coverage and Placement• To achieve ±1.5 dB, use 10 ft (3 m) spacing as X, center to center.• To achieve ±3.0 dB, use 20 ft (6 m) spacing as X, center to center.• To achieve ±6.0 dB, use 30 ft (9 m) spacing as X, center to center.To diagram your loudspeaker placement, as shown below, start in the upper left-hand corner and move down and to the right.The FreeSpace 360P-II loudspeakers are complete and ready for in-ground installation. Mounting each loud-speaker securely on a horizontal surface requires three #10 (M4)screws, which the installer must provide.Installation options include in-ground (with up to 40% of the enclosure buried in earth), or attached to a horizontal surface (a wooden deck or concrete patio, for example).Product color is green and blends with most surroundings. Painting is not recommended.It is recommended to use theFreeSpace 360P-II with a 2nd-order or higher high-pass filter at 70 Hz.Note: The FreeSpace 360P Series II loudspeaker is equipped with a protection circuit that reduces the low-frequency output when over-powered. In the event that the protec-tion circuit is activated, turn off the signal source for 30 seconds for full recovery.Installation。

Please Note: All specifications and improvements to and in the design of this unit and this manual are subject to change at any time without any prior written or published noticed.6122 S. Eastern AveLos Angeles Ca. 90040www.americanaudio.eu1.1.Table of Contents (3)2.Before We Start (5)2.1 What's New to myDMX 2.0 (5)2.2 The myDMX 2.0 Package (7)2.3 Fixture Profiles (8)3.Getting Started (9)3.1 Installation (9)3.2 Setup (10)3.3 Editor (13)3.4 User (16)3.4.1 Live Edits (17)4.Scene Builder (18)4.1 Arranging Fixtures (18)4.2 Controlling Fixtures (20)4.3 Effects (23)5.Other Features (26)5.1 Easy Remote (coming soon) (26)2.Welcome to myDMX 2.0 – a powerful and easy to use DMX lighting control app for PC and Mac. This manual will guide you through using the software. For a quick overview of the software jump straight to the topics in the chapter Getting Started on page 9.2.1W HAT'S N EW TO MY DMX2.0The myDMX 2.0 has been re-built from the ground up. This chapter will give an overview of the most important new features.We have been asked to develop a Mac version of the software for many years – myDMX 2.0 is now PC and Mac compatible.2.1.1 N EW D ESIGNThe software features a new design, which includes new icons, faders, colors and preset components allowing for a quicker and more pleasant workflow.Quickly jump to a color or position with the new popup preset components and change the scene color on the User screen.2.1.2 T HE S CENE B UILDERThe Scene Builder allows you to do everything you used to do with the original Effects Generator and more.Arrange lighting fixtures, draw effects directly onto fixtures and set your effects in real-time.The ‘Linear Fan’ effect allows you to create color gradients and position fans.2.1.3SSL2F IXTURE P ROFILE F ORMATSSL2 fixture profiles allow more information to be stored about the personality of a lighting fixture. This allows for quicker and easier programming. For example, if you have an LED bar with several segments, you can control each segment individually whilst still having global control of master dimmer and macro channels.2.2T HE MY DMX2.0P ACKAGE2.2.1W HAT'S IN THE BOXYour package should include the following:CD with the softwareUSB-DMX interfaceUSB cableThe latest software versions and user manuals are available from our website.2.2.2S OFTWAREThe following software is included:myDMX 2.0 - DMX lighting programming app (PC and Mac)Scan Library – Used to build your own fixture profiles (PC only)EasyView – A real-time 3D visualizer (PC only)Hardware Configuration Tools –A USB-DMX interface management app (PC only) Easy Remote – Remote control of myDMX 2.0(iPad/Android Tablet)2.3 F IXTURE P ROFILESAll of the attributes of a DMX device are saved in a special file called the “Fixture Profile” or .SSL2 file. The more accurate the fixture profile, the easier it will be to program your lighting with myDMX 2.0.If you have an incomplete fixture profile, myDMX 2.0 will not understand the lights you want to control and therefore it will be more difficult for you to program your lighting fixtures.There is a profile for almost every fixture on the market. Fixture profiles can be created and edited with the "Scan Library" editor software. For more details on how to make Scan Library profiles, see chapter 2.2.2 Software on page 7.3.3.1I NSTALLATIONInsert the software installation CD into the CD drive of your computer, or download the software from our website.Double click the setup icon to install the software.Follow the installer instructions.The USB interface drivers will be installed during the software installation. When installing on Windows, you may receive a warning message saying that the drivers hav e not been digitally signed. Press ‘Continue Anyway’.Once the installation is complete, connect the USB interface. Windows systems will run a second device driver installation. Once you see a message bubble on the taskbar to say that the driver has been installed successfully, you are ready to start the myDMX 2.0 software.3.2S ETUPTo begin with, the software needs to be told which lighting fixtures are being used. Select your lighting fixture from the list of manufacturers on the left. If you are looking to add an RGB, RGBD, RGBW, RGBY or Single channel fixture, select the _GENERIC folder at the top. If you do not see your lighting fixture in the list, you will need to make it yourself using the Scan Library editor (PC only), or contact us and we will build the profile for you.To add your lighting fixture, drag and drop it onto the DMX patch table, or select the number of fixtures and starting channel in the bottom left and select patch. Fixtures can be moved within the DMX patch by dragging and dropping.If you are looking to add a matrix of lighting fixtures such as an RGB wall or dancefloor, patch the total number of lighting fixtures here and refer to chapter 4.1 Arranging Fixtures on page 18 for more information.3.2.1A DDRESSING YOUR L IGHTING F IXTUREEach lighting fixture must be given a unique number or “Address”. The address is normally set via an LED display or Dip Switches on the actual lighting fixture. Hover over a fixture to know the address and click the fixture to see the dip switches required to set this address. For example, this lighting fixture is set to address 22.For more information on setting the address on a lighting fixture, refer to the fixture manufacturers’ manual.3.2.2L IST V IEWTo change individual fixture properties, select ‘List View’.The following options are available:Shortcut - To control the selected channel with the mouse, select a keyboard shortcut hereFade - Enables and disables fading of the channel. For example, you may wish to ignore all fade commands on a gobo channelDimmer - Defines a dimmer channel (when the dimmer % value of a step is changed, this channel will be changed)Invert X - Inverts the X channel, so when the fader is at 0, the software will output 255Invert Y - Inverts the Y channel, so when the fader is at 0, the software will output 255X/Y - Swaps the X and Y channels3.3E DITOR3.3.1C ONTROLLING C HANNELSfader with the mouse to change the value.To change the value of the same channel type on everyfixture, hold shift. For example, to change the color of everyfixture, hold shift and move the color fader. Notice that theDMX output value is displayed at the top of the fader.MyDMX 2.0 features a range of preset components to helpyou to quickly adjust a channel. To access the component,click at the top of the channel where the preset/color isdisplayed. For example, clicking at the top of a color channelshows a color wheel.Clicking on the cursor will allow you to drag it around thecolor wheel. Notice that the RGB values are shown. Clickingon the color wheel and dragging up with the mouse willmove the cursor clockwise, dragging down will move thecursor anti clockwise.With the XY grid, clicking on the center point will allow youto quickly set an XY position. Clicking on a blank space in thegrid will allow you to slowly move the position.3.3.2S CENES AND S TEPSAll programming is made with scenes and steps. A step is a static ‘Look’ which contains one value for each channel. Several s teps make up a scene. Scenes can be created by clicking the top left icon in the scene area.Once values have been set, steps can be created here (1). When a new step is created, all faders are set to 0. To copy the current step's values, click here (2). Double click the Fade time, Wait time or dimmer value to modify. To modify several steps at the same time, hold control (PC) / command (Mac) to select multiple steps. To select a range of steps, select the first step of the range, hold shift and then select the final step of the range.You can preview your scene by clicking the play button.3.3.3S CENE S ETTINGSDouble click a property to edit. For example, to change the name of a scene:1.Double click the name2.Type the new name3.Press the Return keyThe following properties can be changed:# - If this is selected, the scene will be included in the showLoops - Set the number of times a scene should repeatNext - Set where you want to scene to go when it reaches the end (make sure a number of loops has been set first!)Enable/Disable Fade - When this is selected, the scene will fade in using the fade time of the first stepTrigger - Add a keyboard shortcut key to trigger the scene3.4U SERThe User screen is where you run your show. Click a scene to activate it. If you want your scene to listen to the Loop and Next properties, make sure that the Play button is selected here.It is possible to change the color of a scene by right clicking the scene.3.4.1L IVE E DITSIt is possible to override scenes by moving the faders.There are two options:LTP - Latest takes priority: The fader value will override the sceneHTP - Highest Takes Priority: If the fader value is higher than the value within the activated scene, it will override the sceneTo set up L TP or HTP, make sure that it is enabled within the ‘User Options’ menu and then click the AUTO button at the bottom of the ch annel you want to override.4. 4.1 A RRANGING F IXTURESThe scene builder allows you to quickly and easily build advanced scenes and create effects without the need to set each fader and step manually.It replaces the effects generator and color manager in the previous software version.Create a new scene and click here to open the scene builder.4.1.1 S ELECTION M ODEWhen the scene builder is opened, you will see your lighting fixtures on the left. Each square represents a lighting fixture. Click and drag the squares to position the lighting fixtures. Hold Control (PC) / Command (Mac) to select multiple fixtures.There are 3 tools to help with fixture selection:Rectangle - Draw a rectangle around the fixtures to select (like selecting files inside Explorer/Finder)Lasso - Draw a perimeter around a set of fixtures to select the fixtures within the chosen perimeterDrag Over - Any fixtures within a drawn shape will be selectedNotice that as fixtures are selected, a number appears. This is the order in which any curve or linear fan effect will be created.4.1.2G ROUPSGroups can be created to help quick recall of fixture selections. To create a group, select the fixtures to be included inside the group and then select the + button.4.1.3 M ATRIXESClick here to create a matrix – myDMX 2.0 will automatically position your lighting fixtures into a matrix.Select the arrow to define a custom width and height of the matrix.4.2 C ONTROLLING F IXTURESOnce you have selected the lighting fixtures you wish to control, all common presets will be shown here. To view only the presets of a particular fixture type, select the appropriate tab.If you have no fixtures selected, you can draw a preset onto a fixture: 1. Select the Pen tool2. Select the presets you want to change3.Click on the fixtures you want to update4.2.1 C OLOR W HEELThe color wheel offers several ways to change the color:Click the cursor and drag around the color wheel to choose a color Click on the color wheel to jump to one of the 6 preset colorsClick on the color wheel and drag up and down to move slowly around the color wheel Select the center sections to modify the brightness and saturation Click in the center of the color wheel to choose a color with a standard color picker or insert RGB values4.2.2 XY G RIDThe XY grid allows you to modify the pan/tilt channels of a fixture (uPan and uTilt are automatically calculated). Click the center point and drag to move the positionClick a blank space in the grid and drag to slowly move the position, use the scroll wheel of your mouse to adjust the precisionSelect the horizontal and vertical bars to adjust only the pan or tilt4.2.3 B EAM O NClicking the beam on button will enable the default preset of each selected fixture. For example, on a moving head this may be ‘Shutter Open’, ‘Iris Open’ and ‘Dimmer 100%’.4.2.4 L INEAR F ANThe linear fan function allows you to define a range by selecting a start and end point.The preset range will then be applied across the selected lighting fixtures. This is a great way to create color gradients and position fans.1. Click here to enable/disable the Linear Fan function2. Click the down arrow to select the fan type3. Click on the component to select the start and end range4. Select the range and drag up and down to move the range4.3E FFECTS4.3.1C OLOR E FFECTTo add an effect, select the effects tab and click the FX icon. Select 'ColorEffect'. A rectangle will appear in the upper left corner playing a rainboweffect. Drag and drop this over your lighting fixtures. The effect can beresized by dragging the corners.To modify a color effect, select the effect type and change the properties. It ispossible to add many effects at the same time by simply choosing anothereffect from the menu.4.3.2P OSITION E FFECTscanners and moving head lighting fixtures.Select the fixtures you want to control, select ‘Position Effect’ fromthe FX menu and then select a starting shape.The shape can be altered by clicking on a point and dragging.Phasing will add a delay on each fixture.4.3.3 C URVE E FFECTThe curve effect tool allows you to apply a dimming curve to any channel. Select 'Curve Effect' from the FX menu and select the fixtures you wish to control. The following properties are available:Rate - Changes the speed of the effect. More wave cycles will be added Size - Changes the height of the wavePhase - Moves the wave forward and backward, consequently changing the starting pointOffset - Moves the wave up and down Phasing - Adds a delay to each fixtureThe curve effects can be stacked to create many interesting patterns.4.3.4 G ENERATE AN E FFECTYou can remove an individual effect by clicking on the trashcan icon. The whole effect can be cleared by selecting the cancel icon (to the leftof the tick icon). Select the tick icon to generate the effect.5.5.1E ASY R EMOTE (COMING SOON)Easy Remote is an iPad and Android tablet app which allows you to control myDMX 2.0 over a WiFi network. The app will be available soon!Follow us on:/americandj/americandj/adjlighting©American Audio® World Headquarters6122 S. Eastern Ave. Los Angeles, CA 90040 USATel: 323-582-3322 Fax: 323-582-3311Web: E-mail:*********************American DJ EuropeJunostraat 26468 EW KerkradeNetherlands*******************www.americandj.euTel: +31 45 546 85 00Fax: +31 45 546 85 99。
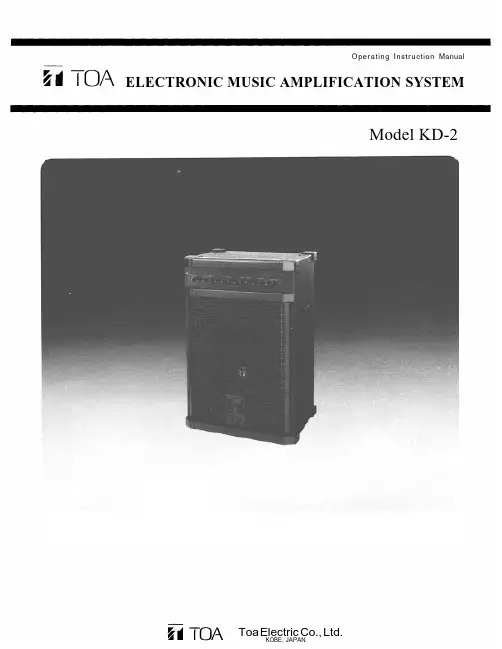
Operating Instruction Manual ELECTRONIC MUSIC AMPLIFICATION SYSTEMModel K D-2Precautions General Description FeaturesFront Panel: Names of components & their usage Rear Panel: Names of components & their usageBlock and Level Diagrams Specifications Appearance1223455~661. Power SupplyThe KD-2 is designed to operate on local AC (50/60Hz) Mains, ±10%.2. XLR Type Audio ConnectorThe connectors are wired as follows.The pin 1 is ground (shield), the pin 2 cold (low, minus), the pin 3 hot (high, plus).3. Phantom Power SupplyThe phantom power switch on channel 1 input permits the user to supply 48V DC through the input connector to a condenser microphone. If phantom power is not required, the switch must be in the "off position.4. Description of components and functions of the KD-2Various descriptions are applied, depending on each manufacturer. In our Operating and Instruction Manual explanation of components and functions is made according to Toa's usage for them.— 1 —ContentsPrecautionsThe TOA KD-2 is a complete electronic music amplification system in a single portable package, consisting of a stereo mixer, spring reverberation unit, power amplifier, and two-way speaker system.The mixer section provides four discrete input channels. Each input features 2-band active EQ, an independent effects send, a direct output, and a channel level control with concentric stereo pan. Channel 1 features an electronically balanced XLR mic input connector with switchable 48 volt phantom power, for use with condenser-type microphones, and Input channels 1 and 2 feature input sensitivity switches. In addition, channel 4 features on RIAA equalized phono input for direct connection of magnetic cartridge turntables.The master section contains an effects patching loop with crossfade and level controls,Stereo L & R controls, and a stereo headphone monitoring system.The 100 watt RMS internal power amplifier features Auto Comp compression circuitry, with an LED indicator, to ensure distortion-free performance and protection for the internal speaker system. The two-way speaker system utilizes a heavy duty 15-inch woofer and a constant directivity horn with piezo electric driver.The KD-2 is covered in a durable and attractive high tech gray vinyl fabric.System FeaturesFour input channels100 watts power amplifier outputAuto Comp compression circuitry w/indicator Power amplifier protection circuitry w/indicatorBuilt-in heavy-duty two-way loudspeaker system of 15"(38cm) woofer and constant directivity horn with piezo driverBuilt-in spring reverberation unitStereo mixer sectionEach Input Channel Two band EQIndependent effect send is post-EQ/post-faderDirect output on each channel, ideal for recording Concentric stereo pan and channel volume controlInput Channel 1 has electronically balanced XLR mic input connector with switchable 48 volt phantom powerInput Channel 4 has phono (RIAA) inputs for turntable with magnetic cartridgeInput Channel 3 and 4 has Input Level Selector switchesMaster SectionLevel and crossfade control for returning effects signals to stereo mixing busses Stereo Left and Right outputs with both RCA and 1/4" jacksHeadphone monitoring for Stereo Left and RightGeneral DescriptionFeaturesPan control [PAN]The pan pot control assigns the fader output signal of each input channel to the Stereo Left and Right mixing busses. At the de-tented center position, the pan pot routes the signal equally to the L and R mixing busses. Pan-ning from one side to the other gradually assigns the input signal to either the stereo L or R mixing busses exclusively.Effects Control [EFF]This control determines the amount of post-fader/post-EQ sig-nal assigned to the effect buss from a given input channel, and thus the level of effects for that channel.Low Equalizer Control [LOW] The low EQ control alters the low frequency response of the input channel, providing ±15dB at 20Hz of continuously variable ac-tive shelving equalization. The "0" detented position provides flat audio response.High Equalizer Control [HIGH] The high EQ control alters the high frequency response of the input channel, providing ±15dB at 20kHz of continuously variable active shelving equalization: The "0" detented position provides flat audio response.Input Channel Level [LEVEL] The level control provides con-tinuously variable adjustment of the channel output to the Stereo Left and Right mixing busses, thus determining the level of that channel in the main sound sys-tem mix. The nominal level of the input level control is at the "0"dB position.Cross-fade Control for Reverb/ Effect[REV/EFF X-FADE]When this control is in the centerposition, the REV RET and EFFRET signals are equally assignedto the stereo mixing buss. Rotat-ing the control counter-clockwisedecreases the EFF RET signallevel, keeping the original level ofthe REV RET signal. Rotating thecontrol clockwise decreases theREV RET signal level, keeping theoriginal level of the EFF RETsignal.Headphone Jack [PHONES]The headphone jack will acceptany stereo headphone with 8ohms impedance, or higher. Thisjack provides the same signal asthe Stereo output L and R.Level Control for Reverb/Effect[REV/EFF LEVEL]This control governs the amountof reverb signal (built-in or out-board) through the reverb returnjack (REV RET), and effect signalreturned through the effect returnjack (EFF RET) to the systemmixing buss. The signals of REVRET and EFF RET are controlledsimultaneously.Stereo Level Control[STEREO LEVEL]These concentric controls deter-mine the overall level of theStereo L & R output (STEREOOUT L and R).System Level Control[SYSTEM LEVEL]This control determines the over-all level of the KD-2 system.Power/Protect L ED Indicator[POWER/PROTECT]The LED indicator lights red andremains lit for 3 seconds after thepower switch has been turned on,and then turns to green when theKD-2 is powered up. The LEDlights red when the protectioncircuit is activated.Power Amp CompressionIndicator [COMP]The Comp LED lights when theinternal compressor is activated.The compressor is provided toprotect the speaker system bycompressing the input signallevel of the power amplifier whenclipping occurs in the outputstage. Frequent flashing of theLED is not reason for alarm.However, a constant or steadylight indicates that the KD-2 isbeing overdriven and that theinternal power amplifier is poss-ibly "under powered" for that ap-plication. The output level of theKD-2 should be decreased untilthe LED only flashes intermittent-ly.Front PanelStereo L & R Output Jack [STEREO OUT L/R]The unbalanced RCA pin jacks and 1/4" phone jacks are wired in parallel. The RCA pin jack has a nominal output level of –10dB and an impedance of Ik ohms, and the 1/4" phone jack has a nominal output level of +4dB and an impedance of 1 k ohms. All jacks may be used simul-taneously.Sum Output Jack [SUM OUT] The Sum Output jack has a nominal output level of +4dB and an impedance of 1 k ohms. The Sum Output is the same signal as the Speaker output. Sum Input Jack [SUM IN]This 1/4" phone jack is directly connected to the mono Sum (Sys-tem) buss. Its nominal input level is –10dB, with an input impe-dance of 10k ohms.Effect Send Jack [EFF SEND] This 1/4" phone jack is used in conjunction with the Effect Re-turn jack to connect an outboard effects device (i.e, delay or re-verb) to the KD-2. The Effect Send jack should be connected to the input of the Effect. Nominal out-put level is –10dB with an impe-dance of 1k ohms.Effect Return Jack [EFF RET] This 1/4" phone jack is used in conjunction with the Effect Send jack to connect an outboard effects device (i.e, delay or re-verb) to the KD-2. The Effect Return jack should be connected to the output of the effect. Nomin-al input level is –20dB with an impedance of 10k ohms. Reverb Return Jack [REV RET] This 1/4" phone jack is used in conjunction with the Effect Send jack to connect an outboard effect device (i.e, delay or reverb) to the KD-2. The Reverb Return jack should be connected to the out-put of the effect device. Nominal input level is –20dB with an impedance of 10k ohms. When a plug is inserted into this jack, the built-in reverb circuitry is auto-matically cut off.Earth TerminalThis terminal can be used to ground other devices such as tape decks and turntable to the KD-2 to reduce hum and shock hazard. And may be used to provide ground connection for tape decks or turntables.Input Level/Source Selector[PAD]The slide switch provides 30dBattenuation for the 1/4" InputJack, and RCA pin Input Jack atthe "30" position. The correctsetting should be made accordingto the output level of the equip-ment connected. For example, aninstrument with a "HOT" outputmay overload the input circuitry,resulting in a distorted or "FUZ-ZY" sound. When using the RCAPhono Input, select the "PHONO"position of this switch.RCA Phono (RIAA) Input[PHONO]These RCA pin jacks have anominal level of –55dB and animpedance of 50k ohms, and in-clude RIAA phono equalization.Input Level Selector[PAD]The slide switch provides 30dBattenuation for the 1/4" InputJack, and RCA pin Input Jack atthe "30" position. The correctsetting should be made accordingto the output level of the equip-ment connected. For example, aninstrument with a "HOT" outputmay overload the input circuitry,resulting in a distorted or "FUZ-ZY" sound.AC Power CordThe power cord is of the three-wire type with proper groundingfacilities built-in. (6ft.)Caution — The ground pinshould not be removed under anycircumstances. If the KD-2 mustbe used without proper ground-ing facilities, a suitable groundingadapter should be utilized. Op-eration of the KD-2 with propergrounding techniques will resultin less system noise and greatlyreduced shock hazard.Power Switch [POWER]The power switch is a three-position type with the middleposition being the "off position.The KD-2 should be operated inthe switch position which pro-duces the lowest amount of sys-tem hum.AC F useWarning: To avoid possibleequipment damage and/or per-sonnel injury, the fuse shouldalways be replaced with sametype and rating. Using improperfuses will also void the warranty.The KD-2 should always be dis-connected from AC outlet prior tochanging fuses. If fuse repeatedlyfails, the unit should be referredto qualified service personnel forrepair.1/4" Phone Channel Input[INPUT]These connectors are unbalanced,1/4" phone jack with an inputimpedance of 100k ohms and aninput level of –30dB. When aplug is inserted into the 1/4" inputjack, the corresponding XLR mic-rophone input or RCA pin chan-nel input is automatically switch-ed out of the input circuitry.RCA Channel Input [INPUT]The RCA pin input jack is unba-lanced, with a nominal level of–30dB and an impedance of 100kohms.Direct Output [DIRECT OUT]The Direct Output on each chan-nel utilizes an unbalanced RCApin jack with an impedance of Ikohms and a level of –10dB. TheDirect Output is post-EQ/post-fader, and is useful for recordingor for sending individual instru-ments to other equipment.Phantom Power On/Off switch[PHANTOM]This switch alternately turns"on" and "off" the phantom pow-er (48V DC) for the XLR connectorassigned to Channel 1. Theswitch should remain in the offposition when a condenser typemic is not in use.Balanced XLR Microphone Input[MIC]The XLR-type microphone inputconnector (Channel 1 only) iselectronically balanced with anominal level of –60dB and aninput impedance of 1k ohms.Phantom powering is providedfor use with condenser-type mic-rophones (see PHANTOM). Themicrophone input is automatical-ly disconnected when either thecorresponding RCA Pin jack orthe 1/4" phone jack is used.Speaker Jack [EXT. SP]The external speaker output is astandard 1/4" phone jack. Speakercables (recommend at least #18gauge wire) should be connectedbetween the KD-2 and externalspeaker systems prior to applyingpower to the unit. When a plug isinserted into the external speakerjack, the internal speaker is auto-matically switched off.Caution — The KD-2 should nev-er be operated into less than an 8-ohm speaker load.Rear PanelMIXER SECTIONFrequency Response+0, -3dB 20Hz to 20kHz (INPUT to STEREO OUT)Total Harmonic DistortionLess Than 0.03% +4dB* 1kHz (STEREO OUT)Hum and Noise (STEREO OUT: Open 20Hz to 20kHz) All Level Control Minimum –85dBOne INPUT Level Control Maximum –68dB EqualizationLOW ±15dB 20Hz ShelvingHIGH ±15dB 20kHz ShelvingPOWER AMPLIFIER SECTIONPower Output100 watts minimum sine wave continuous average power output monaural driving 8-ohm over a power band from 20Hz to 15kHz.The maximum Total Harmonic Distortion (THD) at any power level from 250 milliwatts to 100 wats shall be no more than 0.3%.100 watts continuous average sine wave power into 8-ohm will less than 0.02% THD at 1kHz.Frequency Response+0dB, –1dB 20Hz to 20kHz Total Harmonic DistortionLess than 0.02% at 100 watts into 8-ohm at 1kHz Hum and Noise–70dB below rated output (IHF-A weighted)SPEAKER SECTIONSpeaker15"(38cm) woofer, CD horn and piezo driverSensitivity97dB (1 watt 1 meter)Frequency Response70Hz to 20kHzGENERAL SPECIFICATIONSPower Consumption200 watts maximumDimensions (W×H×D)490mm×719mm×341mm19¼"×28¼"×133/8"Weight26kg (57.3 lbs)Block and Level Diagrams SpecificationsINPUT SPECIFICATIONSInput CHANNEL INPUT CH1~CH4MIC CH1 PHONO CH4 EFF RETREV RETSUM INActualLoadImpedanceFor UseWithNominalInput LevelNominal–30dB (24mV)–60dB (0.78mV)–55dB (1.4mV)–20dB (78mV)–20dB (78mV)–10dB (245mV)MAX. Before Clip0dB (0.775V)–30dB (24mV)–25dB (44mV)+ 10dB (2.45V)+ 10dB (2.45V)+ 20dB (7.75V)ConnectorPHONE JACKRCA PIN JACKXLR-3-31 TYPERCA PIN JACKPHONE JACKPHONE JACKPHONE JACK0dB is referenced to 0.775V RMS.OUTPUT SPECIFICATIONSOutput STEREO OUT (L, R) SUM OUTEFF SEND PHONES DIRECT OUT EXT. SPActualSourceImpedanceFor UseWithNominalOutput LevelNominal+4dB (1.23V)+4dB (1.23V)–10dB (245mV)+ 4dB (1.23V)MAX. Before Clip+ 20dB (7.75V)+ 6dB (1.5V)+ 20dB (7.75V)+ 20dB (7.75V)+ 20dB (7.75V)+ 20dB (7.75V)ConnectorPHONE JACKRCA PIN JACKPHONE JACKPHONE JACKSTEREO PHONEJACKRCA PIN JACKPHONE JACKStereo phone jacks is wired:Tip=Left, Ring=Right, Sleave=Common.The XLR type connector is electronically balanced.The XLR type connector is wired as followsPin No.1-GroundPin No.2-Cold (Low)Pin No.3-Hot (High)0dB is referenced to 0.775V RMS. Specifications are subject to change without notice.Specifications AppearancePrinted in Taiwan 133-02-839-9。

Features Maximum bass with maximum space saving Fiberglass Woofer Cone with Rubber Surround 2.5" Dual 4 ohms Voice Coil Die-cast Aluminum Housing Legendary JBL 100 Hour Power Test JBL at an Affordable PriceJBL delivers a full body bass experience.The JBL Stadium BassHub subwoofer delivers show & shine performance without crowding your passengers or sacrificing cargo area when paired with an amplifier. This subwoofer enclosure fits into the hub of your spare tire for a super easy installation and out of sight sound solution. The 11" (279mm) feather-light fiberglass woofer cone with rubber surround delivers the signature kick and punch of JBL bass. The subwoofer enclosure is designed with excellent density and strength die-cast aluminum material for more stable low end extension performance. Whether you’re cruising or competing, the JBL Stadium BassHub leaves the competition behind without missing a beat.HARMAN International Industries, Incorporated 8500 Balboa Boulevard, Northridge, CA 91329 USA © 2020 HARMAN International Industries, Incorporated. All righ ts reserved. JBL is a trademark of HARMAN International Industries, Incorporated, registered in the United States and/or other countries. Features, specifications and appearance are subject to change without notice.What’s in the box:1 x JBL STADIUM BASSHUB subwoofer1 x Wire harness1 x Vehicle mounting post1 x Factory mounting bracket adapter1 x 2.5mm Allen Wrench1 x QSGTechnical SpecificationsP ower Handling: 600W RMS, 1200W MAXSensitivity (@2.83V/ 1m): 90dBFrequency Response: 20Hz – 150HzVoice Coil diameter: 2.5in. (64mm)Impedance: Dual 4 ohmsD imensions (D x H): 14-3/16" x 6-1/2"(D360mm x H165mm)。

Manuals+— User Manuals Simplified.B2 Audio Rage6 RAGE 8 Subwoofer Owner’s Manual Home » B2 AUDIO » B2 Audio Rage6 RAGE 8 Subwoofer Owner’s ManualContents1 B2 Audio Rage6 RAGE 8Subwoofer2 Product Information3 Product Usage Instructions4 DIMENSION5 Enclosure suggestions6 Documents / Resources6.1 References7 Related PostsB2 Audio Rage6 RAGE 8 SubwooferProduct InformationVoice Coil Dim: 2″Power Handling*: 500 WattsPeak Dynamic Power: 1000 WattsXMAX one way (mm): 15VAS: 5.8 LFS: 38.7 HzQES: 0.52QMS: 6.09QTS: 0.479CMS: 110 um/NMMS: 145 g or 129.7 gBL^2/RE: 69.2 or 61.3Magnet: 175 OzDisplacement: 2.5 L / .088 cu.ftProduct Usage InstructionsTo use the Audiophile Acoustics Rage6 or Rage8 speakers, follow these instructions:1. Select the appropriate model based on your requirements and preferences.2. Ensure that your audio system is compatible with the nominal impedance of the chosen model (Dual 2 Ω orDual 4 Ω).3. Install the speakers in a suitable enclosure according to the provided suggestions:Type: SealedRage6d2: 5 L / .178 cu.ft with Qtc 0.405Rage8d2: 7.6 L / .269 cu.ft with Qtc 0.48Rage8d4: 7.6 L / .269 cu.ft with Qtc 0.513Type: Ported compactRage6d2: 12 L /.42 cu.ft with P: 2 L: 9.43 / 24 cm and FB: 42 HzRage8d2: 15 L / 0.53 cu.ft with P: 2 L: 7.16 / 18.2 cm and FB: 42 HzRage8d4: 15 L / 0.53 cu.ft with P: 2 L: 7.16 / 18.2 cm and FB: 42 HzType: Ported BP 4thRage6d2, Rage8d2, Rage8d4: 18 L / .636 cu.ft with P: 3 L: 14.17 / 36 cm and FB: 42 Hz4. Connect the speakers to your audio system using appropriate wiring and connectors.5. Ensure that the power handling of the speakers matches the output power of your audio system to preventdamage.6. Adjust the speaker settings on your audio system for optimal sound quality.7. Enjoy high-quality audio performance from your Audiophile Acoustics Rage6 or Rage8 speakers.For more information and support, visit the official website: or the Facebook page: /b2audio.DIMENSIONmodel: rage6 / Rage8Model:rage6d2rage8d2rage8d4 Sensitivity:86.2 dB84.1 dB82.2 dB Nominal Impedance:Dual 2 ΩDual 2 ΩDual 4 ΩDC Resistance (DC): 1.9 Ω 1.9 Ω 3.2 ΩVoice Coil Dim:2″2″2″Power Handling*:350 Watts500 Watts500 Watts Peak Dynamic Power:700 Watts1000 Watts1000 Watts XMAX one way (mm):151515VAS: 3.7 L 5.8 L 5 LFS:44.1 Hz38.7 Hz40.9 Hz QES:0.530.520.56QMS: 6.17 6.095.64 QTS:0.4880.4790.5 CMS:120 um/N110 um/N110 um/N MMS:102.5 g145 g129.7 gBL^2/RE:54.769.261.3 Magnet:140 Oz175 Oz175 OzDisplacement: 1.6 L / .056 cu.ft 2.5 L / .088 cu.ft 2.5 L / .088 cu.f tEnclosure suggestionsReferencesB2 audio - It Can Never B2 Loud Manuals+,。

Philips SoundShooter wireless portable speakerBluetooth ®Carabiner clipRechargeable battery 2WSBT30ORGWireless music streamingBig in sound, small in sizePowerful sound supported by wireless music streaming via Bluetooth, a rechargeable battery for playback anywhere and a built-in microphone for hands-free phone calls. And a carabiner too, to clip onto your belt or bag.Designed for grab and go•Built-in rechargeable battery for music playback anywhere •Carabiner clip includedImpressive sound•Up to 8 hours music playback•Wireless music streaming via Bluetooth Simplicity in use•Works with any Bluetooth-enabled device •Built-in microphone for hands-free phone calls •One cable for both charging and music playbackIssue date 2020-07-08Version: 1.0.312 NC: 8670 001 06184UPC: 6 09585 23611 0© 2020 Koninklijke Philips N.V.All Rights reserved.Specifications are subject to change without notice. Trademarks are the property of Koninklijke Philips N.V. or their respective Highlightswireless portable speakerBluetooth® Carabiner clip, Rechargeable battery, 2WSpecificationsBuilt-in rechargeable batteryPlay music out loud - anytime, anywhere. The built-in rechargeable battery lets you enjoy your personal music without the fuss of entangled power cords and the inconvenient search for an electrical outlet. Enjoy great music with the freedom of portability now.Up to 8 hours music playbackEnjoy music playback for up to 8 hours on a single charge.Wireless music streamingYour speaker supports Bluetooth music streaming. It lets you enjoy your favorite tunes in high quality music wirelessly from your Bluetooth enabled devices.Bluetooth-enabledBluetooth is a short range wireless communication technology that is both robust and energy-efficient. The technology allows easy wireless connection to other Bluetooth devices, so you can play your favorite music from any smartphones, tablets or even laptops including iPod or iPhone on Bluetooth-enabled speaker easily.Built-in microphoneWith its built-in microphone, this speaker also works as a speaker phone. When a call comes in, the music is put on pause and you can talk via the speaker. Call for a business meeting. Or, call your friend from a party. Either way, it works great.Charge and play in one cableThis Philips speaker comes with one cable for both battery charging & aux-in music playback.Conveniently eliminate cable clutter and enjoyuncompromised signal quality.Compatibility•Works with: most Bluetooth smartphones, tablets, music devices•iPad: iPad 1, iPad 2•iPhone: iPhone 3, iPhone 3GS, iPhone 4, iPhone 4S •iPod touch: 3rd generation or later•Android tablets & smartphones: with Android 2.1 and Bluetooth 2.1 or above•other music devices: with Bluetooth 2.1 or aboveConnectivity•Bluetooth profiles: A2DP, AVRCP, HFP, HSP •Bluetooth range: Line of sight, 10M or 30FT •Microphone: Built-in microphone •USB charging •Audio in (3.5mm)Sound•Output power (RMS): 2W •Sound System:MonoLoudspeakers •Speaker drivers: Neodynium magnet system Power•Battery type: lithium (built-in)•Operating time on battery: 8 hrAccessories•A cable for: 3.5mm audio in and USB charging •Warranty certificate•World Wide Warranty leaflet •Quick start guideOuter Carton•Gross weight: 2.597 lb •Gross weight: 1.178 kg •GTIN: 1 06 09585 23611 7•Outer carton (L x W x H): 21.6 x 18.4 x 14.6 cm •Outer carton (L x W x H): 8.5 x 7.2 x 5.7 inch •Nett weight: 1.049 lb •Nett weight: 0.476 kg•Number of consumer packagings: 4•Tare weight: 1.548 lb •Tare weight: 0.702 kgPackaging dimensions•Packaging dimensions (W x H x D): 8.7 x 10.2 x 13.3 cm•Packaging dimensions (W x H x D): 3.4 x 4.0 x 5.2 inch •Gross weight: 0.258 kg •Gross weight: 0.569 lb •Nett weight: 0.119 kg •Nett weight: 0.262 lb•Number of products included: 1•Packaging type: Carton •Tare weight: 0.306 lb •Tare weight: 0.139 kg•Type of shelf placement: Laying •UPC: 6 09585 23611 0Product dimensions•Product dimensions (W x H x D): 2.6 x 3.2 x 2.6 inch•Product dimensions (W x H x D): 6.7 x 8.2 x 6.5 cm •Weight: 0.038 kg •Weight: 0.084 lb。
Philips Fidelio SoundAvia wireless speakerwith AirPlay USB port for play/charging 10WAD7000W Experience the richness of natural sound Obsessed with soundThe Philips Fidelio wireless speaker gives you the freedom to play songs from your iPod Touch, iPhone, iPad, and from your computer’s iTunes - wirelessly via AirPlay. Elegant and compact, it fills your home with great music, not clutter.Crystal clear sound•SoundAvia for impressive room-filling sound•FullSound enhances sound detail for rich and powerful sound•10W RMS total output powerElegant and contemporary•Contemporary design for any space, any lifestyle•Finished with high-quality AluminumAdvanced versatility•Stream music with AirPlay wireless technology•Play and charge your iPod/iPhone/iPad via USB port•AUX-in for easy connection to almost any electronic deviceIntuitive control•SoundStudio app for complete control of audio settingsHighlightsSoundAviaDesigned to satisfy the most demanding music aficionados, SoundAvia will fill your room with impressive audio quality from a compact device. Full range front-firing speaker drivers and back-firing bass pipes optimize the sound balance, while the slightly curved baffle design elegantly broadens the optimal listening area.FullSound™Philips' proprietary FullSound technology uses latest-generation Digital Signal Processing to faithfully enhance music rendering. Music content is dynamically analyzed and optimized to let you experience music with great detail and warmth.AirPlay wireless technologyAirPlay lets you stream your entire iTunes music collection to your Philips Fidelio docking stations. It plays wirelessly from the iTunes program on your computer, iPhone, iPad or iPod Touch - to any AirPlay-enabled speaker in your home. All you have to do is ensure your speakers are connected to your Wi-Fi network. AirPlay also lets you playsimultaneously on every speaker in every room. Get your favorite tunes to follow you whichever room you go.SoundStudio AppHave music the way you like it now.SoundStudio truly puts the power over your music into the palm of your hands. It lets you change every aspect of sound, using only your iPhone, with controls that are intuitive and simple. Now you can tweak, tailor and create your desired sound experience and have your favorite songs come to new life. SoundStudioalso lets you listen to thousands of Internet radio stations worldwide, broadening your music experience even further.Play & charge iPod/iPhone/iPadThis speaker comes with a USB port, allowing you to conveniently charge your iPod, iPhone, iPad. Simply connect your Apple device with its USB cable to the back of the speaker. You can play any music from your Apple device whilst it is charging.AUX-in connectionThe AUX-in connection allows direct playback of MP3 content from portable media players. Besides the benefit of enjoying your favorite music in the superior sound quality delivered by the speaker, AUX-in connection is also extremely convenient as all you have to do is to plug your portable MP3 player to thespeaker.Issue date 2020-07-08 Version: 5.0.612 NC: 8670 000 86559 EAN: 87 12581 63248 9© 2020 Koninklijke Philips N.V.All Rights reserved.Specifications are subject to change without notice. Trademarks are the property of Koninklijke Philips N.V. or their respective owners.SpecificationsCompatibility•Compatible with: all iPod, iPhone and iPadiPod/iPhone/iPad App•App name: SoundStudio, Free download from App store•Compatibility: iPod touch, iPhone, iPad iOS 4.3 or laterLoudspeakers•Speaker drivers: 2x2.5"/6.5cm full-range driver •Output power (RMS): 10WAccessories•Included accessories: AC-DC Adapter, 3.5mm stereo line in cable, Warranty certificate, World Wide Warranty leaflet, Quick start guide •User Manual: in CD Connectivity•AirPlay•Aux in•USB: for playing and charging iPod/iPhone/iPad Dimensions•Product dimensions (WxDxH): 106 x 298 x168 mm•Packaging dimensions (WxDxH): 401 x 152 x 215 mm•Product weight: 1.36 kg•Weight incl. Packaging: 2.02 kgPower•Power supply: 100-240VAC, 50/60Hz。
Philips GoGear MP3 playerRaGa8 GB*SA1982Digital music - anytimeenjoy great MP3, WMA sound and FM radioEnjoy 27 hours* of great MP3 and WMA music with the Philips GoGear digital audio player SA1916. Easily search for your favourite songs by album or artist.All your music on the go — every day •MP3 and WMA playback•Equalizer to suit your music preferencesReady to wear, ready to go•Aluminium finish for robustness and durability •Small and wearable for ultimate portability •Up to 27-hour music playback*•Voice recording to take notes or record anything, anytime Easy and intuitive music experience•Drag and drop your songs easily — no software needed •3-line black and white display for easy readingIssue date 2009-11-27Version: 1.0.412 NC: 8670 000 58366EAN: 87 12581 51770 0© 2009 Koninklijke Philips Electronics N.V.All Rights reserved.Specifications are subject to change without notice. Trademarks are the property of Koninklijke Philips Electronics N.V. or their respective SpecificationsMP3 playerRaGa 8 GB*Picture/Display•Backlight•Lines of text:3•Resolution: 128 x 48•Type:LCDSound•Equalizer customisable•Frequency response: 80 - 18,000 Hz•Equalizer settings: Funk, Hip Hop, Jazz, Rock, Techno, Classical•Signal to noise ratio: > 80 dB •Channel separation: 35 dB•Output power (RMS): 2 x 3 mWAudio Playback•Compression format: MP3, WAV, WMA •MP3 bit rates: 8-320 kbps and VBR•ID3 Tag support: Song title, artist, album •WMA bit rates: 5-320 kbps•WMA sample rates: 8, 11.025, 16, 22.050, 32, 44.1, 48 kHz•MP3 sample rates: 16, 32, 44.1, 48, 11.025, 22.050, 24, 8 kHzStorage Media•Built-in memory type: NAND Flash •Built-in memory capacity: 8 GB •Mass storage class compliant•Music memory capacity, MP3: Up to 1600 tracks*Connectivity•Headphones: 3.5 mm •USB: USB 2.0Convenience•Battery low indication •Function: Keypad lock •Superscroll•Volume control•Firmware upgradeableAccessories•CD-ROM: Yes, with IFU, Device Manager •Headphones: AY3822•USB cable: AY3930•Quick start guideSoftware•Device manager: to restore and upgradeGreen Specifications•Lead-free soldered productSystem Requirements•PC OS: Windows 2000/XP/Vista •CD-ROM drive•Internet connection: Yes (for access to updated support documents, manuals, future firmware and PC software upgrades)•USB: Free USB portPower•Play time on internal battery: Up to 27 hours •Battery Type:LI-Polymer •Rechargeable: Yes, via USBDimensions•Blister dimensions (WxDxH): 13.5 x 3.35 x 18.4 cm•Product dimensions (WxDxH): 44 x 46 x 15.6 mm •Product weight: 0.034 kg •Packaging type: ClamshellAudio Capturing•Audio file format: WAV •Built-in microphone: mono •Voice recording: ADPCM*Storage capacity based on 4 minutes per song and 64 kbps WMA or 128 kbps MP3 encoding.*Actual transfer speed may vary based on your operating system and software configuration.*1 GB = 1 billion bytes; available storage capacity will be less.*Optional versions with or without radio are available*Rechargeable batteries have a limited number of charge cycles and may eventually need to be replaced. Battery life and number of charge cycles vary by use and settings.。
VAMP2.0中文说明书还是有很多人对于V-Amp 2.0摸不清头绪,我来整理一下在网上搜集到的说明书和以前自己的经验,希望对大家有帮助。
1、介绍恭喜!阁下购买的V-AMP2为V-AMP虚拟吉它扩音器的改良产品。
我们对其进行改进的最终目的是通过“物理模拟”并结合最新的DSP效果器方式以产生出值得信赖的经典扩音器的音色。
与其上一代产品--V-AMP相比,V-AMP2具有许多优势:被模拟的扩音器数量增加了一倍;五个可进行全局调整的操作模式;由于带有前级旁路(Preamp Bypass),你还可以将该设备单纯作为的效果器来使用。
我们再次直面研发产品带来的挑战。
当然它仍有可能成为未来一段时间人们的话题。
V-AMP2是一款多功能的产品,它既可以在绝不造成任何信号传输问题的情况下,为您带来32款值得信赖的、甚至是特殊的扩音器的音色,还可以为您提供由多效果处理器技术带来的各种声音。
简而言之,V-AMP2给您的是一个声音工具,里面包含了各种当今音乐人梦寐以求的元素。
BEHRINGER是一家由从事专业录音棚技术发展而来的公司。
多年以来,我们已经成功地开发了多种用于录音棚及演出现场的产品,包括麦克风及各类标准机架设备(如压缩器、增强器、噪音门、电子管处理器、耳机放大器、数字效果设备及DI盒等)、监听器、调音台以及专业现场、录音棚混音器。
我们已将所掌握的全部技术融入V-AMP2中。
灵活性是音乐领域中至关重要的一环。
一个现代吉它手不仅需要演奏多种音色,还需要有适应不同演奏环境(家庭录音、录音棚、现场演出)的能力。
因此,庞大的扩音器堆阵已经成为过去。
V-AMP2融尽可能多的功能于一身,而且设置及携带非常方便,同时很容易就可以掌握。
内置的EPROM很方便进行替换,从而使得V-AMP2可以引领时代。
也就是说我们将听取您的建议,并且不断地对新的算法进行研究。
然后放在互联网上供您免费下载,这样即使是在将来,V-AMP2也一样不会落伍。
ZOOM 505ii中文说明书介绍感谢您选择了ZOOM505 II(以下简称” 505 II”).请务必花点时间仔细阅读本手册,以便充分开发本设备的性能,确保获得最佳使用效果.保存好手册\保修卡以及所有的文件,以备将来查询.目录安全警告 (2)功能 (3)本手册中用到的条目 (4)用电池给本设备供电 (5)控制和功能 (6)选择演奏音色 (8)使用调音器功能 (10)编辑音色 (12)储存/复制音色 (14)改变音色调出模式 (16)使用选项踏板 (18)恢复原厂缺省设置 (19)连接效果模块 (20)效果类型和参数 (21)规格 (31)使用警告 (31)音色表排除故障.P.2.安全警告在本手册中,使用明显的警告和注意符号作出提示,防止发生事故.这些符号的含义如下所示: !警告--这个符号表示有特别危险的事项.如果用户忽略了这个符号,在操作设备时发生失误,则会发生严重的伤害甚至死亡.!!注意--这个符号表示有危险的事项.如果用户忽略了这个符号,在操作设备时发生失误,则可能导致身体受到伤害或损坏设备.!警告--关于电源*因为本设备的功率损耗相当高,所以,我们建议您最好随时使用AC电源转换器.用电池作为设备的电源时,只能使用碱性电池.AC转换器的操作*一定要使用9V DC,300MA的AC转换器供电,并且应装备有"中心负极"插头(ZOOM AD-0006).如果不使用指定类型的转换器,则可能会损坏设备或发生安全事故.*连接AC转换器时,只能使用适合转换器额定电压的AC插板.*从AC线板上取下AC转换器时,要抓住AC转换器,而不能拉连接线.*如果长时间不使用设备,应将AC转换器从插线板上取下.安装电池*请使用IEC R6 (尺寸为AA),1.5V的电池(碱性/锰).*不能用505 II来给电池充电.特别要注意电池上的标签,一定要选择合适的类型.*如果准备长期不使用505 II,请取出设备内的电池.*如果电池发生泄漏,请仔细擦净电池舱和电池两端,清除掉所有电池液体的残留物.*使用设备时,应关好电池舱的盖子.!!注意环境使用505II时,不能将它暴露于下列环境中:*温度过高或过低的地方*湿度较高或潮湿的地方*灰尘或沙粒太多的地方*特别震动和摇晃的地方!!注意操作*505 II属于精密的乐器,除了踏板之外,不要用脚或物体去碰设备的其他部分,操作时不要太使劲.*小心,不要让外部物体(纽扣或针等物品)或液体进入设备中*连接之前,一定要先关闭所有设备的电源.*移动设备之前,记得关闭电源,断开所有线缆和AC转换器.!!注意变更请不要打开505 II的外壳,或者试图用任何方式修改本产品,因为这样会损坏设备.P.3.功能505 II是一个精密复杂的吉他多重效果处理器,它具有下列功能和选项:*高级演奏性能505 II仅用了接近于单块效果器的价位,却拥有33个经过各种组合和调色的效果.每个音色中总共可组合9种效果(包括ZNR和音箱模拟器).设备的内存中有36个可以重新写入的音色,还可以不受锁定限制演奏.*直观的用户界面用户界面彻底重新设计.有大型的开关和按钮,以及一个旋转选择器,用它们来操作设备就非常简单.可以即刻调出自己想要的效果,不会发生混乱.*内置半音阶自动调音器这项综合调音功能可以让你在台上迅速而准确地给乐器调音.*两种供电方式,可以随处使用两种供电方式,既可以用AC转换器供电,也可以用四节IEC R6 (尺寸为AA),1.5V的电池供电.使用电池的连续工作时间是:锰电池为8小时 *** 59;碱性电池为28小时.*兼容脚踏开关和踏板在CONTR OL IN插口中可以连接一个脚踏开关选项(FS01)或者表情踏板(FP01/FP02).踏板开关用于快速切换音色,表情踏板则可实时调节音量或效果的音质.*改进后的505的升级换代产品这块效果器继承了ZOO M机型505的非常成功的音色特征,体形小巧,价位较低.而且,它合并了九种新的效果,包括使用了很久的技术失真效果,舞台常用效果和特殊效果.P.4.本手册中用到的条目这一部分解释某些重要的条目,它们在505II的文本中经常使用.*效果模块如下面的图表所示,你可以将505 II看作是几个单块效果器的组合.里面的每个效果就是一个效果单块.除了组成压缩器效果(COMP)或失真效果(DIST)的模块之外,505 II上还有一个ZNR(ZOOM降噪)和一个吉他音箱模拟器.象效果深度这样的参数都可以在各个模块上分别调节,而且各个模块都可以随意打开或关闭.输入-压缩-失真-均衡-降噪-音箱模拟器-调制器-延迟/混响-输出*效果类型在每个效果模块中,都有几个各不相同的效果,这就是效果类型.例如:调制效果模块(MOD)由合唱\边缘声\音高位移器和其他效果类型组成.一次只能选择其中的一个.效果类型通常也用来指代一种效果.*效果参数所有效果模块都有各种可以调节的参数.把效果模块看作一个单块效果设时,参数就可以看作是设备上面的控制旋钮.改变参数设置,将会改变效果深度等条目,从而改变音质特征.*音色(音图)在505 II中,把可以储存到设备中和从设备中调出的效果模块组合称为音色.音色的信息包括每个效果模块的开/关状态,每个模块中的效果类型,以及效果的参数设置.505 II的内存可储存36个音色.*音库把六个音色分为一组,这样的音色组称为音库.505 II中共有六个音库,命名为A到F.每个音库中的音色按1到6来编号.在505 II中,用下列格式来指定一个音色:"A1"-它表示的是音库A中编号为1的音色.以此类推,"B6"则是音库B中编号为6的音色.P.5.音库A音色1音色2音色3音色4音色5音色6音库B音色1音色2音色3音色4音色5音色6音库C音色1音色2音色3音色4音色5音色6音库D音色1音色2音色3音色4音色5音色6音库E音色1音色2音色3音色4音色5音色6音库F音色1音色2音色3音色4音色5音色6*播放模式/编辑模式505 II的内置状态指的就是操作模式.两个主要模式就是播放模式-在这种模式下选择音色,并用这种音色来演奏乐器 *** 59;编辑模式-在这种模式下修改效果.用[PLAY/EDIT]选择键来切换播放模式和编辑模式.使用电池给设备供电1.将505 II翻转过来,打开设备底部的电池舱盖.按住插销,让它松动,然后打开舱盖.2.把四节新的I EC R6(尺寸为AA)电池放进电池舱.按相同的方向插入所有电池.四节IECR6(尺寸为AA)电池所有电池极性应一致。
太空人音响2代说明书
蓝牙耳机关机状态,按着开关键或者多功能键7秒左右。
出现红灯和蓝灯交替闪烁,就进入配对模式了。
同时手机开启蓝牙搜索功能,可见任何设备,收到蓝牙耳机信息,点击确定连接。
太空人蓝牙音箱,内置可充锂电池,支持蓝牙连接、免提通话,手部可灵活摆动。
高保真喇叭,还原声音本质,小身型,大音量。
播放音乐时,脸部炫彩呼吸灯自动变换,营造趣味生活。
兼容市面上带蓝牙功能的手机、平板电脑、笔记本电脑、台式电脑(台式机需配蓝牙适配器)。