爱普生EPSON EPL-6200 installation manual说明书
- 格式:pdf
- 大小:1.40 MB
- 文档页数:2

Read these instructions before using your product.Important Safety Instructions: When using telephone equipment, youshould always follow basic safety precautions to reduce the risk of fire, electric shock, and personal injury, including the following:• D o not use this Epson ® product near water.• A lways keep this guide handy.• A void using a telephone during an electrical storm. There may be a remote risk of electric shock from lightning.• D o not use a telephone to report a gas leak in the vicinity of the leak.Caution: To reduce the risk of fire, use only a No. 26 AWG or largertelecommunication line cord.1 Remove all protective materials from the product.2 L ift up the scanner unit and remove all protective materialsfrom inside the product, then close the scanner unit.6 Close the ink pack tray cover and lock it.7 P ress OK on the LCD screen to start charging the ink.Ink charging takes approximately 5 minutes. A messageappears when ink charging is complete.4 Load paperFor instructions on loading envelopes or legal-size paper, or using the rear paper feed slot, see the online User’s Guide .1 M ake sure the product is done charging the ink, then pullout the paper cassette.2 S lide the side edge guides all the way out and set thefront edge guide to the paper size you are using.3 I nsert paper with the glossy or printable side down.Standard paper: Thick paper:Note: Make sure the paper is under the arrow mark for your paper type and loaded against the front edge of the cassette.4 S lide the edge guides against the paper, but not tootightly.2 P ress an ink pack tray to release it, then pull the tray out.3 S hake an ink pack 10 times, then remove it from thepackaging.Note: Do not touch the green chip on the ink pack.4 M ove the handle forward, place the ink pack into the inkpack tray until it clicks, then move the handle back to itsoriginal position .Note: Make sure the ink pack is fullyinserted and level with the top of the ink pack tray.5 I nsert the ink pack tray into the printer. Repeat steps 2 to5 for the other ink packs.Note: The ink packs are keyed to fit into the correct color slot.If you cannot insert the ink pack tray all the way, do not force it. Make sure the ink pack color matches the color slot on the printer.3 F ollow the instructions on the computer screen to run thesetup program.4 W hen you see the Select Your Connection screen, selectone of the following and follow the on-screen instructions:• Wireless connectionIn most cases, the software installer automatically attempts to set up your wireless connection. If setup is unsuccessful, you may need to enter your network name (SSID) and password.• Direct USB connectionMake sure you have a USB cable (not included).• Wired network connectionMake sure you have an Ethernet cable (not included).PCL or PostScript driver (WF-C5790)Download the software and see your online User’s Guide for instructions..jm/support/wfc5790Mobile printingConnect wirelessly from your smartphone, tablet, or computer.Print documents and photos from across the room or around the world:• Print directly from your iOS device. Simply connect your printer and device to the same network and tap the action icon to select the print option.• Use Epson Print Enabler (free from Google Play™) with Android™ devices (v4.4 or later). Then connect your printer and device to the same network and tap the menu icon to select the print option.• Print remotely with Epson Connect™ and Google Cloud Print™. See your online User’s Guide for instructions or learn more at .jm/connect .Any problems?Network setup was unsuccessful.• Make sure you select the right network name (SSID).• Restart your router (turn it off and then on), then try toconnect to it again.• The printer can only connect to a network that supports 2.4 GHz connections. If your router offers both 2.4 GHz and 5 GHz connections, make sure 2.4 GHz is enabled.• If you see a firewall alert message, click Unblock or Allow to let setup continue.• If your network has security enabled, make sure you enter your network password (WEP key or WPA passphrase) correctly. Be sure to enter your password in the correct case.56 S elect the paper settings on the product’s control panel.12 I f prompted, press Proceed on the LCD screen to set upthe fax, or press Close to set it up later.Note: If your computer does not have a CD/DVD drive or you are using a Mac, an Internet connection is required to obtain the product software.To print from a Chromebook™, go to.jm/support/gcp for instructions.Standard software package1M ake sure the product is NOT CONNECTED to your computer.Windows ®: If you see a Found New Hardware screen, click Cancel and disconnect the USB cable.2 I nsert the product CD or download and run your product’ssoftware package. For the latest software, visit:WF-C5710.jm/support/wfc5710WF-C5790.jm/support/wfc5790。

[武汉]EPSON 6200L激光打印机千元【IT168 武汉行情】随着工作环境的改变,越来越多的SOHO用户及家庭用户把千元级的激光打印机列为首选,而EPSON EPL-6200L凭着良好的品牌加上紧凑的小巧机身,得到了众多消费者的喜爱,特别是1240的价格也是众多个人用户选择的理由之一!爱普生EPL-6200L是一款经济的A4幅面桌面型高速黑白激光打印机。
它具有32bit RISC 48MHz的中央处理器,内置的2MB内存和高速的打印引擎,能够轻松实现20页/分钟的高速打印性能,其独有的"即传即打"打印数据处理技术,与传统打印的数据处理方式截然不同,打印机工作时不必再等待每一页数据全部传输完毕,可在数据传输的同时就开始打印。
这些特点大大减少了用户打印等待时间,使工作效率得到大幅度的提高。
EPL-6200L的分辨率有600dpi,能够保证得到清晰的打印效果!月打印负荷量为15000页,具有IEEE-1284接口和USB1.1两种接口,标配2MB内存,而且支持Mac系统。
采用鼓粉分离式设计,硒鼓的寿命为2万页,粉盒有两种可供选择,1500页和3000页。
由于EPSON EPL-6200L采用了鼓粉分离设计,可实现碳粉或成像单元的单独更换,有效地避免了一体式设计中由于成像单元和碳粉使用寿命的不同,而造成的不必要的资源浪费。
通过EPL-6200L自带的Status monitor状态监视器,可让您随时精确地获取到碳粉使用余量与打印状态。
这些特性让打印机具有了很高的性价比,全面节约打印成本。
可以说该机成本十分经济,可为用户大大节省各种资源。
其“小身材,大用途”可以说是EPSON EPL-6200L的写照,相信千元的价位还是物超所值!爱普生EPL-6200L参数参数纠错硒鼓寿命20000万张sleep mode 睡眠模态mp tray paper size mp 盘子纸张大小toner out error 出自错误的色粉total pages 总数页installed memory 安装了记忆toner 色粉photoconductor 光导体我换了芯片后,打印文件出错,出现了下面的英文,谁知道是什么意思?Open the front cover, then remove and reinstall the developer cartridge.If this error occurs again, replace the developer cartridge.“让你打开前仓取出硒鼓重新安装,如果再出现相同问题就要更换硒鼓”这就是翻译的内容亲自动手为爱普生6200L激打更换硒鼓Epson EPL_6200L是一款经典的小型黑白激光打印机,笔者所在单位办公室已经购进Epson 这款打印机三年有余,打印了上万张黑白文档,最近发现打印出来的文档或者图像浅淡无法看清,或者出现严重影响视觉的黑斑或黑条纹,起初以为是墨粉耗尽或墨粉外泄造成的,先将打印机内部彻底清理一遍,后又重新装入新的墨粉,发现打印效果并无多大改观,询问行家得知,是硒鼓寿命耗尽故无法正常打印,一般硒鼓寿命多在10000张左右,一旦硒鼓寿命耗尽,就算你再怎么保养修补也会无济于事,硒鼓已经寿终正寝,现在就需要更换新硒鼓了。

EPSON 6200系列打印机硒鼓再生拆解方法
机器与硒鼓的相关知识:
EPSON 6200是作为EPSON 6100的升级,在欧洲它的编号为EPSON LP2500,在日本是1400,这两款机器在国内都没有销售。
它的通用性很广泛,包括里面常见的配件感光鼓,粉仓刮板等,像EPSON 5700、5800、5900、6100、6200;Lenovo 1700、1800;方正230、220、210;美能达1200、1300、1350等都是通用的。
该粉盒的编号是EPSON 4519。
粉盒低容可以打印3000页纸张,高容可以打印6000页纸张。
该粉盒带技术芯片,由于粉盒也是分高低容的,因此在给客户换技术芯片的时候需要问一下供应商给你的芯片是高容还是低容的,高容的芯片可以用在低容的粉盒上面,低容的芯片放在高容的芯片上寿命只是它的一半。
硒鼓的拆解方法:
该硒鼓采用鼓粉分离的设计,有单独的鼓体单独的粉仓。
鼓体部分没有废粉仓,没有充电辊。
1、旋转蓝色把手将粉仓和鼓体进行分离;
2、用小的一字改锥卸掉鼓体两侧的小螺钉,取下支架;
3、取下弹簧,拆掉挡板;
4、卸掉螺钉取下侧端盖;注意不要将铁丝丢失;
5、取下感光鼓;
6、用棉花清洁感光鼓;
7、用纸张将感光辊包好避免磕伤或曝光;
搜索关键字:6200 硒鼓再生拆解方法中国耗材网图解。

Epson Stylus Pro 7800 Install GuideUsing the Epson with KCPSJim ReadInstalling the Epson Stylus Pro Printer DriverDownload the latest driver from Epson’s website () and install according to their instructions. Verify that the Windows printer driver is working by printing from Photoshop or Paint. Setting Up a Printer in KCPS for the Epson Stylus Pro PrinterThe Epson Stylus Pro 7800 is supported as a Windows printer using Epson’s print driver.Log in to the KCPS Administration functions and go to Printing-Setup.Setting up the KCPS PrinterSet up a Windows printer for each print size that will be printed by the Epson 7880 printer.1.Open the Printer Setup window and click the “Windows printer” option from the list.2.Next, you’ll need to assign a printer name that is appropriate such as “Epson 16x20”.3.Click Next.4.Assign a Config File for this printer and give it a matching name such as “Epson 16x20”.5.Click Page Setup. Do not make changes here. Changes made in the printer’s page setup will bereflected here.6.From Page Setup, click Properties. Choose the media settings that are right for the paper.Key SettingsMode Settings - Mode (Color Management)Good results can be obtained if you do not use a color profile in KCPS thus delivering an sRGB image to the Epson driver and enabling Automatic color correction using Epson Standard (sRGB) correction in the driver. To use an ICC profile in KCPS for color correction, click Custom Mode and select No Color Adjustment from the drop-down menu.Size and ExpansionBelow are recommended settings to print a 16x24 on 24” roll paper:User Defined Paper SizePaper Size Name24x16Fix Aspect Ratio Not SpecifyPaper Width24.00Paper Height16.1 (this is 16 + 0.1”)Unit inchExpansionAuto Expand selectedAmount of Enlargement Standard (applies ~1.5% overspill on a 16x24)Configure the custom size and save it. Standard Auto Expansion provides adequate overspill.Set up KCPS to deliver a 16x24 image to the driver with this configuration and it will scale the image up about 1.5% to ensure there are no slivers of white along the edges of the roll and provide about 0.05“ at top and bottom so that the trim process will not leave any white slivers. This is similar to how minilabs ensure that the full print area is covered by the image.To set up other size prints, make the paper width exactly the desired size and the height 0.1” larger than the size desired. If 0.1” does not give enough tolerance for the trimming process, this can be increased to as much as 0.25” by adding more to the height of the print. The Epson print driver applies a sliding scale to the overspill percentage based on the size of the image. If the image width is less than the roll width the driver will place the image to one side of the roll and print the overspill on the opposite side to allow for the trim on that side.Setting Auto Expand to Retain Size turns the overspill feature off. This is useful when printing a grid of smaller images or a print with graphic elements near the edges of the image. Without the scaling each image within a grid will be the exact size intended and will not be cropped at the edges of the print.Setting the Amount of Expansion to Min will decrease the amount of scaling applied. A couple of sample 8x10’s showed 3% scaling on the Standard setting and 1.5% scaling on the Min setting.Auto ExpandThe Auto Expand feature is intended to cover any white slivers on the edges of the print by applying an overspill. Select Retain Size to turn this feature off. When printing on a roll of paper Auto Expand will fill in any sliver of white between the edge of the print and the edge of the roll and this cannot be achieved without the use of this feature. However, Auto Expand may not do exactly what you would expect. Consider a 16x24 poster printed on a 24” roll of paper; if this is printed using Retain Size there will probably be a sliver of white along one side or the other of the roll. Print it again with Auto Expand set to the Standard amount of enlargement and the Epson software will first scale the image up by 1.5% then crop the short dimension to exactly 16” and then print. The overspill in the long dimension will cover the white sliver but there will be no extra image in the short dimension to make trimming the image easier. This overspill in the short dimension can be added by changing the user defined paper size height by an amount up to 1.5% of the height or 0.24” on the 16x24 example. (Note: adding this amount to the Page Height will not trigger the Epson software to scale the image to fill a 16.24x24 before adding the 1.5% for overspill.) Adding less to the height has no effect other than to decrease the amount of overspill printed. Knowing that the Epson driver applies different percentages of overspill to different size prints lends understanding to Epson’s recommendation to add 0.1” to the height of any print size.When making prints that do not use the full width of the roll, the Epson software prints the image to one side of the roll (presumably to eliminate a cut when trimming the print). Without the use of Auto Expand there may be a sliver of white between the edge of the print and the edge of the paper. Turn Auto Expand on and the sliver will be taken care of plus the overspill is printed on the opposite side of the print.The white dashed lines represent the overspill. The height of the image is 16” without the overspill.Epson recommends printing the image 0.1” higher than the finished size but up to 0.24” can be used.The size of the finishedprint is 16”x20” after the overspill has been trimmed.Click the Page Layout tab.Choose Landscape.Leave all other settings at their defaults.Queue NameSet up a Queue for this printer and give it a matching name like “Epson 16x20”. Paper WidthUse the maximum paper width of 24 inches.ICC ProfileSelect the appropriate color space for your workflow.。

Eaton 61062Eaton Protection Station USV, USB DIN, 650 VA, 400 W, Eingang:Schuko, Ausgänge: (4) Schuko, (4) Schuko nur Überspannung,TowerAllgemeine spezifikationProduktname KatalognummerEaton Protection Station USV61062Produkt Länge/Tiefe Produkthöhe190 mm370 mmProduktbreite Produktgewicht220 mm 3.8 kgEinhaltung(en)Zertifikat(e)CE-Kennzeichnung IEC/EN 62040-1IEC/EN 62040-2CEEACEAN3553340610622400 W0,6TowerNeinSchutzkontakt (SCHUKO)161 V284 VEaton UPS Companion (ermöglicht eine sichere Systemabschaltung, Stromverbrauchsmessung und Konfiguration der USV-Einstellungen)Auswechselbarverschlossen, Bleisäurebatterie98Eaton Protection Station UPS - 650/800 VA - Installation and user manual (multiple languages)EU Declaration of Conformity Eaton Protection Station UPSLeistungAusg.leist.faktor FormfaktorBeinhaltet Netzwerkkarte Eingangsanschluss Eingangsspannung – min Ausgangsspannung – max Softwarekompatibilität Batteriewechsel BatterietypEffizienzBesondere Merkmale Benutzerhandbücher Zertifizierungsberichte3-in-1-Konzept: USV +Überspannungsschutz + Mehrfachsteckdosenleiste Enthält ein leistungsstarkes Überspannungsschutzgerät, das der Norm IEC 616431 entsprichtMit der EcoControl-Funktion sparen Sie bis zu 30 % mehr Strom als mit USVs der Vorgängergeneration8 Steckdosen zum Anschluss Ihres PCs undIhrer Peripheriegeräte oderIhrer AV-AusrüstungSchutz der Datenleitung, um sicherzustellen, dass die Internetleitung(einschließlich xDSL) vorÜberspannungen geschütztistUSB-Anschluss und Energieverwaltungssoftwarefür Windows/Linux/Mac als StandardBauformFreistehendes ModellAusgangsspannung – min161 VFarbeSchwarzErweiterte AkkukapazitätNoAusgangsspannungsbereich184–264 V (einstellbar auf 161–284 V)TopologieOfflineÜberspannungsschutzJaLaufzeit auf Halblast1 minEingangsnennspannung230 V Standard (220/230/240 V)Eingangsfrequenz-Bereich46-70 HzEingangsspannung – max284 VSpannungsartACPhase (Ausg.)1AkkumanagementWechselbare Batterien, automatischer Batterietest, Tiefentladeschutz, kaltstartfähigAutomatische AusschaltfunktionJaBetriebstemperatur - min0 °CVA Wert650 VAPotentialfreier SchaltkontaktNeinSteckdosen(4) Schuko, (4) Schuko, nur ÜberspannungPhase (Ein.)1VerpackungsinhaltBefestigtes NetzkabelUSB-KabelBenutzerhandbuch in 20SprachenSicherheitshinweise,Geräuschpegel< 25 dB bei 1 MeterEinspeisungstyp1LaufzeitgrafikAnzeige des LaufzeitgraphsBenutzeroberflächeLEDsAnzahl Batterien1Betriebstemperatur - max35 °CSpannung230 VEingangskabellänge1,5 mTemperaturbereich0° bis 35°C (32° bis 95°F)Ethernet-SchnittstelleNeinKommunikationUSB-Port (HID-konform), Kabel im Lieferumfang enthaltenRelative Luftfeuchtigkeit0-85 % ohne BetauungAusgangsscheinleistung650 VARack-Montage-BausatzNeinAnzahl der Ausgänge PC (SCHUKO)8Ausgangsfrequenz50/60 HzLaufzeit bei Volllast1 Min.SchnittstellentypUSBPrimäre Frequenz - min46 HzBatterieleistung12 V/7,2 AhTypUSV-AnlageAusgangsnennspannung230 V Standard (220/230/240 V)ErweiterungssteckplätzeNoEingangsspannungsbereich184–264 V (einstellbar auf 161–284 V)Nennfrequenz50/60 HzPrimäre Frequenz - max70 HzHöhe2000 mEaton Konzern plc Eaton-Haus30 Pembroke-Straße Dublin 4, Irland © 2023 Eaton. Alle Rechte vorbehalten. Eaton ist eine eingetrageneMarke.Alle anderen Warenzeichen sindEigentum ihrer jeweiligenBesitzer./socialmedia。

OTP6200由于是模块产品,在开机之后需要选择所需使用的模块,这里需要测试的是PTN环路上的100M以太网通信业务,选择OTP6200_Ethernet进入,观察仪表后面,发现其实对应的是一个名为OTM2602的模块,观察该模块,有PORT1和PORT2,并分别配有一个光接口口和一个电接口,因为这里不采用环回路径,因此在功能选项里面在选择了RFC2544这个功能选项之后弹出的对话框中选择双端口,在端口选项中选择100Mbps,电气模式以及全双工工作方式,选择自协商方式并退出,OTP6200会自动保存你的操作,连接好网线,点击开始便开始进行RFC2544下的四个指标测试,在测试过程中,点击下面键盘上的F8会弹出详细的测试过程,在所有测试完成之后可以手动选择将测试报告进行输出保存,保存形式为xls,OTP6200有USB接口,方便直接利用优盘等存储设备将测试报告拷贝出来。
打开功能选项,可以看到OTP6200所具有的功能包括:RFC2544,帧分析,误码,环回,PTN以及服务中断测试。
RFC2544,是由RFC定义的一组测试,包括四个测试:吞吐量,延迟,帧丢失率,背靠背。
(1)吞吐率(throughput)定义:被测设备在不丢包的情况下,所能转发的最大数据流量。
通常使用每秒钟通过的最大的数据包数或者字节数来衡量(MB/s),该指标反映被测设备所能够处理的最大数据流量。
(2)丢包率(Lost Rate)定义:在一定的负载下,由于缺乏资源而未能被转发的包占应该转发的包数的百分比,该指标反映被测设备承受特定负载的能力。
(3)时延(Latency)定义:发送一定数量的数据包,记录中间数据包发出的时间T1,以及经由测试设备转发后到达接收端口的时间T2,然后有Latency=T2-T1,其中T1,T2分别为,T1:输入帧的最后一位到达输入端口的时间,T2:输出帧的第一位到达输出端口的时间,该指标反映被测设备处理数据包的速度。
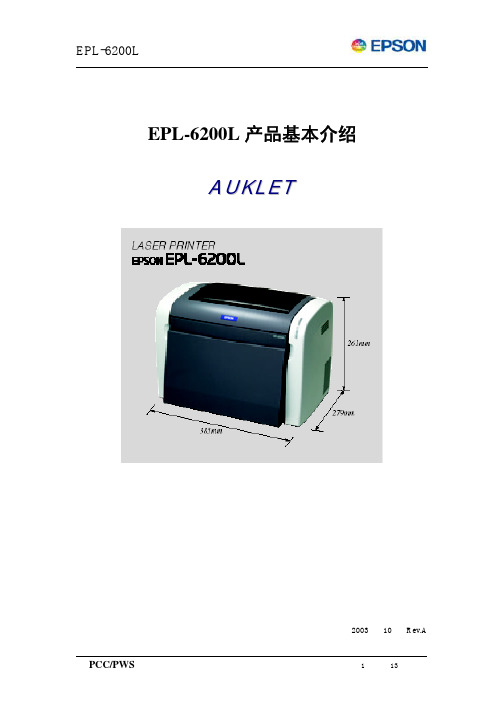
EPL-6200L产品基本介绍A U K L E T愛普生(中国)有限公司技術支援課 2003年10月Rev.A1概要 (4)1.1 上市时间 (4)1.2 市场参考价 (4)1.3 产品定位 (4)1.4 不同地区的名字 (4)2产品特点 (4)2.1 基本描述 (4)2.2 主要特点 (4)3产品比较 (4)3.1 与EPSON EPL-6100L的比较 (4)3.2 与EPSON EPL-6200的比较 (5)4基本规格 (6)4.1 纸张规格 (6)4.2 信赖性,可靠性和维护性 (6)4.2.1 信赖性 (6)4.2.2 可靠性 (6)4.2.3 维护性 (7)4.3 使用环境规格 (7)4.4 控制器基本规格 (7)5状态页说明 (8)6故障信息 (9)7特殊操作 (9)7.1 EEPROM初始化 (9)7.2 打印机调整(隐藏功能) (11)8耗材 (12)9维修信息 (12)9.1 维修服务 (12)9.2 保修期 (12)版本信息版本页项目描述原因---A ALL 首次发行 ---1 概要1.1 上市时间2003年9月1.2 市场参考价约RMB 2100 元1.3 产品定位经济型小型办公室A4幅面黑白激光打印机1.4 不同地区的名字名字地区EPL-6200L 日本之外的国家LP-1400 日本2 产品特点2.1 基本描述简洁轻巧的经济型A4幅面黑白激光打印机,适合小型办公或家庭使用。
2.2 主要特点1) 简洁轻巧的A4幅面黑白激光打印机。
2) 基于主机的打印机技术。
3) 数据压缩技术。
4) 20ppm高速打印。
5) 标配USB1.1接口。
6) 标配IEEE1284双向并行接口。
7) 硒鼓和碳粉既可分开又可以组装为一个整体的设计,既充分利用耗材又便于操作。
8) 碳粉盒有CSIC可自动识别碳粉容量和新碳粉。
9) 最高可达600dpi高清晰度。
10) 无分辨率增强模式。
11) 无300dpi模式。

Note:• A n Internet connection is required to obtain the product software.• T o print from a Chromebook™, go to/support/chromebookprint (U.S.) or http://epson.ca/support/chromebookprint (Canada) for instructions.Firmware Update Notice: The printer is designed to work only with genuine Epson-branded cartridges. Other brands of ink cartridges and ink supplies are not compatible and, even if described as compatible, may not function properly or at all. Epson periodically providesfirmware updates to address issues of security, performance, minor bug fixes and ensure the printer functions as designed. These updates may affect the functionality of third-party ink. Non-Epson branded or altered Epson cartridges that functioned prior to a firmware update may not continue to function.1 M ake sure the product is NOT CONNECTED to yourcomputer.W indows ®: If you see a Found New Hardware screen, clickCancel and disconnect the USB cable.2 D ownload and run your product’s software package. Forthe latest software, visitXP-4200/support/xp4200 (U.S.) http://epson.ca/support/xp4200 (Canada)XP-4205/support/xp4205 (U.S.) http://epson.ca/support/xp4205 (Canada)3 F ollow the instructions on the computer screen to run thesetup program.4 W hen you see the Select Your Connection screen, selectone of the following and follow the on-screen instructions:•Wireless connectionIn most cases, the software installer automatically attempts to set up your wireless connection. If setup is unsuccessful, you may need to enter your network name (SSID) and password.•Direct USB connectionM ake sure you have a USB cable (not included).Mobile and voice-activated printing• Print directly from your Android™ (v4.4 or later) device*.Simply connect your printer and device to the same network and tap the menu icon to select the print option. • Turn your mobile device into an intuitive, easy-to-useprinting and scanning control center with Epson Smart Panel. Download the app from your mobile device’s app store.• Print remotely with Epson Connect™. See your onlineUser’s Guide for instructions or learn more at /connect (U.S.) or http://epson.ca/connect (Canada).Ensure brilliant results with Epson specialtySee the online User’s Guide for information about loading capacity, available paper types and sizes, and loading envelopes.1 M ake sure the product is done charging the ink. Openthe feeder guard, then raise the paper support and tilt it backwards slightly.3 L4 S5 P6 F ollow the instructions on the LCD screen to select yourpaper settings and to adjust the print quality of yourproduct, if necessary.• Use voice-activated assistants to print a variety of creativeand everyday items from your Epson product. Simply add your product to an Epson Connect account, then link the account to a voice-activated assistant. See/voice (U.S.) or http://epson.ca/voice (Canada) for more information.* M ay require the Epson Print Enabler or Mopria Print Service app fromGoogle Play™.Any problems?Network setup was unsuccessful.• Print a network connection report to identify networkproblems and solutions. See your online User’s Guide for instructions.• M ake sure you select the right network name (SSID).• Restart your router (turn it off and then on), then try toconnect to it again.• T he printer can only connect to a network that supports2.4 GHz connections. If your router offers both 2.4 GHz and 5 GHz connections, make sure the 2.4 GHz connection is enabled.• I f you see a firewall alert message, click Unblock or Allow to let setup continue.• I f your network has security enabled, make sure you enteryour network password (WEP key or WPA passphrase) correctly. Be sure to enter your password in the correct case.There are lines or incorrect colors in my printouts.Run a nozzle check to see if there are any gaps in the printout. Then clean the print head, if necessary. See the online User’s Guide for more information.The product’s screen is dark.Make sure your product is turned on, and press any button to wake it from sleep mode.Setup is unable to find my printer after connecting itwith a USB cable.Make sure your product is turned on and the USB cable is securely connected.Any questions?User’s GuideWindows: Click the icon on your desktop or Apps screen to access the online User’s Guide .Mac: Click the icon in Applications/Epson Software/Guide to access the online User’s Guide .If you don’t have a User’s Guide icon, go to the Epson website, as described below.VideosVisit /support (U.S.) orhttp://epson.ca/support (Canada) and search for your product to view support videos (videos available only in English).EPSON, Claria, and Epson Smart Panel are registered trademarks, EPSON Exceed Your Vision is a registered logomark, and Epson Connect is a trademark of Seiko Epson Corporation.Designed for Excellence is a trademark of Epson America, Inc.Windows is a registered trademark of Microsoft Corporation in the United States and/or other countries.Mac is a trademark of Apple Inc., registered in the U.S. and other countries.Android, Chromebook, and Google Play are trademarks of Google LLC.General Notice: Other product names used herein are for identification purposes only and may be trademarks of their respective owners. Epson disclaims any and all rights in those marks.This information is subject to change without notice.© 2022 Epson America, Inc., 1/22Printed in XXXXXXCPD-61850。


Standards and ApprovalsThe following standards are applied only to the printers that are so labeled.(EMC is tested using the Epson power supplies.)North America: FCC Class A, CAN ICES-3 (A)/NMB-3 (A)Europe: CE markingOceania (PP-100III only): Radiocommunications (Electromagnetic Compatibility) Standard, Class AFor Users in EuropeCE Markingwww.epson.eu/conformityCautions on Handling the Ink Cartridge1,2-benzisothiazolin-3-one, 2,4,7,9-tetramethyldec-5-yne-4,7-diol, CI DIRECT YELLOW 173, FYS-109, S186260For Users in the AmericasWarningThe connection of a non-shielded printer interface cable to this printer will invalidate the EMC standards of this device. You are cautioned that changes or modifications not expressly approved by Seiko Epson Corporation could void your authority to operate the equipment.The cords included with this product contain chemicals, including lead, known to the State of California to cause birth defects or other reproductive harm. Wash hands after handling. (This notice is provided in accordance with Proposition 65 in Cal. Health & Safety Code §25249.5 and following.)FCC Compliance Statement For American UsersThis equipment has been tested and found to comply with the limits for a Class A digital device, pursuant to Part 15 of the FCC Rules.These limits are designed to provide reasonable protection against harmful interference when the equipment is operated in a commercial environment.This equipment generates, uses, and can radiate radio frequency energy and, if not installed and used in accordance with the instruction manual, may cause harmful interference to radio communications. Operation of this equipment in a residential area is likely to cause harmful interference, in which case the user will be required to correct the interference at his own expense.For Users in Oceania (PP-100III only)WARNINGThis is a Class A product. In a domestic environment this product may cause radio interference in which case the user may be required to take adequate measures.面向中国用户保留备用。


Quick SetupIMPORTANT: Before using the projector, make sure you read these instructions and the safety instructions in the online User’s Guide.Note: Product availability varies by country and region.Note: The illustrations show the EB-760W, but the steps are the same for all models, unless otherwise specified.Connect the projectorComputerChoose from the following connections. See the sections below or the online User’s Guide for details.VGA cableUSB cableHDMI cableHDMI® portConnect one end of an HDMI cable to one of the projector’s HDMIthe other end to an HDMI port on your computer.Computer portComputeraudio cable.Note: To use the projector’s Computer2 port, change the Monitor Out Portsetting in the Signal I/O menu. See the online User’s Guide for details.USB portConnect the square end of a USB cable to the projector’s USB-B (square) port.Connect the flat end of the cable to any USB port on your computer.Windows® 7 or later: After turning on the projector, follow the on-screeninstructions to install the Epson® USB Display software (EMP_UDSE.EXE;only on first connection). If the software screen does not displayautomatically, open My Computer, Computer, or This PC, then double-clickEPSON_PJ_UD.OS X 10.8.x or higher: After turning on the projector, the setup folder forUSB Display appears in the Finder. Double-click USB Display Installer andfollow the on-screen instructions to install the Epson USB Display software(only on first connection). If the software screen does not display automatically,double-click EPSON_PJ_UD, then double-click USB Display Installer.External monitor and speakersYou can connect an external monitor and external speakers to your projector toenhance your presentations. See the online User’s Guide for details.Wired networkConnect the projector to your network using an Ethernet cable. See “WiredVideo deviceConnect multiple video devices and use the Source Search button on theprojector or remote control to switch between them. For more information onplaying sound through the projector, see the online User’s Guide.Component videoto VGA cable3.5 mmaudio cableRCA video cable(composite video)HDMI cableNote: If you connected a streaming device to an HDMI port, you can alsoconnect it to the projector’s USB-A (flat) port for power.Camera, USB device, or document cameraConnect a digital camera, USB flash drive, USB storage device, or Epson DC-07document camera to the projector’s USB-A(flat) port.If you connect a digital camera, USB flash drive, or USB storage device, you canuse the projector’s PC Free feature. You can also connect other Epson documentcameras to the projector. See the online User’s Guide for details.Using the remote controlInstall the two AA batteries as shown.Choose which sourceto displayand offAccess projector menusdisplay and sound Access the HomescreenNavigate projectormenusControl projectorvolumeFor more information on using the remote control, see the online User’s Guide.Turn on your equipment1 T urn on your computer or video source.2 M ake sure the power cord is connected and plugged into anelectrical outlet.7 T he default language of the menu system is English. To select anotherlanguage, press the Menu button on the remote control. SelectManagement and press . Select Language and press . Select yourlanguage and press . Press the Menu button to exit the menu system.Network your projectorWireless network configurationF ollow these steps to set up the projector for a wireless network connection.1 P ress the Menu button on the remote control.2 S elect the Management menu and press .3 S elect On as the Wireless LAN Power setting.4 S elect the Network menu and press .5 S elect Network Settings and press .6 S elect Wireless LAN as the Priority Control Interface setting.7 S elect one of the following as the Simple AP setting:•O n for a direct connection to a computer, tablet, or smartphone.•O ff to connect your projector to a router or access point.N ote: If you connect to the projector directly, you can only projectlocally-stored content.IP Settings and press .f your network assigns addresses automatically, make sure thesetting is on. If not, make sure DHCP is off and enter the projector’sIP Address, Subnet Mask, and Gateway Address, as needed. Theno prevent the IP address from appearing on the network standby screen,IP Address Display setting to Off.hen you are finished, return to the Network Settings menu and selectto apply your settings. Then select Yes to save the settings.Menu button to exit the menu system.Install the optionalsoftwareYou can use Epson iProjection™ software to display wirelessly from a computerto your networked projector. Download the software and operation guide fromyour product’s support page (see “Where to get help”) and install the programon each computer that will project over the network.To monitor and control your projector over the network, download andinstall the Epson Projector Management software (Windows only) andoperation guide from your product’s support page (see “Where to get help”).Project over a networkIf you need to configure the projector for a wired network, see “Wired networkconfiguration.”1 P ress the LAN button on the remote control. You see a screen like this:2 S tart Epson iProjection on your computer.W indows11: Select > All Apps > EPSON Projector > EpsoniProjection Ver.X.XX.W indows10: Select > EPSON Projector > Epson iProjectionVer.X.XX.W indows 8.x: Navigate to the Apps screen and select EpsoniProjection Ver. X.XX.W indows7: Select or Start > Programs or All Programs > EPSON Projector > Epson iProjection > Epson iProjection Ver X.XX.m acOS 10.13.x or higher: Double-click the Epson iProjection icon in the Applications folder.3 S elect Advanced Connection Mode and click OK.4 S elect the projector you want to connect to, then click Join.I f you don’t see the projector you want, click the Automatic searchbutton to find the projector automatically, click the Manual searchbutton to enter the projector’s IP address, or click the Profile buttonto find the projector based on a previously saved profile.5 I f you see a message asking for a keyword, enter the four digits thatappear on the LAN standby screen and click OK.Your computer image is projected, with a floating toolbar:W hen you’re done presenting, click Leave on the toolbar. Using the Epson iProjection appYou can project wirelessly from a mobile device (iOS, Android™, or Chromebook™) using the Epson iProjection app and a QR code.1 S can the following QR code to download and install the EpsoniProjection app.2 I f you connected the projector to a network wirelessly, make sure toconnect your mobile device to the same network.3 P ress the LAN button on the remote control to display a QR code on theprojector screen.4 S tart Epson iProjection on your mobile device.5 Use the QR code reader feature to read the QR code displayed.6 F ollow the app instructions to connect your device to the projector.For more information on setting up and using this app, visit/projectorapp (U.S.), http://epson.ca/projectorapp (Canada), or /iprojection (Latin America).Using web remoteYou can use a standard web browser to control the projector through the network. A virtual remote control on your computer screen lets you perform many of the same functions as you can with the physical remote control.1 O pen your web browser and enter the IP address of the projector youwant to monitor in the browser’s address bar. The Epson Web Controlmenu opens.I f you’re not sure what the IP address of the projector is, turn theprojector on and select Wired LAN Info or Wireless LAN Info from the Network menu to display the IP address of the projector. (Do not enterthe leading zeroes.)2 S elect Basic Control or Remote. If you see a login screen, enterEPSONWEB as the user name and admin as the password.3 U se the on-screen buttons to operate the projector, as you would usingthe remote control. See the online User’s Guidefor details.Turn off pictureand soundSelect equipment connected toan HDMI portSelect wired or wireless networksignalSelect video signalSelect USB display signalPause videoManaging content(EB-770F/EB-775F)You can manage content from your computer using the Epson Projector Content Manager software, or over the network using a web browser (Epson Web Control) or the Epson iProjection app.Using the Content Manager softwareThe Epson Projector Content Manager software allows you to add images and movies to playlists and load them easily and directly to your projector via USB for playback.Note: Download and install the Epson Projector Content Manager software from your product’s support page (see “Where to get help”). For more information, see the online Epson Projector Content Manager Operation Guide or the online User’s Guide.Troubleshooting•If you see a blank screen, check the following:•M ake sure your computer or video device is properly connected.•M ake sure the Status light on the projector is blue and not flashing.•P ress the power button or the A/V Mute button on the remote control to wake the projector from standby or sleep mode, ifnecessary.•I f you see a blank screen when a computer is connected, check the following:•O n Windows, hold down the Windows key and press P at the same time, then click Duplicate.•I f you are using a Mac laptop with macOS 13, select System Settings > Displays. Press the + pop-up menu button, then choose a display tomirror.O n macOS 12, select System Preferences > Displays > DisplaySettings. Select the projector, then choose the mirror option for yourdisplay from the drop-down menu.O n macOS 11 and older, open System Preferences and selectDisplays. Click the Arrangement tab and select the MirrorDisplays checkbox.•I f the projector does not respond to remote control commands, make surethe batteries in the remote control are installed correctly. Replace thebatteries, if necessary.RegistrationRegister today to get product updates and exclusive offers. You can registeronline at /webreg.Where to get helpManualsFor more information about using the projector, you can view or download themanuals from the Epson website, as described below.Internet supportVisit /support (U.S.), http://epson.ca/support (Canada),or (Latin America) and search for your product todownload software and utilities, view manuals, get FAQs and troubleshootingadvice, or contact Epson.Telephone supportTo use the Epson PrivateLine® Support service, call (800) 637-7661 (U.S. andCanada). This service is available for the duration of your warranty period.You may also speak with a support specialist by calling (562) 276-4394 (U.S.) or(905)709-3839 (Canada).Support hours are 7 a.m. to 4 p.m., Pacific Time, Monday through Friday. Daysand hours of support are subject to change without notice. Toll or long distancecharges may apply.In Latin America, see the online User’s Guide for technical support information.Optional accessoriesFor a list of optional accessories, see the online User’s Guide.You can purchase screens or other accessories from an Epson authorized reseller.To find the nearest reseller in the U.S. or Canada, call 800-GO-EPSON(800-463-7766). Or you can purchase online at (U.S.sales) or http://epsonstore.ca (Canadian sales).To find the nearest reseller in Latin America, go to .EPSON is a registered trademark, Epson iProjection is a trademark, and EPSON Exceed Your Vision is a registeredlogomark of Seiko Epson Corporation.PrivateLine is a registered trademark of Epson America, Inc.Windows is a registered trademark of Microsoft Corporation in the United States and/or other countries.Mac, macOS, and OS X are trademarks of Apple Inc., registered in the U.S. and other countries.Android and Chromebook are trademarks of Google LLC.General Notice: Other product names used herein are for identification purposes only and may be trademarks oftheir respective owners. Epson disclaims any and all rights in those marks.This information is subject to change without notice.© 2022 Epson America, Inc., 11/22CPD-63093。


Start HereIMPORTANT: Before using this product, make sure you read these instructions and the safety instructions in the online User’s Guide.Important Safety Instructions: When using telephone equipment, you should always follow basic safety precautions to reduce the risk of fire, electric shock, and personal injury, including the following:• Do not use the Epson® product near water.• Always keep this guide handy.• A void using a telephone during an electrical storm. There may be a remote risk of electric shock from lightning.• D o not use a telephone to report a gas leak in the vicinity of the leak. Caution: To reduce the risk of fire, use only a No. 26 AWG or largertelecommunication line cord.Note: Do not open the ink bottles until you are ready to fill the ink tanks. The ink bottles are vacuum packed to maintain reliability.1 Remove all protective materials from the product.ST-C8000/ST-C80902 D ownload and run your product’s software package.For the latest software, visit:ST -C8000/support/stc8000 (U.S.) www.epson.ca/support/stc8000 (Canada)ST -C8090/support/stc8090 (U.S.) www.epson.ca/support/stc8090 (Canada)3 F ollow the instructions on the computer screen to run thesetup program.4 W hen you see the Select Your Connection screen, selectone of the following:•Wireless connectionIn most cases, the software installer automaticallyattempts to set up your wireless connection. If setup is unsuccessful, you may need to enter your network name (SSID) and password.•Direct USB connectionM ake sure you have a USB cable (not included).•Wired network connectionMake sure you have an Ethernet cable (not included).PCL or PostScript driver (ST -C8090)Download the software and see your online User’s Guidefor instructions. For the latest software, visit/support (U.S.) or www.epson.ca/support (Canada) and search for your product.Mobile and voice-activatedprinting•Print directly from your smartphone or tablet using iOS orAndroid™ with Epson iPrint™. Simply connect your printerand device to the same network and tap the action icon to select the print option.•Print directly from your Android (v4.4 or later) device*.Simply connect your printer and device to the same network and tap the menu icon to select the print option.•Print from wherever you are, next to your printer orremotely with Epson Connect™. Learn more at /connect (U.S.) or www.epson.ca/connect (Canada).•Use voice-activated assistants to print a variety of creativeand everyday items from your Epson product. Simply add your product to an Epson Connect account, then link the account to a voice-activated assistant. See/voice (U.S.) or www.epson.ca/voice (Canada) for more information.* M ay require the Epson Print Enabler or Mopria Print Service app from Google Play™.3 I nsert paper with the glossy or printable side facedown.Note: Do not load paper above the arrow mark on the side edge guide.5 K6 S elect the paper settings on the product’s control panel.C onnect the fax line1 C onnect a phone cord to a telephone wall jack and to theLINE port on your product. See the online User’s Guidefor more information.2 S elect Proceed on the LCD screen to set up the fax, orselect Close to set it up later.Note:• A n Internet connection is required to obtain the product software.• T o print from a Chromebook™, go to/support/chromebookprint (U.S.) or www.epson.ca/support/chromebookprint (Canada) for instructions.1 M ake sure the product is NOT CONNECTED to yourcomputer.Windows ®: If you see a Found New Hardware screen, click Canceland disconnect the USB cable.EPSON is a registered trademark, EPSON Exceed Your Vision is a registered logomark, and Epson Connect and Epson iPrint are trademarks of Seiko Epson Corporation. Designed for Excellence is a trademark of Epson America, Inc.Mac is a trademark of Apple Inc., registered in the U.S. and other countries.Windows is a registered trademark of Microsoft Corporation in the United States and/or other countries.Android, Chromebook, and Google Play are trademarks of Google LLC.General Notice: Other product names used herein are for identification purposes only and may be trademarks of their respective owners. Epson disclaims any and all rights in those marks.This information is subject to change without notice. © 2020 Epson America, Inc., 12/20CPD-58751R1Need paper and ink?Ensure brilliant results with Epson specialty and plain papers, engineered specifically for Epson printers. Find Epson papers and Epson Genuine Ink at (U.S. sales) or www.epson.ca (Canadian sales) and at Epson authorized resellers. Call 800-GO-EPSON (800-463-7766).ST -C8000/ST -C8090 replacement inks。

㊟意事㊠雷射㊞表機的㊟意事㊠在您開始操作這台印表機之前,請先閱讀下列的說明:❏請勿觸碰印表機內標示著〝CAUTION Hot Surface Avoid Contact 〞(注意!表面高溫請勿觸碰) 字樣的加熱器。
若印表機剛剛列印完資料,則此加熱器的溫度可能會很高。
❏請勿試圖維修或拆除碳粉匣上的任何零件。
同時也請勿使用填充碳粉。
❏請遵守在印表機上的所有標示警告和說明。
❏請使用標籤上所指示的電力規格。
若您不確定該使用何種電力規格,請洽詢經銷商或當地的電力公司。
❏除了在手冊中有特別提及的部份之外,請勿試圖自行維修這項產品。
還有不要打開或移除標示著〝Do Not Remove 〞(請勿移動) 字樣的蓋子,否則可能會讓您暴露在危險電壓或其他危險中。
關於印表機維修服務的相關事項,請直接洽詢合格的維修中心。
尋找放置㊞表機的位置為了容易操作和維護這台印表機,請保留足夠的空間。
❏將印表機放置在靠近電源插座的地方。
❏將所有的電腦和印表機都遠離有電流干擾的機器設備,如喇叭或無線電話的充電座。
c 注意:❏為了有充分的通風環境,請在印表機的周圍保留足夠的空間。
❏避免將印表機放置在陽光直射、高溫、溼度高或灰塵多的地方。
❏請勿將機身放在比印表機的底部面板還狹小的平台上。
那麼可能會因為印表機內部過度的負荷而造成列印及進紙問題。
請務必將印表機放置在平坦、寬度大的平台上,如此橡膠墊才會穩固。
雷射㊞表機安裝說明®4032368-00xxxCAUTION Hot Surface Avoid Contact (㊟意!表面高溫請勿觸碰)155.0 cm10.0 cm10.0 cm15.0 cm15.0 cm 60.0 cm70.6 cm移除保護裝置連接㊞表機插㆖㊞表機的電源線請確定印表機的電源是關閉的。
將電源線插入印表機後側的插槽中,再將另一端插入有接地的電源插座上。
連接㊞表機和電腦使用與 IEEE-1284 相容的並行界面連接線,或是與 USB 1.1 版相容的連接線。
軟硬體安裝 使用與維護註冊商標© 2011 版權所有,翻印必究。
未經允許不得翻印本手冊其中任何一部份。
本手冊內容提及之公司名稱和註冊商標均各自屬於其公司和所有者。
免責聲明本手冊中出現的所有內容都經過仔細考證,儘管如此,我們不排除可能由於疏忽、偶然情形或其他原因造成本手冊出現錯誤、遺漏或不恰當表述,我們對這類錯誤、遺漏或不恰當表述不承擔任何責任和義務。
本手冊中的內容可能變更,恕不另行通知。
我們將不承擔任何法律責任若使用者未遵循本手冊中的操作指示。
版權某些文件(如支票、鈔票、身份證、國債或政府文件等)的掃描可能受到法律禁止或構成犯罪。
當您在掃描各種書籍、雜誌、期刊時,建議您尊重並遵守有關著作權的各項規定。
環境保護關於回收或處置的資訊,請向當地經銷商或供應商資咨詢回收和處置的資訊。
本産品的設計和製造不斷地持續改進以符合新的環保要求,我們致力於生産達到全球環保標準的産品。
請您向當地相關部門諮詢報廢該類物品的處理方法,本産品的外包裝可被回收再利用。
手冊中使用的介面本使用手冊的螢幕圖例是使用Windows XP畫面。
若您使用的系統是Windows 2000、Vista或7,您螢幕上的實際畫面會略有不同,但功能完全一樣。
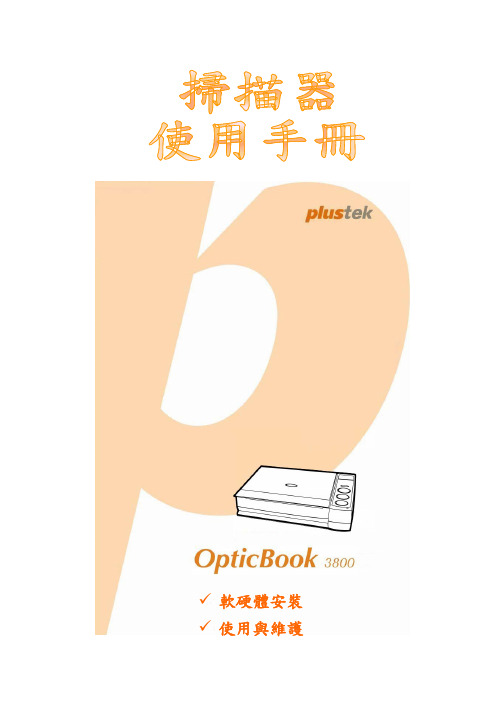
目錄介紹 (1)如何使用本手冊 (1)本手冊所使用的標示 (1)圖示說明 (1)安全注意事項 (2)系統需求 (3)原廠附件 (3)掃描器功能簡介 (3)第一章、安裝掃描器 (5)軟體安裝需求 (5)硬體需求 (5)安裝與設定掃描器 (5)第一步、連接您的掃描器和電腦 (6)第二步、安裝軟體 (6)第三步、測試掃描器 (8)軟體設定疑難排解 (9)安裝額外軟體 (10)第二章、使用與維護 (11)操作掃描器 (11)準備工作 (11)掃描影像 (12)用TWAIN來完成掃描 (13)用掃描器按鍵或用Book Pavilion來完成掃描 (14)用DI Capture來完成掃描 (15)掃描器連接狀態 (16)校準掃描器 (16)待機模式 (17)掃描器安全保護鎖 (18)使用與保養注意事項 (19)附錄A:規格 (20)附錄B:售後服務和保證 (21)服務與支援資訊 (21)產品保證聲明 (21)FCC 射頻干擾聲明書 (22)與P LUSTEK聯繫 (24)感謝您選購本公司的掃描器。

Phaser®6200彩色激光打印机Xerox 消耗品和附件该部分包括下列消耗品和附件的部件号码I 客户自行更换消耗品(CRC)—见第2页I 客户自行更换部件(CRU)—见第5页I 附件包括升级产品和可选产品—见第5页I纸张和介质—见第6页当前面板提示某消耗品不足或需要更换时请确保备有替换件要订购消耗品和附件请与当地经销商联系或访问以下Xerox 网站/officeprinting/6200supplies 注打印机内所有更换客户自行更换消耗品(CRC)的把手和指示用户操作的指示点都是桔红桔红色色的消耗品客户自户自行行更换更换消消耗品(CRC)墨粉盒高容量墨粉盒的使用寿命预计为在Letter 大小的纸张上以每种颜色5%的覆盖率打印8000页图像标准容量墨粉盒的使用寿命预计为在Letter 大小的纸张上以每种颜色5%的覆盖率打印3000页图像这是一页每种颜色5%覆盖率的例图总覆盖率为20%以下使用方法可能会大大缩短墨粉盒的使用寿命I 覆盖率高于5%I 使用大于letter 的纸张I 打印少于4页的作业I使用高质量或照片打印质量模式注安装新的打印机后墨粉盒的使用寿命会有所缩短随后使用的墨粉盒会达到通常的使用寿命成像单元成像单元的预计使用寿命最长为连续打印30,000页letter 大小的纸张以下使用方法会大大缩短成像单元的使用寿命I 打印少于4页的作业I 高于每种颜色10%的覆盖率的覆盖率(总共40%的覆盖率)I 使用的纸张大于Letter 规格I 使用高质量或照片打印质量模式I 自动双面打印I将成像单元暴露在光线下超过十分钟项目部件编号高容量墨量墨粉粉盒:黑色天蓝色紫红色黄色016-2008-00016-2005-00016-2006-00016-2007-00标准容量容量墨墨粉盒:黑色天蓝色紫红色黄色016-2004-00016-2001-00016-2002-00016-2003-00项目部件编号成像单元016-2012-00热定影器热定影器的预计使用寿命最长为打印60,000页letter 大小的纸张以下使用方法会大大缩短转换单元的使用寿命I 在大量的投影胶片或专用纸张上打印I 在某些不支持纸张特别是inkjet 纸张和inkjet 投影胶片上进行打印I没有在前面板正确地设置纸张类型以致热定影器的温度设置不正确转换滚轴转换单元的预计使用寿命最长为连续打印15,000页letter 规格的纸张以下使用方法会大大缩短转换滚轴的使用寿命I 打印少于4页的作业I 过份打开和关闭A 门I 开关打印机I 在投影胶片或专用纸张上打印I 自动双面打印I使用高分辨率打印项目部件编号110伏220伏016-2014-00016-2015-00项目部件编号转换滚轴016-2013-00客户自户自行行更换更换部部件(CRU)附件通用通用纸纸盘项目说明部件编号纸盘1I 500页75克/米220磅纸捆纸张I 100Phaser®6200优质投影片(仅限纸盘1)116-1330-00纸盘2-3I500页75克/米220磅纸捆纸张116-1330-00进纸进纸滚滚筒工筒工具具箱说明部件编号I 在一个纸盘内设置2个进纸滚筒以代替旧滚筒I使用寿命达到100,000页116-1331-00内置内置硬硬盘驱盘驱动动器说明部件编号I 10GB 容量I 增加存储空间可以用来下载字体表格与重叠I提供对校对安全打印保存打印和校样打印作业的支持I实现PDF 打印6200HD附加附加内内存项目部件编号I 64兆字节I 128兆字节I256兆字节ZMD64ZMD128ZMD256高容高容量量进纸进纸器器说明部件编号I 两个可以容纳Legal 大小纸张的附加纸盘I两个纸盘内的纸张容量为1000页75克/米220磅纸捆纸张6200HCF打印打印机机推车说明部件编号I 为Phaser 6200B,Phaser 6200N,和Phaser 6200DP 型号提供可调节高度I 消耗品提供储藏空间I为取得后部缆线提供方便ZCARTD/A纸张与介质升级升级工工具箱说明部件编号Phaser 6200B 至Phaser 6200N 升级升级工工具箱I 提供10/100Base-TX 网络功能I 提供64兆字节附加内存I实现高质量打印功能(2400x 600dpi 分辨率)6200FN/APhaser 6200N 至Phaser 6200DP 升级工具工具箱箱I 提供自动双面打印I 实现高质量打印功能(2400x 600dpi 分辨率)I实现照片质量打印功能(1200x 1200dpi 分辨率)6200FP/APhaser 专业专业打打印纸项目尺寸说明部件编号Phaser 最佳彩色打印纸90克/米224磅纸捆A/Letter (U.S.)8.5x 11英寸A4公制信纸210x 297毫米500页500页016-1368-00016-1369-00Phaser 光面涂层纸148克/米2100磅纸捆A/Letter (U.S.)8.5x 11英寸A4公制信纸210x 297毫米100页100页016-1704-00016-1705-00Phaser 最佳封面纸160克/米260磅封面A/Letter (U.S.)8.5x 11英寸A4公制信纸210x 297毫米100页100页016-1823-00016-1824-00Phaser 6200最佳投影投影胶胶片尺寸说明部件编号A/Letter (U.S.)8.5x 11英寸50页016-1948-00A4公制信纸210x 297毫米50页016-1949-00Phaser 彩色彩色激激光标光标签签尺寸说明部件编号A/Letter (U.S.)8.5x 11英寸108磅标签100页/每页30个标签1.0x 2.625英寸标签016-1812-00A/Letter (U.S.)8.5x 11英寸108磅标签100页/每页6个标签3.33x 4.0英寸标签016-1813-00A4公制信纸210x 297毫米176克/米2100页/每页14个标签3.81x 99.1毫米标签016-1814-00A4公制信纸210x 297毫米176克/米2100页/每页8个标签67.7x 99.1毫米标签016-1815-00Phaser CD/DVD 标签和插和插入入页项目说明部件编号A/Letter (U.S.)8.5x 11英寸50磅纸捆10页/每页2个标签20页/每页1个插入页A/Letter (U.S.)8.5x11英寸卡片016-2011-00A4公制信纸210x 297毫米190克/米210页/每页2个标签20页/每页1个插入页A4(Metric Letter)210x 297毫米卡片016-2026-00Phaser 数码数码相相片纸项目说明部件编号A/Letter (U.S.)8.5x 11英寸60磅封面25页016-2009-00A4公制信纸210x 297毫米157克/米225页016-2010-00Phaser 最佳最佳名名片项目说明部件编号A/Letter (U.S.)8.5x 11英寸50磅纸捆25页/每页10张卡片2.0x 3.5英寸卡片016-1898-00A4公制信纸210x 297毫米190克/米225页/每页10张卡片51x 89毫米卡片016-1899-00Phaser 最佳最佳连连信封信封贺贺卡项目说明部件编号A/Letter (U.S.)8.5x 11英寸50磅25页/信封016-1987-00A4公制信纸210x 297毫米190克/米225页/信封016-1988-00Phaser 彩色彩色激激光标光标签签尺寸说明部件编号。
安裝說明
放置紙張開啟電源將印表機連接至電腦Array
請翻面Copyright © 2006 Seiko Epson Corporation. All rights reserved.
Printed in XXXXXX XX.XX-XX XXX
安裝印表機軟體Windows使用者
1.請確定已關閉印表機的電源。
2.將印表機百寶箱光碟片放入光碟機中。
3.出現此畫面時,請按下『繼續』鍵。
4.請按下『接受』鍵。
5.出現此對話框時,請按下『安裝』鍵開始安裝。
6.請依照螢幕上的指示完成安裝。
Mac OS使用者
1.請確定已關閉印表機的電源。
2.將印表機百寶箱光碟片放入光碟機中。
3.Mac OS 8/9 使用者,請雙擊〝EPSON〞圖示,
然後再雙擊〝Mac OS 8/9〞圖示
Mac OS X使用者,請雙擊〝EPSON〞圖示,然後再雙擊〝Mac OS X〞圖示。
請按下『接受』鍵。
出現此對話框時,請按下『安裝』鍵開始安裝。
請依照螢幕上的指示完成安裝。
10/100 BaseTX使用者
EPL-6200不支援EpsonNet EasyInstall。
若要在網路界面上使用印表機,請依照下列的步驟操作:使用印表機百寶箱光碟片安裝印表機驅動程式。
Network Utilities光碟片中的EpsonNet Config來設定印表機的網路界面。
若您是使用Windows95、98或Me
Network Utilities光碟片中安裝EpsonNet Print)
新增一個Standard TCP/IP Port。
若您是使用Windows95、98或Me
EpsonNet Print新增一個Standard TCP/IP Port)詳細步驟,請參考Network Utilities。