centos7配置nginx+php5.6+mysql5.6+netcore2.0
- 格式:docx
- 大小:190.95 KB
- 文档页数:13

CentOS7下yum⽅式安装Nginx的实现步骤CentOS7下 yum⽅式安装Nginx的实现步骤Nginx 是⼀个很强⼤的⾼性能Web和反向代理服务器,它具有众多⾮常优越的特性。
诸如低开销,⾼并发,⽀持缓存,⽀持正反向代理,⽀持负载均衡,⽀持正则,⽀持rewrite等等不⼀⽽⾜。
所以众多粉丝们也是不计其数。
本⽂基于CentOS 7简要描述yum⽅式的安装部署,供⼤家参考。
如果是编译安装可以参考:有关Nginx的常⽤配置可参考:⼀、配置nginx yum源演⽰环境[root@centos7-router ~]# more /etc/redhat-releaseCentOS Linux release 7.2.1511 (Core)[root@centos7-router ~]# vim /etc/yum.repos.d/nginx.repo[nginx]name=nginx repobaseurl=/packages/OS/OSRELEASE/$basearch/gpgcheck=0enabled=1将上述配置⽂件中的OS替换为rhel或者centos,OSRELEASE替换为6或者7,即当前的Linux为6还是7版本查看本机ip[root@centos7-router ~]# ip addr|grep inet|grep globalinet 172.24.8.254/24 brd 172.24.8.255 scope global eno16777728inet 192.168.1.175/24 brd 192.168.1.255 scope global dynamic eno33554960⼆、安装nginx[root@centos7-router ~]# yum install nginx -y[root@centos7-router ~]# yum install nginx-module-perl.x86_64 -y查看⽣程的相关⽂件[root@centos7-router ~]# rpm -ql nginx/etc/logrotate.d/nginx/etc/nginx/etc/nginx/conf.d/etc/nginx/conf.d/default.conf/etc/nginx/fastcgi_params/etc/nginx/koi-utf/etc/nginx/koi-win/etc/nginx/mime.types/etc/nginx/modules/etc/nginx/nginx.conf/etc/nginx/scgi_params/etc/nginx/uwsgi_params/etc/nginx/win-utf/etc/sysconfig/nginx/etc/sysconfig/nginx-debug/usr/lib/systemd/system/nginx-debug.service/usr/lib/systemd/system/nginx.service/usr/lib64/nginx/usr/lib64/nginx/modules/usr/libexec/initscripts/legacy-actions/nginx/usr/libexec/initscripts/legacy-actions/nginx/check-reload/usr/libexec/initscripts/legacy-actions/nginx/upgrade/usr/sbin/nginx/usr/sbin/nginx-debug/usr/share/doc/nginx-1.12.2/usr/share/doc/nginx-1.12.2/COPYRIGHT/usr/share/man/man8/nginx.8.gz/usr/share/nginx/usr/share/nginx/html/usr/share/nginx/html/50x.html/usr/share/nginx/html/index.html/var/cache/nginx/var/log/nginx三、验证nginx启动nginxroot@centos7-router ~]# systemctl start nginx[root@centos7-router ~]# systemctl enable nginx ###配置⾃启动[root@centos7-router ~]# ss -nltp|grep nginxLISTEN 0 128 *:80 *:* users:(("nginx",pid=65418,fd=6),("nginx",pid=65415,fd=6))查看nginx的版本[root@centos7-router ~]# nginx -vnginx version: nginx/1.12.2查看或修改配置⽂件[root@centos7-router ~]# more /etc/nginx/nginx.confuser nginx;worker_processes 1;error_log /var/log/nginx/error.log warn;pid /var/run/nginx.pid;events {worker_connections 1024;}http {include /etc/nginx/mime.types; ### Author : Leshamidefault_type application/octet-stream; ### Blog : /leshami log_format main '$remote_addr - $remote_user [$time_local] "$request" ''$status $body_bytes_sent "$http_referer" ''"$http_user_agent" "$http_x_forwarded_for"';access_log /var/log/nginx/access.log main;sendfile on;#tcp_nopush on;keepalive_timeout 65;#gzip on;include /etc/nginx/conf.d/*.conf;}[root@centos7-router ~]# firewall-cmd --add-service=http --permanent[root@centos7-router ~]# firewall-cmd --reload从其他机器验证nginx[root@centos7-web ~]# curl http://172.24.8.254<!DOCTYPE html><html><head><title>Welcome to nginx!</title><style>body {width: 35em;margin: 0 auto;font-family: Tahoma, Verdana, Arial, sans-serif;}</style></head><body><h1>Welcome to nginx!</h1><p>If you see this page, the nginx web server is successfully installed and working. Further configuration is required.</p><p>For online documentation and support please refer to<a href="/" rel="external nofollow" ></a>.<br/> Commercial support is available at<a href="/" rel="external nofollow" ></a>.</p><p><em>Thank you for using nginx.</em></p></body></html>如有疑问请留⾔或者到本站社区交流讨论,感谢阅读,希望能帮助到⼤家,谢谢⼤家对本站的⽀持!。
CentOS 7中安装Nginx, MySQL, PHP (LEMP)内容来源于PPPCloud官网教程介绍LEMP 组合包是一款开源的的网站服务组合软件包,在网站服务上起着强有力的作用。
LEMP 包是由Linux、nginx、MariaDB/MySQL 和PHP 组成的,其中nginx的高性能及轻量级等特性替代了Apache ,MySQL 驱动引擎使用MariaDB,PHP用来生成网页动态内容。
本文档中,主要是在PPPCloud箭头的CentOS 7环境下安装LEMP组合包。
CentOS 7为提供的Linux操作系统。
先决条件在本手册开始之前,在服务器中需要存在一个非root的用户注:当遇到Nginx无法运行的情况时,确信SELinux在Nginx在配置文件中正确配置或者改变SELinux的状态到permissive或disabled状态步骤一安装NginxNginx用于呈现网页,作为web server。
打开命令行界面,安装CentOS 7 EPEL,使用sudo超级用户的权限进行安装如何找到服务器公共IP地址如果不知道服务器的ip地址,有多种途径可以去获取到。
通过这个地址,可以使用ssh连接到服务器。
使用iproute2 工具获取ip地址,命令行如下:配置PHP处理器现在PHP组件安装完毕,为了安全起见,需要修改一下配置文件。
打开php-fpm配置文件/etc/php.ini 摘要步骤四配置Nginx到PHP到目前为止,所需的所有的组件均已安装完毕。
还需要进行的配置是关于Nginx 和PHP的相关内容。
修改默认的Nginx配置,调用的脚本名称为info.php,Apache获取该文件,需要指定特定的目录,该目录为web 的根目录。
在CentOS 7中,该目录位置为/usr/share/nginx/html/,因此创建文件,这个显示出来的网页,提供了基本的系统信息。
有效的调试了是否正确设置了配置文件。
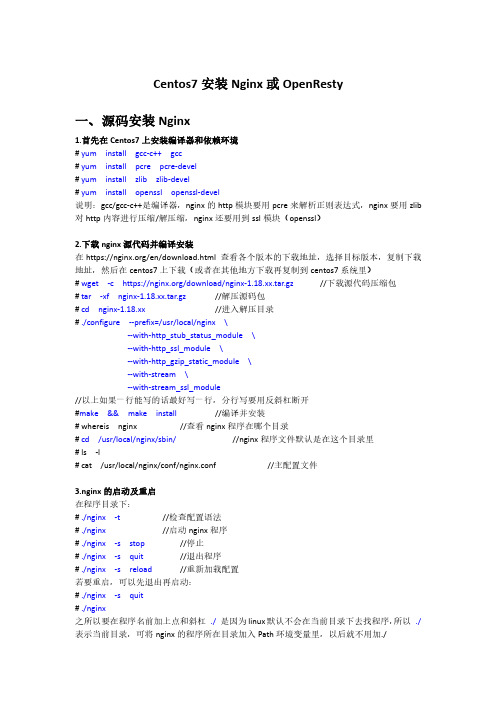
Centos7安装Nginx或OpenResty一、源码安装Nginx1.首先在Centos7上安装编译器和依赖环境#yum install gcc-c++gcc#yum install pcre pcre-devel#yum install zlib zlib-devel#yum install openssl openssl-devel说明:gcc/gcc-c++是编译器,nginx的http模块要用pcre来解析正则表达式,nginx要用zlib 对http内容进行压缩/解压缩,nginx还要用到ssl模块(openssl)2.下载nginx源代码并编译安装在https:///en/download.html查看各个版本的下载地址,选择目标版本,复制下载地址,然后在centos7上下载(或者在其他地方下载再复制到centos7系统里)#wget-c https:///download/nginx-1.18.xx.tar.gz//下载源代码压缩包#tar-xf nginx-1.18.xx.tar.gz//解压源码包#cd nginx-1.18.xx//进入解压目录#./configure--prefix=/usr/local/nginx\--with-http_stub_status_module\--with-http_ssl_module\--with-http_gzip_static_module\--with-stream\--with-stream_ssl_module//以上如果一行能写的话最好写一行,分行写要用反斜杠断开#make&&make install//编译并安装#whereis nginx//查看nginx程序在哪个目录#cd/usr/local/nginx/sbin///nginx程序文件默认是在这个目录里#ls-l#cat/usr/local/nginx/conf/nginx.conf//主配置文件3.nginx的启动及重启在程序目录下:#./nginx-t//检查配置语法#./nginx//启动nginx程序#./nginx-s stop//停止#./nginx-s quit//退出程序#./nginx-s reload//重新加载配置若要重启,可以先退出再启动:#./nginx-s quit#./nginx之所以要在程序名前加上点和斜杠./是因为linux默认不会在当前目录下去找程序,所以./表示当前目录,可将nginx的程序所在目录加入Path环境变量里,以后就不用加./4.设置成开机自启:使用源码安装的nginx默认没有做成系统的服务,可以把nginx程序配置成随开机自启#vi/etc/rc.local//编辑/etc/rc.local文件最后加一行:/usr/local/nginx/sbin/nginx保存#chmod+x rc.local//添加可执行权限然后就可以实现开机自启nginx程序了,系统重启时就会启动nginx程序5.把nginx做成系统服务:创建一个名为nginx.service的文件,内容如下:[Unit]Description=nginx web serverAfter=network-online.target remote-fs.target nss-lookup.targetWants=network-online.target[Service]Type=forkingPIDFile=/var/run/nginx.pidExecStart=/usr/local/nginx/sbin/nginx-c/usr/local/nginx/conf/nginx.conf ExecReload=/bin/kill-s HUP$MAINPIDExecStop=/bin/kill-s TERM$MAINPID[Install]WantedBy=multi-user.target保存,并将文件复制到/etc/systemd/system/目录下#cp nginx.service/etc/systemd/system/nginx.service然后就可以使用systemctl命令对nginx服务进行操作了,比如#systemctl enable nginx//设置为开机自启#systemctl start/restart/reload nginx//启动,重启,重加载配置注意:将nginx做成服务后,就推荐只用systemctl命令对其进行操作(启动,重启等),而不要再使用直接调用Nginx程序,不然2者会有冲突,即把nginx设置成随开机自启和做成系统服务(以上第4、5步骤)只能选一个,只能用一个。

Centos7安装PHP及Nginx的教程详解随着服务端centos的应⽤越来越普及,centos7的使⽤也越来越多,这两年来我从⼀个很少接触centos服务器端维护的⼩⽩,也越来越多的基础其维护操作,给我带来了不少困扰的同时也增加了不少centos服务器搭建和运维的知识,今天就来⼀步⼀步记录⼀下。
⼀、安装PHP随着微信13年开始⼤⽕,php的运⽤也再次⽕了起来,市⾯上很多企业都选择使⽤php作为其应⽤后台,个⼈认为原因有1、php的成本低2、php的⼊门快3、php的开发周期相对较短4、tp5的诞⽣提⾼了php接⼝开发的效率。
正因为需求这么多,因此很多企业的服务器配置就需要能够⽀持php环境从⽽完成项⽬搭建。
其实安装centos安装软件⼀般都分为两种,第⼀是快速安装第⼆是编译安装,个⼈建议编译安装,⾄于快速安装⽅式简单也快速,只要加载到相应的php源,通过yum install即可完成⼀步⼀步的安装过程,我这⾥仅仅讲⼀下如何进⾏编译安装以及编译安装的过程。
第⼀步、安装前前检查系统中是否默认带有php,可以通过查找php⽂件或者进程进⾏校验,如果有安装且不是我们需要的版本,可以通过⼀下命令卸载相关⽂件:yum remove php*第⼆步、安装相关php依赖yum install -y gcc gcc-c++ libxml2-devel openssl-devel libcurl-devel libjpeg-devel libpng-devel libicu-devel openldap-devel freetype freetype-develphp 各版本列表在这个页⾯选择你要下载的国家的⽂件源选择⽂件源后复制⽂件下载链接,在系统中通过通过wget命令下载编译安装,个⼈习惯在/usr/local⽬录下操作,具体步骤如下:进⼊操作⽬录: cd /usr/local解压⽂件: tar -zxvf php-7.2.10.tar.gz进⼊解压后⽂件⽬录: cd php-7.2.10.tar.gz然后通过⼀下命令编译:./configure --prefix=/usr/local/php --with-config-file-path=/usr/local/php/etc --with-mysql=/usr/local/mysql --with-mysqli=/usr/local/mysql/bin/mysql_config --with-iconv --with-zlib --with-libxml-dir=/usr --enable-xml --disable-rpath --enable-bcmath --enable-shmop --enable-sysvsem --enable-inline-optimization --with-curl --enable-mbregex --enable-fpm --enable-mbstring --with-gd --enable-gd-native-ttf --with-openssl --with-mhash --enable-pcntl --enable-sockets --with-xmlrpc --enable-zip --enable-soap --enable-opcache --with-pdo-mysql --enable-maintainer-zts -with-mcrypt=/usr/include --with-mysql=shared,mysqlnd --with-mysqli=shared,mysqlnd --with-pdo-mysql=shared,mysqlnd --enable-ftp --enable-session --with-gettext --with-jpeg-dir --with-freetype-dir --enable-fastcgi --without-gdbm --disable-fileinfo然后通过以下命令完成最后的编译安装:make && make install如果安装过程提⽰有错误或者依赖就需要根据具体的情况去解决,⾄此我们可以通过php -v命令查看是否成功安装。

centos7常⽤需求1. 安装locate⼯具 yum install mlocate2. 安装netstat 和 ifconfig yum install net-tools3. web server yum -y install httpd 配置/etc/httpd/conf/httpd.conf 后ok。
nginx (1)使⽤yum安装nginx需要包括Nginx的库,安装Nginx的库 (2)使⽤下⾯命令安装nginx #yum install nginx (3)启动Nginx #service nginx start firewall开启80端⼝ firewall-cmd --zone=public --add-port=80/tcp --permanent systemctl restart firewalld.service4.安装golangyum install golang注:7可以直接安装golang,低版本需要配置源。
5.mysqlcentos7 mysql数据库安装和配置yum install mariadb-server mariadbsystemctl start/stop/restart mariadb 启动后服务名还是mysql,注:这⾥配置mysql的⼀个分⽀版本mariadb,考虑开源问题,CentOS 7 版本已将MySQL数据库软件从默认的程序列表中移除,⽤mariadb代替了,MariaDB 是⼀个采⽤Aria存储引擎的MySQL分⽀版本,是由原来 MySQL 的作者Michael Widenius创办的公司所开发的免费开源的数据库服务器,MariaDB不仅仅是Mysql的⼀个替代品,它的主要⽬的是创新和提⾼Mysql的技术优化进⼊:/usr/share/mysql⽬录下修改cnf⽂件。
6.tomcattomcat jdk搭建:CentOS中安装jdk和tomcat,并配置环境变量修改配置⽂件:Tomcat/conf/tomcat-users.xmlTomcat/webapps/manager/META-INF/context.xml启动:在解压路径下:/opt/tomcat90/binstartup.shshutdown.sh或将其添加为开机启动。

CentOS 7源码编译安装最新版php5.6和nginx1.7.9及mysql(搭建lnmp环境) –飞嗨突然,一不留神打开了网站,点了一下download,靠,都已经php5.6 stable了,而我yum安装的php还是5.4版本的,太守旧了!嘿嘿,我是微软云的小白鼠,当年就多注册了个账号,还躺着个云服务器在睡觉呢,于是乎,私心想着搭建一个lnmp的备份服务器…源码编译安装,各种依赖包纠结,所以呢,mariadb(mysql)是yum安装的,php5.6和nginx1.7.9是源码安装的…装着装着,在跑./configure脚本的时候,又忘记启用enable curl等等常用扩展鸟,装完后,又去源码目录编译扩展,动态添加扩展…lnmp一、安装mariadb(mysql)服务yum install mariadb mariadb-server mariadb-devel自从mysql被oracle公司收购后,mysql就有闭源收费的风险,所以,就有了社区版改装的mysql分支mariadb来规避这个风险。
centos7开始,yum源的mysql全部都替换成mariadb的了。
所以,mariadb是mysql的一个分支。
不过貌似听说,google有一部分数据库也都已经迁移到mariadb 了,真是要鄙视一下oracle公司,oracle数据库都这么赚了,还打着mysql的主意…二、源码编译安装php5.61.下载php5.6 wget/distributions/php-5.6.5.tar.gz纠结的是,刚安装好的centos 7连wget都木有,所以yum -y install wget然后再下载,,,2.解压tar -xvzf php-5.6.5.tar.gz 进入cd php-5.6.53.运行./configure脚本,启用需要的扩展模块,并指定php的安装目录 ./configure –enable-fpm –enable-mbstring–with-mysql=mysqlnd –with-mysqli=mysqlnd–with-pdo-mysql=mysqlnd这一步很是关键的,我忘记指定–prefix,它默认也是给我安装在/usr/local/php,不过还是指定一下比较妥当。
CENTOS7环境安装MySQL软件环境虚拟机:VMware® Workstation-10.0.1 build-1379776-Win Linux:Centos 7 X86_64MySQL Database: MySQL-5.6.24系统环境MySQL软件安装一、使用RPM安装。
安装采用RPM安装包安装。
下载mysql:/downloads/mysql/打开页面之后,在Select Platform:下选择linux Generic下载后的包为名称为:MySQL-5.6.24-1.linux_glibc2.5.x86_64.rpm-bundle.tar(一)卸载原有MySQL或者Mariadb安装程序1、CentOs7版本默认情况下安装了mariadb-libs,必须先卸载才可以继续安装MySql。
a) 查找以前是否安装mariadb-libs# rpm -qa | grep -i mariadb-libsb)卸载已经安装的mariadb-libs# yum remove mariadb-libs-5.5.41-2.el7_0.x86_642、查找以前是否安装MySQL# rpm -qa | grep -i mysql--说明已经有安装了MySQL程序a)停止mysql服务# sudo service mysql stop或者:# ps -A | grep mysql# kill -9 进程号b)删除之前安装的mysql# rpm -ve MySQL-server-5.6.24-1.linux_glibc2.5.x86_64# rpm -ve MySQL-client-5.6.24-1.linux_glibc2.5.x86_64c)查找之前老版本mysql的目录、并且删除老版本mysql的文件和库# find / -name mysql【查找结果如下】# find / -name mysql/var/lib/mysql/usr/lib64/mysql/usr/local/mysql/usr/local/mysql/data/mysql【删除对应的目录】# rm -rf /var/lib/mysql# rm -rf /usr/lib64/mysql# rm -rf /usr/local/mysql【删除配置文档】# rm -rf /etc/fd)再次查找机器是否安装mysql# rpm -qa|grep -i mysql【无结果,说明已经卸载彻底、接下来直接安装mysql即可】(二)下载和解压、安装【创建一个任意名称文件夹,如:rpm】# mkdir rpm# cd rpm【下载安装包的压缩文档】# wget /Downloads/MySQL-5.6/MySQL-5.6.17-1.el6.x8 6_64.rpm-bundle.tar# tar –xvf MySQL-5.6.17-1.el6.x86_64.rpm-bundle.tar【创建mysql用户和数据目录】#groupadd mysql#useradd -r -g mysql mysql#cd /usr/local#sudo mkdir mysql#cd mysql#sudo mkdir mysql#sudo chown -R mysql .#sudo chgrp -R mysql .【安装RPM包】#sudo rpm -ivh MySQL-server-5.6.24-1.linux_glibc2.5.x86_64.rpm如果出现错误:FATAL ERROR: please install the following Perl modules beforeexecuting ./scripts/mysql_install_db:Data::Dumper先用yum list 查找下module:# yum list|grep -i perl-modul*# yum install -y perl-Module-Install.noarch#rpm -ev MySQL-server-5.6.24-1.linux_glibc2.5.x86_64重新执行:#sudo rpm -ivh MySQL-server-5.6.24-1.linux_glibc2.5.x86_64.rpm【初始化MySql配置文件】#cp f /etc/f可以简单修改配置如下。
Centos7安装并配置mysql5.6完美教程Centos7将默认替换成了Mariadb,对于我们这些还想使⽤的开发⼈员来说并不是⼀个好消息。
然⽽,⽹上关于安装mysql数据库的教程数不胜数,但是,⼤多教程都是漏洞百出。
今天,为了帮助各位需要的⼈,从⽽写下Centos7安装配置mysql5.6的教程。
好了,话不多说,上教程:⼀、安装MySQL2、卸载系统⾃带的Mariadb打开Terminal终端:[root@localhost ~]# rpm -qa|grep mariadb // 查询出来已安装的mariadb[root@localhost ~]# rpm -e --nodeps ⽂件名 // 卸载mariadb,⽂件名为上述命令查询出来的⽂件3、删除etc⽬录下的f[root@localhost ~]# rm /etc/f4、执⾏以下命令来创建mysql⽤户组[root@localhost ~]# groupadd mysql5、执⾏以下命令来创建⼀个⽤户名为mysql的⽤户并加⼊mysql⽤户组[root@localhost ~]# useradd -g mysql mysql6、将下载的压缩包放到 /usr/local/ ⽬录下(通过mv 要移动的⽂件 /usr/local/)7、解压安装包[root@localhost ~]# tar -xvf mysql-5.6.34-linux-glibc2.5-x86_64.tar注:如果压缩包为:mysql-5.6.34-linux-glibc2.5-x86_64.tar.gz,则解压命令为: tar -zxvf mysql-5.6.34-linux-glibc2.5-x86_64.tar.gz8、将解压好的⽂件夹重命名为mysql[root@localhost local]# mv 解压出来的⽂件夹名 mysql9、在 etc 下新建配置⽂件f,并在该⽂件中添加⼀下代码:当然,也有简单⽅式:直接copy⼀份f⽂件到/etc下,然后再修改即可。
Centos7配置.netcore+nginx+mysql+php 1 安装nginxyum install epel-releaseyum install nginx启动nginx服务systemctl restart nginx检查服务是否起来ps –ef|grep nginx修改配置文件cd /etc/nginxcp nginx.conf nginx.conf.bakcp nginx.conf.default nginx.conf浏览器访问,测试是否安装成功加入守护进程,使其开机自启动sytemctl enable nginx配置文件位置:/etc/nginx/nginx.conf网站位置:/usr/share/nginx/htm2 安装.net core 2.0检查系统安装glibc的版本cd /usr/lib64strings libstdc++.so.6|grep GLIBCGLIBCXX大于3.4.18sh -c 'echo -e "[packages-microsoft-com-prod]\nname=packages-microsoft-com-prod \nbaseurl=https:///yumrepos/microsoft-rhel7. 3-prod\nenabled=1\ngpgcheck=1\ngpgkey=https://packages.microsoft .com/keys/microsoft.asc" > /etc/yum.repos.d/dotnetdev.repo'yum updateyum install libunwind libicuyum install dotnet-sdk-2.0.0dotnet –version命令验证安装是否成功3 安装mysql5.6检查是否已经安装mysqlyum list installed | grep mysql给centos源,并选择较新的源wget /get/mysql-community-release-el7-5.noarch.rpmyum localinstall mysql-community-release-el7-5.noarch.rpmyum repolist all | grep mysql如果执行yum-config-manager报没有该命令,执行下面语句【yum -y install yum-utils】yum-config-manager --disable mysql55-communityyum-config-manager --disable mysql57-communityyum-config-manager --disable mysql57-community-dmr查看可以安装版本yum repolist enabled | grep mysqlyum install mysql-community-server启动myql数据库服务service mysqld start添加守护进程,使其可以开机自启动systemctl enable mysqld4 安装php5.6yum list installed | grep phpyum install epel-releaserpm -ivh /enterprise/remi-release-7.rpm查看5.6的可安装包yum list--enablerepo=remi--enablerepo=remi-php56|grep phpyum install --enablerepo=remi --enablerepo=remi-php56 php php-fpmphp-gd php-ldap php-odbc php-pear php-xml php-xmlrpc php-mbstring php-snmp php-soap curl curl-devel php-mysql启动php-fpmsystemctl start php-fpm添加php-fpm为守护进程systemctl enable php-fpm5 部署.net项目做一个测试项目创建一个项目文件夹mkdir /var/webtestdotnet new mvcdotnet restoredotnet publish –c release启动.net core项目[root@localhost publish]# dotnet webtest.dll在nginx配置方向代理编辑nginx配置文件server {listen 80;server_name ;location / {proxy_pass http://localhost:5000;proxy_http_version 1.1;proxy_set_header Upgrade $http_upgrade;proxy_set_header Connection keep-alive;proxy_set_header Host $host;proxy_cache_bypass $http_upgrade;}}测试访问如果出现网关502错误,因为selinux保护机制所导致yum install policycoreutils-pythonsudo cat /var/log/audit/audit.log | grep nginx | grep denied | audit2allow -M mynginxsudo semodule -i mynginx.pp6 配置.net core项目为守护进程目前存在三个问题问题1: Core应用程序运行在shell之中,如果关闭shell则会发现 Core应用被关闭,从而导致应用无法访问,这种情况当然是我们不想遇到的,而且生产环境对这种情况是零容忍的。
问题2:如果 Core进程意外终止那么需要人为连进shell进行再次启动,往往这种操作都不够及时。
问题3:如果服务器宕机或需要重启我们则还是需要连入shell进行启动。
为了解决这个问题,我们需要有一个程序来监听 Core 应用程序的状况。
在应用程序停止运行的时候立即重新启动。
这边我们用到了Supervisor这个工具,Supervisor使用Python开发的。
安装supervisoryum install python-setuptoolseasy_install supervisor配置supervisormkdir /etc/supervisorecho_supervisord_conf > /etc/supervisor/supervisord.conf修改supervisord.conf文件,将文件尾部的配置;[include];files = relative/directory/*.ini改成[include]files = conf.d/*.confps:如果服务已启动,修改配置文件可用“supervisorctl reload”命令来使其生效在/etc/supervisor创建conf.d文件夹mkdir conf.d创建项目启动文件touch webtest.confvi webtest.conf[program:webtest]command=dotnet webtest.dll ;directory=/var/webtest/bin/release/netcoreapp2.0/publish/ ; autorestart=true ;stderr_logfile=/var/log/webtest.err.log ;stdout_logfile=/var/log/webtest.out.log ;environment=ASPNETCORE_ENVIRONMENT=Production ; user=root ;stopsignal=INT启动supervisord程序supervisord -c /etc/supervisor/supervisord.conf检查dotnet项目是否启动ps –ef|grep supervisordps –ef|grep webtest7 配置supervisord为守护进程在/etc/init.d目录下创建supervisordtouch /etc/init.d/supervisord复制下面内容到文件下vi /etc/ini.d/supervisord#!/bin/sh## /etc/rc.d/init.d/supervisord## Supervisor is a client/server system that# allows its users to monitor and control a# number of processes on UNIX-like operating # systems.## chkconfig: - 64 36# description: Supervisor Server# processname: supervisord# Source init functions. /etc/init.d/functionsRETVAL=0prog="supervisord"pidfile="/tmp/supervisord.pid"lockfile="/var/lock/subsys/supervisord"start(){echo -n $"Starting $prog: "daemon --pidfile $pidfile supervisord -c /etc/supervisor/supervisord.confRETVAL=$?echo[ $RETVAL -eq 0 ] && touch ${lockfile}}stop(){echo -n $"Shutting down $prog: "killproc -p ${pidfile} /usr/bin/supervisordRETVAL=$?echoif [ $RETVAL -eq 0 ] ; thenrm -f ${lockfile} ${pidfile}fi}case "$1" instart)start;;stop)stop;;status)status $prog;;restart)stopstart;;*)echo "Usage: $0 {start|stop|restart|status}";;esac设置开机自启动chkconfig supervisord on。