摩托罗拉xirp6600i使用说明书
- 格式:docx
- 大小:13.15 KB
- 文档页数:2

Nokia 6600i slide 用戶指南9215955第版1.1© 2009 Nokia 。
版權所有,翻印必究。
合格聲明書本公司 NOKIA CORPORATION 聲明產品 RM-570 符合歐盟指令1999/5/EC (Directive 1999/5/EC) 的基本要求和相關規定。
此聲明書 (Declaration of Conformity) 的全文可在 /phones/declaration_of_conformity/ 中找到。
Nokia 、諾基亞、Nokia Connecting People 及 Navi 是 Nokia Corporation 的商標或註冊商標。
Nokia tune (諾基亞音調)是 Nokia Corporation 的聲音標記。
本文件中所提及的其他產品與公司名稱可能分別為其各自擁有者之商標或註冊名稱。
未取得諾基亞的書面同意,嚴禁以任何形式複製、傳送、散佈或儲存全部或部分的內容。
Nokia 奉行持續發展的政策。
諾基亞保留對本文件中所描述產品進行改變和改進的權利,恕不另行通知。
美國專利號碼 5818437 和其他申請中的專利。
T9 文字輸入軟體 Copyright © 1997-2009。
Tegic Communications, Inc. 版權所有。
包含 RSA Security 的 RSA BSAFE密碼編譯或安全協定軟體。
Java 與所有 Java 相關標記是 Sun Microsystems, Inc. 的商標或註冊商標。
此產品是以 MPEG-4 Visual Patent Portfolio License 為基礎進行授權,(i) 由從事個人及非商業活動之消費者,搭配符合MPEG-4 Visual Standard 所編碼的資訊,使用於個人及非商業用途,以及 (ii) 搭配經授權的視訊供應商所提供的 MPEG-4 視訊使用。
對於任何其他用途,並不提供或暗示任何授權。
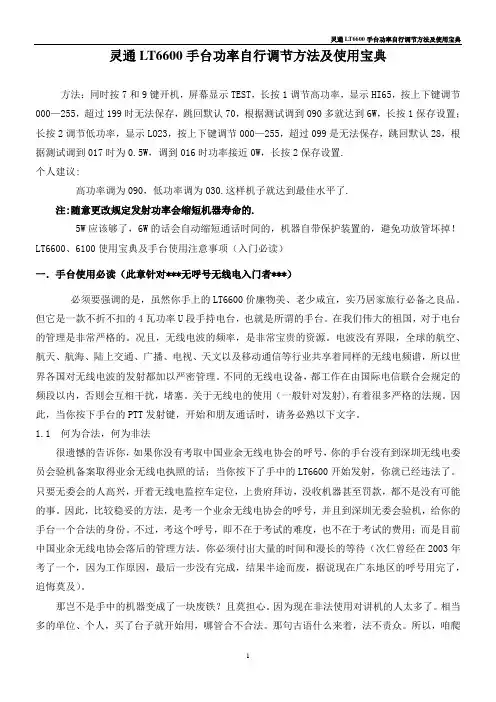
灵通LT6600手台功率自行调节方法及使用宝典方法:同时按7和9键开机,屏幕显示TEST,长按1调节高功率,显示HI65,按上下键调节000—255,超过199时无法保存,跳回默认70,根据测试调到090多就达到6W,长按1保存设置;长按2调节低功率,显示LO23,按上下键调节000—255,超过099是无法保存,跳回默认28,根据测试调到017时为0.5W,调到016时功率接近0W,长按2保存设置.个人建议:高功率调为090,低功率调为030.这样机子就达到最佳水平了.注:随意更改规定发射功率会缩短机器寿命的.5W应该够了,6W的话会自动缩短通话时间的,机器自带保护装置的,避免功放管坏掉!LT6600、6100使用宝典及手台使用注意事项(入门必读)一.手台使用必读(此章针对***无呼号无线电入门者***)必须要强调的是,虽然你手上的LT6600价廉物美、老少咸宜,实乃居家旅行必备之良品。
但它是一款不折不扣的4瓦功率U段手持电台,也就是所谓的手台。
在我们伟大的祖国,对于电台的管理是非常严格的。
况且,无线电波的频率,是非常宝贵的资源。
电波没有界限,全球的航空、航天、航海、陆上交通、广播、电视、天文以及移动通信等行业共享着同样的无线电频谱,所以世界各国对无线电波的发射都加以严密管理。
不同的无线电设备,都工作在由国际电信联合会规定的频段以内,否则会互相干扰,堵塞。
关于无线电的使用(一般针对发射),有着很多严格的法规。
因此,当你按下手台的PTT发射键,开始和朋友通话时,请务必熟以下文字。
1.1 何为合法,何为非法很遗憾的告诉你,如果你没有考取中国业余无线电协会的呼号,你的手台没有到深圳无线电委员会验机备案取得业余无线电执照的话;当你按下了手中的LT6600开始发射,你就已经违法了。
只要无委会的人高兴,开着无线电监控车定位,上贵府拜访,没收机器甚至罚款,都不是没有可能的事。
因此,比较稳妥的方法,是考一个业余无线电协会的呼号,并且到深圳无委会验机,给你的手台一个合法的身份。

MOTOTRBO™PROFESSIONAL SERIES RADIO ACCESSORIES T HE POWER OF YOUR RADIO UNLEASHEDXiR P8200 SERIES Remote Speaker Microphones6 –7 Remote Speaker Microphones-Accessories with standard 3.5mm8 Remote Speaker Microphones-Accessories with threaded 3.5mm9 – 10 Public Safety Microphones10 – 11 Surveillance Accessories and earpieces 12 – 15 Surveillance Accessories Replacement Kits 16, 18 Earpieces 20 – 23 Headsets 24 – 25 Tactical24 – 25 Motorola Orginal® Two-way Radios Batteries 36 – 37 Charger Solutions42 Vehicular and Travel Chargers 45 Impres Battery Management Tools 45 Carry Solutions 47 – 49 Antennas51 – 52Programming Cables58XiR P8600 / P8600i SERIES Remote Speaker Microphones6 –7 Remote Speaker Microphones-Accessories with standard 3.5mm8 Remote Speaker Microphones-Accessories with threaded 3.5mm9 – 10 Surveillance Accessories and earpieces 12 – 15 Surveillance Accessories Replacement Kits 16, 18 Earpieces 20 – 23 Headsets 24 – 25 Tactical24 – 25 MagOne Accessories24 – 25 Operational Critical Wireless Bluetooth ® Accessories 28 – 35 Wireless Replacements Kits34 Motorola Orginal® Two-way Radios Batteries 38 – 41 Charger Solutions42 Vehicular and Travel Chargers 45 Impres Battery Management Tools 45 Carry Solutions 46, 48 – 50 Antennas53, 55 – 56Antennas Accessories 57Programming Cables58XiR P8600EX SERIES Remote Speaker Microphones 8 – 9 Remote Speaker Microphones-Accessories with standard 3.5mm 8 3M Peltor Headsets 26 – 27 Motorola Orginal ® Two-way Radios Batteries 40 – 41 Charger Solutions 42 Carry Solutions46, 49 – 50Antennas54XiR P6600 / P6600i SERIES Remote Speaker Microphones 8 – 9 Remote Speaker Microphones-Accessories with standard 3.5mm 8 Surveillance Accessories and earpieces 14 – 15 Surveillance Accessories Replacement Kits 16 Earpieces 20 – 21 MagOne Accessories20 – 21Headsets 22 – 23 Motorola Orginal ® Two-way Radios Batteries 36 – 39 Charger Solutions 42 Vehicular and Travel Chargers 45 Impres Battery Management Tools 45 Carry Solutions 47, 49 – 50 Antennas 53, 55 Antennas Accessories 57 Programming Cables58PAGESXiR E8600 / E8600i SERIES Remote Speaker Microphones 8 – 9Remote Speaker Microphones-Accessories with standard 3.5mm 8 Surveillance Accessories and earpieces 14 – 15 Surveillance Accessories Replacement Kits 16 MagOne Accessories 20 – 21 Headsets 22 – 23 Motorola Orginal® Two-way Radios Batteries 40 – 41 Charger Solutions 44 – 45 Carry Solutions46 Antennas 55SL1K/SL2K SERIES Surveillance Accessories and earpieces 14 – 15 Surveillance Accessories Replacement Kits 16, 18 Earpieces 20 – 21 Operational Critical Wireless Bluetooth® Accessories 28 – 35 Wireless Replacements Kits 34 Charger Solutions 44 Carry Solutions49 Antennas 56 Antennas Accessories 57 Programming Cables58XiR M8200 SERIES Microphones 61 Mobile Microphone Accessories 62 External Push-To-Talk(PTT) 63 Operational Critical Wireless Bluetooth® Accessories 64 – 67 Replacement Parts and Secondary Audio Accessories 67 Control Station Accessories 71 Installation and Mounting Accessories 72 External Speakers 73 Cables 74 – 75 Antennas 76 – 81XiR M8660 / M8660i Microphones 60 – 61Mobile Microphone Accessories 62 External Push-To-Talk(PTT) 63 Operational Critical Wireless Bluetooth® Accessories 64 – 69 Replacement Parts and Secondary Audio Accessories 66 – 67, 70Control Station Accessories 71 Installation and Mounting Accessories 72 External Speakers73Cables 74 – 75Antennas 76 – 81XiR M6600 SERIES Microphones 61 Mobile Microphone Accessories 62 External Push-To-Talk(PTT) 63 Installation and Mounting Accessories 72 – 73 External Speakers73 Cables 75Antennas76 – 81PAGESIMPRES ™ BATTERIES AND CHARGERS: YOUR BATTERY , SAFER, SMARTER, POWERED FOR LONGERGet rid of the guesswork and get more from every battery.Get the most out of every battery and eliminate the surprise of “low battery alerts”. IMPRES chargers tell you exactly how much capacity is in an IMPRES battery before you attach it to your radio and exactly when an IMPRES battery has reached the end of service life.Enjoy 43% longer battery life from IMPRES over non-IMPRES batteries – without spending maintenance or record keeping time and effort. With IMPRES Battery Fleet ManagementSoftware, you can check the status of 25 or 25,000 batteries at a glance, from one computer.IMPRES ™ AUDIOMake sure every word is heard regardless of the level or direction you’re speaking into the accessory. Be clearly heard the first time and eliminate repeating yourself. Whether you need to talk loudly or quietly, into or away from theaccessory, IMPRES Audio lowers the loud talker level and raises the soft talker level automatically so listeners do not have to adjust the volume depending on who is talking.Policing a busy airport, fixing equipment on a noisy production floor or assisting guests in a quiet hotel, IMPRES Audio promises a high quality communication experience. > Experience IMPRES AudioWINDPORTINGCommunicate clearly in difficult weather. Wherever you work – in howling wind, driving rain, and severe weather – Windporting helps you communicate effectively and listeners hear clearly.Windporting technology eliminates the whining and howling sounds of wind blowing across your lapel/remote speaker microphone. It also prevents water from clogging the microphone for clearer transmissions. > Hear the difference Windporting makesINTELLIGENT AUDIOFocus on your job instead of your radio volume. Make adjusting your radio volume based on background noise a thing of the past. Intelligent Audio listens to sounds in the background and automatically raises or lowers your radio volume so you can always hear. If you’re heading from a noisy area to a quiet place, you won’t disturb others because you forgot to adjust the volume.Intelligent Audio when complemented with IMPRES Audio takes your communications to a new level. > See Intelligent Audio in actionOPERATIONS CRITICAL WIRELESS: YOUR RADIO, UNLEASHEDWork with your radio like never before. Place your radio on a desk or cart, in a purse, medical bag or backpack and converse seamlessly with your wireless earpiece up to 10m away from your radio. Put your wireless PTT where you want to – on a clipboard, steering wheel or coat pocket – without wires getting in the way. Motorola Bluetooth enabled radios allow both an Operations Critical Wireless PTT and audio accessory to be connected and used at the same time. And Operations Critical Wireless accessories last up to 10 hours – up to 3 times the battery life of commercial Bluetooth ® headsets.MOTOTRBO radios are already best in class, but to help you work at your best, you needenhancements targeted to your specific workplace. We’ve developed a line of accessories with unique features designed to optimize the performance of your radio in your work environment,unleashing the full power of the industry’s most advanced digital radio platform.XiR P6600 SERIES XiR P6600i SERIES XiR P8600 Ex SERIES XiR E8600 SERIES XiR E8600i SERIES XiR P8200 SERIES XIR P8600 SERIES XIR P8600i SERIES SL1K SERIES SL2K SERIESPROGRAMMABLE BUTTON: This programmable button allows you to access key features while you keep your radio on your belt or hidden under a jacket.IP RATING: The international standard for rating dust and water protection. Thefirst digit represents the level of dust protection: 5 provides excellent protection fromdust. The second digit represents water protection. IP54 provides protection fromwater sprayed from all directions, IP55 protects against driving rain, and IP57 resistssubmersion in 1 meter of fresh water for 30 minutes.INTRINSIC SAFETY RATING: Motorola-approved accessories are a critical part of theoverall radio system certified by a recognized testing organization as intrinsically safe.Non-Motorola approved accessories may not be certified for MOTOTRBO and if used,could result in equipment that is NOT approved or unsafe in a hazardous environment.**NOTE: TIA = TIA4950 Intrinsic Safety Rating; FM = FM 1988 Intrinsic Safetyrating Accessories with these ratings are approved for FM or TIA when connected toIntrinsically safe FM or TIA radio/battery system.XiR P8200 XiR P8600XiR P8200REMOTE XiR P8600XiR P6600XiR E8600 XiR P8600 Ex RSM ACCESSORIESAUDIOXiR P8200XiR P8200XiR P8200XiR P8600IMPRES AUDIO (MOTOROLA EXCLUSIVE): Ensure your voice is heard clearer, crisper, and louder regardless of level or direction you’re speaking into the accessory. INTELLIGENT AUDIO (MOTOROLA EXCLUSIVE): Set your volume once. Dependon your accessory to listen for changes in background noise, adjusting the volume automatically so you hear every call.MICROPHONE AND PTT: Some accessories have a microphone on the same wireas push-to-talk (2-wire surveillance kit) or on a separate wire (3-wire surveillance kits).Microphones are small, easy to mount and hide during surveillance operations, yetpowerful enough to pick up whispered transmissions and reduce ambient noise.PROGRAMMABLE BUTTON: This programmable button allows you to access keyfeatures while you keep your radio on your belt or hidden under a jacket.INTRINSIC SAFETY RATING: Motorola-approved accessories are a critical part of theoverall radio system certified by a recognized testing organization as intrinsically safe.Non-Motorola approved accessories may not be certified for MOTOTRBO and if used,could result in equipment that is NOT approved or unsafe in a hazardous environment.XiR P8200 XiR P8600HOW DOES IMPRES IMPROVE AUDIO PERFORMANCE? IMPRES enhances the clarity and audio quality of Motorola accessories by reducingambient noise and improving voice intelligibility.If you speak quietly or normally, but not directly into a microphone, IMPRES Audio detects changes in your voice and automatically adjusts the transmitted volume so your listener won’t have to adjust volume up and down.> Experience IMPRES audioXiR P6600XiR P6600XiR P8200XiR P8600XiR E8600XiR P8600XiR P8200XiR P8600SL1KHOW DO TEMPLETRANSDUCERS WORK?These headsets use transducers that rest on your temple to convert audio into sound vibration and transmit it to your inner ear. If you’re using hearing protection or directing heavy traffic, you can hear the audio from your radio and the surrounding environment. Since the transducer sits in front of your ears, you can also wear earplugs and still hear the radio.XiR P6600E8600 SL1KXiR P6600XiR P6600E8600XiR P8600XiR P8200 XiR P8600XiR P8200 XiR P8600 XiR P8600XiR P8600 ExXiR P8600 ExSINGLE NOISE RATING: Signal-to-noise ratio (often abbreviated SNR or S/N) is a measure used in science and engineering that compares the level of a desired signal to the level of background noise. It is defined as the ratio of signal power to the noise power, often expressed in decibels.MICROPHONE AND PTT: Some accessories have a microphone on the same wire as push-to-talk (2-wire surveillance kit) or on a separate wire (3-wire surveillance kits). Microphones are small, easy to mount and hide during surveillance operations, yet powerful enough to pick up whispered transmissions and reduce ambient noise.EARPIECE TYPE: Choose the right fit for your operations – a simple, low cost, discreet earbud or the rugged, high performance CommPort™ style earpiece.MICROPHONE: The in-line microphone on the earbud earpiece is designed for generaluse, while the directional microphone on the CommPort™ style earpiece is ideal for lowernoise environments.OPERATIONS CRITICAL/ENHANCED OPERATIONS CRITICAL: This Bluetooth®solution specifically for businesses features simple pairing, high quality audio and fastpush-to-talk to ensure every word is transmitted. Enhanced Operations Critical Wirelesshas all this, plus instant pairing with just a touch of the accessory to the radio’s Bluetoothadapter, and intrinsically safe certification for hazardous environments. This meansmultiple workers on shifts who need grab-and-go device can all pair at the same timewithout connecting to the wrong radio.XiR P8200 XiR P8600 SL1KXiR P8200XiR P8600SL1K*Note: PTT on radio or with separate wireless PTT. All blue tooth kits require in country type approvals.Note: SL series and XiR P8600 / P8600i series portable radios have Bluetooth embedded in the radio and do not require a separate external adapter.XiR P8200 XiR P8600 SL1KIMPRES BATTERIES AND CHARGERS: Get the most out of every battery andeliminate the surprise of “low battery alerts”. IMPRES chargers tell you exactly how much capacity is in an IMPRES battery before you attach it to your radio and exactly when an IMPRES battery has reached the end of service life.INTRINSIC SAFETY RATING: Motorola-approved batteries are a critical part of the overall radio system certified by a recognized testing organization as intrinsically safe. Non-Motorola approved batteries may not be certified for MOTOTRBO and if used, could result in equipment that is NOT approved or unsafe in a hazardous environment.XiR P8200P6600P6600LOW VOLTAGE BATTERIESWhen paired with the enhanced 'e' series radiosLow Voltage Batteries (PMNN4488, PMNN4499,PMNN4489, PMNN4490, PMNN4493) deliver up to28 hours of battery talk time. Working up to 3 shifts,these new batteries are similar size and weight ascurrent batteries.MOTOTRBO PORTABLE RADIOSSL1KXiR E8600MOTOTRBO PORTABLE RADIOSIMPRES BATTERYMANAGEMENT TOOLS?With the unique IMPRES Battery Reader and IMPRES Battery Fleet Management systems, efficiently manage your batteries with real-time data not available with other manufacturers’ batteries. Our easy-to-use software applications show you if there is enough capacity for a full shift, alert you to low capacity batteries, prevent downtime and eliminate throwing batteries out prematurely.Now over-the-air capable withXiR P8600 / P8600i and P6600 / P6600i with IMPRES batteriesIMPRES BATTERY FLEET MANAGEMENT SOFTWARE REPORTSIMPRES BATTERY FLEET MANAGEMENTACTIVE BATTERY REPORTIMPRES BATTERY DATA READER, GENERAL INFORMATION SCREEN* Must be C revision or greater for compatibility with XiR P6600 / P6600i series and XiR P8600 / P8600i series radios.XiR P6600 XiR P8600 ExXiR E8600SL1KXiR E8600* Must be C revision or greater for compatibility with XiR P6600 / P6600i series and XiR P8600 / P8600i series radios.XiR P8600XiR P8600 Ex MATERIAL: Choose from comfortable and flexible nylon cases, rugged, durable hard leather cases or carry holsters.SWIVEL OR FIXED LOOP: Secure to a belt loop and the case swings freely from side to side. The swivel latch system also allows the radio and case to be removed from the belt loop by simply inverting, lifting it up and out of the belt loop. Fixed loops provide a sturdy attachment to your belt.XiR P8200XiR P6600XiR P8200 XiR P8600XiR P6600 SERIESXiR P8600 XiR P8200 SL1KXiR P8600 ExXiR P6600 XiR P8200 XiR P8600XiR P8200INTEGRATED GPS: A GPS antenna is integrated into the RF antenna. (The XiR P6600 / P6600i series radios do not have GPS capability, but use these antennas.) FREQUENCY BAND: Most antennas only cover a portion of a frequency band. Our wideband UHF and VHF antennas offer coverage across the entire band, enhancing your communication flexibility.XiR P6600XiR P8200XiR P8600XiR P8600 Ex XiR P6600XiR P8600XiR E8600SERIESXiR P6600XiR P8600XiR P8600SL1KMOTOTRBO PORTABLE RADIOSUNRIVALED VOICE AND DATA ON THE GO XiR M8600 / XiR M8600i SERIESThe XiR M8600 series shares the same connector as the XiR M8200 series accessories enabling easy migration. This portfolio is enhanced with integrated Bluetooth ®, giving more flexibility than ever before. Now your drivers can check on packages or walk around the loading dock and stay connected within 10m of their radio. A new IMPRES keypad microphone features a four-way navigation button that makes accessing critical features on the large color display, dialing phone numbers and sending text messages easy.INTEGRATED VOICE AND DATA ON THE GO XiR M8200 SERIESHandling dispatch for a delivery company or hauling freight across the country, accessories must meet challenging installation and operational requirements. XiR M8200 series mobile accessories are specifically designed for hassle-free communication in a vehicle, for dispatch-enabled communication, and for easy installation.XiR M6600 SERIESThe XiR M6600 features a durable telco accessory connector that enables microphones, external speakers and vehicular solutions. Many of the XiR M6600 microphones feature Intelligent Audio. Intelligent Audio listens to sounds in the background and automatically raises or lowers your radio volume so you can always hear clearly. If you’re driving an empty bus that quickly fills with chattering children – you will still be able to hear important communication without taking your hands off the wheel to adjust the radio volume.XiR M8200 SERIESXiR M8600 SERIES XiR M8600i SERIESXiR M6600 SERIESSL1K XiR P8200XiR P8600XiR P6600XiR M8660HOW CAN I COMMUNICATE SAFELY IN MY VEHICLE?The IMPRES Visor Microphone mounts to your vehicle’s visor for safe, convenient communication. Press the external push-to-talk button on the steering wheel to converse without taking your hands off the wheelor your eyes off the road. IMPRES Audio compensates for the distance of the visor mic from your mouth so that your radio communications are loud and clear.XiR M8600XiR M8600LONG RANGE WIRELESS SOLUTIONSDesigned for customers who depend on their high power mobile radio for system connection but must work outside of their vehicle. The Long Range Wireless solution allows you to maintain critical communications even on remote job site.MAINTAIN CRITICAL COMMUNICATIONS EVEN ON REMOTE JOB SITESSITUATIONKeep in touch even on remote job sites when you depend on your high power mobile radio but have to work outside your vehicle. You are a utility worker and need to check the meter readings. You have to park your truck about 100 meters away from the utility box due to access restrictions, yet you stay connected to your radio with your Long Range Wireless Remote Speaker Microphone. You communicate key readings immediately to dispatch. Get your job done safely and more efficiently.SOLUTIONThe Long Range Wireless Remote Speaker Microphone (RSM) pairs instantly with touch pairing to the mobile microphone with Bluetooth gateway. The Bluetooth microphone is compatible with MOTOTRBO XiR M8200 and XiR M8600 / M8600i series mobile radios. The Long Range Wireless RSM works up to 100 meters away from the mobile radio, keeping you in communication where you never thought possible.XiR M8600EARPIECE TYPE: Choose the right fit for your operations – a simple, low cost, discreet earbud or the rugged, high performance CommPort ™style earpiece.Note: XiR M8660 / M8660i series mobile radios have Bluetooth embedded in the radio. *Note: PTT on radio or with separate wireless PTT.MICROPHONE: The in-line microphone on the earbud earpiece is great for general use, while the directional microphone on the CommPort ™ style earpiece is ideal for lower noise environments.HOW DO MOBILE WIRELESS ACCESSORIES HELP ME?Use your mobile radio like never before and freely move around your vehicle. This means a driver can sort through packages on the back of the delivery truck, a bus driver can check on students in the back of the bus, or a city worker can trim trees from a cherry picker and all can still remain connected to their mobile radio. And by removing the wired connection to a desktop mobile, a dispatcher can walk around the office and manage calls.XiR M8600XiR M8600XiR M8600XiR M8600 XiR M8600XiR M8600XiR M8600XiR M8600XiR M8600FREQUENCY BAND: Most antennas only cover a portion of a frequency band. Our wideband UHF and VHF antennas offer coverage across the entire band, enhancing your communication flexibility. INTEGRATED GPS: To support GPS capability in the radio, the GPS antenna is integrated into the RF antenna.XiR M8600 XiR M8600XiR M8600XiR M8600XiR M8600XiR M8600XiR M8600MOTOTRBO MOBILE RADIOSXiR M8600XiR M8600XiR M8600 XiR M8600For more information on Motorola accessories,visit /ap/mototrboMOTOROLA, MOTO, MOTOROLA SOLUTIONS and the Stylized M Logo are trademarks or registered trademarks of Motorola Trademark Holdings, LLCand are used under license. All other trademarks are the property of their respective owners. © 2016 Motorola Solutions, Inc. All rights reserved.GLOBAL_ACCE_CAT_AP_1116Motorola Solutions Singapore Pte Ltd12 Ang Mo Kio Street 64, Ang Mo Kio Industrial Park 3, UE Biz Hub, Block A, Level 7 Singapore 569088。
Quick StartCable ModemMB7220Packaged with your modemPower Cube Coax WrenchEthernet Cable Velcro® Cable Tie Para una Guía de Inicio Rápido enespañol, por favor vaya a/MB7220IRLet’s get startedIf you don’t have cable modem service, please order that from your cable service provider.Now connect your modem as shown on the next panel.Connecting to a Coax CableOn the next panel you’ll need to connect yourmodem to a “live” coax cable. Sometimes a cablewill already be available. Sometimes there’s a coaxwall jack available, and you connect to the jack witha coax cable. Your modem can also share a coaxcable attached to a TV by using a coax splitter.ON/OFF button POWERConnect the supplied power cube between the power jack and an electrical outlet. RESET button ETHERNET (LAN) Here you can connect a computer, router, HDTV, game station, or other Ethernet-capable device. COAXConnect a “live” coax cable to the modem’s COAX connector as discussed above. (Tighten the nut so it’s finger tight. You may want to use the supplied wrench. Make the connection snug but not over-tight.)Prepare to activateBy now you should have:•Subscribed to cable Internet service.•Connected your cable modem.•Powered up your cable modem. To do this, the On/Off button needs to be On. Wait for the green onlineconnection light to stop flashing and remain solidly lit. This may take up to 15 minutes.You should have a recent cable bill handy because it has your account number and you’ll probably need that.If you’re asked for information about your cable modem, you can find this on the label on the bottom of the modem.ActivateFor some service providers, you activate by calling them. Many service providers including Comcast and Cox prefer that you activate by opening the Web browser of a computer that’s plugged into the MB7220’s Ethernet port.For Comcast XFINITY Users Only:If the activation page does not appear in your browser, please go to /internetsetup for more information and to activate your modem.If no registration page appears after following the browser instructions above, you need to contact your cable company to register your modem. Here is a list of phone numbers for some major cable service providers. (Note that this list is subject to change.)Comcast 1 (855) 652-3446Time Warner 1 (855) 704 4503Bright House 1 (888) 289-8988Suddenlink 1 (877) 794-2724Cable One 1 (877) 692 2253Cox 1 (888) 556-1193RCN 1 (866) 832-4726Once your cable modem is registered either online or by phone, your service provider will provision your cable modem service. Typically this takes less than 5 minutes, but in some cases this may take 30 minutes or longer to complete.Once you have activated, you should have Internet access for whatever’s plugged into your cable modem. Congratulations!If your cable modem is NOT working, see Troubleshooting Tips below.If You Want to Connect a Router This connection is optional, done after the cablemodem is activated. A wireless router lets multiple devices (computers, smartphones, tablets, video devices, game stations…) share your cable modem’s Internet connection, either wirelessly or through a direct Ethernet connection.1. The cable modem and the router should both bepowered off.2. Plug the cable modem’s Ethernet cable into therouter’s WAN port. (You may need to disconnectthe cable from your computer first.)3. Power-up the cable modem. Wait for the ONLINElight to be solidly lit.4. Power-up the router. Wait for the router tocomplete its power-up sequence.5. The LAN light on your modem should be lit toshow the Ethernet connection to your router.Follow your router’s instructions for setting up the router and connected devices.Using a computer or other device connected to the router, try connecting to the Internet. If it works, Congratulations! Installation is complete.Front Panel LightsLIGHT COLOR DESCRIPTIONEthernet LANportGreen or AmberBlinking:Ethernet data is flowingGreen: Connected at highest LANspeed, 1 Gbps Amber: Connected at 10 or 100 MbpsOFF: No connectionOnlineGreenBlinking:Trying to go onlineON: OnlineOFF: OfflineUpstreamGreen or BlueGreen Blinking: Ranging in progressGreen ON: Connected on 1 channel Blue Blinking: Negotiating bondedchannel(s)†Blue ON: Bonded with 2 ormore channelsOFF: Upstream not connectedDownstreamGreen or BlueGreen Blinking: Scanning for DS channel Green ON: Connected on1 downstream channelBlue Blinking: Negotiatingbonded channel(s)† Blue ON: Bonded with 2 or morechannelsPowerGreenON: Cable modem power onOFF: Cable modem power off†If a blue light blinks continuously, this indicates partial service (at least one designated channel has not completed bonding). You should still get high Internet speeds, but your service provider may want to know so they can adjust their network.Troubleshooting TipsWhat if I can’t make an Internet connection right after installation?•First turn your cable modem off for at least 8 seconds, then on, to see if that fixes the problem.•Check the connections you’ve made to your cable modem – power, Ethernet, and coax. Are those connections good? •Check that the modem’s power cube is plugged into a live outlet, and that the Ethernet cable is connected securely. •Make sure that your coax cable is live. You can check that by using it with a TV.•Check that you provided the correct setup information to your cable service provider.•Contact your cable service provider to make sure they’ve turned on your Internet service.What if my cable modem has been working, then stops working?•First turn your cable modem off for at least 8 seconds, then on, to see if that fixes the problem.•If the modem’s lights don’t come on, check that the modem is getting power from its power cube and that the modem’s power button is on.•Check your cable modem cables.•Check with your service provider. Sometimes there’s a service outage or some other service issue.What if I’m getting Internet service but my speed is disappointing?•Be sure you know what speed you’re paying for.•Check the speed with a computer plugged into the modem. Use one of the tools found when you search the phrase: broadband speed test.•If you get good speed when a computer’s plugged into the modem, you may have a router problem.•Some video streaming services get bottlenecked, especially at busy times like after dinner. See whether you have the speed problem at less busy times.•Try connecting your cable modem nearer to where the coaxial cable comes into your home. This lets you see whether your home’s cabling is a problem.•If you’re using a splitter with your cable modem, try the cable modem without the splitter to see if that helps. If it does, you may need to get a better splitter.What if I'm told that my cable modem isn't approved for my cable modem service?•That’s probably not true. Leading cable service providers have a list of certified cable modems, and you can check the list for your service provider. You can also find information about certifications at /servicesDo you have any other questions? We have lots more information at /mentorWe like to help.Please visit our support Website or call our support specialists. Our Website has our Motorola Mentor information, and also provides returns and warranty information./supportEmail:*************************Phone: 800-753-0797Limited WarrantyMTRLC LLC warrants this product against defects in material and workmanship for a warranty period of 2 years. To read the full warranty, please go to /warrantySafety PrecautionsThese precautions help protect you and your cable modem.Do not put the cable modem or its power cube in water, since this is a shock hazard.The cable modem should normally be installed indoors. If you use it outdoors, protect it from moisture and be careful about temperature.Your cable modem should be operated in an environment that’s between 32 and 104° Fahrenheit (0 to 40° Centigrade).Your cable modem should not be in a confined space. There should be room for air flow around the top, front, and sides of the cable modem.Make sure to use your cable modem’s power cube and a compatible electrical outlet.FCC StatementThis device complies with Class B Part 15 of the FCC Rules. Operation is subject to the following two conditions: (1) this device may not cause harmful interference, and(2) this device must accept any interference received, including interference thatmay cause undesired operation. Only coaxial cables are to be used with this device in order to ensure compliance with FCC emissions limits. Accessories connected to this device by the user must comply with FCC Class B limits. The manufacturer is not responsible for any interference which results from use of improper cables, or which results from unauthorized changes or modifications to the device.©MTRLC 2015. MOTOROLA and the Stylized M Logo are trademarks or registered trademarks of Motorola Trademark Holdings, LLC. and are used under license. All rights reserved.27722-EL-B/3155。

XPR 7550IS AND XPR 7580e IS ACCESSORIESFrom the drilling platform to the oil refinery, you deal with extremes – flammable gases, combustible dust, high-decibel noise and other hazards. When your job demands the most of you, shouldn’t you demand the most of your radio and accessories?With the new CSA157-certified MOTOTRBO radio, you’re safer, tougher and more productive. The XPR 7550 IS and XPR 7580e IS are designed for the skilled professional who requires maximum protection with an Intrinsically Safe radio.To extend the capabilities of your radios, pair it with a Motorola CSA certified accessory. While most accessories can’t take harsh punishment or perform under pressure, we design accessories that do. That’s why it’s critical to only use the CSA accessories certified with your XPR 7550 IS and XPR7580e IS radios.INDUSTRIAL NOISE CANCELING RSMUnleash the power of Motorola’s Industrial Noise Canceling (INC) RSM and be heard in extremely noisy, dirty and difficult environments. An innovative dual-microphone design suppresses background noise so you can hear and be heard. Plus, the large 1-watt speaker delivers the loudest, clearest audio available – up to 25% more than other MOTOTRBO RSMs – so you can hearabove high noise levels.* I NC RSM (NNTN8382 or NNTN8383) when connected to the XPR 7550 IS and XPR 7580e IS CSA radio should only be used in digital mode.RECEIVE-ONLYEARPIECE FOR INC RSMThis receive-only earpiece is comfortable for all day wear and provides private communication. It features a 3.5 mm threaded connector and is designed for use with the INC Remote Speaker Microphone, NNTN8383.NNTN8382*IMPRES INC Remote Speaker Microphone, IP57 SubmersibleNNTN8383*IMPRES INC Remote Speaker Microphone with threaded 3.5mmaudio jack, IP54RLN5313One Wire Earpiece withClear Acoustic Tube, BlackIMPRES™ CSA REMOTE SPEAKER MICROPHONESIMPRES technology provides superior audio by suppressing ambient noise, improving voice intelligibility and amplifying quiet transmissions. Windporting offers exceptional audio quality and performance, especially in windy and wet conditions. For indoor environments with loud machines and other background noise, Noise Cancelling acousticsprovide exceptional audio performance.RECEIVE-ONL Y EARPIECES FOR IMPRES RSMThese receive-only earpieces are comfortable for all day wear and provide private communication. They feature a 3.5 mm connector and are designed for use with the IMPRES Remote Speaker Microphone with audio jack.PMMN4050IMPRES Noise Cancelling RSM with 3.5 mm audio jack, IP54PMMN4067IMPRES Windporting RSM with volume switch andemergency button, IP64RLN4941Receive-Only Earpiece with clear acoustic tube and rubber eartipRLN4885Receive-Only EarbudPMLN4620D-Shell Receive-OnlyEarpieceHEAVY DUTY HEADSETSRMN4054Receive-only dual-muff heavy-duty headset, designed for use withthe IMPRES RSM.PMLN5275Dual-muff Behind-the-head Heavy Duty Headset with 24dB noise reduction rating.MOTOROLA HEAVY-DUTY HEADSETSMotorola Heavy-Duty Headsets have beenoptimized and certified to meet the performance of your Motorola radio. These headsets protect your hearing and improve communication in loud environments. The variety of styles allows you tocustomize your solution in virtually every situation.PELTOR HEAVY-DUTY HEADSET AND PUSH-TO-TALK ADAPTER3M™ Peltor™ Heavy-Duty Headsets have been optimized and certified with your XPR 7550 IS or XPR7580e IS radio. Designed for use with helmets, they feature a noise-canceling boom microphone and require a Peltor push-to-talk adapter (not included).NNTN8379 1Peltor Heavy Duty Headset with helmet attachment andnoise-cancelling boom microphone, 24dB noise reduction rating.NNTN8380 1Peltor Heavy Duty Headset with helmet attachment andnoise-cancelling boom microphone, 26dB noise reduction rating.NNTN8378 2Peltor Large Push-to-talkadapter1. W hen used with NNTN8379 and NNTN8380 headsets, the radio units are only approved for Class I, Division I, Groups A, B, C and D operation.2. N NTN8378 PTT adapter must be ordered with Peltor headsets NNTN8379 and NNTN8380.IMPRES SMART ENERGYMotorola’s innovative IMPRES battery charging and reconditioning system streamlines and automates battery maintenance. IMPRES radio batteries and chargers communicate to help lengthen battery life so you can be assured your radio battery is ready when you are. Only IMPRES batteries can be charged150 additional times as compared to a standard battery.NNTN8386IMPRES 1800 mAh Li-Ion battery, Intrinsically Safe (CSA)IMPRES CHARGERSPMPN4174*IMPRES Single Unit ChargerWPLN4219IMPRES Multi-Unit Charger with six displays WPLN4212IMPRES Multi-Unit Charger with one displayIMPRES BATTERY * Power supply is included with this part numberIMPRES VEHICULAR CHARGERSTANDARD TRAVEL CHARGERNNTN7616IMPRES Single-Unit Rapid Rate Vehicular ChargerNNTN8525Rapid Rate Travel ChargerLEATHER CARRY ACCESSORIESDurable hard and soft leather carry cases are designed to withstand harsh conditions in hazardous environments. Swivel belt loops keep the case secure while allowing the radio to move freely as you move.PMLN6097Hard Leather Carry Case for with swivel belt loopPLMN6099Soft Leather Carry Case for with swivel belt loopPMLN56102.5 inch replacement leather swivel belt loop PMLN56113 inch replacement leather swivel belt loopPMLN60862.5 inch belt clipANTENNASMotorola antennas are designed to optimizethe performance and coverage of your radio.MISCELLANEOUSComplete your solution with thisassortment of miscellaneous items. NAF5088Coaxial Whip 896-941 MHz NAF5087Coaxial Whip806-870 MHz150****7001Accessory Dust Cover designedto protect your radio connectorPMLN6047Adapter with MolexAccessory Jack enablesthird party accessoriesPMKN4013Programming and Test CableMotorola Solutions, Inc. 500 West Monroe Street, Chicago, Il 60661 U.S.A. 。
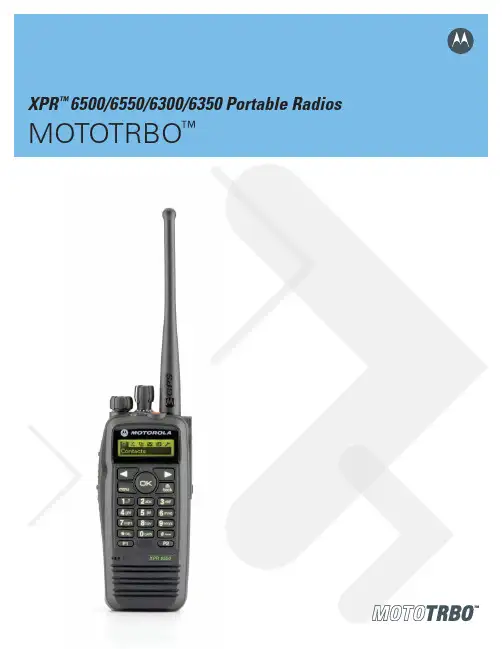
XPR™ 6500/6550/6300/6350 Portable Radios MOTOTRBO™ACCELERATE PERFORMANCE.The next-generation professional two-way radio communications solution is here, with more performance, productivity and value—thanks to digital technology that delivers increased capacity and spectrum effi ciency, integrated data communica-tions and enhanced voice communications. MOTOTRBO is ideal for professional organizations that need a customizable, business-critical communication solutionusing licensed spectrum.Introducing MOTOTRBO ™ Professional Digital Two-Way Radio System. The future of two-way radio.Unique MOTOTRBO System Benefi ts for Enhanced ProductivityMOTOTRBO offers a private, standards-based, cost-effective solution that can be tailored to meetyour unique coverage and feature needs. This versatile portfolio provides a complete system of portable radios, mobile radios, repeaters, accessories, applications and services—a complete solution. The MOTOTRBO portable radio:• U ses Time-Division Multiple-Access (TD MA)technology to provide twice the calling capacity(as compared to analog or FDMA radios) for theprice of one license. A second call doesn’t require a second repeater, saving you equipment costs.• I ntegrates voice and data to increase youroperational effi ciency and support integratedapplications including MOTOTRBO Text MessagingServices and MOTOTRBO Location Services (GPSlocation tracking).• P rovides clearer voice communications throughout the coverage area as compared to analog radios, rejecting static and noise.• O ffers enhanced battery life. Digital TDMA two-way portable radios can operate up to 40 percent longer between recharges compared to typical analog radios.• E nables additional functionality including dispatch data, and enhanced call signaling.• P rovides easy migration from analog to digital • M eets demanding specifications —IP57 for submersibility in water (portable models), U.S. Military 810 C, D, E and F , and Motorola standards for durability and reliability.• I s intrinsically safe and can be used in locations where fl ammable gas, vapors or combustible dust may be present. Approved FM battery option is a 1500 mAh slim LiIon FM battery.• U tilizes Motorola’s state-of-the-art IMPRES ™ technology in batteries, chargers and audioaccessories, providing longer talk time and clearer audio delivery.• I s fully backed by a two-year Standard Warrantyplus one-year Repair Service Advantage (US only)/Extended Warranty (Canada only).• I s fully backed by at least a one-year Workman-ship Warranty for IMPRES chargers and an 18-month Capacity Warranty for IMPRES batteries when used exclusively with IMPRES chargers.MOTOTRBO Portable Benefi tsPage 4 – 5MOTOTRBO ApplicationsPage 6 – 7MOTOTRBO Portable AccessoriesPage 8New Audio Accessory ConnectorPage 9MOTOTRBO Portable Specifi cationsPage 10 – 11ContentsMOTOTRBO ™ System Components and Benefi tsXPR ™ 6500/6550 Display Portable Radios1F lexible, menu-driven interface with user-friendly icons or two lines of textfor ease of reading text messages and navigating through the menus. 2T ri-color LED indicator for clear, visible feedback of calling, scanning and monitoring features.3E mergency button alerts supervisor or dispatcher in an emergency situation. With XPR 6550, location coordinates can be sent to the dispatcher using the MOTOTRBO Location Services application. 4N ew accessory connector meets IP57 submersibility specifi cations and incorporates RF , USB and IMPRES ™ audio capability. 5X PR 6550 includes integrated GPS modem. 6L arge, easy-to-use navigation buttons allow easy access to intuitive menu-driven interfaces.7M eets IP57 specifi cations; submersible in 1 meter of fresh water up to 30 minutes.8Powerful, front projecting speaker that transmits digital TDMA audio or 12.5/25 kHz analog audio.9Three side and two front programmable buttons for easy access to favorite features. New features such as one-touch calling and quick text messaging are made even easier through programmable button access. 10L arge, textured push-to-talk button provides good tactile response and easy access, even when wearing gloves. 11160 channels.Display Portable Radio Standard Package • Display Portable Radio• A ntenna—Standard whip included with XPR 6500; Standard whip with GPS included with XPR 6550• IMPRES ™ Li-ion 1500 mAh Submersible Battery • IMPRES ™Single Unit Charger• 2.5" Belt Clip• User Guide CD Kit (English and French Canadian)Additional Features• Enhanced call management radio check, private call, all call, radio disable • D analog to digital• Short free-form and quick text messaging • Contacts list accommodates up to 256 contacts1234567891011Non-Display Portable Radio Standard Package • Non-Display Portable Radio• A ntenna—Standard whip included with XPR 6300; Standard whip with GPS included with XPR 6350• IMPRES ™ Li-ion 1500 mAh Submersible Battery • IMPRES ™ Single Unit Charger • 2.5" Belt Clip• User Guide CD Kit (English and French Canadian)Additional Features• Enhanced call management Encode/Decode: private call, call alert Encode only: emergency, push-to-talk ID • D analog to digitalXPR ™ 6300/6350* Non-Display Portable Radios1T ri-color LED indicator for clear, visible feedback of calling, scanning and monitoring features.2E mergency button to alert supervisor or dispatcher in an emergency situation. With XPR 6350, location coordinates can be sent to the dispatcher using the MOTOTRBO Location Services application. 3N ew accessory connector meets IP57 submersibility specifi cations andincorporates RF , USB and IMPRES ™audio capability. 4X PR 6350 includes integrated GPS modem. 5 M eets IP57 specifi cations; submersible in 1 meter of fresh water up to 30 minutes.6Powerful, front projecting speaker that transmits digital TDMA audio or 12.5/25 kHz analog audio.7Three side programmable buttons for easy access to favorite features. New features such as one-touch calling and quick text messaging are made even easier through programmable button access.8Large, textured push-to-talk button provides good tactile response and easy access, even when wearing gloves. 932 channels.*XPR 6350 coming soon.123456789MOTOTRBO Location ServicesLocation Services provides the ability to track people and assets, such as vehicles. This advanced approach takes advantage of the GPS modem and receiver integrated within both the portable and mobile radios, combined with the MOTOTRBO Location Services software application.GPS-equipped portable and mobile radios can be confi gured to transmit their geographical coordinates at pre-programmed intervals, on demand and in case of an emergency. MOTOTRBO Location Services software applications provide dispatchers with a real-time display of fl eet activity on a customized, high-resolu-tion, color-coded map. With MOTOTRBO Location Services, you can enjoy the benefi ts of location tracking with no monthly fees or cumbersome external GPS devices to install and maintain.MOTOTRBO is changing the way businesses communicate. Y ou can gain the productivity of powerful data applications such as MOTOTRBO Location Services and Text Messaging now, and with additional applications from Motorola’s Application Developer Program, you’ll be able to leverage ongoing new capabilities—and get the most from your communications investment.MOTOTRBO T ext Messaging ServicesThe MOTOTRBO Text Messaging Services allows communication between radios and dispatch systems, between radios and email-addressable devices, and to remote PC clients attached to radios. This application allows you to utilize another form of communication for your business—whether it’s the needfor discreet communication or the ability to send quick text messages. Thus enabling you to focus on the business at hand. Furthermore, the dispatcher PC can act as a gateway to email, enabling messaging between email-addressable devices and radios.MOTOTRBO ™Portable Radio Accessories Portable RadioMotorola digital technology enables breakthrough radio performance and features. And our new audio connector means MOTOTRBO™ accessories can offer you enhanced performance and capabilities—now andinto the future.• I MPRES™ Smart Audio System—Motorola’s state-of-the-art IMPREStechnology allows communication between the radio and the audio accessory.The result is optimal accessory performance assuring the highest qualitycommunications.O ptimal Audio Performance: When an IMPRES accessory is attached,accessory identifi cation is sent to the radio enabling the radio to optimizeits output for each type of audio accessory. This results in more consistentoutput across all audio accessory types.C ustomization: Accessory programmable buttons can be programmedto any feature available in the radio CPS, rather than being linked to radioprogrammable button programming. This allows accessory programmablebuttons to have independent programmable features. The radio can becustomized to fi t your specifi c applications and needs.• S ubmersibility—The new connector design meets IP57 submersibilityrequirements. This allows for use with submersible accessories, such as thesubmersible remote speaker microphone, which provides optimal messagedelivery even in wet conditions.• F uture Applications—The new portable connector design incorporatesthe antenna signal within the audio connector, which will allow for easy useof accessories that require an antenna signal, such as public safety speakermicrophones. The built in USB capability will allow the use of USB-capableaccessories. The new audio accessory interface is the Motorola standard audioaccessory interface for mid- to high-tier two-way radios. Future accessoryIMPRES 1500 mAh LiIon Battery Analog: 9 hrsDigital: 13 hrs Analog: 9 hrs Digital: 13 hrs IMPRES FM 1400 mAh Battery Analog: 8.5 hrs Digital: 12 hrs Analog: 8.5 hrs Digital: 12 hrs NiMH 1300 mAh BatteryAnalog: 8 hrs Digital: 11 hrsAnalog: 8 hrs Digital: 11 hrsMOTOTRBO ™ Portable Radio SpecificationsDisplay UHFNon-GPS XPR ™ 6500GPSXPR ™ 6550Non-GPS GPSNon-Display UHFXPR ™ 6300XPR ™ 6350*TTFF (Time To First Fix) Cold Start< 1 minute< 1 minute TTFF (Time To First Fix) Hot Start< 10 seconds< 10 secondsHorizontal Accuracy< 10 meters< 10 metersFactory Mutual ApprovalsMOTOTRBO XPR Portable series radios have been certifi ed by FM Approvals in accordance with Canada and U.S. Codes as intrinsically safefor use in Class I, II, III, Division 1, Groups C,D,E,F,G, when properly equipped with a Motorola FM approved battery option. They are alsoapproved for use in Class I, Division 2, Groups A, B, C, D.*Coming SoonSpecifi cations subject to change without notice. All specifi cations shown are typical. Radio meets applicable regulatory requirements. Version 4 03/07Motorola, Inc.United States:1309 E. Algonquin RoadSchaumburg, Illinois 60196Phone: 1-800-422-4210TTY: 1-800-522-5210Fax: 1-800-622-6210MOTOROLA and the Stylized M Logo are registered in the U.S. Patent and Trademark Offi ce. All other product or service names are the property of their registered owners. © Motorola, Inc. 2007 MD-EU/TRBO/PORTABLE。


p.35p.6/supportHelpClose T opicLorem ipsum dolor sit amet, consectetur adipiscing elit. Nunc consectetur lacus at erat rutrum vestibulum. Quisque vestibulum pretium.Questions БългарияГрижа за клиента02 4916 273(Ηационапен номер)België/Belgique Klantenservice/ Service Consommateurs 070 700 035(0.15€/min.)Bosna i Hercegovina Potpora potrošačima 033 941 251(Lokalni poziv)СрбијвPotpora potrošačima 011 321 6840(Lokalni poziv)All registered and unregistered trademarks are the property of their respective owners. Specifications are subject to change without notice.Philips and the Philips’ shield emblem are registered trademarks of Koninklijke Philips N.V. and are used under license from Koninklijke Philips N.V.2014 © TP Vision Europe B.V. All rights reserved. Česká republika Zákaznická podpora 228 880 895(Mistni tarif)Danmark Kundeservice 3525 8314Deutschland Kundendienst ***********(Zum Festnetztarif ihres Anbieters)ΕλλάδαΤμήμα καταναλωτών2111983028(Διεθνής κλήση)Eesti Klienditugi 6683061(Kohalikud kõned)España Atención al consumidor 902 88 10 83(0,10€ + 0,08€/min.)France Service Consommateurs 01 57 32 40 50(coût d’un appel local sauf surcoût éventuel selon opérateur réseau)Hrvatska Potpora potrošačima 01 777 66 01(Lokalni poziv)Ireland Consumer Care 0818 210 140(National call)Italia Servizio Consumatori 02 45287014(Chiamata nazionale)Қазақстан Республикасыбайланыс орталығы810 800 2000 00 04(стационарлық нөмірлерден Қазақстан Республикасы бойынша қоңырау шалу тегін)Latvija Klientu atbalsts 6616 3263(Vietĕiais tarifs)Lietuva Klientų palaikymo tarnyba 8 52140293(Vietinais tarifais)Luxembourg Service Consommateurs 2487 1100(Appel national)/(Nationale Ruf)Magyarország Ügyfélszolgálat (06 1) 700 8151(Belföldi hívás)Nederland Klantenservice ***********(0,10€/min.)Norge Forbrukerstøtte 22 97 19 14Österreich Kundendienst 0820 40 11 33(0,145€/Min.)Республика БеларусьКонтакт Центр8 10 (800) 2000 00 04(бесплатный звонок по Республике Беларусь со стационарных номеров)Российская ФедерацияКонтакт Центр8 (800) 220 00 04бесплатный звонок по РоссииPolska Wsparcie Klienta 22 3971504(Połączenie lokalne)Portugal Assistência a clientes 707 78 02 25(0,12€/min. – Móvel 0,30€/min.)România Serviciul Clienţi 031 6300042 (Tarif local)Schweiz/Suisse/Svizzera Kundendienst/ S ervice Consommateurs/Servizio Consumatori 0848 000 291(0,081 CHF/Min)Slovenija Skrb za potrošnike 01 8888 312(Lokalni klic)Slovensko Zákaznícka podpora 02 - 33215493(vnútroštátny hovor)Suomi Finland Kuluttajapalvelu 09 8862 5040Sverige Kundtjänst 08-5792 9096Türkiye Tüketici Hizmetleri 444 8 445УкраїнаСлужба підтримки споживачів0-800-500-480(дзвінки зі стаціонарних телефонів безкоштовні)United Kingdom Consumer Care ***********(5p/min BT landline)Argentina Consumer Care ***********Buenos Aires Consumer Care ***********Brasil Suporte ao Consumidor ***********Brasil (São Paulo)Suporte ao Consumidor 2938 0245。
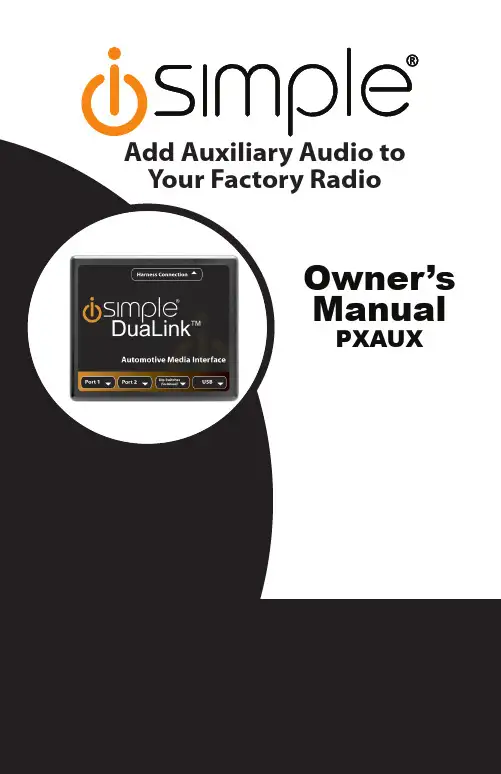
Add Auxiliary Audio to Your Factory RadioTable of ContentsPages 4445667778888-991010IntroductionCompatibility NotesDipswitch SettingsInstallationFord/Lincoln/Mercury ISFD531General Motors ISGM531General Motors ISGM532/ISGM533General Motors ISGM534General Motors ISGM535Honda ISHD531Hyundai ISHY531/ISHY532Mazda ISMZ531Nissan ISNI531/ISNI532Toyota ISTY531Volkswagen ISVW532TroubleshootingPXAUX & Optional Add-onsFactory Radio (not included)Vehicle Specific Harness(actual harness may vary)ORORMP3 Player (not included)DVD Player(not included)RCA InputRCA Input 3.5mm Input3.5mm Input PXAUX InterfaceYour Audio Devices4IntroductionThank you for purchasing the iSimple ® PXAUX. The PXAUX is designed to provide endless hours of listening pleasure from your factory radio. T o ensure that your auxiliary audio input performs correctly with your radio, we recommend that you read this entire manual before attempting installation of the PXAUX. This interface allows connectivity for two auxiliary audio inputs.Dipswitch Settings(ISTY531 & ISHD531 ONLY)Dipswitch 1Dipswitch 2Dipswitch 3Dipswitch 4All Vehicles with XM button Off Off Off Off All vehicles without XM buttonOff Off On Off 2010+ Vehicles equipped with navigationOn Off Off Off All Vehicles with AM ‐SAT button Off Off Off Off All Vehicles without AM ‐SAT button Off Off On Off Scion All VehiclesOff Off Off Off 2010‐2011 Camry with AM ‐SAT buttonOn Off Off Off 2012+ vehicles equipped with non ‐navigation touchscreen radioOn Off Off Off Vehicles equipped with navigationOn Off Off Off All Other Vehicles with AM ‐Sat button OffOff Off Off All other Vehicles Wwithout AM ‐Sat button Off Off On Off LexusApplicationHonda ToyotaInstallation1.When making electrical connections it is always recommended thatthe vehicle’sbattery be disconnected from the electrical system before performing the installation.Please Note: If the radio is equipped with a built in CD Changer, please remove ALL discs before proceeding to prevent damage to the radio’s CD mechanism.2.Carefully remove the trim panels covering the bolts that secure theradio into the dash cavity. Remove these bolts, and carefully pull the radio from the dashof the vehicle. This will provide access to the factory radio connectors where youwill connect the vehicle specific harness.3.Disconnect the factory harness (if present) from the back of the radio. If you are installing the PXAUX into a T oyota or Honda with an external CD Changer and you are using CD Changer emulation mode, the CD Changer will have to be disconnected at the changer location for proper operation.4.Connect the 8-Pin auxiliary input cables to the ports on the PXAUX5.Plug in the male connectors on the vehicle specific harness into the port on the back of the radio. Next, connect the factory harness (if present) into the female connector on the vehicle specific harness. Be sure to make a firm connection but do not force it. Plug the Black micro-fit 24-pin connector on the vehicle specific harness into the PXAUX.6.T o complete the installation secure the PXAUX into the cavity in the dash behind the radio. Be sure that the cables and interface modules are not near moving parts or sharp metal edges as they may damage the cables. T o prevent rattling noises inside the dash, use zip ties, tape, or other fasteners to mount the interfaces securely.7.With all connections made, reconnect the vehicle’s battery, insert the key into the ignition, and turn the vehicle on. Check for proper operation of the PXAUX before reinstalling the factory dash panels.8.Note: The first time you access the PXAUX, your radio may display “DEV INIT” while the device is initializing. If this is displayed, please wait one minute then cycle the ignition off and on. Then access PXAUX mode again to begin normal operation.5Ford/Lincoln/Mercury ISFD531 Operation Selecting AUX:Press the “AUX” or “SAT” button (SR123 icon on navigation radio) until “AUX1” is displayed on the screen. When you press the “AUX” button, you will see the corresponding “SAT” modes, a slight delay, and then the current mode will be displayed.Selecting between AUX1 / AUX2Press the “AUX” or “SAT” button (SR123 icon on navigation radio) until “AUX1” or “AUX2” is displayed on the screen.General Motors ISGM531 OperationNon NavigationSelecting AUXPress the “BAND” button a few times until “XM” is displayed on the screen. Immediately turn the rotary knob in the top right hand corner to scroll through available sources. Once “AUX1” is displayed, press the “FWD>>” button to select it. If you are currently in “SAT” mode you will need to press the “►I SEEK” button instead of “FWD>>” to select “AUX1” mode.Selecting between AUX1 / AUX2If you are currently in “AUX1” or “AUX2” mode turn the rotary knob to cycle through the available sources. Once “AUX1” or “AUX2” is displayed on the screen press the “FWD>>” button to select it.Navigation radio operationSelecting AUXPress the “FM” button then press the “XM” button. Immediately turn the rotary tune knob in the top right hand corner to scroll through available sources. Once “AUX1” is displayed, press the “►” button on the screen to select it. If you are currently in “SA T” mode, press the “SEEK ►I” button instead of the “►” button to select “AUX” mode.Selecting between AUX1 / AUX2If you are currently in “AUX1” or “AUX2” mode, turn the rotary knob to cycle through the available sources. Once “AUX1” or “AUX2” is displayed on the screen, press the “►” button to select it..6General Motors ISGM532/ISGM533Operation Selecting AUXPress the “BAND” button a few times until XM is displayed on the screen. Immediately turn the rotary knob to scroll through available sources. Once “AUX1” is displayed press PRESET 2 to select it.Selecting between AUX1 / AUX2If you are currently in “AUX1” or “AUX2” mode turn the rotary knob to cycle through the available sources. Once “AUX1” or “AUX 2” is displayed on the screen press PRESET 2 to select it.General Motors ISGM534 Operation Selecting AUXPress the “AM/FM” button and then the “XM” button. Turn the rotary tune knob clockwise until “AUX1” is displayed. Press the “>>>>>” button to select it. (It may be necessary to press the “CA T” button in order to make the “>>>>>” button visible.) Selecting between AUX1 / AUX2Press the “AM/FM” button and then the “XM” button. Turn the rotary tune knob clockwise until “AUX2” is displayed. Press the “>>>>>” button to select it. (It may be necessary to press the “CA T” button in order to make the “>>>>>” button General Motors ISGM535 OperationNon NavigationSelecting AUXPress the “BAND” button until “XM” is displayed on the screen. Immediately turn the rotary knob to scroll through available sources. Once “AUX1” is displayed, press PRESET 6 to select it.Selecting between AUX1 / AUX2If you are currently in “AUX1” or “AUX2” mode turn the rotary knob to cycle through available sources. Once “AUX1” or “AUX2” is displayed on the screen press PRESET 6 to select it..7Honda/Acura ISHD531 Operation Satellite Radio ModeSelecting AUXPress the “XM” button to switch to SAT. Immediately turn the rotary knob or press TUNE UP to scroll through available sources. Once “AUX1” is displayed, press PRESET 6 to select it.Selecting between AUX1 / AUX2Press the “XM” button to switch to SAT. Immediately turn the rotary knob or press TUNE UP to scroll through available sources. Once “AUX2” is displayed, press PRESET 6 to select it.CD Changer ModeSelecting AUXPress the “DISC” or “AUX” button to switch to CD Changer mode. You are now in the AUX1 mode.Selecting between AUX1 / AUX2If you are currently in “AUX1” or “AUX2” mode press the “DISC ▲” button to cycle between AUX1” & “AUX 2” .Disc up and down are Preset 5 & Preset 6 Hyundai ISHY531/ISHY532 Operation Selecting AUXPress the “XM” button to cycle through the PXAUX sources until “AUX1” or “AUX2” is displayed.Selecting between AUX1 / AUX2Press the “XM” button to cycle through the PXAUX sources until “AUX1” or “AUX2” is displayed.Mazda ISMZ531 OperationSelecting AUXPress the “SAT” button to enter satellite radio mode. Press the “CATEGORY UP” or “CATEGORY DOWN” button to scroll through the available sources until “AUX 1” or “AUX 2” is displayed. If satellite radio is present, the PXAUX sources will show up AFTER the last satellite radio category.Selecting between AUX1 / AUX2Press the “CATEGORY UP” or “CATEGORY DOWN” button to scroll through the available sources until “AUX 1” or “AUX 2” is displayed.8Nissan ISNI531/ISNI532 Operation Selecting AUXRadios equipped with a “SAT” buttonPress the “FM” button and then the “SAT” button. Immediately press the “SEEK>>” button to scroll through the available sources. Once “AUX1” is displayed, press the “<<TUNE” button to select it.Radios equipped with a “RADIO” or “AM/FM/SAT” button Press the “RADIO” or “AM/FM/SAT” button a few times until “SAT” is displayed. Immediately press the “SEEK ▲” button to scroll through the available sources. Once “AUX1” is displayed, press the “TUNE ▼” button to select it. Selecting between AUX1 / AUX2For radios that have a “SAT” buttonPress the “FM” button and then the “SAT” button. Immediately press the “SEEK >>” button to scroll through the available sources. Once “AUX2” is displayed, press the “<<TUNE” button to select it.For radios equipped with a “RADIO” or “AM/FM/SAT” button Press the “Radio” or “AM/FM/SAT” button a few times until “SAT” is displayed. Immediately press the “SEEK▲” button to scroll through the available sources. Once “AUX2” is displayed, press the “TUNE ▼” button to select it. Toyota/Scion/Lexus ISTY531 Operation Satellite Radio ModeSelecting AUXPress the “AM/SAT” button to switch to AM then again to switch back to SAT. Immediately turn the rotary knob to scroll through available sources. Once “AUX1” is displayed, press PRESET 6 to select it.Selecting between AUX1 / AUX2If you are currently in “AUX1” or “AUX2” mode turn the rotary knob to cycle through the available sources. Once “AUX1” or “AUX2” is displayed on the screen press PRESET 6 to select it.910Volkswagen ISVW532 OperationSelecting AUXPress the “CD” button twice to switch the radio to the CD Changer source. This will access “AUX1”.Selecting between AUX1 / AUX2T o select “AUX2” press preset #2. T o select “AUX1” press preset #1.SymptomCause Remedy Radio shows “DEV INIT”PXAUX device is initializing.This only occurs the first time the PXAUX is powered on. Wait a few minutes, cycle ignition off and on then enter SAT mode.Radio does not recognize module.Dipswitches are not set properly or the unit did not initialize properly.See connection diagram for proper dipswitch setting. If the dipswitches are set properly disconnect the 24 pin micro-fit connector from the PXAUX for 5 minutes to reset the interface. No sound.Auxiliary cable is not connected to accessory or PXAUX.Verify that the auxiliary cable is connected to the PXAUX and the accessory.TroubleshootingCD Changer ModeSelecting AUXPress the “DISC” or “AUX” button to switch to CD Changer mode. You are now in the AUX1 mode.Selecting between AUX1 / AUX2If you are currently in “AUX1” or “AUX2” mode press the “DISC ▲” button to cycle between AUX1” & “AUX 2” .。
Standard and Dual Control Head Packages Available P25 Interoperability CapablePerformance in Critical SituationsSafety, productivity, and efficiency demand reliable communication. Challenges increase across wideareas and in communities that are growinggeographically. For the people who keep government and commercial institutions functioning, staying linked is a vital need. Motorola has specifically designed the PM1500 Professional Series two-way mobile radio to meet the needs of public safety, public works, utility, transportation and construction professionals. The PM1500 offers durability, extensive signaling, and a standard external speaker for users who communicate under tough, loud conditions and must depend on clear communication.255 Channels Multicolored LED Indicators Large Channel and Push Button On/Off Volume Knobs Backlit 8-Character Alphanumeric Display User friendly icons and soft menu so you easily view status and access features. Display for viewing of channel names and Caller ID Programmable Emergency Button Alerts dispatcher in an emergency situation4 Programmable ButtonsEasy access to favorite features. Optional key-pad microphone allows you to scroll through the menu and access up to 16 programmable features7.5 Watt External Speaker Allows for clear, crisp communication in loud environmentsDual Control Head OptionEnables multiple radio control heads to belocated within the same vehicle. Available with independent volume and backlight display P25 Conventional Upgradeable A single software upgrade makes this radio P25 Interoperable and able to interact with other networks in times of crisisPM1500 Standard Package Palm Microphone 7.5 Watt External Speaker Mounting Hardware 20 Ft. Power Cable 17 Ft. Remote Mount Cable Ignition Sense Cable User Guide CD2-Y ear Standard WarrantyPM1500 Dual Control Head Standard Package Also Includes Two Palm Microphones One 7.5 Watt External Speaker One 13 Watt External Speaker Two 17 Ft. Remote Mount Cables Additional Mounting BracketStandard Features2External Speaker HSN4038AStubby, Roof MountAntenna HAD4007AFoot Switch HLN5113BExternalAlarm Cable HKN4258CKeypad Microphone HMN4079C20 Foot Power CordHKN4192BQuality that delivers under tough conditions...For a stronger, more efficient community.Additional PM1500 Features allow you to send and receive information in a variety of wayswith Quik-Call II™ , MDC1200, and DTMF SignalingSelective Call – Send and receive calls from a specific group or individual Call Alert – Send and receive alerts of incoming callsMDC1200 Signaling Only Features:Push-to-T alk ID – Identify your callsEmergency (Encode/Decode) – Alerts dispatcher in urgent situations Status/Message (Encode) – Allows radio to send pre-programmed messages Selective Radio Inhibit (Decode) – Allows system owner to disable stolen or missing radiosRadio Check (Decode) – Lets others check your radio statusPM1500 Programmable FeaturesChoose up to 16. Top features include: EmergencyAlerts dispatcher in urgent situationsRepeater T alkaroundUnit-to-unit communication, bypassing the repeater Channel ScanMonitors the scan list channels for any activity Zone Up/Zone DownAllows you to select alternate zones DimSets preferred volume level for radio speaker Nuisance Channel DeleteTemporarily deletes a specific channel from your scan mode if you no longer want to hear activity on that channelPM1500 Accessories:Customizing one radio or an entire fleetMicrophone To manage menus and converse conveniently SpeakersIdeal for extremely noisyenvironmentsPower CablesProviding power to suityour needs SwitchesFootswitches improve operating convenienceand safety Alarm CableExternal alarm cable foradded securityAntennasOptimize range and quality for different configurationsFor a complete listing of accessories and availability contact us today.3SPECIFICATIONSMOTOROLA and the Stylized M Logo are registered in the U.S. Patent and Trademark Office. All other product or service names are the property of their registered owners. © Motorola, Inc. 2007.MD-EUPM1500BROCHA 5/07Accelerated Life T estMotorola’s Accelerated Life Test (ALT) is a developmental process of rigorous laboratory testing that simulates years of field use. Motorola has a firm commitment to quality and reliability. These radios have been designed, manufactured and tested to achieve high levels of component and workmanship quality. Motorola radios are designed to minimize costly repairs and downtime.,。
摩托罗拉MD481无绳电话使用说明书一.性能介绍out of range 超出范围 (由于主机失电后,需要从新对吗)Lin in Use 其他电话正在使用中TALK 本电话使用中(相等于已经拿起听筒或已经拨号或还没有拨号)MUTE 无声(对方听不到你的说话声,你可以听到对方说话声)UNMUTE 解除无声HOLD 保持(听不到对方说话声同时对方也听不到你的说话声)UNHOLD 解除保持DIAL 拨号(当选择需要拨出的号码时)BACK 返回(返回上级菜单)CALL 来电(来电话或已经来过电话)Call Who? (呼谁?)Answer ON (应答开启)PRIVATE (私人电话本)也就是存在独立子机上电话本二.功能按键介绍:“▲■” 键(播放留言);播放/停止播放。
“Del” 键(删除留言);在播放当前留言时,按“Del”键就删除当前播放的留言。
“(ON)flash” 键(通话或拨号)“(OFF)cancel”键(结束或取消)“▲▼” 键(查阅来电);或选中拨号。
OPTIONS(选项) FORMAT(格式);号码格式Delete (删除此条来电)Delete all(删除所有来电)Store (储存电话)Private (储存到私人电话本)Shared (储存到共享电话本)“handsfree”键(免提);免提/听筒“redial” 键(重拨);再按“▲▼”键,查阅已拨电话或选中重拨电话(预留5组已拨电话)。
“intercom”键(呼叫子机或座机);可以有选择某话机或全部话机对讲(直线距离50米)。
“page” 键(呼叫子机);呼叫所有子机进行对讲(子机无此按键)。
“memo” 键(家人留言);按住“memo”键约3秒,听到"嘀"的一声后开始留言,此时要按住不不放直至录音完毕后再松开“memo”键即可(子机无此按键)。
三.通话状态下功能键介绍:1.MUTE/UNMUTE(受话关/受话开)2.HOLD/UNHOLD(保持/静音)指示灯:1.“in use/voice mail”接听/有留言。
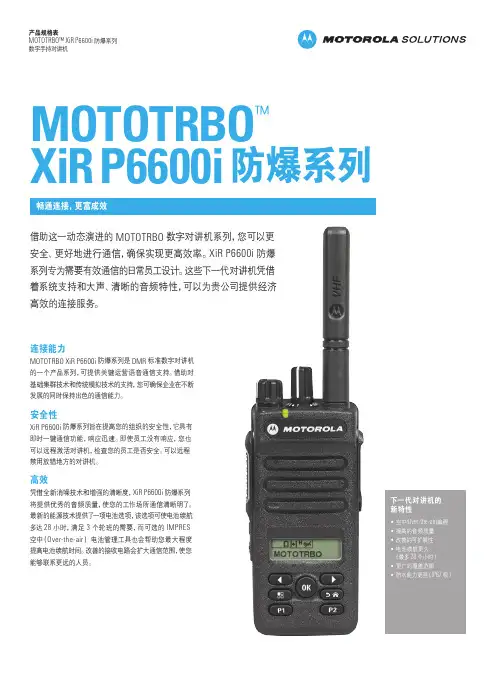
摩托罗拉xirp6600i使用说明书
1、讲话和收听:
用无线对讲机相互通话时,同一群组的对讲机必须设定同一频道(1至22)、干扰消除静音码(0至38)。
在与其它无干扰消除静音码的群组通话时,请将T-5720的干扰消除静音码设为0。
为提高通话清晰度,嘴离麦克风5到7.5厘米左右讲话。
按住通话键(PTT 键)不放,讲话。
当对讲机处在发射状态时,红色指示灯常亮。
松开通话键(PTT键)结束通话(按住不放讲话,释放为收听)。
2、设置频道:
开机,按一下菜单键(MENU键),即进入频道选择菜单,当前的频道号码(屏幕中间的大数字)开始闪烁。
用滚动键“+”或“-”设置新的频道号码。
然后按通话键(PTT键)保存频道设置。
3、干扰消除静音码(哑音):
干扰消除静音码使您选择不同的代码组合,从而将干扰减至最小。
设置干扰消除静音码,按菜单键(MENU键)两下,干扰消除静音码(屏幕右上角的小数字)开始闪烁。
用滚动键“+”或“-”设置新的干扰消除静音码。
然后按通话键(PTT键)保存频道设置。
您可以为每一个频道设置特别的干扰消除静音码。
要设置频道及干扰消除静音码组合,按菜单键(MENU键)及选择键“+”或“-”设置频道。
再按菜单键(MENU键)及选择键“+”或“-”设置干扰消除静音码。
按通话键(PTT键)退出菜单,保存频道及干扰消除静音码的组合。
4、音量:
按下监听建(MON键)的同时旋转开关音量旋钮,直到调到合适的音量。
顺时针旋转音量增大,逆时针旋转音量减小。
5、监听:
通话前,您可以通过按监听键(MON键)监听对讲机的音量大小、调解音量或检查该频道的活动情况。
6、60秒自动停止发射:
通过防止意外发射,延长电池使用时间,在通话键(PTT键)按下连续60秒后,对讲机会发出一种连续警告音,并自动停止发射。