
princ-ch08-presentation
- 格式:ppt
- 大小:906.00 KB
- 文档页数:35


Pointing Devices and Keyboard User Guide© Copyright 2008 Hewlett-Packard Development Company, L.P.Microsoft and Windows are U.S. registered trademarks of Microsoft Corporation.The information contained herein is subject to change without notice. The only warranties for HP products and services are set forth in the express warranty statements accompanying such products and services. Nothing herein should be construed as constituting an additional warranty. HP shall not be liable for technical or editorial errors or omissions contained herein.First Edition: August 2008Document Part Number: 485059-001Product noticeThis user guide describes features that are common to most models. Some features may not be available on your computer.Table of contents1 Using pointing devicesSetting pointing device preferences (2)Using the TouchPad (2)Using the pointing stick (2)Connecting an external mouse (2)2 Using the keyboardUsing hotkeys (3)Displaying system information (fn+esc) (4)Initiating Sleep (fn+f3) (4)Switching the screen image (fn+f4) (5)Viewing battery charge information (fn+f8) (5)Decreasing screen brightness (fn+f9) (5)Increasing screen brightness (fn+f10) (5)Activating the ambient light sensor (fn+f11) (5)3 Using HP Quick Launch ButtonsAccessing the Quick Launch Buttons control panel (8)Displaying the Q Menu (9)4 Using HP QuickLook 2Configuring QuickLook 2 (11)Using manual information collection (11)Using QuickLook 2 (12)For more information (12)5 Using keypadsUsing an optional external numeric keypad (14)6 Cleaning the TouchPad and keyboardIndex (16)iiiiv1Using pointing devicesComponent Description(1)Pointing stick*Moves the pointer and selects or activates items on the screen.(2)Left pointing stick button*Functions like the left button on an external mouse.(3)TouchPad*Moves the pointer and selects or activates items on the screen.(4)Left TouchPad button*Functions like the left button on an external mouse.(5)Center TouchPad button*Functions like the center button on an external mouse.(6)Right TouchPad button*Functions like the right button on an external mouse.(7)TouchPad scroll zone Scrolls up or down.(8)Right pointing stick button*Functions like the right button on an external mouse.(9)Center pointing stick button*Functions like the center button on an external mouse.*This table describes factory settings. To view or change pointing device preferences, select Start>Control Panel>Hardwareand Sound>Mouse.1Setting pointing device preferencesUse Mouse Properties in Windows® to customize settings for pointing devices, such as buttonconfiguration, click speed, and pointer options.To access Mouse Properties, select Start>Control Panel>Hardware and Sound>Mouse.Using the TouchPadTo move the pointer, slide your finger across the TouchPad surface in the direction you want the pointer to go. Use the TouchPad buttons like the corresponding buttons on an external mouse. To scroll up and down using the TouchPad vertical scroll zone, slide your finger up or down over the lines.NOTE:If you are using the TouchPad to move the pointer, you must lift your finger off the TouchPadbefore moving it to the scroll zone. Simply sliding your finger from the TouchPad to the scroll zone will not activate the scrolling function.Using the pointing stickPress the pointing stick in the direction you want to move the pointer on the screen. Use the left andright pointing stick buttons as you would the left and right buttons on an external mouse.Connecting an external mouseYou can connect an external USB mouse to the computer using one of the USB ports on the computer.A USB mouse can also be connected to the system using the ports on an optional docking device.2Chapter 1 Using pointing devices2Using the keyboardUsing hotkeysHotkeys are combinations of the fn key (1) and either the esc key (2) or one of the function keys (3).The icons on the f3, f4, and f8 through f11 keys represent the hotkey functions. Hotkey functions andprocedures are discussed in the following sections.Function HotkeyDisplay system information.fn+escInitiate Sleep.fn+f3Switch the screen image.fn+f4Display battery information.fn+f8Decrease screen brightness.fn+f9Increase screen brightness.fn+f10Activate the ambient light sensor.fn+f11Using hotkeys3To use a hotkey command on the computer keyboard, follow either of these steps:●Briefly press the fn key, and then briefly press the second key of the hotkey command.– or –●Press and hold down the fn key, briefly press the second key of the hotkey command, and thenrelease both keys at the same time.Displaying system information (fn+esc)Press fn+esc to display information about system hardware components and the system BIOS version number.In the Windows fn+esc display, the version of the system BIOS (basic input-output system) is displayed as the BIOS date. On some computer models, the BIOS date is displayed in decimal format. The BIOS date is sometimes called the system ROM version number.Initiating Sleep (fn+f3)CAUTION:To reduce the risk of information loss, save your work before initiating Sleep.Press fn+f3 to initiate Sleep.When Sleep is initiated, your information is stored in system memory, the screen is cleared, and power is conserved. While the computer is in the Sleep state, the power lights blink.The computer must be on before you can initiate Sleep.NOTE:If a critical battery level occurs while the computer is in the Sleep state, the computer initiates Hibernation and the information stored in memory is saved to the hard drive. The factory setting forcritical battery action is Hibernate, but this setting can be changed using Power Options in WindowsControl Panel.To exit Sleep, briefly press the power button.The function of the fn+f3 hotkey can be changed. For example, you can set the fn+f3 hotkey to initiate Hibernation instead of Sleep.NOTE:In all Windows operating system windows, references to the sleep button apply to the fn+f3hotkey.4Chapter 2 Using the keyboardSwitching the screen image (fn+f4)Press fn+f4 to switch the screen image among display devices connected to the system. For example, if a monitor is connected to the computer, pressing fn+f4 alternates the screen image from the computer display to the monitor display to a simultaneous display on both the computer and the monitor.Most external monitors receive video information from the computer using the external VGA videostandard. The fn+f4 hotkey can also alternate images among other devices receiving video information from the computer.The following video transmission types, with examples of devices that use them, are supported by the fn+f4 hotkey:●LCD (computer display)●External VGA (most external monitors)●S-Video (televisions, camcorders, DVD players, VCRs, and video capture cards with S-Video-injacks)●HDMI (televisions, camcorders, DVD players, VCRs, and video capture cards with HDMI ports)●Composite video (televisions, camcorders, DVD players, VCRs, and video capture cards withcomposite-video-in jacks)NOTE:Composite devices and S-Video devices can be connected to the system only by usingan optional docking device.Viewing battery charge information (fn+f8)Press fn+f8 to display charge information for all installed batteries. The display indicates which batteries are charging and reports the amount of charge remaining in each battery.Decreasing screen brightness (fn+f9)Press fn+f9 to decrease screen brightness. Hold down the hotkey to decrease the brightness levelincrementally.Increasing screen brightness (fn+f10)Press fn+f10 to increase screen brightness. Hold down the hotkey to increase the brightness levelincrementally.Activating the ambient light sensor (fn+f11)Press fn+f11 to activate and deactivate the ambient light sensor.Using hotkeys53Using HP Quick Launch Buttons The HP Quick Launch Buttons enable you to quickly open programs, files, or Web sites you usefrequently. You can use the factory settings, which are described in the following table. Or you canreprogram the buttons by opening the Q Menu in the Quick Launch Buttons control panel.The Quick Launch Buttons include the info button (1), the presentation button (2), and the calculatorbutton (3).The following table describes the factory settings for the Quick Launch Buttons.NOTE:Button functions vary, depending on the software installed on your computer.Component Description(1)Info button Launches Info Center, which provides shortcuts to features, suchas the following:NOTE:Some of the features listed may not be included with yourcomputer model.●HP Wireless Assistant●HP ProtectTools Suite6Chapter 3 Using HP Quick Launch ButtonsComponent Description●HP 3D DriveGuard●HP Help and Support●HP Notebook Accessories Product Tour●HP Product User Guides●HP Connection Manager●HP Software Setup●Presto! BizCard 5(2)Presentation button Opens the Presentation Options window, which enables you tostart a frequently used presentation, file, program, or Web site. Youcan also adjust the display settings for optimum viewing.(3)Calculator button Launches the Windows calculator.7Accessing the Quick Launch Buttons control panel The Q Menu in the Quick Launch Buttons control panel enables you to set your own preferences for the info button and the presentation button. Both buttons can be used to launch frequently used programs.You can open the Quick Launch Buttons control panel in any of the following ways:●Select Start>Control Panel>Hardware and Sound>Quick Launch Buttons.– or –Right-click the HP Quick Launch Buttons icon in the notification area, and then select one of thefollowing tasks:◦Adjust HP Quick Launch Buttons Properties◦Launch Q Menu◦Turn Presentation On◦Turn Ambient Light Sensor Off8Chapter 3 Using HP Quick Launch ButtonsDisplaying the Q MenuThe Q Menu provides quick access to the Quick Launch Button settings.To display the Q Menu on the desktop:▲Right-click the HP Quick Launch Buttons icon in the notification area, at the far right of the taskbar, and then select Launch Q Menu.NOTE:For more information about the Q Menu, refer to the software Help.Displaying the Q Menu94Using HP QuickLook 2HP QuickLook 2 enables you to see your Microsoft® Outlook e-mail, calendar, contact, and taskinformation without starting the operating system. After QuickLook 2 has been configured, you canquickly access your important information when the computer is off or in Hibernation by pressing the info button.10Chapter 4 Using HP QuickLook 2Configuring QuickLook 2To configure QuickLook 2, follow these steps:1.Open Microsoft® Outlook.QuickLook 2 displays 2 icons on the Outlook toolbar:The QuickLook 2 Preferences icon enables you to set automatic data collection preferences.The QuickLook Capture icon enables you to manually initiate QuickLook 2 information capture in addition to automatic retrieval.NOTE:For most tasks, you will use the QuickLook 2 Preferences icon.2.Click the QuickLook 2 Preferences icon on the Outlook toolbar.The QuickLook 2 Preferences dialog box opens.3.Set the following preferences:●When you want QuickLook 2 to capture information from Outlook and save it on your harddrive●What types of data you want to be displayed for your calendar, contacts, e-mail, and tasks4.Select security, if needed, and set a personal identification number (PIN).Using manual information collectionEven if you have configured QuickLook 2 to collect information at preset intervals, you can also manually collect and save Outlook information any time you are logged on to your Outlook account.Configuring QuickLook 211Using QuickLook 2The info button behavior depends on the power state of the computer, as shown in the following table.Power state Info button behaviorOff Opens QuickLook.Hibernation Opens QuickLook.On Opens Info Center.Sleep Returns the computer to its previous state.NOTE:QuickLook 2 is enabled at the factory. If you disable QuickLook 2 in the system BIOS, pressing the info button opens Info Center when the computer is on. Pressing the info button when the computer is off, in Hibernation, or in the Sleep state has no effect.For more informationFor more details about setting up and using QuickLook 2, refer to the QuickLook 2 software Help.12Chapter 4 Using HP QuickLook 25Using keypadsThe computer has an integrated numeric keypad and also supports an optional numeric keypad or an optional external keyboard that includes a numeric keypad.Component Description(1)Num lock light On: Num lock is on.(2)num lk key Alternates between the navigation and numeric functions on theintegrated numeric keypad.NOTE:The keypad function that is active when the computer isturned off will be reinstated when the computer is turned back on.(3)Integrated numeric keypad Can be used like the keys on an external numeric keypad.13Using an optional external numeric keypadKeys on most external numeric keypads function differently according to whether num lock is on or off.(Num lock is turned off at the factory.) For example:●When num lock is on, most keypad keys type numbers.●When num lock is off, most keypad keys function like the arrow, page up, or page down keys.When num lock on an external keypad is turned on, the num lock light on the computer is turned on.When num lock on an external keypad is turned off, the num lock light on the computer is turned off.To turn num lock on or off on an external keypad as you work:▲Press the num lk key on the external keypad, not on the computer.14Chapter 5 Using keypads6Cleaning the TouchPad and keyboard Dirt and grease on the TouchPad can cause the pointer to jump around on the screen. To avoid this,clean the TouchPad with a damp cloth, and wash your hands frequently when using the computer.WARNING!To reduce the risk of electric shock or damage to internal components, do not use avacuum cleaner attachment to clean the keyboard. A vacuum cleaner can deposit household debris on the keyboard surface.Clean the keyboard regularly to prevent keys from sticking and to remove dust, lint, and particles thatcan become trapped beneath the keys. A can of compressed air with a straw extension can be used to blow air around and under the keys to loosen and remove debris.15IndexAambient light sensorhotkey5Bbattery charge information5 buttonsinfo6pointing stick1presentation7Quick Launch6TouchPad1Ccomposite video5Ddisplayimage, switching5screen brightness hotkeys5 Ffn key3function keys3HHDMI5hotkeysambient light sensor5battery charge information5 decreasing screenbrightness5description3displaying systeminformation4increasing screenbrightness5initiating Sleep4switching screen image5using4HP QuickLook 210Iinfo button6integrated numeric keypad,identifying13Kkeyboard hotkeys, identifying3keypad, externalnum lock14using14keypad, integratedidentifying13Llight, num lock13Mmouse, externalconnecting2setting preferences2Nnum lk key, identifying13num lock light, identifying13num lock, external keypad14Ppointing devicesidentifying1setting preferences2using2pointing stickidentifying1using2pointing stick buttons,identifying1presentation button7QQuick Launch Buttons6Quick Launch Buttons controlpanel6SS-Video5screen brightness hotkeys5screen image, switching5scroll zone, TouchPad1Sleep hotkey4system information hotkey4TTouchPadidentifying1using2TouchPad buttons,identifying1TouchPad scroll zone,identifying1Vvideo transmission types516Index。

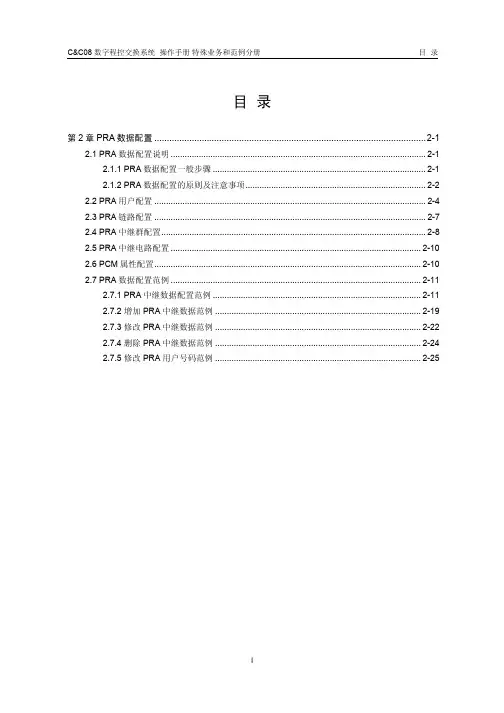
目录第2章 PRA数据配置.............................................................................................................2-12.1 PRA数据配置说明.............................................................................................................2-12.1.1 PRA数据配置一般步骤...........................................................................................2-12.1.2 PRA数据配置的原则及注意事项.............................................................................2-22.2 PRA用户配置....................................................................................................................2-42.3 PRA链路配置....................................................................................................................2-72.4 PRA中继群配置.................................................................................................................2-82.5 PRA中继电路配置...........................................................................................................2-102.6 PCM属性配置..................................................................................................................2-102.7 PRA数据配置范例...........................................................................................................2-112.7.1 PRA中继数据配置范例.........................................................................................2-112.7.2 增加PRA中继数据范例........................................................................................2-192.7.3 修改PRA中继数据范例........................................................................................2-222.7.4 删除PRA中继数据范例........................................................................................2-242.7.5 修改PRA用户号码范例........................................................................................2-25第2章 PRA数据配置2.1 PRA数据配置说明PRA就是基群速率接入,其接口物理层协议I.431是以PCM的ITU-T G.703建议为基础,存在E1标准和T1标准,对应于不同的速率。
