勺轮播种机说明书(DOC)
- 格式:doc
- 大小:3.80 MB
- 文档页数:20
Fertilizer and Seed SpreaderACCURA1600be strong,beKUHN.br7ACCURA 1600 -SIMPLE AND EFFICIENT2TRIANGULAR DISTRIBUTION PROFILEThe CDA system creates a triangular distribution profile,in which the total distribution width is actually much larger than the defined working width.On the next pass,it “fills in”the edges of the triangle for even distribution in the field.Triangular dispersion patterns create wide working widths and precise material placement,even in windy conditions.The triangular distribution profile reduces the impact of conduction errors, waste of inputs and poisoning of plants due to excess fertilizersThe Accura 1600offers excellent application rate control,high quality distribution patterns and easy adjustments.This simple and affordable machine helps to maximize the yield potential of your crops,reducing input costs.Compact and maneuverable,it is a great option for mixed farms,special crops and operations with grain crops in smaller areas,providing wide working widths with precision.COAXIAL DISTRIBUTION ADJUSTMENT -CDAWith the exclusive and patented system CDA -Adjustment of Coaxial Distribution,it is the only one in the Brazilian market that manages to provide a coefficient of variation within European standards,below 12.5%.Two features make the CDA system unique:1.Distribution width adjustment system,which allows quick adaptation of various fertilizers and working widths,adjusting the fertilizer deposition point on the discs.It is an extremely ergonomic system,which does not require the adjustment of the blade of the discs.2.The floodgates are designed close to the center of the discs,allowing several points of supply for the reeds.This helps to ensure a constant flow of fertilization and a uniform pattern.ISOBUSThe software is simple to set up and the machine can work with any terminal that meets the appropriate industry standards.All of this results in an excellent return on investment foryou.53126IMPORTANT POINTSDifferent fertilizers, rates and widths, the Coaxial Distribution Adjustment system, helps to face these challengesThe agitator regulates the supply and promotes the flow of fertilizers. Rotating at 17 rpm,reduces damage and prevents dust formationConductive brush ensures product flow to the vanes. Deflectors reduce turbulence to ensure uniform flow Sealed gearbox prevents contaminationModifies the working width in a few seconds, changing the fertilizer drop point on the disc80°Progressive opening of the outlets creates a variation in the '' supply angle ''. High accuracy at any rate and speed445613I m p r e s s o n o B r a s i l -Y 92N 01G BAccura 1600Type ofhitch3 points Minimum tractor lift capacity (kg) 2.500 kg Disc drive system and agitator Mechanic Capacity (L)1.600Working width (m)12 –36 Standard distribution disc S8Activation of the outletsHydraulic Electronic Adjustment of the application rate Up to 475 kg / m (depending on product density)Outlet opening systemHydraulic actuator Electromechanical ActuatorHydraulic connections required on the tractor 2 double-acting valvesDisplayISOBUS (Optional display availability) *Adjusting the working width Manual or Automatic (with ISOBUS display)Hopper material Polyethylene Dimensions (m)1,30 x 1,53 x 2,37Distribution systemCoaxial Distribution Adjustment -CDARecommended working speeds (km/h))8 to 12Fertilizer identification guide anddistribution tablesApproximate empty weight (kg)350Standard OptionalSIMPLES E EFICIENTEACCURA 1600ESPECIFICAÇÕES TÉCNICASS2(12-18 m)S4 (18-24 m)S6(24-32 m)S8(30-36 m)DISTRIBUTION DISCSThe values shown are approximate. The exact distance depends on the propagation of the material. Consult the tables to determine the required disc for a specific material. Always use high quality fertilizer for long working lengths.*With electronic drive -ISOBUS, there is the availability of the Raven CR7 or Trimble GFX-750 displayKUHN DO BRASIL S.AArno Pini St, 1380, Passo Fundo -RSKuhn reserves the right to change its products,specifications and options without prior notice,free from the obligation to update previously marketed products.The images are illustrative and may contain options and versions different from the one presented,consult a Kuhn dealer for detailed information on the factory.The machines and equipment in this prospectus may be covered by at least one patent and /or a registered model.The marks mentioned in this document may be protected in one or more countries.For more information on KUHN products visit:.br.brKUHN dealerAlso find KUHN on social networks。
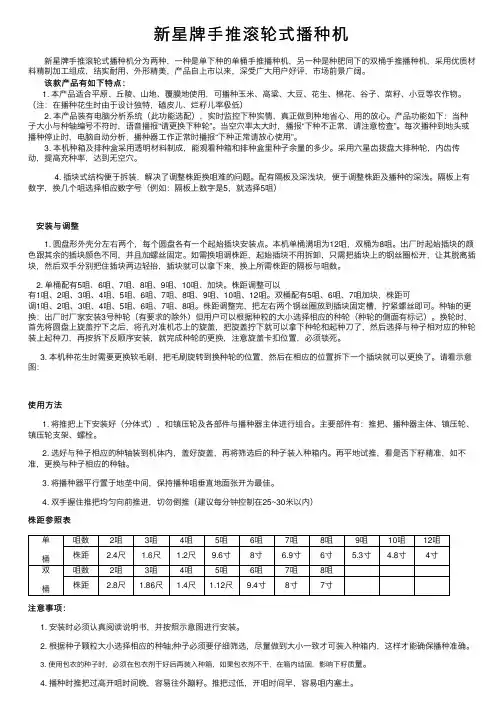
新星牌⼿推滚轮式播种机新星牌⼿推滚轮式播种机分为两种,⼀种是单下种的单桶⼿推播种机,另⼀种是种肥同下的双桶⼿推播种机,采⽤优质材料精制加⼯组成,结实耐⽤、外形精美,产品⾃上市以来,深受⼴⼤⽤户好评,市场前景⼴阔。
该款产品有如下特点:1. 本产品适合平原、丘陵、⼭地、覆膜地使⽤,可播种⽟⽶、⾼粱、⼤⾖、花⽣、棉花、⾕⼦、菜籽、⼩⾖等农作物。
(注:在播种花⽣时由于设计独特,磕⽪⼉、烂籽⼉率极低)2. 本产品装有电脑分析系统(此功能选配),实时监控下种实情,真正做到种地省⼼、⽤的放⼼。
产品功能如下:当种⼦⼤⼩与种轴编号不符时,语⾳播报“请更换下种轮”。
当空⽳率太⼤时,播报“下种不正常,请注意检查”。
每次播种到地头或播种停⽌时,电脑⾃动分析,播种器⼯作正常时播报“下种正常请放⼼使⽤”。
3. 本机种箱及排种盒采⽤透明材料制成,能观看种箱和排种盒⾥种⼦余量的多少。
采⽤六星齿拨盘⼤排种轮,内齿传动,提⾼充种率,达到⽆空⽳。
4. 插块式结构便于拆装,解决了调整株距换咀难的问题。
配有隔板及深浅块,便于调整株距及播种的深浅。
隔板上有数字,换⼏个咀选择相应数字号(例如:隔板上数字是5,就选择5咀)安装与调整1. 圆盘形外壳分左右两个,每个圆盘各有⼀个起始插块安装点。
本机单桶满咀为12咀,双桶为8咀。
出⼚时起始插块的颜⾊跟其余的插块颜⾊不同,并且加螺丝固定。
如需换咀调株距,起始插块不⽤拆卸,只需把插块上的钢丝圈松开,让其脱离插块,然后双⼿分别把住插块两边轻抬,插块就可以拿下来,换上所需株距的隔板与咀数。
2. 单桶配有5咀、6咀、7咀、8咀、9咀、10咀、加块。
株距调整可以有1咀、2咀、3咀、4咀、5咀、6咀、7咀、8咀、9咀、10咀、12咀。
双桶配有5咀、6咀、7咀加块,株距可调1咀、2咀、3咀、4咀、5咀、6咀、7咀、8咀。
株距调整完,把左右两个钢丝圈放到插块固定槽,拧紧螺丝即可。
种轴的更换:出⼚时⼚家安装3号种轮(有要求的除外)但⽤户可以根据种粒的⼤⼩选择相应的种轮(种轮的侧⾯有标记)。

2BJD-4勺轮式玉米播种机的试验示范
兰俊田
【期刊名称】《农业技术与装备》
【年(卷),期】2011(000)013
【摘要】机械播种是粮食作物生产的关键环节,需要根据不同作物种植技术要求与实际条件选择合适的播种机,适时、适量地把种子置于位置和土壤环境适宜的播种层,使作物获得良好的生长发育环境.随着现代玉米种业的发展,其通过机械精选和装袋,玉米优种的发芽率达92%以上,玉米种子论斤(1斤=0.5 kg)卖变成以每0.067 hm2为单位按颗粒数卖,而且种子的价格也逐渐提高.
【总页数】2页(P62-63)
【作者】兰俊田
【作者单位】山西省原平市农机技术推广站
【正文语种】中文
【相关文献】
1.勺轮式玉米精密播种机的设计 [J], 冯晓静;杨欣;周剑;桑永英
2.勺轮式玉米精密播种机适应性考核试验与研究 [J], 张婧
3.勺轮式玉米精密播种机适应性考核试验与研究 [J], 张婧
4.勺轮式大豆播种机排种机构优化设计与试验 [J], 李晓红;陈再胜
5.垂直勺轮式玉米精密排种器排种性能试验研究 [J], 陈福德
因版权原因,仅展示原文概要,查看原文内容请购买。
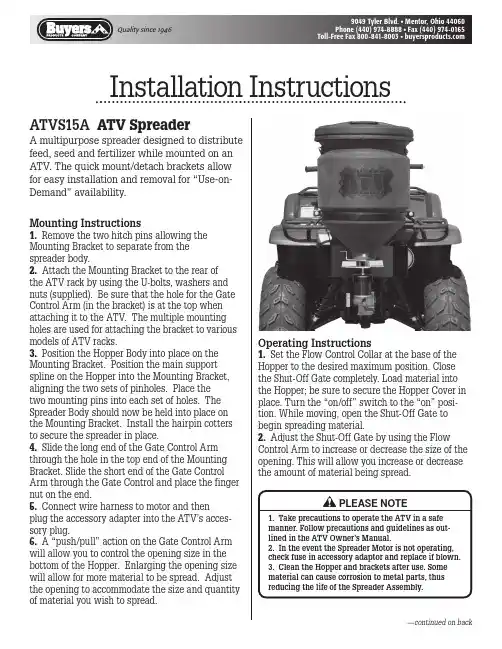
ATVS15A ATV Spreader—continued on backA multipurpose spreader designed to distribute feed, seed and fertilizer while mounted on an ATV. The quick mount/detach brackets allow for easy installation and removal for “Use-on-Demand” availability.Mounting Instructions1. Remove the two hitch pins allowing the Mounting Bracket to separate from the spreader body.2. Attach the Mounting Bracket to the rear of the ATV rack by using the U-bolts, washers and nuts (supplied). Be sure that the hole for the Gate Control Arm (in the bracket) is at the top when attaching it to the ATV. The multiple mounting holes are used for attaching the bracket to various models of ATV racks.3. Position the Hopper Body into place on the Mounting Bracket. Position the main support spline on the Hopper into the Mounting Bracket, aligning the two sets of pinholes. Place the two mounting pins into each set of holes. The Spreader Body should now be held into place on the Mounting Bracket. Install the hairpin cotters to secure the spreader in place.4. Slide the long end of the Gate Control Arm through the hole in the top end of the Mounting Bracket. Slide the short end of the Gate Control Arm through the Gate Control and place the finger nut on the end.5. Connect wire harness to motor and then plug the accessory adapter into the ATV’s acces-sory plug.6. A “push/pull” action on the Gate Control Arm will allow you to control the opening size in the bottom of the Hopper. Enlarging the opening size will allow for more material to be spread. Adjust the opening to accommodate the size and quantity of material you wish to spread.Operating Instructions1. Set the Flow Control Collar at the base of the Hopper to the desired maximum position. Close the Shut-Off Gate completely. Load material into the Hopper; be sure to secure the Hopper Cover in place. Turn the “on/off” switch to the “on” posi-tion. While moving, open the Shut-Off Gate to begin spreading material.2. Adjust the Shut-Off Gate by using the Flow Control Arm to increase or decrease the size of the opening. This will allow you increase or decrease the amount of material being spread.Installation Instructions1. Take precautions to operate the ATV in a safe manner. Follow precautions and guidelines as out-lined in the ATV Owner’s Manual.2. In the event the Spreader Motor is not operating, check fuse in accessory adaptor and replace if blown.3. Clean the Hopper and brackets after use. Some material can cause corrosion to metal parts, thusreducing the life of the Spreader Assembly.PLEASE NOTE3010007 Rev. AHARDWARE KIT 3010006MOUNTING BRACKET 3003297HITCH PIN 3001281FRAME 3009472LID 3009308SPINNER DISK 3001042MOTOR 3000966HOPPER 3009307GATE CONTROL 3010422HOPPER STRAP 3003298SHUT OFF GATE 3001009GATE MOUNT BRACKET 3001039。