开博尔高清播放机20110120现有机型最新固件下载地址
- 格式:xls
- 大小:38.00 KB
- 文档页数:6
中兴V880刷机教程---综合版经过两天时间,浏览于安卓网论坛,学习了刷机,把我产小V刷了5次,从2.2.2版的刷到2.3.5版的,再从2.3.5版的刷到2.2版的,发现,还是2.2版的好点,闲置的ROM空间有160M是最多的,2.3.5版的有130M,玩游戏(愤怒的小鸟),2.2版的好点,当然这是我个有的看法,可能是我的ROM下载的不是很好的。
其它测试都差不多的,不论是2ROM 还是3ROM 的。
现在我把我所学到手机刷机方法综合在一起,给机友们分享一下,希望对小白们有用的,俗话说得好了:先知者为师,我也是从别人那里学的。
古人说,书生都是小偷,你从我这悄悄的学去,我从你这悄悄的学来,这一点也没有错,其实大家心里明白的,大家都很辛苦。
不说这么多的了。
刷机总的来说有分为两种:一种是电脑刷机,一种是用手机SD卡刷机。
这两种有简单的一点的,也有复杂一点的,下面我一一说来。
(1)用手机SD 卡刷机,较简单一点,国行7月新机刷机教程(超级简单)1)首先查看自己的机器是不是gen2版本的,如果是,则继续。
查看方法:下载PigFish.apk 软件,并安装到手机上(可以用豌豆荚安装,或者拷贝到tf卡用手机安装)安装完毕后,运行它,查看第一行文字,是否有GEN2字样,如果有,请继续往下。
2)下载并拷贝 recovery-clockwork-4.0.1.4-blade-gen2.img 到tf卡根目录下,更名为recovery.img(更名是非必须的)下载你喜欢的ROM,更名为update.zip,同样放到TF卡根目录下。
(recovery-clockwork 地址:/file/dn6wfxhw )3)下载z4root_130.apk 软件,安装到手机上,安装完毕后,运行它,选择获取临时root3)下载RecoveryManager_v0.34b.apk软件,安装到手机上。
运行它,选择Install Recovery选择步骤2TF卡中的recovery.img文件,点击它,选择OK。

原道N12豪华版刷机、ROOT、优化全套教程一、刷机1.从原道官网(/)下载产品固件及刷机工具1.1不建议在论坛之类的地方下载固件;1.2建议使用N12豪华版-2.3-20120105-GZ-SDK2.1固件或N12豪华版-2.3-20120105-EZ-SDK2.1固件,新出的N12豪华版-4.03-20120213-ALL-正式版固件虽然新,但是并不太好用。
就是待机时间长点,速度快点。
但大家可以通过下面介绍的优化方式来提高速度。
1.3刷机工具挺多,就下载2918量产工具。
2.解压固件及刷机工具2.1固件解压出来后是个IMG格式的压缩包2.2刷机工具解压出来后,将2918量产工具\驱动\xp文件拷至 C:\WINDOWS\system32\drivers。
此步骤可以先不进行,到后面设备连电脑时如果选择不了驱动文件时再进行。
3.打开刷机工具,选择固件。
4.开始刷机:关掉设备,按住音量+键,用USB连上电脑,持续到电脑上发现新硬件时再松开音量+键。
如果之前没有安装过此设备驱动,则会弹出如下提示:选择“从列表或指定位置安装(高级)”,单击下一步。
选择□在搜索中包括这个位置,如果无法浏览或是确定则按2.2步骤操作。
可以浏览就选择2918量产工具\驱动\xp,驱动程序文件夹下的rockusb.sys这样,就完成了USB设备的驱动安装。
此时,刷机工具就连上了,连接设备一栏的“1”变成绿色,点“升级”开始刷系统。
一直等待程序运行完,N12自动重启,刷机完毕。
注:刷完机首次开机会要时间长些。
二、获取管理权限(ROOT)在网络上下个Root GingerBreak木蚂蚁ROOT软件,放在N12里,直接安装。
或者利用QQ电脑管家安卓应用助手/91手机助手/360手机助手/豌豆荚之类的安装,安装完毕。
打开木蚂蚁:获得ROOT权限,等待设备重启了就行了。
ROOT成功!三、优化这里的优化主要是针对系统程序,删除那些没什么用的系统程序。

From Nuremberg BT-VS/MKP-XPT Product Management 20.04.2023Release LetterProduct: VIDEOJET decoder 7000 VJD-7513Version: Firmware 10.40.0055This letter contains latest information about the above-mentioned product.1. GeneralThis firmware release 10.40.0055 is a feature release based on FW 10.31.0005.Changes since last release FW 10.31.0005 are marked in blue.VIDEOJET decoder 7000 uses robust, fan-less technology designed for ambitious environmental conditions while providing maximum performance on minimum space in a nicely designed industrial housing.VIDEOJET decoder 7000 displays video from Standard Definition (SD), High Definition (HD), 4K Ultra High Definition (UHD), and Megapixel (MP) cameras and encoders using H.265, H.264 or MPEG-4 encoding at up to 60 frames per second over IP networks.VIDEOJET decoder 7000 is the successor of VIDEOJET decoder 8000 (VJD-8000, VJD-8000-N). It is using the same housing but comes with different video output interfaces and provides improved performance and functionality.Notes:•Firmware update may take several minutes due to a large cumulative Microsoft patch.•This firmware includes OpenSSL.From NurembergBT-VS/MKP-XPT Product Management 20.04.20232. Applicable products•VIDEOJET decoder 7000, VJD-75133. New Features•SRTP for encrypted multicast traffic is supported. This allows fully secured communication with and video streaming from CPP13 and CPP14 cameras in multicast environments.•SNMPv3 trap service has been added, including the support of SNMP-related RCP+ commands for configuration.• A JPEG snapshot is now possible from each of the displays, including JPEG quality settings parameter.•Display order can be re-arranged in case Windows display detection differs from mechanical order.•The default layout is depending on the display number to simplify the identification of display order. The number of video windows per display increases as square of the display number.•The web interface of the decoder has been updated to the latest style guide and re-structured to ease usage for installation, licensing, and integration purposes.o The new web pages provide links to documentation and include a live preview.o Maintenance log file creation and download is supported by a workflow mechanism.o A keyboard emulator supports initial setup for IP Matrix even without keyboard connected.From NurembergBT-VS/MKP-XPT Product Management 20.04.20234. Changes•The Video SDK as one of the core components for the decoder firmware has been updated to latest version 6.40, providing a great number of improvements and fixes, mainly aroundONVIF and RTSP support, increasing the overall robustness.•An issue is fixed for banner upload when banners are activated.•An issue is fixed for zooming out in client dewarping mode of panoramic camera streams.•An issue is fixed where client dewarping was not working on line 1 of a panoramic camera in onboard dewarping mode. Onboard dewarping is only available for lines 2 and higher, line 1 always provides the full warped image circle.•An issue with DNS server configuration is fixed.•An issue is fixed where CPP13 and CPP14 cameras were not correctly connected in camera sequences.•Maintenance log file download is improved, supported by the new web interface structure.•An issue is fixed where daylight saving time was incorrectly reflected in time zone offset calculation.5. System RequirementsFor configuration purposes:•Configuration Manager 7.61 or newerFor operation purposes:•Bosch Video Management System 12.0 or higherNote that not all features may be supported by BVMS yet.Please refer to BVMS release notes.From NurembergBT-VS/MKP-XPT Product Management 20.04.20236. Restrictions; Known Issues•Connecting encrypted streams without proper signalling may result in crashing the software decoder instance, resulting in black video displayed.•Alarms will not be signaled with a red border around the cameo if connection was established using CONNECT_PRIMITIVE.•Using CONNECT_PRIMITIVE via TCP is not possible.•CONNECT_PRIMITIVE does not support "first available" feature.•Audio may remain audible despite layout change to other than single view.•RCP+ command CONF_ALARM_CONNECT_TO_IP is not supported.•Alarm connection does not support audio, nor does it include metadata.•Maximum password length is 19 characters.•With “Reconnect last devices” active camera connections are stored and automatically reconnected after reboot. To avoid deadlock in case of an overload situation the automaticreconnect will be deactivated after the decoder was forced into reboot for ten times within 10 minutes.•Monitors may be swapped after update. Swap back is possible using Configuration Manager.•IP Matrix pre-requisites for multi-decoder clustering:o Fixed IP addresses must be assigned; DHCP configuration is not functional.o Passwords for service level must be same on all clustered decoders.o Passwords for user level must be same on all clustered decoders.•After removing a slave decoder from the IP Matrix master, both decoders must be restarted.•Camera sequences are paused when picture-in-picture mode is activated.•Time related settings may appear in Configuration Manager only with delay or after a reboot.•Monitors connected to the Display Port via USB-C may not always be detected during booting.In this case, unplug and reconnect the adapter or cable to the monitor. If only one monitor isused it is recommended to connect to the direct HDMI output.•Log file download stability may be affected by workload of decoder. As a workaround, the download may need to be repeated, or the workload of the decoder may need to be reduced (disconnect all camera streams).•Time zone configuration is only supported via TIME_ZONE_STRING.•The KBD-DIGITAL keyboard is locked automatically during start-up of the decoder, or with re-connect. It will be unlocked after entering the PIN but the lock screen will remain until the next action on the keyboard.•Certificates used with the decoder must not have any Windows policies defined.•DNS resolution is not implemented yet, thus time server entry only works with IP addresses.•Dewarping zoom does not work correctly for panoramic cameras in on-board dewarping mode for camera line 1.•Overload messages and traps may appear too sensitive in cases where display refresh rates are lower than video stream frame rates.From NurembergBT-VS/MKP-XPT Product Management 20.04.20237. Previous Revisions7.1. New Features with 10.31.0005•Support for HOST_NAME to get and set the device’s hostname; only supported in extended configuration mode.•Support for DNS_SERVER_IP_STRING to get and set primary and secondary DNS server IPv4 addresses.7.2. Changes with 10.31.0005•Optimized transparent data processing time to allow adequate transparent data pass-through for serial PTZ keyboard.•An issue is fixed to apply e-PTZ presets correctly in camera sequences.•Feature loss due to suppressing encrypted UDP multicast connections for Bosch IP cameras with firmware 8 and higher, and fall back to TCP, tunneled via HTTPS control connection.(This feature will be added again with FW 10.40.)From NurembergBT-VS/MKP-XPT Product Management 20.04.20237.3. New Features with 10.30.0005•The default setting for Automatic IPv4 address assignment is set to “DHCP plus Link-Local”.Though this might seem a small change, it may have an impact:The former default IP address 192.168.0.200 will virtually become obsolete.Instead, the camera will assign itself an auto-IP address out of the range 169.254.1.0 to169.254.254.255 as long as there is no other IP address assigned by a DHCP server.(https:///wiki/Link-local_address)The advantage is that there are no more duplicate IP addresses, which is consideredprohibited in a network.•Network authentication 802.1x with EAP/TLS has been added.Please note that the server certificate needs to get the usages ‘Trust’ and ‘EAP_TLS_Trusted’ assigned.The client certificate will get the necessary usages assigned automatically.•The possibility of large banner overlays has been introduced.o Banners can be uploaded as images that can be displayed over three areas: top, center and bottom. The images are scaled to fill the area and cropped wherenecessary.o Banners can be sequenced with a configurable dwell time.o Configuration Manager 7.60 is supporting this with upload and banner sequence configuration, including banner previews.•Set and recall prepositions for moving cameras (AUTODOME, MIC) as well as for ONVIF PTZ cameras via keyboard has been added to the IP Matrix functionality.•Images can be uploaded to the decoder for two purposes, using Configuration Manager. The images shall be in JPG format and must be named as follows:o‘monitor background’ image, shown as background of an empty video window: ‘Logo.jpg’o‘’no camera’ image, shown on connection failure: ‘NoCamLogo.jpg’7.4. Changes with 10.30.0005•An issue was fixed where uploading a new video loss image did not break the software seal.From NurembergBT-VS/MKP-XPT Product Management 20.04.20237.5. Changes with 10.23.0002• A security vulnerability has been fixed where a crafted configuration packet sent by an authenticated administrative user can be used to execute arbitrary commands in systemcontext (CVE-2021-23862).For more details refer to our Security Advisory BOSCH-SA-043434-BT, published at ourSecurity Advisory web pagehttps:///xc/en/support/product-security/security-advisories.htmlor visit our PSIRT website at https://.7.6. New Features with 10.22.0038•APIPA (link-local address, Auto-IP) is used instead of a default IP address when DHCP is on and no DHCP server responded.•Transparent data pass-through for serial PTZ keyboard (SERIAL_PORT_APP_VAL and TRANSFER_TRNSPARENT_DATA) has been added.•Support of RCP+ via CGI (including WRITE commands) has been added.•HTTP digest authentication is supported for RCP+ via CGI.•Display orientation can be changed per line via RCP+.•RCP+ WRITE command MONITOR_NAME now supported for custom monitor names.•Updated RCP+ documentation is now available via the VIDEOJET decoder webpage.•Download of screen and tile snapshots via snap.jpg is now supported (requires at least user privileges).•Firmware update on-screen countdown dialog now shows a heartbeat whenever a single update step takes longer.•Support of CONNECT_URL read queries to get current video connection details, including current digital and dewarping zoom settings, has been added.•Support of various digital and dewarping zoom persistence modes(DIGITAL_ZOOM_PERSISTENCE_MODE) has been added.•Support of SYSTEM_DATETIME_V2 to read/write UTC system time has been added.•Support for new Sentinel RMS licenses has been added. Legacy licenses can now also be based on new installation code (lock code from Sentinel RMS).From NurembergBT-VS/MKP-XPT Product Management 20.04.20237.7. Changes with 10.22.0038•IP Matrix initialization is now working also for camera lines larger than 1.•RCP+ response for query on connected cameras is now working correctly.•URL extension for camera configuration in IP Matrix is no longer truncated.•An issue with an unexpected application restart has been fixed.•The DECODER_GROUP command is no longer supported when decoder IP address is not static. This disables the whole IP matrix configuration pages in Configuration Manager until a static IP is configured in the decoder’s network settings.•Improvements were made for log export via webpage and via Configuration Manager.•KBD-DIGITAL keyboard PIN is now used immediately without application restart.•KBD-DIGITAL keyboard PIN is now required whenever keyboard is attached and at application start.•Display orientation is now working for further monitor types.•Support of further USB to serial COM port adapters for KBD-DIGITAL keyboard connectivity.o Current: Prolific PL2303 [hardware ID USB\VID_067B&PID_2303]o New: Prolific PL2303GT [hardware ID USB\VID_067B&PID_23C3]o New: ATEN UC232A [hardware ID USB\VID_0557&PID_2008]o New: Unitek Y-108 [hardware ID FTDIBUS\VID_0403+PID_6001]o CableCreation CD0489 (PL2303) [hardware ID USB\VID_067B&PID_2303] is compatible to the already supported Prolific PL2303 adapter.Please note that the KBD-DIGITAL keyboard connectivity requires continuous maintenance, since new or not listed USB-to-serial COM port adapters typically require the installation of a suitable driver on the VIDEOJET decoder and an adaption of the hardware ID filter in thekeyboard detection software module. Newer USB adapters may require a firmware update to become supported.From NurembergBT-VS/MKP-XPT Product Management 20.04.20237.8. New Features with 10.01.0036Security• A protected configuration mode has been implemented, allowing too enable SSD encryption (BitLocker) and too disable USB ports, e.g. for installation of the decoder in public areas.•The configuration of the decoder can be protected by Software Sealing, similar to IP cameras.•The latest Microsoft Windows security updates have been included.Miscellaneous• A dewarped cutout from panoramic cameras can be defined with PTZ coordinates.• A new way to control and integrate the decoder into a management system has been added by a JSON RPC API. This allows to send commands and retrieve status information via JSON remote procedure calls. The API documentation is added to the distribution package.• A video output capture service (VOCS) has been implemented which could be activated via a license, applicable per display output. This service captures the memory of the video outputand encodes it into a camera-like video stream, which can be recorded via Video StreamingGateway (VSG) onto iSCSI storage.• A time server can be added to synchronize the decoder.•Decoder log file can be downloaded via Configuration Manager. This is especially recommended when download of the log file is not working correctly via web browser.7.9. Changes with 10.01.0036•Upload of background image and connection loss image to the decoder and reverting them to default is now also possible with service password set. The former restriction is obsolete.•Various minor bug fixes.From NurembergBT-VS/MKP-XPT Product Management 20.04.20237.10. New Features with 9.60.0017IP Matrix enhancements•KBD-DIGITAL is supported in addition to KBD-UNIVERSAL XF.This keyboard requires a serial-to-USB adapter to connect to the decoder.Both keyboards can be mixed in a clustered multi-decoder IP Matrix, one keyboard perdecoder.•Playback from local recording is supported.Permission is configured via Configuration Manager for the whole IP Matrix, valid for all users.•Buttons for next and previous camera have been added to the KBD-UXF functions.•Audio can be switched on or off via keyboard.•Camera channels can be extended via license up to 64 cameras per decoder unit.Note:IP Matrix manual is now separated intoo One configuration manual for IP Matrixo One operation manual for IP Matrix using KBD-UXFo One operation manual for IP Matrix using KBD-DIGITALSecurity•The latest Microsoft Windows security updates have been included.Miscellaneous•Background image and connection loss image can be uploaded to the decoder, replacing the default images. Reverting them to default is done by uploading an empty image.Note: Upload is only possible in conjunction with an empty service password.7.11. Changes with 9.60.0017•Temperature control margin increased to improve maximum performance at the specified maximum temperature, covering component tolerances, and to ensure that all productsadhere fully to their specification.•Various minor bug fixes.Security SystemsFromNuremberg BT-VS/MKP-XPT Product Management 20.04.202311BOSCH and the symbol are registered trademarks of Robert Bosch GmbH, Germany 7.12. Features with initial release 9.51• VIDEOJET decoder 7000 displays video from Standard Definition (SD), High Definition (HD),4K Ultra High Definition (UHD), and Megapixel (MP) cameras and encoders using H.264 or MPEG -4 encoding at up to 60 frames per second over IP networks.• VIDEOJET decoder 7000 provides an HDMI and a DisplayPort (via USB-C connector) output, both capable of driving up to 4K UHD displays simultaneously.• Display settings are automatically discovered and set for optimal display performance. • Monitor layouts can be switched independently for each display.• Upright monitors (portrait mode) are supported.• Video window (cameo) aspect ratio can be set to 16:9, 9:16, 3:4, or 1:1.• Active camera connections and layout are stored and automatically reconnected after reboot if configured. To avoid deadlock in case of an overload situation the automatic reconnect will be deactivated after VIDEOJET decoder 7000 was forced into reboot for 3 times within 10 minutes.• Video smoothing can be configured.• RTSP connections are supported, enabling connectivity to 3rd party and ONVIF cameras. • Discovery port is configurable.• Cameo distance is configurable.• VIDEOJET decoder 7000 supports IP Matrix application as built-in feature.• VIDEOJET decoder 7000 is able to display VCA metadata.• VIDEOJET decoder 7000 provides bi-directional G.711 audio for the video stream shown in single view on the first monitor.• Configuration is done using the Configuration Manager.• The number of decoders presented in capabilities is configurable to regulate the consumption of VMS licenses. Default value is 30.• System access is password-protected with two levels.• The system firmware can be upgraded remotely.• System API is compatible to predecessor VIDEOJET decoder 8000 for easy plug-and-play integration.• Operating temperature iso 0 °C to +50 °C (+32 °F to +122 °F) ambient temperature, with airflow o 0 °C to +40 °C (+32 °F to +104 °F) ambient temperature, still airFor detailed functional description of inherited firmware features, please refer to the VIDEOJET decoder 8000 firmware 9.51 release notes.For detailed technical specification, please refer to the datasheet.。
双核新时代揭密开博尔K12热销之谜商场上,琳琅满目的商品比比皆是,好的商品自然会有好的评价,想要获得高评价,也得看它值不值。
从整个角度上来看,要说商场上畅销的东西还真是多如过江之鲫,不论是服装,还是商品,都达到一个顶端消费,给足了消费者空间。
而对于人们对物质方面的追求总是美中不足,但每个家庭的客厅都少不了一台电视与播放器的搭配,尤其是从开博尔双核播放器的产生开始,双核时代领就了一个狂潮,而开博尔双核K12的热销便成了一个谜,为何如此畅销,与小编一起来揭密开博尔K12热销之谜。
双核新时代最发烧的盒子:开博尔K12不得不承认消费者的眼光独到,追寻时尚物品的手段可谓是信手拈来,开博尔K12这个双核时代的领航者一出,消费者便后脚一迈,踏进纳入购物的行列中,要想达到神速就得有冲锋陷阵的精神。
开博尔K12这个双核时代最为发烧的网络机顶盒还未在市场上放热呢,就已经进入了用户的大厅,其智能Android 多重娱乐体验系统,意味着拥有一台开博尔K12,您就等于拥有了网络电视机顶盒+DVD+游戏机+客厅电脑,神奇改造普通电视,一步变身智能电视!一家人其乐融融的享受着双核新时代最发烧的影视。
开博尔K12华美容姿双核动力魅力逼人物品不是外表华美就可取代一切,最为关键是要看其内涵,只有如此,才能达到真正的真、善、美和人们追求的高、富、帅。
当然了,内外兼容更能独领风骚。
而开博尔K12这位内外兼修的双核至尊机型,外观设计不但协调柔和,全铝合金属机身,炫银色体系风格,突显风华绝代。
苹果工艺制造,机体美观大方,清新一格,时尚尊贵。
表面的磨砂工艺处理,细节之外的细腻包被,全身散发出的迷人魅力无不让人为之倾倒,温柔似水的面容,让人有捧在手心的感觉。
迎接双核新纪元开博尔K12至尊配置随着播放器行业双核时代的来临,开博尔K12与时俱进,跟进时代的步伐,强势加入市场竞争,双引擎,双动力,超高的硬件配置,搭载了最新安卓4.1系统,播放影视稳定而流畅。
Apple所有产品固件官方下载链接地址整理汇总(更新4.1)iPhone 4iphone(4.2.1/8C148)iPhone3,1_4.2.1_8C148_Restore.ipswiPhone 4(4.1/8B117)iPhone3,1_4.1_8B117_Restore.ipsw iPhone 4(4.0.2/8A400) iPhone3,1_4.0.2_8A400_Restore.ipsw iPhone 4(4.0.1/8A306) iPhone3,1_4.0.1_8A306_Restore.ipsw iPhone 4(4.0/8A293) iPhone3,1_4.0_8A293_Restore.ipswipadipad (4.2.1/8C148) iPad1,1_4.2.1_8C148_Restore.ipswipad (3.2.2/7B500) iPad1,1_3.2.2_7B500_Restore.ipswipad (3.2.1/7B405) iPad1,1_3.2.1_7B405_Restore.ipsw ipad (3.2/7B367) iPad1,1_3.2_7B367_Restore.ipswiPhone 3GSiPhone 3GS(4.2.1/8C148)iPhone2,1_4.2.1_8C148a_Restore.ipsw iPhone 3GS(4.1/8B117)iPhone2,1_4.1_8B117_Restore.ipsw iPhone 3GS(4.0.12/8A400) iPhone2,1_4.0.2_8A400_Restore.ipsw iPhone 3GS(4.0.1/8A306) iPhone2,1_4.0.1_8A306_Restore.ipsw iPhone 3GS(4.0/8A293) iPhone2,1_4.0_8A293_Restore.ipsw iPhone 3GS(3.1.3/7E18) iPhone2,1_3.1.3_7E18_Restore.ipsw iPhone 3GS(3.1.2/7D11) iPhone2,1_3.1.2_7D11_Restore.ipsw iPhone 3GS(3.1/7C144) iPhone2,1_3.1_7C144_Restore.ipsw iPhone 3GS(3.0.1/7A400) iPhone2,1_3.0.1_7A400_Restore.ipsw iPhone 3GS(3.0/7A341) iPhone2,1_3.0_7A341_Restore.ipswiPhone 3GiPhone 3G(4.2.1/8C148) iPhone1,2_4.2.1_8C148_Restore.ipsw iPhone 3G(4.1/8B117) iPhone1,2_4.1_8B117_Restore.ipswiPhone 3G(4.0.2/8A400) iPhone1,2_4.0.2_8A400_Restore.ipsw iPhone 3G(4.0/8A293) iPhone1,2_4.0_8A293_Restore.ipsw iPhone 3G(3.1.3/7E18) iPhone1,2_3.1.3_7E18_Restore.ipsw iPhone 3G(3.1.2/7D11) iPhone1,2_3.1.2_7D11_Restore.ipsw iPhone 3G(3.1/7C144) iPhone1,2_3.1_7C144_Restore.ipsw iPhone 3G(3.0.1/7A400) iPhone1,2_3.0.1_7A400_Restore.ipsw iPhone 3G(3.0/7A341) iPhone1,2_3.0_7A341_Restore.ipsw iPhone 3G(2.2.1/5H11) iPhone1,2_2.2.1_5H11_Restore.ipsw iPhone 3G(2.2/5G77) iPhone1,2_2.2_5G77_Restore.ipsw iPhone 3G(2.1/5F136) iPhone1,2_2.1_5F136_Restore.ipsw iPhone 3G(2.0.2/5C1) iPhone1,2_2.0.2_5C1_Restore.ipsw iPhone 3G(2.0.1/5B108) iPhone1,2_2.0.1_5B108_Restore.ipsw iPhone 3G(2.0/5A347) iPhone1,2_2.0_5A347_Restore.ipswiPhoneiPhone(3.1.3/7E18) iPhone1,1_3.1.3_7E18_Restore.ipsw iPhone(3.1.2/7D11) iPhone1,1_3.1.2_7D11_Restore.ipswiPhone(3.1/7C144) iPhone1,1_3.1_7C144_Restore.ipsw iPhone(3.0.1/7A400) iPhone1,1_3.0.1_7A400_Restore.ipsw iPhone(3.0/7A341) iPhone1,1_3.0_7A341_Restore.ipswiPhone(2.2.1/5H11) iPhone1,1_2.2.1_5H11_Restore.ipswiPhone(2.2/5G77) iPhone1,1_2.2_5G77_Restore.ipswiPhone(2.1/5F136) iPhone1,1_2.1_5F136_Restore.ipswiPhone(2.0.2/5C1) iPhone1,1_2.0.2_5C1_Restore.ipsw iPhone(2.0.1/5B108) iPhone1,1_2.0.1_5B108_Restore.ipsw iPhone(2.0/5A347) iPhone1,1_2.0_5A347_Restore.ipsw iPhone(1.1.4/4A102) iPhone1,1_1.1.4_4A102_Restore.ipsw iPhone(1.1.3/4A93) iPhone1,1_1.1.3_4A93_Restore.ipsw iPhone(1.1.2/3B48b) iPhone1,1_1.1.2_3B48b_Restore.ipsw iPhone(1.1.1/3A109a) iPhone1,1_1.1.1_3A109a_Restore.ipsw iPhone(1.0.2/1C28) iPhone1,1_1.0.2_1C28_Restore.ipsw iPhone(1.0.1/1C25) iPhone1,1_1.0.1_1C25_Restore.ipsw iPhone(1.0/1A543a) iPhone1,1_1.0_1A543a_Restore.ipswiPod Touch 4GiPod Touch 4G(4.2.1/8C148) iPod4,1_4.2.1_8C148_Restore.ipsw iPod Touch 4G(4.1/8B117) iPod4,1_4.1_8B117_Restore.ipswiPod Touch 3GiPod Touch 3G(4.2.1/8C148) iPod3,1_4.2.1_8C148_Restore.ipsw iPod Touch 3G(4.1/8B117) iPod3,1_4.1_8B117_Restore.ipsw iPod Touch 3G(4.0.2/8A400) iPod3,1_4.0.2_8A400_Restore.ipsw iPod Touch 3G(4.0/8A293) iPod3,1 4.0 8A293 Restore.ipsw iPod Touch 3G(3.1.3/7E18) iPod3,1_3.1.3_7E18_Restore.ipsw iPod Touch 3G(3.1.2/7D11) iPod3,1_3.1.2_7D11_Restore.ipsw iPod Touch 3G(3.1.1/7C145) iPod3,1_3.1.1_7C145_Restore.ipswiPod Touch 2GiPod Touch 2G(4.2.1/8C148) iPod2,1_4.2.1_8C148_Restore.ipsw iPod Touch 2G(4.1/8B117)iPod2,1_4.1_8B117_Restore.ipsw iPod Touch 2G(4.0.2/8A400) iPod2,1_4.0.2_8A400_Restore.ipsw iPod Touch 2G(4.0/8A293) iPod2,1 4.0_8A293 Restore.ipsw iPod Touch 2G(3.1.3/7E18) iPod2,1_3.1.3_7E18_Restore.ipsw iPod Touch 2G(3.1.2/7D11) iPod2,1_3.1.2_7D11_Restore.ipsw iPod Touch 2G(3.1.1/7C145) iPod2,1_3.1.1_7C145_Restore.ipsw iPod Touch 2G(3.0/7A341) iPod2,1_3.0_7A341_Restore.ipsw iPod Touch 2G(2.2.1/5H11a) iPod2,1_2.2.1_5H11a_Restore.ipsw iPod Touch 2G(2.2/5G77a) iPod2,1_2.2_5G77a_Restore.ipsw iPod Touch 2G(2.1.1/5F138) iPod2,1_2.1.1_5F138_Restore.ipswiPod Touch 1GiPod Touch 1G(3.1.3/7E18) iPod1,1_3.1.3_7E18_Restore.ipswiPod Touch 1G(3.1.2/7D11) iPod1,1_3.1.2_7D11_Restore.ipsw iPod Touch 1G(3.1.1/7C145) iPod1,1_3.1.1_7C145_Restore.ipsw iPod Touch 1G(3.0/7A341) iPod1,1_3.0_7A341_Restore.ipsw iPod Touch 1G(2.2.1/5H11) iPod1,1_2.2.1_5H11_Restore.ipsw iPod Touch 1G(2.2/5G77) iPod1,1_2.2_5G77_Restore.ipswiPod Touch 1G(2.1/5F137) iPod1,1_2.1_5F137_Restore.ipsw iPod Touch 1G(2.0.2/5C1) iPod1,1_2.0.2_5C1_Restore.ipsw iPod Touch 1G(2.0.1/5B108) iPod1,1_2.0.1_5B108_Restore.ipsw iPod Touch 1G(2.0/5A347) iPod1,1_2.0_5A347_Restore.ipsw iPod Touch 1G(1.1.5/4B1) iPod1,1_1.1.5_4B1_Restore.ipsw iPod Touch 1G(1.1.4/4A102) iPod1,1_1.1.4_4A102_Restore.ipsw iPod Touch 1G(1.1.3/4A93) iPod1,1_1.1.3_4A93_Restore.ipsw iPod Touch 1G(1.1.2/3B48b) iPod1,1_1.1.2_3B48b_Restore.ipsw iPod Touch 1G(1.1.1/3A110a) iPod1,1_1.1.1_3A110a_Restore.ipsw iPod Touch 1G(1.1/3A101a) iPod1,1_1.1_3A101a_Restore.ipswiPodShuffle 3G(132/1.1) iPod_132.1.1.ipswShuffle 2G(133/1.0.4) iPod_133.1.0.4.ipswShuffle 2G(131/1.0.4) iPod_131.1.0.4.ipswShuffle 2G(130/1.0.4) iPod_130.1.0.4.ipswShuffle 1G(129/1.1.5) iPod_129.1.1.5.ipswShuffle 1G(128/1.1.5) iPod_128.1.1.5.ipsw Nano 5G(34/1.0.2 34A20020) iPod_1.0.2_34A20020.ipswNano 4G(31/1.0.4) iPod_31.1.0.4.ipswNano 3G(26/1.1.3) iPod_26.1.1.3.ipswNano 2G(29/1.1.3) iPod_29.1.1.3.ipswNano 2G(19/1.1.3) iPod_19.1.1.3.ipswNano 1G(17/1.3.1) iPod_17.1.3.1.ipswNano 1G(14/1.3.1) iPod_14.1.3.1.ipswMini 2G(7/1.4.1) iPod_7.1.4.1.ipswMini 1G(6/1.4.1) iPod_6.1.4.1.ipswMini 1G(3/1.4.1) iPod_3.1.4.1.ipswClassic 3G(160 GB)(35/2.0.4) iPod_35.2.0.4.ipswClassic 2G(33/2.0.1) iPod_33.2.0.1.ipswClassic(24/1.1.2) iPod_24.1.1.2.ipsw5G(20/1.3) iPod_20.1.3.ipsw5G(13/1.3) iPod_13.1.3.ipsw5.5G(25/1.3) iPod_25.1.3.ipsw4G Phone/Color(5.1.2.1) iPod_5.1.2.1.ipsw 4G Photo/Color(11/1.2.1) iPod_11.1.2.1.ipsw 4G(4/3.1.1) iPod_4.3.1.1.ipsw 4G(10/3.1.1) iPod_10.3.1.1.ipsw 3G(2/2.3) iPod_2.2.3.ipsw 1G/2G(1/1.5) iPod_1.1.5.ipsw。

SINAMICSIntelligent Operator Panel (IOP)Firmware and Software Update InstructionsEdition: August 2016Technische Änderungen vorbehalten. Page Siemens AG 2016Content1.Firmware and Software Update Instructions 3 1.1Limitations 3 1.2Important Notes 3 1.3Support of different SINAMICS IOP Hardware versions 3 1.4Software Downloads for SINAMICS IOP 4 1.5Extracting the software 4 1.6Update process 5 2IOP USB-Driver - Installation Steps 92.1Driver Installation 9 3Service & Support 113.1Tips & Tricks 11 3.2FAQs 11 3.3Documentation 111. Firmware and Software Update Instructions1.1 LimitationsThe following limitations apply to the Firmware and Software Update of theSINAMICS Intelligent Operator Panel (IOP):1. The IOP (6SL3255-0AA00-4JA_) should only be connected to a standard USB port on the PC.2. This version of the IOP Updater is compatible with the Windows XP and Windows 7 32 bit and64 bit operating systems.3. You need Admin rights on your PC account to install the USB-driver for the update procedure.4. The IOP Updater must be started from a local drive.5. Your Windows must provide .NET from version 4.5.11.2 Important NotesWith the Firmware V1.6.x a new IOP USB-Driver is provided. This driver must be installed before the firmware update can be performed. The firmware update driver installation procedure detailed in chapter 2 ”IOP USB-Driver Installation Steps”.Caution:During the firmware update the IOP and a SINAMICS Control Unit may not be simultaneously connected via USB to the PC.1.3 Support of different SINAMICS IOP Hardware versionsIOP-Order-No. IOP-Version SupportedIOP-FirmwareSupported USBInterfaceSupported Operating SystemEnvironment for Upgrading the IOP6SL3255-0AA00-4JA0 A02 V1.1 – V1.6.x USB V1.1 Windows XPA03 V1.1 – V1.6.x USB V1.1 Windows XPA04 V1.1 – V1.6.x USB V1.1 Windows XPA05 V1.1 – V1.6.x USB V1.1 Windows XPA06 V1.1 – V1.6.x USB V1.1/ V2.0 Windows XP, Windows 7 32 Bit B01 V1.1 – V1.6.x USB V1.1/ V2.0 Windows XP, Windows 7 32 Bit B02 V1.1 – V1.6.x USB V1.1/ V2.0 Windows XP, Windows 7 32 Bit6SL3255-0AA00-4JA1 A01 V1.1 – V1.6.x USB V1.1/ V2.0 Windows XP, Windows 7 32 BitB01 V1.1 – V1.6.x USB V1.1/ V2.0 Windows XP, Windows 7 32/ 64 BitC01 V1.1 – V1.6.x USB V1.1/ V2.0 Windows XP, Windows 7 32/ 64 BitD01 V1.1 – V1.6.x USB V1.1/ V2.0 Windows XP, Windows 7 32/ 64 BitD02 V1.1 – V1.6.x USB V1.1/ V2.0 Windows XP, Windows 7 32/ 64 Bit6SL3255-0AA00-4JC1 A01 V1.5.1 - V1.6.x USB V1.1/ V2.0 Windows XP, Windows 7 32/ 64 BitB01 V1.5.1 - V1.6.x USB V1.1/ V2.0 Windows XP, Windows 7 32/ 64 BitB02 V1.5.1 - V1.6.x USB V1.1/ V2.0 Windows XP, Windows 7 32/ 64 Bit The IOP currently does not Support USB V3.0. This can be identified by the blue connector.Technische Änderungen vorbehalten. Page Siemens AG 20161.4 Software Downloads for SINAMICS IOPThe SINAMICS IOP Upgrades and Language Packages are available on the Internet:/WW/view/en/672732661.5 Extracting the softwareTo extract the files, the following procedure should be performed:No. Instructions1. Download the required file to anappropriate folder on your local drive.2. Navigate to the folder containing the zipped update file on your local drive.3. Extract the update files.Note:When extracting the zipped files it is essential that the "All files/folders in archive" option is selected.Technische Änderungen vorbehalten. Page Siemens AG 20161.6 Update processTo update the IOP, the following procedure should be performed:No. Instructions1. Navigate to the folder to which theupdate files have been extracted.2. Double-click the “IOPUpdater.exe”file.3. Follow the instructions on screen.4. If the USB driver is present thefollowing screen is displayed:NOTE:If the driver is not installed, please note the instructions in chapter 2 “IOP USB-Driver – Installation Steps”.5. Start the update process byselecting the icon “Update IOP”6. After each part of the Updateprocess the User is prompted by the onscreen instructions. First the Format is performed then the IOP Firmware is Updated.7. Next the user is prompted connectthe IOP in Mass Storage Mode (the IOP will be blank as the File System has been Formatted).8. After connecting the IOP in MassStorage Mode and clicking “OK” the following is displayed. Select “Yes” if your IOP is mounted on the stated Drive.Technische Änderungen vorbehalten. Page Siemens AG 20169. The following screen allows theselection and download of optional Wizards.Hint: The Basic Wizard is already installed. Choose “?” to get more information.The optional Wizards can be downloaded from the Siemens Online Support Portal from IOP V1.6:https://support.industry.siemens.co m/cs/ww/en/view/67273266Detailed information about the optional Wizards can be found in the Operating Instructions Manual “Intelligent Operator Panel (IOP)”: https://support.industry.siemens.co m/cs/ww/en/view/101920450Download the needed Wizards from our Support Portal to an appropriate folder on your local drive. Navigate to the folder containing the zipped Wizard files on your local drive.Extract the Wizard files.Note:When extracting the zipped files it is essential that the "All files/folders in archive" option is selected.Opens two windows, one todownload from your local folder, the other to copy the contents of the unzipped downloaded folder into the other opened window with 32 character foldernames(…\IOP_Update_Vxxx\efs\wizards)Target folder “efs\wizards” within the IOP-Updater folder structure (Example based on V1.5.x):10. The following screen allows theselection of the requested languages and the supported parameter sets (firmware version V3.x or V4.x; choose “?” to get more information).11. The following is displayed when theFile System is being copied.12. Once the process ends the followingscreen is displayed.Technische Änderungen vorbehalten. Page Siemens AG 20162 IOP USB-Driver - Installation StepsThis chapter includes the installation steps for installing the IOP USB-Driver. Admin rights are needed to install a Device Driver. It is not necessary to have the IOP connected to install the IOP Driver.2.1 Driver InstallationNo. Instructions1. Navigate to the folder to which theupdate files have been extracted.2. Double click “IOPUpdater.exe”. The screen opposite shows that the IOP Driver is already installed. However, you can select Force Driver Re-install to install the IOP Driver again.3.Select Install IOP Driver , and screen opposite is displayed.Select ”Install this driver software anyway”.4. The IOP-Updater informes about the running installation process.5. After installation is completed thefollowing screen should beNo. Instructionsdisplayed.SINAMICS IOPTechnische Änderungen vorbehalten.Page Siemens AG 2016 Subject to change without prior notice. 11 of 11 3 Service & Support3.1 Tips & TricksProblemTitle IOP shows ablank screenIf you get a blank screen when you plug your IOP into a Drive, this means the FW Update did not work properly. Start the update process.Another reason for a blank screen can be you have no files on your IOP. This can be quickly determined by pluggin the IOP into the USB port and looking at the IOP device as a Drive. If it is blank then no files exist on the IOP, please run “IOPUpdater.exe” again.IOP shows “Consistencycheck error”This means that the IOP Update of the Firmware has not work properly, please run IOPUpdater.exe again. This could be related to the following FAQ’s.3.2 FAQsSIOS-IDTitle 67273266Which IOP version supports which SINAMICS Control Unit and/or SINAMICS firmware version? 56293000 Is there a SINAMICS IOP (V1.1) Firmware USB Update problem?More FAQs concerning IOP you can find here:/WW/view/en/30563514/133000 (use search item “IOP”)3.3 DocumentationSIOS-IDTitle 109736312German: Operating Instructions Intelligent Operator Panel (IOP), 02/2016, FW V1.6 SP2 109736312English: Operating Instructions Intelligent Operator Panel (IOP), 02/2016, FW V1.6 SP2。
Firmware for ioLogik E1200 Series (E1210) Release NotesSupported Operating SystemsNotesChangesApplicable ProductsBugs Fixed• Added SNMP Trap Community Setting to the web console.• Added a note on the password settings page that passwords are limited to 16 characters.• Fixed DHCP lease time did not ask for extension when half of the lease time elapsed.• Closed IP forwarding function (Port 0).• Closed UDP Port 161 when SNMP agent is disabled.• Fixed RESTful API header case-sensitive issue.• Fixed invalid token issue on login page when using Firefox.EnhancementsN/AioLogik E1210-T, ioLogik E1210• Added OPTIONS method for RESTful API.• Added quick access URI for RESTful API.New FeaturesN/A• This version of the firmware only works with ioSearch v2.0 or later versions.• To prevent system failure, only update the next or the previous released firmware version to prevent from system failure.Supported Operating SystemsNotesChangesApplicable ProductsBugs FixedN/A• Fixed file transfer problems when using the Chrome browser (e.g., firmware update, configuration import or export).EnhancementsN/AioLogik E1210, ioLogik E1210-T• Added the EtherNet/IP protocol.• Added RESTful API.• Added new registers for the Modbus/TCP protocol.• Added new OIDs for the SNMP protocol.• Modbus, EtherNet/IP, and RESTful services can be disabled (enabled by default).• Added sending heartbeat to port 9500 of MX-AOPC UA Server after the heartbeat function is enabled.• Increased password length from 8 to 16 characters.• Added a function to check special characters to prevent Cross-Site Scripting.• Passwords are now sent using the POST method instead of the GET method.New FeaturesN/AN/ASupported Operating SystemsNotesChangesApplicable ProductsBugs FixedN/AN/AEnhancementsN/AioLogik E1210, ioLogik E1210-T• Improved protocol efficiency for the ioLogik 2500 Series.New FeaturesN/AN/ASupported Operating SystemsNotesChangesApplicable ProductsBugs FixedN/A• Unable to disable the P2P heartbeat interval.• When the P2P client heartbeat is larger than 256 the time interval is incorrect.EnhancementsN/AioLogik E1210, ioLogik E1210-T• Supports ioLogik 2500 expansion mode.• Supports setting an initial value for a counter.New FeaturesN/AN/ASupported Operating SystemsNotesChangesApplicable ProductsBugs FixedN/A• The counter storage is deleted when the power fails.EnhancementsN/AioLogik E1210-T, ioLogik E1210• Supports SNMP protocol.• Added P2P heartbeat function.New FeaturesN/A• This version of firmware only works with ioSearch v1.5 or later versions.• Use the web console when upgrading the firmware from v1.0 to v1.10.Supported Operating SystemsNotesChangesApplicable ProductsBugs Fixed• Ensured that the system works properly after unstable power conditions.N/AEnhancementsN/AioLogik E1210, ioLogik E1210-TN/ANew FeaturesN/AN/ASupported Operating SystemsNotesChangesApplicable ProductsBugs Fixed• Improved firmware upgrading speed.• Removed Modbus/TCP ID checking mechanism.N/AEnhancementsN/AioLogik E1210, ioLogik E1210-T• Added "Locating I/O" function in General Settings.• Added Modbus address function code=0x08 for “ECHO” function.• Counter overflow status displayed in Channel Settings can be cleared manually.New FeaturesN/A• This version of the firmware only works with ioSearch v1.5 or later versions.• Use the web console when upgrading the firmware from v1.0 to v1.9.。
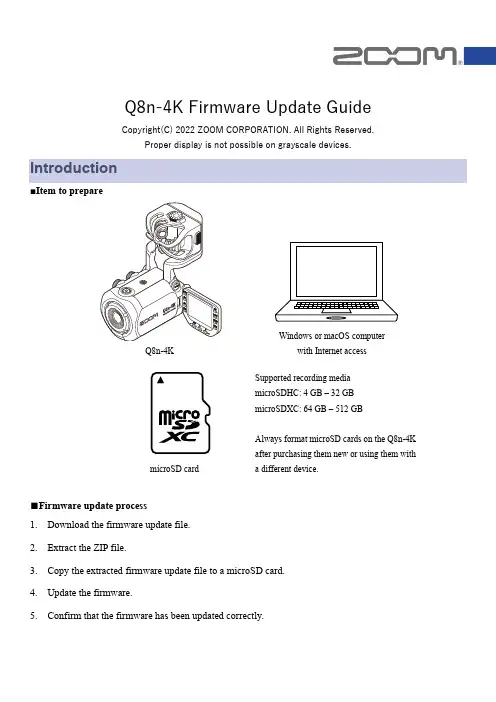
Q8n-4K Firmware Update GuideCopyright(C) 2022 ZOOM CORPORATION. All Rights Reserved.Proper display is not possible on grayscale devices.Introduction■Item to prepare■Firmware update process1. Download the firmware update file.2. Extract the ZIP file.3. Copy the extracted firmware update file to a microSD card.4. Update the firmware.5. Confirm that the firmware has been updated correctly.Q8n-4KWindows or macOS computerwith Internet accessmicroSD cardSupported recording media microSDHC: 4 GB – 32 GB microSDXC: 64 GB – 512 GBAlways format microSD cards on the Q8n-4K after purchasing them new or using them witha different device.Updating the FirmwareThis guide explains firmware update to version 1.03 as an example.1.Download the firmware update file.Download the ZIP file that contains the firmware update file from the Q8n-4K download page.On Windows2.Extract the ZIP fileSelect the folder that contains the downloaded ZIP file. Click ① “Compressed Folder Tools” and then click ② “Extract all”. This extracts the ZIP file.3.Copy the firmware update file to a microSD card.Copy the “Q8N4K_FW.BIN” file to a microSD card.Firmware update file Copy the firmware update fileto a microSD card.On macOS2. Extract the ZIP file.After downloading, open the ① “Downloads” folder which appears at the right end of the Dock by default. Then, click ②. Downloaded files will be shown.3. Copy the firmware update file to a microSD card.Copy the “Q8N4K_FW.BIN” file to a microSD card.Copy the firmware update file to a microSD card.The following procedures are the same on both Windows and macOS.4.Charge the battery enough or connect an AC adapter.NOTEThe firmware update is not possible if the remaining battery power is low.5.Insert the microSD card into the Q8n-4K.6.Turn the power on while pressing7.Press to select “YES✓”.This opens a final confirmation screen.Firmware update? Ver.1.02Ver.1.038.Press to select “YES✓”.After updating, the Completion Screen opens.NOTEDuring the firmware update, do not turn the power off or remove the microSD card.9.After the firmware update completes, turn the power off.NOTEIn the unlikely event that firmware update should fail, follow the procedures from the beginning again to update the firmware.Confirming that the firmware has been updated correctlyCheck the firmware versions used by the Q8n-4K.1.Presson the Recording Screen.The SETTINGS Screen opens.2.Press on the SETTINGS Screen.3. Check the firmware version.・Copying or reprinting this manual in part or in whole without permission is prohibited.・Windows® is a trademark or registered trademark of Microsoft® Corporation.・macOS® is a trademark or registered trademark of Apple Inc.・microSDXC logos are trademarks.・Other product names, registered trademarks and company names in this document are the property of their respective companies.・All trademarks and registered trademarks in this document are for identification purposes only and are not intended to infringe on the copyrights of their respective owners.・The illustrations in these instructions might differ from actual screens.©2022 ZOOM CORPORATION Z2I-4745-01。
开博尔F8评测:64位安卓盒子炫酷"芯"活力展"睛"彩评测前言【天极网家电频道陈文斌】当32位处理器的盒子方案大行其道,由于产品同质化现象泛滥而导致的市场饱和现象日益严重,盒子行业略显“疲乏”,缺少了一股创新活力将盒子行业推向另一个高度,甚至有盒子玩家坦言“智能网络机顶盒已经沦为纯粹的网络机顶盒”。
在日渐消沉的盒子行业,由开博尔领衔“64位处理器+Android5.1”的一股全新力量拔地而起,打破行业僵局,这款型号为开博尔F8的盒子新品将会给我们带来怎么样的惊艳体验呢?下面我们一起来了解下这款跨时代产品!一、参数介绍开博尔F8搭载了全新的64位八核RK3368超级之芯,基于A53先进架构,整机性能相当于普通电视盒子的400%,且内置安卓5.1系统,支持4K、HDMI2.0、H.265硬解与16G超大闪存,下面是开博尔F8的详细参数:关于瑞芯微RK3368:瑞芯微RK3368处理器采用28nm工艺制程,八核64Bit ARM Cortex-A53架构,运行频率为1.5GHz,内置Mali-G6110GPU,可以实现与PC同级别的图形处理性能。
Cortex-A53架构是ARM系列性能最高的产品,在功耗更低的情况下实现了高速计算和图形处理,是普通盒子性能的400%。
64位处理器指的是逻辑算数单元、寄存器、总线宽度都是64位(8个字节)的处理器,一次性能够处理更长的指令,处理器数据流的宽度增加了一倍,突破了32位处理器对4G内存支持的限制瓶颈,内存支持更大,从而能够得到更加畅快的体验。
关于安卓5.1系统:Android5.1支持ART环境默认运行,可以加速应用安装、开启和运行的速度,另外64位Android 5.1系统兼容64位/32位应用,在保证超快感体验的同时,保证了网络机顶盒在未来很久一段时间内不为过时。
关于4K:开博尔F8支持4K解码和4K分辨率输出,最大可实现4K@60fps视频解码输出。
硬盘U 盘
现在,您就可以添加相关需要共享的文件夹给播放机共享了。
点击“媒体库”,然后选择“添加到媒体库”。
以上设置完成后,启动播放机后,播放机会自动搜索局域网上的 UPNP媒体服务器(例如:安装了
“Windows Media Player 11"的电脑),并分别显示文件名称在相应的<电影><音乐><图片>列表中。
选
5、关闭Windows的防火墙。
6、诊断:点击 开始→运行→输入 \\本机IP地址 或\\本计算机名字弹出。
此时,应该出现共享的share名字。
点击该名字,应该能够进入访问下面的内容,否则samba共享配
置不正确,请检查防火墙设置或访问权限方面的问题。
开博尔H1283固件扩充及使用技巧这几天对h1283仔细研究了一下,现整理出来供初学者参考,以少走弯路。
H1283固件结构H1283 硬件环境256M Flash ROM + 256M DDR RAM软件主系统为Busybox嵌入式Linux系统官方固件核心采用quashfs压缩格式,49.5M,不支持直接写入,但同时挂载usr/local/etc,为yaffs格式,可读写40M空间。
~# df -hFilesystem Size Used Available Use% Mounted on/dev/root 49.5M 49.5M 0 100% //dev/mtdblock/2 40.0M 1.3M 38.7M 3% /usr/local/etc/dev/rd/0 40.0k 40.0k 0 100% /mnt/rd/dev/scsi/host0/bus0/target0/lun0/part1 1.8T 1.8T 31.4G 98% /tmp/usbmounts/sda1~#mount/dev/root on / type squashfs (ro)none on /dev type devfs (rw)none on /proc type proc (rw,nodiratime)devpts on /dev/pts type devpts (rw)none on /sys type sysfs (rw)none on /tmp type ramfs (rw)/dev/mtdblock/2 on /usr/local/etc type yaffs (rw,noatime)/dev/rd/0 on /mnt/rd type vfat (rw,nodiratime,fmask=0022,dmask=0022,codepage=cp437,iocharset=iso8859-1)/dev/scsi/host0/bus0/target0/lun0/part1 on /tmp/usbmounts/sda1 type ufsd (rw,nodiratime,nls=utf8,uid=0,gid=0,fmask=0,dmask=0,sparse)系统支持无盘和内置硬盘工作模式。
Software Update InstructionsZClone® Xi (ZXi)Software Update Instructions (Includes Firmware Update)1.0 IntroductionThe latest ZXi software, manual, and readme file (which contains the software release notes) can always be found on the ZXi support page at: /knowledge/zclonexi . The ZXi v1.1 software release contains both a software and firmware update.2.0 RequirementsTo perform the software and firmware updates, the following are required:The ZXi:▪ Connected to a network with Internet access (for updating “FROM NETWORK), or▪ With a USB flash drive formatted NTFS or exFAT (for updating “FROM USB DRIVE ).3.0 Software UpdateThere are two methods available to update the ZXi software:A. FROM NETWORK – Via the Internet through a network connection.B. FROM USB DRIVE – Via software file download onto a USB drive flash.3.1 Software Update From Network – Via the InternetThe ZXi software can be installed/updated by connecting the ZXi to a network with Internetaccess.1.Connect the ZXi to a network with Internet access. Set the proxy settings (IP settings) ifnecessary. Attach a network cable to the back of the ZXi.2. From the main menu on the ZXi, tap the down arrow twice then tap the SoftwareUpdates icon. A screen will appear showing the current version of software installedtowards the top of the screen.3. Select From Network . The ZXi will check for a newer version on the web. If one is found,it will display the version on the screen and theUpdate icon will be selectable.4. Tap the Update icon to begin the update. A confirmation screen will appear. Tap Yes tocontinue the update.5.Do not interrupt the update process. It may take several minutes. Once completed, a‘Successful’ screen will appear.6. Reboot the ZXi by turning the unit off then back on using the Power button in front ofthe unit.7. Verify the software version at the top of the ‘Software Updates’ screen.8. When finished, go to section 4.0 Firmware Update and perform a firmware update.3.2 Software Update From USB Drive – Via software downloadThe latest software can also be downloaded from Logicube’s website and be placed onto a USB flash drive.Download the latest software from the ZXi product support page at:/knowledge/zclonexi1. Download the zip file from the download page.2. Extract the contents of the downloaded zip file to the root of the USB flash drive (thefile must not be in any folder). Do not connect the USB flash drive yet. The ZXi willdisplay a message when to connect the USB drive. If the computer being used to extract the contents of the downloaded zipfile has the software WinZip, or other third party zip software, pleasereview Section 6.1.2.1 of the ZXi User’s Manual before proceeding.3.From the main screen, tap the Software Updates icon. 4.Select From USB Drive. The ZXi will prompt for the USB drive to be connected to USB_1 (the front USB port). 5.Connect the USB drive to USB_1. ZXi will then check for the version of the software on the USB drive and will display that version on the box next to the selected location. 6. Tap the Update icon to begin the update. A confirmation screen will appear. Tap Yes tocontinue the update. Do not interrupt the update process. It may take several minutes.Once completed, a ‘Successful’ screen will appear.7. Reboot the ZXi by turning the unit off then back on using the Power button in front ofthe unit.8. Verify the software version at the top of the ‘Software Updates’ screen. 9.When finished, go to section 4.0 Firmware Update and perform a firmware update.4.0 Firmware UpdateZXi software releases may contain a firmware update. This section provides instructions on how to check if a firmware update is required, and how to perform the firmware update.1.After the software is updated on the ZXi, from the main menu, tap the down arrow twice then tap theSoftware Updates icon.2.Tap the “Firmware Update” tab. One of two screens will appear:a.FIRMWARE UPGRADE AVAILABE– Tap the Update icon. A message will appear: “FIRMWAREUPDATE COULD TAKE UP TO A FEW MINUTES TO COMPLETE; PLEASE DO NOT INTERRUPTPOWER DURING THIS TIME. ON COMPLETION THE UNIT WILL AUTO-RESTART AND CONFIRMTHE UPDATE.” Tap the OK icon to start the firmware update process.b.FIRMWARE UPGRADE NOT AVAILABLE –This message will appear if the device does not requirea firmware update. No further action is necessary if this message appears.。