rx2600入门指南(中文)
- 格式:pdf
- 大小:1.27 MB
- 文档页数:68
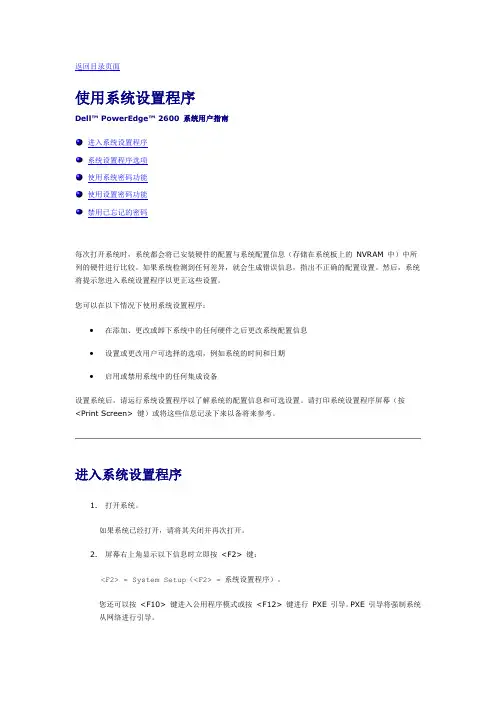
返回目录页面使用系统设置程序Dell™ PowerEdge™ 2600 系统用户指南进入系统设置程序系统设置程序选项使用系统密码功能使用设置密码功能禁用已忘记的密码每次打开系统时,系统都会将已安装硬件的配置与系统配置信息(存储在系统板上的NVRAM 中)中所列的硬件进行比较。
如果系统检测到任何差异,就会生成错误信息,指出不正确的配置设置。
然后,系统将提示您进入系统设置程序以更正这些设置。
您可以在以下情况下使用系统设置程序:∙在添加、更改或卸下系统中的任何硬件之后更改系统配置信息∙设置或更改用户可选择的选项,例如系统的时间和日期∙启用或禁用系统中的任何集成设备设置系统后,请运行系统设置程序以了解系统的配置信息和可选设置。
请打印系统设置程序屏幕(按<Print Screen> 键)或将这些信息记录下来以备将来参考。
进入系统设置程序1.打开系统。
如果系统已经打开,请将其关闭并再次打开。
2.屏幕右上角显示以下信息时立即按<F2> 键:<F2> = System Setup(<F2> = 系统设置程序)。
您还可以按<F10> 键进入公用程序模式或按<F12> 键进行PXE 引导。
PXE 引导将强制系统从网络进行引导。
如果等待时间过长,操作系统已开始载入内存,则请让系统完成载入操作,然后关闭系统并再试一次。
注:请参阅操作系统附带的说明文件,以确保有序地关闭系统。
您也可以通过响应某些错误信息进入系统设置程序。
请参阅“响应错误信息”。
注:要获得使用系统设置程序的帮助,请在程序运行时按<F1> 键。
响应错误信息如果系统启动时显示器屏幕上显示错误信息,请记录该信息。
在进入系统设置程序之前,请参阅《安装与故障排除指南》中的“系统哔声代码”和“系统信息”,以查找对该信息的解释和更正错误的建议。
注:安装内存升级件之后首次启动系统时,接收到错误信息是正常的。
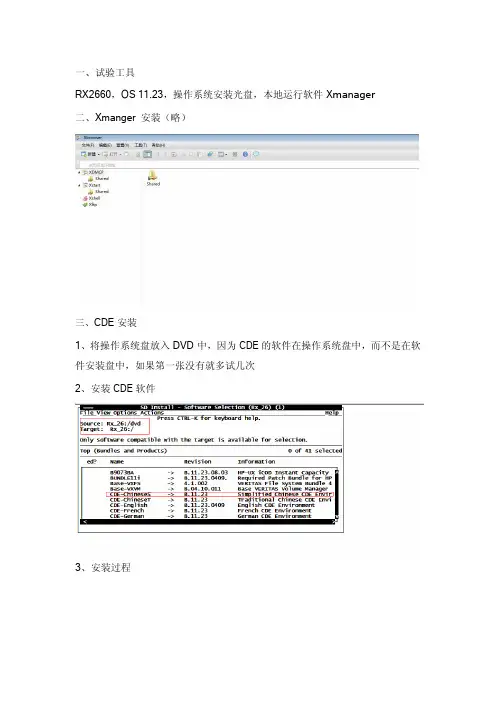
一、试验工具RX2660,OS 11.23,操作系统安装光盘,本地运行软件X m an ag e r二、Xmanger 安装(略)三、CDE 安装1、将操作系统盘放入DVD 中,因为CDE 的软件在操作系统盘中,而不是在软件安装盘中,如果第一张没有就多试几次2、安装CDE 软件3、安装过程4、重启5、服务启动6、安装完成7、进入系统8、乱码解决通常我们使用一些UNIX的图形仿真终端,要想实现中文字体的解决可以有两种方法,下面以Xmanager为例来说明一下。
1.使用字体服务器。
在HP-UX服务器端做以下操作:#vi /etc/services去掉下面一行的注释符号,意思为打开7000端口The X11 font server listens on port 7000#vi /etc/rc.config.d/xfsRUN_X_FONT_SERVER=1把上面的变量置为1的意思是每次主机启动都会自动启动字体服务器。
#/sbin/init.d/xfs start上面的命令是手动启动字体服务器进程。
在Xmanager的Xconfig中的font选项加入字体服务器,其中IP地址为你打开字体服务的主机。
这时你用Xmanager连入 HP-UX时显示的就为中文环境,而不是乱码。
2.从HP-UX系统中下载HP的中文字体库文件到本地PC机,然后把字体加入Xmanager 中。
这种方法的好处是字体就在你本机上,连入任何一台HP-UX主机都是中文环境,而不需要在每台HP-UX主机上打开字体服务器功能。
强烈推荐使用此中方法。
HP-UX中中文字体库的位置为:/usr/lib/X11/fonts/hp_chinese_s/75dpi可以在本地PC机上建一个目录如hp_chinese_s,然后使用ftp以二进制方式下载所有上面目录下的字体文件。
在把hp_chinese_s目录拷贝至本地PC的Xmanager软件所在目录的font目录下,然后再在Xmanager的Xconfig字体选项加入你下载下来的字体就可以了。

AssistanceNous vous remercions pour l'achat de ce produit NETGEAR. Rendez-vous sur /support pour enregistrer votre produit, obtenir de l'aide, accéder aux téléchargements et manuels de l'utilisateur les plus récents et rejoindre notre communauté. Nous vous recommandons d'utiliser uniquement les ressources d'assistance officielles de NETGEAR.Pour consulter la déclaration de conformité actuelle pour l'UE, rendez-vous sur la page/app/answers/detail/a_id/11621/.Pour obtenir les informations relatives à la conformité légale, rendez-vous sur /about/regulatory/.Avant de brancher l'alimentation, reportez-vous au document de conformité légale.NETGEAR INTL LTDBuilding 3, University Technology Centre Curraheen Road, Cork, IrlandeAvril 2018Pour commencer, téléchargez l'applicationNighthawkNETGEAR, Inc.350 East Plumeria Drive, San Jose, CA 95134 Etats-Unis© NETGEAR, Inc., NETGEAR et le logo NETGEAR sont des marques commerciales de NETGEAR, Inc. Toutes les marques commerciales autres que NETGEAR sont utilisées à des fins de référence uniquement.L'application Nighthawk vous guide à travers l'installation.Pour télécharger l'application, rendez-vous sur .En faire plus avec l'application NighthawkMaintenant que votre WiFi Nighthawk est configuré, voici ce quevous pouvez notamment faire avec l'application :Afficher les périphériques connectés à votre réseau.Modifier le nom de réseau et le mot de passe WiFi.Tester la connexion Internet de votre routeur.(en fonction des régions)Contenu de l'emballageNom et mot de passe du réseau WiFi du routeurUne étiquette sur votre routeur indique le nom du réseau WiFiprédéfini, le mot de passe et le code QR.。
中文使用手冊目錄產品介紹 (3)產品特色 (3)系統需求 (4)使用前需知 (4)安裝驅動程式 (5)在 Windows98/98SE下安裝驅動程式 (5)製作磁碟分割區與保密功能設定 (8)Format.exe應用工具程式﹝Format.exe﹞操作介面說明 (8)磁碟分割設定功能 (8)磁碟保密設定 (9)磁碟組態設定 (11)Lock.exe保密區登入程式﹝Lock.exe﹞操作介面說明 (12)免責條款 (14)產品介紹感謝您選購此高速 USB 2.0 行動碟產品。
本產品能讓您更方便且快速地在個人電腦與筆記型電腦間,存取及傳輸大量資料。
由於本產品提供較傳統儲存裝置更高的容量及更快的傳輸速率,其功能足以取代軟碟機或硬碟機。
除此之外,本產品所附之應用工具程式,可以讓您在此行動碟上製作磁碟分割區及設定保密磁碟來保護您的個人重要資料。
擁有此行動碟產品,您就能在日常生活中享受它所帶來的便利。
產品特色z符合 USB 2.0 介面規格。
支援熱插拔功能。
z在雙通道模式下,讀出速度可以達到每秒19MB,寫入速度可以達到每秒14MB。
* z在單通道模式下,讀出速度可以達到每秒10MB,寫入速度可以達到每秒7MB。
* z USB 埠直接供電,無需外加任何電源即可運作。
z不需安裝任何驅動程式。
(只有在 Windows®98下使用,才需要安裝驅動程式光碟內所附之驅動程式)z製作磁碟分割區之功能及設定保密磁碟區之功能。
z防震、無噪音、更長的資料保存時間。
注意:此行動碟之實際讀出與寫入速度會被行動碟內所使用之快閃記憶體與電腦之系統效能所影響。
系統需求z具備可正常使用之 USB 埠的桌上型或筆記型電腦。
z具備下列其中之一的作業系統:Windows® 98/98SEWindows® MEWindows® 2000Windows® XPMac™OS 9.x 或之後之版本Linux™ Kernel 2.4 或之後之版本使用前需知z請避免讓此USB 2.0行動碟產品接觸到高溫與水氣或讓其曝曬在日光下。

RW2600系列3G路由器操作手册本手册包括RW2600和RW2620主要收集详细的配置命令和命令配置界面文件目录一:操作登陆 (2)二:命令列表 (3)三:拨号配置 (12)四:按需拨号 (14)五:串口透明传输 (19)六:二次拨号 (21)七:双线备份 (25)八:DHCP配置 (29)九:IPSEC配置 (30)九:IOS升级 (32)一﹑RW2600系列路由器操作登陆配置概述1.1 配置方式RW2600系列路由器支持两种方式的配置,用户可根据自己的需要和习惯选用。
1.1.1 通过超级终端(Hypertrm)进行配置将RW2600 路由器的console 口与pc 机(要求运行Windows 操作系统)的串口(com1 或com2)用线缆相连,并且按照表1.1 中的要求,配置好Windows 的超级终端,启动终端,启动RW2600 路由器,用户即可对系统进行配置。
1.1.2 通过telnet 仿终端进行配置首先,用户应将RW2600 路由器的其中一个以太口的imp 地址与运行telnet 客户机(一般为运行Windows 操作系统的PC 机)的网卡up 地址设定在同一子网中;其次,确保路由器的以太口与运行telnet 客户机的系统物理连接正常;(可通过在telnet 客户机上ping RW2600 路由器以太口的ip 地址来证实)。
以上两步实现后,用户在telnet 客户机上运行telnet A.B.C.D(A.B.C.D 为MOBILEROUTER 的以太口的ip 地址,默认为192.168.0.1),即可对系统进行配置。
二﹑命令列表2.1 控制界面介绍命令列表分为8种控制界面:以太口控制界面虚拟接口控制界面初始界面-特权模式界面-配置模式界面-虚拟拨号池控制界面-虚拟拨号池拨出模式界面串口传输控制界面DHCP池控制界面2.2.1初始界面进入Router> 后键入?可以显示出下面可用命令Router>enable Turn on privileged commandsexit Exit from the EXEChistory Display the session command historyping Send echo messagesquit Disconnectshow show informationtracert Tracer routeenable 进入特权模式exit 退出当前界面history 显示使用过的命令记录ping 测试到某IP地址的连通性,格式为ping 《IP地址》quit 退出当前界面show 查询配置参数,详细参数在特权模式介绍tracert 追踪前往一个IP地址的路径过程格式为tracert 《IP地址》2.2.2特权模式界面键入enable后回车进入特权模式在特权模式界面下键入?可以看到可使用的命令Router#clock Manage the system clockconfigure Enter configuration modeconnect manual open ppp sessiondebug Debugging functionsdevs Devices operatordisable Turn off privileged commandsdisconnect disconnect ppp sessionenable Turn on privileged commandserase Erase a filesystemexit Exit from the EXECfs File system operatorhistory Display the session command historyno Disable debugging functionsnslookup Lookup dns record.ping Send echo messagesquit Disconnectreset Halt and perform a cold restartshow show informationtelnet Telnet clientterminal Set terminal line parameterstracert Tracer routeusbhost usb hostwrite Save running-configclock 定义当前系统时间,格式为(年份/月份/日期小时/分钟/秒数) configure 进入配置模式,键入参数terminal后回车connect 打开一个PPP连接接口,参数为Dialer 0-3 或者link 0-15 debug 捕获显示系统中的动态信息变化,参数有Crypto 捕获IPSEC信息dhcp 捕获dhcp相关信息ipstack 捕获所有接受和发送的IP信息格式为mem debugmodem 捕获modem的状态信息pevent PEVENTppp 捕获ppp相关信息ppp-detail 捕获ppp详细信息snmp 捕获snmp详细信息usbhost 捕获可插拔设备信息,参数为all为全部usbmodem Set usb modem debugdevs 控制内部硬件设备连接和开启,参数为join(连接设备编号Devicename)和open(打开设备编号Device name)disable 退出特权模式disconnect 关闭一个ppp连接接口,参数为Dialer 0-3 或者link 0-15 enable 进入特权模式(此命令可以忽略,因为已经进入特权模式)erase 清除所有已经保存的配置回复初始设置,参数startup-configexit 退出当前界面fs 显示系统文件(此命令主要为编程调试,一般不会使用)history 显示执行过的命令no 消除一个命令的执行,这个界面主要是消除debug显示,参数debug nslookup 进入dns查询模式ping 测试到某IP地址的连通性,格式为ping 《IP地址》quit 用于TELNET管理员退出reset 重启路由器show 查询配置参数详细参数如下arp 查询arp列表clock 显示当前设备时间crypto 显示IPSEC状态,参数crypto ipsec /sainfodevs 显示硬件设备编号Device nameinterface 显示接口状态信息,参数为Dialer和Ethernet 接口号ip 查询IP相关信息,详细参数有<icmp 查询ICMP信息,参数statisticskmem 查询TCP/IP协议占用的内存资源listen 将侦听的TCP/IP信息按照队列列出nat 查询NAT信息,参数statistics(统计)translations(转换列表)route 查询路由表socket 查询IP协议的通道统计statistics 查询IP详细统计信息tcp 查询TCP详细信息,参数statisticsudp 查询UDP详细信息,参数statistics>mem 显示内存状态mount 显示加载的硬件模块mpd 显示mpd信息,参数< layers Layers to open/closesessions Active sessionssummary Daemon status summarytypes Supported device typesversion version>netgraph 显示网络连接的状态统计,参数为nodes和typespevent PEVENT informationreload 定时重启,参数at是指某时间重启参数in指在多长时间之后重启running-config 查看当前系统配置snmp-server 显示本机snmp服务信息sys 查看系统简要状态threads 查看线程状态usbd 查看设备硬件telnet 远程TELNET登陆到某IP地址,格式为telnet (ip地址)terminal 将debug信息显示在当前界面上,monitor参数为显示在当前界面,no为不显示tracert 追踪前往一个IP地址的路径过程格式为tracert 《IP地址》usbhost 重启指定的硬件设备,格式为reset (设备硬件编号)write 保存当前配置2.2.3 配置模式界面Router#config terminal (键入该命令进入配置模式界面)进入配置模式后键入?Router(config)#arp Set a static ARP entryconsole Set console paramcrypto Encryption moduleenable Set privileged passwordexit Exit from configure modehostname Set system's network nameinterface Select an interface to configureip Global IP configuration subcommandslink link configmodem modem devicesno Negate a command or set its defaultsreload Halt and perform a cold restartrestore restore factory configsnmp-server Modify SNMP engine parametersservice Modify use of network based servicestelcom tansparent serial/ip connectortftp Trivial File Transfer Protocolusername Establish User Name Authenticationarp 手动绑定IP/MAC地址,格式1.1.1.1<IP>hhhh.hhhh.hhhh<MAC地址>console 设定console口的信号设置有参数baud<波特率>length<数据位>parity<效验位>stop<停止位>crypto 设定IPSEC参数,参数isakmp policy进入第一阶段协商设置参数map进入第二阶段协商设置进入第一阶段协商设置界面后参数:Encryption 设置第一阶段加密算法,参数des,aes,3desExit 退出当前界面Group 设置DH组,参数1和2Hash 设置验证算法,参数MD5和shaLifetime 设置隧道生存时间进入第二阶段协商设置后参数:Exit 退出当前界面Crypto map 0/进程号Encryption 设置第二阶段加密算法, 参数des,aes,3desKey 设置握手密钥,如123456No 否决命令local-site 设置本地保护地址,如192.168.1.0 255.255.255.0peer 设置对端IPSEC服务器地址,如1.1.1.1pfs 设置PFS组,参数group1或者group2remote-site 设置远端保护地址,如192.168.2.0 255.255.255.0 enable 设置进入特权模式的密码,参数passwordexit 退出当前界面hostname 定义主机名interface 进入接口,选项有Dialer 0-3 ,Ethernet0ip 配置IP服务,dhcp 进入DHCP配置,参数之后详细列出name-server<设置DNS服务器地址>route<设置静态路由>格式 1.1.1.1 <IP地址>255.255.255.0<子网掩码>1.1.1.2<下一跳网关>routing<开启路由功能>link 进入LINK模式可选任意编号0-15modem modem功能开启auto或者关闭disableno 无效化任意该界面下的命令,格式no <之前的命令>reload 重启路由器,参数at是在某个时间重启,参数in是在一段时间之后重启restore 恢复出厂配置service 启动服务配置,参数DHCPsnmp-server 设定SNMP服务,参数community<团体名字> ro/rw<只读/读写>参数contact<身份标识>参数enable trap<开启SNMP捕获>参数host<通告的ip地址>参数localname<本地标识>service 打开服务,参数DHCPtelcom 进入串口模式,编号1tftp 开启本机TFTP服务,参数serverusername 定义本地登陆用户名,参数password<密码>2.2.4虚拟接口控制界面键入iterface ?可以选择进入网络接口Router(config)# interfaceDialer Point-to-Point ProtocolEthernet IEEE 802.3进入DIALER 0配置界面Router(config)# interface Dialer 0<0-3> interface number在DIALER 0配置界面键入?Router(config-if-Dialer)#compress compressdialer-on-demand dialer-on-demandexit Exit from interface configuration modeipcp ipcplinkst dialer linksnat NAT interface configuration commandsno Negate a command or set its defaultsrequest requestroute Define route for this interfacetimeout Define timeout values for this interfacevjcomp vjcompcompress 开启压缩数据协议参数MPPCdialer-on-demand 开启按需拨号exit 退出当前界面ipcp 配置IPCP,参数pretend-ip伪装IP ,参数ranges是地址范围linkst 链接link池,编号0-15nat 设定nat参数,outside设本接口为nat外接口,参数dmz <IP地址>为设定DMZ主机地址,参数redirect<IP地址端口号TCP/UDP协议名>为设定本接口为某端口映射no 否决已设定的命令request 申请服务,参数dnsroute 将本接口获得的地址设置为默认路由,参数default timeout 设置拨号连接超时时间参数idle<秒>vjcomp2.2.5以太口控制界面Router(config)# interface Ethernet 0回车进入以太口配置模式exit Exit from interface configuration modeip Interface Internet Protocol config commandsmac-address Manually set interface MAC addressmtu Set the interface Maximum Transmission Unit (MTU) no Negate a command or set its defaultsexit 退出当前界面ip 定义接口IP地址,参数格式address <IP地址>mac-address 定义本接口MAC地址,格式HHHH.HHHH.HHHH mtu 设定本接口最大传输单元最大1500no 否决命令2.2.6 DHCP池控制界面Router(config)# ip dhcp excluded-address (IP地址)不予分配的IP地址Router(config)# ip dhcp pool 名字bootfile boot file nameclient-identifier client identifierclient-name client namedefault-router default-routerdns-server dns-serverdomain-name domain-nameexit Exit from dhcp configuration modelease address lease timenetbios-name-server NetBIOS (WINS) name servernetbios-node-type NetBIOS node typenetwork Network number and maskno Negate a command or set its defaultsoption raw DHCP optionsbootfileclient-identifier 定义DHCP用户MAC标识client-name 定义DHCP客户名字default-router 设置用户默认网关dns-server 设置用户DNSdomain-name 设置域名exit 退出当前界面lease 设置租约时间,格式为,天/小时/分钟netbios-name-server 设置netbios服务器地址netbios-node-type 设置netbios节点类型network 设置地址池,格式<IP><子网掩码>no 否定命令option option 命令控制2.2.7 虚拟拨号池控制界面Router(config)# link 0 进入link模式,Router(config-link)# 键入?后显示的可用命令Dialer-member Dialer interface this link terminate for.authentication Set PPP link authentication methodbackup-link Backup link for this link.exit Exit from link configuration modeident LCP identkeep-alive LCP echo keep-alivesmrru mrrumultilink set link multilinkno Negate a command or set its defaultsopen open linkpassword Set outbound passwordprotocol phys type configredial link redialusername Set outbound usernameDialer-member 挂接一个dialer,编号为0-4authentication 设置PPP验证方式,参数有accept:eap,pap,chap-md5, chap-msv2 backup-link 设定备份link链路,参数0-15exit 退出当前界面identkeep-alive LCP存活时间mrrumultilink 此拨号池设置为多链路模式no 无效化当前命令open 启用当前link配置password 设置拨号密码protocol 选择拨号方式,参数:modem,pppoe,pptp虚拟拨号池拨出模式界面:键入modem后回车进入modem配置界面,键入?可调参数如下apn APN名字,可选uninet,cmnet 等band band selectdeactive modem deactivedialer-on-ring 拨号唤醒exit 退出当前模式mru 最大接收单元mtu 最大发送单元no 无效化当前命令prefmode 选择线路模式,2为3G,4为1/X,8为混合模式repower 重置拨号模块键入pptp后回车进入pptp配置界面,键入?可调参数如下exit 退出当前界面mru 最大接收单元mtu 最大发送单元no 无效化当前命令peer 拨号目标IP<ip地址>键入pppoe后回车进入pppoe配置界面,键入?可调参数如下exit 退出当前界面mru 最大接收单元mtu 最大发送单元no 无效化当前命令redial 设置链路重协商次数,参数always,或1-65535username 设置拨号密码2.2.8串口传输控制界面在配置模式下键入telcom 后加编号1进入串口配置模式Router(config)# telcom 1Router(config-telcom)# 键入?exit Exit from telcom configuration modeidle_time seconds to disconnect from server when there is no datatransmission.default not disconnectno Negate a command or set its defaultsserial telcom serial config,such as baudrate,parity,data lengthand so ontcp tcpudp udpexit 退出当前界面idle_time 串口空闲时间,参数1-65535,单位秒no 无效化当前命令serial 设置串口数据,参数baud波特率,length数据位,parity校验位,stop停止位tcp 可设置tcp连接方式,参数如下client <进入客户方式,格式:tcp client ip(IP地址)port 1-65535>server <进入服务方式,格式:tcp server port 1-65535> udp 设置udp连接方式,参数如下client <进入客户配置方式,格式:udp client port1-65535 ip(IP地址)port 1-65535>server <进入服务配置方式,格式:udp server port 1-65535ip(IP地址)port 1-65535>三﹑普通(长连接)拨号配置3.1 基本配置命令Router> enable // 进入特权模式Router# Configure terminal // 从终端进行手动配置模式Router(config)# int e 0 //进入E0接口配置模式Router(config-if-eth)# ip add 192.168.1.1 255.255.255.0 //配置e0接口的网络逻辑地址Router(config-if-eth)# exit //退出所有配置模式或者关闭一个激活的终端会话和终止一个EXECRouter(config)# int d 0 //进入拨号D0接口配置模式Router(config-if-Dialer)# compress mppc //命令开启无线传输中的MPPC数据压缩功能Router(config-if-Dialer)# nat outside //命令开启NAT功能Router(config-if-Dialer)# route default //使用默认路由Router(config-if-Dialer)# exit //退回到配置模式Router(config)# link 0 //进入虚拟拨号池界面Router(config-link)# protocol mode //进入无线拨号模式Router(config-modem-link)# prefmode 8 //无线EVDO拨号设置为3G兼容模式8为EVDO的兼容模式详细号码区分如下EVDO的PREFMODE代号信道2 CDMA4 EVDO8 CDMA/EVDO兼容WCDMA的PREFMODE代号信道0 WCDMA/GPRS兼容模式1 仅WCDMA2 仅GPRS3 兼容模式,WCDMA优先4 兼容模式,GPRS优先Router(config-modem-link)# apn cmnet/uninet //(电信不必配置此项,移动或者联通需要配置此项,移动为cmnet联通为uninet )Router(config-modem-link)# exit //退回虚拟拨号池界面Router(config-link)# username test@test.133vpdn.sc //配置无线拨号用户名Router(config-link)# password test //配置无线拨号密码Router(config-link)# redial always //让接口一直拨号(必须配置)Router(config-link)# Dialer-member 0 //适配到D 0 接口Router(config-link)# open //回车后立即启用该拨号配置Router(config)# user admin(用户名) 123(密码) //添加管理用户名及密码Router(config)# en password 123 //添加enable密码四﹑按需拨号配置法4.1 基本配置命令Router(config)# ip add 192.168.1.1 255.255.255.0 //配置e0接口的网络逻辑地址Router(config)# int d 0 //进入拨号D0接口配置模式Router(config-if-Dialer)# compress mppc //命令开启无线传输中的MPPC数据压缩功能Router(config-if-Dialer)# nat outside //命令开启NAT功能Router(config-if-Dialer)# route default //使用默认路由Router(config-if-Dialer)# linkst 0 //适配0号虚拟拨号池Router(config-if-Dialer)# dial-on-demand //启用按需拨号模式Router(config-if-Dialer)# timeout idle 20 //配合按需拨号,设置超时时间Router(config-if-Dialer)# exit //退回到配置模式Router(config)# link 0 //进入虚拟拨号池界面Router(config-link)# protocol mode //进入无线拨号模式Router(config-modem-link)# prefmode 8 //无线拨号设置为3G兼容模式Router(config-modem-link)# apn cmnet/uninet //(电信不必配置此项,移动或者联通需要配置此项,移动为cmnet联通为uninet )Router(config-modem-link)# exit //退回虚拟拨号池界面Router(config-link)# username test@test.133vpdn.sc //配置无线拨号用户名Router(config-link)# password test //配置无线拨号密码Router(config-link)# redial always //让接口尝试拨号(必须配置)Router(config-link)# no keep-alive //关闭keep-aliveRouter(config)# user admin(用户名) 123(密码) //添加管理用户名及密码Router(config)# en password 123 //添加enable密码4.2 debug 命令调试在超级用户模式下的debug命令能够提供端口传输信息,节点产生的错误消息,诊断协议包和其它有用的troubleshooting数据.注意:使用debug命令要注意,它会占用系统资源,引起一些不可预测现象.终止使用debug命令请用no debug 命令.Debug命令默认是显示在控制台端口上的,若是telnet过去的,可用Router#terminal monitor 监控到控制台信息.Router#ter mon //进入监控模式Router#debug ppp //打开PPP debug信息Router#no debug ppp //关闭PPP debug信息Router#debug modem //打开PPP modem信息Router#no debug modem //关闭PPP modem信息show命令:show interface---显示接口统计信息,一些常用的show interface命令:Router#show interface ethernet 0 //显示本地以太接口地址信息Router#show int d 0 //查看无线是否拨号成功,并获得ip Router#show mpd sessions //查看会话的激活状态Router#show startup-config //显示当前路由器正在运行的配置4.3 恢复出场配置参数Router# erase startup-config //恢复出厂参数恢复出厂参数如下:Router# show run#Begin construct configure!interface Ethernet 0ip address 192.168.0.1 255.255.255.0!ip routingip http server!4.4无线(电信/移动/联通)配置显示以下是在各种无线网路模式下作相应的配置:CDMA1X/EVDO长连接拨号配置:Router# sh run#Begin construct configure interface Ethernet 0ip address 192.168.1.1 255.255.255.0 !!interface Dialer 0nat outsideroute defaultcompress mppc!link 0protocol modemprefmode 8username test@test.133vpdn.sc password testredial alwaysDialer-member 0open!ip routingtftp serverip http server!CDMA1X/EVDO按需拨号配置:Router# sh run#Begin construct configure interface Ethernet 0ip address 192.168.1.1 255.255.255.0 !!interface Dialer 0nat outsidetimeout idle 20route defaultdial-on-demandcompress mppclinkst 0!link 0protocol modemprefmode 8username test@test.133vpdn.scpassword testredial alwaysno keep-alive!ip routingGPRS/EDGE/WCDMA/TD-SCDMA长连接拨号配置:Router# sh run#Begin construct configureinterface Ethernet 0ip address 192.168.1.1 255.255.255.0!!interface Dialer 0nat outsideroute defaultcompress mppc!link 0protocol modemprefmode 1apn cmnet/uninet //必配APN,TD的APN:cmnet;WCDMA的APN:uninet username test@test.133vpdn.scpassword testredial alwaysDialer-member 0open!ip routingtftp serverip http server!GPRS/EDGE/WCDMA/TD-SCDMA按需拨号配置:Router# sh run#Begin construct configureinterface Ethernet 0ip address 192.168.1.1 255.255.255.0!!interface Dialer 0nat outsidetimeout idle 20route defaultdial-on-demandcompress mppclinkst 0!link 0protocol modemprefmode 1apn cmnet/uninet //必配APN,TD的APN:cmnet;WCDMA的APN:uninet username test@test.133vpdn.scpassword testredial alwaysno keep-alive!ip routing五﹑串口透明传输配置介绍5.1拓扑图5.2 配置过程先配置联通网络后再进行透明传输配置,透明传输配置如下outer(config)# telcom 1Router(config-telcom)# tcp client ip 1.1.1.1 port 1000此命令为把自己设定为透明传输的客户端,1.1.1.1是服务端的地址,1000是响应端口(双方端口号要一致),根据实际情况变化Router(config-telcom)# idle_time 30按需拨号需要此设置,如果有数据传输则激活拨号,如果30秒没有接受到数据则断开TCP 连接(仅TCP方法有效)Router(config-telcom)# serial buad 115200更改设定透明传输的串口波特率,默认115200,可以根据列表自由设定(和该串口直接连接的数据设备波特率必须一致)如果命令需要更改,在命令前加上no字符可以否决刚才生效的命令Router(config-telcom)# no tcp client之后就可以重新配置以udp为例Router(config-telcom)# udp client port 1000 ip 1.1.1.1 port 1000此命令是将本地设为udp传输客户端,第一个port是本地的响应端口号1000,ip是服务器地址,之后的port是服务器端口号1000,回车以后如果显示以下语句表示成功连接服务器成功(液晶屏幕)显示以下则失败,并且每隔5秒尝试重连通正在连接服务器(液晶屏幕)RW2620也可以设定成为透明传输服务端,也有TCP和UDP两种方法1 TCP方法串口速率与以上设定一样Router(config)# telcom 1Router(config-telcom)# tcp server port 1000将本端设置为TCP服务端2 UDP方法Router(config)# telcom 1Router(config-telcom)# udp server port 1000 ip 118.115.94.251 port 1000(118.115.94.251是客户端的IP地址,后面的port是客户端响应端口)5.3 显示配置文件在启用TCP客户端配置后显示配置文件sh run#Begin construct configureinterface Ethernet 0ip address 192.168.1.1 255.255.255.0!!interface Dialer 0nat outsideroute defaultcompress mppc!link 0protocol modemprefmode 8username cardpassword cardDialer-member 0!!ip routingtelcom 1tcp client ip 1.1.1.2 port 1000六﹑二次拨号(用MODEM拨号进入公网后,再拨入私有网络)6.1拓扑图6.1 配置过程6.1.1使用无线长连接方式先配置无线拨号Router(config)# int d 0 //进入拨号D0接口配置模式Router(config-if-Dialer)# compress mppc //命令开启无线传输中的MPPC数据压缩功能Router(config-if-Dialer)# nat outside //命令开启NAT功能Router(config-if-Dialer)# route 1.1.1.2 //指定PPTP地址路由Router(config-if-Dialer)# exit //退回到配置模式Router(config)# link 0 //进入虚拟拨号池界面Router(config-link)# protocol mode //进入无线拨号模式Router(config-modem-link)# prefmode 8 //EVDO无线拨号设置为3G兼容模式Router(config-modem-link)# apn cmnet/uninet //(电信不必配置此项,移动或者联通需要配置此项,移动为cmnet联通为uninet )Router(config-modem-link)# exit //退回虚拟拨号池界面Router(config-link)# username card //配置无线拨号用户名Router(config-link)# password card //配置无线拨号密码Router(config-link)# redial always //让接口一直拨号(必须配置)Router(config-link)# Dialer-member 0 //适配到D 0 接口Router(config-link)# open //回车后立即启用该拨号配置6.1.2检查无线拨号是否获得IP地址Router# show inter dialer 0Dialer0 is upInternet address is: 118.115.94.251/32Remote address is: 172.22.209.122Interface type is: 0x35MTU is: 1500 bytesobytes = 1375(B) opackets = 22ibytes = 1097(B) ipackets = 19Total = 2472(B) packets = 41验证获取IP成功后进入下一步6.1.3配置PPTP拨入私网Router(config)# int d 1 //进入拨号D1接口配置模式Router(config-if-Dialer)# compress mppc //命令开启MPPC数据压缩功能Router(config-if-Dialer)# nat outside //命令开启NAT功能Router(config-if-Dialer)# route default //使用默认路由Router(config-if-Dialer)# exit //退回到配置模式Router(config)# link 1 //进入虚拟拨号池界面Router(config-link)# protocol pptp //进入无线拨号模式Router(config-modem-link)# peer 1.1.1.2 //指定PPTP服务器IP地址Router(config-modem-link)# exit //退回虚拟拨号池界面Router(config-link)# username 123 //配置PPTP拨号用户名Router(config-link)# password 123 //配置PPTP拨号密码Router(config-link)# redial always //让接口一直拨号(必须配置)Router(config-link)# Dialer-member 1 //适配到D 0 接口Router(config-link)# open //回车后立即启用该拨号配置6.1.4配置完成后检查PPTP拨号是否获得地址Router# show inter dialer 1Dialer1 is upInternet address is: 12.0.0.1/32Remote address is: 11.0.0.254Interface type is: 0x35MTU is: 1335 bytesobytes = 0(B) opackets = 0ibytes = 0(B) ipackets = 0Total = 0(B) packets = 0二次拨号成功6.2用show run显示配置文档如下sh run#Begin construct configureinterface Ethernet 0ip address 192.168.1.1 255.255.255.0!!interface Dialer 0nat outsideroute 1.1.1.2compress mppc!interface Dialer 1nat outsideroute defaultcompress mppc!link 0protocol modemprefmode 8username cardpassword cardredial alwaysDialer-member 0open!link 1protocol pptppeer 1.1.1.2username 123password 123redial alwaysDialer-member 1open!七﹑双线备份(以PPTP有线方式为主,无线拨号为备份线路)7.1拓扑图7.2 配置命令Router(config)# int e 0 //进入E0接口配置模式Router(config-if-eth)# ip add 192.168.1.1 255.255.255.0 //配置e0接口的网络逻辑地址Router(config-if-eth)# ip add 10.10.10.1 255.255.255.0 secondary//配置e0接口的次网络逻辑地址(用于连接有线网)Router(config-if-eth)# exit //退出所有配置模式或者关闭一个激活的终端会话和终止一个EXEC配置主线路Router(config)# link 1 //进入1号虚拟拨号池界面Router(config-link)# protocol pptp //进入PPTP拨号模式Router(config-pptp-link)# peer 1.1.1.2 //设定PPTP服务器地址Router(config-pptp-link)# exit //退回虚拟拨号池界面Router(config-link)# username 123 //配置PPTP拨号用户名Router(config-link)# password 123 //配置PPTP拨号密码Router(config-link)# redial always //始终LCP协商Router(config-link)# Dialer-member 1 //适配到D1 接口Router(config-link)# backup-link 0 //设定LINK 0为备份线路Router(config-link)# open //回车后立即启用该拨号配置Router(config)# int d 1 //进入拨号D0接口配置模式Router(config-if-Dialer)# compress mppc //命令开启无线传输中的MPPC数据压缩功能Router(config-if-Dialer)# nat outside //命令开启NA T功能Router(config-if-Dialer)# route default //使用默认路由Router(config-if-Dialer)# exit //退回到配置模式Router(config)#ip route 1.1.1.2 255.255.255.255 10.10.10.2 //必须配置一个到PPTP服务器的静态路由,下一跳为有线网关配置备份线路Router(config)# link 0 //进入0号虚拟拨号池界面Router(config-link)# protocol mode //进入无线拨号模式Router(config-modem-link)# prefmode 8 //EVDO无线拨号设置为3G兼容模式Router(config-modem-link)# apn cmnet/uninet //(电信不必配置此项,移动或者联通需要配置此项,移动为cmnet联通为uninet )Router(config-modem-link)# exit //退回虚拟拨号池界面Router(config-link)# username card //配置无线拨号用户名Router(config-link)# password card //配置无线拨号密码Router(config-link)# Dialer-member 0 //适配到D 0 接口Router(config-link)# exit //退回到配置模式Router(config)# int d 0 //进入拨号D0接口配置模式Router(config-if-Dialer)# compress mppc //命令开启无线传输中的MPPC 数据压缩功能Router(config-if-Dialer)# nat outside //命令开启NA T功能Router(config-if-Dialer)# route default //使用默认路由Router(config-if-Dialer)# exit //退回到配置模式7.3查询设置是否成功Router(config-)#show interface dialer 1 检查是否获得地址(主链路连接正常应该获得地址)Dialer1 is upInternet address is: 12.0.0.1/32Remote address is: 11.0.0.254Interface type is: 0x35MTU is: 1335 bytesobytes = 0(B) opackets = 0ibytes = 0(B) ipackets = 0Total = 0(B) packets = 0Router(config-)#show interface dialer 0 检查是否获得地址(主链路连接正常应该关闭,主链路连接不正常则获得地址)Router# sh inter d 0Dialer0 is downInternet protocol processing disabled主链路无法连接后默认将启动备份链路拨号,dialer 0 口就会开始拨号并获得地址Router# show inter dialer 0Dialer0 is upInternet address is: 118.115.94.251/32Remote address is: 172.22.209.122Interface type is: 0x35MTU is: 1500 bytesobytes = 1375(B) opackets = 22ibytes = 1097(B) ipackets = 19Total = 2472(B) packets = 417.4 检查配置文件sh run#Begin construct configureinterface Ethernet 0ip address 192.168.1.1 255.255.255.0ip address 10.1.1.1 255.255.255.0 secondary !!interface Dialer 0nat outsideroute defaultcompress mppc!interface Dialer 1nat outsideroute defaultcompress mppc!link 0protocol modemprefmode 8username cardpassword cardDialer-member 0!link 1protocol pptppeer 1.1.1.2username123password 123redial alwaysbackup-link 0Dialer-member 1open!ip routingip route 1.1.1.2 255.255.255.255 10.10.10.2 Router#八﹑DHCP配置8.1 配置命令Router(config)# ip dhcp pool TEST //建立一个dhcp pool,这里是TESTRouter(config-dhcp)# network 192.168.2.0 255.255.255.0 //进入pool后定义地址池范围(必须和E0口地址在一个网段内)Router(config-dhcp)# lease 0 1 0 //定义租约时间,第一个是天第二个是小时,第三个是分钟Router(config-dhcp)# default-router 192.168.2.1 //定义默认路由Router(config-dhcp)# dns-server 61.139.2.69 //定义DNS地址Router(config-dhcp)# domain-name TEST //定义DHCP域名Router(config-dhcp)# exit //退回配置界面Router(config)# ip dhcp excluded-address 192.168.2.1 //定义排除地址Router(config)# service dhcp //启动DHCP服务(必须配置)8.2 显示配置使用show run显示的DHCP内容如下Router# show run#Begin construct configure!interface Ethernet 0ip address 192.168.0.1 255.255.255.0!service dhcpip dhcp pool shiyannetwork 192.168.2.1 255.255.255.0default-router 192.168.2.1dns-server 61.139.2.69domain-name shiyanip dhcp excluded-address 192.168.2.1ip routingip http server九﹑RW2620 IPSEC功能使用以及配置9.1 配置命令Router(config)# crypto isakmp policyRouter(config-config-isakmp)# encryption des/3des/aes(选择第一阶段加密算法,支持des,3des 或者aes,与对端一致)Router(config-config-isakmp)# hash md5/sha (选择验证算法,支持md5或者sha,与对端一致同时包含第一阶段和第2阶段)Router(config-config-isakmp)# group 1/2 (DH组可选1(768)或者2(1024)组,与对端一致)Router(config-config-isakmp)# lifetime 60-86400 (定义生存时间,单位秒)Router(config)# crypto map 0(定义加密配置映射可选0-15任意)Router(config-crypto-map)# key 123456(定义握手KEY,握手密钥)Router(config-crypto-map)# encryption des/3des/aes(选择第二阶段加密算法,支持des,3des 或者aes,与对端一致)Router(config-crypto-map)# local-site 192.168.1.0 255.255.255.0(定义本地保护IP地址掩码)Router(config-crypto-map)# remote-site 192.168.2.0 255.255.255.0定义远端保护IP地址掩码)Router(config-crypto-map)# peer 1.1.1.1(定义对端IPSEC服务器映射地址)Router(config-crypto-map)# pfs group1-2(设置PFS组,可选1-2)Router(config)# interface d 0(进入外出接口)Router(config-if-Dialer)# crypto map 0 (在接口上加载加密映射表)9.2 显示配置Interface Ethernetip address 192.168.2.1 255.255.255.0!!interface Dialer 0nat outsideroute defaultcrypto map 0!link 0protocol modemprefmode 8username cardpassword cardredial alwaysDialer-member 0open!ip routingcrypto map 0peer 1.1.1.1local-site 192.168.1.0 255.255.255.0remote-site 192.168.2.0 255.255.255.0key 123456encryption aes 256!crypto isakmp policyencryption aes!十﹑RW2620系统IOS升级:10.1 配置命令rw2600升级1、首先要启动tftp server 服务,并记下本设备的ip地址。

全球首发!AMDR72700XR52600X详测及超频设置指南距离AMD发布第二代锐龙处理器和新一代的X470芯片组主板已经过去了一周,不过产品正式解禁上市需要到4月19日(也就是今天),其实很多代理商都已经备足了货,只等放闸开卖。
我也在第一时间入手了新的第二代锐龙平台,现在就来曝光一下AMD R7 2700X/R5 2600X和X470主板的性能详测以及新平台的超频设置分享。
★AMD第二代锐龙处理器和X470芯片组对比上一代产品有何改进?★AMD R7 2700X和R5 2600X等第二代锐龙处理器采用基于上代锐龙改良而来的“Zen+”核心架构,核心代号更新为“Pinnade Ridge”,依然采用AM4接口,可兼容上一代的300系列主板芯片组,X370、B350甚至A320主板更新BIOS后都可以支持第二代锐龙处理器。
第二代锐龙处理器的制程升级到了12nm LP工艺,优化了缓存系统,进一步降低延迟,支持的新技术包括有第二代精准频率提升Precision Boost 2、第二代自适应动态扩频Extended Frequency Range2(XFR2)等,另外还增加了对StoreMI的支持。
基于Precision Boost 2技术,第二代AMD 锐龙处理器可监控自身能耗和温度,当监测到自身低温、安静运行时,处理器可针对任何应用程序以 25MHz 的幅度递增时钟频率。
而XFR2则让第二代 AMD 锐龙处理器可感知到高端散热方案并自动提升性能,也就是说可利用高端散热器来实现更低的温度而获得更高的多核性能提升。
下面是AMD官方网站发布的关于Precision Boost 2和Extended Frequency Range2(XFR2)的一些资料说明:X470作为此次与第二代锐龙处理器“手牵手”一同上市的新产品,X470对比上一代的X370变化其实并不大。
说实话,目前的主板芯片组产品,无论是intel还是AMD,在功能上已经非常完善,短时间内几乎已经不可能再折腾出什么新的亮点。

M-5261/0213OMEGAnet Online Service Internet e-mail **************Servicing North America:U.S.A: Omega Engineering, Inc., One Omega Drive, P .O. Box 4047ISO 9001 Certified Stamford, CT 06907-0047 USA Toll Free: 1-800-826-6342 TEL: (203) 359-1660 FAX: (203) 359-7700 email: **************Canada: 976 Bergar Laval (Quebec), Canada H7L 5A1 Toll Free: 1-800-826-6342 (514) 856-6928 FAX: (514) 856-6886 email: **************For immediate technical or application assistance:U.S.A and Canada: Sales Service: 1-800-826-6342/1-800-TC-OMEGA® Customer Service: 1-800-622-2378/1-800-622-BEST® Engineering Service: 1-800-872-9436/1-800-USA-WHEN®Mexico: En Español: 001 (203) 359-7803 FAX: (001) 203-359-7807**************.mx e-mail: *****************Servicing Europe:Benelux: Managed by the United Kingdom Office Toll-Free: 0800 099 3344 TEL: +31 20 347 21 21FAX: +31 20 643 46 43 e-mail:**************France: Managed by the United Kingdom Office Toll-Free: 0800 466 342 TEL: +33 (0) 161 37 29 00 FAX: +33 (0) 130 57 54 27 e-mail:**************Germany/Austria: Daimlerstrasse 26 D-75392 Deckenpfronn, Germany Toll-Free************ TEL: +49 (0) 7059 9398-0 FAX: +49 (0) 7056 9398-29e-mail:*************United Kingdom: OMEGA Engineering Ltd.ISO 9001 Certified One Omega Drive, River Bend Technology Centre, Northbank Irlam, Manchester M44 5BD England Toll-Free: 0800-488-488 TEL: +44 (0)161 777-6611 FAX: +44 (0)161 777-6622 e-mail:**************.uk ®It is the policy of OMEGA Engineering, Inc. to comply with all worldwide safety and EMC/EMI regulations that apply. OMEGA is constantly pursuing certification of its products to the European New Approach Directives. OMEGA will add the CE mark to every appropriate device upon certification.The information contained in this document is believed to be correct, but OMEGA accepts no liability for any errors it contains, and reserves the right to alter specifications without notice.W ARNING: These products are not designed for use in, and should not be used for, human applications.Installation GuidePX2600 SeriesMulti-Range Differential Pressure TransducerGeneral Information• Every PX2600 has been calibrated and tested before shipment to guarantee performance for all pressure ranges.• The PX2600 series is available in four versions, which have field selectable range capability via a slide switch. See four versions below:Multi-Range SpecificationsVersion Unidirectional BidirectionalPX2600-001 DX0.1”, 0.25”, 0.5” and 1.0” W.C FS+/- 0.1”, 0.25”, 0.5” and 1.0” W.C. FS PX2600-010 DX 1.0”, 2.5”, 5.0” and 10” W.C. FS+/- 1.0”, 2.5”, 5.0” and 10” W.C. FS PX2600-250 DX25, 50, 100 and 250 Pa FS+/- 25, 50, 100 and 250 Pa FSPX2600-2.5k DX.25, .50, 1.00 and 2.5 kPa+/- .25, .50, 1.00 and 2.5 kPa The PX2600 is available in three field selectable output configurations. See three versions below: 2-Wire 4-20mA (Current)3 Wire 0-5 or 0-10 VDC (Voltage)MECHANICAL INSTALLATIONMounting PositionMount and calibrate in vertical position for quick and easy installation on ducts, walls or ceilings and in control rooms.Media CompatibilityPX2600 transducers are designed to be used with air on nonconducting gases. Use with liquids or corrosive gases will damage the unit.EnvironmentThe operating temperature limits the PX2600 are as follows:Operating Temperature32°F to 122°F (0°C to 50°C)Compensated Temperature Range32°F to 122°F (0°C to 50°C)SIMPLE 5-STEP SETUP INSTRUCTIONSSTEP 1:For CE compliance a properly grounded shielding cable is required.ELECTRICAL CONNECTIONSRemovable Terminal Block for Easy WiringSIMPLE 5-STEP SETUP INSTRUCTIONSSTEPS 2-5Power on - LCD DisplayDisplay momentarily toggles thru all existing setup parameters on initial power up. Pressure is nor-mally indicated on display. Units are either in inches of water column (WC) 001DX & 010DX, or Pas-cal (Pa) 250DX & 2.5KDX.OmegaPX2600-010DXZERO AND SPAN ADJUSTMENT*The unit may be recalibrated in the field using the push button zero/span.Zero Adjustment:1. With unit at zero differential pressure, push zero button for 5 seconds. Units output and display will update.Span Adjustment:2. Apply full scale pressure (Note: Full scale value of largest range). Press and hold zero button for 5 seconds. Units output and display will update.*Zero and Span points must be within 10% of factory setting.PERFORMANCE SPECIFICATIONSAccuracy RSS* (at constant temperature.) ±1% FS*RSS of Non-Linearity, Non-Repeatability and Hysteresis.Thermal EffectsCompensated Range °F(°C)+32 to +122°F (0 to 50)Zero/Span Shift %FS/°F(°C)0.03 (0.054)Maximum Line Pressure10 PSIWarm-up Shift±0.2% FS totalPosition Effects(Unit is factory calibrated at 0g effect in the vertical positionZero Offset (%FS/G)0.2%RETURNING PRODUCTS FOR REPAIRPlease contact Omega at 1-800-826-6342 or 1-203-359-1660 before returning unit for repair to review information relative to your application. Many times, only minor field adjustments may be necessary. When returning a product to Omega, the material should be carefully packaged and shipped prepaid to:Omega Engineering, IncOne Omega DriveP.O. Box 4047Stamford, CT 06907-0047To assure prompt handling, please supply the following information and include it inside the package of returned material:1. Name and phone number of person to contact.2. Shipping and billing instruction.3. Full description of the malfunction.4. Identify any hazardous material used with product.Notes: Please remove any pressure fittings and plumbing that you have installed and enclose any re-quired mating electrical connectors and wiring diagrams. Allow approximately 3 weeks after receipt at Omega for the repair and return of the unit. Non-warranty repairs will not be made without customer approval and a purchase order to cover the repair charges.Calibration ServicesOmega maintains a complete calibration facility that is traceable to the National Institute of Standards & Technology (NIST). If you would like to recalibrate or re-certify your Omega pressure transducers or transmitters, please call our Sales Department at 1-800-826-6342 or 1-203-359-1660 for scheduling, cost and turnaround estimates.Thank you,Omega Engineering, Inc.OMEGA ENGINEERING, INC. warrants this unit to be free of defects in materials and workmanship for a period of 13 months from date of purchase. OMEGA’s WARRANTY adds an additional one (1) month grace period to the normal one (1) year product warranty to cover handling and shipping time. This ensures that OMEGA’s customers receive maximum coverage on each product.If the unit malfunctions, it must be returned to the factory for evaluation. OMEGA’s Customer Service Department will issue an Authorized Return (AR) number immediately upon phone or written request. Upon examination by OMEGA, if the unit is found to be defective, it will be repaired or replaced at no charge. OMEGA’s WARRANTY does not apply to defects resulting from any action of the purchaser, including but not limited to mishandling, improper interfac-ing, operation outside of design limits, improper repair, or unauthorized modification. This WARRANTY is VOID if the unit shows evidence of having been tampered with or shows evidence of having been damaged as a result of excessive cor-rosion; or current, heat, moisture or vibration; improper specification; misapplication; misuse or other operating conditions outside of OMEGA’s control. Components in which wear is not warranted, include but are not limited to contact points, fuses, and triacs.OMEGA is pleased to offer suggestions on the use of its various products. However, OMEGA neither assumes responsibility for any omissions or errors nor assumes liability for any damages that result from the use of its products in accordance with information provided by OMEGA, either verbal or written. OMEGA warrants only that the parts manufactured by the company will be as specified and free of defects. OMEGA MAKES NO OTHER WARRANTIES OR REPRESENTATIONS OF ANY KIND WHATSOEVER, EXPRESSED OR IMPLIED, EXCEPT THAT OF TITLE, AND ALL IMPLIED WARRANTIES INCLUDING ANY WARRANTY OF MERCHANTABILITY AND FITNESS FOR A PARTICULAR PURPOSE ARE HEREBY DISCLAIMED. LIMITATION OF LIABILITY: The remedies of purchas -er set forth herein are exclusive, and the total liability of OMEGA with respect to this order, whether based on contract, warranty, negligence, indemnification, strict liability or otherwise, shall not exceed the purchase price of the component upon which liability is based. In no event shall OMEGA be liable for consequential, incidental or special damages.CONDITIONS: Equipment sold by OMEGA is not intended to be used, nor shall it be used: (1) as a “Basic Component” under 10 CFR 21 (NRC), used in or with any nuclear installation or activity; or (2) in medical applications or used on hu-mans. Should any Product(s) be used in or with any nuclear installation or activity, medical application, used on humans, or misused in any way, OMEGA assumes no responsibility as set forth in our basic WARRANTY/DISCLAIMER language, and, additionally, purchaser will indemnify OMEGA and hold OMEGA harmless from any liability or damage whatsoever arising out of the use of the Product(s) in such a manner.Direct all warranty and repair requests/inquiries to the OMEGA Customer Service Department. BEFORE RETURNING ANY PRODUCT(S) TO OMEGA, PURCHASER MUST OBTAIN AN AUTHORIZED RETURN (AR) NUMBER FROM OME -GA’S CUSTOMER SERVICE DEPARTMENT (IN ORDER TO AVOID PROCESSING DELAYS). The assigned AR number should then be marked on the outside of the return package and on any correspondence.The purchaser is responsible for shipping charges, freight, insurance and proper packaging to prevent breakage in transit.FOR WARRANTY RETURNS, please have the following information available BEFORE contacting OMEGA:1. Purchase Order number under which the product was PURCHASED,2. Model and serial number of the product under warranty, and 3. Repair instructions and/or specific problems relative to the product.OMEGA’s policy is to make running changes, not model changes, whenever an improvement is possible. This affords our customers the latest in technology and engineering.OMEGA is a registered trademark of OMEGA ENGINEERING, INC.© Copyright 2009 OMEGA ENGINEERING, INC. All rights reserved. This document may not be copied, photocopied,reproduced, translated, or reduced to any electronic medium or machine-readable form, in whole or in part, without the prior written consent of OMEGA ENGINEERING, INC.FOR NON-WARRANTY REPAIRS, consult OMEGA for current repair charges. Have the following information available BEFORE contacting OMEGA:1. Purchase Order number to cover the COST of the repair,2. Model and serial number of the product, and 3. Repair instructions and/or specific problems relative to the product.TEMPERATUREThermocouple, RTD & Thermistor Probes, Connectors, Panels & Assemblies Wire: Thermocouple, RTD & ThermistorCalibrators & Ice Point ReferencesR ecorders, Controllers & Process MonitorsInfrared PyrometersPRESSURE, STAIN AND FORCETransducers & Strain GagesLoad Cells & Pressure GagesDisplacement TransducersI nstrumentation & AccessoriesFLOW/LEVELRotameters, Gas Mass Flowmeters & Flow ComputersAir Velocity IndicatorsTurbine/Paddlewheel SystemsT otalizers & Batch ControllerspH/CONDUCTIVITYpH Electrodes, Testers & AccessoriesBenchtop/Laboratory MetersControllers, Calibrators, Simulators & PumpsI ndustrial pH & Conductivity EquipmentDATA ACQUISITIOND ata Acquisition & Engineering SoftwareCommunications-Based Acquisition SystemsPlug-in Cards for Apple, IBM & CompatiblesDatalogging SystemsRecorders, Printers & PlottersHEATERSHeating CableCartridge & Strip HeatersImmersion & Band HeatersF lexible HeatersLaboratory HeatersENVIRONMENTALMONITORING AND CONTROLMetering & Control InstrumentationRefractometersPumps & TubingAir, Soil & Water MonitorsIndustrial Water & Wastewater TreatmentpH, Conductivity & Dissolved Oxygen Instruments。


2600 Series 用户手册2009年1月机器类型:4433, 4445型号:目录安全信息 (5)序言 (6)查找有关打印机的信息 (6)安装打印机 (9)处理安装过程中的安全性警告 (9)安装打印机(只用作复印机) (9)了解打印机的部件 (14)使用打印机操作面板 (15)了解打印机软件 (17)安装打印机软件 (17)安装可选的XPS驱动程序(仅限于Windows Vista用户) (17)使用Windows打印机软件 (18)使用Macintosh(英文版)打印机软件 (19)装入纸张和文档原件 (21)装入纸张 (21)装入各种类型的纸张 (21)将文档原件放置在扫描仪玻璃上 (24)打印 (26)打印基本文档 (26)打印文档 (26)打印网页 (26)打印多份文档 (27)逐份打印 (27)先打印最后一页(倒序打印) (28)将多页文档打印到一张纸上 (28)暂停打印作业 (29)取消打印作业 (30)打印特殊文档 (31)选择适当的特殊类型纸张 (31)使用打印机软件打印照片 (31)打印信封 (32)打印标签 (32)打印自定义尺寸的纸张 (33)打印其他的特殊文档 (34)保存和删除打印设置 (35)复印 (36)进行复印 (36)复印4 x 6照片 (36)扫描 (37)扫描文档原件 (37)取消扫描作业 (37)传真 (39)发送传真 (39)自动接收传真 (40)维护打印机 (41)维护打印墨盒 (41)安装打印墨盒 (41)取出旧的打印墨盒 (42)再填充打印墨盒 (43)使用原装Lexmark打印墨盒 (43)清洗打印墨盒喷头 (44)擦洗打印墨盒的喷头和触点 (44)维护打印墨盒 (45)擦洗扫描仪玻璃 (45)清洗打印机的外壳 (45)订购耗材 (46)订购打印墨盒 (46)订购纸张和其他耗材 (46)回收Lexmark产品 (47)问题解答 (48)使用打印机问题解答软件(仅限于Windows) (48)安装问题解答 (48)电源指示灯不亮 (48)软件不能安装 (49)页面不能打印 (50)反安装并重新安装软件 (52)启用USB端口(Windows) (53)解决打印机电源问题 (54)通告 (55)产品信息 (55)版本通告 (55)能源消耗 (58)索引 (64)安全信息请只使用随同此产品提供的电源和电源线,或者使用经过制造商认证的电源和电源线作为替代。
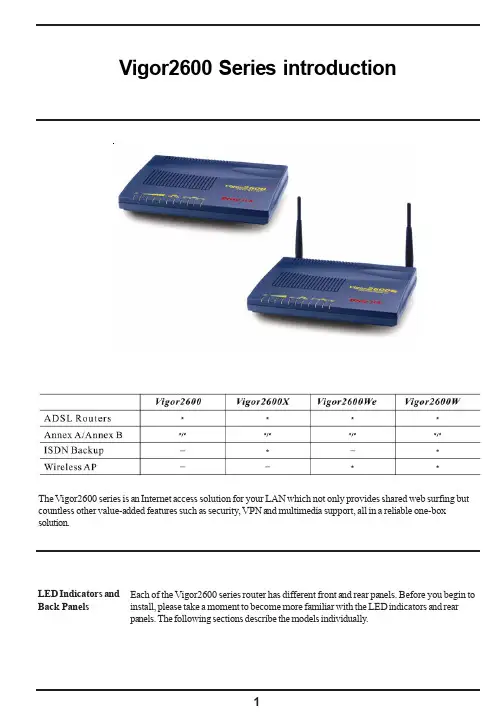
Vigor2600 Series introductionLED Indicators and Back Panels Each of the Vigor2600 series router has different front and rear panels. Before you begin to install, please take a moment to become more familiar with the LED indicators and rear panels. The following sections describe the models individually.The Vigor2600 series is an Internet access solution for your LAN which not only provides shared web surfing but countless other value-added features such as security, VPN and multimedia support, all in a reliable one-box solution.Copyright Declarations Copyright 2003 All rights reserved. This publication contains information that is protected by copyright. No part may be reproduced, transmitted, transcribed, stored in a retrieval system, or translated into any language without written permission from the copyright holders.The following trademarks are used in this document:. Microsoft is a registered trademark of Microsoft Corp.. Windows,Windows 95, 98, Me, NT, 2000, XP and Explorer are trademarks ofMicrosoft Corp.. Apple and Mac OS are registered trademarks of Apple Computer Inc.Other products may be trademarks or registered trademarks of their respective manufacturers.TrademarksSafety Instructions Warranty . Read the installation guide thoroughly before you set up the router.. The router is a complicated electronic unit that may be repaired only be authorizedand qualified personnel. Do not try to open or repair the router yourself.. Do not place the router in a damp or humid place, e.g. a bathroom.. The router should be used in a sheltered area, within a temperature range of +5 to +40 Celsius.. Do not expose the router to direct sunlight or other heat sources. The housing andelectronic components may be damaged by direct sunlight or heat sources.. Keep the package out of reach of children.. When you want to dispose of the router, please follow local regulations onconservation of the environment.We warrant to the original end user (purchaser) that the router wil be free from any defects in workmanship or materials for a period of three (3) years from the date of purchase from the dealer. Please keep your purchase receipt in a safe place as it serves as proof of date of purchase. During the warranty period, and upon proof of purchase, should the product have indications of failure due to faulty workmanshipand/or materials, we will, at our discretion, repair or replace the defective productsor components, without charge for either parts or labor, to whatever extent wedeem necessary tore-store the product to proper operating condition. Any replacement will consist of a new or re-manufactured functionally equivalent productof equal value, and will be offered solely at our discretion. This warranty will not apply if the product is modified, misused, tampered with, damaged by an act of God,or subjected to abnormal working conditions. The warranty does not cover the bundled or licensed software of other vendors. Defects which do not significantly ©affect the usability of the product will not be covered by the warranty.We reserve the right to revise the manual and online documentation and to make changes from time to time in the contents hereof without obligation to notify any person of such revision or changes.European Community Be A Registered OwnerFirmware & Tools Updates Hereby, we declare that the router is in compliance with the essential requirements and other relevant provisions of R&TTE Directive 99/5/EC.Web registration is preferred. Y ou can register your Vigor router via http:// . Alternatively, fill in the registration card and mail it to the address found on the reverse side of the card.Due to the continuous evolution of DrayTek ADSL & Router technology, all routers will be regularly upgraded. Please consult the DrayTek web site for more information on newest firmware, tools and documents.Vigor2600 Series Start Guide QuickIdentify your variant Delivery check Aim of thischapterQuickly connect your router to the Internet Check your router package for the following items :The Router1 printed Quick Start Guide with warranty/ registration card1 CD includes detailed User Manual in electronic form, released firmware and utilities1 AC/DC power supply adapter (black)1 Ethernet LAN cable (blue) for connection to a computer or hub1 ADSL line cable (RJ-11, black)1 ISDN line cable (RJ-45, black) for Vigor2600X/ Vigor2600W only2 external antennas for Vigor2600W/ Vigor2600We onlyY our router package should contain all these items. If any item ismissing or damaged, contact your dealer or our Customer ServiceDepartment immediately.The Vigor2600 series all contain Annex A/Annex B models,please check if the package is suitble for your using.Y ou can get the information from bottom of Vigor2600series router.Annex A : connecting to an analog POTS lineAnnex B : connecting to a digital ISDN lineWhat youneed from ISP DSL ParametersIt should provide at least the following information from ISP :1. The VPI/VCI of the virtual channel to use on the DSL line2. Protocol : PPPoE, PPPoA or MPoA (RFC1483/2684)3. Encapsulation Method : LLC/SNAP or VCMUX4. Modulation Method : T1.413, G.lite, G.DMTDSL line Depending on the variant Vigor2600 series you purchased, the following DSLservice must be available at your local premisses:ADSL over POTS [Annex A] :ADSL service must be enabled on your POTS telephone line.ADSL over ISDN [Annex B] :ADSL service must be enabled on your ISDN telephone line.(Vgior2600 series provides multimode which can automatically detect)Local networkingTo use the Ethernet port(s) you need at least:One PC with an Ethernet Card installed.TCP/IP protocol suiteFor TCP/IP, your PC can set either static IP or DHCP to ask IP from router. The default gateway of router is 192.168.1.1. If static IP is chosen, you can set 192.168.1.x for your PC.A Web browserExample:VPI/VCI = 0/33Protocol = PPPoAEncapsulation Method = VCMUXModulation Method = G.DMTUsername/PasswordOnly for PPPoE/PPPoA mode usersFixed IP Address/ Subnet Mask/ Gateway IP AddressOnly for MPoA mode users. Some ISP will use DHCP method to provide IP address for MPoA mode users, then users do not need to know the fixed IP address.If you do not know these information in detail, please contact your ISP to get these informations.What you needin your sideThe wire installationEthernet port (between router and PC), DSL port and Power port as below:Install ‘ Router Tools ‘This tool which provides ‘Smart StartWizard’, ‘Firmware Upgrade Program’and ‘TFTP client’ is in the attached CD. It supportsWindows, Mac OS 8/9 andMac OS X. Moreover, it provides ‘Syslog Tool” for Windows system. ForVigor2600X and Vigor2600W models, there is vitual TA program for the usage ofISDN AP.Turn on your router Once all previous steps are completed, turn on your router. After Power is on,the ‘ACT’ LED and corresponding LAN port LED will light.If the LEDs do not light normally, please refer to section A, ‘Trouble Shooting’,for furthur information.Connect to router If the PC is set to obtain IP address automatically (recommended), you canuseWindows winipcfg.exe or ipconfig.exe to check if it has obtained an IP addressfrom the router. If not, please reboot PC and ensure that it has obtained an IP addressfrom the router.Then you can use ‘Smart StartWizard’ to confige router or connect to router viaWebbrowser directly. The default IP of router is 192.168.1.1.Password The default password is null. You can press ‘OK’ to skip it.Once past the password prompt, you will now see the router’s main menu:(Example: Vigor2600)Enter RouterMenu Set DSL Parameters Click on ‘Internet Access Setup’ on the right-hand menu.You will find two items : PPPoE/PPPoA and MPoA (RFC 1483/2684).Then Y ou can continuely enter setting menu according to the protocol which ISP assigns.For PPPoE/PPPoA Users Enter your allocated username, password and DSL parameters according to the information provided by your ISP.If you want to connect to Internet all the time, you can check ‘Always On’.For MPoA (RFC 1483/2684) Users Enter your allocated W AN IP address(or enabling DHCP client to get IP from ISP) and DSL parameters according to the information provided by your ISP.Auto detect ATM/DSL Setting You can also use this function to detect A TM/ DSL setting. Please follow the instructions to operate. If your country is not in the list, it may take longer time todetect.Surfing Internet Once all previous steps are completed, you can surf Internet now. You can alsomonitor the connection condition via router management function.(Example: Vigor2600)Wireless LANSetting Wireless setting is for Vigor2600W and Vigor2600We only.If you want to connect your wireless supported devices to Vigor2600W orVigor2600We, you need to configure the router before you start to use it.Wireless LAN Interface The Vigor2600W and Vigor2600We are equipped with a wireless LAN interface compliant with the 11Mbps IEEE 802.11b protocol. The features of wireless LAN capability enable high mobility of several simultaneous users accessing all LAN facilities just like on a wired LAN as well as Internet and WAN access.The Frequency Domain is set as Europe and the MAC address will show as above. Click General Settings, you could configure the SSID and wireless channel.Scheduler: You can set wireless device to work at some time interval only. These are 4 internals you can choose: schedule1, schedule2, schedule3, and schedule4. The default setting is always working. You can set the schedule under Advanced Setup >> Call Schedule Setup. (Please refer to detail manual on the attached CD)WEP Security of Wireless LAN Interface SSID(Service Set Identification): You should set the SSID same as your note book wireless card to allow the client PCs to access the network via the wireless LAN interface. The default SSID is "default".Channel: To select a wireless channel for Vigor2600W / Vigor2600We. The default channel is 6.Hide SSID: To check it to hide SSID when the wireless clients sniffing radio.WEP Encryption:To improve the security and privacy of your wireless data packets the WEP encryption feature can be used. The WEP encrypts each frame transmited from the radio using one of the keys entered from this panel. WEP encryption can be enabled by selecting 64 bits or 128 bits from pull down menu. These are 4 key sets can be entered and only one key can be selected. The key can be entered by ASCII or Hexadecimal.Disable: Turns off the WEP encryption mechanism.WEP 64 Bit: For 64bits WEP key, either 5 ASCII characters or 10 hexadecimal digitals leading by 0x can be entered. For example, ABCDE or 0x4142434445.WEP 128 Bit: For 128bits 13 ASCII characters or 26 hexadecimal digits leading by 0x can be entered. For exmaple, ABCDEF GHIJKLM or0x4142434445464748494A4B4C4D.Access Control of Wireless LAN Interface For additional security of wireless access, the Access Control allows your to restrict thenetwork access rights by the wireless LAN MAC address of client. Only the valid MAC address which has been configured can allow to access the wireless LAN interface. Enable Acces Control: To check the Enable Access Control to enable the MACAddress access control feature.MAC Address: To type the specific MAC Address which could be added on, removed from or edited from the access list above.ADD: To add a MAC address on the list.Remove: To remove the selected MAC address on the list.Edit: To edit the selected MAC address on the list.Cancel: To cancel the MAC address access control setup.Clean All: To clean all of configured MAC address on the list.OK:To save the access control list.Trouble Shooting for‘ Can not get on to the Internet’Check if the hardware is OK?Check if the power and LAN line are connected correctly. After power is on, the ‘ ACT ‘ LED will blink once a second, and the correspondent LAN port will light.Can you ping the router from yourPC?The default gateway IP of router is 192.168.1.1.Please check if you can ping router correctly.For WindowsFor Mac(Terminal)If not, please check the IP address of your PC. We suggest you set ‘ get IP automatically ‘1. Enter “Control Panel” and double click “Network”.2. Choose “TCP/IP of LAN device” and press “Properties”.3. Choose “Obtain an IP address automatically”1. Enter “Control Panel” and double click“Network and Dial-up Connections”.2. Right click “Local Area Connection” andchoose “Properties”.3. Choose “TCP/IP” and press “Properties”.4. Select ‘Obtain an IP address automatically’1. Enter “Control Panel” and double click“Network Connections”.2. Right click LAN icon and choose“Properties”.3. Choose “TCP/IP” and press “Properties”.4. Select “Obtain an IP address automatically”For Mac OS9.x user Control Panel —> TCP/IPFor Mac OSX user System Preferences —> NetworkAre DSL/ ISPConnect to router Web Configurator.settings Ok?(Example: Vigor2600)Check if the setting of DSL is ok. (For MPoA users, please refer to the MPoAexplanation on page 14 )—> VPI/VCI/Modulation mode:T1.413, G.Lite, G.DMT, Multimode—>Encapsulation mode: VCMUX or LLC/SNAPFor PPPoE/PPPoA user, please check if user name/ password provided by ISP are correct or not.For MPoA (RFC1483/2684) mode users, please check if the WAN IP/ Gate-way/ Namemask is set or ISP requires you to use DHCP client to get WAN IP.Check DSL Status Y ou can know the DSL status via status monitor.(Example: Vigor2600)Report to people who concerned if still can not work If the router setting is OK and your PC on the LAN can also talk to router successfully, there may be wrong settings on DSL (eg. VPI, VCI, modulation etc...) when there is still no ADSL Internet connection. Please contact local ISP representatives to help you for configuration. If the router does not work correctly, please contact your dealer for help. For any further questions, please *******************************.tw.。
TBS CROSSFIRE Nano diversity RX Revision 2021-10-14 Quickstart guideThe CROSSFIRE Diversity Nano RX is the TBS CROSSFIRE Diversity 8ch RX in a nano package. Next level reliability and range in a form factor that will blow minds.The small size allows you to save space and weight, while still retaining the key features that make theCROSSFIRE system flexible and reliable.Key features:●Super compact, only 24 x 18 mm (1.8g)●Same feature set like TBS CROSSFIRE DIVERSITY RX receiver (Redundant RF stages, 1s backupbattery circuitry for RF beacons, SBUS, CRSF, SmartAudio, MAVLInk, Serial Bridge, FLARM)●Telemetry support●Full range receiver●5V voltage input●Integrated backup battery charger -no over-discharge protection, use a battery with BMS!● 2.54mm pitch front connector and 2mm pitch side connectorNote:*** Firmware 2.87 or newer required! ***How to:Update TX/Update RXWiring receiverThe receiver does not come with any connectors on-board, this is intending to allow for flexible and more varied setups, i.e. it is easier to add a connector than to remove a pre-soldered one.Use normal servo-wires to either connect directly to the soldering pads/vias or use a 2.54mm pin header to mount it to a motherboard.Output CH1 to CH8 are multi-purpose and support the below functionality.Receiver pin Output type Diversity RX (Nano)Default value1PWM CH1 (PWM Ch1 to 12), PPM, RSSI, LQ, RSSI/LQ, CRSF TX PWM Ch. 12PWM CH2 (PWM Ch1 to 12), RSSI, LQ, RSSI/LQ, CRSF RX PWM Ch. 2PWM Ch. 3 3PWM CH3 (PWM Ch1 to 12), RSSI, LQ, RSSI/LQ, SBUS,n.i.SBUS, Serial TX, MAVLink TX, CRSF TX, DSMX, SmartAudio4PWM CH4 (PWM Ch1 to 12), RSSI, LQ, RSSI/LQ, Serial RX,PWM Ch. 4MAVLink RX, CRSF RX5PWM CH5 (PWM Ch1 to 12), RSSI, LQ, RSSI/LQ, Serial RTS PWM Ch. 56PWM CH6 (PWM Ch1 to 12), RSSI, LQ, RSSI/LQ, Serial RTS PWM Ch. 6PWM Ch. 7 7PWM CH7 (PWM Ch1 to 12), RSSI, LQ, RSSI/LQ, Serial RX,MAVLink RX, CRSF RXPWM Ch. 8 8PWM CH8 (PWM Ch1 to 12), RSSI, LQ, RSSI/LQ, SBUS,n.i.SBUS, Serial TX, MAVLink TX, CRSF TX, DSMX, SmartAudioReceiver LED ColorReceiver LED indicators DescriptionSolid green▀▀▀The link is up and running OKSolid red▀▀▀No packages received from the transmitter and receiver is infailsafe modeSlow red blinking▀▀▀The receiver needs an update, confirmation on the TX is required Slow green blinking▀▀▀The receiver is in binding mode/ Find mode activeFast green blinking■■■■Receiver bootloader active or firmware upgrade runningGreen is flashing███diversity RX is in Find-mode (up to 1 min. delay between flashing) Double green blinking■■■■Authentication running/ error. Rebind your receiver if it remainslonger than a few secondsRed/ Green blinking, any pattern■■■■firmware issue, run the emergency update for the receiver, then rebind itLiPo LED indicator StatusRed blinking▀▀▀Backup battery is charging Solid red▀▀▀Backup battery is fully chargedAntennaThe antennas use a U.FL connector. Connect the antenna with the U.FL connector to the socket on the receiver. To ensure that it does not disconnect or unseat, run the coax cable across the receiver board over to the servo channel end and secure it with the heat shrink tubing.BindingMake sure you have updated the firmware to at least version 2.87! The binding is super simple.1.Power up the TBS CROSSFIRE transmitter2.On the standard transmitter, enter the configuration menu by pressing and holding the joystick for3 seconds, select “General” and “Binding” - a message “Binding” will start blinking, waiting for thereceiver. On the micro transmitter, a short press on the button will initiate binding mode.3.Power up the receiver (without pressing the Bind button!), if your receiver has not been previouslybound, it will automatically bind. Otherwise, press and release the “BIND” button on the receiver to initiate binding. You need to push the button within one minute to avoid the timeout. If thestatus LED starts flashing slowly the receiver has switched successfully to bind mode.4.Within a few seconds, the process will finish with a “Binding complete” message on the standardtransmitter, or a solid green LED on the micro transmitter. If it doesn’t bind, please verify that your firmware is to the newest version on both the receiver and the transmitter. You may want to bind through the LUA script on the Micro TX to walk through the wizard on the firmware update.BST connectivityThe TBS CROSSFIRE Diversity Nano RX comes with a fully-featured BST port. To connect it to other devices like TBS CORE PRO, FPVision layer, GPS, or other TBS peripherals, a custom cable needs to be made. BST connector usually has 5 pins, but on the CROSSFIRE Nano RX only SDA, SCL, and GND have to be connected. The best practice is to use a BST cable, cut the connector on one, and cut the unused wires on the other connector. Then solder the required wires accordingly.BST cable pinout:Further InformationThis manual is a quick start guide that does not include all functions and information in detail or at all.For further information check the official TBS CROSSFIRE manual:English version/German version。
C I S C O2500、1600系列路由器使用手册(总105页)--本页仅作为文档封面,使用时请直接删除即可----内页可以根据需求调整合适字体及大小--《CISCO 2500、1600系列路由器使用手册》目录1. CISCO 2500,1600系列路由器基本知识. 物理端口介绍. 内存体系结构介绍. 配置途径. 命令行配置模式. 多重引导IOS. 从服务器中自动下载路由器配置文件. 配置Autoinstall功能. 常用的命令行快捷编辑器. 路由器口令的安全管理. 检查灵巧配置及工作状态的常用命令2. IP协议配置的基本原则3. IP协议配置. 包过滤功能配置4. 常见广域网协议配置. CISCO HDLC协议配置. 配置. 帧中继配置. PPP配置5. IP路由协议配置. 静态路由配置. 缺省路由配置. IGRP配置. OSPF配置. RIP配置6. 远程访问服务配置7. DDR over PSTN配置8. NAT(Network Address Translation)功能配置9. 备份配置正文1.CISCO 2500,1600系列路由基本知识CISCO 2500,1600系列路由器是多协路由器,但从另一角度来说,它是一台计算机,就象大家熟悉的运行WINDOWS95的PC机一样。
CISCO路由器也包含硬件和软件两部分。
. 物理端口介绍CISCO 2500系列包含以下几种端口:高速同步串口,最大支持的E1速率。
通过软件配置,该种端口可以连接DDN,帧中继(Frame Relay),,PSTN(模拟电话线路)。
注意:如果用该同步端口连接电话线路,要求Moden必须支持同步/异步串口,该种端口可以用软件设置为同步工作方式。
在同步工作方式下,最大支持128K,异步方式下,最大支持。
AUI端口,即粗缆口。
一般需要外接转换器(AUI-RJ45),连接10Base-T以太网络。
ISDN端口,可以连接ISDN网络(2B+D)。
HP RX2660服务器技术参数说明及详细列表HP Integrity rx2660动能服务器带来了全新的入门级价值。
它是一款经济高效的通用平台,能够为您的IT环境提供极高的机架密度和性能/瓦特(节省电力的同时提高效能)。
凭借可轻松处理繁重的应用层和事务工作负载的出色性能和容量,它将是您满足数据库、Java™、商务智能和技术计算需求的理想之选。
Integrityrx2660动能服务器提供了机架安装式和立式外形,具有标准3年保修支持,旨在提供关键业务计算能力和UNIX®的优势,可满足各种规模的企业的需要。
Integrity rx2660动能服务器支持HP-UX 11i、Microsoft® Windows® Server 2003、Linux和OpenVMS等操作环境,为您提供了广泛的应用选择。
此外,它还具备众多特性-包括易用的管理工具和可维护性,旨在简化系统管理员的维护工作。
借助惠普服务器技术,如通用硬盘、Integrity Integrated Lights Out (iLO 2)、HP Systems Insight Manager (HP SIM)和HP System Insight Display (一种位于服务器前端的LED显示屏,方便用户了解系统状态), 您可以更加轻松地监控系统。
此外,Integrity rx2660动能服务器支持两种I/O技术(PCI-X或PCI Express), 最多可提供8个SAS驱动器的内部存储容量(超过1.1 TB), 还能够在机箱内进行处理器升级。
简单地说,HP Integrity rx2660动能服务器能够让您应对当前挑战,同时兼顾基础设施的未来。
HP Integrity动能服务器:凭借灵活的容量、安全的可用性和简化的管理,为您提供更佳的IT投资回报。
主要功能及优势出色的灵活性-HP Integrity rx2660动能服务器能够让您根据工作负载选择合适的操作环境。
Package ContentsRoutera. Position the antennas.For the best WiFi performance, position the antennas asshown.yellow Internet port on your router.Note: If your Internet connection does not require amodem, connect your main Ethernet cable to the yellowInternet port on the router.a. Make sure that the WiFi LED is lit.b. Look for the sticker on your router that displays yourd. Launch a web browser.The installation assistant automatically displays.Set Up Your NetworkSet Up Your Hardware1SupportThank you for purchasing this NETGEAR product. You can visithttps:///support/ to register your product, gethelp, access the latest downloads and user manuals, and join ourcommunity. We recommend that you use only official NETGEARsupport resources.Si ce produit est vendu au Canada, vous pouvez accéder à cedocument en français canadien à https:///support/download/.(If this product is sold in Canada, you can access this document inCanadian French at https:///support/download/.)For regulatory compliance information including the EUDeclaration of Conformity, visit https:///about/regulatory/.See the regulatory compliance document before connecting thepower supply.Extend your router’s warranty and technical support with NETGEARProSupport for Home (US only). For more information visit/home/.。
Upgrading System Memory, Internal FlashMemory, and Boot ROM in Cisco2600 SeriesRoutersProduct Numbers:BOOT-2600=, BOOT-2600XM-256=, BOOT-2650=, MEM2600-4D=, MEM2600-8D=, MEM2600-16D=, MEM2600-32D=, MEM2600XM-32D=, MEM2600XM-64D=, MEM2600XM-128D=, MEM2600XM-128DBOT=, MEM2600XM-2X64D=,MEM2600-4FS=, MEM2600-8FS=, MEM2600-8U16FS=, MEM2600-16FS=, MEM2600XM-16FS=, MEM2600XM-32FS=, MEM2620-32FSBOOT=, MEM2650-2X64D=, MEM2650-8D=, MEM2650-16D=, MEM2650-32D=, MEM2650-64D=,MEM2650-8U32FS=, MEM2650-32FS=, MEM2691-64D=, MEM2691-128D=Note In this document, the term “Cisco2600 series” represents the following router models: Cisco2610, Cisco2610XM, Cisco2611, Cisco2611XM, Cisco2612, Cisco2613, Cisco2620, Cisco2620XM,Cisco2621, Cisco2621XM, Cisco2650, Cisco2650XM, Cisco2651, Cisco2651XM, and Cisco2691.Use this document in conjunction with Cisco2600 Series Hardware Installation Guide and theRegulatory Compliance and Safety Information document for your router, both available online at/univercd/cc/td/doc/product/access/acs_mod/cis2600/index.htm.If you have questions or need help, see the “Obtaining Documentation” section on page21 and the“Obtaining Technical Assistance” section on page22 for further information.This document includes the following sections:•Accessing the System Board, page2•Upgrading DRAM, page4•Replacing the Internal Flash Memory SIMM, page12•Replacing the Boot ROM in Cisco 2600 Series Routers, page15•Closing the Chassis, page19•Obtaining Documentation, page21•Documentation Feedback, page21•Obtaining Technical Assistance, page22•Obtaining Additional Publications and Information, page23Corporate Headquarters:Cisco Systems, Inc., 170 West Tasman Drive, San Jose, CA 95134-1706USAUpgrading System Memory, Internal Flash Memory, and Boot ROM in Cisco 2600 Series RoutersAccessing the System BoardAccessing the System BoardYou must open the chassis to access the system board.NoteTo see translations of the various warnings that appear in this publication, refer to the Regulatory Compliance and Safety Information document that accompanied this device.Removing the Chassis Cover on Cisco 261x, Cisco 262x, Cisco 265x, and Cisco 26xxXMThis section describes the procedure for opening the chassis by removing the chassis cover.WarningDo not touch the power supply when the power cord is connected. For systems with a power switch, line voltages are present within the power supply even when the power switch is OFF and the power cord is connected. For systems without a power switch, line voltages are present within the power supply when the power cord is connected.WarningTo prevent personal injury or damage to the chassis, never attempt to lift or tilt the chassis using the handles on modules (such as power supplies, fans, or cards); these types of handles are not designed to support the weight of the unit. Statement 1032Tools RequiredYou need the following tools to remove and replace the chassis cover:•Number 2 Phillips screwdriver•Electrostatic discharge (ESD)-preventive wrist strapRemoving the Chassis CoverTo remove the chassis cover:Step 1Power off the router and unplug the AC power cord. If the router uses a DC power supply, remove power from the DC circuit with the following steps:a. Locate the circuit breaker on the panel board that services the DC circuit.b. Switch the circuit breaker to the OFF position.Step 2Disconnect all cables from the rear panel of the router.WarningBefore opening the unit, disconnect the telephone-network cables to avoid contact with telephone-network voltages. Statement 1041Step 3Attach an ESD-preventive wrist strap and ensure that it makes good contact with your skin. Connect the equipment end of the wrist strap to the metal back plate of the chassis.Accessing the System BoardWarningUpgrading System Memory, Internal Flash Memory, and Boot ROM in Cisco 2600 Series RoutersUpgrading DRAMUpgrading System Memory, Internal Flash Memory, and Boot ROM in Cisco 2600 Series RoutersUpgrading DRAMTo see how much memory is currently installed in the router, enter the show version command. Near themiddle of the resulting output, a message similar to the following appears:Cisco 2610(MPC860) processor (revision 0x200) with 28672K/4096K bytes of memory.This line shows how much memory is installed (in this example, 28672Kb / 4096 Kb). The first numberrepresents primary memory and the second number represents shared memory.Memory CapacitiesCisco2600 series routers use two types of dynamic memory:•5-V EDO DRAM DIMMs (Cisco2610, Cisco2611, Cisco2612, Cisco2613, Cisco2620, and Cisco2621 routers)• 3.3-V SDRAM DIMMs (Cisco26xxXM, Cisco2650, Cisco2651, and Cisco2691 routers) Caution EDO DRAM and SDRAM DIMMs are not interchangeable. Although it is mechanically possible to install an incorrect DRAM DIMM into a router, the router does not boot.DRAM memory capacities are shown in Table1:T able1Cisco 2600 Series DRAM Memory T ableRouter DRAM Capacity DRAM TypeCisco2610EDO DRAM:32 MB, 64 MB5-V100-pin DIMMCisco2611Cisco2612Cisco2613Cisco2620Cisco2621Cisco2650SDRAM:32 MB, 64 MB, 96 MB, 128 MB3.3-V100-pin DIMMCisco2651Cisco2610XM SDRAM:32 MB, 64 MB, 96 MB, 128 MB,160MB, 192 MB, 256 MBCisco2611XMCisco2620XMCisco2621XMCisco2650XMCisco2651XMCisco2691SDRAM:64 MB, 128 MB, 192 MB, 256 MB3.3-V168-pin DIMMUpgrading System Memory, Internal Flash Memory, and Boot ROM in Cisco 2600 Series RoutersUpgrading DRAMCautionUpgrading System Memory, Internal Flash Memory, and Boot ROM in Cisco 2600 Series RoutersUpgrading DRAMCautionUpgrading System Memory, Internal Flash Memory, and Boot ROM in Cisco 2600 Series RoutersUpgrading DRAMNoteUpgrading System Memory, Internal Flash Memory, and Boot ROM in Cisco 2600 Series RoutersUpgrading DRAM NoteUpgrading System Memory, Internal Flash Memory, and Boot ROM in Cisco 2600 Series RoutersUpgrading DRAMCautionCautionUpgrading System Memory, Internal Flash Memory, and Boot ROM in Cisco 2600 Series RoutersUpgrading DRAM CautionReplacing the Internal Flash Memory SIMMStep3Hold the DIMM with the polarization notch on the right, near the rear of the chassis, and with the connector edge at the bottom.Step4Beginning with socket 0, insert the DIMM perpendicular to the socket. Push firmly into place, as shown in Step1 of Figure9. When the DIMM is properly seated, the socket guide posts fit through thealignment holes, and the locking spring clips click into place, as shown in Step 2 of Figure9.Step5Ensure that each DIMM is straight (perpendicular to the socket). (See Figure9.)Caution It is normal to feel some resistance when installing a DIMM, but do not use excessive force on the DIMM, and do not touch the surface components.Step6Repeat Step3 through Step5 for each DIMM.Step7Reinstall the router cover. Follow the instructions in the “Closing the Chassis” section on page19.Replacing the Internal Flash Memory SIMMThe system code (router operating system software) is stored in a flash memory 80-pin single in-linememory module (SIMM) in Cisco261x, Cisco262x, Cisco265x, and Cisco26xx XM routers.Note In Cisco 2691 routers, the internal flash memory is a compact flash card, not a SIMM. If you are replacing the internal compact flash card in a Cisco 2691 router, refer to the Installing and FormattingICisco I2691, Cisco I3631 and Cisco I3700 Compact Flash Memory Cards document.Tools RequiredYou need the following tools to remove and replace the system-code SIMM on the router:•Medium-size flat-blade screwdriver (1/4-inch [0.625cm])•ESD-preventive wrist strap•Flash SIMMPreparing to Install the Flash SIMMThere is one system-code (flash memory) SIMM socket on the system board. You can verify how muchflash memory is already installed in your router by entering the show flash EXEC command.Caution The system code is stored on the flash memory SIMM, but new system-code SIMMs are shipped without preinstalled software. Before continuing with this procedure, use the copy flash tftpcommand in privileged EXEC mode to back up the system code to a TFTP server.Replacing the Internal Flash Memory SIMMNoteFor more information about the copy flash tftp command and other related commands, refer to the Cisco IOS configuration and command reference publications. These publications are available on the Documentation CD-ROM and on . You can also order printed copies. See the “Obtaining Documentation” section on page 21 for ordering information.NoteTo upgrade a Cisco 2620 or Cisco 2621 router to 32MB of flash memory, you must install the flash SIMM and upgraded boot ROM that are supplied with Cisco product number MEM2620-32FSBOOT=, and you must install Cisco IOS Release 12.1(3)T or Cisco IOS Release 12.2T or later release. For the boot ROM installation procedure, see the “Replacing the Boot ROM in Cisco 2600 Series Routers” section on page 15.CautionIt is critical that the correct voltage SIMMs be installed in the Cisco 2600 series routers. Using the incorrect memory causes the system to malfunction and may cause damage to the system board or memory card. For flash memory requirements, see Table 5.T able 5Cisco 2600 Series Flash Memory SIMMsRouter Flash Memory Compatibility Flash Device Cisco 26108 MB, 16 MB5-V SIMMCisco 2611Cisco 2612Cisco 2613Cisco 262011.For Cisco 2620 and Cisco 2621 routers, a boot ROM upgrade is required for 32MB flash operation.See the note above.8 MB, 16 MB, 24 MB, 32 MBCisco 26211Cisco 2650Cisco 2651Cisco 2610XM 16 MB, 32 MB, 48 MB 3.3-V SIMMCisco 2611XM Cisco 2620XM Cisco 2621XM Cisco 2650XM Cisco 2651XMReplacing the Internal Flash Memory SIMM CautionReplacing the Boot ROM in Cisco 2600 Series Routers CautionNoteReplacing the Boot ROM in Cisco 2600 Series Routers CautionReplacing the Boot ROM in Cisco 2600 Series RoutersReplacing the Boot ROM in Cisco 2600 Series Routers CautionClosing the Chassis Testing ROM InstallationTip Before testing your ROM installation, close the router chassis using the procedure provided in the “Closing the Chassis” section on page19.Test your installation by rebooting the router. If you installed the ROM correctly, the router boots intothe ROM monitor or operating system.If you suspect that the ROM is inserted incorrectly, remove and reinstall the ROM as described in the“Replacing the Boot ROM in Cisco 2600 Series Routers” section on page15. Reboot the router again.Closing the ChassisThis section describes the procedure for closing the chassis.Installing the Chassis Cover on Cisco261x, Cisco262x, Cisco265x, and Cisco26xxXMTo close the chassis:Step1Referring to Figure1 and Figure2, press the two chassis sections together and verify the following:•The top section fits into the rear of the bottom section. The bottom section fits into the front of the top section.•Each side of the top and bottom sections fits together.Caution To fit the two sections together, it might be necessary to work them together at one end and then the other, working back and forth; however, use care to prevent bending the chassis edges.Step2When the two sections fit together snugly, slide the chassis top so it fits into the front bezel.Step3Replace the cover screws. Tighten the screws to no more than 8or 9inch/pound of torque.Step4Reinstall the chassis on the wall, rack, desktop, or table.Step5Reconnect all cables. If the router uses a DC power supply, switch the circuit breaker to the ON position. Installing the Chassis Cover on Cisco 2691Step1Hold the cover so the tabs at the rear of the cover are aligned with the chassis.Step2Push the cover toward the rear, making sure that the cover tabs fit under the chassis back panel, and the back panel tabs fit under the cover.Step3Slide the cover slightly to the left to lock the cover into position. (See part 1 in Figure16.)Closing the ChassisObtaining DocumentationObtaining DocumentationCisco documentation and additional literature are available on . Cisco also provides severalways to obtain technical assistance and other technical resources. These sections explain how to obtaintechnical information from Cisco Systems.You can access the most current Cisco documentation on the World Wide Web at this URL:/univercd/home/home.htmYou can access the Cisco website at this URL:International Cisco websites can be accessed from this URL:/public/countries_languages.shtmlOrdering DocumentationYou can find instructions for ordering documentation at this URL:/univercd/cc/td/doc/es_inpck/pdi.htmYou can order Cisco documentation in these ways:•Registered users (Cisco direct customers) can order Cisco product documentation from the Ordering tool:/en/US/partner/ordering/index.shtml•Nonregistered users can order documentation through a local account representative by calling Cisco Systems Corporate Headquarters (California, USA) at 408526-7208 or, elsewhere inNorth America, by calling 800553-NETS (6387).Documentation Feedback************************************************************************.You can submit comments by using the response card (if present) behind the front cover of yourdocument or by writing to the following address:Cisco SystemsAttn: Customer Document Ordering170 West Tasman DriveSan Jose, CA 95134-9883We appreciate your comments.Obtaining Technical AssistanceObtaining Technical AssistanceFor all customers, partners, resellers, and distributors who hold valid Cisco service contracts, the CiscoTechnical Assistance Center (TAC) provides 24-hour-a-day, award-winning technical support services,online and over the phone. features the Cisco TAC website as an online starting point fortechnical assistance. If you do not hold a valid Cisco service contract, please contact your reseller. Cisco TAC WebsiteThe Cisco TAC website provides online documents and tools for troubleshooting and resolving technicalissues with Cisco products and technologies. The Cisco TAC website is available 24 hours a day, 365days a year. The Cisco TAC website is located at this URL:/tacAccessing all the tools on the Cisco TAC website requires a user ID and password. If youhave a valid service contract but do not have a login ID or password, register at this URL:/RPF/register/register.doOpening a TAC CaseUsing the online TAC Case Open Tool is the fastest way to open P3 and P4 cases. (P3 and P4 cases arethose in which your network is minimally impaired or for which you require product information.) Afteryou describe your situation, the TAC Case Open Tool automatically recommends resources for animmediate solution. If your issue is not resolved using the recommended resources, your case will beassigned to a Cisco TAC engineer. The online TAC Case Open Tool is located at this URL:/tac/caseopenFor P1 or P2 cases (P1 and P2 cases are those in which your production network is down or severelydegraded) or if you do not have Internet access, contact Cisco TAC by telephone. Cisco TAC engineersare assigned immediately to P1 and P2 cases to help keep your business operations running smoothly.To open a case by telephone, use one of the following numbers:Asia-Pacific: +61 2 8446 7411 (Australia: 1 800 805 227)EMEA: +32 2 704 55 55USA: 1 800 553-2447For a complete listing of Cisco TAC contacts, go to this URL:/warp/public/687/Directory/DirTAC.shtmlTAC Case Priority DefinitionsTo ensure that all cases are reported in a standard format, Cisco has established case priority definitions.Priority 1 (P1)—Your network is “down” or there is a critical impact to your business operations. Youand Cisco will commit all necessary resources around the clock to resolve the situation.Priority 2 (P2)—Operation of an existing network is severely degraded, or significant aspects of yourbusiness operation are negatively affected by inadequate performance of Cisco products. You and Ciscowill commit full-time resources during normal business hours to resolve the situation.Obtaining Additional Publications and Information Priority 3 (P3)—Operational performance of your network is impaired, but most business operationsremain functional. You and Cisco will commit resources during normal business hours to restore serviceto satisfactory levels.Priority 4 (P4)—You require information or assistance with Cisco product capabilities, installation, orconfiguration. There is little or no effect on your business operations.Obtaining Additional Publications and InformationInformation about Cisco products, technologies, and network solutions is available from various onlineand printed sources.•Cisco Marketplace provides a variety of Cisco books, reference guides, and logo merchandise. Go to this URL to visit the company store:/go/marketplace/•The Cisco Product Catalog describes the networking products offered by Cisco Systems, as well as ordering and customer support services. Access the Cisco Product Catalog at this URL:/univercd/cc/td/doc/pcat/•Cisco Press publishes a wide range of general networking, training and certification titles. Both new and experienced users will benefit from these publications. For current Cisco Press titles and otherinformation, go to Cisco Press online at this URL:•Packet magazine is the Cisco quarterly publication that provides the latest networking trends,technology breakthroughs, and Cisco products and solutions to help industry professionals get themost from their networking investment. Included are networking deployment and troubleshootingtips, configuration examples, customer case studies, tutorials and training, certification information,and links to numerous in-depth online resources. You can access Packet magazine at this URL:/packet•iQ Magazine is the Cisco bimonthly publication that delivers the latest information about Internet business strategies for executives. You can access iQ Magazine at this URL:/go/iqmagazine•Internet Protocol Journal is a quarterly journal published by Cisco Systems for engineeringprofessionals involved in designing, developing, and operating public and private internets andintranets. You can access the Internet Protocol Journal at this URL:/ipj•Training—Cisco offers world-class networking training. Current offerings in network training are listed at this URL:/en/US/learning/index.htmlObtaining Additional Publications and InformationThis document is to be used in conjunction with Cisco 2600 Series Hardware Installation Guide and the Regulatory Compliance and SafetyInformation document for your router.CCIP, CCSP, the Cisco Arrow logo, the Cisco Powered Network mark, Cisco Unity, Follow Me Browsing, FormShare, and StackWise are trademarksof Cisco Systems, Inc.; Changing the Way We Work, Live, Play, and Learn, and iQuick Study are service marks of Cisco Systems, Inc.; and Aironet,ASIST, BPX, Catalyst, CCDA, CCDP, CCIE, CCNA, CCNP, Cisco, the Cisco Certified Internetwork Expert logo, Cisco IOS, the Cisco IOS logo,Cisco Press, Cisco Systems, Cisco Systems Capital, the Cisco Systems logo, Empowering the Internet Generation, Enterprise/Solver, EtherChannel,EtherSwitch, Fast Step, GigaStack, Internet Quotient, IOS, IP/TV, iQ Expertise, the iQ logo, iQ Net Readiness Scorecard, LightStream, MGX,MICA, the Networkers logo, Networking Academy, Network Registrar, Packet, PIX, Post-Routing, Pre-Routing, RateMUX, Registrar, ScriptShare,SlideCast, SMARTnet, StrataView Plus, Stratm, SwitchProbe, TeleRouter, The Fastest Way to Increase Your Internet Quotient, TransPath, and VCOare registered trademarks of Cisco Systems, Inc. and/or its affiliates in the United States and certain other countries.All other trademarks mentioned in this document or Website are the property of their respective owners. The use of the word partner does not implya partnership relationship between Cisco and any other company. (0401R)Copyright © 2002-2004, Cisco Systems, Inc.All rights reserved.。
BladeCenter HS23 (E5-2600)Product Guide (withdrawn product)The BladeCenter® HS23 (E5-2600) is a two-socket blade server running the Intel® Xeon® processor E5-2600 product family. With its industry-leading RAS features, energy efficiency, outstanding performance, flexible and scalable I/O, and complete systems management, HS23 offers a robust platform optimized for your mission-critical applications. Standard 30 mm single-wide form-factor protects your investments by providing compatibility with the BladeCenter H, E, S, and HT chassis.Suggested use: versatile platform to run a broad range of workloads, including infrastructure, virtualization, and enterprise applications.The following figure shows the BladeCenter HS23.Figure 1. BladeCenter HS23Did you know?BladeCenter HS23 is the first BladeCenter server that offers four integrated LAN ports: dual-port Gigabit Ethernet and dual-port 10Gb Ethernet with Virtual Fabric capability. With Emulex 10GbE Virtual Fabric Adapter II for HS23 CFFh expansion card, HS23 scales up to 14 virtual NICs (vNICs) per single-wide blade server for a total of 18 I/O ports with the choice of Ethernet, Fibre Channel, SAS, iSCSI, and FCoE connectivity.Click here to check for updatesComponents and connectorsThe following figure shows the front view of the server, indicating key components.Figure 2. Front view of the BladeCenter HS23The following figure shows the top view of the server, indicating key components.Figure 3. Top view of the BladeCenter HS23The following figure shows the bottom view of the BladeCenter HS23 (contains light path diagnostics panel).Figure 4. Bottom view of the BladeCenter HS23 (shows light path diagnostics panel)System specificationsThe following table lists the system specifications.Table 1. System specificationsComponents SpecificationsForm factor Single-wide (30 mm) blade server.Chassis support BladeCenter H, BladeCenter HT, BladeCenter S, BladeCenter E. (Some configurations might have restrictions. See Table 5 for compatibility details.)Processor Up to two Intel Xeon processor E5-2600 product family CPUs with eight-core (up to 2.7 GHz) or six-core (up to 2.9 GHz) or quad-core (up to 3.3 GHz) or dual-core (up to 3.0 GHz). Two QPIlinks up to 8.0 GT/s each. Up to 1600 MHz memory speed. Up to 20 MB L3 cache.Chipset Intel C600.Memory Up to 16 DDR3 DIMM sockets (8 DIMMs per processor) using Very Low Profile (VLP) DIMMs.Support for up to 1600 MHz memory speed depending on the processor. Four memorychannels per processor (2 DIMMs per channel).MemorymaximumsUp to 512 GB with 16x 32 GB RDIMMs and two processors.MemoryprotectionECC, Chipkill, memory mirroring, and memory rank sparing.Disk drive bays Two 2.5" hot-swap SAS/SATA drive bays supporting SAS, SATA, and SSD drives.Maximum internal storage Up to 3.6 TB with 1.2 TB 2.5" SAS HDDs, or up to 2 TB with 1 TB 2.5" NL SAS HDDs, or up to 2 TB with 1 TB 2.5" SATA HDDs, or up to 3.2 TB with 1.6 TB 2.5" SAS SSDs. Intermix of SAS and SATA HDDs and SSDs is supported.RAID support RAID 0, 1, 1E, and 10 with integrated LSI SAS2004 controller.Network interfaces Two Gigabit Ethernet ports and two 10 Gb Ethernet ports with integrated Emulex BladeEngine 3 (BE3) controller.7875-B3x1x Xeon E5-2630 6C 2.3GHz15MB 1333MHz 95W 4x 4 GB /512 GBIntegratedSAS/SATA0 / 2Optional2x 1Gb2x 10Gb0 / 27875-C1x1x Xeon E5-2650 8C 2.0GHz20MB 1600MHz 95W 4x 4 GB /512 GBIntegratedSAS/SATA0 / 2Optional2x 1Gb2x 10Gb0 / 27875-C2x1x Xeon E5-2660 8C 2.2GHz20MB 1600MHz 95W 4x 4 GB /512 GBIntegratedSAS/SATA0 / 2Optional2x 1Gb2x 10Gb0 / 27875-C3x1x Xeon E5-2665 8C 2.4GHz20MB 1600MHz 115W 4x 4 GB /512 GBIntegratedSAS/SATA0 / 2Optional2x 1Gb2x 10Gb0 / 27875-C4x1x Xeon E5-2670 8C 2.6GHz20MB 1600MHz 115W 4x 4 GB /512 GBIntegratedSAS/SATA0 / 2Optional2x 1Gb2x 10Gb0 / 27875-C5x1x Xeon E5-2680 8C 2.7GHz20MB 1600MHz 130W 4x 4 GB /512 GBIntegratedSAS/SATA0 / 2Optional2x 1Gb2x 10Gb0 / 27875-C6x1x Xeon E5-2650 8C 2.0GHz20MB 1600MHz 95W 4x 8 GB /512 GBIntegratedSAS/SATA0 / 2Optional2x 1Gb2x 10Gb0 / 27875-C7x1x Xeon E5-2660 8C 2.2GHz20MB 1600MHz 95W 4x 8 GB /512 GBIntegratedSAS/SATA0 / 2Optional2x 1Gb2x 10Gb0 / 27875-C8x1x Xeon E5-2680 8C 2.7GHz20MB 1600MHz 130W 4x 8 GB /512 GBIntegratedSAS/SATA0 / 2Optional2x 1Gb2x 10Gb0 / 27875-D1x1x Xeon E5-2650L 8C 1.8GHz20MB 1600MHz 70W 4x 4 GB /512 GBIntegratedSAS/SATA0 / 2Optional2x 1Gb2x 10Gb0 / 27875-F1x1x Xeon E5-2648L 8C 1.8GHz20MB 1600MHz 70W 4x 4GB /512 GBIntegratedSAS/SATA0 / 2Optional2x 1Gb2x 10Gb0 / 27875-G1x†§1x Xeon E5-2630 6C 2.3GHz15MB 1333MHz 95W 4x 4GB /512 GBIntegratedSAS/SATA0 / 2Optional2x 1Gb4x 10Gb1 / 27875-G2x†§1x Xeon E5-2670 8C 2.6GHz20MB 1600MHz 115W 4x 4 GB /512 GBIntegratedSAS/SATA0 / 2Optional2x 1Gb4x 10Gb1 / 27875-91x§‡2x Xeon E5-2620 6C 2.0GHz15MB 1333MHz 95W 16x 8GB /512 GBIntegratedSAS/SATA0 / 2Optional2x 1Gb2x 10Gb0 / 27875-92x§‡2x Xeon E5-2650 8C 2.0GHz20MB 1600MHz 95W 16x 8GB /512 GBIntegratedSAS/SATA0 / 2Optional2x 1Gb2x 10Gb0 / 27875-93x§‡2x Xeon E5-2650 8C 2.0GHz20MB 1600MHz 95W 16x 8GB /512 GBIntegratedSAS/SATA0 / 2Optional2x 1Gb2x 10Gb0 / 2Model*Intel Xeon processor**(2 maximum)Memory(std / max)RAIDcontrollerDrivebays(used /max)DiskdrivesStandardEthernetI/O slots(used /max)* x in the Machine Type Model (MTM) represents a region-specific letter (for example, the EMEA MTM is 7875A1G, and the US MTM is 7875A1U). Ask a Lenovo representative for specifics.** Processor detail: Model, cores, core speed, L3 cache, memory speed, power.# Supports 10Gb with the addition of the 10 Gb Interposer Card for BladeCenter HS23, 94Y8550.† These models ship standard with Emulex 10GbE VFA Advanced II for BladeCenter HS23, 90Y9332.§ These models ship standard with Virtual Fabric Advanced Software Upgrade (LOM), 90Y9310.‡ Models 91x and 92x ship standard with USB Memory Key for VMWare ESXi 5.0, 41Y8300. Model 93x ships with USB Memory Key for VMware ESXi 5.0 Update1, 41Y8307.Express modelsExpress modelsThe following table lists Express models. Table 3. Express modelsModel Intel Xeon processor*(2 max)Memory(std / max)RAIDcontrollerDrivebays**DiskdrivesStandardEthernetI/O slots**United States, Latin America, Canada7875-E1U2x Xeon E5-2620 6C 2.0GHz15MB 1333MHz 95W 8x 4 GB /512 GBIntegratedSAS/SATA0 / 2Optional2x 1Gb2x 10Gb0 / 27875-E2U2x Xeon E5-2630 6C 2.3GHz15MB 1333MHz 95W 8x 8 GB /512 GBIntegratedSAS/SATA0 / 2Optional2x 1Gb2x 10Gb0 / 27875-E3U2x Xeon E5-2670 8C 2.6GHz20MB 1600MHz 115W 8x 8 GB /512 GBIntegratedSAS/SATA0 / 2Optional2x 1Gb2x 10Gb0 / 27875-E4U2x Xeon E5-2620 6C 2.0GHz15MB 1333MHz 95W 4x 8 GB† /512 GBIntegratedSAS/SATA0 / 2Optional2x 1Gb2x 10Gb0 / 27875-E5U2x Xeon E5-2640 6C 2.5GHz15MB 1333MHz 95W 4x 8 GB† /512 GBIntegratedSAS/SATA0 / 2Optional2x 1Gb2x 10Gb0 / 27875-E6U2x Xeon E5-2650 8C 2.0GHz20MB 1600MHz 95W 8x 8 GB /512 GBIntegratedSAS/SATA0 / 2Optional2x 1Gb2x 10Gb0 / 2Europe, Middle East, Africa7875-K1G1x Xeon E5-2620 6C 2.0GHz15MB 1333MHz 95W 1x 8 GB /512 GBIntegratedSAS/SATA0 / 2Optional2x 1Gb2x 10Gb0 / 2* Processor detail: Model, cores, core speed, L3 cache, memory speed, power.** Number used / Maximum number† Models E4x and E5x have four DIMMs as standard which means that half of the eight memory channels are unused. To maximize memory performance, consider adding additional DIMMs to populate all channels.Chassis supportProcessorsThe HS23 supports the processor options listed in the following table. The server supports one or two processors. The following table also shows which server models have each processor standard. If no corresponding where used model for a particular processor is listed, then this processor is available only through Configure to Order (CTO).Table 5. Processor optionsPart number Intel Xeon processor description Modelswhere used81Y9292Intel Xeon Processor E5-2603 4C 1.8GHz 10MB 1066MHz 80 W A1x81Y9294Intel Xeon Processor E5-2609 4C 2.4GHz 10MB 1066MHz 80 W A2x81Y9295Intel Xeon Processor E5-2620 6C 2.0GHz 15MB 1333MHz 95W B1x, 91x, E1U,E4U, K1G94Y8572Intel Xeon Processor E5-2630 6C 2.3GHz 15MB 1333MHz 95W B3x, E2U, G1x 81Y9304Intel Xeon Processor E5-2630L 6C 2.0GHz 15MB 1333MHz 60W-94Y8570Intel Xeon Processor E5-2637 2C 3.0GHz 5MB 1600MHz 80W-94Y8571Intel Xeon Processor E5-2640 6C 2.5GHz 15MB 1333MHz 95W B2x, E5U46C9206Intel Xeon Processor E5-2643 4C 3.3GHz 10MB 1600MHz 130W-94Y8562*Intel Xeon Processor E5-2648L 8C 1.8GHz 20MB 1600MHz 70W F1x81Y9298Intel Xeon Processor E5-2650 8C 2.0GHz 20MB 1600MHz 95W C1x, C6x, 92x,93x, E6U81Y9305Intel Xeon Processor E5-2650L 8C 1.8GHz 20MB 1600MHz 70W D1xy94Y8565*Intel Xeon Processor E5-2658 8C 2.1GHz 20MB 1600MHz 95W-81Y9299Intel Xeon Processor E5-2660 8C 2.2GHz 20MB 1600MHz 95W C2x, C7x94Y8671Intel Xeon Processor E5-2665 8C 2.4GHz 20MB 1600MHz 115W C3x81Y9302Intel Xeon Processor E5-2667 6C 2.9GHz 15MB 1600MHz 130W-94Y8589Intel Xeon Processor E5-2670 8C 2.6GHz 20MB 1600MHz 115W C4x, E3U, G2x 81Y9300Intel Xeon Processor E5-2680 8C 2.7GHz 20MB 1600MHz 130W C5x, C8x* Intel Xeon robust thermal profile processors.If memory mirroring is used, then DIMMs must be installed in pairs (minimum of one pair per CPU), and both DIMMs in a pair must be identical in type and size. The effective memory available to the system is only half of that installed.If memory rank sparing is used, then two single-rank or dual-rank DIMMs must be installed per populated channel (the DIMMs do not need to be identical). In rank sparing mode, one rank of a DIMM in each populated channel is reserved as spare memory. The size of a rank varies depending on the DIMMs installed.Chipkill, memory mirroring, and memory rank sparing modes are mutually exclusive. Only one operational memory mode can be enabled on a server, and it is a system-wide setting.The following table lists memory options available for the HS23 server. DIMMs can be installed one at a time, but for performance reasons, install them in sets of four (one for each of the four memory channels). Table 7. Memory options for the HS23Part number FeaturecodeDescription MaximumsupportedModels where used1333 MHz DIMMs46C0563A0WY4GB (1x4GB, 1Rx4, 1.35V) PC3L-10600 CL9ECC DDR3 1333MHz VLP RDIMM 16 (8 per processor)-46C0564A0WZ4GB (1x4GB, 2Rx8, 1.35V) PC3L-10600 CL9ECC DDR3 1333MHz VLP RDIMM 16 (8 perprocessor)A1x, A2x, B1x, B2x, B3x,D1x, E1U, F1x, G1x46C0568*8644*8GB (1x8GB, 2Rx4, 1.35V) PC3-10600 CL9ECC DDR3 1333MHz VLP RDIMM 16 (8 perprocessor)91x, E2U, K1G00D4985A3BU8GB (1x8GB, 2Rx8, 1.35V) PC3L-10600 CL9ECC DDR3 1333MHz VLP RDIMM 16 (8 perprocessor)E4U, E5U46C0599242216GB (1x16GB, 2Rx4, 1.35V) PC3L-10600 CL9ECC DDR3 1333MHz VLP RDIMM 16 (8 per processor)-00D5008A3KN32GB (1x32GB, 4Rx4, 1.35V) PC3L-10600 CL9ECC DDR3 1333MHz VLP RDIMM 16 (8 per processor)-1600 MHz DIMMs90Y3148A1S14GB (1x4GB, 2Rx8, 1.5V) PC3-12800 CL11ECC DDR3 1600 MHz VLP RDIMM 16 (8 perprocessor)C1x, C2x, C3x, C4x, C5x,G2x00D4989*A3BV*8GB (1x8GB, 1Rx4, 1.5V) PC3-12800 CL11ECC DDR3 1600MHz VLP RDIMM 16 (8 per processor)93x, C7x90Y3149*A1S2*8GB (1x8GB, 2Rx4, 1.5V) PC3-12800 CL11ECC DDR3 1600 MHz VLP RDIMM 16 (8 per processor)92x, E3U00D4993*A3BW*8GB (1x8GB, 2Rx8, 1.5V) PC3-12800 CL11ECC DDR3 1600MHz VLP RDIMM 16 (8 perprocessor)C6x, C8x, E6U90Y3157A3BS16GB (1x16GB, 2Rx4, 1.5V) PC3-12800 CL11ECC DDR3 1600MHz VLP RDIMM 16 (8 per processor)-46W0716A4G916GB (1x16GB, 2Rx4, 1.35V) PC3L-12800 CL11ECC DDR3 1600MHz VLP RDIMM 16 (8 per processor)-* Withdrawn, not available for ordering. Intended only as a reference for models where used.External backup unitsThe following table lists the external backup options that are offered by Lenovo that can be used with the BladeCenter HS23 in backup solutions.Table 19. External backup optionsPart number DescriptionExternal RDX USB drives362532Y RDX External USB 3.0 Dock with 320GB Cartridge362550Y RDX External USB 3.0 Dock with 500GB Cartridge36251TY RDX External USB 3.0 Dock with 1TB CartridgeExternal SAS tape backup drives6160S5E IBM TS2250 Tape Drive Model H5SExternal SAS tape backup autoloaders6171S5R IBM TS2900 Tape Autoloader w/LTO5 HH SASExternal tape backup libraries61732UL IBM TS3100 Tape Library Model L2U61734UL IBM TS3200 Tape Library Model L4UFibre Channel backup drives for TS3100 and TS3200 Tape Libraries00NA1076173 LTO Ultrium 5 Fibre Channel Drive00NA1136173 LTO Ultrium 5 Half High Fibre Drive SledSAS backup drives for TS3100 and TS3200 Tape Libraries00NA1096173 LTO Ultrium 5 SAS Drive Sled00NA1116173 LTO Ultrium 5 Half High SAS Drive SledFor more information, see the list of Product Guides in the Backup units category:https:///servers/options/backupLenovo Financial ServicesTrademarksLenovo and the Lenovo logo are trademarks or registered trademarks of Lenovo in the United States, other countries, or both. A current list of Lenovo trademarks is available on the Web athttps:///us/en/legal/copytrade/.The following terms are trademarks of Lenovo in the United States, other countries, or both:Lenovo®BladeCenter Interoperability GuideBladeCenter®Lenovo ServicesServerGuideServerProven®System x®The following terms are trademarks of other companies:Intel® and Xeon® are trademarks of Intel Corporation or its subsidiaries.Linux® is the trademark of Linus Torvalds in the U.S. and other countries.Microsoft®, Windows Server®, and Windows® are trademarks of Microsoft Corporation in the United States, other countries, or both.Other company, product, or service names may be trademarks or service marks of others.。