海尔空调售后维修网点29页PPT文档
- 格式:pdf
- 大小:5.49 MB
- 文档页数:29


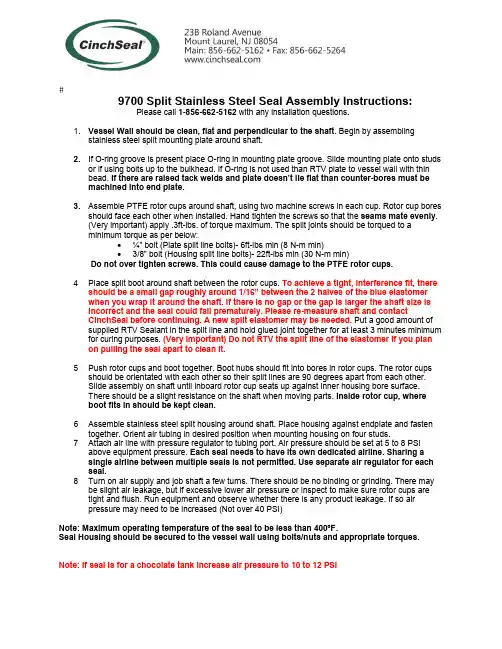
9700 Split Stainless Steel Seal Assembly Instructions:Please call 1-856-662-5162 with any installation questions.1. Vessel Wall should be clean, flat and perpendicular to the shaft. Begin by assemblingstainless steel split mounting plate around shaft.2. If O-ring groove is present place O-ring in mounting plate groove. Slide mounting plate onto studsor if using bolts up to the bulkhead. If O-ring is not used than RTV plate to vessel wall with thinbead. If there are raised tack welds and plate doesn’t lie flat than counter-bores must bemachined into end plate.3. Assemble PTFE rotor cups around shaft, using two machine screws in each cup. Rotor cup boresshould face each other when installed. Hand tighten the screws so that the seams mate evenly.(Very important) apply .3ft-lbs. of torque maximum. The split joints should be torqued to aminimum torque as per below:∙¼” bolt (Plate split line bolts)- 6ft-lbs min (8 N-m min)∙3/8” bolt (Housing split line bolts)- 22ft-lbs min (30 N-m min)Do not over tighten screws. This could cause damage to the PTFE rotor cups.4 Place split boot around shaft between the rotor cups. To achieve a tight, interference fit, thereshould be a small gap roughly around 1/16” between the 2 halves of the blue elastomerwhen you wrap it around the shaft. If there is no gap or the gap is larger the shaft size isincorrect and the seal could fail prematurely. Please re-measure shaft and contactCinchSeal before continuing. A new split elastomer may be needed. Put a good amount of supplied RTV Sealant in the split line and hold glued joint together for at least 3 minutes minimum for curing purposes. (Very Important) Do not RTV the split line of the elastomer if you planon pulling the seal apart to clean it.5 Push rotor cups and boot together. Boot hubs should fit into bores in rotor cups. The rotor cupsshould be orientated with each other so their split lines are 90 degrees apart from each other.Slide assembly on shaft until inboard rotor cup seats up against inner housing bore surface.There should be a slight resistance on the shaft when moving parts. Inside rotor cup, whereboot fits in should be kept clean.6 Assemble stainless steel split housing around shaft. Place housing against endplate and fastentogether. Orient air tubing in desired position when mounting housing on four studs.7 Attach air line with pressure regulator to tubing port. Air pressure should be set at 5 to 8 PSIabove equipment pressure. Each seal needs to have its own dedicated airline. Sharing asingle airline between multiple seals is not permitted. Use separate air regulator for each seal.8 Turn on air supply and job shaft a few turns. There should be no binding or grinding. There maybe slight air leakage, but if excessive lower air pressure or inspect to make sure rotor cups aretight and flush. Run equipment and observe whether there is any product leakage. If so airpressure may need to be increased (Not over 40 PSI)Note: Maximum operating temperature of the seal to be less than 400ºF.Seal Housing should be secured to the vessel wall using bolts/nuts and appropriate torques. Note: If seal is for a chocolate tank increase air pressure to 10 to 12 PSI。
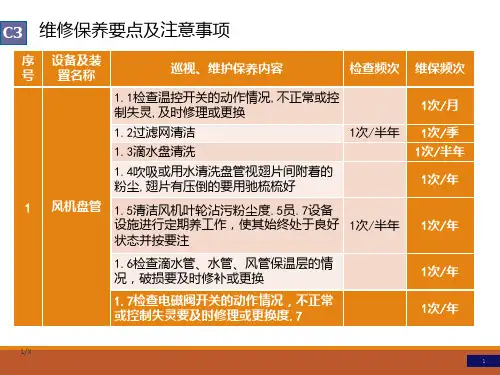
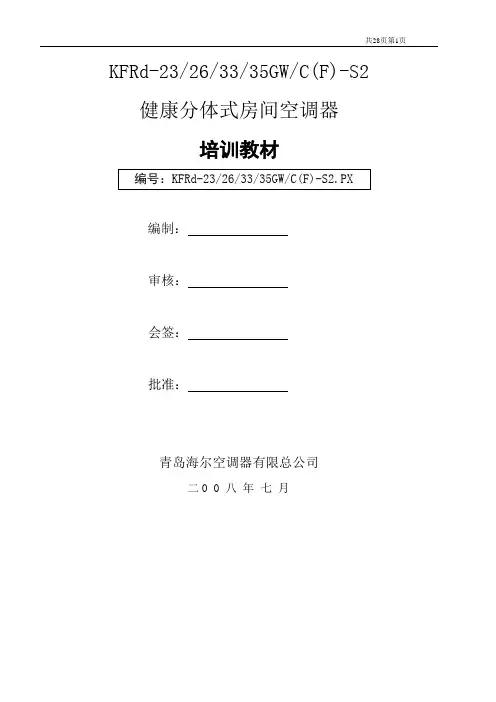
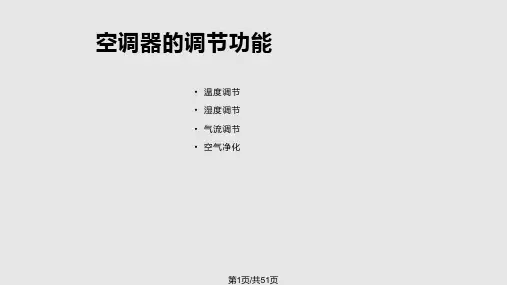
KFRd-23/26/33/35GW/C(F)-S2 健康分体式房间空调器培训教材编制:审核:会签:批准:青岛海尔空调器有限总公司二0 0 八年七月目录一.型号商标二.产品外观图三.主要特点四.衍生关系及通用性五.技术参数六.电控功能介绍七.电气原理图、线路图八.售后服务8.1安装说明8.2安装与维修操作注意要点8.3故障显示一览表8.4产品爆炸图及明细一.型号商标KFRd-23GW/C(F)-S2 KFRd-26GW/C(F)-S2 KFRd-33GW/C(F)-S2KFRd-35GW/C(F)-S2二.产品外观图室内机:室外机: 35铁壳外机三.主要特点及特殊功能介绍3.1主要特点1)220V普通电源,商用家用两相宜2)内机采用多部件易拆卸设计,清洗更洁净;3)海尔空调大风扇采用航空动力技术,加上优化的风道系统设计,使空调噪音很低。
生活更宁静、更舒适;4)遥控器常用按键采用荧光按键,方便夜间使用;辅助电热功能,热量更充足;5)外观结构设计美观大方;显示屏显示更加时尚。
6)具有强力杀菌媒、停电补偿功能,该系列产品的高品位设计,比前期同类产品具有更强的节能降耗能力,更符合未来壁挂式空调的发展趋势。
7)多种智能控制模式,操作更便捷,控制更先进。
3.2特殊功能介绍3.2.1高效节能室内机蒸发器参照国际先进母本设计,包围贯流风扇,提高换热效率,此外采用国际名牌高效压缩机,加之优化的系统匹配,高效节能。
3.2.2超低噪音依据现代航空动力技术,新开发不等距贯流风扇,优化风道设计,室内机超静音设计.3.2.3其它优势3.2.3.1停电补偿:用户根据需要可以用遥控器设置停电补偿功能,使用时发生停电若再来电,空调可自动开机到停电前的状态。
3.2.3.2双机切换功能:配上海尔专用的遥控器控制实现两台空调自动交替运转,并可远程监控空调运行状态,特别适合无人看守,需恒温控制的电信机站等场所。
3.2.4实时时钟定时:可以根据需要精确设定开关机时间。