KeyShot Manual
- 格式:pdf
- 大小:1.91 MB
- 文档页数:30
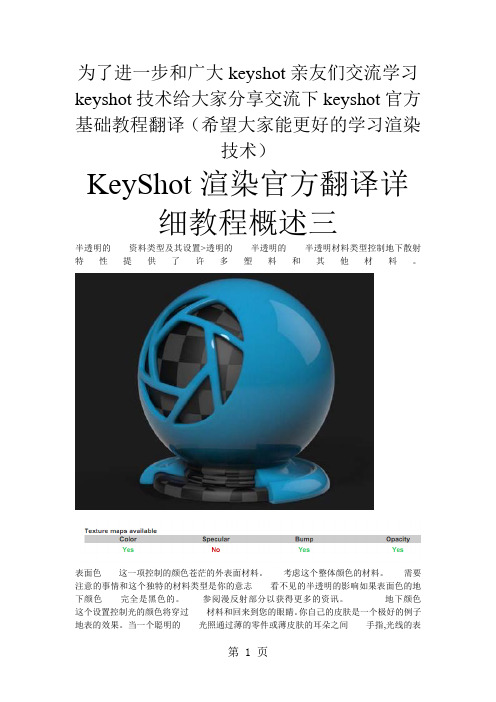
为了进一步和广大keyshot亲友们交流学习keyshot技术给大家分享交流下keyshot官方基础教程翻译(希望大家能更好的学习渲染技术)KeyShot渲染官方翻译详细教程概述三半透明的资料类型及其设置>透明的半透明的半透明材料类型控制地下散射特性提供了许多塑料和其他材料。
表面色这一项控制的颜色苍茫的外表面材料。
考虑这个整体颜色的材料。
需要注意的事情和这个独特的材料类型是你的意志看不见的半透明的影响如果表面色的地下颜色完全是黑色的。
参阅漫反射部分以获得更多的资讯。
地下颜色这个设置控制光的颜色将穿过材料和回来到您的眼睛。
你自己的皮肤是一个极好的例子地表的效果。
当一个聪明的光照通过薄的零件或薄皮肤的耳朵之间手指,光线的表面之下的是什么,而来的回更多的红色。
当光线穿过表面是弹来弹在许多随机的方向。
这创造了柔软的半透明的效应,而非了一种玻璃折射作用方向的材料类型。
对塑料材料,你会经常设置这个颜色很相似表面的颜色。
也许只是有点光亮。
透明这一项控制光就会有多深渗透,通过表面。
你越半透明价值,更多的地下的颜色你会看到来自表面。
半透明的价值观也会创造更高更看材料。
粗糙度增加表面粗糙度和分发反射传播的表面和创造一个更卡纸的表面。
高光这一项控制强度的反射在水面上。
先进的范畴下这材料类型你也会找到一个折射率设置。
这可进一步增加或减少反射的强度在水面上。
半透明资料类型及其设置> >半透明半透明半透明左边,设置半透明0.1岁。
这产生很少的半透明性和物质看上去就像一个硬塑料。
在右边的半透明已经增加到5点。
这个结果在实质性的半透明性和结果看起来很软。
天鹅绒资料类型及其设置>天鹅绒天鹅绒在天鹅绒上的资料是非常有用的软织物为创造有明显效果,导致光抓住软纤维细编织面料。
这是一个非常复杂的材料KeyShot标准,你一般都会被能够做得不够好frabric材料用塑料或先进的材料类型。
然而,这种材料类型并提供控制参数没有其他材料中发现的类型。

keyshot用法KeyShot是一款强大的渲染和动画软件,它以其快速、高效和高质量的渲染能力而闻名。
本篇文章将详细介绍KeyShot的使用方法,包括其基本功能、安装、界面、基本操作、材质、灯光、相机、动画制作以及导出和分享等。
KeyShot是一款基于OpenGL技术的渲染软件,它能够快速创建高质量的渲染和动画。
KeyShot适用于各种行业,包括机械设计、产品设计、动画和电影制作等。
它提供了丰富的工具和功能,使您能够轻松地创建逼真的渲染和动画,以展示您的创意和设计。
二、安装和界面1. 安装:安装KeyShot非常简单,只需按照软件提示的步骤进行操作即可。
确保您的计算机满足最低系统要求,以确保最佳的性能。
2. 界面:KeyShot的界面直观且易于使用。
您将看到一个菜单栏,其中包含各种选项和命令,用于管理您的项目、导入和导出文件以及控制渲染过程。
此外,您还将看到一个工作区,其中包含您的项目文件、相机和灯光等元素。
三、基本操作1. 打开项目:使用KeyShot的“打开项目”功能,您可以导入您的设计文件并开始创建渲染。
2. 创建对象:使用KeyShot的绘图工具,您可以创建所需的物体和元素,例如模型、材质、灯光和相机等。
3. 调整属性:使用KeyShot的属性面板,您可以更改对象的属性,例如大小、颜色、透明度和光源等。
4. 渲染和动画:使用KeyShot的渲染引擎,您可以创建逼真的渲染和动画。
您可以使用动画工具来控制对象的位置、旋转和颜色变化等。
四、材质KeyShot提供了大量的材质库,您可以使用这些材质来更改对象的光泽和纹理。
您可以在材质库中选择不同的材质,并应用它们到您的工作空间中的对象上。
您还可以创建自定义材质,以便更好地匹配您的项目需求。
五、灯光KeyShot的灯光工具提供了多种不同类型的光源,包括点光源、方向灯和环境灯等。
您可以使用这些光源来模拟自然光或人工照明效果。
您还可以调整灯光的强度、颜色和衰减方式等属性,以创建逼真的照明效果。

KEYSHOT中文教程详细
KeyShot是一款功能强大的渲染软件,可以将3D模型快速、高效地
渲染成逼真的图像。
本文将详细介绍如何使用KeyShot进行渲染,并包含
以下内容:安装和界面、导入模型、调整材质、设置灯光、调整摄像机、
渲染设置等。
接下来,我们需要导入3D模型。
点击“文件”->“导入”->“模型”,选择你要导入的模型文件。
导入后,模型会显示在项目窗口中。
调整摄像机是控制图像视角的重要工具。
通过调整摄像机的位置、焦
距和景深等参数,可以改变图像的视觉效果。
在KeyShot中,可以选择不
同的摄像机模式,如透视模式、正交模式等。
最后,需要设置渲染参数。
在渲染设置中,你可以选择渲染的分辨率、输出格式、光线追踪深度等。
选择合适的参数可以提高渲染速度和图像质量。
另外,你还可以使用渲染队列功能,同时渲染多个场景,提高工作效率。
当所有参数调整完成后,点击界面上的渲染按钮,KeyShot将开始渲
染图像。
渲染时间根据模型复杂度和渲染设置而定,可能需要几分钟甚至
几个小时。
渲染完成后,可以保存渲染结果,并将其导出为图片或动画。
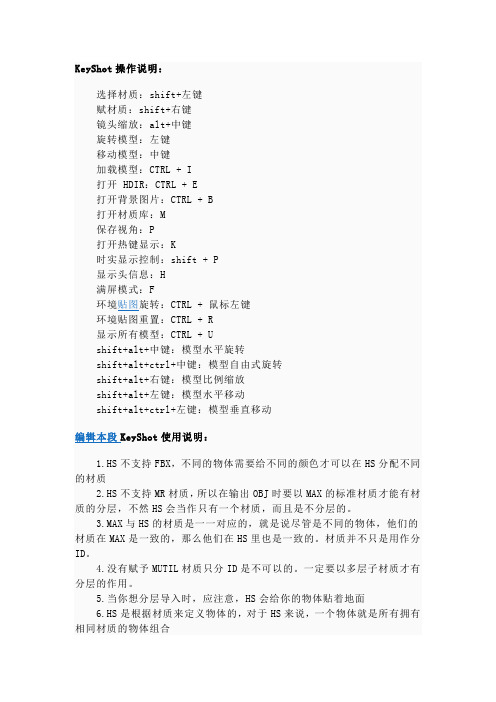
KeyShot操作说明:选择材质:shift+左键赋材质:shift+右键镜头缩放:alt+中键旋转模型:左键移动模型:中键加载模型:CTRL + I打开 HDIR:CTRL + E打开背景图片:CTRL + B打开材质库:M保存视角:P打开热键显示:K时实显示控制:shift + P显示头信息:H满屏模式:F环境贴图旋转:CTRL + 鼠标左键环境贴图重置:CTRL + R显示所有模型:CTRL + Ushift+alt+中键:模型水平旋转shift+alt+ctrl+中键:模型自由式旋转shift+alt+右键:模型比例缩放shift+alt+左键:模型水平移动shift+alt+ctrl+左键:模型垂直移动编辑本段KeyShot使用说明:1.HS不支持FBX,不同的物体需要给不同的颜色才可以在HS分配不同的材质2.HS不支持MR材质,所以在输出OBJ时要以MAX的标准材质才能有材质的分层,不然HS会当作只有一个材质,而且是不分层的。
3.MAX与HS的材质是一一对应的,就是说尽管是不同的物体,他们的材质在MAX是一致的,那么他们在HS里也是一致的。
材质并不只是用作分ID。
4.没有赋予MUTIL材质只分ID是不可以的。
一定要以多层子材质才有分层的作用。
5.当你想分层导入时,应注意,HS会给你的物体贴着地面6.HS是根据材质来定义物体的,对于HS来说,一个物体就是所有拥有相同材质的物体组合就算分好了材质,很多时候HS还是会把他们混淆7.HS不支持从MAX导入的材质的中文显示,最好设置的时候用英文,如果不是的话系统会讲中文显示的列为同一材质而导致错误。
8.不要拖动赋予材质然后修改HS自带的材质,会改变系统的。
正确的是SHIFT+右键然后再双击修改9.只能移动一开始导入的物体,不能移动MERGE的物体10.ior调节材质的亮度,值越高就越像完全的反射,一般还是蛮有必要调节的11.Shift+P停止实时渲染12.可以用PS来制作HDRI用作物体的光照贴图13.图像里和环境里的gamma相当于对比度,越高对比越小14.SCREENSHOT不能代替RENDER,只是保存你所见到的画面,不过当你的SCREENSHOT不动很久的时候,它会不断的继续运算,出来的效果其实相差不大。

keyshot渲染教程入门KeyShot渲染教程入门KeyShot是一款强大的实时渲染软件,可以轻松地将3D模型转化为逼真的渲染图像。
下面是一个简单的入门教程,帮助你快速上手KeyShot渲染。
第一步:导入模型打开KeyShot软件,点击“导入”按钮将你的3D模型导入到KeyShot中。
你可以导入各种格式的文件,包括OBJ,STL,IGES等。
第二步:设置场景在导入模型之后,你可以设置场景的环境和背景。
点击“环境”按钮,在弹出的菜单中选择适合你模型的环境。
你还可以调整背景色、亮度等参数。
第三步:设置材质KeyShot拥有丰富的材质库,你可以选择适合你模型的材质。
点击“材质”按钮,在弹出的菜单中选择你喜欢的材质,并将其拖拽到模型上进行应用。
第四步:设置光源光源对于渲染效果至关重要。
点击“光源”按钮,在弹出的菜单中选择合适的光源类型,比如太阳光、室内光等。
将光源拖拽到场景中,并调整光源的位置和亮度。
第五步:调整摄像机角度点击“摄像机”按钮,在弹出的菜单中调整摄像机的位置和角度。
通过调整摄像机角度,可以获得不同的渲染效果。
第六步:渲染图像调整好场景、材质、光源和摄像机之后,你可以开始渲染图像了。
点击“渲染”按钮,在渲染设置中选择适合你需求的渲染选项,并点击“渲染”按钮开始渲染。
第七步:保存图像渲染完成后,你可以点击“保存”按钮将渲染图像保存到硬盘上。
你可以选择适合你的图像格式,比如JPEG、PNG等。
这是一个简单的入门教程,帮助你了解如何使用KeyShot进行基本的渲染。
随着你的实践和经验的积累,你可以探索更多高级的渲染技巧,提升你的渲染效果。
希望这个教程对你有帮助!。

1.主界面Import:导入模型 Materials:材质Enviroment:环境贴图 Backplate:背景图 Screenshot:截屏 Render:渲染 Options:选项 1.Import点击Import(导入模型)按钮,出现窗口:如果是直接打开keyshot2.0然后导入模型的话务必要注意的是:导入的模型路径和模型文件名必须为全英文。
例如我们无法将放在桌面的文件导入进来,因为它的路径是C:\Documents and Settings\Administrator\桌面\XXXX.3dm 其中出现了中文字符“桌面”,同样的道理,存放模型文件的文件夹以及文件本身都不可以出现中文字符,否则将出现错误。
而我因为安装了keyshot的犀牛接口,所以我一般在犀牛里面直接打开keyshot,这样就可以忽略路径及文件名带中文的问题当我们选择打开模型文件时候会弹出对话框 Merge with current scene:与当前场景合并Same coordinates as previous object:按照原文件的坐标 Retain materials (beta):保留材质(试用版) Keep individual parts:保持各个部分Imprort by colors (beta):按颜色导入(试用版)可以按照个人需求进行勾选,一般可以勾选不过假如你需要在一个场景里渲染多个物件的话建议勾选Same coordinates as previous object(按照原文件的坐标)。
2.Materials点击Materials按钮会自动转到library窗口,在Group(材质分类)窗口,除去All选项,一共有28种类材质供我们选择。
分别是: Architecture建筑类效果CC新增特殊材质(包括布类金属透镜石头甚至还有星空效果舞厅灯光皮肤等材质) Cloth and Leather 布和皮革 Gem Stones 宝石效果Glass and Lens 玻璃和透镜效果 Glass玻璃效果Hard Plastic 硬塑料效果 Leather 皮革效果 Liquids液体效果Lxf (这个分类的材质是CC类中的不知道为何会再分一类出来暂无解) Mesh网孔效果Metals 2磨砂及粗糙金属效果 Metals普通金属效果 Metals其他金属效果Miscellaneous杂效果 Other其它效果Paint油漆,喷漆效果Paints油漆,喷漆上光效果 Plastic塑料效果 Precious Metals Rubber橡胶效果Soft Touch软接触效果 Soft Touch贵重金属效果Transparent Plastic透明塑料效果 Velvet丝绒效果 Wood木质效果 Wood光滑木质效果 X-Ray X 射线照片效果Group 左边的Search自然是搜索窗口你只需输入你要找的材质的名称中的一部分即可搜索出来比如我们要找,你可以不必把这个单词整个背下来输入你记得的一部分 rpl 我们就可以搜索到它当然了这并不是什么特殊功能只是这对许多学设计而英语不好的朋友带来了便利关于keyshot2.0的附材质方法与1.9以及hypershot有所不同的是,他不是用Shift+左键选取然后Shift+右键附着的。
keyshot新手入门参数详解keyshot中英对照图像输出为2400 3000景深是通过FSTOP来控制的,距离可以直接在画面中点取,越小的值,取景越小模糊的越多,当你渲染时觉得很毛糙,提高采样值!B 键取消背景图控制选项解释Samples 采样Ray bounces光线反射次数Anti aliasing反混淆水平(也称抗锯齿级别)Shadow quality阴影质量Global illumination quality球形(全球)照明质量Pixel filter size像素过滤大小DOF quality景深质量Sharp shadows阴影锐化High quality texture filtering高质量纹理过滤Samples :采样控制图像每个像素的采样数量。
在大场景的渲染中,模型的自身反射与光线折射的强度或者质量需要较高的采样数量。
较高的采样数量设置可以与较高的抗锯齿设置(Anti aliasing)做配合。
Ray bounces光线反射次数这个参数的设置时控制光线在每个物体上反射的次数Anti aliasing反混淆水平(抗锯齿级别)提高抗锯齿级别可以将物体的锯齿边缘细化,当这个参数值越大,物体的抗锯齿质量也会提高。
Shadow quality阴影质量这个参数所控制的是物体在地面的阴影质量。
Global illumination quality球形(全球)照明质量提高这个参数的值可以获得更加详细的照明和小细节的光线处理。
一般情况下这个参数没有太大必要去调整。
如果需要在阴影和光线的效果上做处理,可以考虑改变它的参数。
Pixel filter size像素过滤大小这是一个新的功能,他的功能为增加了一个模糊的图像,得到柔合的图像效果。
建议使用1.5到1.8之间的参数设置。
不过在渲染珠宝首饰的时候,大部分情况下有必要将参数值降低到1和1.2之间的某个地方。
DOF quality景深质量增加这个选项的数值将导致画面出现一些小颗粒状的像素点出现以体现景深效果。
选择材质:shift+左键赋材质:shift+右键镜头缩放:alt+中键旋转模型:左键移动模型:中键加载模型:CTRL + I打开HDIR:CTRL + E打开背景图片:CTRL + B打开材质库:M保存视角:P打开热键显示:K时实显示控制:shift + P显示头信息:H满屏模式:F环境贴图旋转:CTRL + 鼠标左键环境贴图重置:CTRL + R显示所有模型:CTRL + Ushift+alt+中键:模型水平旋转shift+alt+ctrl+中键:模型自由式旋转shift+alt+右键:模型比例缩放shift+alt+左键:模型水平移动shift+alt+ctrl+左键:模型垂直移动Keyshot4使用说明:1.HS不支持FBX,不同的物体需要给不同的颜色才可以在HS分配不同的材质2.HS不支持MR材质,所以在输出OBJ时要以MAX的标准材质才能有材质的分层,不然HS会当作只有一个材质,而且是不分层的。
3.MAX与HS的材质是一一对应的,就是说尽管是不同的物体,他们的材质在MAX 是一致的,那么他们在HS里也是一致的。
材质并不只是用作分ID。
4.没有赋予MUTIL材质只分ID是不可以的。
一定要以多层子材质才有分层的作用。
5.当你想分层导入时,应注意,HS会给你的物体贴着地面6.HS是根据材质来定义物体的,对于HS来说,一个物体就是所有拥有相同材质的物体组合就算分好了材质,很多时候HS还是会把他们混淆7.HS不支持从MAX导入的材质的中文显示,最好设置的时候用英文,如果不是的话系统会讲中文显示的列为同一材质而导致错误。
8.不要拖动赋予材质然后修改HS自带的材质,会改变系统的。
正确的是SHIFT+右键然后再双击修改9.只能移动一开始导入的物体,不能移动MERGE的物体10.ior调节材质的亮度,值越高就越像完全的反射,一般还是蛮有必要调节的11.Shift+P停止实时渲染12.可以用PS来制作HDRI用作物体的光照贴图13.图像里和环境里的gamma相当于对比度,越高对比越小14.SCREENSHOT不能代替RENDER,只是保存你所见到的画面,不过当你的SCREENSHOT不动很久的时候,它会不断的继续运算,出来的效果其实相差不大。
Keyshot图文介绍hypershot1.9for rhino渲染器灯光材质渲染建议方案第一步:在Photoshop里边做一张你所需要的图片颜色也就是灯光的颜色先不要保存。
第二步:把做好的图片用Photoshop转成32位的图片格式。
第三步:点击保存保存的格式为hdr图片格式。
*注*1、要渲染灯光材质首选必须有一个地板,这个地板不是hypershot默认的地板而是自己建的一个地面。
2、在渲染的之前请在rhino犀牛里边吧图层分好不同的材质不能再统一图层当中。
3、如果你是直接从hypershot导入rhino犀牛的模型是如果出现不能导入说明你的文件存放在中文的文件夹内,最好是把rhino犀牛的模型放在hypershot默认打开文件夹内部。
*注*如果你的hypershot的安装目录中存在中文文件夹里很有可能也不能导入模型。
第四步:导入模型之后保持原有的材质只需双击要渲染的灯光模型在diffuse漫反射颜色可以设置自己想要的颜色。
*注*如果在Photoshop中所做的hdr图片的颜色不是白色,在这里你调diffuse漫反射颜色和Ambient周围颜色是没有很大的作用的。
第五步:设置Ambient周围的颜色同理第四步。
第六步:调节材质的发光强度将diffuse environment右边的参数数值越大发光强度就越大。
第七步:单击texture右边的按钮导入刚刚用Photoshop做的hdr灯光材质。
第八步:激活主菜单选择settings选项栏勾选detailed Indirect Illumination即可。
第九步:点击开始渲染。
创新设计,创意生活,创造未来!本文来自广州大学设计论坛首先打开文件2选择HDRI文件WHITE STUDIO3调整指环的材质钻石的材质可以直接用自带材质4取消显示环境,调整亮度普通单单一个戒指还不能出来这样的效果这里需要一点技巧,HS跟VRAY同样是渲染器,那么渲染的原理也是一样的要出来好的表现效果,最重要的还是环境跟材质HS虽然没有灯光系统,但是反光板还是能做的这里我在戒指的上下方都建了一个反光板来得到更好的反射效果(PS:同理,可以做为遮挡HDRI的光用,之前有筒子说很难控制好局部的细节,也就是有些部分偏暗了不好控制,也可以利用这个举一反三)最后得到效果Keyshot玻璃杯+水的设定练习请问下为什么我做出来的习惯插在水下面的部分是黑色的。
keyshot渲染教程在这份Keyshot渲染教程中,我们将向您展示如何使用Keyshot软件进行渲染。
Keyshot是一款功能强大且易于使用的渲染软件,它能够帮助您快速创建惊人逼真的渲染效果。
第一步是准备您要渲染的模型。
您可以使用Keyshot自带的建模工具创建新的模型,或者导入您已经建模好的模型。
确保您的模型在Keyshot中正确地放置和定位。
第二步是设置材质和纹理。
Keyshot提供了各种各样的材质选项,包括金属、玻璃、塑料等等。
您可以根据模型的需要选择合适的材质,并对其进行进一步的调整。
另外,您还可以为模型添加纹理,如木纹、金属质感等等,以增加细节和真实感。
第三步是调整灯光和相机设置。
灯光是渲染中至关重要的一部分,它能够影响整体的视觉效果。
Keyshot提供了各种各样的灯光选项,包括点光源、平行光等等。
您可以根据需要调整灯光的位置、强度和颜色。
另外,相机设置也是需要考虑的重要因素,您可以选择不同的相机视角和景深效果来达到想要的渲染效果。
第四步是设置渲染参数。
Keyshot提供了各种渲染参数选项,您可以根据需要调整渲染的分辨率、光线追踪的精度、渲染时间等等。
同时,Keyshot还支持渲染动画,您可以设置动画帧数和帧率来创建动态的渲染效果。
最后一步是进行渲染并保存图片或动画。
一旦您完成了所有的调整和设置,就可以点击渲染按钮开始渲染过程。
渲染的时间会根据您设置的参数和计算机的性能而有所不同。
完成渲染后,您可以保存渲染结果为图片或者动画格式,并进行后期处理或分享。
希望这个简易的Keyshot渲染教程对您有所帮助。
通过学习和实践,您将能够掌握更多Keyshot的技巧和技能,创建出令人赞叹的渲染作品。
祝您渲染愉快!。
Welcome to KeyShot 2KeyShot is the first interactive image creation tool of its kind that allows anyone with little or no experience to create photographic images from their 3D digital data within minutes. It is a continuation of the product HyperShot that was developed by Luxion from 2006 until 2009.About this manualKeyShot works on both, Mac and PC. The functionality is identical. The onlydi ff erences are some of the supported file formats as well as the CTRL key, which is ⌘ on the Mac. This will be clearly documented throughout the manual. How it worksKeyshot is a realtime raytracing and global illumination application that is entirely CPU based and thus doesn’t require any special hardware to run. With the use of scientifically accurate materials and real world light combined with extreme ease-of-use anybody can generate photographic images from their 3D geometry within a matter or minutes after first opening the program.The performance of KeyShot increases when more processors are being added. KeyShot’s architecture is highly optimized such that when the number of processors doubles, performance also doubles.There is no limit on how many CPUs can be addressed in one computer. KeyShot also supports chip sets with a hyper-threaded architecture with the same e ffi ciencies as multiple CPUs and multi-core CPUs.KeyShot raytraces constantly, as soon as you start the application. At any point in time you are able to stop the realtime rendering by hitting [Shift] + [P]. Resume realtime raytracing using the same key combination.KeyShot licensingThe KeyShot license is locked to the MAC address of your computer. The exception is KeyShot Pro Floating which allows you run KeyShot from any computer. Please contact sales@ for more information.You can deactivate your license from your current computer and activate on another machine. Please note that an internet activation is needed for this. You can transfer your licenses between a total of 3 machines. There is no limit on how often you can do this.To deactivate a license to move to another computer, simply start KeyShot and go to the Help menu (PC), or KeyShot menu (PC), and select Deactivate license on this computer.You can now activate KeyShot on a di ff erent computer with your permanent serial code.KeyShot contentKeyShot, by default, has the following content structure:•Scenes: Contains all your saved scenes.•Materials: Contains all materials.•Textures: Contains all textures and labels used with your materials •Environments: Contains all you lighting environments•Backplates: Contains images and photographs•Renderings: Contains all Screenshot and RenderingsKeyShot user interface and toolsThis chapter describes the user interface and all the tools inside KeyShot. Please note the following abbreviations:•LMB = Left Mouse Button•MMB = Middle Mouse Button•RMB = Right Mouse ButtonThe KeyShot applications has 3 main areas:•Realtime window•Library•OptionsRealtime WindowThe realtime window has the main toolbar on the bottom that takes the user through the 6 steps from importing a model to creating the final image.•Import : Import a model including KeyShot’s own scenes (.bip files)•Materials : Open material library.•Environment : Open the environment library to access lighting environments •Backplates : Open the backplates library to access images to add to the scene.•Screenshot : Save image from the realtime window.•Render : Open the render settings to control the final image output.When working with objects in the realtime window, you will also have the option to access important functions via the right mouse button pop up menu when clicking on the object.LibraryThe library contains all content for your scenes which can be dragged and dropped into the realtime window. When first opening the library, right click into each tab and select Rescan Library Directory . You can also add additional content, create groups and remove content from the library.•Materials : Drag and drop a material onto an object in the realtime window or one or multiple objects in the Scene Tree (Options). When dragging materials onto the object you will notice that the part will adopt the material and show the result in realtime. The material is not being applied until you let go of the mouse button.•Environments : Drag and drop into the realtime window to see the e ff ect of the lighting in the scene.•Textures : Drag and drop textures onto an object with any non-transparent material. Hold down the CTRL (CMD) key to apply the texture as a bump map to any material.•Backplates : Contains your photographs and other background images that you may want to use to compose the final image.•Rendering : Contains all realtime and o ffl ine rendered images which can also be used as back plates.Import 3D data,or scene (.bip)file Open materiallibrary Open environment library Open backplate library Save image from therealtime window Open settings for final renderOpen options windowOptions [Spacebar]The options dialog will give you access•to work with the scene and objects in the scene - Scene•create and edit materials - Material•adjust the lighting - Environment•compose the final image - Backplate•set up the perfect image in realtime - Realtime•control the camera and save views - CameraPreferencesPreference settings allow you to control•General settings•Location of the KeyShot Resources•Import settingsRight mouse button menuThe right mouse button menu gives you the ability to quickly interact with the model and the scene.Hotkeys [K]KeyShot relies heavily on hotkeys for fast and e ffi cient workflow. You can access the list of hotkeys by simply hitting [K]. To close tke hotkey list, hit [K] again. When using hotkeys, make sure that the realtime window is active. You can make it active by simply clicking inside of it.Moving the CameraKeyShot is a highly interactive and dynamic application. When moving the camera, you will notice some pixelation that will stop when the camera movement stops. At that point in time the image will res to perfection until the camera is moved again. To move the camera use the following mouse and hotkey combinations:•[ALT LMB], Mac: [⌥ LMB] : Tumble the camera around the focal point •[ALT MMB], Mac: [⌥ MMB]: Pan the camera•[ALT RMB], Mac [⌥ MMB]: Dolly the camera, i.e. moving the camera closer to or away from the object. CAD users would describe this as “Zoom”. Make sure to move the mouse horizontally.Import - Importing dataImporting 3D data or KeyShot scenes (bips)Select import model to import your model in any of the following file formats:•SolidWorks 2010 and prIOR (.sldprt, .sldasm) - Windows only•Pro/ENGINEER Wildfire 2, 3, 4, 5 (.prt, .asm)•Rhinoceros 4.0 and prIOR (.3dm)•SketchUp 7 and prIOR (.skp)•3DStudio Max (.3ds)•IGES•STEP AP203/214•Obj•FBX•BIP (KeyShot Scene - import objects with materials and cameraviews)After selecting Import Model, you have the following options:•Merge with current scene: Select this option when you want to add multiple models into the same scene. You may want to move the first imported object first by moving the model using [SHIFT ALT Left Mouse Button], and drag the model o ff the center on the ground plane.•Same coordinates as previous object: This ensures that the imported object maintains the same size relative to the previously imported object. This only makes sense when you add a second object to a scene. Make sure that Merge with current scene is checked. This has no e ff ect when importing .bip files.•Keep individual parts: This option allows you to keep individual parts that otherwise may be grouped together. This can come in handy for all kinds of file formats. When parts appear to be grouped together and can’t be unlinked, simply re-import by checking this option. This has no e ff ect whenimporting .bip files.Scene - Working with objectsThe scene tab contains the scene tree that gives you direct access to all objects and parts in the scene, as well as the ability to move and scale objects (not parts yet).Scene treeThe scene tree gives you access to the objects in the scene and all its parts. Right now you will see either the part or layer name, or the material name.You can do the following:•Hide/Unhide: Quickly hide/unhide entire objects or individual parts. You can select multiple parts and hide them through the right mouse button menu.•Delete/Undo Delete: Works like Hide/Unhide•Link/Unlink parts: Linking parts will put them in the same material group. Once linked, you can hide them, delete them, change and edit materials for all linked parts simultaneously. To unlink, simply select individual parts you want to unlink and select Unlink from the right mouse button menu.•Assign Material: Select an individual or multiple parts/objects. Then open the material library and assigning a material by dragging and dropping a material ball onto the selected parts/objects.•Edit Material: Right click on the selected part and select Edit material.•Copy Material: Right click on the selected part and select Copy material.•Paste/Paste and link material: After copying you can pasteMoving and ScalingYou can move and scale an object in conjunction with or instead of using the Move Widget in the realtime window.•Position: Move the object in local x, y, or z direction.•Rotation: Rotate the object around the local x, y or z axis. Use the up/down arrows to quickly rotate around 45º.•Scale: Increase the size of the object in local x, y, or z direction•Size: Increase or decrease the overall size of the object.•Snap to ground: Snap the object to the ground plane.•Reset: Reset the object back to it’s original position.Material - Working with materialsApplying materialsTo apply a material to any part of an object, open the material library. Select a material and drag and drop it onto the object. Notice how the parts adopt the material as soon as you move the mouse over the part. The part will not be painted until you let go of the mouse button. Alternatively, you can use [SHIFT LMB] to select a material and [SHIFT RMB] to apply the material to the desired portion of the model. If you desire to apply the selected material to several parts of the model, simple continue to [SHIFT RMB] click onto the desired parts.You can also open the Scene tab in the Option menu and drag and drop the material onto the one or multiple parts, or the entire object.Editing and creating new materialsWhether you want to create a new material or edit an existing one, the steps are identical. In essence, whenever you edit an existing material on the object you are creating a new material. To edit or create new materials double click onto a material that has been applied to a part of the object in the scene, or right click onto a part in the scene and select Edit material. Either way you will be taken to the Material tab in the Options dialog. The selected material’s parameter list appears. The available choices will depend on which material you selected. Please see APPENDIX: KeyShot Materials for more detailed information on the individual parameters for each material.All material changes and new creation always stay with the object, and are saved in the BIP file.KeyShot’s materials are fundamentally di ff erent from “shaders” found in traditional rendering applications. All of KeyShot’s materials are scientifically accurate, requiring therefore far less work to define a certain material and finish for an object.•Name: The name of the material. + allows you to add the material to the library for later reuse.•Material type: Choose the material like that you would like to start out with. Think in terms of real world materials such as metal, glass, plastic etc. Each material has predefined color and parameter settings. Upon selecting the material type you will see the immediate e ff ect a core material has.•Color, IOR, Roughness et a l: Tweak the color and parameters, and see thee ff ects immediately.•Reset: Reset ALL parameter, texture, bumpmap and label changes to the beginning when the dialog was first opened.Once you made the edits to the core material you have chosen, you can save the material to the library for later use in other scenes by hitting the + next to Name.Applying texturesNon-transparent materials can have a texture applied to replace the base color. This texture will can be a jpeg, ti ff, png or other common file format. To apply a texture, create a new material or edit and existing material. Then select the Texture tab.•Load: Select a jpeg, ti ff or any other image file. When you selected an image once, and then open a di ff erent material to map a texture the previous texture is available for immediate use, yet with default settings. You can select a new texture if you choose.•Enable: Turn texture on or o ff.•Repeat: Switches between single and multiple copies of the texture.•Sync: Synchronize all settings with the bump map.•Projection: Determines how the texture is being mapped:UV coordinates: Your object may not have any uv coordinates and the texture may not show up initially. Change the projection type.Box Map: Mapping uses a “box”.Planar x, y, z: uses the planar projection from the x, y, or z direction. To determine the direction, turn on the coordinate system in the View menu, or use [SHIFT] + C. If the surface you would like to map to is at an angle, you may want to try and rotate the object so it aligns with the projection direction. After mapping you can move the object back to its original position. The mapping will stay.Cylindrical (beta): Uses a cylinder standing up (y-direction) for mapping. If your object requires cylindrical mapping in any other direction, rotate the object to align the object with the projection direction. Move the object back to its original position after mapping.Spherical (beta): Uses a sphere with y being the up direction. If your object requires spherical mapping in a di ff erent direction, rotate the object to align the object with the projection direction. Move the object back to its original position after mapping.•Position: Drag the texture on the model into position. Move the camera using [ALT] + LMB. You can still interact with all other parameters while in this mode.•Keep aspect ratio: Maintains the original aspect ratio of the image•Flip horizontal / vertical: Invert the texture.•Shift u: Move the texture in horizontal direction over the surface.•Shift v: Move the texture in vertical direction over the surface.•Scale u: Change the width of the texture.•Scale v: Change the height of the texture.•Angle: Rotate the texture around its center.•Intensity: Change the brightness of the texture.Bump mappingYou can apply a bumpmap to any material by using any kind of image, allowing you to add extra realism to materials, and stunning visual e ff ects. The bumpmap can be combines with texture maps mentioned above, or used by themselves.To apply a bumpmap, create a new material or edit an existing material. Then select the Bumpmap tab. This will open up a new dialog that looks nearly identical to the texture map dialog.Bump Map: Select a jpeg, ti ff or any other image file. When you selected an image once, and then open a di ff erent material to map a texture the previous texture is available for immediate use, yet with default settings. You can select a new bumpmap if you choose.•Load: Select a jpeg, ti ff or any other image file. When you selected an image once, and then open a di ff erent material to map a bumpmap the previous bumpmap is available for immediate use, yet with default settings. You can select a new bumpmap if you choose.•Enable: Turn bumpmap on or o ff.•Repeat: Switches between single and multiple copies of the bumpmap.•Sync: Synchronize all settings with the bump map.•Projection: Determines how the bumpmap is being mapped:UV coordinates: Your object may not have any uv coordinates and the bumpmap may not show up initially. Change the projection type.Box Map: Mapping uses a “box”.Planar x, y, z: uses the planar projection from the x, y, or z direction. To determine the direction, turn on the coordinate system in the View menu, or use [SHIFT] + C. If the surface you would like to map to is at an angle, you may want to try and rotate the object so it aligns with the projection direction. After mapping you can move the object back to its original position. The mapping will stay.Cylindrical (beta): Uses a cylinder standing up (y-direction) for mapping. If your object requires cylindrical mapping in any other direction, rotate the object to align the object with the projection direction. Move the object back to its original position after mapping.Spherical (beta): Uses a sphere with y being the up direction. If your object requires spherical mapping in a di ff erent direction, rotate the object to alignthe object with the projection direction. Move the object back to its original position after mapping.•Position: Drag the bumpmap on the model into position. Move the camera using [ALT] + LMB. You can still interact with all other parameters while in this mode.•Keep aspect ratio: Maintains the original aspect ratio of the image.•Normal map: When using an actual Normal Map, make sure to check this option•Flip horizontal / vertical: Invert the bumpmap.•Shift u: Move the bumpmap in horizontal direction over the surface.•Shift v: Move the bumpmap in vertical direction over the surface.•Scale u: Change the width of the bumpmap.•Scale v: Change the height of the bumpmap.•Angle: Rotate the bumpmap around its center.•Height: Controls the height of the bunmpmap.LabelsIf you are working with a logo, make sure that the image has transparency, also known as an “Alpha Channel”. Only .ti ff or .png files can have an alpha channel or transparency. The transparency will allow the color of the material to be visible.•Add: Add a label.•Delete: Delete a label.•Up/Down arrows: Move label to front/back•Enable: Turn label on or o ff.•Repeat: Switches between single and multiple copies of the label.•Projection: Determines how the label is being mapped:Normal Projection: The default setting wraps the label onto any given surface UV coordinates: Your object may not have any uv coordinates and the label may not show up initially. Change the projection type.Box Map: Mapping uses a “box”.Planar x, y, z: uses the planar projection from the x, y, or z direction. To determine the direction, turn on the coordinate system in the View menu, or use [SHIFT] + C. If the surface you would like to map to is at an angle, you may want to try and rotate the object so it aligns with the projection direction. After mapping you can move the object back to its original position. The mapping will stay.Cylindrical (beta): Uses a cylinder standing up (y-direction) for mapping. If your object requires cylindrical mapping in any other direction, rotate the object to align the object with the projection direction. Move the object backto its original position after mapping.Spherical (beta): Uses a sphere with y being the up direction. If your object requires spherical mapping in a di ff erent direction, rotate the object to align the object with the projection direction. Move the object back to its original position after mapping.•Position: Drag the label on the model into position. Move the camera using [ALT] + LMB. You can still interact with all other parameters while in this mode.•Keep aspect ratio: Maintains the original aspect ratio of the image.•Two sided: See front and back of label.•Flip horizontal / vertical: Invert the label.•Shift u: Move the label in horizontal direction over the surface.•Shift v: Move the label in vertical direction over the surface.•Scale u: Change the width of the label.•Scale v: Change the height of the label.•Angle: Rotate the label around its center.•Intensity: Change the brightness of the texture.•Depth: Determines how far the label should be projectedEnvironment - Adjust lighting and other environment e ff ectsThe functions in the environment tab control the lighting in the scene. These are grouped into 2 categories, Environments and Environment Shading.•Background Color: This function allows you to change the background color. The background color is hidden by the environment. You will need to hide the environment (see below) in order to see the background color. The background color doesn’t a ff ect the scene, nor is it reflected in the object.•Visible Environment [E]: Hides the environment when checked, and displays the background color set above. Note that even when the environment is hidden the scene will still be fully illuminated, and all shadows and reflections continue to be present.•Brightness [Arrow keys]: Controls the amount of light in the scene. Use the left /right arrow keys to decrease / increase the amount of light in the scene. •Gamma: Controls the intensity of the light in the scene. Larger values will yield less of a contrast between light and dark areas, resulting in softer shadows. Lower values yield a higher contrast between light and dark areas.•Rotation [CTRL LMB], [⌘ LMB] (Mac): Rotates the environment around the y (vertical)” axis of the scene. When rotating the environment you will notice that the ground shadow doesn’t update until you let go of the mouse button and finish the rotation.•Ground Shadows: Turn the ground shadows on and o ff. Shadows that are being cast onto the object itself will still be visible.•Ground Reflections: Turns the ground plane into a reflective surface. The amount of reflection is controlled by the color of the background and the camera angle. To get additional control over ground reflections it is recommended to add a geometric plane to the scene which can then be painted with various materials and textures.•Flatten Ground [G]: This flattens the bottom part of the sphere to give it “gum drop” shape. You may notice some stretching of the environment towards the edge of the ground. Flattening of the Ground may be desired to get a more detailed reflection of the ground in the object. This is often times desired by people working with cars.•Environment Size: Controls the size of the spherical environment in meters. Note that changing the size will not change the intensity of the light. Changing the environment size can be used to control the reflections in an object.•Environment Height Adjustment: This functions allows you to move te environment up and down to control position of the lighting in the enviromentand reflection in the object. The number is a relative percentage of the overall size of the environment. Together with the Rotation of the environment this function gives great control over the position of the lighting.Backplates - Using images in the background Backplates are 2D images that can be used as background image against the scene. They can also be used to place a 3D object “into the image”, making it look like that is actually part of the image. Use the Camera controls to adjust Distance, Perspective, Azimuth, Incline, and Twist to get the perfect fit. Use the Ground grid for perfect perspective matching.By default, the realtime window will adjust and assume the aspect ratio of the backplate. This behavior can be controlled under Preferences.The functions are:•Select: Load backplate•Use backplate: Quickly toggle backplate on/o ff.•Adjust brightness: Takes on Brightness and Gamma set in the Realtime tab when checked.Realtime - Setting up the perfect picture in realtimeUse this tab extensively. The settings in here let you control the scene, so you can get the perfect picture in realtime. Your final rendering will then look identical.Image SettingsAdjustment: These settings a ff ect the overall image including the backplate.•Width / Height: This allows you to set the size of the realtime window. It is recommended to set the proper aspect ratio before setting camera angles. A larger windows will result in slower realtime performance.When changing the window size, you can chose from pre-set resolution, or enter your custom resolution.•Lock Aspect Ratio: Uncheck when changing the aspect ratio•Brightness: Adjusts the overall brightness of the image.•Gamma: Determines the overall contrast of the image. A higher gamma value will result in darker areas appearing less dark, and brighter areas to be less bright.Realtime SettingsThese settings a ff ect realtime and final rendering.•Ray Bounces: Determines the number of bounces light makes in a scene. It is important to gradually increase the number of raybounces until no di ff erence can be noticed when increasing the number. This number should be used in the final rendering•Shadow Quality: Determines the quality of the Ground Shadow. This setting is independent of the setting in the Render Tab, but is indicative of what value should be used in the rendering.•Detailed Shadows [S]: Calculates detailed and inter-object shadows when checked.•Detailed Indirect Illumination: Turns on light reflections from objects.•Ground indirect illumination: Turns on ground caustics.•Fast updates: This allows fast interaction in realtime. When unchecked, you will not see any pixelation but have a detailed raytraced scene at all times. However, this is very computationally intensive, and therefore only recommended for 8 core systems and higher.•Sepia: Turns on Sepia e ff ect in realtime.•Ground grid: Turn on a grid on the ground planeCamera - Working with the camera and camerae ff ectsThe camera tab contains functions for interacting with the camera for fine tuning the camera position, select di ff erent camera types, and save the current view with its settings.•View: This pulldown menu contains all saved views that you create throughout your session. It contains several predefined views, as well as the last view with which your scene was saved. To go from one view to the next, simply select a new view. You can also switch to the next view using [ALT N], [⌥N] (Mac). You can Add (+) a new view, or Delete (-) the current view.•Lock camera: This will freeze the camera in its current positions so it can’t be moved. All other functions are not a ff ected.•Orthographic camera: Switch the camera to Orthographic to work with a true orthographic camera. You will notice that some functions will become unavailable.•Keep above ground: This will keep the camera above the ground plane. Uncheck if you want to move the camera below the ground.•Distance: Controls the distance of the camera from the object.•Azimuth: The horizontal angle from the reference direction (focal point). •Inclination: The elevation angle of the camera with the focal point as being the center.•Twist [CTRL ALT Wheel], [⌘⌥ Wheel] (Mac): Changing the twist angle will tilt the camera around its horizontal viewing axis.•FOV - Field of View: The field of view is that part of the scene that is visible through the camera at a particular position and orientation in space. FOV works in conjunction with Focal Length. Notice how both sliders move simultaneously.•Focal Length [ALT Wheel], [⌥ Wheel] (Mac): Changing the focal length to change perspective. In Photography terms, this is also referred to as “Zoom”. When increasing the value, the camera zooms closer to the object and therefore must be moved away from the object. The larger the focal length, the less perspective you will have in the scene. If you decrease the focal length, you will add more perspective. You may need to move the camera closer to the object to get the desired e ff ect.•Perspective: Changes FOV / Focal Length and Distance of the camera to the object simultaneously. It is a combination of those 2 functions in one, allowing you to change the perspective of the scene while “keeping the object in place”.•Pick pivot: Set the pivot point。