Informix安装配置精讲
- 格式:doc
- 大小:63.50 KB
- 文档页数:9

Informix数据库配置详细解说-电脑资料1.配置概述本次数据库配置将采用数据库系统、数据库日志和数据库应用系统数据分开进行配置,以达到数据库系统优化的目的,。
2.营销系统数据库配置示例2.1 规划数据库空间根据配置的思想,将数据库系统分三个区。
分别是:rootdbs:informix系统区,我们将一号机的e1_1dbs4分配给它,为了便于记忆我们将该区取个名为yxroot。
具体操作为:#ln/dev/re1_1dbs4/dev/yx_root#chowninformix:informix/dev/yx_root#chmod664/dev/yx_rootlogdbs:informix日志区,我们将一号机的e1_1dbs5分配给它,为了便于记忆我们将该区取个别名为yx_log。
具体操作为:#ln/dev/re1_1dbs5/dev/yx_loG#chowninformix:informix/dev/yx_loG#chmod664/dev/yx_logworkdbs:informix数据区,我们将一号机的e1_1dbs0到e1_1dbs3分配给它,为了便于记忆我们将该区取个别名为yx_work。
具体操作为:#ln/dev/re1_1dbs0/dev/yx_dbs0#ln/dev/re1_1dbs1/dev/yx_dbs1#chowninformix:informix/dev/yx_dbs?#chmod664/dev/yx_dbs?2.2 Informix系统参数配置informix系统参数配置文件由如下文件决定:2.2.1 Informix启动环境文件:start_yx 文件内容如下:echo"startdbserveronyx"INFORMIXDIR=/usr/informix exportINFORMIXDIRTBCONFIG=tbconfig.yxDBDATE=Y4MD/PATH=$PATH:$INFORMIXDIR/bin:. exportPATHMAILTBCONFIG2.2.2 Informix配置文件:$INFORMIXDIR/etc/tbconfig.yx $cd$INFORMIXDIR/etc$cptbconfig.stdtbconfig.yx$vitbconfig.yx修改相应参数:ROOTPATH /dev/yx_rootROOTSIZE 1000000TAPEDEV /dev/nullPHYSFILE 100000LOGSIZE 100000LOGFILES 3LOGSIZE 100000MSGPATH /usr/informix/online_yx.loG CONSOLE /dev/consoleSERVERNUM 0DBSERVERNAME XXclic_yx#注:XX:按各地市名称来取#福州:fz 莆田:pt 泉州:qz 漳州:zz 龙岩:ly#三明:sm 南平:np 宁德:ndUSERS 300TRANSACTIONS 300LOCKS 200000BUFFERS 20000TBLSPACES 6000LOGSMAX 602.2.3 Informix网络连接配置文件:$INFORMIXDIR/etc/sqlhosts.yx该文件只有在C/S模式下和数据库联网才用到(略)2.3 Informix初始化操作:1.启动系统环境:以informix用户登录启动环境操作:#../start_yx2.初始化数据库系统区操作:tbinit-i3.创建数据库日志和工作区tbspaces–c–dyx_log–p/dev/yx_log–o0 –s870000tbspaces–c–dyx_work–p/dev/yx_dbs0 -o0 –s2000000tbspaces–ayx_work–p/dev/yx_dbs1 -o0–s20000004.移动数据库系统区的日志到新的数据库日志区a.在logdbs上生成逻辑日志,逻辑日志共取600M,每个日志100M,分6个。
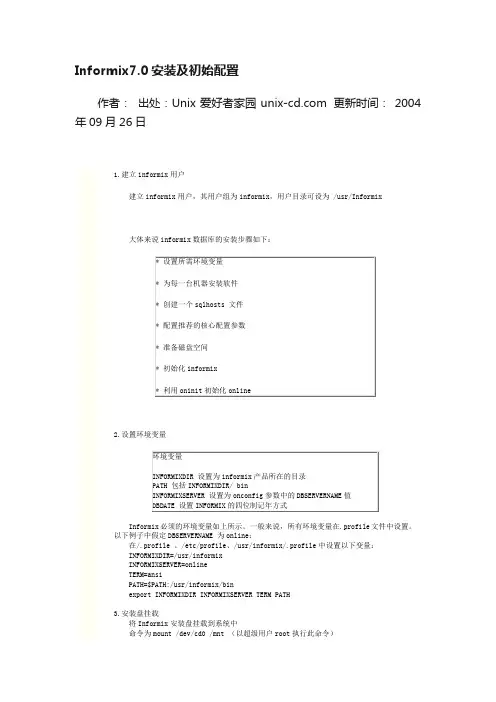
Informix7.0安装及初始配置作者:出处:Unix爱好者家园 更新时间:2004年09月26日1.建立informix用户建立informix用户,其用户组为informix,用户目录可设为 /usr/Informix大体来说informix数据库的安装步骤如下:2.设置环境变量Informix必须的环境变量如上所示。
一般来说,所有环境变量在.profile文件中设置。
以下例子中假定DBSERVERNAME 为online:在/.profile 、/etc/profile、/usr/informix/.profile中设置以下变量:INFORMIXDIR=/usr/informixINFORMIXSERVER=onlineTERM=ansiPATH=$PATH:/usr/informix/binexport INFORMIXDIR INFORMIXSERVER TERM PATH3.安装盘挂载将Informix安装盘挂载到系统中命令为mount /dev/cd0 /mnt (以超级用户root执行此命令)4.安装产品4.1安装INFORMXI--SQL将informix安装盘挂载到/mnt目录下以后,依次执行以下命令进行安装:cd /usr/informix当出现下面的提示时, 按回车键继续进行安装:之后系统要求输入INFORMIX-SQL产品的序列号和活动码:安装程序设置完系统文件的权限并对相关文件进行初始化完毕后, 结束INFORMIX-SQL系统的安装工作。
4.2 安装INFORMIX-ONLINE文件拷贝完毕后, 在#号提示符后面输入下面的命令, 执行INFORMIX-ONLINE系统的安装程序:当出现下面的提示时, 按回车键继续进行安装:之后系统要求输入INFORMIX-ONLINE产品的序列号和活动码:安装程序设置完系统文件的权限并对相关文件进行初始化完毕后, 结束INFORMIX-ONLINE系统的安装工作。
RedHat7.2安装informix暨双机配置教程(QQ:1633748241)目录1.安装环境 (2)2.安装过程 (2)(1)建立informix用户组和用户 (2)(2)设置informix用户的环境变量 (2)(3)安装EsqlForLinux (2)(4)安装IDS2000-9.21.UC3-1 (3)(5)informix数据库的配置 (3)(6)informix相关配置文件的配置 (4)(7)以informix用户身份登录并第一次启动Online Server (6)(8)创建数据空间(dbspace)以存放系统及其它应用 (6)(9)将逻辑日志及物理日志移出rootdbs (7)(10)使Online Server正式运行 (8)rmix的ODBC设置 (9)(1)安装clientsdk-281-TC1.NT (9)(2)ODBC设置 (9)rmix的双机配置 (12)(1)双机环境 (12)(2)双机配置 (12)(3)安装informix数据库 (14)(4)配置和检测informix双机 (15)(4)双机测试 (16)RedHat7.2安装informix暨双机配置教程1.安装环境Win7+VMware6.5+RedHat7.2 Linux内核:2.4.7-10informix:EsqlForLinux+IDS2000-9.21.UC3-12.安装过程(1)建立informix用户组和用户以下操作全部由root用户执行[root@aaa root]#groupadd informix[root@aaa root]#useradd -g informix -d /opt/informix -m -s /bin/csh informix [root@aaa root]#passwd informix(2)设置informix用户的环境变量以下操作由informix用户执行[root@aaa root]#su - informix[root@aaa root]#vi .cshrc.cshrc文件内容如下:setenv INFORMIXDIR /opt/informixsetenv INFORMIXSERVER db_onlinesetenv ONCONFIG onconfigsetenv PATH ${PATH}:/bin:${INFORMIXDIR}:${INFORMIXDIR}/bin保存退出source使之生效[informix@aaa ~]$ source .cshrc(3)安装EsqlForLinux以下操作由root用户执行将EsqlForLinux.tar文件用root用户传至/opt/informix目录下[root@aaa root]# export INFORMIXDIR=/opt/informix[root@aaa root]# cd /opt/informix/解压tar文件[root@aaa informix]# tar xvf EsqlForLinux.tar安装[root@aaa informix]# ./installsqlEnter your serial number (for example, INF#X999999) >ACN#J334914Enter your serial number KEY (uppercase letters only) >OTRZLE注:在输入序列号及口令后,ESQL安装完毕。
经常在论坛中看到有新人寻求informix的安装步骤,回想自己当初刚接触时,也是得到了众多好心人的帮助。
如今将自己的实际经验与从前前辈们的安装文档自整理下放到这里,希望能对有需要的人有所帮助。
由于毕竟经验有限,其中难免有遗漏或者不足的地方,欢迎大家批评指正!1. 创建informix组和informix用户,组ID和用户ID为301(注:此处可根据需要自己设置),并为informix用户设置密码group:informixuser:informix2. 为Informix数据库安装创建文件系统,并赋予权限,例:/informixchown -R informix:informix /informix3. 修改环境变量.profile文件INFORMIXDIR=/informix;PA TH=$PA TH:$INFORMIXDIR/bin;ONCONFIG=onconfig.test;INFORMIXSERVER=online;TERMCAP=$INFORMIXDIR/etc/termcap;TERM=vt100;export INFORMIXDIR PA TH ONCONFIG INFORMIXSERVER TERMCAP TERM4. 数据库安装必须用root用户安装安装目录选择informix./ids_install(此为10版本的集成安装,显示如下:Product Setup Type------------------------------------------------ ------------------------1. [ ] IBM Informix IConnect2. [x] IBM Informix Client-SDK Typical3. [x] IBM Informix Dynamic Server Typical4. [x] IBM Informix JDBC Driver)若为10以下的版本,可以选择进入SERVER文件夹,执行installserver进行安装。

实验5Informix软件安装及配置informix安装配置实验指导书深圳市讯⽅通信技术有限公司2009年8⽉⽬录1. 实验⽬的 (4)2. 实验器材 (4)3. 实验内容说明 (4)4. 实验步骤 (4)4.1安装INFORMIX前准备 (4)4.1.1 增加informix⽤户组 (4)4.1.2 增加informix⽤户 (5)4.1.3 激活informix⽤户 (5)4.2安装I NFORMIX数据库 (5)4.2.1 上传⽂件到服务器 (5)4.2.2 执⾏安装 (5)4.3配置INFORMIX数据库 (13)4.3.1 创建错误信息⽬录 (13)4.3.2 设置环境变量 (14)4.3.3 增加数据库服务信息 (14)4.3.4 配置数据库服务端⼝ (15)4.3.5 检查⽂件配置 (15)4.3.6 创建rootdbs数据库空间 (16)4.3.7 配置onconfig⽂件 (16)4.3.8 初始化数据库 (18)4.3.9 查看数据库运⾏状态 (18)4.3.10 启动后创建⽤户空间 (18)4.3.11 创建命令 (19)4.4启动关闭数据库 (20)5. 附录A:INFROMIX常⽤命令 (20)5.1 ONINIT (20)5.1.1 功能说明 (20)5.1.2 使⽤说明 (21)5.1.3 举例说明 (21)5.2 ONMODE (21)5.2.1 功能简述 (21)5.2.2 使⽤说明 (21)5.2.3 举例说明 (23)5.3 ONSPACES (23)5.3.1 功能简述 (23)5.3.2 使⽤说明 (23)5.3.3 举例说明 (24)5.4 ONSTAT (24)5.4.1 功能简述 (24)5.4.2 使⽤说明 (24)1. 实验⽬的1、通过本实验,让学⽣了解informix软件安装及配置。
2、了解informix软件特点,熟悉基本数据库操作。
2. 实验器材1、安装Linux AS4以上版本操作系统的PC机⼀台(或者LinuxAS4操作系统安装在虚拟机上);2、informix数据库软件⼀套;3. 实验内容说明informix是IBM公司出品的关系数据库管理系统(RDBMS)家族。
Informix生产系统安装及配置一、ApplicationDB数据库安装与配置1、创建用户和用户组创建informix用户和informix组Informix用户挂载点/Informix2、修改环境变量修改informix用户的.profile文件,Vi .profile 添加以下内容:INFORMIXDIR=/Informix;PATH=$INFORMIXDIR/bin:$PATH;ONCONFIG=onconfig.loan;INFORMIXSERVER=loandb;export INFORMIXDIR PATH ONCONFIG INFORMIXSERVERexport TERM=vt100TERMINFO=$INFORMIXDIR/etc/typetab;TERMCAP=$INFORMIXDIR/etc/termcap;DBDATE=Y4MD-;Export TERMINFOR TERMCAP DBDATE3、安装数据库及组件Csdk安装:1)Cd /opt/Informix_setup/csdk2)Chmod 777 installclientsdk3)./installclientsdk4)根据安装向导填写安装路径/informix,其他选项按默认值选择,之后开始安装IDS安装:1)Cd /opt/Informix_setup/server2)Chmod 777 installserver3)./installserver4)根据安装向导填写安装路径/informix,其他选项按默认值选择,之后开始安装4、更改磁盘设备信息属组及权限并链接设备文件将所有为AppliactionDB数据库创建的裸设备的字符型设备文件(c类型)的属组更改为informix:InformixCd /devChownInformix:Informixrloan* rflow* rtemp* rphy* rlog*将所有为AppliactionDB数据库创建的裸设备的字符型设备文件(c类型)的权限更改为660Chmod 660 rloan* rflow* rtemp* rphy* rlog*Su –InformixMkdir data将所有为AppliactionDB数据库创建的裸设备的字符型设备文件(c类型)软链接到该目录下,例如:Ln –s /dev/rloan_rootdbsloan_rootdbs链接所在目录:Loan_data_01:/Informix/data/loan_data/Loan_data_02:/Informix/data/loan_data/Loan_index_data:/Informix/data/loan_index/Flow_data_01:/Informix/data/flow_data/Flow_data_02:/Informix/data/flow_data/Flow_index_data:/Informix/data/flow_index/Tempdbs:/Informix/data/temp_data/Rootdbs:/Informix/data/Phy_loan_log:/Informix/data/Log_loan_log:/Informix/data/5、创建onconfig脚本Su –InformixCd etcCponconfig.stdonconfig.loanOnconfig参数修改:################################################################### # Licensed Material - Property Of IBM## "Restricted Materials of IBM"## IBM Informix Dynamic Server# Copyright IBM Corporation 1996, 2009. All rights reserved.## Title: onconfig.std# Description: IBM Informix Dynamic Server Configuration Parameters ## Important: $INFORMIXDIR now resolves to the environment# variable INFORMIXDIR. Replace the value of the INFORMIXDIR# environment variable only if the path you want is not under# $INFORMIXDIR.## For additional information on the parameters:# /infocenter/idshelp/v115/index.jsp####################################################################################################################################### Root Dbspace Configuration Parameters#################################################################### ROOTNAME - The root dbspace name to contain reserved pages and # internal tracking tables.# ROOTPATH - The path for the device containing the root dbspace # ROOTOFFSET - The offset, in KB, of the root dbspace into the# device. The offset is required for some raw devices. # ROOTSIZE - The size of the root dbspace, in KB. The value of # 200000 allows for a default user space of about# 100 MB and the default system space requirements.# MIRROR - Enable (1) or disable (0) mirroring# MIRRORPATH - The path for the device containing the mirrored# rootdbspace# MIRROROFFSET - The offset, in KB, into the mirrored device## Warning: Always verify ROOTPATH before performing# disk initialization (oninit -i or -iy) to# avoid disk corruption of another instance###################################################################ROOTNAME rootdbsROOTPATH $INFORMIXDIR/data/loan_rootdbs(修改到rootdbs所在目录)ROOTOFFSET 256 (偏移量256K)ROOTSIZE 4000000(大小4G)MIRROR 0MIRRORPATH $INFORMIXDIR/tmp/demo_on.root_mirrorMIRROROFFSET 0#################################################################### Physical Log Configuration Parameters#################################################################### PHYSFILE - The size, in KB, of the physical log on disk. # If RTO_SERVER_RESTART is enabled, the# suggested formula for the size of PHSYFILE# (up to about 1 GB) is:# PHYSFILE = Size of BUFFERS * 1.1# PLOG_OVERFLOW_PATH - The directory for extra physical log files# if the physical log overflows during recovery # or long transaction rollback# PHYSBUFF - The size of the physical log buffer, in KB###################################################################PHYSFILE 39000000PLOG_OVERFLOW_PATH $INFORMIXDIR/tmpPHYSBUFF 128################################################################### # Logical Log Configuration Parameters################################################################### # LOGFILES - The number of logical log files# LOGSIZE - The size of each logical log, in KB# DYNAMIC_LOGS - The type of dynamic log allocation.# Acceptable values are:# 2 Automatic. IDS adds a new logical log to the# root dbspace when necessary.# 1 Manual. IDS notifies the DBA to add new logical # logs when necessary.# 0 Disabled# LOGBUFF - The size of the logical log buffer, in KB###################################################################LOGFILES 250LOGSIZE 10000DYNAMIC_LOGS 2LOGBUFF 64################################################################### # Long Transaction Configuration Parameters################################################################### # If IDS cannot roll back a long transaction, the server hangs# until more disk space is available.## LTXHWM - The percentage of the logical logs that can be# filled before a transaction is determined to be a # long transaction and is rolled back# LTXEHWM - The percentage of the logical logs that have been # filled before the server suspends all other# transactions so that the long transaction being# rolled back has exclusive use of the logs## When dynamic logging is on, you can set higher values for# LTXHWM and LTXEHWM because the server can add new logical logs# during long transaction rollback. Set lower values to limit the # number of new logical logs added.## If dynamic logging is off, set LTXHWM and LTXEHWM to# lower values, such as 50 and 60 or lower, to prevent long# transaction rollback from hanging the server due to lack of# logical log space.## When using Enterprise Replication, set LTXEHWM to at least 30%# higher than LTXHWM to minimize log overruns.###################################################################LTXHWM 70LTXEHWM 80################################################################### # Server Message File Configuration Parameters################################################################### # MSGPATH - The path of the IDS message log file# CONSOLE - The path of the IDS console message file###################################################################MSGPATH $INFORMIXDIR/online_loan.logCONSOLE $INFORMIXDIR/tmp/online.con################################################################### # Tblspace Configuration Parameters################################################################### # TBLTBLFIRST - The first extent size, in KB, for the tblspace # tblspace. Must be in multiples of the page size. # TBLTBLNEXT - The next extent size, in KB, for the tblspace# tblspace. Must be in multiples of the page size. # The default setting for both is 0, which allows IDS to manage# extent sizes automatically.## TBLSPACE_STATS - Enables (1) or disables (0) IDS to maintain# tblspace statistics###################################################################TBLTBLFIRST 0TBLTBLNEXT 0TBLSPACE_STATS 1################################################################### # Temporary dbspace and sbspace Configuration Parameters################################################################### # DBSPACETEMP - The list of dbspaces used to store temporary# tables and other objects. Specify a colon# separated list of dbspaces that exist when the# server is started. If no dbspaces are specified,# or if all specified dbspaces are not valid,# temporary files are created in the /tmp directory# instead.# SBSPACETEMP - The list of sbspaces used to store temporary# tables for smart large objects. If no sbspace# is specified, temporary files are created in# a standard sbspace.###################################################################DBSPACETEMP tempdbsSBSPACETEMP################################################################### # Dbspace and sbspace Configuration Parameters################################################################### # SBSPACENAME - The default sbspace name where smart large objects # are stored if no sbspace is specified during# smart large object creation. Some DataBlade# modules store smart large objects in this# location.# SYSSBSPACENAME - The default sbspace for system statistics# collection. Otherwise, IDS stores statistics# in the sysdistrib system catalog table.# ONDBSPACEDOWN - Specifies how IDS behaves when it encounters a# dbspace that is offline. Acceptable values# are:# 0 Continue# 1 Stop# 2 Wait for DBA action###################################################################SBSPACENAMESYSSBSPACENAMEONDBSPACEDOWN 2################################################################### # System Configuration Parameters################################################################### # SERVERNUM - The unique ID for the IDS instance. Acceptable # values are 0 through 255, inclusive.# DBSERVERNAME - The name of the default database server# DBSERVERALIASES - The list of up to 32 alternative dbservernames, # separated by commas###################################################################SERVERNUM 0DBSERVERNAME loandbDBSERVERALIASES loandbshm################################################################### # Network Configuration Parameters################################################################### # NETTYPE - The configuration of poll threads# for a specific protocol. The# format is:# NETTYPE <protocol>,<# poll threads> # ,<number of connections/thread># ,(NET|CPU)# You can include multiple NETTYPE# entries for multiple protocols.# LISTEN_TIMEOUT - The number of seconds that IDS# waits for a connection# MAX_INCOMPLETE_CONNECTIONS - The maximum number of incomplete# connections before IDS logs a Denial # of Service (DoS) error# FASTPOLL - Enables (1) or disables (0) fast# polling of your network, if your# operating system supports it.###################################################################NETTYPE s octcp,8,500,NET (网络协议用户4000)NETTYPE ipcshm,2,50,CPU (内存通道用户100)LISTEN_TIMEOUT 60MAX_INCOMPLETE_CONNECTIONS 1024FASTPOLL 1################################################################### # CPU-Related Configuration Parameters################################################################### # MULTIPROCESSOR - Specifies whether the computer has multiple # CPUs. Acceptable values are: 0 (single# processor), 1 (multiple processors or# multi-core chips)# VPCLASS cpu - Configures the CPU VPs. The format is:# VPCLASS cpu,num=<#>[,max=<#>][,aff=<#>]# [,noage]# VP_MEMORY_CACHE_KB - Specifies the amount of private memory# blocks of your CPU VP, in KB, that the# database server can access.# Acceptable values are:# 0 (disable)# 800 through 40% of the value of SHMTOTAL# SINGLE_CPU_VP - Optimizes performance if IDS runs with# only one CPU VP. Acceptable values are:# 0 multiple CPU VPs# Any nonzero value (optimize for one CPU VP) ###################################################################MULTIPROCESSOR 1VPCLASS cpu,num=8,noageVP_MEMORY_CACHE_KB 0SINGLE_CPU_VP 0################################################################### # AIO and Cleaner-Related Configuration Parameters################################################################### # VPCLASS aio - Configures the AIO VPs. The format is:# VPCLASS aio,num=<#>[,max=<#>][,aff=<#>][,noage] # CLEANERS - The number of page cleaner threads# AUTO_AIOVPS - Enables (1) or disables (0) automatic management # of AIO VPs# DIRECT_IO - Specifies whether direct I/O is used for cooked# files used for dbspace chunks.# Acceptable values are:# 0 Disable# 1 Enable direct I/O# 2 Enable concurrent I/O####################################################################VPCLASS aio,num=1CLEANERS 8AUTO_AIOVPS 1DIRECT_IO 0################################################################### # Lock-Related Configuration Parameters################################################################### # LOCKS - The initial number of locks when IDS starts. # Dynamic locking can add extra locks if needed. # DEF_TABLE_LOCKMODE - The default table lock mode for new tables.# Acceptable values are ROW and PAGE (default). ###################################################################LOCKS 1000000DEF_TABLE_LOCKMODE row################################################################### # Shared Memory Configuration Parameters################################################################### # RESIDENT - Controls whether shared memory is resident.# Acceptable values are:# 0 off (default)# 1 lock the resident segment only# n lock the resident segment and the next n-1# virtual segments, where n < 100# -1 lock all resident and virtual segments# SHMBASE - The shared memory base address; do not change# SHMVIRTSIZE - The initial size, in KB, of the virtual# segment of shared memory# SHMADD - The size, in KB, of additional virtual shared# memory segments# EXTSHMADD - The size, in KB, of each extension shared# memory segment# SHMTOTAL - The maximum amount of shared memory for IDS,# in KB. A 0 indicates no specific limit.# SHMVIRT_ALLOCSEG - Controls when IDS adds a memory segment and# the alarm level if the memory segment cannot# be added.# For the first field, acceptable values are:# - 0 Disabled# - A decimal number indicating the percentage# of memory used before a segment is added# - The number of KB remaining when a segment# is added# For the second field, specify an alarm level# from 1 (non-event) to 5 (fatal error).# SHMNOACCESS - A list of up to 10 memory address ranges# that IDS cannot use to attach shared memory.# Each address range is the start and end memory # address in hex format, separated by a hyphen. # Use a comma to separate each range in the list. ###################################################################RESIDENT 0SHMBASE 0x700000010000000SHMVIRTSIZE 32656SHMADD 8192EXTSHMADD 8192SHMTOTAL 0SHMVIRT_ALLOCSEG 0,3SHMNOACCESS################################################################### # Checkpoint and System Block Configuration Parameters################################################################### # CKPINTVL - Specifies how often, in seconds, IDS checks# if a checkpoint is needed. 0 indicates that# IDS does not check for checkpoints. Ignored # if RTO_SERVER_RESTART is set.# AUTO_CKPTS - Enables (1) or disables (0) monitoring of# critical resource to trigger checkpoints# more frequently if there is a chance that# transaction blocking might occur.# RTO_SERVER_RESTART - Specifies, in seconds, the Recovery Time# Objective for IDS restart after a server# failure. Acceptable values are 0 (off) and# any number from 60-1800, inclusive.# BLOCKTIMEOUT - Specifies the amount of time, in seconds,# for a system block.###################################################################CKPTINTVL 1800AUTO_CKPTS 1RTO_SERVER_RESTART 0BLOCKTIMEOUT 3600################################################################### # Transaction-Related Configuration Parameters################################################################### # TXTIMEOUT - The distributed transaction timeout, in seconds# DEADLOCK_TIMEOUT - The maximum time, in seconds, to wait for a# lock in a distributed transaction.# HETERO_COMMIT - Enables (1) or disables (0) heterogeneous# commits for a distributed transaction# involving an EGM gateway.###################################################################TXTIMEOUT 300DEADLOCK_TIMEOUT 60HETERO_COMMIT 0################################################################### # ontape Tape Device Configuration Parameters################################################################### # TAPEDEV - The tape device path for backups. To use standard# I/O instead of a device, set to stdio.# TAPEBLK - The tape block size, in KB, for backups# TAPESIZE - The maximum amount of data to put on one backup# tape. Acceptable values are 0 (unlimited) or any# positive integral multiple of TAPEBLK.###################################################################TAPEDEV /dev/nullTAPEBLK 32TAPESIZE 0################################################################### # ontapeLogial Log Tape Device Configuration Parameters################################################################### # LTAPEDEV - The tape device path for logical logs# LTAPEBLK - The tape block size, in KB, for backing up logical # logs# LTAPESIZE - The maximum amount of data to put on one logical# log tape. Acceptable values are 0 (unlimited) or any # positive integral multiple of LTAPEBLK.###################################################################LTAPEDEV /dev/nullLTAPEBLK 32LTAPESIZE 0################################################################### # Backup and Restore Configuration Parameters#################################################################### BAR_ACT_LOG - The ON-Bar activity log file location.# Do not use the /tmp directory. Use a# directory with restricted permissions.# BAR_DEBUG_LOG - The ON-Bar debug log file location.# Do not use the /tmp directory. Use a# directory with restricted permissions.# BAR_DEBUG - The debug level for ON-Bar. Acceptable# values are 0 (off) through 9 (high).# BAR_MAX_BACKUP - The number of backup threads used in a# backup. Acceptable values are 0 (unlimited)# or any positive integer.# BAR_RETRY - Specifies the number of time to retry a# backup or restore operation before reporting # a failure# BAR_NB_XPORT_COUNT - Specifies the number of data buffers that# eachonbar_d process uses to communicate# with the database server# BAR_XFER_BUF_SIZE - The size, in pages, of each data buffer.# Acceptable values are 1 through 15 for# 4 KB pages and 1 through 31 for 2 KB pages.# RESTARTABLE_RESTORE - Enables ON-Bar to continue a backup after a# failure. Acceptable values are OFF or ON.# BAR_PROGRESS_FREQ - Specifies, in minutes, how often progress# messages are placed in the ON-Bar activity# log. Acceptable values are: 0 (record only# completion messages) or 5 and above.# BAR_BSALIB_PATH - The shared library for ON-Bar and the# storage manager. The default value is# $INFORMIXDIR/lib/ibsad001 (with a# platform-specific file extension).# BACKUP_FILTER - Specifies the pathname of a filter program# to transform data during a backup, plus any# program options# RESTORE_FILTER - Specifies the pathname of a filter program# to transform data during a restore, plus any # program options# BAR_PERFORMANCE - Specifies the type of performance statistics# to report to the ON-Bar activity log for backup # and restore operations.# Acceptable values are:# 0 = Turn off performance monitoring (Default) # 1 = Display the time spent transferring data # between the IDS instance and the storage # manager# 2 = Display timestamps in microseconds# 3 = Display both timestamps and transfer # statistics###################################################################BAR_ACT_LOG $INFORMIXDIR/tmp/bar_act.logBAR_DEBUG_LOG $INFORMIXDIR/tmp/bar_dbug.logBAR_DEBUG 0BAR_MAX_BACKUP 0BAR_RETRY 1BAR_NB_XPORT_COUNT 20BAR_XFER_BUF_SIZE 31RESTARTABLE_RESTORE ONBAR_PROGRESS_FREQ 0BAR_BSALIB_PATHBACKUP_FILTERRESTORE_FILTERBAR_PERFORMANCE 0################################################################### # Informix Storage Manager (ISM) Configuration Parameters################################################################### # ISM_DATA_POOL - Specifies the name for the ISM data pool# ISM_LOG_POOL - Specifies the name for the ISM log pool###################################################################ISM_DATA_POOL ISMDataISM_LOG_POOL ISMLogs################################################################### # Data Dictionary Cache Configuration Parameters################################################################### # DD_HASHSIZE - The number of data dictionary pools. Set to any# positive integer; a prime number is recommended. # DD_HASHMAX - The number of entries per pool.# Set to any positive integer.###################################################################DD_HASHSIZE 31DD_HASHMAX 10################################################################### # Data Distribution Configuration Parameters#################################################################### DS_HASHSIZE - The number of data Ddstribution pools.# Set to any positive integer; a prime number is# recommended.# DS_POOLSIZE - The maximum number of entries in the data# distribution cache. Set to any positive integer.###################################################################DS_HASHSIZE 31DS_POOLSIZE 127################################################################### User Defined Routine (UDR) Cache Configuration Parameters################################################################### PC_HASHSIZE - The number of UDR pools. Set to any# positive integer; a prime number is recommended.# PC_POOLSIZE - The maximum number of entries in the# UDR cache. Set to any positive integer.###################################################################PC_HASHSIZE 31PC_POOLSIZE 127#################################################################### SQL Statement Cache Configuration Parameters#################################################################### STMT_CACHE - Controls SQL statement caching. Acceptable# values are:# 0 Disabled# 1 Enabled at the session level# 2 All statements are cached# STMT_CACHE_HITS - The number of times an SQL statement must be# executed before becoming fully cached.# 0 indicates that all statements are# fully cached the first time.# STMT_CACHE_SIZE - The size, in KB, of the SQL statement cache# STMT_CACHE_NOLIMIT - Controls additional memory consumption.# Acceptable values are:# 0 Limit memory to STMT_CACHE_SIZE# 1 Obtain as much memory, temporarily, as needed # STMT_CACHE_NUMPOOL - The number of pools for the SQL statement# cache. Acceptable value is a positive# integer between 1 and 256, inclusive.###################################################################STMT_CACHE 0STMT_CACHE_HITS 0STMT_CACHE_SIZE 512STMT_CACHE_NOLIMIT 0STMT_CACHE_NUMPOOL 1################################################################### # Operating System Session-Related Configuration Parameters################################################################### # USEOSTIME - The precision of SQL statement timing.# Accepted values are 0 (precision to seconds)# and 1 (precision to subseconds). Subsecond# precision can degrade performance.# STACKSIZE - The size, in KB, for a session stack# ALLOW_NEWLINE - Controls whether embedded new line characters # in string literals are allowed in SQL# statements. Acceptable values are 1 (allowed) # and any number other than 1 (not allowed).# USELASTCOMMITTED - Controls the committed read isolation level.# Acceptable values are:# - NONE Waits on a lock# - DIRTY READ Uses the last committed value in # place of a dirty read# - COMMITTED READ Uses the last committed value # in place of a committed read# - ALL Uses the last committed value in place # of all isolation levels that support the last # committed option###################################################################USEOSTIME 0STACKSIZE 64ALLOW_NEWLINE 0USELASTCOMMITTED NONE################################################################### # Index Related Configuration Parameters################################################################### # FILLFACTOR - The percentage of index page fullness# MAX_FILL_DATA_PAGES - Enables (1) or disables (0) filling data# pages that have variable length rows as# full as possible# BTSCANNER - Specifies the configuration settings for all # btscanner threads. The format is:# BTSCANNER num=<#>,threshold=<#>,rangesize=<#>, # alice=(0-12),compression=[low|med|high|default] # ONLIDX_MAXMEM - The amount of memory, in KB, allocated for# the pre-image pool and updator log pool for# each partition.###################################################################FILLFACTOR 90MAX_FILL_DATA_PAGES 0BTSCANNER num=1,threshold=5000,rangesize=-1,alice=6,compression=default ONLIDX_MAXMEM 5120#################################################################### Parallel Database Query (PDQ) Configuration Parameters#################################################################### MAX_PDQPRIORITY - The maximum amount of resources, as a# percentage, that PDQ can allocate to any# one decision support query# DS_MAX_QUERIES - The maximum number of concurrent decision# support queries# DS_TOTAL_MEMORY - The maximum amount, in KB, of decision# support query memory# DS_MAX_SCANS - The maximum number of concurrent decision# support scans# DS_NONPDQ_QUERY_MEM - The amount of non-PDQ query memory, in KB.# Acceptable values are 128 to 25% of# DS_TOTAL_MEMORY.# DATASKIP - Specifies whether to skip dbspaces when# processing a query. Acceptable values are:# - ALL Skip all unavailable fragments# - ON <dbspace1><dbspace2>... Skip listed# dbspaces# - OFF Do not skip dbspaces (default)###################################################################MAX_PDQPRIORITY 100DS_MAX_QUERIESDS_TOTAL_MEMORYDS_MAX_SCANS 1048576DS_NONPDQ_QUERY_MEM 128DATASKIP#################################################################### Optimizer Configuration Parameters# OPTCOMPIND - Controls how the optimizer determines the best# query path. Acceptable values are:# 0 Nested loop joins are preferred# 1 If isolation level is repeatable read,# works the same as 0, otherwise works same as 2# 2 Optimizer decisions are based on cost only# DIRECTIVES - Specifies whether optimizer directives are# enabled (1) or disabled (0). Default is 1.# EXT_DIRECTIVES - Controls the use of external SQL directives.# Acceptable values are:# 0 Disabled# 1 Enabled if the IFX_EXTDIRECTIVES environment# variable is enabled# 2 Enabled even if the IFX_EXTDIRECTIVES# environment is not set# OPT_GOAL - Controls how the optimizer should optimize for# fastest retrieval. Acceptable values are:# -1 All rows in a query# 0 The first rows in a query# IFX_FOLDVIEW - Enables (1) or disables (0) folding views that# have multiple tables or a UNION ALL clause.# Disabled by default.# AUTO_REPREPARE - Enables (1) or disables (0) automatically# re-optimizing stored procedures and re-preparing# prepared statements when tables that are referenced # by them change. Minimizes the occurrence of the# -710 error.####################################################################OPTCOMPIND 2DIRECTIVES 1EXT_DIRECTIVES 0OPT_GOAL -1IFX_FOLDVIEW 0AUTO_REPREPARE 1#################################################################### Read-ahead Configuration Parameters####################################################################RA_PAGES - The number of pages, as a positive integer, to# attempt to read ahead#RA_THRESHOLD - The number of pages, as a postive integer, left# before the next read-ahead group。
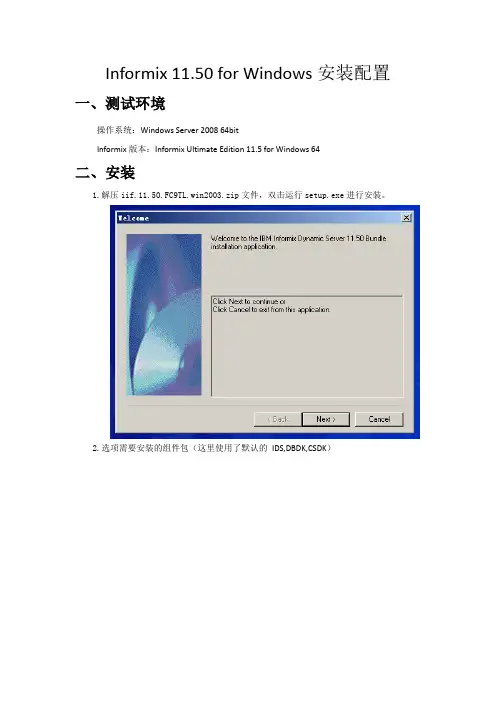
Informix 11.50 for Windows安装配置一、测试环境
操作系统:Windows Server 2008 64bit
Informix版本:Informix Ultimate Edition 11.5 for Windows 64
二、安装
1.解压iif.11.50.FC9TL.win2003.zip文件,双击运行setup.exe进行安装。
2.选项需要安装的组件包(这里使用了默认的IDS,DBDK,CSDK)
3.点击Next继续执行
4.阅读并接受协议,点击Next
5.选择Typical方式进行安装
6.选择安装目录,这里安装路径设置为“E:\informix11.5”。
7.设置informix 用户密码
8.确认安装信息,点击“Next”
9.等待IDS安装结束,点击“Finish”。
10.自动加载DBDK安装程序
11.点击Next执行安装
12.设置DBDK安装目录
13.点击Done完成DBDK安装
14.自动加载CSDK安装程序
15.选择接受许可协议
16.设置本地信息,默认Windows用户
17.选择Custom进行安装
18.为Client-SDK设置路径
19.点击Next后,进行安装
20.完成CSDK 安装
21.全部完成安装后,程序组里增加了IDS,DBDK,CSDK 三组,在IDS 的程序组里:以数据库服务名(ids1150)为标题的链接可视为informix 的console 接口,server instance manager 可以管理instance,modifyinstallation 可以管理informix 安装组件。

l i n u x6下i n f o r m i x_11.7安装配置手册新开局linux6 下informix_11.7安装配置手册本文仅适用于数据库挂载本地盘的情况。
本文中逻辑日志设置为19个,逻辑日志,物理日志以及tempdbs的大小设置为2G,rootdbs设置为5.1G,其他地区可根据局方划分虚拟空间的大小灵活调整。
建立informix账户useradd –u 500 –g 500 –d /home/Informix –s /bin/bash Informix确认shell类型如果shell类型不是bash则修正informix账户shell类型chsh –s /bin/bash informix编辑informix环境变量INFORMIXDIR=/home/informixINFORMIXSERVER=hbcdr1PATH=$PATH:$INFORMIXDIR/binLD_LIBRARY_PATH=$LD_LIBRARY_PATH:$INFORMIXDIR/lib:$INFORM IXDIR/lib/esqlexport INFORMIXDIR INFORMIXSERVER PATH解压informix_11.7安装包解压后文件切换账户至root进行安装直接ENTER回车选1并回车选1回车或直接按回车键指定安装路径,并选Y回车确认;我们常用/home/Informix,如果不指定informix默认安装到/opt/IBM/informix中此处选1或者按ENTER默认Typical此处选2,不要默认选项此处选1并回车确认此处直接回车确认此处直接回车,系统自动安装安装完毕回到informix账户下如果是本地磁盘做数据库则在informix账户下建立chunklink目录并执行数据库空间mkdir /home/Informix/chunklinkcd /home/Informix/chunklinktouch rootdbstouch tempdbstouch logdbstouch phydbstouch datadbs1 datadbs2 datadbs3 datadbs4 datadbs5chmod 660 *dbs*编辑onconfig文件cp onconfig.std onconfig根据现场主机实际情况编辑onconfig文件注意rootdbs方面ROOTNAME rootdbsROOTPATH /home/informix/chunklink/rootdbsROOTOFFSET 10000ROOTSIZE 5100000Logdbs方面LOGFILES 2LOGSIZE 200000DYNAMIC_LOGS 3LOGBUFF 64FULL_DISK_INIT 1在初始化之前设置成1 初始化完成后会自动变成0 DBSERVERNAME ivpndb2 要根据现场实际情况变更LOCKS 6000000 锁的数量要根据预计的业务量进行调整共享内存方面SHMVIRTSIZE 1024000SHMADD 128000备份方面TAPEDEV /home/informix/ph.dat 备份文件名和路径TAPEBLK 1024TAPESIZE 24000000 备份文件大小编辑sqlhosts文件修改services文件用root编辑/etc/services增加7787端口初始化oninit –ivy初始化执行时间较长因为要将本地磁盘空间先划分出一部分作为rootdbs 这个耗时较长此时online.log日志中可见到FULL_DISK_INIT变成0初始化完成onstat –d可见rootdbs划分其他必要空间各划分2G作为tempdbs logdbs phydbs空间onspaces -c -d tempdbs -t -p /home/informix/chunklink/tempdbs -o 0 -s 2000000 onspaces -c -d logdbs -p /home/informix/chunklink/logdbs -o 0 -s 2000000 onspaces -c -d phydbs -p /home/informix/chunklink/phydbs -o 0 -s 2000000划分datadbs空间【耗时长,划一个datadbs大约需要10分钟】这里只划分4个出来【4*20G=80G 划分80G作为数据库数据空间】onspaces -c -d datadbs -p /home/informix/chunklink/datadbs1 -o 0 -s 20000000 onspaces -a datadbs -p /home/informix/chunklink/datadbs2 -o 0 -s 20000000 onspaces -a datadbs -p /home/informix/chunklink/datadbs3 -o 0 -s 20000000 onspaces -a datadbs -p /home/informix/chunklink/datadbs4 -o 0 -s 20000000系统在执行上述命令的时候,同时在chunklink目录下可观察到datadbs1在增大修改数据库状态从online变成静止onmode –s变更逻辑日志/*可以指定文件大小,且此处执行的条数要和逻辑日志个数一致/onparams -a -d logdbs -s 100000 -ionparams -a -d logdbs -s 100000 -ionparams -a -d logdbs -s 100000 -ionparams -a -d logdbs -s 100000 -ionparams -a -d logdbs -s 100000 -ionparams -a -d logdbs -s 100000 -ionparams -a -d logdbs -s 100000 -ionparams -a -d logdbs -s 100000 -ionparams -a -d logdbs -s 100000 -ionparams -a -d logdbs -s 100000 -ionparams -a -d logdbs -s 100000 -ionparams -a -d logdbs -s 100000 -ionparams -a -d logdbs -s 100000 -ionparams -a -d logdbs -s 100000 -ionparams -a -d logdbs -s 100000 -ionparams -a -d logdbs -s 100000 -ionparams -a -d logdbs -s 100000 -ionparams -a -d logdbs -s 100000 –i另开一窗口onstat –l可见新增的逻辑日志begin是从3开始0级备份在informix家目录下touch ph.dat备份文件并执行0级备份执行19次onmode –l 同时onstat –l可见到onmod e –c 重定位onmode –c重定位checkopint点此时U---C-L重定位到number20上删除系统默认逻辑日志onparams -d -l 1 -yonparams -d -l 2 -yonparams -d -l 3 -yonparams -d -l 4 -yonparams -d -l 5 -yonparams -d -l 6 -yonparams -d -l 7 -yonparams -d -l 8 -yonparams -d -l 9 -yonparams -d -l 10 -y onparams -d -l 11 -y onparams -d -l 12 -y onparams -d -l 13 -y onparams -d -l 14 -y onparams -d -l 15 -y onparams -d -l 16 -yonparams -d -l 17 -yonparams -d -l 18 -yonparams -d -l 19 -y此时number 1中还有系统自带逻辑日志先0备再删除ontape –s –L 0onparams -d -l 1 –yonmod e –m 恢复在线状态重启数据库Onmode –kyOninit –vy完成如果安装过程中出问题需要重新安装请删除/home/Informix/chunklink/下的文件并重新touch相关数据空间且要修改onconfig配置文件中的FULL_DISK_ONIT为1在执行oninit –ivy其余步骤和本文一致。

Informix安装完成后进行配制一、测试是否已经连接先点击开始→所有程序→Informix Clinet SDK→ILogin Demo如下图就会弹出一个测试是否联通了的测试界面如下点击File→Run就会弹出如下图然后在这个页面里输入相应的信息如下图里面的server里填写的是数据库服务名:enipas_online_net Hostname里填写的是数据库IP地址:221.5.135.13 Servicename里填写的是数据库端口:9003Protocolname里填写的是onsoctcpUsername 里填写的是用户名scutestPassword 里填写的是密码scutestStores Database 里填写的是数据库名:scpdb填写完后再点击OK进行测试如出现下面的窗口就是连接测试成功然后关闭这个重启电脑(informix客户端安装后一定要重启后才能使用)二、配制informix点击开始→所有程序→Informix Client SDK →Informix Setnet32 如下图就会弹出点击Server Information 如下图在这里填写完相应信息如下图在informix Server里填写数据库服务名:enipas_online_net HostName 里填写数据库IP地址:221.5.135.13 Protocolname里填写的是onsoctcpService Name里填写的是数据库端口:9003然后点击Host Information 就会弹出如下页面在这里填写数据库的用户名和密码如下图然后点击确定就会弹出如下信息点击确定就可以了三、配制informix的ODBC数据源重启后开始配制informix的ODBC数据源: 如下图1、点击开始→管理工具→数据源就会弹出下图2、就会出现下图点击添加就会出现下图选择INFORMIX 3.30 32 BIT就会出现下图在Data Source Name里输入连接名cqwtin7 然后点击Connetction在Connetction 里的Server Name里输入数据库服务名:enipas_online_net 然后再填写Database Name 里输入数据库名scpdb在User Id里输入用户名scutestPassword 里输入密码scutest然后点击Test Connection进行连接测试如果成功就可以了。
INFORMIX数据库安装配置文档一、INFORMIX Online 7.24安装步骤1·建立INFORMIX组、用户在天腾主机系统安装完成的前提下,以root用户注册,执行#sysadm→users→add 菜单,先增加informix用户组,再增加informix用户。
用户创建完成后,按CTRL+d 退出root用户,在login:状态下以informix用户身份注册,在$提示符下,输入id命令,检查informix用户创建的正确性。
(注:创建informix用户时,请注意口令失效期需大于1,口令有效期不要注明。
同时informix用户号和组号需大于或等于100。
可参见TANDEM S4206主机上用户帐号管理配置文档)2·INFORMIX 环境变量的设置与INFORMIX相关的环境变量有以下几种:RMIXDIR变量(指定Informix的工作目录):INFORMIXDIR=/informix; export INFORMIXDIRb.PATH变量(使得Informix命令可被用户使用):PATH = $PATH: $INFORMIXDIR/bin ; export PATHc.ONCONFIG变量(指定Informix Online 的初始化配置文件):ONCONFIG =onconfig.lyg; export ONCONFIGRMIXSERVER变量(指定数据库服务器名字):INFORMIXSERVER=lygserver ; export INFORMIXSERVERe. LANG和LC_CTYPE变量(支持Online的汉化语言包):LANG=chinese; export LANGLC_CTYPE=C; export LC_CTYPE以上环境变量已附加到/etc/profile文件中。
3·INFORMIX Online 7.X数据库空间的分布。
Tandem S4206主机上I nformix Online数据库系统空间的使用和划分有以下约定:Online自身系统数据库sysmaster、sysutils等位于根数据库空间rootdbs;Online系统临时数据位于数据库空间tmpdbs;Online系统逻辑日志位于数据库空间loglog;Online系统物理日志位于数据库空间phylog;Online系统工作数据位于数据库空间workdbs;构成Informix Online数据库空间的所有chunk均为原始设备(又称生设备或raw disk),所有chunk的用户主、用户组均为informix,用户权限为660。

INFORMIX FOR LINUX 安装使用手册(ONLINE分册)高伟达软件技术有限公司2003年2月19日Informix 数据库的安装、配置及检查使用一:Informix Online for Linux的安装方法 (2001-05-10 20:39:08)1、创建INFORMIX用户组和informix用户。
home=/usr/informix2、给informix加密码。
3、展开informix安装文件:rpm -i ******************.rpm(共三个)4、修改root的profile,增加INFORMIXDIR=/usr/informixexport INFORMIXDIR执行profile5、数据库安装,安装的原则是先装低版本的软件,后装高版本的软件,最后装online。
a、 #cd /usr/informixb、 #./installclientsdkc、 #./installonline6、增加文件系统online。
用户可以定义别的文件系统。
mount /online文件系统。
创建数据文件onlinedbs。
#cd /online#>onlinedbs#chmod 660 onlinedbs7、修改/online和/online/onlinedbs的权限#chown informix /online#chgrp informix /online#chown informix /online/onlinedbs#chgrp informix /online/onlinedbs8、以informix注册cd /usr/informix/etc9、将onconfig.std文件拷贝到onconfig或别的文件名。
vi onconfig中的参数a、ROOTPATH /online/onlinedbsb、ROOTSIZE 100000c、CONSOLE /dev/nulld、TAPDEV /dev/null或用户定义e、LTAPDEV /dev/nullf、DBSERVERNAME db(此项可自己定义但要求与sqlhosts中的定义一致。
接下来会提示是否检查安装介质,选择Skip跳过进入安装界面,选择next选择安装语言:选择为Chinese(simplified)(简体中文)点Next进入下一步选择键盘点下一步进入安装号码输入框,按如下输入安装号码选择下一步后会给出警告提示是否初始化驱动器并删除硬盘上数据,选择是进入创建分区界面,选择“自定义分区”点下一步1.建立引导区boot分区,大小200M,点“新建”,挂载点选择”/boot”,大小输入200,文件系统类型默认:ext3,点“确定”完成2.建立swap分区,点“新建”,在文件系统类型内选择:swap,大小内输入4096点“确定”完成3.开始新建操作系统物理卷,点“新建”,在文件系统类型内选择:LVM,大小内输入60G4.建立系统逻辑卷,点“LVM”按钮,进入管理界面后,建立一个逻辑卷组; 在卷组名称内输入vg00,物理范围选择:32MB,然后开始建立逻辑分区,点“添加”,进入选择挂载点,输入逻辑卷名称,大小,详细如下5.开始新建数据库空间物理卷,点“新建”,在文件系统类型内选择:LVM,大小内输入硬盘内所有剩余空间,或输入100G6.建立数据库空间逻辑卷,点“LVM”按钮,进入管理界面后,建立一个逻辑卷组,在卷组名称内输入sealdb,物理范围选择:64MB,然后点“确定”创建完成后点击“下一步”出现如下画面点下一步进入网络设置,按下图所示,编辑网络设备,取消’dhcp‘选项,手工输入ip地址(可任意输入,稍后在修改),并手工设置主机名,点击下一步如下图所示,点击继续后点下一步选择时区,时区选择亚洲/上海,点击下一步设置root口令,至少6位,点击下一步选择软件包:勾选上软件开发和网络服务器点击“下一步”选择应该软件包在服务器上安装的软件包如下:1.)桌面环境:默认2.)应用程序选择:编辑器其他不选3.)开发:选择GNOME软件开发 Java开发去掉里面的JDK1.4.2 软件开发开发工具全选开发库老的开发软件4.)服务器选择:FTP服务器服务器配置工具服务器老的网络服务器中选中telnet5.)基本系统:系统工具中选中sysstat 老的软件支持管理工具基本 X窗口系统 JAVA 点击下一步进行软件包的依赖性检测点击下一步进行软件包的安装直到安装完毕。
一、印鉴网络informix安装和配置说明第一步:配置环境变量如用字符界面建用户如下:1、建立informix组:groupadd -g 20000 informix2、建立informix用户:useradd -u 20000 -g 20000 -d /home/informix -m3、informix 20000为用户UID,UID原则上要与其它用户不能重复。
4、配置informix用户环境变量:在informix用户下操作5、修改.bash_profile文件增加以下环境变量,如用图形界面则比较简洁。
INFORMIXDIR=/home/informixINFORMIXSERVER=vsealONCONFIG=onconfig.vsealLANG=zh_CN.GB18030DBDATE=Y4MD-LD_LIBRARY_PATH=$INFORMIXDIR/lib:$INFORMIXDIR/lib/esql:$LD_LIBRARY_PATHexport INFORMIXDIR INFORMIXSERVER ONCONFIG LD_LIBRARY_PATH DBDATE LANGPATH=$PATH:$INFORMIXDIR/binexport PATH保存后exit退出再以informix用户得新进入系统中第二步:准备安装文件1、把解开的一个Linux-IDS.9.40.tar服务端与clientsdk.Linux.tar客户端文件传入Linux环境/home/informix目录中,文件名可能根据行里给的文件可能不一样,但安装文件肯定应该有一个客户端和一个服务端的。
2、解开服务端压缩包:tar xvf Linux-IDS.9.40.tar3、解开客户端压缩包:tar xvf clientsdk.Linux.tar解开后会生成一个SERVER的目录,cd SERVER 目录下把iif.cpi拷贝到上一级目录上即执行cp iif.cpi ../4、执行完成后,把iif.cpi解开执行cpio -idmv <iif.cpi5、最后解开csdk.cpi文件执行cpio -idmv <csdk.cpi生成的文件你看的到;第三步:开始安装首先用informix用户登陆完成后su到root安装ids:在informix目录下运行./installserver碰到提示,直接回车;完成后exit退出到informix用户环境下安装csdk:在inforomix目录下运行./installclientsdk;安装前先设置安装的变量export INFORMIXDIR=/home/informix/碰到提示敲yes,回车;这样你的clientsdk就装好了;第四步:开始配置一、用root用户登入配置以下文件:1、vi配置/etc/services文件,在最后增加两行:sqlexec 8888/tcpsqlexe 7777/tcpsqlexec是services 名字,8888是端口号;TCP表示TCP/IP协议2、配置/etc/hosts文件192.168.28.1 linux(本主机名称)二、在informix用户下配置以下文件1、配置$INFORMIXDIR/etc/sqlhosts文件把前面两行加#注释掉,在最后两行加上:vseal onipcshm linux sqlexevseal_tcp onsoctcp linux sqlexec这里配置了共享内存方式和soctcp方式连接数据库的两种方式;linux代表主机名;sqlexe/sqlexec分别代表在services文件中配的服务;另外需要注意的是,informix for linux 9.4版中release提到不支持tlitcp方式;所以这里采用的onipcshm方式;2、建立空间以informix用户操作在INFORMIXDIR中建立dbs目录;cd /home/informixmkdir dbscd dbscat /dev/null >rootdbschmod 660 rootdbs保证所有的dbs文件都是informix用户informix组;权限都是660;3、配置$INFORMIXDIR/etc/onconfig.vseal文件cd /home/informix/etccp onconfig.std onconfig.vsealvi onconfig.vseal以下列出需要注意的几点内容:--rootdbs路径、空间ROOTNAME rootdbs # Root dbspace nameROOTPATH /home/informix/dbs/rootdbs # Path for device containing rootdbspaceROOTOFFSET 0 # Offset of root dbspace into device (Kbytes)ROOTSIZE 2000000 # Size of root dbspace (Kbytes)--物理日志的dbs空间,先用rootdbs的20M;PHYSDBS rootdbs # Location (dbspace) of physical logPHYSFILE20000# Physical log file size (Kbytes)--逻辑日志用默认的# Logical Log ConfigurationLOGFILES 10 # Number of logical log filesLOGSIZE 2000 # Logical log size (Kbytes)把磁带的东西都改成/dev/nullTAPEDEV /dev/null # Tape device pathTAPEBLK 32 # Tape block size (Kbytes)TAPESIZE 10240 # Maximum amount of data to put on tape (Kbytes)LTAPEDEV /dev/null # Log tape device pathLTAPEBLK 32 # Log tape block size (Kbytes)LTAPESIZE 10240 # Max amount of data to put on log tape (Kbytes)--配置数据库服务器参数,根据自己机器配置的实际情况分配locksDBSERVERNAME vseal # Name of default database serverDBSERVERALIASES vseal_tcp # List of alternate dbservernamesNETTYPE ipcshm,1,8,CPU # Configure poll thread(s) for nettypeNETTYPE soctcp,1,8,NET # Configure poll thread(s) for nettype另外就是onconfig.vseal文件中所有/usr/informix都替换成/home/informix/6、初始化数据库了oninit -ivy成功后用onstat -i 就可以看到了Informix Dynamic Server Version 9.40.UC1E1 -- On-Line -- Up 00:31:47 –18872Kbytesonstat>用q退出二、JDK安装1.下载jdk-1_5_0-linux-i586.bina. 首先复制到/usr/local下b. chmod a+x jdk-1_5_0-linux-i586.binc. 执行./ jdk-1_5_0-linux-i586.bin 安装d. ln –s /usr/local/jdk1.5.0 /usr/local/jdke. cd /etc/profile.dvi java.sh#set java environmentexport JA V A_HOME=/usr/local/jdkexport PATH=$PATH:$JA V A_HOME/binexport CLASSPATH=$JA V A_HOME/lib/tools.jar:.: $JA V A_HOME/lib/dt.jar 使用Ctrl + D 结束编辑f. chmod 755 /etc/profile.d/java.sh三、网络后台验印程序配置和数据库的导入在图形界面下增加seal用户用seal组,后用seal用户登入到系统中修改2)安装服务例程文件包以seal用户登陆将vol.tar传输到影像服务主目录/home/seal/下,执行如下命令:tar xvf vol.tar执行chmod –R 744 javaSeal/* #赋予系统文件执行权限3)系统架构说明解压后生成影像服务例程主目录/home/seal/javaSeal,其子目录如下Bin 服务执行程序目录Init 初始数据库存放目录(1)在目录/cibCISSvr/Bin下有如下文件和目录:Update 客户端更新程序目录和验印参数文件存放目录com 程序目录lib 程序目录config 配置文件存放目录log 日志存放目录MQMain.class 程序文件SocketMain.class 程序文件Start.sh 服务启动脚本Stop.sh 服务停止脚本1.3、初始化数据库用seal用户登入进入/home/seal/javaSeal/init目录,执行$dbaccess查看数据库是否可正常连接数据库执行$dbimport shseal –l buffered –i . 导入数据库执行$dbaccess查看数据库shseal是否创建成功。
Informix数据库安装指导(仅供内部使用)拟制: _________ 日期: _________审核: _________ 日期: _________批准: _________ 日期: _________深圳市华为技术有限公司版权所有不得复制目录1INFORMIX安装 (3)1.1安装ESQL/C和Online Server (3)1.2在CDROM光驱中放入Informix ESQL/C安装盘; (3)1.3在$HOME目录下读取ESQL/C安装文件(在SUN OS下): (3)1.4换盘,在CDROM光驱中放入Informix Online安装盘; (3)1.5在$HOME目录下读取Oline Server安装文件(在SUN OS下): (3)1.6安装ESQL/C软件 (3)1.7安装Online软件 (3)1.8设置INFORMIXDIR环境变量; (4)2数据库的配置 (4)2.1相关的环境变量 (4)2.2相关的文件 (4)2.3Informix Online Server的配置过程 (5)2.3.1设置环境变量: (5)2.3.2配置存放Informix数据的原始设备文件。
(5)2.3.3Informix Online Server在能使用这些原始设备以前,必须经过设置相应的属性72.3.4将onconfig.std拷贝成onconfig,配置onconfig文件。
(7)2.3.5配置网络文件 (8)1INFORMIX安装约定:$打头的字符串表示环境变量,{}包含的字符串表示可替代的变量(根据实际要求来确定). 在安装前,先建一个informix用户和informix用户组,其根目录为$INFORMIXDIR(根据空间来确定在哪个目录,如/home/informix)。
以下的安装步骤中: Informix用户的Home目录是$INFORMIXDIR,主机名为{SERVER},IP地址为{IP_ADDRESS}(如129.9.136.168)1.1 安装ESQL/C和Online Server使用Informix产品系统的ESQL/C和Online Server两种产品。
windows系统下Informix 11.7安装手册1. 概述Informix在windows系统下的安装过程与Linux下的有些不同,这里通过实际操作,详细描述了Informix在windows系统下的安装,创建实例,配置数据库的过程2. 安装环境3. 安装得到Informix 11.7在windows64位系统下的安装包,大小约为518MB,安装包为.zip 的压缩文件。
因Informix软件需要使用Informix账户进行管理,所以在安装之前需要创建Informix用户。
如果系统中没有预先创建Informix账户,则Informix Server的安装过程中将自动创建该用户,下面以没有预先创建Informix账户的环境为例,详细介绍安装过程。
1)将得到的安装包解压到合适的位置。
2)双击启动安装程序ids_install.exe,得到如下图所示安装界面,单击next按钮进入下一步单击“next”按钮。
4)单击next按钮后得到如下安装界面。
选择合适的安装位置来安装Informix Server,默认为:C:\Program Files\IBM\Informix\11.70。
这里选择e盘下的Informix文件夹作为安装位置(e:\Informix),在地址栏里输入e:\Informix。
也可以通过点击“choose”按钮来选择安装位置或点击“Restore Default Folder”来重新使用默认安装路径。
然后单击“next”按钮。
5)单击next按钮进入下一步,在这里可以选择安装的类型。
“typical”为标准的安装类型,“Custom”为自定义安装类型。
在这里我们选择默认的“typical”类型并取消创建默认实例。
此处应强调的是,在默认情况下“create server instance”前的复选框不能去掉。
这里应先点选“custom”前的单选按钮,之后再点选“typical”按钮,此时便可以去掉“create server instance”前的复选框了。
二、安装infomix1.informix安装a. informix用户添加及其环境参数(用scoadmin命令)或者:groupadd informixuseradd -g informix infomix查看infomix用户主目录是否已建(more /etc/passwd)没有则mkdir /usr/informixsu - informix (pwd应在/usr/informix下)vi .profile 添加以下四行内容 (建informix用户的profile)INFORMIXDIR=/usr/informixINFORMIXSERVER=infoserverPATH=$INFORMIXDIR/bin:$PATHexport INFORMIXDIR INFORMIXSERVER PATH以上参数我们把informix装在/usr/informix目录下.informix安装顺序!sql---- 4gl---- esql---- idsb 安装informix服务程序用informix用户登录,(su - informix保证当前目录在/usr/informix下)然后:装sql――――――――――――――――mount /dev/cd0 /mntcpio -icvdBum <cdrom/sql.tar./installsql# umount /cdrom―――――――――――――――装主服务程序cpio -icvdBum <cdrom/IDS.CPIsu(改用root用户登录)# ./installids(记不清,就是解包后的IDS. CPI,应该有个install*命令出来)# umount /cdromc.为infoserver准备空间# cd $INFORMIXDIR# cat /dev/null >online# chown informix online# chgrp informix online# chmod 660 onlined. 编辑$INFORMIXDIR/etc/sqlhosts文件infoserver ontlitcp scosysv infomix第一行infoserver为INFORMIX-ONLINE的server名,ontlitcp是共享内存方式连接(只限本地),scosysv是本地主机名(hostname), infomix是服务名(对应于/etc/services中)。
INFORMIX安装1.安装informix一定要先安装jdk。
Jdk安装完毕,在/etc/profile中配置java环境变量,然后在/etc/rc.local中把共享内存改为当前机器内存的一半。
2.建informix用户:增加用户组:建立informix组:groupadd -g 1001 informix增加用户:建立informix用户:useradd -u 1001 -g 1001 -d /opt/informix -m informix –s /bin/csh(groupadd命令增加用户组groupadd [-g gid] groupg 制定组的ID号gid 组的ID号(不能与现有的组ID号重复)group 组名增加用户useradd命令增加用户组useradd [-u uid | -g group] | -d dir | -s shell | -c comment | -m [-k skel_dir] ] login说明:u 指定用户ID号g 制定所在组d 指定用户目录s 制定用户SHELLc 用户的注释m 建立用户目录login 用户的登录名)命令:su root #转到root用户groupadd -g 1001 informix #新建informix组useradd -u 1001 -g 1001 -d/opt/informix -m informix -s /bin/csh #新建informix 用户3.转到root用户,执行命令:passwd Informix,为informix增加密码,激活用户;命令:id #确认是否为root用户passwd informix #设置密码,2次输入informix密码su –informix #激活用户,登陆informix用户4.在本机利用ftp工具将informix的安装tar包(C15M7NA.tar)传到/commsoft目录(以bin方式上传)。
Informix-online Dynamic server完全安装手册一、安装步骤:(1)创建informix目录:/informix如果已创建,这一步可以不执行。
(2)创建informix用户及informix组。
(3)设置环境变量。
设置环境变量在profile文件增加以下内容:INFORMIXDIR=/usr/InformixINFORMIXSERVER=pthkONCONFIG=onconfig.pthkPATH=$PATH:$INFORMIXDIR/binexport INFORMIXDIR INFORMIXSERVERexport ONCONFIG PA TH说明:INFORMIXSERVER 该环境变量被设置为服务器的名称,它是客户机与服务器进行连接的入口,它的值将放入sqlhosts文件中,只有该值有效时客户才能完成与服务器的连接(如果客户与服务器的机型不同,则需要将sqlhosts文件同时装入所有的机器中,以便进行初始化操作)。
(4)SQL 和 online的安装以 root 用户注册, 进入 informix 用户目录:# cd /usr/informix执行命令:# . ./.profile使informix 环境变量生效;SQLRT.TAR、CONNECT.CPI 、IDS.CPI将SQL的安装文件拷贝到当前目录下:用 tar 或 cpio 命令(根据安装文件类型而定);#tar xvf (文件名.TAR)#cpio –icudvmB –I (文件名.cpi)执行SQL的安装程序:# ./installsql根据屏幕提示输入正确的序列号 (serial number) 和活动码 (active number);完成SQL的安装;#./installconn第一个选yes第二个选no将 online 的安装文件拷贝到当前目录下:用 tar 或cpio 命令(根据安装文件类型而定); 将安装文件展开;执行 online 的安装程序:# ./installserver根据屏幕提示输入正确的序列号 (serial number) 和活动码 (active number);完成 online 的文件安装(5) 修改sqlhosts文件中的通信参数。
这取决于实际采用的通信方式。
(6)创建chunk。
创建chunk的目的是为了存储数据定义空间。
Chunk既可以是一个指定的设备,也可以是一个UNIX文件,两者的区别在于前者存取速度快,并且可以通过如下步骤创建一个以UNIX文件形式存在的chunk:chunk是作为数据库空间存储块文件。
cat /dev/null >file-namechmod 660 file-namechgrp Informix file-name 用于修改文件的存取权限和属主名称chown Informix file-name其中file-name是用户自定义的文件名。
上面并未确定chunk的大小,仅仅指出一个文件名称而已。
要参数设置中,你可以为online系统指出具体的chunk大小,那时online将会为你扩充该文件,以达到你的要求。
在裸设备上建chunk.。
(假设裸设备名为/dev/rdsk)# ln /dev/rdsk /dev/chunk1chmod 660 /dev/chunk1chgrp Informix /dev/chunk1chown Informix /dev/chunk1(7) 分别设置好相关其他文件分别设置好/usr/informix/etc/sqlhosts; /etc/services; /etc/hosts; etc/hosts.equiv 文件a. 设置/usr/informix/etc/sqlhosts 文件:格式: 数据库服务器名网络通讯协议描述主机服务器名网络服务器端口名内容:例: demo_on onipcshm on_hostname on_servernamedemo_se seipcpip se_hostname sqlexecpthk ontlitcp on_hostname pthk说明:pthk:定义在.profile中的INFORMIXSERVERontlitcp:tcp/ip方式on_hostname:定义在/etc/hosts中的主机名pthk:定义在/etc/services中的tcp/ip端口名。
b. /etc/hosts文件(定义了网络上所有的计算机名和网络IP地址的对应关系,主机名应和/INFORMIXDIR/etc/sqlhosts中的一致)格式: 网络节点IP地址计算机名字内容:例 192.192.192.1 scosysv 192.192.192.100 xcibm c. /etc/services 文件(加入数据库tcp/ip端口名)格式: 网络服务逻辑名字网络端口号/网络协议内容:例 pthk 6500/tcppthk:对应于/INFORMIXDIR/etc/sqlhosts中的相应内容6500/tcp:不能和其它端口地址重复。
d. /etc/hosts.equiv 文件(定义网络中的计算机名字) [可以不加] 例: ...localhostxcibm...(8) 设置UNIX核心文件stune中的参数设置/etc/conf/cf.d/stune中的参数例: 在 stune 文件中设置好以下参数SHMMAX: 409600000SHMMIN: 1SHMALL: 512SHMMNI: 100SHMSEG: 6SEMMNI 300 (如不成功系统会给定选择范围)SEMMNS 100 (如不成功系统会给定选择范围)SEMMAP 10 (如不成功系统会给定选择范围)SEMMNU 100SEMMSL 25注意:设置完成后,一定要重新连接 UNIX 内核。
用root注册,在/etc/conf/cf.d目录下执行 (#./link_unix –y -y)(9) 初始化informix 数据库。
用Informix用户注册,①$ onmonitor②选择parameters→initialize选项进入初始化online磁盘参数界面Page Size [ 2] Kbytes 页面大小,不可修改Mirror [N](镜像,使online带有镜像功能)Tape Dev. [/dev/null ] (该域确定使用online的ontape功能时用到的磁带驱动器名称)Block Size [ 16] Kbytes (使用的磁带数据块大小)Total Tape Size [ 10240] Kbytes (可向磁带中写入的总数据量)Log Tape Dev. [/dev/null ] (该域确定使用online的ontape功能进行逻辑日志备份所使用的磁盘驱动器名称),对于tape dev和log tape dev,你必须确定Block Size (使用的磁带数据块大小)和Total Tape Size(可向磁带中写入的总数据量)Stage Blob [ ] (该域只可用于informix-onlie/optical光盘产品,你可以在该域中写入一个dbspace名称,以作为blob类型数据的临时存空间)Root Name [rootdbs ] (根dbspace的名称)Root Size [ 300000] Kbytes (根dbspacec的第一个chunk的大小,一般2个g)Primary Path [/usr/informix/rootdbs1 ] (根dbspace的第一个chunk的位置,)Root Offset [ 0] Kbytes (chunk相对于设备的偏移量,即所创建的chunk位于设备的哪个位置。
Mirror Path [ ]Mirror Offset [ 0] Kbytes chunk相对于设备的偏移量,即所创建的chunk位于设备的哪个位置Phy. Log Size [10000] Kbytes (物理日志大小)Log. Log Size [ 5000] Kbytes (一个逻辑日志的大小)Number of Logical Logs [ 6] 第一次确定的逻辑日志个数。
注:a) Phy. Log Size + ( Log. Log Size * Number of Logical Logs ) = 所有数据库空间大小20%b) Log. Log Size * Number of Logical Logs ) : Phy. Log Size = 3:1c) Phy. Log Size : Log. Log Size = 2 :1d) 主要更改Tape Dev,Log Tape Dev, Root Name ,Root Size,P rimary Path, Phy. Log Size,Log. Log Sizee) 如是符号链接,Primary Path 应是/usr/informix/dbs/root_dbs1设置完成后按ESC键,online将确认所指定的根dbspace中的chunk,并为它分配空间。
若该chunk1不存在,或设备的存取权限出现问题,或系统空间不够大,该确认工作都会失败而显示一条出错信息。
③如果确认工作成功,则进入共享内存界面:SHARED MEMORY PARAMETERS 设置Server Number [ 0] 本服务器的编号,online根据这个编号使用共享内存的不同位置Server Name [pthk] 在sqlhosts文件中唯一确定的服务器名称Server Aliases [ ] 服务器别名,采用多种通信方式,则必须在server aliases中分别作出声明,不同的别名用逗号分隔。
Dbspace Temp [tempdbs] 用于确定作为临时存储空间的Dbspace。
Deadlock Timeout [60] 在声明出现死锁之前,online系统等待执行一条分布式SQL语句的时间Secs Number of Page Cleaners [ 1] 从数据缓冲池中读取脏数据页并将其放入释放空间队列的线程个数。
Forced Residency [N] 强制驻留项。
如果选Y,则保证用于强制驻留的区域在以后的操作中不会被释放掉。
Stack Size (K) [ 32] 该域确定了为每个用户预留的装载变量的空间大小,其装载的变量将被数据库服务器内部使用。
Non Res. SegSize (K) [ 8000] 该域确定了共享内存中的虚拟单元大小Optical Cache Size (K) [ 0]Physical Log Buffer Size [ 32] K 确定在共享内存中开辟的物理日志缓冲区大小Dbspace Down Option [0]Logical Log Buffer Size [ 32] K 确定在共享内存中开辟的逻辑日志缓冲区大小Preserve Log For Log Backup [Y]Max # of Logical Logs [ 300] 确定系统可分配的最大逻辑日志数Transaction Timeout [ 300] 系统可同时运行的最大事务个数。