第3章 Hyper-V虚拟机的管理(科干院)
- 格式:ppt
- 大小:1.55 MB
- 文档页数:44
如何使用Hypervisor进行虚拟化管理虚拟化技术让我们的计算机可以同时运行多个操作系统和应用程序,提高计算资源的利用率和灵活性。
Hypervisor是虚拟化技术的核心组成部分,它可以将计算机硬件资源划分成多个虚拟机,每个虚拟机都有自己的操作系统和应用程序。
本文将介绍如何使用Hypervisor进行虚拟化管理。
Hypervisor的分类Hypervisor可以分为Type 1 Hypervisor和Type 2 Hypervisor两种类型。
Type 1 Hypervisor也称为Bare Metal Hypervisor,它直接运行在物理硬件之上,虚拟机的操作系统运行在Hypervisor之上。
Type 1 Hypervisor的性能更高,安全性更好,但部署和管理比较复杂。
常见的Type 1 Hypervisor有VMware ESXi、Microsoft Hyper-V和Xen等。
Type 2 Hypervisor也称为Hosted Hypervisor,它运行在操作系统之上,虚拟机的操作系统也运行在操作系统之上。
Type 2 Hypervisor的性能较低,安全性较差,但部署和管理比较简单。
常见的Type 2 Hypervisor有VirtualBox和VMware Workstation等。
如何选择Hypervisor选择Hypervisor需要考虑以下几个方面:1. 支持的操作系统。
不同的Hypervisor支持的操作系统不同,需要根据实际需求选择合适的Hypervisor。
2. 性能和可靠性。
Type 1 Hypervisor的性能和可靠性更高,但需要复杂的部署和管理;Type 2 Hypervisor的性能和可靠性较低,但部署和管理比较简单。
3. 安全性。
Hypervisor需要保护虚拟机之间的隔离,防止虚拟机之间的攻击。
Type 1 Hypervisor的安全性更高,但需要采用严格的安全策略和管理措施。
hyper-v虚拟机常用命令在没有安装powershell模块之前是不能使用powershell命令来管理Hyper-V的,1.Start-VM 虚拟机开机Start-VM -VM 虚拟机名-Server 服务器名-Wait -Force-VM 指定要启动的虚拟机名称-Server 指定虚拟机所在物理服务器,留空的话默认为".",即本机。
-Wait 指定等待该项任务完成后再运行下面的命令,一般在连续做操作时用到-Force 虚拟机开机时不会进一步弹出选项,因此该参数对于Start-VM好像没有什么作用如果按顺序写参数值的话,前面的"-VM"、"-Server"等参数名可以省略。
示例:Start-VM testvps 给testvps开机Start-VM testvps -Wait ; Stop-VM testvps -Force 先给testvps开机再给testvps关机,这里必须用-Wait否则第二条命令会报错,结果只开不关2.Stop-VM 虚拟机关机(相当于直接按服务器关机按钮)Stop-VM -VM 虚拟机名-Server 服务器名-Wait -Force-Force 虚拟机关机时,会进一步弹出选项"是否确实要执行此操作?"。
加该参数后不会现提示,直接选择默认值[Y]其余参数与Start-VM类似。
示例:Stop-VM testvps 给testvps关机,运行后会弹出提示,按Y后继续Stop-VM testvps -Force 直接给testvps关机,不弹出提示Start-VM testvps -Wait -Force ; Stop-VM testvps 先给testvps关机再给testvps开机,这里必须用-Wait,否则第二条命令会报错,结果只关不开Get-VM -Running | Stop-VM -Wait 逐个停止服务器上所有运行中的3.Invoke-VMShutdown 虚拟机关闭(关闭虚拟机中的Windows系统后再关机。
hyper-v简介及安装使⽤(图⽂详解)前⾔:作为IT界的巨头,微软⾃⼰的虚拟化技术,也是微软第⼀个采⽤Vmware与CitrixXen⼀样基于hypervisor的虚拟化技术,有着⾃⼰可圈可点的地⽅,微软⾃⼰的虚拟化技术嘛,对windows的⽀持基本是没有问题的,⽽根据官⽅的资料介绍,它甚⾄可以安装专门为Linux设计的Integrated Components(⾥⾯包含磁盘和⽹络适配器的VMbus驱动)以使Linux虚机也能获得⾼性能,同样的,和主流的虚拟化技术相似,hyper-v也⽀持半虚拟化与全虚拟化,但它的半虚拟化仅⽀持与宿主机相同版本的系统,如果你不喜欢它的图形化界⾯,那你也可以在Server Core(命令⾏的windows)上安装hyper-v虚拟化程序,来满⾜⾃⼰的需求。
总⽽⾔之,hyper-v虚拟化技术继承了它的缔造者,微软图形化界⾯⽅便操作与直观展⽰的好处,按它的说法,它的虚拟化性能不⽐业界主流的虚拟化性能差,那就让时间来检验它的真伪吧。
本⽂章旨在介绍在windows server2012操作系统上安装hyper-v并使⽤它来建⽴你的第⼀个虚拟机程序。
hyper-v运⾏平台:windows server2008R2及更⾼版本的服务器系统,win7及更⾼版本桌⾯操作系统,hyper-v server 操作系统硬件要求: Intel或者AMD64位处理器 CPU必须具备硬件的数据执⾏保护( DEP )功能,⽽且该功能必须启动 硬件辅助虚拟化,即为Intel VT或AMD-V 内存最低限度为2GB。
安装hyper-v虚拟机化⼯具:1.打开服务器管理器》管理》添加⾓⾊/功能2.下⼀步3.默认配置下⼀步4.默认配置下⼀步5.勾选Hyper-V6.在弹出的界⾯点击添加功能。
7.下⼀步8.下⼀步9.下⼀步10.勾选或选择当前服务器的⽹络适配器》下⼀步11.迁移服务根据需求勾选,不需要则下⼀步12.下⼀步13.⾃动重启需不需要都可以,如果有别的服务在运⾏,那就不要勾选了14.等待安装完成。
Windows应用程序基础架构实验报告专业班级成绩评定______学号姓名(合作者____号____) 教师签名程庆华单元二任务2:配置和部署Hyper-V 第周星期第节实验二:hyper-v服务器设置启动SVR2虚拟机。
一:更改计算机名称1.dos下输入netdom renamecomputer 计算机名/newname:Hyper-v02(输入hostname可显示当前计算机名称)2.在Powershell下输入:rename-computer二:修改IP地址A:利用sconfig.cmd修改IP地址:1.dos下输入sconfig.cmd,按向导完成B:利用netsh修改IP地址2.在DOS下输入Netsh interface ipv4 show interfaces 显示当前设置3.设置网卡的IPv4静态地址netsh interface ipv4 set address name=source=static address= mask= gateway=4.设置网卡自动获得IP地址:Netsh interface ipv4 set addressname="idx" source=DHCP5.重命名网络适配器netsh interface set interface name="oldname"newname="newname"6.禁用网络适配器netsh interface set interface name="name"admin=DISABLED7.设置网卡的静态DNS服务器地址:netsh interface ipv4 add dnsservername= address= index=8.设置动态指定DNS服务器地址netsh interface ipv4 set dnsserver name=。
Hyper-V组件,Windows 8是首次将企业用Hyper-V集成在个人系统中,可见虚拟化技术的发展之迅速。
Hyper-V的功能十分强大,在这里仅将Hyper-V作为虚拟机进行使用与配置,更多内容还请自行学习。
Hyper-V是微软提供的一款高效率的虚拟化管理软件,在早期的Windows服务器中配备Hyper-V组件,Windows 8是首次将企业用Hyper-V集成在个人系统中,可见虚拟化技术的发展之迅速。
Hyper-V在个人使用中,最大的一个作用是作为虚拟机使用。
该技术基于Windows Virtual PC的基础上发展而来,与虚拟机不同的是,该软件将直接使用部分物理设备如CPU而不进行虚拟化。
使用Hyper-V功能,对系统和设备都有一定的要求:系统要求:32位和64位的Windows 8均可开启Hyper-V功能,但是只有64位的Windows 8可以创建虚拟机,32位的系统却不可以,只能进行虚拟机的链接。
由于32位系统支持的最大内存不过4G,即使开启了虚拟机功能,也不会获得很好的使用体验,所以在32位系统中取消了虚拟机的功能。
设备要求:Hyper-V需要具有二级地址转换(SLAT)且支持虚拟化CPU(AMD-V或Intel-VT)。
Hyper-V功能的添加在“控制面板”中,选择“程序”:之后点击“启用或关闭Windows功能”:之后会弹出“Windows功能”对话框,稍稍等待加载功能选项:加载好之后,找到Hyper-V功能,将其勾选,并点击“确定”:Windows功能进行功能的启用:将Hyper-V 添加到你的计算机之后,必须重新启动才能完成该过程。
因为重启后才能启动Windows 虚拟机监控程序和虚拟机管理服务。
重启之后可以在开始屏幕中看到Hyper-V相关的磁贴:Hyper-V虚拟机的创建点击磁贴中的Hyper-V管理器,可以见到Hyper-V的简介:选择“Hyper-V管理器”下方登入系统的用户名,即可查看已经创建的虚拟机及虚拟机快照。
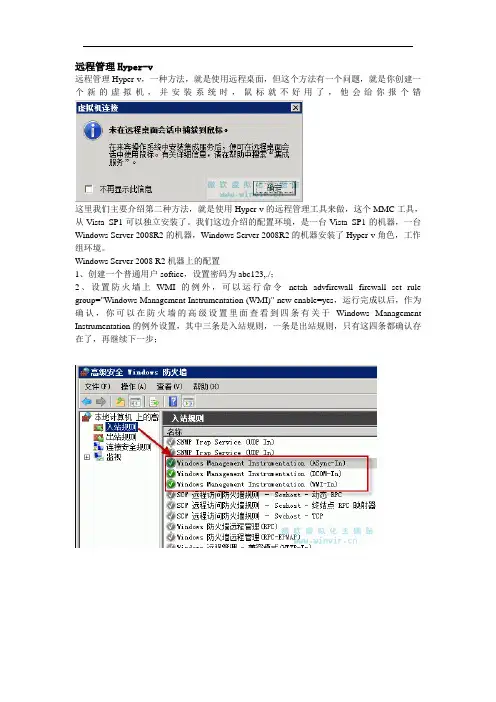
远程管理Hyper-v远程管理Hyper-v,一种方法,就是使用远程桌面,但这个方法有一个问题,就是你创建一个新的虚拟机,并安装系统时,鼠标就不好用了,他会给你报个错这里我们主要介绍第二种方法,就是使用Hyper-v的远程管理工具来做,这个MMC工具,从Vista SP1可以独立安装了。
我们这边介绍的配置环境,是一台Vista SP1的机器,一台Windows Server 2008R2的机器,Windows Server 2008R2的机器安装了Hyper-v角色,工作组环境。
Windows Server 2008 R2机器上的配置1、创建一个普通用户softice,设置密码为abc123,./;2、设置防火墙上WMI的例外,可以运行命令netsh advfirewall firewall set rule group="Windows Management Instrumentation (WMI)" new enable=yes,运行完成以后,作为确认,你可以在防火墙的高级设置里面查看到四条有关于Windows Management Instrumentation的例外设置,其中三条是入站规则,一条是出站规则,只有这四条都确认存在了,再继续下一步;3、开始----管理工具----组件服务,打开以后,展开组件服务,展开计算机,选择我的电脑,选择属性,打开以后,选择com安全,在启动和激活权限中,选择编辑限制按钮,将softice 添加上,并且添加远程启动和远程激活的权限,最终的结果是4、开始----运行----wmimgmt.msc----打开WMI管理器----选择WMI控件----右键选择属性----选择安全5、选择CIMV2,选择安全设置按钮,在此添加softice6、操作还没有结束,还要继续选择高级按钮,选择softice,选择编辑,按照截图设置7、重复5 6两步,设置root下面virtualization的安全属性8、开始----运行----azman.msc,打开授权管理器,右键选择授权管理器,选择打开授权存储,选择路径C:\ProgramData\Microsoft\Windows\Hyper-V\InitialStore.xml,打开以后,找到角色分配,分配用户和组9、添加上softice这个用户,最终结果是到此为此,Hyper-v服务器的设置就算完成了,下面还要配置客户端1、在Vista SP1的机器上安装上KB952627补丁,添加上Hyper-v远程管理工具;2、添加softice用户,并且添加上administrators组中,使用softice登录;3、运行netsh advfirewall firewall set rule group="Windows Management Instrumentation (WMI)" new enable=yes命令,添加WMI的防火墙例外;4、运行Netsh firewall add allowedprogram program=%windir%\system32\mmc.exe name="Microsoft Management Console",添加MMC的防火墙例外;5、开始----运行---dcomcnfg,打开组件服务----计算机----我的电脑----右键属性----COM安全----在访问权限下面,选择编辑限制,添加ANONYMOUS LOGON本地访问和远程访问的权限至此,客户端与服务器之间的配置己经完成,到客户端打开Hyper-v管理工具,连接服务器,测试正常参考文档Hyper-V Remote Management: You do not have the required permission to complete this task. Contact the admi nistrator of the authorization policy for the computer ‘COMPUTERNAME’Install and Configure Hyper-V Tools for Remote Administration附录资料:不需要的可以自行删除VIW虚拟因特网教室第一章概述()因特网教室,是一个在局域网环境中模拟因特网的教学系统,它采用多种先进的网络技术,把因特网带进校园,让学校的师生在校园网中即可模拟上因特网,无须拨号,也不必通过代理服务器,只要在任一浏览器中敲入所需网址,就可完成恰似在因特网上才能实现的全部功能,从而实现信息的交换、发布与检索。
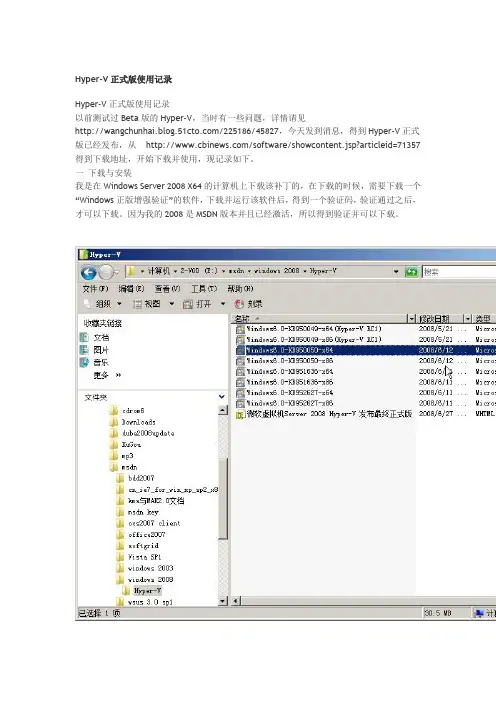
Hyper-V正式版使用记录Hyper-V正式版使用记录以前测试过Beta版的Hyper-V,当时有一些问题,详情请见/225186/45827,今天发到消息,得到Hyper-V正式版已经发布,从/software/showcontent.jsp?articleid=71357得到下载地址,开始下载并使用,现记录如下。
一下载与安装我是在Windows Server 2008 X64的计算机上下载该补丁的,在下载的时候,需要下载一个“Windows正版增强验证”的软件,下载并运行该软件后,得到一个验证码,验证通过之后,才可以下载。
因为我的2008是MSDN版本并且已经激活,所以得到验证并可以下载。
图1 下载后的Hyper-V正式版下载了正式版(英文版)和多语言包后,双击安装。
在安装这些软件的时候,安装程序还要下载更新程序(需要连接到Internet)并安装,如图2所示。
图2安装完成之后,提示需要重新启动,此时,单击“关闭”按钮,暂时先不要重新启动,如图3所示。
图3 不需要重新启动安装完成后,重新启动计算机,再次进入后,从“管理工具”中运行“Hyper-V管理器”,如图4所示。
二配置与使用右击计算机名称,弹出快捷菜单,如图4所示,包括“Hyper-V设置”、“虚拟网络管理器”等命令,先选择“Hyper-V设置”命令。
图4 Hyper-V管理器在“Hyper-V”设置对话框中,可以设置默认的虚拟硬盘、虚拟机的保存路径,我通常都是保存在一个空闲空间比较大的磁盘分区上,并且使用一个很短的路径,例如E盘的VMS文件夹,对于Microsoft虚拟机来说,则可以保存为MVMS,这个就看自己的爱好与习惯了。
在Hyper-V设置中,还可以设置“键盘”、“鼠标释放键”等设置,这些比较简单,不一一介绍。
如图5所示。
图5 Hyper-V设置在图4中,选择“虚拟网络管理器”,还可以添加虚拟网络,类似于VMware的VMnet1、VMnet2等虚拟网卡,这些比较简单,也不介绍。
Hyper-V实验手册实验前准备Lab 01:配置iSCSI目标服务器实验目的:通过配置iSCSI目标服务器,可以让学员了解Windows Server 2012的存储管理功能,为之后的群集实验做准备。
实验内容在本实验中,学员将在虚拟机:Windows Server 2012域控制器(VDC1)上,安装并配置iSCSI目标服务器。
在‘添加角色与功能向导’中,添加角色8)在‘服务器管理器’窗口,单击‘管理’,在下拉菜单中单击‘添加角色和功能’。
9)在‘选择安装类型’页面,选择‘基于角色和功能的安装’,然后单击‘下一步’。
10)在‘选择目标服务器’页面,单击‘下一步’。
11)在‘选择服务器角色’页面,勾选‘文件和存储服务(已安装)-文件和iSCSI服务(已安装– iSCSI目标服务器)’,单机‘下一步’。
Lab 02:配置实时迁移虚拟机存储实验目的:通过配置实时迁移虚拟机存储,可以让学员了解Windows Server 2012 Hyper-V对虚拟机存储调用的灵活性。
实验内容在本实验中,学员将在物理机Windows Server 2012 Hyper-V(Host11)上,在不中断虚拟机运行的情况下迁移其存储。
Lab 03:配置实时迁移虚拟机(无共享存储)实验目的:通过配置实时迁移虚拟机及其存储,可以让学员了解Windows Server 2012Hyper-V 在虚拟机迁移方面的新特性。
实验内容在本实验中,学员将在无共享存储情况下,将域成员Hyper-V服务器(Host11)上的虚拟机(XP)实时迁移到另一台域成员Hyper-V服务器(Host12)。
Lab 04:Hyper-V复制实验目的:通过配置Hyper-V复制,可以让学员了解Windows Server 2012 在Hyper-V服务器高可用性方面的新特性。
实验内容在本实验中,学员将在两台Windows Server 2012 Hyper-V服务器上,实现虚拟机复制功能。
(2022)国家开放大学电大《网络系统管理与维护》《农业概论》网络课形考网考作业(合集)答案国家开放大学电大《网络系统管理与维护》《农业概论》网络课形考网考作业(合集)答案《网络系统管理与维护》网络课答案形考任务1理解上网行为管理软件的功能【实训目标】掌握使用Hyper-V创建虚拟机的方法与步骤。
【实训环境】1台服务器。
【实训内容】假设你是一家公司的网络管理员,负责管理和维护公司的网络。
你的公司希望使用Hyper-V技术实现服务器虚拟化。
为此,需要你执行以下工作: 1.在一台服务器上安装Hyper-V角色。
2.创建一个“内部”虚拟网络。
3.创建一个虚拟机并安装来宾操作系统。
4.在安装来宾操作系统的过程中,执行存储迁移。
一、实训结果1.在一台服务器上安装Hyper-V角色。
2.创建一个“内部”虚拟网络。
3.创建一个虚拟机并安装来宾操作系统。
4.在安装来宾操作系统的过程中,执行存储迁移。
二、实训体会1、Hyper-v提供了三种虚拟网络:“专用”网络、“内部”网络、“外部”网络2、虚拟机的迁移包括移动虚拟机和移动虚拟机的存储3、Windowsserver2022R2引入了第二代虚拟机的概念,提示了虚拟机的性能和安全性。
4、Windowsserver2022的第二代虚拟机支持热添加内存和网卡5、通过Hyper-v技术,可以在一台物理服务器上建立多个虚拟机并且在每个虚拟机中运行不同的应用服务。
形考任务2理解计算机病毒防范的常用方法,掌握安装和配置防病毒软件【实训目标】理解计算机病毒防范的常用方法,掌握安装和配置防病毒软件。
【实训环境】1台服务器、1台工作站计算机。
【实训内容】假设您是一家公司的网络系统管理员,负责公司的网络安全管理工作。
为此,请您完成以下工作: 1.部署网络版杀毒软件的控制中心。
2.设置控制中心,每天11点在线同步病毒库。
3.安装网络版杀毒软件的客户端程序。
4.设置控制中心,每天19点扫描客户端计算机。
hyper-v是什么?有什么作⽤?hyperv详细图⽂教程介绍hyer v简介Hyer-V是⼀个微软的虚拟机,部署在win 8.x 64位 pro以上版本中,和Windows 2008以上服务器的版本中。
是微软第⼀个采⽤类似Vmware和Citrix开源Xen⼀样的基于hypervisor的技术。
这也意味着微软会更加直接地与市场先⾏者VMware展开竞争,但竞争的⽅式会有所不同。
虽然简单,但是实际操作中还是会有很多问题的。
尤其是⾯向服务器的Hyper-V在平时的桌⾯测试中体验并不是⼗分的好。
本⽂通过Hyper-V结合远程桌⾯来部署虚拟机的教程。
hyer v图⽂使⽤教程要求CPU⽀持虚拟化,所以没有虚拟化的还是⽤vm、vb吧;1.打开功能:2.会出现Hyper-V管理器3.打开管理器,更改hyper-v的路径(可选);4.创建虚拟交换机,我这⾥创建了⼀个外部和⼀个内部,可选的是创建⼀个内部或者两个内部交换机,内部交换机可以⽤于桥接到主机⽹络,也可以进⾏远程控制,这⾥创建内部⽹络的作⽤是控制,创建外部⽹络的作⽤是上⽹。
5(可选)如果你不想主机和虚拟机同时上⽹的化,省去这个步骤。
这个步骤就是把上⽹的适配器共享给内部vEtranet;6.创建并安装虚拟机,注意这⾥可以选择⽹络适配器和旧版⽹络适配器,如果你不想安装集成服务⼜想让虚拟机上⽹,那么就应该创建旧版的⽹络适配器,创建⽹络适配器需要你安装集成服务,但是安装后虚拟机会变成16位⾊的。
所以⾃⼰斟酌两种⽅式。
7.虚拟机安装好了,打开windows xp虚拟机,运⾏gpedit.msc,然后按下图更改客户端为24⾊(因为xp在远程访问时候默认只有16位⾊,这⾥搞到24⾊算是我的极限了,不知道有没有办法调到32位⾊),已经看不出来和32位⾊的区别了。
8.然后是开启远程桌⾯,添加⽤户,不多说,注意的是⽤户⼀定要有密码,不然登不上。
9.(可选)如果进⾏了5的设置,⽤ipconfig /all来获取本地连接2的ip地址。
一:部署SMB共享存储打开服务器管理器,并切换到文件和存储服务,然后我们在文件和存储服务选项卡中选择共享,并在右侧的共享任务选择新建共享。
在新建共享向导中,我们需要选择文件共享配置类型,因为我们是用于存放Hyper-V的存储,所以我们这里选择SMB共享- 应用程序,此配置文件将针对Hyper-V存储以及数据库存储做优化。
然后我们需要选择共享位置,我这里就俩盘,所以果断选择D盘了。
然后会让我们输入共享名称,并且会自动在上一步骤中的位置创建X:\Shares\的默认路径用作存放共享位置。
我们在共享名称中可以设置一个比较简单好记上口的名称,以便我们在其他位置进行访问。
然后会让我们选择其他设置,由于我们这里是用于Hyper-V存储,所以可以不选择这些。
如果选择加密数据访问,这将使得Hyper-V存储到SMB共享存储的文件是经过加密传输的。
然后在权限设置页面,我们单击自定义权限。
然后在高级安全设置中单击添加。
在权限项目中的主机进行设置,单击选择主体。
然后打开选择用户、计算机或组对话框中,默认没有计算机对象,所以需要修改对象类型,单击右侧的对象类型。
然后我们选择计算机,单击确定。
然后我们在搜索一下我们要授权访问SMB共享存储的Hyper-V主机名称,并进行检查名称,完成后单击确定。
返回权限项目对话框中,赋予Hyper-V主机完全控制权限。
使用同样的步骤,把所有Hyper-V主机的权限添加到我们的共享权限中,所有的Hyper-V 主机都需要完全控制权限,并应用于共享文件夹、子文件夹以及文件。
然后回到新建共享向导中,单击下一步继续创建SMB共享存储。
在进行创建SMB共享存储之前会到确认页面,确认没有问题后单击创建即可。
如果没有问题,这里会显示成功创建共享。
到此为止一个简单的SMB 3.0共享存储就已经建立好了,我们可以把Hyper-V的虚拟机、磁盘存储设置修改到此位置二:使用SMB共享存储在前面的文章中,我们部署好了SMB共享存储,那么我们应该如何让Hyper-V主机使用SMB 共享存储,用作虚拟机磁盘文件、虚拟机文件等的存放。
Hyper-v使用手册系统要求1 .基于x64处理器,运行x64版本的Windows Server 2008的标准,在Windows Server 2008企业或Windows Server 2008数据。
2.硬件辅助虚拟化。
这是在现有的处理器,包括一个虚拟化的选择工具体来说,佛蒙特州英特尔或AMD的虚拟化(AMD公司-五,以前的代号为“ Pacifica ”的) 。
3.NX的位元相容的CPU必须具备硬件和数据执行保护(DEP )必须启用。
4.内存应该是最低限度的2GB或更多。
由于Hyper-V底层的Hypervisor代码量很小,不包含任何第三方的驱动,非常精简,所以安全性更高。
Hyper-V采用基于VM bus的高速内存总线架构,来自虚机的硬件请求(显卡、鼠标、磁盘、网络),可以直接经过VSC,通过VMbus总线发送到根分区的VSP,VSP调用对应的设备驱动,直接访问硬件,中间不需要Hypervisor的帮助。
这种架构效率很高,不再像以前的Virtual Server,每个硬件请求,都需要经过用户模式、内核模式的多次切换转移。
更何况Hyper-V现在可以支持Virtual SMP,Windows Server 2008虚机最多可以支持4个虚拟CPU;而Windows Server 2003最多可以支持2个虚拟CPU。
每个虚机最多可以使用64GB内存,而且还可以支持X64操作系统。
安装和使用方法点开“服务管理器”,点击“添加角色”,勾上“HPV-管理器”,如下图:点“下一步”,点“安装”,就OK了,安装完后系统会提示你“重启”,“重启”好后,点击“管理工具”打开“HPV-管理器”,如下图:现在还没有创建任何的虚拟机,所以列表里是空的,单击右上角“创建”右击选择“虚拟机”,如下图:在这里为创建的虚拟机输入名称,由于这里要创建的是2008 Server,所以就叫08,还有虚拟机存放的位置,为了方便,就新建一个08的文件夹,将其存放在里面,如下图:点“下一步”,会看见让设置创建虚拟机的内存,默认08是512M,而03则是256M,其实这也足够了,当然如果你机器内存非常的大,你也可以设置的大点,如下图:点“下一步”,这里会提示让你选择网络适配器,在这里,先不要管它,继续我们的“下一步”,会看见下图:这里让你输入创建虚拟机文件的名称及位置,还有虚拟机硬盘的大小,我给它20G足够了,点“下一步”,会出现下图:这里其实就是提示我们插入2008 Server的光盘镜像,所以选择“从引导CD/DVD-ROM安装操作系统”,然后浏览到当前镜像文件的位置,点“完成”,就可以了,如下图:这时,在回到虚拟机列表,会看见有了2008这台机器,实际上它还没有安装操作系统,如下图:右击“2008”这台机点“启动”。
Hyper-V虚拟服务器管理员手册1.安装虚拟服务器Hyper-V组件1.1安装前准备工作运行Hyper-V组件首先必须在主板的BIOS里设置里开启CPU的Virtualization Technology支持,AMD的CPU则需开启Virtualization支持,如果CPU不支持虚拟化或没有在主板开启虚拟化支持的功能将导致虚拟机软件无法正常工作。
1.2 Hyper-V组件的安装在windows server 2008版本的服务器系统中均提供Hyper-V虚拟化组件,其主要作用是:在一台服务器上虚拟出多个不同版本的操作系统(如:windows xp,windows2003,linux等)。
Hyper-V组件在默认情况下是没有安装的,以下为Hyper-V组件安装的步骤:右击我的电脑,选择管理在管理器中选中角色选项,选择添加角色在弹出的设置向导中选择下一步选中配置窗口中选中Hyper-V,继续下一步操作这里不需要设置,直接选择下一步在这里选择虚拟机中使用网卡,该网卡主要用于虚拟机的网络连接,必须选择服务器中有连接网络的网卡,否则所有的虚拟将无法连接到网络。
请跟据实际情况选择相应的网卡。
如果想虚拟机中配置不同的虚拟机使用不同的网卡可在这里选择多个网卡。
完成安装配置,点击安装进行安装安装完成后需要重启服务器,点击关闭并重启服务器重启后Hyper-V将继续安装,如图所示表示安装完成安装完成后服务器将多出一块虚拟网卡,此时服务器需连接网络则需要对该网卡进行重新配置,原来的网卡中设置IP 地址的选项将被禁用无法配置,网络配置步骤如下:在右角下网络连接的图标上右键,选择“打开网络和共享中心”中网络和共享中心中选择更改适配器设置,进网卡进行配置选中新的虚拟网卡右键,选择属性对网卡进行配置选中IPv4选项,点击属性进行IP地址配置,ip地址根据实际情况进行输入,配置完以后Hyper-V就安装完成了。
2. Hyper-V组件的使用打开Hyper-V管理器,可在控制面板→管理工具中找到在管理界面中选择新建虚拟机在弹出的配置向导中输入虚拟机的名称,可以输入任意的名称,最好是方便识用不同系统及用途输入虚拟机中使用的内存,一般使用3G比较适合这里配置虚拟中使用的网卡,选择刚才我们新创建的虚拟网卡,如果新建了多个虚拟网卡可根据实际情况进行选择如果以前没有创建过模板,那么选择“创建虚拟硬盘”进行模板的创建,当安装过一次系统以后对系统进行保存操作,然后把该虚拟机的vhd文件复制出来可作为以后新建的虚拟的模板,免去重复安装操作系统的步骤。
Course 10981A: Infrastructure Provisioning with System Center Virtual Machine ManagerCourse OutlineModule 1: Overview of Hyper-V and Virtual Machine ManagerBefore Virtual Machine Manager can be used to manage the virtualized environment you should understand some of the key concepts and features in both Hyper-V and Virtual Machine Manager. This includes the various networking and storage features in Virtual Machine Manger and how Virtual Machine Manager User Roles and Run As Account can be used to control access to the resources being managed. You should also understand how you can use Windows PowerShell with Virtual Machine Manager and how you can generate PowerShell Cmdlets for many tasks in the Virtual Machine Manager Console.Lessons∙Overview of Hyper-V∙Overview of Virtual Machine ManagerLab : Completing the Fabric for the VMM environmentAfter completing this module, students will be able to:∙Describe the key components and features in Hyper-V.∙Describe the key components and features in Virtual Machine Manager.Module 2: Configuring High Availability for Virtual Machine Manager and Hyper-VIn most enterprise virtualized environments high availability is a key function that is implemented for business-critical workloads. This ensures workloads remain available at all times and also provides load-balancing capabilities. For this reason it is important that you understand how high availability can be configured for the Hyper-V Hosts, Virtual Machine Manager Management Server and the Virtual Machine Manager database. In this module you will learn about the clustering requirements for Virtual Machine Manager. You will also learn how to configure SQL AlwaysOn for the Virtual Machine Manager database. Finally, you will learn how to configure clustering for Hyper-V.Lessons∙Clustering requirements for Virtual Machine Manager∙Configuring SQL AlwaysOn for the Virtual Machine Manager Database∙Hyper-V Host ClusteringLab : Implementing High Availability for Virtual Machine ManagerAfter completing this module, students will be able to:∙Describe the clustering requirements Virtual Machine Manager.∙Configure SQL AlwaysOn for the Virtual Machine Manager database.∙Configure Hyper-V clustering.Module 3: Updating Virtual Machine Manager and Fabric ServersKeeping the IT environment up to date in an enterprise is paramount from both a security and a performance perspective. Proper update management also helps ensure that systems remain available by applying patches that improve the applications running on them. In the virtualized environment updatemanagement is just as important, especially when there are multiple System Center components deployed. In this module you will learn how Virtual Machine Manager integrates with Windows Server Update Services to manage the updates on Virtual Machine Manager Fabric infrastructure servers such as the Virtual Machine Manager Management Server and Library Server. You will also learn the considerations that should be taken into account and service order that should be applied when updating Virtual Machine Manager when you have other System Center components deployed.Lessons∙Understanding the Servicing Order for System Center∙Performing the manual update process in Virtual Machine Manager∙Patching the Virtual Machine Manager Fabric with Windows Server Update ServicesLab : Updating the Virtual Machine Manager environmentAfter completing this module, students will be able to:∙Describe the servicing order when updating System Center components.∙Update Virtual Machine Manager.∙Update the Virtual Machine Manager Fabric.Module 4: Configuring Networking in Virtual Machine ManagerNetworking in Virtual Machine Manager has been extended extensively within the last two iterations of System Center. For example, in System Center 2012 SP1 Virtual Machine Manager, the ability to deploy third-party switch extensions such as Cisco was added. In System Center 2012 R2 Virtual Machine Manager, Top-of-rack (TOR) switch integration was added. It is important that you not only understand the basic concepts of networking in Virtual Machine Manager but that you also know how to configure some of the advanced network settings. This knowledge will prove invaluable when configuring Virtual Machine Manager in an enterprise environment, especially where networking spans multiples sites and/or locations. In this module you will learn some of the key networking fundamentals in Virtual Machine Manager before moving onto advanced networking features such as Port Profiles, Top-of-rack switches and Windows Server Gateways.Lessons∙Overview of Networking in Virtual Machine Manager∙Logical Networks∙Uplink and Virtual Port Profiles∙Logical Switches∙Virtual Machine Networks∙Software Defined Networking (optional)Lab : Configuring Networking in VMMAfter completing this module, students will be able to:∙Describe the core networking features in Virtual Machine Manager.∙Create logical networks, network sites and IP pools.∙Configure Uplink Port Profiles and Virtual Port Profiles.∙Configure Logical Switches.∙Configure VM Networks.∙Understand Software Defined Networking in Virtual Machine Manager (optional).Module 5: Configuring Storage in Virtual Machine Manager Virtual Machine Manager provides support for both Block Storage and File Storage. Block Storage can include Fibre Channel, iSCSI and Serial Attached SCSI (SAS). File storage includes network file shares that can be located on a Windows File Server or on third party Network Attached Storage (NAS) devices provided by vendors such as NetApp or EMC. When configuring storage in Virtual Machine Manager you need to understand how it is discovered, classified, provisioned, allocated and decommissioned. In this module you will learn about the various storage options that are available in Hyper-V and Virtual Machine Manager. You will also learn how storage is discovered and classified. Finally, you will learn how to configure and manage storage in Virtual Machine Manager.Lessons∙Storage options available in Hyper-V and Virtual Machine Manager∙Understanding Storage in Virtual Machine Manager∙What Storage will be managed?∙Configuring and Managing Storage in Virtual Machine ManagerLab : Provisioning and configuring Storage in Virtual Machine ManagerAfter completing this module, students will be able to:∙Describe the storage options available in Virtual Machine Manager.∙Understand storage in Virtual Machine Manager.∙Understand what storage will be managed in Virtual Machine Manager.∙Configure and manage storage in Virtual Machine Manager.Module 6: Managing Clouds in Virtual Machine Manager One of Virtual Machine Managers most powerful features is its ability to create and manage Private Clouds including the resources made available to them and controlling access to Virtual Machines and Services deployed within them. Before provisioning a Private Cloud in Virtual Machine Manager it is important that you understand the key concepts around Cloud Computing such the difference between Private, Public and Hybrid Clouds. When provisioning a Private Cloud it is also important that you configure the resources available to the cloud appropriately. This includes the Library resources, Virtual Machines and Services that are deployed to the cloud. In this module you will learn some of the key concepts in Cloud computing. You will also learn how to create and manage a Private Cloud in Virtual Machine Manager including how resources, capacity and capability are configured for the cloud. Finally, you will learn how access to the Private Cloud and its associated resources is configured.Lessons∙Introduction to Clouds∙Creating and Managing a Private Cloud in Virtual Machine Manager∙Working with User Roles in Virtual Machine ManagerLab : Managing Clouds in Virtual Machine ManagerAfter completing this module, students will be able to:∙Describe the key concepts in Cloud Computing.∙Create and manage Clouds in Virtual Machine Manager.∙Create and configure User Roles in Virtual Machine Manager.Module 7: Configuring and Managing the Virtual Machine Manager Library and Library Objects The Virtual Machine Manager Library provides access to file-based resources such as sysprep images, virtual hard disks and ISO files. This makes provisioning Virtual Machines and Services much quicker and easier as the Library acts as a catalog of resources that are available at all times. It is important that you understand how to configure and manage the Virtual Machine Manager Library especially when you have multiple Library servers in your environment. In this module you will learn about the Virtual Machine Manager Library structure and how Libraries are synchronized. You will also learn about equivalence objects with the Library and how library objects can be tagged and versioned.Lessons∙Overview of the Virtual Machine Manager Library∙Managing LibrariesLab : Configuring and Managing the Virtual Machine Manager LibraryAfter completing this module, students will be able to:∙Describe the Virtual Machine Manager Library.∙Configure and manager the Virtual Machine Manager Library.Module 8: Preparing the Windows Operating System for deployment in Virtual Machine Manager There are a number of methods that can be used to prepare an Operating System for deployment in Virtual Machine Manager. For example, you can use Sysprep to prepare an Operating System which then generalizes the image so that it can be re-used indefinitely. You can also use a Windows Imaging Format (WIM) file to create a .VHD. It is important that you understand the various methods in which an Operating System can be prepared for deployment so that you can use the best method for your environment. In this module you will learn how to use Sysprep and WIM to prepare Operating System images for deployment with Virtual Machine Manager. You will also learn the architecture of virtual machines in relation to physical computers including how application settings are affected in a virtualized environment. Finally, you will learn about the preparations that must be performed when deploying bare-metal Hyper-V Hosts and Scale-out File Servers.Lessons∙Preparing a Windows Operating System∙Virtual Machine Architecture∙Preparations required for Bare Metal deployments of Hyper-V and Scale-out File ServersLab : Preparing the Windows Operating SystemAfter completing this module, students will be able to:∙Prepare a Windows Operating System for deployment in Virtual Machine Manager.∙Understand Virtual Machine Architecture.∙Prepare for a bare-metal deployment of Hyper-V and Sale-out File Server.Module 9: Virtual Machine and Service Templates Templates in Virtual Machine Manager provide a method of standardizing the deployment of Virtual Machines and Services thereby saving time and ensuring that when deploying them, they are configured appropriately. When creating a Virtual Machine or Service Template there are many properties that can be configured such as the hardware, Operating System and applications that will be deployed, so it is important that you understand how these properties are configured. In addition, when creating Virtual Machine Templates you can also apply Hardware, Guest OS and Application Profiles which can be used to apply standard settings for Virtual Machines and Services deployed with Virtual Machine Manager. In this module you will learn how to configure Virtual Machine and Service Templates. You will also learn how to create hardware and Guest OS Profiles to help standardize the deployment of Virtual Machines and Services. You will also learn how to configure, deploy and update Service Templates including how Service Templates are used in the realworld.Lessons∙Overview of Virtual Machine Templates∙Overview of Service Template TemplatesLab : Deploying Virtual Machines and ServicesAfter completing this module, students will be able to:∙Configure Virtual Machine Templates.∙Configure Service Templates.Module 10: System Center Integration Virtual Machine Manager, as with other System Center components can be integrated with other components to provide additional features and manageability. For example when Virtual Machine Manager is integrated with Operations Manager you can monitor the Virtual Machine Manager environment and be alerted when Operations Manager detects problems such as a pending hard disk failure in the Virtual Machine Manager fabric. By integrating Virtual Machine Manager with Orchestrator you can also automate tasks in Virtual Machine Manager such as deploying a Virtual Machine or a Service. In this module you will learn how integration between Virtual Machine Manager and Operations Manager is configured and what benefits this brings. You will also learn how integration between Virtual Machine Manager and Orchestrator is configured including the benefits this brings.Lessons∙Monitoring the Virtual Machine Manager environment with Operations Manager∙Automation with OrchestratorLab : Responding to Alerts using OrchestratorAfter completing this module, students will be able to:∙Monitor the Virtual Machine Manager environment with Operations Manager.∙Automate the Virtual Machine Manager environment with Orchestrator.Module 11: Windows Azure Pack Windows Azure Pack is a no-cost Azure solution for the datacenter. By using Windows Azure Pack and Virtual Machine Manager you can offer cloud-based services such as Virtual Machine Clouds, Web Site Clouds and SQL Server databases from a secure Self-Service environment hosted in your datacenter. In this module you will learn about the key features of Windows Azure Pack including its architecture and the Tenant and Administrator Portals that provide access to the Windows Azure Pack features. You will also learn about the various deployment methods for Windows Azure Pack including how to perform an express deployment. Finally, you will learn how to configure VM Clouds, User Accounts and Plans in Windows Azure Pack so that you can offer Self-Service Virtual Machine provisioning.Lessons∙Overview of Windows Azure Pack∙Deploying Windows Azure Pack∙Configuring Windows Azure Pack∙Windows Azure Pack Tenant ExperienceLab : Deploying Windows Azure Pack and provisioning infrastructure servicesAfter completing this module, students will be able to:∙Describe Windows Azure Pack.∙Perform an Express deployment of Windows Azure Pack.∙Configure Windows Azure Pack.Module 12: Azure Site Recovery As with most business critical applications and services, a disaster recovery solution is key to ensure applications and services are available at all times. This is also the case in a virtualized environment. Microsoft Azure Site Recovery provides a service that can be used to orchestrate the replication, failover and recovery of an on-premise Virtual Machine Manager environment to another on-premise Virtual Machine Manager environment such as a disaster recovery site. In addition Azure Site Recovery can be used to replicate the Virtual Machine Manager environment to Azure. In this module you will learn how to configure Azure Site Recovery to provide protection for the Virtual Machine Manager environment including how it can be integrated with Windows Azure Pack to provide disaster recovery for IaaS workloads.Lessons∙Overview of Azure Site Recovery∙Configuring and using Azure Site RecoveryLab : Configuring Azure Site RecoveryAfter completing this module, students will be able to:∙Understand Azure Site Recovery.∙Configure Azure Site Recovery.。