HONG-V6.0(部品&模具报价系统)
- 格式:xls
- 大小:1.10 MB
- 文档页数:2
红旗Linux 桌面6.0 SP3发行概述发行时间:2010年4月北京中科红旗软件技术有限公司Red Flag Software Co., Ltd.该文档包含下列和红旗Linux 桌面版6.0 SP3 相关的内容:产品简介版本概述开发记录注意事项及常见问题(FAQ)主要系统软件包列表二、产品简介红旗Linux桌面版6.0 SP3 的英文名称为Red Flag Linux Desktop 6.0 SP3,产品代号(Code Name )是SuetJade。
基本系统基于红旗桌面版6.0 SP2。
SuetJade是红旗软件公司针对原红旗Linux桌面版6.0 SP2 产品存在的问题,以及电子政务、教育、SMB尤其是OEM等领域的实际需求,同时结合了Linux技术的发展趋势以及国家重大项目的技术规范和要求而全力推出的。
SuetJade是一款面向家庭、教育、政府、金融以及行业等领域的通用桌面操作系统平台,适用于学习、办公、上网、开发,以及娱乐等应用。
红旗Linux桌面版6.0 SP2 可以通过在线升级平滑升级到红旗Linux桌面版6.0 SP3。
SuetJade正式包装产品形式为:以DVD为存储介质,有两个不同版本,分别为精简版和完整版。
精简版是集成了系统的常用软件和必要的软件包的版本。
完整版中加入了SuetJade上层应用、开发等的软件和开发工具精选光盘,也包含了一些商业硬件设备的驱动程序和商业应用软件的体验版本。
SuetJade的源代码是完全开放的,方便Linux开发者和SuetJade用户能够自行定制使用。
SuetJade全面符合国家制定的Linux的标准,同时在系统多个方面取得了实质性的进展:扩展硬件兼容性及无线设备的支持、加速系统的启动和关闭、提高桌面应用程序的启动速度、全新设计的用户目录结构和控制面板、改进的桌面浏览器程序功能、开发个人信息管理程序、前所未有的3D 桌面特效体验、全新五种语言的系统国际化体验、高效便捷的网络配置框架等。


Linux海量教程DIY就要Linux红旗Linux6.0桌面版图解安装教程本章将帮助您顺利地安装Red Flag Linux Desktop6.0。
Red Flag Linux Desktop6.0具有时尚的安装界面、简捷的安装配置步骤和个性化的安装风格,使得整个安装过程清晰简明。
原创作者:中科红旗公司推荐广大Linux初学者选用红旗Linux系统,支持我国的操作系统。
预览:红旗Linux6.0桌面版Linux公社致力于Linux的发展。
祝您阅读愉快!1安装前的准备安装Red Flag Linux Desktop6.0之前,需要做一些前期准备工作,其中包括:备份数据、硬件检查、制作驱动盘、准备硬盘分区等。
1.1备份数据安装Red Flag Linux Desktop6.0之前,最好将硬盘上的重要数据备份到软盘、光盘、磁带等存储介质上,以避免在安装过程中发生意外,带来不必要的损失。
通常要做备份的内容包括系统分区表、系统中的重要文件和数据等。
1.2系统基本硬件需求安装Red Flag Linux Desktop6.0至少需要如下基本硬件配置:Intel Pentium兼容CPU,PII以上CPU和256MB以上内存,推荐使用512M以上内存;最少3G自由空间,建议使用6G以上的空间;VGA兼容或者更高分辨率的显卡;键盘、鼠标、光驱等。
如果使用256MB内存,在安装过程中将无法启动图形界面,建议您使用更高的内存配置,如:384MB。
1.3了解计算机的硬件配置和网络信息为保证安装与配置的顺利进行,安装前还应收集以下几方面的计算机信息:1安装前的准备续Red Flag Linux Desktop6.0具有良好的硬件兼容性,与近年来生产的大多数硬件兼容。
但是,硬件的技术规范改变频繁,因此可能难以保证百分之百兼容您的硬件。
关于最新的硬件支持信息,请访问红旗公司的网站:。
1.4准备足够的磁盘空间如果不把Red Flag Linux Desktop6.0安装在一个独立的硬盘上,就应保证将其硬盘空间和计算机中其他操作系统(如Windows或其他版本的Linux)所使用的硬盘空间分开。

Microsoft Visual C++6.0介绍从2008年4月开始,全国计算机等级考试将全面停止Turbo C2.0(简称TC)软件的使用,所有参加二级C语言、三级信息技术、网络技术和数据库技术上机考试的考生,都要在Visual C++6.0(简称VC)环境下调试运行C程序。
众所周知,VC软件主要是用来开发C++程序的,如何在VC下调试运行C程序,对于众多程序设计者来说,确实是一个新的话题。
VC与TC的差异,主要是体现在程序设计语言C++与C的关系上。
其实,了解计算机程序设计的人都知道,C++是C语言的升级板,VC是在Windows进行C++程序设计的主要软件,VC完全兼容了C的功能,也就是说,在VC下是完全能够进行C语言程序开发。
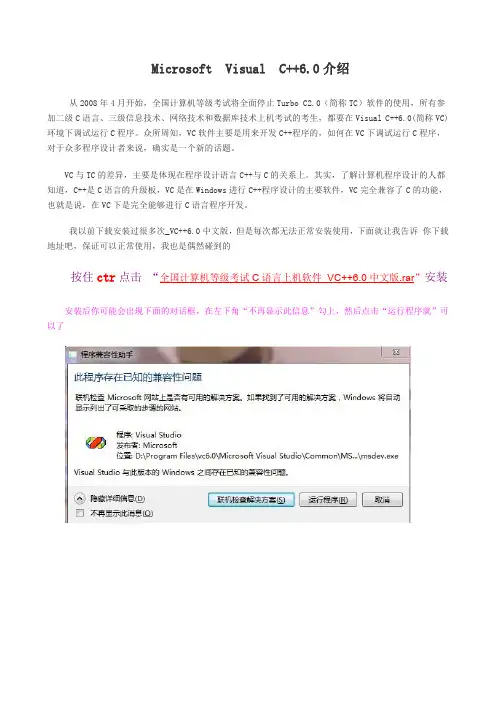
我以前下载安装过很多次_VC++6.0中文版,但是每次都无法正常安装使用,下面就让我告诉你下载地址吧,保证可以正常使用,我也是偶然碰到的按住ctr点击“全国计算机等级考试C语言上机软件_VC++6.0中文版.rar”安装安装后你可能会出现下面的对话框,在左下角“不再显示此信息”勾上,然后点击“运行程序就”可以了目录1编制并运行一个简单程序 (3)1.1编制并运行程序的“四步曲” (3)1.2工程(P ROJECT)以及工程工作区(P ROJECT W ORKSPACE) (3)1.3启动并进入VC6的集成开发环境 (4)1.4创建工程并输入源程序代码 (5)1.5不创建工程,直接输入源程序代码 (8)1.6编译、链接而后运行程序 (8)1.7及时备份自己的创作 (9)1.8将自己设计的产品提供给他人使用 (9)2VC6集成开发环境使用参考 (10)2.1VC6的常用菜单命令项 (10)2.2VC6的主要工作窗口 (12)3严谨思维,调试程序 (13)3.1什么时候需要对程序进行调试 (13)3.2对程序进行调试的基本手段和方法 (14)3.3对一个简单程序的调试过程 (15)3.4设计合适的程序调试方案 (17)3.5优秀程序员的基本素质——丰富的想象、严谨的思维 (18)4编译与链接过程中常见的出错提示 (20)4.1常见编译错误 (21)4.2常见链接错误 (24)1编制并运行一个简单程序1.1编制并运行程序的“四步曲”让我们用VC6先来编制一个最简单的程序,并让它运行(执行)而得出结果,以此来作为了解VC6的开端。
nero 6.0Nero 6.0: The Ultimate Multimedia Suite for All Your Digital NeedsIntroductionIn today's digital age, multimedia software has become an essential tool for both professional and personal use. Whether it is creating, editing, or burning multimedia content, having a reliable and feature-rich software is crucial. One such software that has left a lasting impression is Nero 6.0. Released in 2003 by Nero AG, Nero 6.0 quickly became a game-changer in the multimedia industry. In this document, we will explore the various features and benefits that Nero 6.0 offers, making it the ultimate multimedia suite for all your digital needs.1. Feature 1: Nero Burning ROMOne of the standout features of Nero 6.0 is its powerful burning capabilities through Nero Burning ROM. This module allows users to burn CDs, DVDs, and Blu-ray Discs with exceptional reliability and speed. With support for variousformats, including ISO, UDF, and Hybrid, Nero Burning ROM ensures that your burned discs are compatible with a wide range of devices. Whether it is creating audio CDs from your favorite music tracks or backing up important data, Nero Burning ROM offers an intuitive interface and a seamless burning experience.2. Feature 2: Nero VisionAnother notable component of Nero 6.0 is Nero Vision. This module provides users with advanced video editing and authoring capabilities. With Nero Vision, you can import videos from various sources, including digital cameras and camcorders, and edit them with ease. The software offers an array of editing tools, such as trimming, cropping, and adding transitions, to enhance the quality of your videos. Additionally, Nero Vision allows you to create professional-looking DVD menus and chapters, making it an ideal solution for creating personalized home movies or professional video presentations.3. Feature 3: Nero PhotoSnapIn addition to video editing, Nero 6.0 also offers powerful photo editing capabilities through Nero PhotoSnap. Thismodule allows users to import, edit, and enhance their digital photos easily. With a wide range of tools and effects, users can crop, adjust brightness and contrast, remove red-eye, and apply artistic filters to their images. Nero PhotoSnap also enables users to create photo slideshows with music and transitions, perfect for showcasing memorable moments with family and friends.4. Feature 4: Nero Wave EditorFor users interested in audio editing, Nero 6.0 includes Nero Wave Editor. This module provides a comprehensive set of tools to edit and enhance audio files. Whether it is trimming, normalizing, or applying effects like reverb or echo, Nero Wave Editor offers precise control and flexibility. Furthermore, the software supports various audio formats, ensuring compatibility with different devices and platforms. With Nero Wave Editor, audio editing becomes a breeze, allowing users to create professional-quality soundtracks or podcasts.5. Feature 5: Nero RecodeNero 6.0 also includes Nero Recode, a module designed for converting and compressing video files. With the increasing popularity of portable devices, optimizing video files fordifferent platforms has become essential. Nero Recode simplifies this process by allowing users to convert videos into various formats, including MPEG-4 and H.264. Moreover, the software offers advanced compression options while maintaining excellent video quality. Whether it is preparing videos for playback on your smartphone or sharing them online, Nero Recode ensures compatibility and optimal file sizes.ConclusionIn conclusion, Nero 6.0 remains an iconic multimedia suite that offers a wide range of powerful features and capabilities. Whether you are a professional multimedia creator or simply a hobbyist, Nero 6.0 provides the tools you need to bring your digital creations to life. From burning discs with Nero Burning ROM to editing videos with Nero Vision, enhancing photos with Nero PhotoSnap, editing audio with Nero Wave Editor, or converting videos with Nero Recode, this comprehensive suite has it all. With its user-friendly interface and powerful functionalities, Nero 6.0 undoubtedly stands as the ultimate multimedia solution for all your digital needs.。


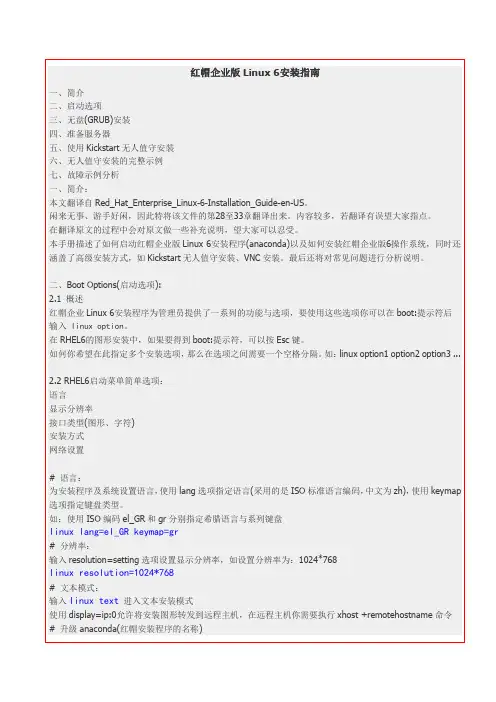
红帽企业版 Linux 6安装指南一、简介 二、启动选项 三、无盘(GRUB)安装 四、准备服务器 五、使用 Kickstart 无人值守安装 六、无人值守安装的完整示例 七、故障示例分析 一、简介: 本文翻译自 Red_Hat_Enterprise_Linux-6-Installation_Guide-en-US。
闲来无事、游手好闲,因此特将该文件的第28至33章翻译出来。
内容较多,若翻译有误望大家指点。
在翻译原文的过程中会对原文做一些补充说明,望大家可以忍受。
本手册描述了如何启动红帽企业版 Linux 6安装程序(anaconda)以及如何安装红帽企业版6操作系统,同时还 涵盖了高级安装方式,如 Kickstart 无人值守安装、VNC 安装。
最后还将对常见问题进行分析说明。
二、Boot Options(启动选项): 2.1 概述 红帽企业 Linux 6安装程序为管理员提供了一系列的功能与选项,要使用这些选项你可以在 boot:提示符后 输入 linux option。
在 RHEL6的图形安装中,如果要得到 boot:提示符,可以按 Esc 键。
如何你希望在此指定多个安装选项, 那么在选项之间需要一个空格分隔。
linux option1 option2 option3 ... 如: 2.2 RHEL6启动菜单简单选项: 语言 显示分辨率 接口类型(图形、字符) 安装方式 网络设置 # 语言: 为安装程序及系统设置语言, 使用 lang 选项指定语言(采用的是 ISO 标准语言编码, 中文为 zh), 使用 keymap 选项指定键盘类型。
如:使用 ISO 编码 el_GR 和 gr 分别指定希腊语言与系列键盘linux lang=el_GR keymap=gr# 分辨率: 输入 resolution=setting 选项设置显示分辨率,如设置分辨率为:1024*768linux resolution=1024*768# 文本模式: 输入 linux text 进入文本安装模式 使用 display=ip:0允许将安装图形转发到远程主机,在远程主机你需要执行 xhost +remotehostname 命令 # 升级 anaconda(红帽安装程序的名称)输入 linux updates 升级新版本的 anaconda 安装程序linux updates= 通过网络加载 anaconda 升级程序,后跟 URL 地址# 指定安装方式 首先,开机出现安装界面后可以按 Tab 键,将显示以>vmlinuz initrd=initrd.img 开始的附加界面,在此我们 可以输入 askmethod 回车, >vmlinuz initrd=initrd.img askmethod 几个下一步之后安装程序会询问我们安装方式。

Red Hat Enterprise Linux 6.4 安装指导以在RH2488 V2服务器上安装为例,适用以下机型1 安装前准备1.1 硬件环境准备无备注:本指导书以虚拟光驱、虚拟软驱为例,如使用物理光驱、物理软驱安装系统操作则以实际系统光盘、软盘代替。
1.2 软件环境准备1.2.1准备操作系统安装文件到redhat 官网下载安装文件,或者采用光盘安装文件。
1.2.2下载驱动安装包以下载Tecal RH2285 V2软件包为例1.登录网站。
2.在主菜单中,选择“服务支持> 软件下载> IT > 服务器”。
3.在导航树中,选择目标服务器的名称和版本号,例如“机架服务器->RH2285 V2 -> Tecal RH2285 V2 V100R002C00SPC113 ”。
4.下载软件名中含“Rhel-drivers”字段的驱动安装包。
1.2.3校验软件包完整性检验获取的软件包,确保与网站上的原始软件包一致。
单击和,可分别获取软件数字证书和软件。
校验工具和校验方法在如下链接中可以获取:软件数字签名(OpenPGP)验证工具1.2.4下载驱动程序配套表在网站的主菜单中选择“软件下载”节点下的目标服务器的名称和版本号,例如“服务支持> 软件下载> IT > 服务器> “机架服务器->RH2285 V2 -> Tecal RH2285 V2 V100R002C00SPC113”,然后下载包括”驱动程序配套表”的文档。
1.3 环境配置1. 服务器上电启动后,按下“DEL”键,进入BIOS setup,设置BIOS时间为当前时间,按下“F9”,恢复默认BIOS设置,完成后按下“F10”保存退出。
1-12、在系统启动,LSI控制器初始化的时候,根据实际情况按相应的提示信息配置好磁盘RAID关系。
其中LSI SAS2208& LSI 2108控制器下必须做raid再安装系统。
目录(一)Microsoft软件 (3)(二)Novell软件…………………………………………………………………………(三)Symantec软件1)防病毒软件………………………………………………………2)备份软件…………………………………………………………(四)防病毒、网络安全类软件、防火墙和信息安全类1)瑞星/卡巴斯基/ NOD32/金山毒霸/Mcafee/Trendmicro………2)Netscreen /Check Point/网康互联网控制网关/上网行为管理/PSEC VPN/ SSL VPN ………………………………………………………………………3)SonicWALL/ FortiGate…………………………………………4)虹安/铁卷电子文档安全系统软件 (27)(五)专业设计和排版软件1)中望软件……………………………………………………………2) WPS office办公软件/金山硬件软件/Adobe/ Autodesk…………(六)Red Hat软件/IBM软件…………………………………………………………………(七)中间件软件BEA/金碟……………………………………………………………(八)数据备份和双机软件BrightStor ARCserve Backup/Veritas Backup/双机备份软件……(九)工具类和数据库软件1) TP Serv-U/Sybase/PowerSoft/WinGate……………………………2) MDaemon/VMware/CrystalReports/Inprise…………………………3) CITRIX /Oracle软件………………………………………………4) WinRAR/ACDSee/ Northern/ pdfFactory……………………………(十)系统管理软件用友软件/U6-普及型ERP/任我行管家婆…………………………购买小常识:1.微软销售许可方式,分为以下四种:a.OEM:针对硬件厂商,如HP、IBM、联想、宏基、方正、TCLb.COEM:即简包装,包含光盘及说明书,无完整外包装c.FPP:即彩包,针对零售市场,包装中含有许可证、安装介质、资料以及完整外包装,用户必须遵守“最终用户许可协议”---- End User License Agreementd.License:针对企业客户批量采购,包装中含有许可证,此授权用户可以使用该软件,并不包括复制软件的权利证明;最初订单要求达到5个许可,它不但价格优惠,而且安装运行便利、便于保存及其他软件保障等方面的优势。
vb6.0 官方下载 vb6.0 下载中文企业版中文企业版,它是 visual basic 6.0系列功能最完整的版本 !vb6.0 简体中文企业版是一种由微软公体中文企业版 ,从任何标准来说, VB 都是世界上使用人数最 多的语言ADO 连接数据库,或者轻松的创建 ActiveX 控件。
Visual 中文企业版安装教程: 1. 点击 Setup.exe 进入安装 程序 2. 在弹出的“兼容性助手”对话框中点击运行程序(若有 恶意软件保护”程序请点击运行) 3. 按照提示点击“下一步” 注意:产品 ID 号为: 111-1111111 姓名、公司名称任意写。
)(点击“运行程序”()点击“继续”()点击“确定”)展开 VB编程语言历史: Visual Basic 从 1991 年诞生以来, 现在已经 13 年了。
BASIC 是微软的起家产品,微软当然不忘了这位 功臣。
随着每一次微软技术的浪潮, Visual Basic 都会随之 获得新生。
可以预见,将来无论微软又发明了什么技术或平 台, Visual Basic 一定会首先以新的姿态登上去的。
如果你 想紧跟微软,永远在最新的技术上最快速地开发,你就应该 选择 Visual Basic 。
发展历史司开发的包含协助开发环境的事件驱动编程语言。
vb6.0 简Visual Basic 6.0 Visual Basic 6.0 中文企业版拥有图形用户界面 (GUI ) 和快速 应用程序开发 (RAD ) 系统,可以轻易的使用 DAO 、 RDO 、Basic 6.01991 年,微软公司推出了 Visual Basic 1.0 版。
这在当时引 起了很大的轰动。
这个连接编程语言和用户界面的进步被称 为Tripod (有些时候叫做 Ruby ),最初的设计是由阿兰•库珀Alan Cooper )完成的。
许多专家把 VB 的出现当做是软件 开发史上的一个具有划时代意义的事件。
Agile e6.0.2Installation Manual for Agile e6.0.2 on UNIX Server Part Number: INSUNIX-602ACopyrights and TrademarksCopyright © 1992-2006 Agile Software Corporation. All rights reserved.You shall not create any derivative works of this publication nor shall any part of this publication be copied, reproduced, distributed, published, licensed, sold, stored in a retrieval system or transmitted in any form or by any means: electronic, mechanical, photocopying, or otherwise, without the prior written consent of Agile Software Corporation, 6373 San Ignacio Avenue, San Jose, California 95119-1200 U.S.A.; Telephone 408.284.4000, Facsimile 408.284.4002, or </>.The material in this document is for information only and is subject to change without notice. While reasonable efforts have been made in the preparation of this document to ensure its accuracy, Agile Software Corporation assumes no liability resulting from errors or omissions in this document or from the use of the information contained herein. Agile Software Corporation reserves the right to make changes in the product design without reservation and without notification to its users.Agile e6 is a registered trademark. All other brands or product names are trademarks or registered trademarks of their respective holders.Java and Solaris are registered trademarks of Sun Corporation.Microsoft, Microsoft Windows, Microsoft Word, Microsoft Excel, Internet Explorer and SQL Server are registered trademarks of Microsoft Corporation.Oracle and Oracle 10g are registered trademarks of Oracle Corporation.NOTICE OF RESTRICTED RIGHTS:The Software is a “commercial item,” as that term is defined at 48 C.F.R. 2.101 (OCT 1995), consisting of “commercial computer software” and “commercial computer software documentation” as such terms are used in 48 C.F.R. 12.212 (SEPT 1995) and when provided to the U. S. Government, is provided (a) for acquisition by or on behalf of civilian agencies, consistent with the policy set forth in 48 C.F.R. 12.212; or (b) for acquisition by or on behalf of units of the Department of Defense, consistent with the policies set forth in 48 C.F.R. 227.7202-1 (JUN 1995) and 227.7202-4 (JUN 1995).August 1, 2006iiR EVISIONSAll InitialdocumentA 26/06/2006Added note forSetting the OracleNLS_LANG valueiiiC ONTENTSChapter 1 Introduction 1Chapter 2 Preparing the Installation 2 Hardware and Software Requirements 2Chapter 3 Setting up Licensing 3 Obtaining Licenses 3 Preparing the Installation 3 Installing the FELICS License Server 4 Starting the FELICS License Agent 4 Modifying the FELICS port number configuration 4Chapter 4 Installing Agile e6 5 Preparing the Installation 5 Mounting the DVD for HP-UX 6 Mounting the DVD for Solaris 6 Mounting the DVD for AIX 6 Mounting the DVD for Linux 7 Starting the Installation 7 Setting the Oracle NLS_LANG value 9 Importing the Database Dump 9 Checking the Installation 9 Checking for running processes 9 Starting required Processes 10 Adapting the Agile e6 Environment 10 Testing the Installation 10 Troubleshooting 10 Chapter 5 Starting the FileServer 12ivChapter 1Introduction This guide describes how to install Agile e6 for Oracle 10gR2 (10.2.0.2) running under UNIX.The instructions in this guide assume that you will perform the Agile e6 installation followed by the Oracle 10g installation. If you plan to use Agile e6 with an existing Oracle 10g installation, refer to the document Administration Manual for Agile e6.0.2 (PLM602_Admin.pdf) for instructions on setting up the Agile e6 environment to work with existing Oracle databases.For complete information on installation prerequisites, including required operating system maintenance-level fixes and system patch levels, refer to the document Prerequisites Guide includes the Pre-Installation Checklist (PLM602_Inst_Reqs.pdf).For information about database preparation and requirements, refer to the Oracle Add On folder delivered with the Oracle installation package (see the document Installation Manual for Oracle10g for Agile e6.0.2 on UNIX (PLM602_10g_UNIX)).1Agile e6Chapter 2Preparing the Installation Before installing Agile e6, do the following:Review the hardware and software requirements for your platform.Set the necessary installation prerequisites.Follow the instructions in the next chapter to set up licensing.Hardware and Software RequirementsThis section describes the minimal hardware and software requirements for performing an initial installation of Agile e6 in a small test environment. For complete information on the requirements for a production environment, refer to the document Prerequisites Guide includesthe Pre-Installation Checklist (PLM602_Inst_Reqs.pdf). To install and run Agile e6, you will need the following minimum requirements:One of the following UNIX systems:• HP UX 11i, 11v2 (PA-RISC 2.0 or higher)• Sun Solaris 9,10 (UltraSPARC IIi or higher)• IBM AIX 5L Version 5.2, 5.3 (Power PC 4 or higher)• SUSE Linux Enterprise Server 9 (i386)Memory:• Agile e6 Server: 50 MB RAM per concurrent user• Database server: 6 MB RAM per connected user, plus 400 MB RAM for database servicesSwap space: twice the amount of RAMDisk space:• Agile e6 Server: 400 MB• Oracle 10g Server: up to 2 GB• Oracle 10g Client: 500 MBOne of the following web browsers (to run the Web Client). A web browser is necessary only on the client machine, not on the server:• HP-UX, AIX, Solaris and Linux: Mozilla 1.7.xNote: Operating system versions other than those listed above are currently notsupported.2Chapter 3 Setting up LicensingChapter 3Setting up Licensing To allow users to access PLM functionalities, Agile e6 requires valid licenses. This section describes how to install the license software and insert the required license keys prior to installing Agile e6.Obtaining LicensesAgile e6 uses FELICS, a license management tool, to handle licenses. To obtain licenses you will need to provide the host ID of the system on which the FELICS license server will run.1. To determine the host ID, run the uchostid program, which is distributed on the Agile e6DVD in the following directory:/licemgr/unix/<machine_type>/uchostid2. Mail the hostid to: ************ to get the licenses for your installation.The FELICS License Software has three components:The FELICS License Server, which hosts the licenses for Agile e6. You can install the FELICS License Server on any system accessible by the Agile e6 Server (also known as the axalantServer). It is recommended to install it on the database machine.The FELICS Agent, which communicates with the FELICS and Agile e6 Servers to check the validity of licenses for the Agile e6 clients. The FELICS Agent must be installed on the same machine as the Agile e6 Server and FileServer.The FELICS Tools, which are utilities for importing and managing license keys. The FELICS Tools should typically be installed on the same machine as the FELICS License Server andon the administrators PC.Preparing the Installation1. Log in as root.2. Set the environment variable LANG to the value “C”:setenv LANG C3. Copy the following file from the installation DVD:cp licemgr/unix/<machine-type>/felics30cb04.tar.Z /tmp/4. Uncompress the FELICS software:uncompress /tmp/felics30cb04.tar.Zcd /tar xvf /tmp/felics30cb04.tarrm /tmp/felics30cb04.tar3Agile e6Installing the FELICS License ServerAfter following the instructions in the previous section to extract and uncompress the FELICS software, you can use a script to install the FELICS License Server software and add license codes.1. While logged in as root, execute the following script:/usr/felics/felics.installThis runs the program brandli, which checks in the licenses and then starts the FELICSLicense Server (/usr/felics/felics).2. Log out.Starting the FELICS License AgentTo make the FELICS licenses available for Agile e6, the FELICS License Agent must run on every Agile e6 application server. Start the agent with the hostname of the FELICS License Server host as an argument:/usr/felics/felicscltd –s <felicssrvhostname>Note: You have to do the following step before you can access the FELICS License Server.Modifying the FELICS port number configurationThe following step is needed if you use only the FELICS License Agent and do not run the FELICS.install script:Change to the directory where the FELICS software is installed, usually /usr/felics and copy the example configuration file felics.ini.v30 to felics.in:cd /usr/felicscp felics.ini.v30 felics.inifelics.ini contains the following important entries which can be modified:TRANSPORT=udpChange the entry to tcp instead of udp if you use more than 40 clients, which also implies that the Admin-Port (ADMINPORT) needs to be different from the Agent-Port. We recommend to use 12346 for the Admin-Port in that case.AGENTPORT=12345The port used by the FELICS License Agent to connect to the FELICS License Server.ADMINPORT=12345The port used by the FELICS Tools to modify the Licenses on the FELICS License Server.For complete information on FELICS, refer to the document Felics Administrator’s Guide.4Chapter 4 Installing Agile e6Chapter 4Installing Agile e6 Preparing the InstallationNote: Java Runtime Environment 1.4.2, which is required, is not installed during the installation process.1. Login as installation user.This can be any user; the user does not need administrative access.2. Point the JAVA_HOME environment variable to the installed Java Runtime Environment.echo $JAVA_HOMEIf $JAVA_HOME is unknown to your shell environment, set it as follows:If you are running in a c shell (csh):setenv JAVA_HOME <Path to the JRE Directory>Example: setenv JAVA_HOME /usr/j2seIf you are running in a k shell (ksh):set JAVA_HOME=<Path to the JRE Directory>export JAVA_HOMENote: This environment variable is always needed to run the Agile e6 software.You should set it in default startup file for the user who runs the Agile e6software, e.g. in the $HOME/.login file.Then test the correct setting of $JAVA_HOME with the following command:$JAVA_HOME/bin/java –versionwhich should produce an output like the following one:java version "1.4.2_11"Java(TM) 2 Runtime Environment, Standard Edition (build 1.4.2_11-b06)Java HotSpot(TM) Client VM (build 1.4.2_11-b06, mixed mode)3. If you are working remote, please set the DISPLAY environment variable.Check that your environment variable DISPLAY is set to your current working display bycalling:echo $DISPLAYIf $DISPLAY is unknown to your shell environment, set it as follows:5Agile e6csh-Shellsetenv DISPLAY <YourCurrentDisplay>:0.0Example: setenv DISPLAY 192.168.0.2:0.0ksh-Shellset DISPLAY=<YourCurrentDisplay>:0.0export DISPLAY4. Create the installation directory.This is the directory where you will install the Agile e6 software (for example, /app/plm60).Make sure that the installation user is the owner of the directory.5. Mount the Agile e6 Installation DVD to your file system:The DVD has an ISO 9660 file system with Rock Ridge extension (rrip). If you get filenames such as “filename;1“ (HP-UX), use the mount option rrip to get correct filenames. The mount command needs the name of the device or the special file (/dev/*). See /etc/fstab or use the system tools.Note: You may need root privileges to mount the DVD.Mounting the DVD for HP-UX1. Find the device file name for the DVD drive with the following command:ioscan -fn2. Create the /SD_CDROM directory if it does not exist3. To mount the UNIX installation DVD, use:mount /dev/dsk/c0t0d0 /SD_CDROMor use:samMounting the DVD for SolarisThe operating system should recognize the inserted DVD automatically and mount it to/cdrom/cdrom0The operating system releases the DVD with the command eject /cdrom.If the automatic mount does not run, you need to mount the DVD with a command with root privileges.Mounting the DVD for AIXTo mount the UNIX installation DVD, use:mount -o ro -v cdrfs /dev/cd0 /cdromor use:smit6Mounting the DVD for LinuxThe operating system should recognize the inserted DVD automatically and mount it to/media/cdromor/media/cdrecorderThe operating system releases the DVD with the command eject /cdrom.If the automatic mount does not run, you need to mount the DVD with a command with root privileges.Starting the Installation1. Start the installation by changing to the setup directory:cd <dvd-path>/unix/setup2. Enter the following command:/setupThis opens the license agreement window shown in the following figure.3. After reviewing the license agreement, click Accept.This opens a new window where you have to select the installation type.4. Click Install to continue.Note: For Upgrade refer to Upgrade Guide from e6.0 to e6.0.2(PLM602_Upgrade.pdf).This opens the setup dialog window, which you can use to set the necessary parameters.5. Set parameters in the setup dialog window.The setup window allows you to set or change the following parameters:• Path to Oracle installation: Enter the path to your Oracle client installation if it differs from the default entry.• Install Agile e-series to: Enter your Agile e6 target directory if it differs from the default entry.• Agile e6 Daemon RPC number: Contains the RPC number, which is used by the Windows Client to start up the application.• Agile e6 Java Daemon Socket number: Contains the socket number, which is used by the Java Client to start up the application.• Agile e6 Admin Service httpd port: Contains the port number, which is used by the Admin Server. This is necessary to administrate the Agile e6 environments.Note: There is a secure httpd running on the next port (8028 if you do not change the default settings).Please note the following restrictions for the values you can choose:• The Agile e6 Daemon RPC number must be between 550000000 and 990000000• The Agile e6 Java Daemon Socket number must be between 1 and 65535.We recommend to use numbers higher than 1024 to avoid conflicts with wellknown services.• The Agile e6 Admin Service httpd port must be between 1 and 65535.We recommend to use numbers higher than 1024 to avoid conflicts with wellknown services.6. Make sure all parameters have the correct values, and then click Install to start theinstallation.Depending on how many platforms you install and how fast your storage system is, theinstallation may take from about five minutes to half an hour.Setting the Oracle NLS_LANG valueIf you have an existing dump containing customer data with non-ASCII characters, you need to modify the NLS_LANG setting. Change the default for NLS_LANG in the file$ep_root/axalant/scripts/axalant_srv to the value used in the previous installation. When upgrading, the value is modified automatically.If you have a complete new installation where no dump with existing data will be used, it is recommended to use the default value for NLS_LANG.Importing the Database DumpTo import the database dump, do the following:imp plm/plm@plm60 file=plm60.dmp buffer=132000 commit=y log=plm60.log analyze=n full=y commit=y: Rollback segments cannot get too smallanalyze=n: No statistics will be createdbuffer=132000: Necessary for lobs, better import performancefull=y: Import complete dump even if the dump was exported by a different userAfter importing the database dump, check the logfile for errors.Checking the InstallationChecking for running processesAfter the Agile e6 installation the processes (daemons) listed below should be running on the server machine.Note: Check this by typing ps -efe6 Daemon:dtv_dmn <RPC number>e6 Admin Service httpd:tclsh8.3 htd/bin/httpd.tcle6 Java daemon:<$JAVA_HOME>/bin/java -cp ../axalant/bin/java/jade.jar:[...]Starting required ProcessesIf any of the processes required by Agile e6 components are not running on the server machine, you can start them manually:1. Open the folder axalant/scripts.2. Run the following scripts to start the required processes:• To start the Java Client, run: jacc• To start the DataView daemon, run: dmn_start• To start the Java daemon, run: java_dmn• To start the Admin service, run: httpd_startThe DataView daemon starts a process on the server that is used by the Windows Client. The Java daemon starts a process on the server that is used by the Web and Java Client. TheAdmin service, which is based on a TCL-web server, is needed to configure PLMenvironments on the server.3. To start these services at boot time, refer to the following document for information:<InstallDir>/unsup/scripts/init/readmeAdapting the Agile e6 EnvironmentBefore testing the installed software, you must adapt your existing environment to your Oracle user.Note: For information on creating, configuring, and managing Agile e6environments, including setting attributes for the PLM Business andPresentation Services, refer to the document Administration Manual for Agilee6.0.2 (PLM602_Admin.pdf).Testing the InstallationTo test the Agile e6 installation, try to run the UNIX Java Client. For information, refer to the document Installing the Agile e6 UNIX Client.TroubleshootingIf Agile e6 fails to connect with the DataView client, check the following:Check running processes (ps –ef) and check whether the dtv_dmn is running. (See the previous section for a description.)If there is no running dtv_dmn process, change directory:cd <InstallDir>/axalant/scriptsThen try to start the dtv_dmn process manually using dmn_start.Make sure that the RPC number for the process running on the machine matches the RPC number the client is using to connect to the server.Chapter 5Starting the FileServer This section describes how to install and start the Agile e6 FileServer.1. Log in as user edbserv.If this user does not already exist, you must create it.2. Copy the FileServer executable file to the home directory of edbserv.The executable file is located in:<InstallDir>/axalant/bin/<machine-type>/cd <InstallDir>/axalant/bin/<machine-type>cp fms* libepshr_cry.*~edbserv3. Add the directory where you copied the epshr_cry library to your Shared Library Path.You have to use the following environment variables on these Unix Systems:• AIX: LIBPATH• HPUX: SHLIB_PATH• Linux: LD_LIBRARY_PATH• Solaris: LD_LIBRARY_PATHUse this command to add the path:• If you are running in a c shell (csh) on Solaris:setenv LD_LIBRARY_PATH $LD_LIBRARY_PATH:<Path to the edbserv HomeDirectory>Example: setenv LD_LIBRARY_PATH $LD_LIBRARY_PATH:$HOME• If you are running in a k shell (ksh) on Solaris:set LD_LIBRARY_PATH=$LD_LIBRARY_PATH:<Path to the edbserv HomeDirectory>export LD_LIBRARY_PATH4. Start the FileServer:cdnohup ./fms_srv –verbose &The FileServer creates vaults and starts up in the background.5. Add startup of FileServer to your boot time start up scripts.See the example <InstallDir>/unsup/scripts/init/fmssrv.。
新华软件XDPS6.0仿真运行一、安装XDPS6.01、运行XDPS6.0文件夹中的setup.exe,一路按“next”装完。
建议不要改变安装路径,就用默认的d:\XDPS6.0,因为我们要用本厂的资料覆盖,所以路径不要变。
2、安装过程中有个选项,让选择下面4项是否安装。
z操作员站数据文件;z操作员站执行文件;z VDPU执行文件;z NTDPU执行文件;z CEDPU执行文件;z安装时钟卡驱动只安装第二项“操作员站执行文件”和第三项“VDPU执行文件”。
3、 重新启动电脑。
虽然安装程序没有要求重启,但首次安装还是重启一下要好,除非该电脑以前已经装过XDPS。
4、 将本厂的data文件夹全部复制到d:\XDPS6.0中;5、将D:\XDPS6.0\bin中的VDPU目录再复制两次,并分别改名为“1VDPU”、“2VDPU”、“3VDPU”,并分别将其中的Vdpu.exe也分别重命名为“1Vdpu.exe”、“2Vdpu.exe”、“3Vdpu.exe” ,为方便起见,可分别创建快捷方式并复制到桌面或开始菜单中。
6、 分别将D:\XDPS6.0\bin\1(or2or3)VDPU中的VDPU.cfg中修改:[NODE] NAME=M-VdpuNODE=1(or2or3)分别为1、2、3DPU的节点号SoftSwitcher=0DASSOE=0二、安装虚拟网卡: 在WINDOWS XP下运行setup安装完XDPS软件之后,单机运行软件需要一个固定的IP地址,为了不影响网卡的正常工作(一般网卡都设为自动获得IP地址),需另外安装一个“虚拟网卡”作为运行XDPS系统需要:1、 运行“控制面板”→“添加硬件”→选择:“是,我已经连接了此硬件(Y)”→“添加新的硬件设备”→“安装我手动从列表选择的硬件(高级)”→“网络适配器”→选择安装Microsoft Loopback Adapter。
2、 Microsoft Loopback Adapter安装完毕之后,在“控制面板”中选择“网络连接”→选择“Microsoft Loopback Adapter”→右键选择“属性”→双击“Internet协议(TCP/IP)”→“使用下面的IP地址”→在IP地址中键入“222.222.221.1”,子网掩码“255.255.255.0”3、寻找c:\windows\system32系统文件夹下的XDPS网络配置文件xnet.ini,修改网络设置项与Microsoft Loopback Adapter的设置一致:[IPAddress]BasePort=3300Net1=222.222.221.1Net2=Mask1=255.255.255.0Mask2=三、XDPS运行事项:1、先在“开始”菜单中或桌面上运行XDPS6.0虚拟控制器软件1VDPU(或2VDPU或2VDPU或全部运行)。