SD305C说明书V1.2.1_20130425
- 格式:pdf
- 大小:1.37 MB
- 文档页数:20

UTD7000C系列数字存储示波器用户手册序 言尊敬的用户:您好!感谢您选购优利德仪器,为了正确使用本产品,请在使用之前仔细阅读说明书,特别留意“安全注意事项”的部分。
如果您已经阅读完本说明书全文,建议您将说明书妥善的保管,以便在使用过程中进行查阅。
版权与声明版权信息优利德科技(中国)股份有限公司版权所有。
商标信息UNI-T是优利德科技(中国)股份有限公司[UNI-TREND TECHNOLOGY(CHINA)CO., LTD]的注册商标。
文档版本UTD7000C-20210730-REV.0声明●UNI-T 产品受中国或其他国家专利权的保护,包括已取得或正在申请的专利。
●本公司保留更改产品规格和价格的权利●UNI-T 保留所有权利。
许可软件产品由UNI-T 及其子公司或提供商所有,受国家版权法及国际条约规定的保护。
本文中的信息将取代所有以前出版的资料中的信息。
如果原购买者自购买该产品之日起三年内,将该产品出售或转让给第三方,则保修期应为自原购买者从UNI-T或授权的UNI-T分销商购买该产品之日起三年内。
探头及其他附件和保险丝等不受此保证的保护。
如果在适用的保修期内证明产品有缺陷,UNI-T可自行决定是修复有缺陷的产品且不收部件和人工费用,或用同等产品(由UNI-T决定)更换有缺陷的产品。
UNI-T作保修用途的部件、模块和更换产品可能是全新的,或者经修理具有相当于新产品的性能。
所有更换的部件、模块和产品将成为UNI-T的财产。
以下提到的“客户”是指据声明本保证所规定权利的个人或实体。
为获得本保证承诺的服务,“客户”必须在适用的保修期内向UNI-T通报缺陷,并为服务的履行做适当安排。
客户应负责将有缺陷的产品装箱并运送到UNI-T指定的维修中心,同时预付运费并提供原购买者的购买证明副本。
如果产品要运送到UNI-T维修中心所在国范围内的地点,UNI-T应支付向客户送返产品的费用。
如果产品送返到任何其他地点,客户应负责支付所有的运费、关税、税金及任何其他费用。

IM302111/2020REV04 POWERTEC® 205C, 255C, 305CSpare Parts – POWERTEC® 205C (1)Figure A: Machine Assembly - POWERTEC® 205C (2)Figure B: Machine Assembly - POWERTEC® 205C (4)Figure C: Wire Drive Assembly - POWERTEC® 205C (5)Miscellaneous Items (not shown in figure A, B, C) - POWERTEC® 205C (5)Spare Parts – POWERTEC® 255C & 305C (6)Figure D: Machine Assembly - POWERTEC® 255C & 305C (6)Figure E: Machine Assembly - POWERTEC® 255C & 305C (9)Figure F, G: Wire Drive Assembly – POWERTEC® 255C & 305C (11)Miscellaneous Items (not shown in figure D, E, F, G) (11)Electrical Schematic (12)CODE: 50234 (12)CODE: 50235 (13)CODE: 50236, 50238, 50240 (14)CODE: 50237, 50239, 50241 (15)WEEE (16)Lincoln Electric Bester Sp. z o.o.ul. Jana III Sobieskiego 19A, 58-260 Bielawa, Polandwww.lincolnelectric.euSpare Parts – POWERTEC® 205CSP50234/50235 REV02Figure A: Machine Assembly - POWERTEC® 205CItem Description Part Number QTY 1 2 3 4 5 6 7 1 BASE R-3019-121-2/08R 1 X XWHEELS 1029-660-201R 2 X X2 REARWHEELS 1029-660-101R 2 X X3 FRONTT1 R-4034-096-1R 1 X -4 TRANSFORMERT1 R-4034-080-1R 1 - X TRANSFORMERSUPPORT R-1019-204-1/08R 1 X X5 FAN6 FAN 0873-100-031R 1 X XL1 R-4034-089-1R 1 X X7 CHOKER1 R-0010-308-1R 1 X X8 RESISTOR9 RECTIFIERV1 R-0010-309-1R 1 X X THERMAL SENSOR 80°C1115-769-003R 1 X XTHERMAL SENSOR 115°C1115-769-012R 1 X X10 REARPANEL R-1012-202-4/08R 1 X XCONNECTION) 2719-107-733R 1 X X(GAS11 STICKERSOLENOID 0972-423-005R 1 X X12 GASPLUG 1361-599-058R 1 X X13 HOLEHEIGHT) R-7040-228-3R 1 X XCYLINDER14 STICKER(GASLEAD R-5041-164-1R 1 X X15 POWER16 SHELF R-3019-123-3/08R 1 X XBUSH 1373-111-331R 2 X XCABLE17 RUBBERBUSH 1373-182-002R 3 X X18 RUBBERCABLE19 DIVIDER R-3019-201-1/08R 1 X XSTANDARD 0744-000-192R 1 X X20 REELHUBNUT B11035-1 1 X X21 PLASIC22 STICKER R-0010-276-1R 1 X XSOCKET 1158-632-032R 2 X X23 FUSECAP 1158-632-033R 2 X X24 FUSEF1 1158-660-010R 1 X X25 FUSEF2 1158-660-008R 1 X X26 FUSE27 SHIELD R-1019-197-1/08R 1 X X28 SHIELD R-1019-186-1/08R 1 X X29 STICKER R-0010-280-1R 1 X X30 KNOBS 9ET13639-3R 2 X XFigure B: Machine Assembly - POWERTEC® 205CItem Description Part Number QTY 1 2 3 4 5 6 7 RC 0874-400-011R 1 X X31 FILTER32 CLAMP 1361-599-398R 1 X X33 CABLERELEIF 1361-599-399R 1 X XT2 C-4244-374-2R 1 X X34 TRANSFORMERBOARD Y024-4R 1 X X35 P.C.36 CONTACTORK1 1115-212-207R 1 X -K1 1115-212-220R 1 - X CONTACTORX13 1131-990-005R 6 X -37 TERMINALBLOCKX13 1131-990-005R 9 - XX12,BLOCKTERMINALX11 1361-599-255R 1 - X38 TERMINALBLOCK39 PLATE D-2731-731-1R 1 - X40 STICKER(230/400V) R-0010-221-1R 1 - XPANEL R-3019-120-4/08R 1 X X41 FRONT42 SHIELD R-1019-221-1/02R 1 X XPRODUCT) R-0010-266-1R 1 X X(NAME43 STICKERSLEEVE 1361-599-708R 1 X X44 EUROPANEL) R-0010-263-1R 1 X X(FRONT45 STICKERX2,X3 C-2986-001-2R 2 X X46 SOCKETS47 STICKER 2719-107-053R 1 X XS1 1115-260-168R 1 X X48 SWITCHS3 1115-270-005R 1 X X49 SWITCHSHIELD 1115-299-073R 1 X XFLAME50 BLACKH1 0917-421-024R 1 X X51 LAMP52 POTENTIOMETERR13 1158-113-304R 3 X XR11,R12,53 KNOB 9ET10491R 1 X XS11 1115-280-005R 1 X X54 SWITCH55 SWITCHS12 1115-280-004R 1 X XSIDEPANEL R-3019-122-1/02R 1 X X56 RIGHT57 HINGLES D-2541-004-2/02R 2 X XDOOR R-1019-190-1R 1 X X58 WIREDRIVE59 LOCKS 0654-610-004R 2 X X60 LEFTPANEL R-1019-189-1R 1 X XSIDEX -1(WIRINGDIAGRAM) R-0010-264-1R61 STICKER- X1DIAGRAM) R-0010-265-1RSTICKER(WIRING62 COVER R-1012-209-2/02R 1 X X(WARNING) 2719-107-728R 1 X X63 STICKERFigure C: Wire Drive Assembly - POWERTEC 205CItem Description Part Number QTY 1 2 3 4 5 6 7 ASSEMBLY 0744-000-160R 1 X X WIREDRIVEPLATE 0744-000-219R 1 X X64 FEEDGUIDE 0744-000-224R 1 X X65 INLET66 ADAPTER 0744-000-227R 1 X X67 FIXINGCAP 0744-000-216R 1 X XCOVER 0744-000-218R 1 X X68 METAL69 PRESSURECOMPL. 0744-000-221R 1 X XARMPRESSUREARM 0744-000-220R 1 X X70 SPRINGCOMPL. 0744-000-223R 1 X XARM71 FIXING72 MOTOR 0744-000-229R 1 X XKEY 0646-231-102R 1 X X73 WOODROF74 EUROCOMPLETE R-8040-042-2R 1 X XSOCKETGUIDE R-2010-006-1R 1 X X75 OUTLET76 SLEEVES 1361-599-564R 2 X X77 SLEEVES 1361-599-565R 2 X X78 SLEEVES 1361-599-720R 2 X X79 STICKER 2719-107-732R 1 X XMiscellaneous Items (not shown in figure A, B, C) - POWERTEC® 205CItem Description Part Number QTY 1 2 3 4 5 6 7 (PRIMARY) R-5041-165-1R 1 X -80 WIRINGHARNESS(PRIMARY) R-5041-165-2R 1 - XHARNESS81 WIRING(SECONDARY) R-5041-166-1R 1 X XHARNESS82 WIRINGHARNESS R-5041-175-1R 1 X X83 WIRINGLEAD R-5041-101-1R 1 X X84 PESpare Parts – POWERTEC ® 255C & 305CSP50236/50237/50238/50239/50240/50241 REV02Figure D: Machine Assembly - POWERTEC ® 255C & 305CItem Description Part NumberQTY12345671 BASE R-3019-179-1/08R 1 X X X X X X2 REAR WHEELS 1029-660-201R 2 X X X X X X3 FRONT WHEELS 1029-660-101R 2 X X X X X X4 TRANSFORMER T1 R-4034-082-1R 1 X X - - - -TRANSFORMER T1 R-4034-083-1R 1 - - X X X X5 FAN SUPPORT R-1019-201-1/08R 1 X X - - - -FAN SUPPORT R-3019-183-1/08R 1 - - X X X X6 FAN 0873-100-031R 1 X X - - - -FAN R-8040-255-1R 1 - - X X X X7 RECTIFIER V1 R-0010-294-1R 1X X - - - -RECTIFIER V1 R-0010-295-1R 1 - - X X X X THERMAL SENSOR 80°C 1115-769-003R 1 X X X X X X THERMAL SENSOR 115°C 1115-769-012R 1 X X X X X X 8 CHOKE L1 R-4034-089-1R 1 X X X X X X THERMAL SENSOR 65°C 1115-769-053R 1 X X X X X X THERMAL SENSOR 140°C 1115-769-013R 1 X X X X X X 9 RESISTOR R1 R-0010-116-3R 1 X X X X X X 10 STICKER 2719-107-769R 1 X X X X X X 11 SHIELD R-1019-220-1/08R 1 X X X X X X 12 SHELFR-3019-181-1/08R1X X X X X X 13 RUBBER CABLE BUSH 1373-111-331R 1 X X X X X X 14 RUBBER CABLE BUSH 1373-182-002R 1 X X X X X X 15 DIVIDER R-3019-182-1/08R 1 X X X X X X 16 SHIELD R-1019-202-1/08R 1 X X X X X X 17 REEL HUB STANDARD 0744-000-192R 1 X X X X X X 18 PLASIC NUT B11035-1 1X X X X X X 19 FUSE SOCKET 1158-632-032R 2 X X X X X X 20 FUSE CAP1158-632-033R2 X X X X X X 21 FUSE F1 1158-660-010R 1 X X X X X X 22 FUSE F2 1158-660-008R 1 X X X X X X 23 STICKER F1 2719-107-193R 1 X X X X X X 24 STICKER F22719-107-111R 1 X X X X X X 25 SHIELDR-1019-186-1/08R 1 X X X X X X 26 STICKER R-0010-280-1R 1 X X X X X X 27 SHIELD R-1019-203-1/08R 1 X X X X X X 28 KNOBS9ET13639-3R 2 X X X X X X 29 SWITCH S11 1115-280-005R 1 X X X X X X 30 SWITCH S12 1115-280-004R 1 X X X X X X 31 REAR PANEL R-1019-198-1/08R 1 X X X X X X 32 BRACKETS R-1019-153-1/08R 2 X X X X X X 33 COVER R-1019-199-1/02R 1 X X X X X X 34 STICKER (WARNING) 2719-107-728R 1 X X X X X X 35 STICKER (LIFTING) R-0010-279-1R 1 X X X X X X 36 EYE BOLTS 0653-313-011R 2 X X X X X X 37 LEFT SIDE PANEL R-1019-216-1R 1 X X X X X X 38 STICKER (WIRING DIAGRAM) R-0010-298-1R 1 X - X - X - STICKER (WIRING DIAGRAM) R-0010-299-1R 1 - X - X - X 39 RIGHT SIDE PANEL R-3019-184-1/02R 1 X X X X X X 40 HINGLES D-3574-007-1/33R 2 X X X X X X 41 WIRE DRIVE DOOR R-1019-217-1R 1 X X X X X X 42 LOCKS0654-610-004R2 X X X X X XFigure E: Machine Assembly - POWERTEC ® 255C & 305CItem Description Part NumberQTY123456743 FRONT PANEL R-3019-180-1/08R 1 X X X X X X 44 STICKER (FRONT PANEL) R-0010-254-1R 1 X X X X X X 45 LAMP H1 0917-421-024R 1 X X X X X X 46 SWITCH S3 1115-270-019R 1 X X X X X X 47 BLACK FLAME SHIELD 1115-299-073R 1 X X X X X X 48 SWITCH S1 1115-260-167R 1 X X X X X X 49 SWITCH S2 1115-260-166R 1 X X X X X X 50 POTENTIOMETER R11,R12, R13 1158-113-304R 3 X X X X X X 51 KNOB 9ET10491R 1 X X X X X X 52 SHIELD R-1019-205-1/02R 1 X X X X X X53 STICKER (NAME PRODUCT) R-0010-255-1R 1 X X - - - -STICKER (NAME PRODUCT) R-0010-256-1R 1 - - X X X X 54 EURO SLEEVE 1361-599-708R 1 X X X X X X 55 SOCKETS X2, X3 C-2986-001-2R 2 X X X X X X 56 FILTER RC 0874-400-011R 1 X X X X X X 57 CABLE RELEIF R-0010-258-1R 1 X X X X X X 58 CLAMP 1361-599-633R 1 X X X X X X 59 HOLE PLUG 1361-599-058R 1 X X X X X X 60 GAS SOLENOID 0972-423-005R 1 X X X X X X 61 TRANSFORMER T2 C-4244-374-2R 1 X X X X X X 62 CONTACTOR K1 1115-212-220R 1 X - - - - - CONTACTOR K1 1115-212-219R 1 - X X - X - CONTACTOR K1 1115-212-210R 1 - - - X - X 63 P.C. BOARD Y024-4R 1 X X X X X X 64 TERMINAL BLOCK X13 1131-990-005R 6 X - X - X - TERMINAL BLOCK X12, X13 1131-990-005R 9 - X - X - X65 STICKER (230/400V) R-0010-221-1R 1 - X - X - X66 PLATE D-2731-731-1R 1 - X - X - X 67 TERMINAL BLOCK X11 1361-599-255R 1 - X - X - X 68 CAPACITOR C1 1158-121-045R 1 - - X X X X 69 POWER LEAD D-5578-171-1R 1 X - X - X - POWER LEAD D-5578-171-2R 2 - X - X - X70 WORK LEADK14011-1 1 X X - - - - WORK LEADK14012-1 1 - - X X X XFigure F, G: Wire Drive Assembly – POWERTEC ® 255C & 305CItem Description Part NumberQTY1234567 WIRE DRIVE ASSEMBLY 0744-000-160R1 X X X X - - 71 FEED PLATE 0744-000-219R 1 X X X X - - 72 INLET GUIDE 0744-000-224R 1 X X X X - - 73 ADAPTER 0744-000-227R 1 X X X X - - 74 FIXING CAP 0744-000-216R 1 X X X X - - 75 METAL COVER 0744-000-218R 1 X X X X - - 76 PRESSURE ARM COMPL. 0744-000-221R 1 X X X X - - 77 SPRING PRESSURE ARM 0744-000-220R 1 X X X X - - 78 FIXING ARM COMPL.0744-000-223R1X X X X --WIRE DRIVE ASSEMBLY 0744-000-241R 1 - - - - X X 79 FEED PLATE 0646-233-002R 1 - - - - X X 80 INTERMEDIATE GUIDE 0646-233-023R 1 - - - - X X 81 INLET GUIDE 0646-233-025R 1 - - - - X X 82 LEFT PRESSURE ARM COMPLETE 0646-233-007R 1 - - - - X X 83 RIGHT PRESSURE ARM COMPLETE 0646-233-005R 1 - - - - X X 84 FIXING ARM COMPL. 0646-233-015R 2 - - - - X X 85 SPRING PRESSURE ARM 0646-233-013R 2 - - - - X X 86 AXIS PRESSURE ARM 0646-233-003R 2 - - - - X X 87 AXES OF DRIVE ROLL 0646-233-020R 2 - - - - X X 88 GEAR WHEEL MOTOR 0646-233-028R 1 - - - - X X 89 GEAR WHEELS ROOL 0646-231-090R 2 - - - - X X 90 COVER 0646-233-027R 1 - - - - X X 91 FIXING CAPS 0744-000-190R 2 - - - - X X92 MOTOR 0744-000-229R 1 X X X X - - MOTOR 1111-722-046R 1 - - - - X X 93 WOODROF KEY 0646-231-102R 1 X X X X X X 94 EURO SOCKET COMPLETE C-2985-006-2R 1 X X X X X X 95 OUTLET GUIDE D-1829-066-4R 1 X X X X X X 96 SLEEVES 1361-599-720R4 X X X X X X 97 SLEEVES 1361-599-565R 2 X X X X - - SLEEVESD-1869-033-3R 2 - - - - X X 98 STICKER2719-107-732R1 X X X X X XMiscellaneous Items (not shown in figure D, E, F, G)Item DescriptionPart Number QTY123456799 WIRING HARNESS (PRIMARY) R-5041-176-1R 1 - X - X - X100 WIRING HARNESS (PRIMARY) R-5041-176-2R 1 X - X - X - 101 WIRING HARNESS (SECONDARY) R-5041-177-1R 1 X X X X X X 102 WIRING HARNESS R-5041-185-1R 1 - - X X X X 103 WIRING HARNESSR-5041-186-1R1 X X - - - -Electrical SchematicRecycleSTF eA lC uB r a s sB o a r d sP l a s t i c sL i q u i d C r i s t a lE x t e r n a l E l e c t r i c C a b l e sC a p a c i t o r sDescription Ref.BASE 1 X WHEELS 2, 3 X X TRANSFORMERS 4, 59 X X X SUPPORT 5 X FAN 6 X X RECTIFIER 7 X CHOKE 8 X X RESISTOR 9 XSHIELD 10, 15, 21,25, 47XSHELF 11 X RUBBER CABLE BUSH 12, 13 X DIVIDER 14 X REEL HUB 16 X FUSE SOCKET 17 X FUSE CAP 18 X FUSE 19, 20 X SIDE PANEL 26, 31, 33 XSWITCHES 22, 23, 41,42, 43X X XKNOBS 24, 46 X LOCKS 34 X HINGLES 32 X REAR PANEL 27 X BRACKETS 28 X COVER 29 X EYE BOLTS 30 X POTENCIOMETERS 39 X GAS SOLENOID 58 X X X FRONT PANEL 40 X BLACK FLAME SHIELD 44 X WIRE DRIVE ASSEMBLY 35 X X X EURO SOCKET 36 X SLEEVES 37, 38 X LAMP 45 X X EURO SLEEVE 48 X SOCKETS 49 X X X P.C. BOARD 61 X TERMINAL BLOCK 50, 52 X X PLATE 51 X CAPACITOR 53 X FILTER RC 54 X X XCABLE RELEIF55 X CLAMP56 X HOLE PLUG57 X CONTACTOR 60 X X X POWER LEAD 62 X WORK LEAD 63 X。

D3877-US-Rev A May 27, 2010John Deere455/1520/1530Grain DrillScale SystemInstructionsAndRepair PartsFt. Atkinson, Wisconsin USAPanningen, The Netherlands John Deere 750/1560/1590-15 ft Grain Drill D3859-US-Rev A TABLE OF CONTENTSINTRODUCTION ............................................................................................................................................................................................... 1 Charging Battery and Welding ....................................................................................................................................................................... 1 SCALE BRACKET AND LOAD CELL MOUNTING INSTALLATION ................................................................................................................. 2 John Deere Grain Drill Scale Kit .................................................................................................................................................................... 3 Clutch Arm Updates ....................................................................................................................................................................................... 4 JUNCTION BOX MOUNTING ............................................................................................................................................................................ 6 Connect Load Cell and J-Box Cable .............................................................................................................................................................. 6 Installing Wires into Terminal Block ............................................................................................................................................................... 6 INDICATOR MOUNTING ................................................................................................................................................................................... 7 Power Connection: ........................................................................................................................................................................................ 7 Load Cell Connection:.................................................................................................................................................................................... 7 TROUBLE SHOOTING ...................................................................................................................................................................................... 8 How to Check the Drill Scale After Installation ............................................................................................................................................... 8 REPAIR PARTS ................................................................................................................................................................................................ 9 Kit – Scale System – JD455 .......................................................................................................................................................................... 9 Kit – Scale System – JD1520/JD1530 ......................................................................................................................................................... 10 Indicator Swivel Mount ................................................................................................................................................................................. 11 LICENSE AGREEMENT . (12)All rights reserved. Reproduction of any part of this manual in any form whatsoever without Digi-Star’s express written permission is forbidden. The contents of this manual are subject to change without notice. All efforts have been made to assure the accuracy of the contents of this manual. However, should any errors be detected, Digi-Star would greatly appreciate being informed of them. The above notwithstanding, Digi-Star can assume no responsibility for errors in this manual or their consequence. © Copyright! 2008 Digi-Star, Fort Atkinson (U.S.A.).D3859-US-Rev A John Deere 750/1560/1590-15 ft Grain Drill 1INTRODUCTIONCongratulations on the purchase of your new Digi-Star Grain Drill Scale System. This scale system is specifically designed to weigh the seed hopper on a John Deere 455/1520/1530 Grain Drill. The scale kit can be used to record and monitor seed weight going into or out of the seed hopper. This scale system is covered by the following US patents: 6732667, 7059258 and 7273017. The single-use license is included with this document (see page 12). This SAFETY ALERT SYMBOL indicates important safety messages in the manual. When you see this symbol, be alert to the possibility of PERSONAL INJURY and carefully read the message that follows.NEVER OPERATE WITHOUT ALL COVERS, SHIELDS AND GUARDS IN PLACE. KEEP HANDS, FEET AND CLOTHING AWAY FROM MOVING PARTS. FAILURE TO HEED MAY RESULT INSERIOUS PERSONAL INJURY OR DEATH. Some covers and guards have been removed for illustrative/photographic purposes only in this manual. For information on ordering repair parts, refer to Parts Section in this book. This supersedes all previous published instructions.Important!Charging Battery and WeldingDisconnect all cables from the weighing indicator before charging the battery or welding on the machine. Ifcables are left connected, the weighing indicator and connected load cells could be damaged.Important: Do not weld near indicator, load cells or cables; remove from area to be welded. Place ground close to area to be welded to prevent current from passing through electronic parts.Scale Indicator Remote Indicator OptionalJ-Box2 John Deere 750/1560/1590-15 ft Grain Drill D3859-US-Rev A SCALE BRACKET AND LOAD CELL MOUNTING INSTALLATIONThe John Deere 455/1520/1530 Grain Drill Scale Kit consists of mounting four load cells, J-Box and scale indicator to support the seed hopper. 1. On the right side, as you are facing forward looking at the tractor, loosen the four 7/16 bolts that hold the seed bin to the frame.2. On the left side, remove the 7/16 bolts that hold the seed bin to the frame.3. Use a jack to lift the left bin side up; use a 4” x 4” or 4” x 6” board. Support the 4” x 4” or 4” x 6” board with the walkway and the front frame. Put your jack between the board and the bottom of the seed bin.It is recommended the hopper be supported by two methods when installing the load cells and brackets. In addition to lifting the hopper with a chain or nylon strap, the hopper should be supported in the middle with a hydraulic jack or stands.Important: The lifting chains, bucket attachments, loader/skid steer or winch must be capable of lifting and controlling 1000 lbs.4. Jack up the bin 5”.5. Install the bottom bracket with 7/16 x 1.5” bolt and 7/16 x 1.5” socket head cap screws. IMPORTANT : The 7/16 socket head cap screws are mounted in the countersink holes in the lower bottom bracket. Leave the bolts loose at this time.6. Install the top bracket with 7/16 x 1.5” bolt and 7/16 x 1.5 socket head cap screw. IMPORTANT: The 7/16 x 1.5” socket head cap screws are mounted in the countersink holes in the upper bracket. Tighten the 7/16 tapered bolts first and then the 7/16 standard bolts.D3859-US-Rev A John Deere 750/1560/1590-15 ft Grain Drill3John Deere Grain Drill Scale Kit4 John Deere 750/1560/1590-15 ft Grain Drill D3859-US-Rev A 7. Slide the load cells into the sockets on the bottom bracket. Slide the load cells all the way into the socket. Stop when the load cell cord is up against the socket. (Load cells with 11 ft cable are in the rear.) IMPORTANT : Decal must point DOWNWARD . See Detail A.8. Lower the seed hopper down slowly and be careful not to cut the load cell cord next to the socket on the bottom bracket. Lower the hopper until the top bracket socket lines up with the bottom load cells. Slide the load cells into the top socket and install 3/8 clevis pin and cotter pin.9. Let the jack down. Do not tighten the bottom bracket bolts at this time.10. Repeat steps 2 – 9 for the right side. IMPORTANT : For JD455 grain drill, disconnect the drive shaft bearing holder, drive chain and clutch arm.11. When both sides are completed, tighten the bolts on the bottom bracket. Tighten the tapered bolts first and then the standard hex head bolts.Clutch Arm UpdatesTo make room for the load cells, the hopper was raised upward by approximately 4”. As a result, the drive lineclutch must be modified. There are two types of updates depending on your grain drill series.D3859-US-Rev A John Deere 750/1560/1590-15 ft Grain Drill 5JD455 Clutch Arm Updates1. Mount the drive shaft bearing holder provided with the kit. Weld the bottom bracket to the drill frame when the shaft looks straight.2. Install the chain tightener provided with the kit (you may need to shorten the chain).3. Install the new clutch drive arm. Drill a hole in the arm so the clutch is disengaged when the drill is up and engaged when the drill is down. The length extended on the clutch arm is the same distance that the seed bin was raised, because of the scale system.JD1520/1530 Clutch Arm Updates1. Switch space (number 1) with gear (number 2).2. Remove bolts on end bearing holder and slide main shaft (number 3) away from tank.3. Remove sprocket and role pin, then slide the bearing on first.4. Install bearing holder close to the inside of the sprocket.5. Line up the chain so the sprocketswill be straightwith each other. Make sure theshaft does not touch the tank. 6. A hole will have to be drilled in the gusset on the frame to get the U-bolt to go in (number 4).6 John Deere 750/1560/1590-15 ft Grain Drill D3859-US-Rev A JUNCTION BOX MOUNTINGThe junction box is water resistant, not water-proof. It should be mounted to avoid submersion during wet weather and to avoid physical abuse. The junction box can be mounted on the front or rear of the drill, planter or seeder. All load cell cables must reach the J-Box. Install by removing the double sided tape backing and apply to cleaned surface.Connect Load Cell and J-Box Cable 1. Route front and rear load cell cables to J-box location. Make sure they are not bound or pinched. Cable tie (customer provided) load cell cables in place. 2. Insert load cell and J-box cables through each of the water-tight strain-reliefs. 3. Remove each terminal block from the J-box. 4. Connect wires of the same color to the same terminal block as shown above. See instructions below. 5. Install terminal block into the J-box as shown (location not important). 6. Tighten nuts on the water-tight strain-reliefs. 7. Assure that gasket is properly installed in the cover. 8. Attach cover using 4 screws (provided). Installing Wires into Terminal Block 1. Open levers 90º to locked position. 2. Insert individual wires into terminal. 3. Close lever. 4. Tug wire to assure solid connection. Note: Wire strip length is 7/16” (11mm). 406232 J-Box Lever Nut 4Pt (Planter) 141837 Cable - 30Ft J-Box 406074 Cable - 45Ft J-Box 403335 Cable - Power 17Ft 2-Wire 406073 Cable - Power 36Ft 2-Wire 406072 Cable - Power 6Ft 2-Wire 824316 Cable - 15Ft-J-Box 145096 Cable - 70Ft-J-Box 406276 Cable – Power 65Ft 2-WireStrain ReliefD3859-US-Rev A John Deere 750/1560/1590-15 ft Grain Drill 7INDICATOR MOUNTINGThe scale indicator can be mounted in the tractor cab or on the drill with swivel mounting pack (406081). Two cables must be connected to the indicator bottom panel, J-Box and power cables. Refer to Indicator Manual D3831-US for details of indicator mounting options and connection of power cord. 1. Bolt the readout in the cab with the bracket, or mount the bracket in the front of the lift cylinder. 2. Install power cord to a 12-volt negative ground battery. 3. Route J-box cable to indicator and install to indicator bottom panel. 4. Program indicator with set-up #145015 and calibration #14000 (see Indicator Manual)Power Connection:The power cable should be connected directly to a vehicle battery or regulated power supply. The scale end of the power cable is attached to the J901 connector located on the bottom panel of the indicator. Connect the RED wire from the power cable to +12 VDC and the BLACK wire to GROUND. The indicator is fused internally at 4 amps. Power Cable Connections: Wire color Wire Function Red Battery (+12 VDC) Black GROUNDLoad Cell Connection:The indicator is designed to operate with strain gage load cells. The indicator will normally be supplied with a “J-BOX” cable going between the scale and the load cell junction box. Load Cell Wire Digi-StarFunction1RED+EX2GREEN-SIG3WHITE +SIG 4 BLACK -EX 5 CLEAR SHIELDTRACTOR CAB MOUNTING INDICATOR MOUNTINGS DRILL MOUNTING8 John Deere 750/1560/1590-15 ft Grain Drill D3859-US-Rev A TROUBLE SHOOTINGHow to Check the Drill Scale After InstallationFor the first test, lift the drill all the way up, to a level area. Put 200-250 pounds of weight on the right side, then compare it to the left. Both sides should be within four to six pounds of each other. • If the weight is not within the four to six pound range, the drive chain might be too tight or the clutch is binding. Loosen the chain and check the weight again. • If loosening the chain does not fix the problem, you must remove the clutch arm, and then check the weight on both sides. NOTE : The clutch arm needs to be on the back of the clutch to work properly. The second test is to lift the drill to a level area and zero the scale. Lift the drill up and down two to three times, checking to see if the scale zeros out. Each time the scale is in the up position, it should be within four to six pounds. If not, remove the clutch arm and repeat the test. If this solves the weigh problem, the clutch is binding or it needs lubrication. NOTE : The clutch arm needs to be on the back of the clutch to work properly. If further assistance is necessary, please call Digi-Star, LLC at 920-563-9700.REPAIR PARTSKit – Scale System – JD455KEY QTY. PARTNO. DESCRIPTION KEY QTY. PARTNO. DESCRIPTION1 2 406403 Weld-Bottom LC Mnt 9 8 406414 SCR-7/16-14 x 1.5 HHCS Grd 52 2 406406 Weld–Top LC Mnt 10 2 406401 SCR-3/8-16 x 1.5 HHCS ZPGrd 53 1 406397 Angle–Brg Holder Bottom 11 2 406400 Wash-3/8 Flat Type A Wide ZP4 1 406396 Plate-Bearing Holder Top 12 8 406416 Nut-7/16-14 Ser Flange ZP5 1 406402 Bar-Clutch Arm 13 2 404705 Nut-3/8-16 Ser Flange ZP6 4 405897 Pin-Cotter 5/32 x 1.0 ZP 14 2 400373 Cell-1.5 DB-11 Ft7 4 405860 Pin-Clevis 3/8 x 2.25 ZP 15 2 400400 Cell-1.5 DB-16 Ft8 8 406415 SCR-7/16-14 x 1.5 FSHBlkKit – Scale System – JD1520/JD1530KEYQTY.PART NO.DESCRIPTION KEY QTY.PART NO.DESCRIPTION1 2 406403 Weld-Bottom LC Mnt (JD455)9 8 406414 SCR-7/16-14 x 1.5 HHCS Grd 5 2 2 406406 Weld–Top LC Mnt (JD455)10 2 406401 SCR-3/8-16 x 1.5 HHCS ZPGrd 53 1 406396 Plate-Bearing Holder Top 11 2 406400 Wash-3/8 Flat Type A Wide ZP4 1 406489 Brkt-Brg Suppt (JD1520/1530)12 8 406416 Nut-7/16-14 Ser Flange ZP 5 1 406490 Bolt-U 1/2-13 x 5-625W x 8.375L Gr5 ZP13 2 406085 Nut-1/2-13 Ser Flange ZP 6 4 405897 Pin-Cotter 5/32 x 1.0 ZP 14 2 404705 Nut-3/8-16 Ser Flange ZP 7 4 405860 Pin-Clevis 3/8 x 2.25 ZP 15 2 400373 Cell-1.5 DB-11 Ft 88406415SCR-7/16-14 x 1.5 FSH Blk162400400 Cell-1.5 DB-16 FtIndicator Swivel Mount406081KEYQTY.PART NO.DESCRIPTION1 1 403980 Brkt – Robo Mtg2 2 406086 Brkt – Swivel Cast (JD H161618)3 2 406087 Gasket – 1.813OD x 1.218 ID x .313 WID4 2 400036Scr – 1/4-20 x 3/4 HHCS ZP5 2 400038Washer – Lock 1/4 ZP6 2 400035Nut – 1/4-20 ZP7 2405989 Scr – 3/8-16 x 3.0 HHCS ZP Grd 5 8 2 404292 Nut – 3/8-16 Nyloc ZP92405612GT400 Indicator (Not included in kit 406081)406385KEYQTY.PART NO.DESCRIPTION1 1 404230 Ram Suction Cup with Twist Lock2 2 403180 Assembly – 1” Ram Mount32403779 Scr - #10 x 5/8 PHSTS 48-2 Blk ZP321LICENSE AGREEMENTIMPORTANT NOTICE: Acceptance and use of the enclosed electronic scale products (hereinafter referred to as “Purchased Product”) constitutes your agreement to the following terms and conditions. Please carefully read the following terms and conditions before using or reselling the Purchased Product.1.Limited License. Digi-Star, LLC, a Wisconsin limited liability company(“Owner”) is the owner of the following U.S. Patents related to grain drills: 6,732,667, 7,059,258, 7,273,017, 7,357,087, 7,448,335, 7,523,710 and any other patents which result from continuation applications thereof (“Patents”). Owner hereby grants to the customer (“Customer”) a non-exclusive, non-transferable, revocable, limited license to use the technology described in the Patents to use the Purchased Product to assemble a seed planter product covered by the Patents (“Licensed Product”), and to sell and offer for sale one (1) unit of the Licensed Product in accordance with the terms and conditions set forth herein. Alternatively, Customer may resell the Purchased Product to another entity for the purpose of that entity assembling one (1) unit ofa Licensed Product under a permitted sublicense from the Customerwith the same terms as this Agreement. If Customer would like to assemble, use, sell or offer for sale more than one (1) Licensed Product, or resell more than one (1) Purchased Product, Customer understands and agrees that it must purchase another Purchased Product from Owner or acquire a separate license by requesting and purchasing another unit of the same SKU number that resulted in this purchase.2.Acceptance of Terms and Conditions. Customer warrants that it has theauthority to enter into this binding agreement. If Customer does not accept the terms and conditions, Customer shall not use the Purchased Product. Customer understands and agrees that if it uses the Purchased Product as permitted herein, it will be deemed to have accepted these terms and conditions and they shall become a binding agreement.3.Limitations on Use. Customer agrees that it will use the LicensedProduct only as expressly authorized in this Agreement, and that any use not expressly authorized in this Agreement is prohibited. Customer agrees that it will not: (i) loan, rent, lease, assign, sublicense, distribute or otherwise transfer its rights under this Agreement to a third party, other than to resell the Purchased Product to another entity for the purpose of that entity assembling one unit of a Licensed Product; (ii) copy or reproduce the Licensed Product; or (iii) grant any sublicenses other than to an end user of the Licensed Product, or to another entity for the purpose of that entity assembling one unit of a Licensed Product.Customer agrees to use reasonable efforts to prevent any unauthorized use or copying of the Licensed Product and will notify Owner immediately upon learning of any such unauthorized use or copying.Customer’s obligations under this section shall survive any termination of this Agreement or the license granted hereunder. Any unauthorized use of the Licensed Product will result in, among other things, the immediate termination of this license.4.Ownership of Proprietary Rights. Customer acknowledges that theLicensed Product is covered intellectual and/or proprietary rights, and that all such intellectual and proprietary rights are owned by Owner.Customer hereby acknowledges that it has no rights in the foregoing except as expressly granted herein.5.NO WARRANTY. Customer agrees to fully test and evaluatethe Purchased Product and Customer acknowledges and agrees that Owner will not assume any product liability or any otherliability for the Purchased Product or the Licensed Product. The Purchased Product is furnished to Customer “AS IS.” Except as otherwise provided by separate documentation, OWNER MAKES NO WARRANTIES, EITHER EXPRESS OR IMPLIED, WITH RESPECT TO THE PURCHASED PRODUCT. Customer agrees that Owner shall have no liability resulting from Customer’s use of the Purchased Product for any indirect damages including consequential, incidental or special damages for loss of profit, good will or otherwise. Customer shall indemnify and hold Owner harmless from any and all losses, expenses, damages, costs or expenses of any kind, including but not limited to reasonable attorneys’ fees, incurred by Owner resulting from Customer’s use of the Purchased Product. NO ORAL OR WRITTEN STATEMENTS MADE BY OWNER OR ITS EMPLOYEES INCLUDING BUT NOT LIMITED TO STATEMENTS REGARDING CAPACITY, SUITABILITY FOR USE, OR PERFORMANCE OF THE PURCHASED PRODUCT SHALL BE DEEMED A WARRANTY OR REPRESENTATION BY OWNER FOR ANY PURPOSE NOR GIVE RISE TO ANY LIABILITY OR OBLIGATION OF OWNER.6.Remedies for Violations. Owner reserves the right to seek allremedies available at law and in equity for violations of this Agreement, including but not limited to the right to recover the Licensed Product.7.Fees. In consideration for the rights granted under thisAgreement, Customer has paid a license fee that was included in the amount invoiced to the Customer for the sale of the Purchased Product.8.Entire Agreement. Except as expressly stated herein to thecontrary, this Agreement constitutes the entire agreement between the parties regarding the subject matter hereof, and no verbal or written prior statements or representations of any sort made by any party shall be effective or valid for any purpose whatsoever. This Agreement may be amended only upon the mutual consent of all parties in writing.9.Severability. If any provision of this Agreement shall be held tobe invalid, illegal or unenforceable, the validity, legality and enforceability of the remaining provisions shall not in any way be affected or impaired thereby. The failure of any party to enforce any provision of this Agreement shall not be considereda waiver thereof, nor shall such failure prevent the futureenforcement of any such provision.erning Law. This Agreement and the relationship betweenthe parties shall be governed in all respects by the laws of the State of Wisconsin and the United States of America. The parties consent to the jurisdiction and venue of the Wisconsin and United States courts located in Wisconsin for resolution of any dispute under to this Agreement.Use or sale of the Licensed Product or of Purchased Product shall bind Customer to all terms and conditions herein without the necessity of signatures on this Agreement.。


Sun StorEdge 3000 系列安装、操作和维护手册Sun StorEdge 3510 FC 阵列Sun Microsystems, Inc.4150 Network CircleSanta Clara, CA 95054 U.S.A.650-960-1300部件号 817-2760-102003 年 3 月,修订版 A请将对本文档的意见发送到:*******************版权所有 © 2002-2003 Dot Hill Systems Corporation, 6305 El Camino Real, Carlsbad, California 92009, USA.保留所有权利。
Sun Microsystems, Inc. 和 Dot Hill Corporation 可能拥有与本产品或文档中涉及的技术相关的知识产权。
具体来说(且不仅限于此),这些知识产权包括 /patents 所列出的美国专利中的一项或多项,以及在美国或其他国家(地区)申请的一项或多项补充专利或未决专利。
本产品或文档按照限制其使用、复制、分发和反编译的许可证进行分发。
本产品或文档的任何部分,未经 Sun 及其许可方(如果有)的事先书面授权,不得以任何形式或任何手段加以复制。
第三方软件由 Sun 供应商提供版权及许可授权。
本产品的某些部分来源于 Berkeley BSD 系统,已获得 University of California 的许可。
UNIX 是在美国和其他国家(地区)的注册商标,已通过 X/Open Company, Ltd. 获得独家许可。
Sun、Sun Microsystems、Sun 标志、Sun StorEdge、AnswerBook2、, 和 Solaris 是 Sun Microsystems, Inc. 在美国和其他国家(地区)的商标或注册商标。
美国政府权利 ó 商业使用。
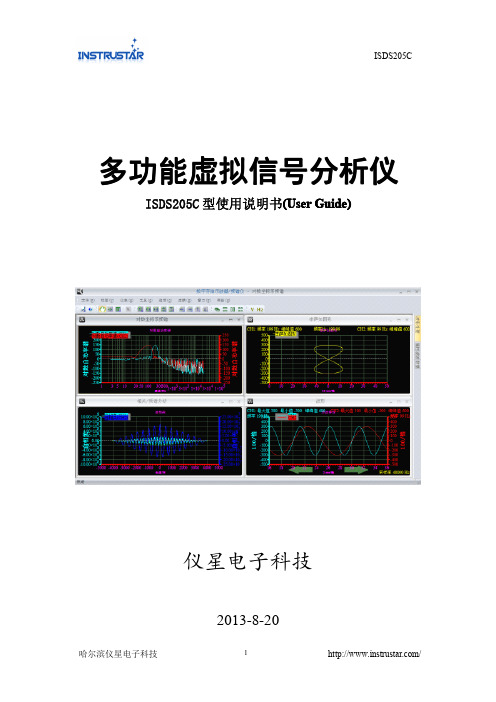
产品简介BREMAX网络多功能遥控器由杭州博脉科技有限公司自主研发,配有目前最流行的USB接口,可与计算机连接并通过INTERNET下载所需的遥控器编码,做到随时更新,永不过时,是E时代数字生活的时尚之选。
NRC-305C是博脉公司推出的最新一款多功能遥控器,符合现代人追求简约的生活理念,它集世界数百种电视机(TV)和影碟机(DVD/VCD)遥控器的常用功能于一体,并通过独有的智能控制技术,使用户能轻松地操作家中的电视机(TV)和影碟机(DVD/VCD),真正是遥控器损坏、遗失、替换的理想选择!BREMAX网络多功能遥控器让您的生活更轻松!按键说明图 1注意:遥控器面板上的黑色字符是电视机(TV)模式下的功能按键,面板上的蓝色字符是DVD/VCD设备模式下的功能按键。
1.前窗2.电视机(TV)电源键/电视状态指示灯3.影碟机(DVD/VCD)播放控制键4.画中画(PIP)控制键5.声道键对节目声道进行切换,可进行立体声,左声道,右声道选择6.缩放键选择不同的屏幕显示模式,如:16:9,4:3等7.图像键用于设置图像属性8.导航键用于选定菜单选项9.声音键用于设置声音属性10.功能切换键用于电视机/影碟机功能模式切换11.音量加减键12.数字键13.数位键14.USB口用于从网络下载遥控器编码15.TV/A V键选择TV等设备的输入信号源16.静音键17.频道选择键18.返回键返回上一级菜单19.菜单键20.屏显键21.睡眠键定时设备进入待机状态22.设置键用于设置遥控器的编码23.影碟机(DVD/VCD)电源键/影碟机(DVD/VCD)指示灯遥控器设置z快速设置向导如果您知道家中电视机或影碟机的品牌,推荐使用手动调代码(第5页)如果您想加快遥控器的设置过程,推荐使用智能调代码(第5页)如果您有一台个人电脑,并接入了互联网,推荐使用网络下载(第6页)z电池安装打开电池盖,按照电池仓内图所示标明的“+/-”符号,装入三节新的AAA电池(7号电池),如图2所示图2注意:1. 不要将新旧电池或不同型号的电池混合使用;2.若电池发生漏液现象,请及时将电池取出,清洁电池仓后换上新电池;3.长时间不使用本遥控器,请将电池取出。
RS-WIC-*无线灌溉控制器使用说明书文档版本:V1.0目录1.产品简介 (3)1.1产品概述 (3)1.2功能特点 (3)1.3产品选型 (3)1.4技术参数 (3)2.外形尺寸及部件说明 (4)2.1外形尺寸 (4)2.2产品说明 (4)3.设备安装说明 (5)3.1设备安装前检查 (5)3.2设备组装 (5)3.3设备安装 (5)4.设备接入平台说明 (6)4.1设备配置 (6)4.2设备字典及实时数据选项说明 (8)4.3设备接入平台说明 (8)5.联系方式 (10)6.文档历史 (10)1.产品简介1.1产品概述无线灌溉控制器是一款基于LoRa无线扩频通信技术研发的新型产品。
主要应用于园林、城市绿化、大田灌溉、校园绿化等灌溉领域,外壳坚固、防水、防盗。
可通过LORA网关在平台检测控制器状态,在平台上完成手动、自动、定时等远程操作功能。
按照指令自动开启或者关闭阀门,从而控制灌溉管线的通断;另外可通过我公司网络型采集终端采集土壤墒情值,上传到后台系统,即可根据农作物对浇灌的不同要求设定不同的浇灌策略,实现个性化浇灌。
1.2功能特点⏹采用LoRa无线扩频通信技术,传输距离可达视距3000m。
⏹搭配LORA网关使用,可在平台上实现手动、自动、定时等操作。
⏹提供电池供电与10~30V直流宽电压范围供电等供电方式。
⏹电池供电,可实现每天控制3-4次,续航3-4年。
⏹外壳坚固、防水、防盗。
1.3产品选型RS-公司代号WIC-无线灌溉控制器VDC-脉冲输出,内置一次性电池供电VDY-脉冲输出,直流10-30V供电RDY-继电器输出,直流10-30V供电M10固定式安装立杆+膨胀螺丝(立杆直径48mm,长度1m)M10D固定式安装立杆+预埋件地笼(立杆直径48mm,长度1m)1.4技术参数通信方式LoRa扩频通信最远通信距离视距3000m继电器输出(选配)负载能力:3A30V-DC/255V-AC脉冲输出(选配)±9V(持续时间:20ms/80ms)供电(选配)DC10-30V或锂亚电池供电控制响应时间小于2s设备配置NFC,提供中性配置软件防水等级IP652.外形尺寸及部件说明2.1外形尺寸2.2产品说明3.设备安装说明3.1设备安装前检查收到设备时,请仔细检查包装,打开包装后视检仪器及配件是否因为运送而导致破损凹陷或缺失,如果发现问题,请及时联系经销商或生产厂家,并保留包装,以便寄回处理设备清单:■无线灌溉控制器箱体*1■无线灌溉控制器立杆*1■LORA阀门控制器*1■合格证、保修卡*1■棒状天线*1■安装螺丝包■防水接线盒■控制延长线2m■电池(选配)■电源适配器+电源线(选配)■膨胀螺栓(选配)■预埋件-地笼+安装螺母垫片(选配)3.2设备组装1、若购买型号RS-WIC-VDC请先安装电池,使用三角钥匙打开箱门,拧下设备王字壳上盖四个螺丝,将上盖轻轻抬起往下移动,直至看到电路板电池座,将电池插入,上盖螺丝拧紧。
u Direct interface to 26‑bit Wiegand card readers u Onboard buzzer output u Supervised onboard pointuRequest to Exit and Request to Enter inputs that can have a shunt only optionuFour door states: Locked, Unlocked, Secured, Fire UnlockThe D9210C Access Control Interface Module is a fully supervised, addressable SDI bus device that allows access control integration for Bosch G Series Control Panels. This highly reliable module offers 14programmable levels of access authority. Authority for access is controlled by the level of the user, the time of day, the state of the door and the armed state of the area. Each of the authority restrictions can be controlled through automatic and manual ers can be added to the system with local programming using RPS (Remote ProgrammingSoftware), D5200, or with credentials using the Add User function through keypads.Functions Reader Input•Standard 5-wire Weigand interface.•+5 VDC or +12 VDC supplied to power readers.•Open collector output for reader LED.Unsupervised Inputs•Tamper – supports normally open devices.•REX – supports normally open devices. Request to Exit on short.•RTE – supports normally open devices. Request to Enter on short.Supervised Input•1000Ω End of line resistor.•Use for door contact.Door StatesFour-door states are controlled through the keypad,RPS (Remote Programming Software), scheduledevents (Skeds) and automatic programmable functions in the D9210C parameters:•Locked: Lock Relay de-activated thru valid credential or RTE (Request to Exit) input.•Unlocked: allows the door to be opened for free access. Lock Relay is activated.•Secured: does not allow access unless a Fire Unlock occurs. Valid credential or RTE will not activate relay.•Fire Unlock: allows free access no matter what the previous door state or armed state is. This is aprogrammable option that can be used to allow free access into or out off the building upon a fire alarm.Two automatic functions link the door state to the arming state of the area:•Auto Door: When the area is disarmed, the door state is switched to “Unlocked.”•Disarm on Open: with this function as "Yes," a user with valid access rights will activate the strike and disarm the system after the door is opened. With this function as "No," the area will disarm upon the strike activation.Indicators•Heartbeat LED: Blue LED blinks on and off when system is operational. A steady On or Off LED indicates a system error.•Reader LED: Rapidly blinking LED indicates the Card data is being received. When the LED is off, no carddata is being received.USA UL D9210C Series: ALVY: (UL294):Access Control System Units AMCX:Central Station Alarm Units (UL1610),AOTX: Local Alarm Units (UL609),APAW: Police Station Alarm Units(UL365), APOU: Propriety Alarm Units(UL1076), NBSX: (UL1023):Household Burglar Alarm SystemUnits, UOTU: (UL985): Control Unitsand Accessories – Household SystemType, UOXX: Control Unit Accessories,System (UL864)Installation/configuration notesThe D9210C Access Control Interface Module is individually programmed through the control panel it is connected to.Compatibility InformationCategory Commercial Code DescriptionReaders and ARD-AYH12EM Prox Wall Mount Accessories ARD-AYJ12EM Prox MullionARD-AYK12EM Prox Mini MullionARD-AYQ12EM Prox Wall Mount VandalResistantARD-AYCE65B EM Prox or PIN MullionARD-R10HID iClass Mini MullionARD-R40HID iClass Wall MountD8223HID Prox Wall MountD8224HID Prox MullionD8224‑SP HID Prox Switch Plate MountD8225HID Prox Mini MullionD8229PIN ReaderCredentials ACA-ATR13EM TokensACD-ATR11ISO EM CardsACD-ATR14CS EM Clamshell CardsACD-IC2K26-50iClass CardsACT-IC2K26-10iClass TokensD8236‑10HID Prox CardsD8236KF‑10HID Prox Tokens Systems D9412GV4Control PanelD7412GV4Control PanelD9412GV3Control PanelD7412GV3Control PanelD9412GV2Control PanelD7412GV2Control PanelD9412G Control PanelD7412G Control PanelQuantity Component1D9210C1 1 kΩ ½ watt end of line resistor3# 6x3/8 self-tapping sheet metal screws to secure themodule to mounting skirt or enclosure Technical specificationsEnvironmental ConsiderationsElectrical RequirementsReader RequirementsLock Relay (Dry Contact SPDT)CompatibilityMechanicalTrademarksWiegand is a copyright of HID GLOBAL.Ordering informationD9210C Access Control Interface ModuleFully supervised, addressable SDI bus device thatallows access control integration for Bosch G SeriesControl Panels.Order number D9210CAccessoriesD203 EnclosureWorks with input, output, and receiver modules wherethe circuit boards have through-hole or three-pointmounting systems.Order number D203D8103 EnclosureGrey steel enclosure measuring 41 cm x 41 cm x 9 cm(16 in. x 16 in. x 3.5 in.).Order number D8103D8108A Attack Resistant EnclosureGrey steel enclosure measuring 41 cm x 41 cm x 9 cm(16 in. x 16 in. x 3.5 in.). UL Listed. Includes a lock andkey set.Order number D8108AD8109 Fire EnclosureRed steel enclosure measuring 40.6 cm x 40.6 cm x 8.9cm (16 in. x 16 in. x 3.5 in). UL Listed. Includes a lockand key set.Order number D8109Represented by:Europe, Middle East, Africa:North America:Asia-Pacific:Bosch Security Systems B.V.P.O. Box 800025600 JB Eindhoven, The Netherlands Phone: + 31 40 2577 284****************************** Bosch Security Systems, Inc.130 Perinton ParkwayFairport, New York, 14450, USAPhone: +1 800 289 0096Fax: +1 585 223 9180*******************.comRobert Bosch (SEA) Pte Ltd, Security Systems11 Bishan Street 21Singapore 573943Phone: +65 6571 2808Fax: +65 6571 2699*****************************© Bosch Security Systems 2016 | Data subject to change without notice 198****6331|en,V2,22.Jul2016。
DECT Baby Monitor• 100% private connection• Night lightSCD501/00The most reliable connection to your babyThe essential connection to your babyOur new DECT SCD501/00 Baby Monitor delivers complete reassurance by providing the essentials of a baby monitor. The most reliable connection with crystal clear sound and a comforting night light for you and your baby.BenefitsReliable technology•DECT technology guarantees zero interference & 100% privacy •Perfect clear sound due to DECT TechnologyConstant Reassurance and Secure Connection•Energy saving Smart ECO mode•Always know when your monitor is in range and connected •Sound level lights indicate if the baby makes noise Freedom and flexibility•Range up to 300 meters*•The parent unit is mains powered and battery operated •Superior operating time up to 24 hoursComforting and soothing your baby•Comforting nightlight[field not found 'leaflet_type'] (2019, November 21)FeaturesZero interference with DECTDECT technology guarantees zero interference from any other transmitting product like other baby monitors, cordless phones and cell phones. Data encryption provides a secure and private connection, so you can be sure that you are the only one that can hear your baby.Perfect clear soundHear every tiny giggle, gurgle, and hic-up with perfect clarity.DECT(Digital Enhanced Cordless Telecommunications) technology provides high quality,crystal clear sound so you can hear your baby anytime.Smart ECO modeThe unique Smart ECO mode automatically minimizes your transmission power and increases your battery lifetime. The closer you are to your baby,the less power is needed for a perfect connection (not available in US and Canada).Always connectedThe parent unit will alert you when your monitor is out of range or when the power is low, helping you make sure that you are always connected to your baby.Sound activation 5 LED lightsLights are activated to indicate the level of sound in your baby's room. Even when the Parent Unit is muted.300m RangeIndoor range up to 50 meters*, Outdoor range up to 300 meters*.Battery and mains operatedThe parent unit runs perfectly on mains power. For extra mobility you can also insert batteries to allow cordless use of the parent unit. You can insert two 1.5V R6 AA alkaline non-rechargeable batteries or two 1.2V R6 AA rechargeable batteries.Operating time up to 24 hoursThe small parent unit will give you the freedom of cordless streaming for up to 24 hours before re-charging is required. However this is depending on the type of batteries used and how often and how long you use the parent unit on batteries.Comforting nightlightYour baby may still be restless when you first put them to bed. Help soothe and calm your baby to sleep with the warm tranquil glow of the nightlight.data subject to change 2019, November 21Specifications[field not found 'disclaimer_text']FeaturesDECT Technology Yes Energy saving Smart ECO modeYes Linked and in range indicationYes Sound activation lights5 LED lights Volume control and sound activation Yes Comforting night lightYes Indoor range up to 50mOutdoor range up to 300 metersPowerOperating time on battery hour 24 hours Power Supply120 V (US)220 - 240 V Tuner/Reception/Transmission Frequency band DECT Automatic channel selectionYes Number of channels 120Convenience Battery low indica-tionYes Volume control Yes Auto out-of-range warningYes Sound-level lights Yes Technical specifications Operating tempera-ture range °C10 - 40 °C Storage temperature range 10 - 40 °CLogistic dataF-box dimensions (W x H x D)220 x 156 x 56 mmDevelopment stages Stages Pregnancy 0 - 6 monthsAccessories Quick start guide Yes User manual YesPackaging dimensions Height 15.60 cm Width 22.00 cm Depth5.70 cm Nett weight 0.33 kg Gross weight 0.44 kgEAN08710103657675Number of products included1Country of origin CN Harmonised Systems Code 851769Outer Carton Length 30.10 cm Width 23.50 cm Height18.30 cm Gross weight 2.48 kgEAN18710103657672Number of consumer packagings5* The operating range of the baby monitor varies depending on the surroundings and factors that cause interference.* This monitor does not have a charging function.data subject to change 2019, November 21Version: 9.0.1EAN: 08710103657675© 2019 Koninklijke Philips N.V.All rights reserved.Specifications are subject to change without notice. Trademarks are the property of Koninklijke Philips N.V. or their respective 。