烤炉使用说明书
- 格式:doc
- 大小:28.00 KB
- 文档页数:4

1| Storage | Warranty Attached |We sincerely appreciate you purchasing this product.Please keep this User Manual, which includes the Warranty for correct product use and customer service.User ManualSmokeless, Eco-friendly RoasterAone Grill* Specifications of the product are subject to change as product quality improvements are made.Contents1. Product Configuration & Assembly Procedure (3)2. Precautions (5)3. How to Use (8)4. Items to Check before Applying for Customer Services (11)5. Warranty & Warranty Provisions (12)2To all of our Dear CustomersYou are kindly requested to become fully acquainted with this User Manual for safe use and handling of this product. Please keep this User Manual readily available to refer to when the product does not work as intended or when there is a question about the product.Product Configuration & Assembly ProcedureAssemblyProcedure34Optional Item:Photo Item NameRemarksMulti-pan (includes Tempered GlassLid)Lid Assembly① Handle② Handle Support ③ Glass Lid④ Rubber Gasket ⑤ Metal Gasket ⑥ Screw12Assemble / disassemble by taking hold of handle as shown in the drawing. Make sure the oil fence reaches the correct position as shownwhen assembling the main body. There are arrow marks on both ends of the Coanda Air Guide. After attaching Coanda Air Guide to main body in the direction indicated by the arrows in the drawing, push both ends tofully assemble.34When assembling the radiator to the main body, attach it firmly to the position that correctly matches the direction of the arrow indicatorsshown in the drawing.When assembling the controller to the main body, take hold of the handles on both ends andassemble / disassemble as shown in thedrawing.PrecautionsPlease become fully acquainted with the below contents and adhere to the methods of use as they are very important matters associated with product safety.Use the designated power cable only.56Precautions (cont.)Make sure that metal objects, chopsticks, etc., are not inserted into the controller hole. There is danger of electric shock or malfunction. (Particular attention must be paid when there are children nearby.)This product is prohibited from being used in places where it can come into contact with flame, combustible gas, rainwater, or wetness. Doing so can cause electric shock or the outbreak of fire.This product is prohibited from being used in places which have an unstable surface, or placed on a surface covered with a material that reacts to and weakens with heat. Doing so could result in the outbreak of fire.Do not place on or near a hot gas or electric burner, or in a heated oven.Extreme caution must be used when moving an appliance containing hot oil or other hot liquids.Stop using the product in the event when abnormal vibrations or noise occurs.People who rely on others for assistance due to a physical or mental disability and people who lack the skills to handle the product should not use it.CautionDo not pour water into the controller or allow water to come into contact with it. There are dangers of short circuit, electric shock, and malfunction.Do not use anything other than the exclusive-use grill pan and multi-pan. There is danger of product malfunction.Disassembling, repairing, and reconfiguring the product by anyone other than this company’s service professional technician is prohibited. The outbreak of fire or abnormal functioning can occur.When attaching or detaching the power cable to the outlet, be sure to grasp the plug firmly to attach/detach it. The danger of electric shock or the outbreak of fire can occur due to a damaged power cable.When attaching or detaching the power cable to the main body of the grill, be sure to grasp the connector firmly to attach/detach it. The danger of electric shock or the outbreak of fire can occur due to a damaged power cable.Major Components of PrecautionPlease become fully acquainted with the below contents and adhere to methods of use as they are very important matters associated with product safety.Pan (Cooling Fan Motor)Taking care that the rubber gasket is not damaged, assemble/disassemble bytwisting in the horizontal direction. If contact is not made correctly, the suction(intake) fan may not function as designed.Make sure that the square rubber gasket on both ends are correctly fastenedsince vibration or noise can occur. Be careful to make sure that the square rubbergasket does not get damaged.Make sure that excessive force is not applied to the suction (intake) fan and becareful not to drop it.Multi-pan (Hot Pot Pan)Absolutely do not operate the suction (intake) fan when using the multi-pan. If you use the multi-pan while the suction (intake) fan is operating, it may cause damage to the product.Make sure that the handles of the multi-pan are not touched when they are hot. Do not touch/hold the handles when it is hot. Touch the handles only when they are sufficiently cooled down.When cooking, putting water in the oil tray is recommended even when the multi-pan is used.Water Quantity: about 4 oz.Heat RadiatorBe careful when washing the heat radiator or when it is in use because there is thedanger that its shape can be damaged if too much force is applied to it.The heat radiator can become scratched, smudged, and chipped. This is normal and willnot affect its functionality.Square rubber gasketSquare rubber gasket7How to Use01 Preparation for Cooking A. Check all around the product.Clear away all flammable or non-heat-resistant items within the range of 1 ft.B. Put water into the oil tray.* Water Quantity: About 4 oz.C. Since the suction fan can cause vibration, place the product on a flatsurface.02 How to Cook A. Cooking Meat (Using the Grill Pan)1. After putting the meat on the grill pan, set the temperaturecontroller to the MAX level, turn on the suction fan switch at thesame time, and add ingredients. (After heating up, issues ofodor, smoke, popping grease, etc., can occur when addingcooking ingredients.)2. Adjust the temperature controller knob appropriately to properlycook.B. Cooking Fish (Using the Grill Pan)1. Put fish on the grill pan and then turn on the suction fan switchbefore heating.2. Set the temperature control knob to level 2-3.3. Turn the fish over on the grill pan after about 10 minutes, andcontinue cooking the fish for about 8 minutes. (Cookappropriately according to the size and variety of fish.)C. Cooking Using the Multi-pan1. If the lid is kept on until just before a broth comes to boil, ithelps to shorten the completion time of what is being cooked.2. If cooking with the lid covered, as the broth comes to a boil, itmay start to spill over. Slowly open the lid and continuecooking.Absolutely do not operate the suction fan when using the multi-pan. Otherwise you might get burned.D. Cautions When Cooking1. Do not pour cold water onto the pan when the pan is hot. Thepan may become deformed.2. When cooking using the grill pan, try to cut the foodingredients that are added so they are below the air-intakeholes in order for the oil mist purging system to be effective.When side dishes, such as vegetables are to be cooked on the grill pan using other cooking tools, use them in aheight lower than the position of the air vent and put themnear the air-intake holes.03 After Cooking A. Cautions When Cleaning the Product1. Unplug the product first, and clean it after it has cooled down.2. The pan is hot right after cooking so there is the danger that itwill cause burns. Clean the product after the pan has sufficiently89cooled down.3. Each component, beginning with the grill pan and multi-pan,can be cleaned using kitchen detergent, sponge, wash cloth, etc. The product can be damaged if metal brushes, abrasive powder, sharp brushes, and such are used to clean the components.4. Use only neutral detergent for cleaning.5. Make sure to dispense the oil tray and oil fence before cleaningWhen moving the product without taking it apart, the grill’smain body can become contaminated or the suction fan damaged due to residual substance (oil) in the oil pan and oil fence. Since cleaning can be difficult due to neglecting residual substance (oil) for long periods of time, clean the product in warm water after using it once it has sufficiently cooled off. Clean the product parts with warm water after the cooking is finished and the hot parts cool enough.Cleaning the Suction FanAfter cleaning the suction fan wings using a neutral (soft) detergent, in the area between the indicated in the picture above, dry it sufficiently to prevent damage to the suction fan.Be careful not to let water come into contact with the motor area,including the electric parts to prevent damaging the suction fan. Also, be careful not to damage the square rubber gasket at both ends.B. Drying1. After removing the residue and water from the controller andsuction fan, allow them to dry on their own. There is danger of product failure when attaching components that have not dried completely.2. Do not dry components directly over a fire. There are dangersof product discoloration, warping, and outbreak of fire.03After CookingC. Storage1. Once cooking is complete, turn the temperature controller to theOFF position and disconnect the power cable for storage.Square rubber gasketSquare rubber gasket2. Store the product in the storage case or box so that is does notget damaged.3. Since moisture, dirt, bugs, and such can cause productdamage, be sure to store the product indoors.4. Periodically remove dirt and dust from the power cord plug.An outbreak of fire can occur due to dirt and dust build-up onthe plug.Heat-resistant Rubber PackingIf the heat-resistant rubber packings intalled in 4 places of the main body, as shown in the figure above, are removed, the grill’s main body may become warped due to high temperature. Be careful to make sure that the heat-resistant rubber packings attached to the main body do not become damaged or lost.10Items to Check Before Applying for Customer ServiceIf there is anything wrong with the product, please contact the customer service center. Please check the below questions and answers before requesting repair.11Warranty & Warranty Provisionsproduct.14, Dolgoji-ro 23-gil, Seongbuk-gu, Seoul, Republic of KoreaImported and Distributedexclusively byAone Grill America, Inc.e-mail:************************************13。
WITTCO FOOD SERVICE EQUIPMENT 7737 NORTH 81 STREETINSTALLATION & OPERATION MANUALDRAWER WARMERS CHIP WARMERSMODELS: CHIP WARMERS:200-1-CW 200-2-CW DRAWER WARMERS:CAFÉ’:200-1R-C 200-2R-C200-3R-C 200-4R-CCAFE’ BUILT-IN:200-1R-BI-C 200-2R-BI-C 200-3R-BI-C 200-3R-BI-CSLIMLINE LOW PROFILE:SLIMLINE BUILT-IN:200-1-SL-LP 200-1-SL-BI 200-2-SL-LP200-2-SL-BIR-SERIES:R-SERIES BUILT-IN:200-1R 200-1R-BI 200-2R 200-2R-BI 200-3R 200-3R-BI200-4R 200-4R-BIIMPORTANT FOR YOUR SAFETYTHIS MANUAL HAS BEEN PREPARED FOR PERSONNEL QUALIFIED TO INSTALL ELECTRICAL EQUIPMENT, WHO SHOULD PERFORM THE INITIAL FIELD START-UP AND ADJUSTMENTS OF THE EQUIPMENT COVERED BY THIS MANUAL.FOR YOUR SAFETYDO NOT STORE OR USE GASOLINE OR OTHERFLAMMABLE VAPORS OR LIQUIDS IN THEVICINITYOF THIS OR ANY OTHER APPLIANCE.Improper installation, adjustment,alteration, service, or maintenance cancause property damage, injury, or death.Read the installation, operating andmaintenance instructions thoroughlybefore installing or servicing equipment.IN THE EVENT OF A POWER FAILURE,DO NOT ATTEMPT TO OPERATE THIS DEVICE.TABLE OF CONTENTSIMPORTANT FOR YOUR SAFETY . . . . . . . . . . . . . . . . . . . . . . . . . . . . . . . . . . . . . . . . 1 GENERAL . . . . . . . . . . . . . . . . . . . . . . . . . . . . . . . . . . . . . . . . . . . . . . . . . . . . . . . . . . . 3 INTRODUCTION . . . . . . . . . . . . . . . . . . . . . . . . . . . . . . . . . . . . . . . . . . . . . . . . . 3 INSTALLATION . . . . . . . . . . . . . . . . . . . . . . . . . . . . . . . . . . . . . . . . . . . . . . . . . . 3 TRIM KIT INSTALLATION . . . . . . . . . . . . . . . . . . . . . . . . . . . . . . . . . . . . . . . . . . 4 ELECTRICAL REQUIREMENTS. . . . . . . . . . . . . . . . . . . . . . . . . . . . . . . . . . . . . 5 SPECIFICATIONS . . . . . . . . . . . . . . . . . . . . . . . . . . . . . . . . . . . . . . . . . . . . . . . . . . . . . 6 OPERATION . . . . . . . . . . . . . . . . . . . . . . . . . . . . . . . . . . . . . . . . . . . . . . . . . . . . . . . . . 7 CONTROLS . . . . . . . . . . . . . . . . . . . . . . . . . . . . . . . . . . . . . . . . . . . . . . . . . . . . . 7 CLEANING . . . . . . . . . . . . . . . . . . . . . . . . . . . . . . . . . . . . . . . . . . . . . . . . . . . . . . 9 STAINLESS STEEL CARE . . . . . . . . . . . . . . . . . . . . . . . . . . . . . . . . . . . . . . . . . 9 MAINTENANCE . . . . . . . . . . . . . . . . . . . . . . . . . . . . . . . . . . . . . . . . . . . . . . . . . . 9 TROUBLESHOOTING . . . . . . . . . . . . . . . . . . . . . . . . . . . . . . . . . . . . . . . . . . . . . . . . . 10 SERVICE & PARTS INFORMATION . . . . . . . . . . . . . . . . . . . . . . . . . . . . . . . . . . . . . . 10 WIRING DIAGRAMS . . . . . . . . . . . . . . . . . . . . . . . . . . . . . . . . . . . . . . . . . . . . . . . 11 - 16GENERALWITTCO Drawer Warmers and ChipWarmers are produced with qualityworkmanship and material. Properinstallation, usage, and maintenance ofyour warmer will result in many years ofsatisfactory performance.It is suggested that you thoroughly readthis entire manual and carefully follow allof the instructions provided.The WITTCO Drawer and ChipWarmers provide an efficient means ofholding a variety of prepared hot foodproducts at proper temperatures untilserving.Before installing, verify that the electricalservice agrees with the specifications onthe rating plate located on the lowerback corner of the warmer. If the supplyand equipment requirements do notagree, do not proceed with unpackingand installation. Contact your WITTCOCustomer Service Department immediately.UNPACKING:The Warmer was inspected beforeleaving the factory. The transportationcompany assumes full responsibility forsafe delivery upon acceptance of theshipment. Immediately after unpacking,check for possible shipping damage tothe warmer.If the warmer is found to be damaged, save the packagingmaterial and contact the carrierwithin 15 days of delivery.Carefully unpack warmer and place in awork accessible area.1. Remove banding holding thecarton to the pallet.2. Carefully remove warmer fromcarton and place on floor or table.3. Remove legs from drawer ofwarmer.4. Secure legs to the bottom ofwarmer by screwing legs into theholes provided.5. Remove any and all packagingmaterials in drawers.6. Peel off vinyl protection film.7. Thoroughly clean the warmer asdescribed in the cleaning instruct-ions. CLEANING: The warmer should be thoroughly cleaned prior to putting into service. Use a mild soap and water solution to clean the interior drawer inserts of the unit. Never use harsh chemicals orabrasive pads to clean the unit. LOCATION: For efficient warmer operation, choose a location that will provide easy loading and unloading without interfering with the final assembly of food orders. The installation location must allow adequate clearances for servicing and proper operation.Models: 200-1R-BI-C, 200-2R-BI-C,200-3R-BI-C, 200-4R-BI-C, 200-1R-BI,200-2R-BI, 200-3R-BI, 200-4R-BI.Built-in Drawer Warmers come with a “trim kit.” Follow the general installation instructions in the “Installation & Operation Manual” regarding Unpacking, Electrical Requirements, Cleaning, and Removal of Vinyl Protection Film.1. Remove the drawer assembliesfrom the cabinet.a. Open drawer to fullextension.b. Lift up drawer and pull out.2. Place Trim Kit flush with the frontof the Drawer Warmer. 3. Trim Kit has 4 mounting holes.There are two holes on thebottom and two holes on the top.4. Using #8 Tech Screws thatare included, fasten the fourscrews into the mounting holes.The screws are self-tapping and no pilot holes are necessary.5. Connect Drawer Warmer toelectrical power supply per yourlocal electrical code.Please refer to the Electrical Requirements in the Installation & Operation Manual.”6. Slide/install Warmer intowall/cabinet opening.7. Reinstall drawer assemblies intowarmer – Top to BottomELECTRICAL CODES & STANDARDS:The warmer must be installed in accordance with:In the United States of America:1. State and Local Codes.2. National Electrical Code, ANSI/NFPA-70 (latest edition.) Copiesmay be obtained from: TheNational Fire ProtectionAssociation, Batterymarch Park,Quincy, MA 02269.In Canada:1. Local Codes.2. Canadian Electrical Code, CSAC22.1 (latest edition.) Copiesmay be obtained from: TheCanadian Standard Association,178 Rexcale Blvd., Etobicoke,Ontario, Canada M9W 1R3. ELECTRICAL CONNECTIONS:The warmer is factory wired for either 110/120 volt or 208/240 volt, single phase operation. All 110/120 volt warmers are equipped with a 8 foot cordand NEMA 5-15 plug as standard equipment. All 208/240 volt warmersare equipped with a 8 foot cord and NEMA 6-15 plug. Refer to wiring diagrams in the back of this manual.The cord and plug supplied is a suitable durable cord with a molded three-prong plug, and is provided with a proper strain relief.All warmers are equipped with a three-prong plug. Itis imperative that this plug must be connected into a properly grounded three-prong receptacle. If the receptacle is not the proper grounding type, contact an electrician. DO NOT REMOVE THE GROUNDING PRONG FROM THIS PLUG.Verify that the power source matches the Serial Data Plate locatedon the lower back corner of the warmer and the plug configuration before the connection is made. (Fig. 1)Fig. 1OPERATIONThe Warmer and itsparts are hot. Be very careful when operating, cleaning, or servicing the warmer.The warmer Control Panel contains an operating indicator light and a full range thermostat. (Fig.2)THERMOSTAT DIAL:The thermostat also acts as the On/Off switch to the warmer system. Turning the thermostat counter clock-wise until it stops will turn the warmer off.POWER LIGHT:The power light turns on and off as the heating elements cycle.Fig. 2It is recommended that prior to placing the warmer into operation that it be preheated at the highest temperature setting for a period of 30 to 45 minutesThe Warmer and itsparts are hot. Be very careful when operating, cleaning, or servicing the warmer.Once the warmer has been connected to the appropriate power source, the warmer is ready for operation.The warmers have one, two, three, or four drawers depending on the model purchased.Each drawer has a separate thermostat dial and thermometer.Begin by turning the thermostat dial to the number 5. This will cause the heating element to start heating. When this occurs, the red operating indicator light will illuminate. This red light will stay on as long as the heating element is engaged.Once the predetermined temperature is achieved, the heating element will beginto cycle. During this period, the red operating indicator light will turn on and off as the heating elements cycle.The thermometer, which is located on the drawer of the warmer (Fig. 3), will begin to move and indicate the interior temperature of the drawer.(Fig. 3)The greater the thermostat number setting, the higher the temperature. The lower the thermostat number setting, the lower the temperature.The thermostat setting is from 1 to 10. A chart of the thermostat setting and approximate temperatures is below. (Fig. 4)The operator should always monitor the food product to insure that it remains at proper temperatures.CRISP & MOIST KNOB:Each warmer drawer is equipped with a “CRISP & MOIST” knob. For example: If you want the food moist, slide the knob to the right to the word “Moist.” If you want your chips, etc. crispy, slide the knob to the left to the word “Crisp.” (Fig. 5)(Fig. 5)The Warmer and its parts are hot. Be very careful when operating, cleaning, or servicing the warmer.U nplug electrical power supply before cleaning.DAILY:1. Unplug electrical power supply.2. Allow warmer to cool beforecleaning.3. Clean drawers and the interior ofthe warmer with a mild soap andwater. Never use harshchemicals or abrasive pads toclean the warmer.4. Rinse and dry with a soft drycloth.5. Clean the exterior of the warmerwith a clean damp cloth.HEAVY-DUTY CLEANING:For heavy-duty cleaning, use warm water, a degreaser, and a plastic, stainless steel, or Scotch-Brite pad. Never rub in a circular motion -- rub gently in the direction of the steel grain. Always rinse thoroughlyCLEANING:Stainless Steel contains 70 – 80% iron, which will rust if not properly maintained. Stainless Steel also contains 12 – 30% chromium, which forms an invisible passive, protective film that shields against corrosion.If the protective film remains intact, the stainless steel will remain intact. However, if the film is damaged, the stainless steel can break down and rust. PREVENTIVE CARE:To prevent stainless steel break-down, follow these steps:1. Never use any metal tools,scrapers, files, wire brushes,or scouring pads (except forstainless steel scouring pads,)which will mar the surface.2. Never use steel wool– whichwill leave behind particles that willrust.3. Never use acid-based orchloride containing cleaningsolutions – which will breakdown the protective film.4. Never rub in a circular motion.Always rub gently in the directionof the steel grain.5. Never leave any food productsor salt on the surface. Manyfoods are acidic. Salt containschloridePRESERVING & RESTORING:Special stainless steel polishing cleaners can preserve and restore the protective film.Preserve the life of stainless steel with a regular application of a high-quality stainless steel polishing cleaner, as a final step to daily cleaning.If signs of breakdown appear, restore the stainless steel surface. First, thoroughly clean, rinse, and dry the surface. Then, on a daily basis, apply a high-quality stainless steel polish according to manufacturer’s instructions.HEAT TINT:Darkened areas, called “heat tint,” may appear on stainless steel exposed to excessive heat. Excessive heat causes the protective film to thicken. This is unsightly, but is not a sign of permanent damage.To remove heat tint, follow the routine cleaning procedure. Stubborn heat tint will require heavy-duty cleaning.To reduce heat tint, limit the exposure of equipment to excessive heat. The Warmer and itsparts are hot. Be very careful when operating, cleaning, or servicing the warmer.U nplug electricalpower supply before cleaning.TROUBLESHOOTINGTo obtain Service and Parts information concerning this model, contact WITTCO Service Department at the address listed on the front cover of this manual or refer to our website: for a complete listing of Authorized Service and Parts depots.Customer Service 1-800-367-8413Technical Service 1-866-628-0485Service Parts 1-866-628-0485When calling for service, have the model number and serial number available.WIRING DIAGRAMS200-1-CW, 200-1R-C, 200-1R-BI-C, 200-1R, 200-1R-BI200-1-SL, 200-1-SL-BI200-2-CW, 200-2R-C,200-2R-BI-C, 200-2R, 200-2R-BI200-2-SL, 200-2-SL-BI200-3R-C, 200-3R-BI-C, 200-3R, 200-3R-BI200-4R-C, 200-4R-BI-C, 200-4R, 200-4R-BI。
电烤炉操作规程
《电烤炉操作规程》
一、场地选择
1. 选择通风良好的场地,避免在密闭的地方使用电烤炉;
2. 不要将电烤炉放置在易燃物品旁边,避免火灾事故的发生。
二、电源连接
1. 将电烤炉插头插入适配的插座中,确保接地良好;
2. 操作前检查电烤炉的电源线是否损坏,避免使用不安全的电烤炉。
三、预热
1. 打开电烤炉开关,选择合适的温度进行预热;
2. 预热完毕后,将食物放入烤盘中。
四、操作提示
1. 注意观察电烤炉工作时的情况,避免发生异常情况;
2. 避免用湿手去操作电烤炉,避免触电危险;
3. 使用工具时要小心谨慎,避免烫伤。
五、清洁与维护
1. 在使用完毕后,断开电源,等待电烤炉冷却后再进行清洁;
2. 避免用水直接冲洗电烤炉,可以使用湿布擦拭清洁;
3. 定期检查电烤炉的电源线和插头是否完好,避免使用不安全的电烤炉。
六、使用注意事项
1. 使用时要注意风险防范,避免发生烫伤或火灾等意外情况;
2. 遵守使用说明书上的操作规程,不要将不明白的操作用法强行操作。
以上就是关于电烤炉的操作规程,在使用电烤炉时一定要严格遵守相关规范,以确保安全使用。
P/N 1010729 修订版 A 05/19Transcribed from P/N 1010729 Rev N 03/19®垂直接触式烤炉用户手册型号 VCT-20/25/50生产编号:9200560、9200600、9200602、9200606、 9200608、9200609、9200614、9200616、 9200620、9200622、9200624、9200625、 9200626、9200628、9200629、9200630、 9200631、9200632、9200633、9200634、 9200637、9200638、9200639、9200640、9200644、9200646、9200647垂直接触式烤炉2®P/N 1010729 修订版 A 05/19Transcribed from P/N 1010729 Rev N 03/19一般说明型号为 VCT -20、VCT -25 和 VCT -50 的垂直接触式烤炉是为接触烤面包而设计的。
该烤炉的设计让操作员可以将面包同时放置在加热的走台两侧。
将面包放入烤炉的顶部,然后在烤炉底部取出均匀的金棕色热面包。
型号 VCT -20 配备有辅助加热系统,为面包提供额外加热。
本手册提供垂直接触式烤炉的防护、安装和操作步骤。
我们建议在安装和使用设备之前先阅读本手册包含的所有信息。
您的垂直接触式烤炉由现有最精细的材料制成,并且按照严格的质量标准组装。
本设备已在工厂进行测试,以保证可靠的无故障使用。
重要说明! 保存本说明书以供将来查阅。
如果设备的所有权发生变更,请确保设备附有本手册。
保证信息请阅读本手册中的“有限质量保证”全文。
如果设备在运达时已损坏,请立即联系承运人并提出损坏索赔。
提出索赔时请保存好所有包装材料。
货物损坏索赔是买方的责任,不包含在保证之中。
担保不包括:• 装运过程造成的损坏或使用不当引起的损坏。
烤炉使用说明书一、简介烤炉是一种普遍使用的厨房电器,适用于烹饪、烘烤和烤制食物。
本使用说明书将为您提供烤炉的正确使用和维护方法,以确保您的烤炉能够长时间高效运转。
二、安全注意事项1. 在使用烤炉之前,请务必仔细阅读使用说明书,并确保所有安全注意事项都被充分理解和遵守。
2. 烤炉需要接入正确的电源插座,确保插座电压符合标准以避免电器损坏或电流过大引起火灾。
3. 使用烤炉时,请确保背后和两侧有足够的空间,以确保热量可以正常散发,防止烧伤或火灾发生。
4. 在使用烤炉时,不要让孩子或宠物靠近烤炉,以免发生意外伤害。
5. 在使用烤炉时,请勿将金属物体放入炉腔,以避免触电或电器故障。
三、操作指南1. 打开炉门:按下炉门开关按钮,轻轻拉开炉门。
确保炉门完全打开并稳定在位。
2. 设置温度:使用温度控制旋钮,将烤炉预热温度设定在所需温度上方。
等待一段时间,直至烤炉达到预设温度。
3. 调节烤制时间:使用时间控制旋钮,将所需烤制时间设定在所需时间上方。
烤炉会在设定时间结束后自动停止加热。
4. 放入食物:小心地将食物放入预热好的烤炉炉腔中。
确保食物与炉壁之间有足够的空间,以确保空气能够流通,并均匀烤熟。
5. 关闭炉门:轻轻将炉门关上,确保炉门完全关闭并且紧密密封。
6. 烤制结束后:等待烤制时间结束,使用烤炉手柄小心打开炉门。
注意避免热气对面部或手部造成烫伤。
取出食物前,请务必切断电源并等待烤炉冷却。
四、维护保养1. 清洁:在清洁烤炉之前,请确保将电源拔下。
使用干净的湿布擦拭炉门和炉腔内侧。
请勿使用尖锐物体刮擦以避免损坏烤炉表面。
2. 炉腔清洁:烤炉内部可能会有烹饪残渣或食物渗漏。
您可以使用适量的温和的肥皂水或非腐蚀性清洁剂在冷却的烤炉内清洁。
请勿使用粗糙的清洁工具,以免刮伤烤炉内壁。
3. 炉网清洁:使用干净的湿布擦拭炉网,去除油脂和食物残渣。
如果有需要,您可以将炉网浸泡在温和的清洁剂中。
4. 烘烤盘和烤网的使用:使用烘烤盘和烤网之前,请先用洗涤液和水彻底清洗,并确保它们干燥。
家用电烤炉使用说明书使用前须知:- 请先仔细阅读本使用说明书,并按照操作指引正确使用电烤炉。
- 在初次使用之前,请将电烤炉连接到适当的电源电压,并确保电源线路无损坏。
- 请避免在潮湿或多尘的环境中使用电烤炉,以免影响使用效果和安全性能。
- 为确保使用安全,请务必将电烤炉放置在平稳的工作台面上,在使用过程中避免碰撞并保持良好通风。
一、外观和主要组成部分1. 电烤炉的外观:电烤炉采用优质不锈钢材料制成,具有耐高温、防腐蚀的特点。
2. 主要组成部分:电烤炉主要由加热器、控制器、温度调节器等部分组成。
二、使用步骤1. 插入电源:将电烤炉插头插入相应的电源插座,并确认电源已连接。
2. 打开电烤炉:将电烤炉的主开关置于打开的位置,此时电烤炉开始供电。
3. 温度设置:根据需求,使用温度调节器调节所需的烤炉温度。
转动温度调节器至所需温度位置,调节器上的示数即为当前设定温度。
4. 预热:关闭烤炉门,在温度设定完成后,按下预热按钮,使电烤炉进行预热。
预热完成后,等待指示灯亮起。
5. 烹饪食物:将待烹饪的食物置于电烤炉烤架上,并将烤架置于合适的高度位置。
关闭烤炉门,开始烹饪。
6. 调整烤制时间:根据食物种类和烹饪要求,使用控制器调整烤制时间。
7. 烤制完成:当烤制时间到达设定时间后,电烤炉会自动停止加热并发出提示音。
此时,打开烤炉门,取出烹饪好的食物。
8. 关闭电烤炉:使用完成后,将电烤炉的主开关置于关闭的位置,断开电源。
三、注意事项1. 使用电烤炉过程中,请勿触摸加热器、控制器和温度调节器等零部件,以免烫伤。
2. 在使用过程中,电烤炉表面会有一定的温度升高,请避免直接接触,以免烫伤。
3. 在烹饪过程中,请勿将手或其他物品放入电烤炉内部,以免造成伤害或设备故障。
4. 请勿长时间空转电烤炉,以免对设备造成损坏。
5. 清洁时,请先断开电源,待烤炉完全冷却后再进行清洁。
6. 清洁电烤炉时,请使用温和的洗涤剂和软布擦拭,切勿使用粗糙的洗刷工具。
卞小芳英语101 1031015电烤炉说明书一、特点该电烤炉是根据我厂多年生产经验、对国内外同类产品比较、综合各电烤炉优点开发的新型高效节能电炉,烤制品味道纯正。
具有节能安全、卫生方便、提温快、性能稳定、耗电少、运行成本低、使用寿命长、操作维护简便等优点,其烘烤质量均达到食品卫生标准及国际出品标准。
二、用途及工作原理本机主要用于食品加工业,豆类、果仁类、坚果类(如花生、乳白米、水煮五香花生、瓜子、杏仁、板栗、蚕豆)等降低水分烘干、烤制熟品。
本机以电热管为热源,采用回转滚笼、热传导、热辐射原理,设有自动控温装置;以热空气为干燥介质,将热能作用在被烘烤物体上,在烘烤过程中被烘烤物在笼内由推进装置不断推进,形成不间断循环,使之受热均匀,有效的保证了烘烤质量。
三、操作使用注意事项1、开机前应检查电源、传动部分是否正常,然后按动正转电钮使转笼空转3-5分钟,一切无异常时开启炉温开关升温,在升温过程中,转笼不能停止转动以防高温下变形。
2、一般加花生果75公斤左右,花生米100公斤左右。
3、每更换花生米或花生果的原料时,因所含水分不同,应先烤1-2炉摸出数据后,才能成批投入生产。
4、当工作结束时先关掉控温开关,转笼不停炉温下降到50度左右时方能使转笼停止,以防高温下静止受热变形。
四、维护及保养1、开机前应检查转笼的电控系统是否正常,转动部分的螺栓是否松动,温控仪显示是否正常,完好时(开启)升温。
2、转笼炉的减速机,轴两端轴承,应按时检查注齿轮油和润滑脂以防止缺油损坏。
3、转笼底部通过抽屉应及时检查,清除所聚集的分泌灰渣等杂物,防止冒烟着火污染被烘烤物。
4、如有新设计产品,另行通知。
Introduction of an Electric Oven1.FeaturesAccording to the many-year production experience of our factory, to the comparison of domestic and foreign similar products, we have developed the electric oven combined with advantages of various electric ovens, which is new and efficient and the baked food tastes pure. With the advantages of energy saving, safety, sanitation and convenience, rapid temperature raising, stable performance, less power consumption, low running cost, long service life, convenient operation and maintenance and other advantages, the baking quality meets the food hygiene standards and the international product standards.e and Working PrinciplesThis machine is mainly used in food processing industry, beans, nuts category, nuts ( such as peanuts, white rice, boiled spiced peanuts, melon seeds, almonds, chestnut, broad bean) to reduce the water drying and to roast cooked products.This machine with electric heating tube for the heat source adopts the rotary cage, heat conduction and heat radiation theory, with automatic temperature control device, takes the hot air as drying medium and puts the heat effect on the baked object. In the baking process, the baked object is advanced ceaselessly by the propulsion device in a cage. So it forms a continuous loop which guarantees uniform heating and the baking quality efficiently.3.Operation Points for Attention in Use(1), Check whether power and drive parts are normal, then click on button to make the rotating cage idling for 3-5 minutes. With nothing abnormal, then open temperature switch to increase temperature. In the heating process, you cannot stop the rotating cage in case of deformation at high temperature.(2), Generally 75 kilograms of peanut fruit or 100 kilograms of peanuts are allowed.(3), During each replacement of peanuts or peanut fruit raw materials, due to the moisture of different, you should first baked 1-2 furnace touch and work out data, then put onto mass production. (4), When finished, turn off the control switch. The rotating cage does not stop until the temperature dropped to 50 degrees in case of static thermal deformation under high temperature.4.Maintenance(1), Check whether the rotating cage control system is normal, the rotating part of the bolt is loosened, temperature control instrument display is normal, intact (open ) warming.(2), Check the rotating cage furnace speed reducer and shaft bearings at both ends in time, and inject gear oil and lubricating grease to prevent damage of oil starvation.(3), Check the rotating cage bottom through the drawer in time, clear the aggregation of secretory ash and other debris in order to prevent smoke polluting the baked.(4), If the new design product comes out, we will inform you.。
加热指示灯3 电
源指示灯
开盖开关 设备名称 红外线烘烤炉 设备功能 烘烤 文件编号 设备型号
厂 商
金遁
版本/次
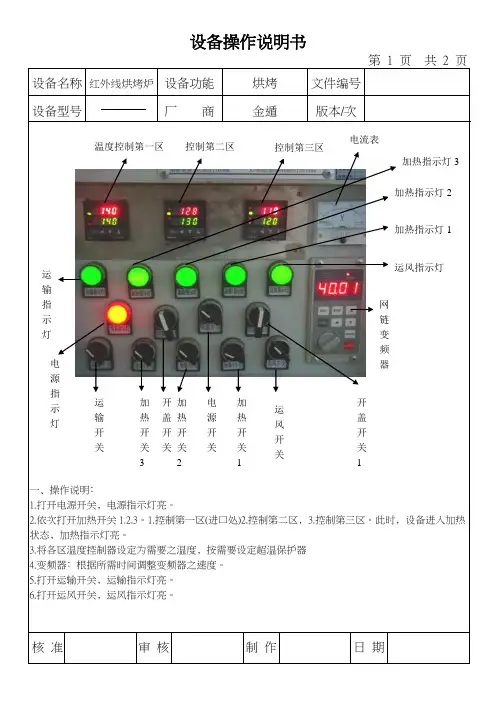
一﹑操作说明﹕
1.打开电源开关﹐电源指示灯亮。
2.依次打开加热开关1.2.3。
1.控制第一区(进口处)2.控制第二区﹐
3.控制第三区。
此时﹐设备进入加热状态﹐加热指示灯亮。
3.将各区温度控制器设定为需要之温度﹐按需要设定超温保护器
4.变频器﹕根据所需时间调整变频器之速度。
5.打开运输开关﹐运输指示灯亮。
6.打开运风开关﹐运风指示灯亮。
核 准 审 核 制 作 日 期
电源开关
加热开关2 加热开关3 加热开关1
温度控制第一区
控制第二区
控制第三区
运输开关 运输指示灯 网链变频器
运风开关
运风指示灯
加热指示灯1
加热指示灯2
开盖开关 1
电流表。
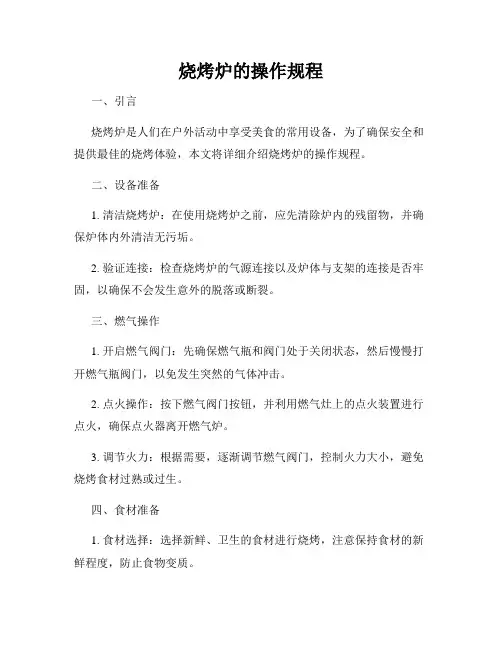
烧烤炉的操作规程一、引言烧烤炉是人们在户外活动中享受美食的常用设备,为了确保安全和提供最佳的烧烤体验,本文将详细介绍烧烤炉的操作规程。
二、设备准备1. 清洁烧烤炉:在使用烧烤炉之前,应先清除炉内的残留物,并确保炉体内外清洁无污垢。
2. 验证连接:检查烧烤炉的气源连接以及炉体与支架的连接是否牢固,以确保不会发生意外的脱落或断裂。
三、燃气操作1. 开启燃气阀门:先确保燃气瓶和阀门处于关闭状态,然后慢慢打开燃气瓶阀门,以免发生突然的气体冲击。
2. 点火操作:按下燃气阀门按钮,并利用燃气灶上的点火装置进行点火,确保点火器离开燃气炉。
3. 调节火力:根据需要,逐渐调节燃气阀门,控制火力大小,避免烧烤食材过熟或过生。
四、食材准备1. 食材选择:选择新鲜、卫生的食材进行烧烤,注意保持食材的新鲜程度,防止食物变质。
2. 切割处理:将食材切成适当的大小或形状,以便于烧烤过程中的均匀加热。
3. 调味:根据个人口味,可使用盐、胡椒粉、烧烤酱等进行腌制或调味处理,提升食物的口感。
五、烧烤操作1. 烧烤前烤格准备:用刷子清洁烤格,确保无残留物,或者在烤格上铺上锡纸,以防粘连。
2. 规避风险:选择安全的地点放置烧烤炉,远离易燃物品和人员密集区域,防止火灾风险。
3. 控制火候:根据食材特性和个人喜好,控制火力大小和烤制时间,注意不要过度烤煮,以免食物焦黑或过干。
4. 定期翻动:定期翻动食物,确保均匀受热,避免烧糊或生坯的现象。
5. 烟熏处理:可以根据个人喜好,使用烟熏木片等增添独特的风味,但要注意烟熏火候和烟雾排放的安全。
六、操作安全1. 火焰监控:在烧烤过程中,时刻关注炉内的火焰状态,如发现异常或明显熄灭,应及时查明原因并处理。
2. 防滑防烫:操作时应注意手部和烤格的防烫保护,以免发生烫伤或滑倒意外。
3. 远离儿童:烤制过程中,应将烧烤炉放置在儿童无法接触的地方,防止发生意外伤害。
七、烧烤后清理1. 断开燃气:在烧烤结束后,及时关闭燃气阀门,并将烧烤炉冷却后才能进行清理。

红外线电烤炉使用说明书Infrared Electric BBQInstruction Manual非常感谢购买红外线电烤炉产品。
使用前请详细阅读本说明书。
说明书请妥为保管。
Thank you for the infrared BBQ purchase.Please read the instruction carefully before using. Please make the manual safekeep.产品简介 Product instruction ………………安装说明 Installation instruction ………使用说明 Usage instruction …………………注意事项 Notes …………………………………清洁保养 Maintenance ………………目录Contents1-23-67-8910产品简介Brief introduction零部件名称: Components炉盖 Cover烤盘 Baking tray水盘 Water tray炉体 Body 故障处理Attention故障代码AttentionE1 热电偶没有插好E2 主板上热电偶插口损坏The thermocouple is damaged onthe mainboardE3 热电偶损坏The thermocouple is damagedE4主板温度过高Too hot for the mainboardE5 主板上传感器损坏the sensor on the mainboard is damaged.E6主板上传感器损坏或风扇吸风口堵塞The sensor on the mainboard isdamaged or the fan is blockedE9The thermocouple is not plugged in故障代码Fault Code解决方法Solution插好主板上脱落的热电偶插头Plug the thermocouple which plugsoff the mainboard更换主板Replace the mainboard更换热电偶Replace the thermocouple1.查看控制器底部风扇的进风口和出风口是否被堵塞。
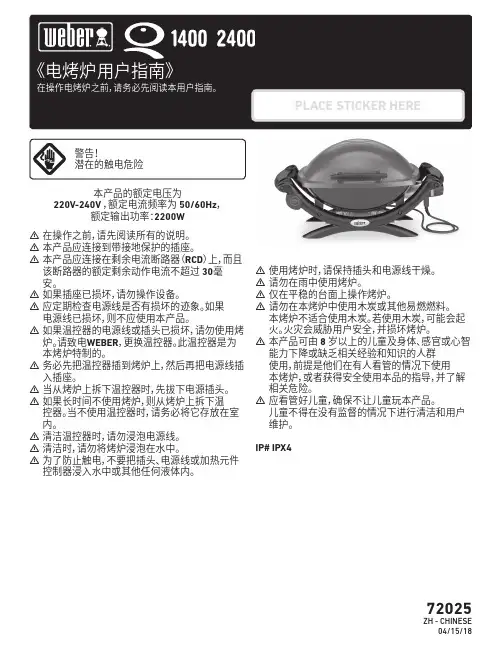
72025ZH - CHINESE04/15/18220V-240V ,额定电流频率为 50/60Hz ,额定输出功率:2200Wm 在操作之前,请先阅读所有的说明。
m 本产品应连接到带接地保护的插座。
m 本产品应连接在剩余电流断路器(RCD )上,而且该断路器的额定剩余动作电流不超过 30毫安。
m 如果插座已损坏,请勿操作设备。
m 应定期检查电源线是否有损坏的迹象。
如果电源线已损坏,则不应使用本产品。
m 如果温控器的电源线或插头已损坏,请勿使用烤炉。
请致电WEBER ,更换温控器。
此温控器是为本烤炉特制的。
m 务必先把温控器插到烤炉上,然后再把电源线插入插座。
m 当从烤炉上拆下温控器时,先拔下电源插头。
m 如果长时间不使用烤炉,则从烤炉上拆下温 控器。
当不使用温控器时,请务必将它存放在室内。
m 清洁温控器时,请勿浸泡电源线。
m 清洁时,请勿将烤炉浸泡在水中。
m 为了防止触电,不要把插头、电源线或加热元件控制器浸入水中或其他任何液体内。
m 使用烤炉时,请保持插头和电源线干燥。
m 请勿在雨中使用烤炉。
m 仅在平稳的台面上操作烤炉。
m 请勿在本烤炉中使用木炭或其他易燃燃料。
本烤炉不适合使用木炭。
若使用木炭,可能会起火。
火灾会威胁用户安全,并损坏烤炉。
m 本产品可由 8 岁以上的儿童及身体、感官或心智能力下降或缺乏相关经验和知识的人群 使用,前提是他们在有人看管的情况下使用 本烤炉,或者获得安全使用本品的指导,并了解相关危险。
m 应看管好儿童,确保不让儿童玩本产品。
儿童不得在没有监督的情况下进行清洁和用户维护。
IP# IPX4若未能遵循本使用手册中的“危险”、 “警告”和“注意”提示,可能导致严重身体伤害或死亡,或者可能引发火灾或爆炸,造成财产损失。
m切勿以任何方式改装本产品或更改其用途。
m您只能按照本手册中的用法使用本烤炉。
本手册未推荐的用法可能造成火灾、触电或人身伤害。
m不得用作加热器。
m使用烤炉时,切勿让烤炉处于无人看管的状态。
Joyoung九使用说明书电烤炉倥气炸锅阳生活电器有
限公司
第一次使用前准备:
1、将电烤炉的炸锅,炸篮取出。
2、使用温水清洁炸锅、炸篮,用浸过清洁剂的混布德拭电烤炉侧壁及底部、待完全干燥后再使用。
3、将电烤炉放置在平稳表面。
请使用单独一条电源线路。
4、电烤炉周围应预面足够空同,保证表面到其它物品至少10cm 距离,顶部及出风口不能放置任何物品。
使用说明书:
1、将食物置于炸篮中。
2、担据食物的高厦,合理放置在炸篮中,保证食物尽量不超过炸监高度。
3、挤炸篮放入炸锅推入电烤炉中,根据食调或个人喜好设置您想要的加热温度,
4、将定时旋钮质时针旋转到适当的烧烤时问,此时电烤炉即开始工作。
5、当烧烤完或。
电烤炉会“叮”的一声响提示您,并自动切断电源。
6、拉出炸锅,持炸锅放置桌子或耐高温的支撑物上按下释放按钮取下炸篮,使用耐高温隔热物件将食物小心地从炸篮中取出或抓住
炸篮把手小心地将食物从炸篮中倒入器血中。
小贴士:
1、请勿使用里料或纸质等不耐热的容器承数食物入电烤炉。
2、请勿使用玻璃或陶瓷的盘子或盖子。
3、可根据个人口味调整烧烤时间,烧烤过程中建议您经常检查食物避免食物烤焦。
4、为使烧烤、烘焙效果更好,建议使用前先预热5-10分钟。
5、电烤炉处于工作状态时和工作结来后的一段时间内,外表面及出风口的温度可能非常高,请勿随意触摸、移动,以免造成危险。
一、基本参数:二、运输与保管:在运输过程中,本产品应小心轻放,以防止剧烈震动,包装好的产品一般不应长期露天存放,应放在通风良好,无腐蚀性气体的仓库内,不能倒置,需要临时存放时,应采用防雨措施。
三、安装位置与注意事项:1. 本产品应放在平稳的地方,左右侧离开不燃物10cm以上,背面应离不燃物20cm以上。
2. 切勿将易燃物品(如毛巾等)放在炉体上,否则可能引起燃烧发生火灾事故。
3. 切勿使用其它气体作燃料。
4. 如发生漏气,应立即关闭煤气阀,打开窗户,加强通风,切勿开、关电源及点火,待维修好后再使用。
5. 使用完毕后关闭好炉擎。
四、使用方法:1. 使用前应检查是否接通煤气管道以及是否接牢后方可使用。
2. 打开煤气调节阀门,用力按下炉体前面的开关,慢慢向反时针方向旋转,直至听到“嘀”一声,然后放手,并在透孔观察是否已经点燃,以确定炉内已经着才能使用,如炉具停用过久,或第一次使用。
可能一次打不着火,因进气管道有空气,可照上述方法再打火,直至打着为止。
3. 炉体前开关转至90°时,火力最大,大于90°时或小地90°火力将逐渐变小。
4. 使用完毕后应将体前面的开关向顺时针方向旋转直至听到“嘀”一声,并将罐装煤气的调节阀门关闭。
5. 用户应定期清除残渣,以保持清洁。
五、清洁与保养:1. 清洁保养时,应关闭好炉擎,以防意外事故发生。
2. 每天工作完毕后,可用不含腐蚀性清洁剂的毛巾,清洁炉体表面,以防损坏炉体表面。
(注意:本炉使用低压气阀,严禁使用中、高压气阀。
)保修卡燃气火山石烧烤炉使用说明书。
组装——第9页感谢您购买WEBER 烤炉。
请花几分钟时间在 上在线注册您的产品,为其提供保护。
72016ZH - CHINESE02/01/18在操作燃气烤炉前,请务必阅读本使用手册。
m 危险如果您闻到燃气味:1) 关闭烤炉的燃气供应。
2) 熄灭任何明火。
3) 打开烤炉盖。
4) 如果仍能闻到燃气味,请远离烤炉并立即致电燃气供应商或 消防局。
燃气泄漏可能引发火灾或爆炸,造成严重的身体伤害、死亡或 产损失。
m 警告1) 请勿在本烤炉或任何其他烤炉附近存放或使用汽油,或者其 他易燃液体或气体。
2) 不得将未连接使用的燃气罐存放在本烤炉或任何其他烤炉 附近。
m 警告:在操作烤炉前,请认真执行本使用手册中的所有燃气泄漏检查步骤。
即使烤炉是由经销商组装的,也请执行这些步骤。
m 警告:请勿在未事先阅读本使用手册中“燃烧炉点火”部分的情况下为本烤炉点火。
仅供户外使用。
安装人员须知: 必须将这些说明留给用户,用户应保留这些说明以供日后参考。
烤炉使用手册LPG警告:m烤炉组装不当可能引发危险。
请认真遵循组装说明。
m请勿在零部件未全部安装到位的情况下使用本烤炉。
必须按照组装说明正确组装烤炉。
m您的 WEBER燃气烤炉切不可让儿童 使用。
烤炉的可接触部件可能会很烫。
请让小孩、老人和宠物远离运行中的烤炉。
m请小心谨慎地使用您的 WEBER燃气 烤炉。
烹调或清洁期间烤炉温度很高,切勿使其处于无人看管的状态,切勿在使用过程中移动烤炉。
m请勿在您的WEBER燃气烤炉中使用木炭、煤球或火山石。
m在给烤炉点火或烹制食物时,切勿俯身于开盖的烤炉上。
m在烤炉发烫或开盖时,切勿将手或手指放在烹调箱的前沿。
m使用时,整个烹调箱都会发烫。
请勿 触碰。
m在烤炉工作期间,无论何种情况都不应尝试断开燃气调节器或任何燃气接头。
m操作烤炉时,请务必戴上防烫烧烤手套或烤箱手套。
m 请遵循适用于您的燃气烤炉类型的调节器连接说明。
m如果燃烧炉在烤炉工作时熄灭,请关闭所有燃气阀。
.0首次安装或使用灶具前须先阅读本说明书以防发生意外或损坏灶具v目录灶具结构 (3)注意事项及安全说明 (4)环保须知 (9)首次使用前 (10)一般说明 (10)首次使用前的清洁和加热 (11)使用 (12)开关 (12)防漏熄火安全装置 (12)烧烤前 (13)烧烤 (14)防漏熄火安全装置 (16)烧烤后 (16)清洁与护理 (17)烧烤架火山石容器加热装置 (17)火山石 (17)烧烤槽 (18)不锈钢表面 (19)玻璃瓷面控制面板 (19)解决问题指南 (20)电气连接 (21)售后服务 (23)数据牌 (23)2灶具结构hga烧烤架b加热装置可提起额定值为 2800 瓦c火山石d火山石容器e操作指示灯f排水龙头g控制旋钮h烧烤槽i主电线j插头视所输往的国家而定本灶具可能附有或不附有插头所示的插头只作解说用途34嵌入式安装和连接如所购买的灶具没有插头或插头已剪去应由合格电气技师严格遵守国家和当地规定安装和连接灶具因错误安装或连接所导致的损坏本生产商概不负责请将本灶具与符合当地和国家规定的地线连接以确保安全定期检查此项基本安全要求至关重要如有任何疑问须交由合格技师检查家中的接线系统因接地不良导致触电等后果本生产商概不负责切勿用延伸电线将本灶具连接至电源延伸电线未必符合本灶具的安全要求例如会有过热危险本灶具的设计不适用于在船或旅行车飞机等流动设备上使用除非已经由合格工程师作出安装风险评估认为适用本灶具符合一切有关的法律安全规定然而不适当使用会导致个人损伤及对灶具造成损坏在安装和首次使用灶具前请仔细阅读本安装和使用说明书说明书提供了有关灶具的安全操作和护理的重要数据阅读上述资料可避免发生意外及对灶具造成损坏切勿让小孩触摸或使用本灶具年老体弱人士使用本灶具时须加以监督请将说明书放在安全的地方并将之转交日后的使用者注意事项及安全说明烧烤炉上面安装抽油烟机使用滤纸或碳式过滤器的抽油烟机不可与本灶具配用开放式烤架不得使用循环式抽油烟机如本灶具装在抽风机下面抽风机的整个排气系统必须用金属制造具有防热功能抽风机的排气管须符合国家和当地的建筑规定如有其它机械通风系统则在使用任何煮食灶具前须先了解该通风系统对燃烧和火焰情况的影响烧烤炉与抽油烟机的距离不得少于650 毫米抽风机的滤网须定期清洗滤网积聚的油脂可能会引起火灾Miele 营业代理员或技术服务人员竭诚为您服务乐于提供任何 Miele 产品的正确安装数据正确使用为安全起见本灶具必须以内置式结构操作因此必须确保所有电气装置均装上防护装置本灶具只供作家居用途不可用于商业目的本灶具只用于在家中制备食物用作任何其它用途可能会造成危险风险由用者自负如因使用或操作不当造成损坏本生产商概不负责本灶具切勿用来为房间取暖切勿在提起加热装置时开炉所产生的高温可能会烧着灶具附近的物品灶具的寿命也将大为缩短本灶具不得在户外安装或操作使用烧烤炉时烧烤槽必须注入水注意事项及安全说明5慎防损坏当烧烤或为食物保温时不要在开放式烧烤炉上放置煲平底锅或类似器具不要使用如铝箔或一次性铝箔容器遮盖烧烤架积聚的热力会损坏烧烤架切勿掉落任何物件在灶具的玻璃瓷面在某些情况下轻的物体也可能造成损坏切勿使用蒸汽清洁机来清洁本灶具蒸汽会侵入电气装置导致短路加压蒸汽也会对炉的表面和组件造成永久性损坏本生产商对此概不负责如使用本烤炉的地方有蟑螂有其它虫害须特别注意本烤炉及附近环境时常保持清洁如因蟑螂或其它虫害导致本灶具受损将不获保修注意事项及安全说明6慎防烫伤本灶具使用中会发出高温熄灭后一段时间仍然烫手切勿让儿童接触他们可能意识不到灶具很热切勿将任何可能引起小孩兴趣的物品贮存在灶具上面或靠近灶具的地方否则小孩可能会爬上灶具引起烫伤为了加强防护使用烧烤炉时宜使用耐热锅架或手套避免使其受潮因为这将使热度迅速传过材料造成烫伤烧烤进行中须看管灶具油烧得太热或食物残渣或脂肪掉到火山石上会使火焰窜起烧着抽油烟机导致火灾烧烤炉上切勿放置任何物品如果仍有余热或错误地将烤炉打开将可能引起物品融化或着火切勿使用如台布或厨房箔纸等物品遮盖烤炉如果错误地打开灶具将可能引起火灾万一烧着请使用适当的灭火毯或灭火器扑灭定期清洁火山石必要时进行更换沾满油的火山石很容易着火每次使用后都要清洁烧烤槽和火山石容器以免油或脂肪积聚切勿让小童触摸到排水龙头因为排出的水可能仍然烫手注意事项及安全说明7灶具损坏如果灶具和陶瓷表面受损应立刻切断电源并在维修之前不得使用如果灶具没有完全安装应从电源点拔出电线如果通过插头和插座连接请关闭插座拔出插头拔插头时只可拉插头而不得拉扯电线与维修服务部联络待损坏的玻璃瓷面面板更换后再使用本灶具否则可能存在危险因为滚泻的液体会由裂缝渗入电气组件导致电击危险维修工作须交由合格人员进行以确保安全由不合格人士进行修理及进行其它工作可能会有危险切勿掀开本灶具的外壳保修期内须交由本公司认可维修工程师维修否则保修无效其它安全守则始终使儿童远离灶具在灶具旁边使用插座时要小心电器的电线不要接触到热的灶具否则会烧毁电线的绝缘层产生触电危险食物要煮熟或彻底翻熟影响整体煮食时间的因素很多包括食物的体积和数量及温度等有些食物含有微生物质要煮透才可将之杀灭因此在煮食或再加热诸如禽类等食物时将食物煮透十分关键如有疑问请选择较长的烹调或翻热时间确保烹调的食物均匀受热注意事项及安全说明8包装材料的弃置本灶具选用不损环境的装箱和防护材料这些材料一般可以循环再用此外还须确保所有的塑料纸和塑料袋均经安全处理并放置在远离儿童的地方以防因误用而窒息请勿随便抛弃确保被回收再造弃置旧灶具旧灶具部分材料可回收再用请向经销商废物收集中心或废料收购商查询有关的回收安排待弃置的旧灶具要妥为存放确保不会对儿童构成危险弃置旧灶具前请关闭并切断电源剪除无用的插头剪去机背电线以防遭人胡乱使用此工作须由合格人员执行环保须知9一般说明数据牌随同使用说明书奉上请将数据牌贴在本说明书底页的空位请将说明书放在安全的地方并将之转交日后的使用者首次使用前10首次使用前的清洁和加热首次使用前请用温和清洁溶液清洁烧烤槽和烧烤架并用软布彻底抹干参见清洁与护理用湿布清洁所有其它灶具表面然后抹干金属装置具有防护涂层新灶具首次加热时可能会发出轻微异味气味和烟雾会在短时间消散并非连接问题或灶具有故障首次使用前开关拧向顺时针方向着炉拧向逆时针方向熄炉拧到0位置便熄炉着炉后控制旋钮左面的操作指示灯会亮着熄炉后灯便熄灭防漏熄火安全装置安全断路开关是确保加热装置在平放位置才加热若不是平放位置便会停止加热使用烧烤前使用烧烤炉可加入或不加入火山石没有火山石冒起的蒸汽会使烧烤中的食物保持湿润烧烤时加入火山石可散发特别浓郁的香味着炉前的准备工夫如下^拿出烧烤架掀起加热装置如不使用的话拿走火山石容器^烧烤槽内水的容量如不使用火山石烧烤注水到上标线a约需 2.5 升水如使用火山石烧烤注水到下标线b约需 1.2 升水^如使用火山石把容器放回烧烤槽^放下加热装置上面套回烧烤架^现在可以着炉使用烧烤正确程序^将火力调校到12位置预热烧烤架约 5分钟^用最高火力烧烤食物几分钟^然后把旋钮拧低至10或9级火力就容易烧着的食物^烧烤中翻转食物一次或更多次烧烤中要注意槽中水位如有需要须加水不要在开放式烧烤炉上放置煲平底锅或类似器具不要使用如铝箔或一次性铝箔容器遮盖烧烤架积聚的热力会损坏烧烤架使用烧烤要点用厨房用纸巾敷在湿食物上吸干水份以免烧烤中爆出火花烧烤后洒点盐到食物上可免抽干水份食物经腌制后再烧烤会更美味未经腌制的食物要涂点油所用的油要能耐高温上表提供的时间仅供参考以烧烤炉已预热和使用 9 至 12 级火力为依据较低的火力适用于为食物保暖食物时间分钟肉类与香肠香肠 6 - 8鱼柳8 - 10汉堡包12 - 16鸡腿16 - 18猪扒14 - 18羊扒8 - 10肝脏 4 - 8火鸡扒8 - 10烤肉串14 - 18肉排 / 肉片8 - 12T 骨扒20 - 25鱼类鳟鱼12 - 16三文鱼柳10 - 12金枪鱼10 - 12蔬菜蔬菜卡巴 5 - 6甜玉米20 - 25洋葱14 - 16水果菠萝片 2 - 3苹果切片2 - 3使用防漏熄火安全装置如水位落得太低安全断路开关会自动熄炉^请加入冷水待灶具冷却后烧烤装置会再次开动您可以继续烧烤烧烤后步骤如下^关掉烧烤炉^每次使用后在灶具尚暖时清洁灶具请参阅清洁与护理^烧烤后留意火山石外观如沾满油会变得乌黑这时须要更换使用烧烤架火山石容器加热装置待灶具冷却后再清洁每次使用后用温水醮清洁剂清洗烧烤架和火山石容器烧固了的食物渍要放在水中浸软再用刷子刷除烧烤装置上的残渍用温和擦洗剂清除清洁后再彻底抹干火山石定期清洁火山石将火山石放入适当的容器并注入温和的清洗溶液任由火山石放置一会儿搅动火山石数次然后倒掉清洗溶液用清水冲洗火山石两到三次将火山石放在适当的纸巾上干透切勿使用蒸汽清洁机来清洁本灶具蒸汽会侵入电气装置导致短路加压蒸汽会对炉的表面和组件造成永久性损坏本生产商概不负责切勿使用沙粉钢丝刷磨蚀性清洁剂或强力清洁剂如除锈剂或除渍剂以免搪瓷面受损切勿使用含有纯碱强酸氯化物或磨蚀性物质的清洁剂以免损坏表面材料可使用温和擦洗剂清洁加热装置尖锐物件会损坏瓷面和炉身的封边以及炉身和灶面的封边要避免使用使用清洁剂清洁不锈钢和玻璃瓷面时必须遵照包装上的生产商指示进行清洁后请用干的软布抹干以免留下石灰垢不要用清洁剂清洗火山石容器的不锈钢表面清洁与护理烧烤槽^烧烤后待烧烤槽中的水冷却后再排出^在烧烤槽下面的排水龙头底部放一个大小适中的容器逆时针方向 a 拧动排水龙头 f 以打开排水龙头^水排空后将排水龙头拧向顺时针方向b 以关上龙头直至不能拧动为止^烧烤槽放入温水和清洁剂彻底清洗^将清洁剂排入适当容器然后放入热水冲洗干 用清洁的布抹干确保烧烤炉底部要方便接触到以便排水待水冷却后才排水以免烫伤不要用清洁剂清洗烧烤槽的不锈钢表面清洁与护理不锈钢表面用醮有少量温和清洁液的软海绵清洁不锈钢表面用软布抹干顽固污渍需先浸润清洁不锈钢表面时可选用不锈钢专用清洁剂请顺着钢粒方向拭抹用力要均匀您也可以使用含保护剂的专用清洁剂以清除瓷面的水斑和污垢将清洁剂涂抹到整个清洁面上不锈钢专用清洁剂和护理剂在大多数百货公司和五金杂货店有售玻璃瓷面控制面板玻璃瓷面和控制旋钮应用温和清洁溶液和清水清洁然后抹干如要使用少许玻璃瓷面专用清洁剂请遵从制造商的说明进行切勿在玻璃瓷面上使用洗涤液以免瓷面留下难以清除的蓝光清洁与护理不过轻微故障可自行解决发生故障开着后烧烤炉不能加热检查以下各项安全断路开关装置是否已启动请参阅安全断路开关灶具是否开着电源保险丝是否完好如保险丝熔断请联络电气技师或维修服务部所有电力维修工作必须由合资格的维修技师执行并必须符合国家及本地的安全规定擅自维修会造成危险解决问题指南数据牌提供了电压额定负载和保险丝额定值请确保这些数据与家中的电源吻合各灶具的电气连接均须采用符合国家和当地安全规定的适当断流开关带保险丝的双极连接装置或带保险丝的插头及开关插座而开关按钮必须在灶具装嵌后容易接触到如灶具安装后插座不能触摸到视国家而定所有电极必须加装断电装置为加强安全应安装 30 微安断路电流的残余电流装置(RCD)符合 DIN VDE 0664VDE 0100 第 739 节关上开关后断流开关所有极必须有 3毫米的接触间隙包括开关保险丝和继电器必须符合EN 60 335重要事项英国适用本灶具供连接单相 230-240 伏 50 赫电源采用 3 芯电线电源线的芯线按照下列颜色分辨绿/黄色= 地蓝色= 中褐色= 火警告本灶具必须接地线所有电气工作必须由适当的合格和胜任人士进行并须严格遵守国家和当地的安全规定由不合格人士进行安装修理及其它工作可能会有危险本生产商对未经许可的工作概不负责进行安装或修理工作时请确保本灶具没有接电本灶具必须嵌入厨柜台面使用以确保所有电气部件已妥为遮蔽带电部件不得外露切勿用延伸电线将本灶具连接到电源延伸电线不保证符合灶具的安全要求电气连接21如本灶具通过带保险丝的插头和开关插座连接本灶具电线内各芯线的颜色未必与插头各线端标明的颜色相符在这种情况下请遵照以下指示连接^绿 / 黄双色线须连接在插头内有 E 字标记接地符号z绿色或绿 / 黄双色的接线端^蓝色线须连接有 N字标记或黑色的接线端^褐色线须连接有 L 字标记英国 / 爱尔兰或 A 字标记澳大利亚 / 新西兰或红色的接线端不可重新接线插头 %6如本灶具配有不可重新接线的插头下列信息将适用如墙上插座不适用于本产品随附的插头必须将之切断并装上适当的插头保险丝座和保险丝必须从旧插头中拆出和弃置应弃置旧插头并千万不要将它插入家中的其它插座有触电危险在更换保险丝后必须重新装上保险丝盖如遗失保险丝盖在换上适当配件前切勿使用插头正确保险丝盖配件的颜色应与插头底部的插入件颜色相同或与插头底部刻字所指的颜色一致视插头的设计而定应安装 ASTA 认可符合 BS 1362 标准的正确保险丝额定值的替代保险丝保险丝的替换盖可向当地的电器供货商或Miele 维修代理购买重要事项本机必须连贯接到符合当地和国家规定的有效接地系统方可确保电气安全定期测试此项基本安全要求至关重要如有任何疑问须由合格电气技师检查家中的接线系统如因接地不良而导致触电等后果本生产商概不负责因错误安装或连接所导致的损坏本生产商概不负责电气连接22售后服务如发生故障自己不能修理请联络Miele 经销商或Miele 维修部请参阅背页地址如要联络维修服务部门请报上炉头的型号和机身编号这些资料可在数据牌上找到数据牌请在此贴上本灶具随附的数据牌确保灶具型号与使用说明书前面所载的型号相同请注意为改善服务您的电话对话可能被录音2324252627香港Miele (Hong Kong) Limited香港铜锣湾希慎道 18 号友邦中心 4 楼 401 室电话(852) 2610 1331传真(852) 2610 1013电邮**********************南非Miele (Pty.) Ltd.304 Tungsten Road, Strydom Park 2194P.O. Box 1654, Randburg 2125电话(011) 793-7452电传 (011) 793-7447网址www.miele.co.za电邮*******************爱尔兰Miele Ireland Ltd.Broomhill Road, Tallaght, Dublin 24电话(01) 46 10 710传真(01) 46 10 797电邮*************网址http://www.miele.ie英国Miele Co. Ltd.Fairacres, Marcham Road, Abingdon, Oxon, OX14 1TW 电话Abingdon (01235) 554455传真(01235) 554477维修部办事处电话Abingdon (01235) 554466网址本公司保留修改权 / 03 本手册用纸为未用氯气漂白的纤维纸。
HD9257产品注册欢迎购买并使用飞利浦产品!为了能充分享受飞利浦提供的支持,请在/welcome 上注册您的产品。
产品概况91021865743C A B D F H G E a控制面板b 透明视窗A 温度降低按钮c 炸篮B 温度增加按钮d 炸篮拆卸按钮滑盖C 预设程序选择按钮e 炸篮拆卸按钮D 灯光按钮f 炸篮手柄E 开始/暂停按钮g 炸锅F 待机按钮h 进风口G 时间减少按钮i 出风口H时间增加按钮j电源线首次使用之前1 拆掉所有包装材料。
2 去除产品上的贴纸或标签(如果有)。
3 首次使用之前,请根据清洁章节中的说明彻底清洁本产品。
使用前的准备1 将本产品置于稳固、水平、平整且隔热的表面上。
注意•请勿在产品上方、两侧及背面放置物品。
这会阻隔气流并影响空气加热的效果。
•切勿将正在运行的产品放在可能被蒸汽损坏的物体 (例如墙壁和橱柜)附近或下方。
•将橡胶塞留在炸锅中。
请勿在烹饪之前将其取出。
使用本产品烹饪表下表提供了常见食物的基本烹饪设置。
注意•这些基本设置仅供参考。
由于食材的来源、大小、形状和品牌各有不同,我们无法保证为您的食材提供最佳设置。
•制作大量食物时(例如,炸薯条、对虾、鸡腿、冷冻点心),为获得更好的效果,请将炸篮中的原料摇晃、翻动或搅拌 2 至 3 次。
原料份量时间分钟温度注意香肠2-6 根10-18180°C炸制期间摇晃、翻动或搅拌原料鸡腿约 125 克1 个2-6 个17-27180°C 鸡胸肉1-5 片15-25180°C 鱼排1-5 块1 层平铺25-32160°C鸡米花 冷冻半成品250 克14-16180°C 炸制期间摇晃、翻动或搅拌原料速冻春卷8-14 块15-30180°C 空气煎炸警告• 该款空气炸锅采用热空气加热。
请勿在炸锅中倒入油、油脂或任何其他液体。
• 切勿触摸高温表面。
接触高温表面前请佩戴隔热手套。
his grill is intended for outdoor household useonly. Do not use indoors or for commenercialcooking. Fuel, such as charcoal briquettes, is not to be used with appliance.The supply cord should be regularly examined for signs of damage and the appliance is not to be used if the cord is damaged.IMPORTANT SAFEGUARDSand before cleaning. Allow to cool before handling.o not operate any appliance with a damaged cord or plug or after the appliance malfunctions or is dropped or damaged in any manner. Return appliance to the near-est authorized service facility for examination repair, or adjustment.o not let cord hang over edge of table or counter or touch hot surfaces.here applicable, always attach plug to appliance and When using electrical appliances, basic safety precautions should always be followed including the following:Read all instructionsTable of Contents1. Important Safeguards32. Illustrated Parts List 43. Exploded View54. Assembly Instructions65. Warnings106. Operating Instructions 107. Cleaning 108. Storage 119. Warranty 111. IMPORTANT SAFEGUARDS nsDANGERFailure to follow the Dangers, Warnings and Cautions contained in this Owner’s Manual may result in serious bodily injury or death, or in fire or an explosion causing damage to property. WARNINGS:m W ARNING: Do not use charcoal or other combustible fuels in this grill. This grill is not designed for charcoal use and a fire could result. The fire could create an unsafe condition and damage to the grill.• A lways plug Temperature Controller into grill beforeplugging power cord into outlet.• D o not operate unit if plug receptacle is damaged.• O perate grill only on a level, stable surface.• D o not in any way alter this product or its use.• I f using an extension cord it must be rated no lessthan that of the appliance. Extension cords must bemarked with the letter “W” and with a tag stating,“Suitable for use with outdoor appliance”.• U se shortest length extension cord possible. Do notconnect 2 or more extension cords together.• D o not immerse grill or Temperature Controller inwater when cleaning.• D o not leave Temperature Controller in the ON posi-tion during periods of non-use.• D o not leave grill unattended when in use.• K eep children and pets away from grill when in use.• Y oung children should be supervised to ensure thatthey do not play with the appliance.• T his appliance is not intended for use by youngchildren or infirm persons unless they have beenadequately supervised by a responsible person toensure that they can use the appliance safely.• C lean drip tray regularly.• L ocate power cord away from traffic areas. Arrangethe cord so that it will not be pulled or tripped over.• D o not use grill near combustible materials such asdry grass, shrubs, etc.• D o not allow grill to come into close contact withflammable materials such as paper, walls, draperies,towels, chemicals, etc.• D o not use as a heater.• D o not move the grill while it is in use. Allow theappliance to cool before moving, cleaning orstoring it.• D o not use grill when raining or snowing.• T o prevent grill from being splashed or falling intowater, do not set grill within 10 feet of any body ofwater such as a pool or pond.• D o not operate grill with a Temperature Controllerthat has a damaged cord or plug. Call The FulhamGroup for a replacement Temperature Controller.The Temperature Controller is made specifically forthis grill.• P ulling Temperature Controller by the knob couldcause the knob to come off.• D o not allow cord to touch the grill when it is hot.• T his grill is intended for outdoor household useonly. Do not use indoors or for commercial cooking.• I f a flare up occurs, do not use water to put out fire.Turn grill to OFF. Unplug power cord and wait forgrill to cool.• M ake sure no other high wattage appliances areplugged into the same circuit when using grill.• D o not clean this product with a water spray or thelike.• U nplug grill when not in use and cover when cool.Properly store the appliance indoors when not inuse – out of the reach of children.• U se this grill only as described in this manual. Anyother use not recommended in this manual maycause fire, electric shock, or injury to persons.• A lways ensure that electrical socket being used hasthe correct rating. Socket must be rated no lessthan 120V AC, 13Amps.• T his appliance conforms to technical standards andthe safety requirements for electrical devices.• T he dip tray must be in place at all times during grilloperation.• D o not build this model of grill in any built-in orslide-in construction. Ignoring this warning couldcause a fire or an explosion that may damageproperty or cause serious bodily injury or death.2. Illustrated Parts ListA. Lid & Firebox 1 pcB. Left Foot 1 pcC. Right Foot 1 pcD. Cooking Grate 1 pcE. Drip Tray 1 pcF. Temperature Controller 1 pc3. Exploded Diagram1Lid15Probe Decoration Panel30Decoration Panel2Lid Handle Base Assy16Lock Handle31Upper Leg3Lid Handle17Probe Assembly32Button4Hook18Firebox Assembly33Sliding Lock5Lid Inner Panel19Lock Spring34Spring6Cooking Grate20Lock35Button Spring7Upper Part Lid Hinge21Drip Pan Assembly36Lower Leg Fixing Part 8Stopper22Drip Tray Right Bracket37Upper Leg Fixing Part 9Heating Element23Drip Tray Left Bracket38Lower Leg End Cap 10Lid Cushion 24Leg Assembly Bracket39Lower Leg11Lower Part Lid Hinge25Stop Panel40Left Foot12Lid Hinge Pin Assembly26Upper Leg End Cap41Right Foot13Reflector Assembly27Upper Leg Pin42Rubber Feet14Control Panel Assembly28Upper Leg Holder43Probe Guard29PinButton4. Assembly InstructionsRemove all the contents from packaging, and make sure all parts are present before attempting to assemble!Step 1: Attach FeetPut the left foot and right foot on the lower leg as illustrated. The feet and legs have color coded arrows on them. When properly aligned, two ar -rows of the same color will be pointing at each other.Step 2: Extend Legs to mid position.Move the left foot and right foot as illustrated until the end.Step 3: Extend legs to high positionPush the button and pull the legs out until the end.If only mid height is desired, skip to step 4.Step 4: Lift Grill to HeightHold both sides of the chassis and lift up until the legs standing on the ground.Step 5:Put the grill down and check if the legs are in the position as illustrated.Leg tip should be visible through bracket holeStep 6: Put the Drip Tray to the correct position as shown.Step 7: Put the probe into the correct position in the frame as shown.To Collapse grillStep 1: Wait for Grill to cool completelyStep 2 : Be sure gas bottle or supply hose is disconnectedStep 5: Push legs inward towardgrill chassis. You must push the legrelease button (as shown) to collapselegs under grillStep 4: While holding grill offthe ground,swing the legs apart andlower the grill slowly at the sametime, continue until grill is flat on theground with legs to the sides Step 3 : Place one foot on eachgrill foot and lift grill chassis up-wards to unlock legs4. Assembly Instructions (cont.)m WARNINGS• Any modification of the appliance may be dangerous.• Visually inspect cord, plug and Temperature Controller for damage and wear before operation.• W hen heating the grill for the first time, it may give off a slight burning odor. The grill is burning off excess lubri-cants found on the heating element. This does not affect the safety of your grill.• T o prevent fire or electric shock, always use a certified electrician should new circuits or outlets be required.• I mproperly grouded outlets could cause electrical shock.• T he use of an extension cord is not recommended. If you must use an extension cord, use the shortest length extension cord possible. Do not connect 2 or more ex-tension cords together. Keep connections off the ground and dry. Do not let cord hang over edge of table top where it can be tripped over or pulled by children. Only use extension cord labeled for outdoor use.• C over grill or store in weather protected area when not in use.• C lean the grate and cookbox between uses.– W arning: Do not use the barbecue within 60 cm (24in) of combustible materials from the back or sides of the grill. Do not use under any combustible construction.– W arning: The entire cooking box gets hot when in use.Do not leave unattended.– W arning: Keep any electrical power cord away fromany heated surface.– W arning: Keep the cooking area clear of inflammable vapors and liquids such as petrol, kerosene, alcohol,etc., and other combustible materials.– W arning: When cooking, the appliance must be on a level, stable surface in an area clear of combustiblematerial.– W arning: Keep cord clear of cookbox.Dangers– P lace the grill on a stable, non-combustible surface– D o not use indoors, or in a recreational vehicle or on a boat– E nsure temperature controller is plugged fully into grill before proceedingCOOkING1) Open lid2) E nsure cooking grate is properly positioned in grill,and that firebox is free from debris.3) P reheat grill– T urn knob clockwise to MAX. Red light indicates thatpower is on.4) C lose lid and allow grill to heat for 5-10 minutes(longer in clod weather)5) W hen beginning to cook, a lower temperature may beselected by turning knob counterclockwise.6) W hen cooking is complete, turn knob counterclockwise to OFF. Unplug temperature controller.See storage section for additional requirements.Cleaning the outside surface:1. W ipe surface grime off with a clean cloth and mild dishwashing detergent or baking soda.2. F or stubborn surface dirt, use warm soapy water solution and a nylon scrubbing brush.3. Clean the rinse with water.4. Allow surfaces to dry fully before use.Cleaning the Heating Element:1. E nsure the grill is unplugged from the power source and the temperature control unit is removed.2. Remove the cooking grate.3. R emove the heating element by unscrewing the wing nuts and lifting the element out.4. G ently clean the heating element with a damp cloth. Do not scratch the element’s surface or immerse in water.5. Reinstall the heating element.6. I nspect the temperature controller and the power cord for by any possible damage, and then reinstall.Any other servicing should be performed by an authorized service representative.5. WARNINGS 8. STORAGE6. OPERATING INSTRUCTIONS7. CLEANING9. WARRANTY and REPLACEMENT PARTSThis warranty covers defects in parts and workmanship for a period of 3 years from the originalpurchase date. Any damage claim regarding the enameling must be submitted within 30 days ofpurchase to be covered by the warranty.The following conditions are NOT covered by this warranty:• Unevenness and color variations in the enamel coating.• Damage caused by improper assembly or disregard of the manual.• Use of spare parts not supplied by manufacturer.• Damage resulting from modifications or inappropriate use.• Abuse of the grill• Damage caused by improper maintenance or repairs by an unauthorized person.Limitations and exclusions:1. This warranty applies only to the original purchaser and may not be transferred.2. I f you can not verify the purchase date of the grill the warranty period will begin on the date thegrill was manufactured.3. Replacement or repair parts are warranted for the remaining period of the original part warranty.Your obligations:This grill must be assembled, installed, operated and maintained in accordance with all applicablecodes and the instruction manual furnished with this grill. You must keep an invoice, cancelledcheck or payment record to verify the purchase date of the grill.STORAGE AND/OR NON-USE• D uring periods of non-use, the Temperature Controllerwith power cord should be in the “OFF” position. Storegrill indoors.OPERATINGm WARNING: The grill must not be used upon anycombustible surface such as dry grass, shrubs, etc.m WARNING: The grill is not intended for installation inor on recreational vehicles, SUVs and/or boats.m WARNING: T o protect against electrical shock, do notimmerse any part of this appliance in water or any otherliquid.Outside surface – Use a warm soapy water solution toclean , then rinse with water.For troubleshooting, FAQs or customer service, visit us at www.cuisinartgrilling. com/customerservice or contact us at 1-866-994-6390T o order replacement parts or additional Cuisinart Grilling products,visit us at or call 1-800-211-9604Model# CEG 980North American Distributor:The Fulham GroupNewton, MA 02466。
概述
本烤炉由单片机系统组成精密控制电路。
由SSR[过零触发型]作电子开关,设定和炉盘温度由LED数码分二排直接显示。
比较传统型感温片控制电路,具有控温精度高,无火花,节能环保的特点。
设定温度段方便灵活,使烤肉温度恰到好处,味道鲜美,口感柔和。
深受广大顾客的喜爱。
一、面板示意图
1、炉丝加热指示灯;
2、高温键[烤肉温度键];
3、控温指示灯;
4、中温键;
5、停止加热指示灯;
6、停止加热键;
7、数码显示器。
二、详细说明
1、上电后,显示器亮。
上一行显示炉盘温度,下一行显示设定温度。
2、设定温度分二档,当按高温键时,设定温度为210℃±3℃,当按中温键时,设定温度为120℃±3℃。
3、烤肉温度一般设定在210℃,当需要烤肉时,按高温键,此时,若炉盘温度低于设定温度时,高温键上面的红色指示灯亮,表示烤炉处于加热状态,当炉盘温度升到大于或等于设定温度时,加热指示灯由交替闪烁到熄灭,当加热指示灯熄灭时,控温指示绿灯亮,表示已经达到烤肉温度。
4、当炉盘温度低于设定温度时,烤炉自动接通加热,如此反复,使炉盘温度一直被控制在设定温度范围内。
5、如果不需要继续保持在烤肉控温状态时,可按动中温键,此时中温键上方绿灯亮,这样炉盘经过自然降温后,被保持在中温状态,炉盘被控制在120℃范围内;当低于该温度时,高温键上方的加热灯亮,到达该温度时,控温绿灯亮。
6、当不需要加热时,按动“停止”键,烤炉结束控温工作,此时,该键上方的红色指示灯亮。
三、后侧板示意图
1、电源开关,工作时顺时针方向,轻轻旋转到定位不动时停止。
2、电源保险丝。
容量6A。
需要换新时,逆时针方向旋开,装入保险丝后,顺时针方向旋紧。
3、电源线及插头,带有保护接地。
四、技术参数
1、电源:单相220V±15%(功率大于1000V A)。
2、烤炉功率:P=1000W。
3、控制方式:SSR过零触发方式。
4、整机重量:约1KG。
5、外形尺寸:460×260×100
6、烤盘尺寸:280×210
五、具体操作方法
1、把电源插头插入带有保护接地的插座中,当接地线位于上方时,插座的右孔=L,左孔=N。
2、显示器正常显示时(非常情况下,当显示不正常时,可按一下“停止”键)上一行显示炉盘温度,下一行显示中温温度120℃。
3、按动一次高温键,加热指示灯亮(炉丝通电状态),炉盘温度开始升高,设定温度由120℃变成210℃。
4、当温度达到设定温度时,加热灯灭,控温灯亮,表示已经达到了烤肉温度。
5、当需要烤炉在保温状态时,按动“中温”键。
6、烤肉结束时,按“停止”键。
六、维护与保养
1、注意防止水和油直接渗入到控温仪内部。
2、每天使用最后结束时,要清理炉丝底部盘中残油。
3、轻拿轻放,不可跌落、撞击。
4、轻触按键,切忌过度用力。
七、常见故障排除
1、接入电源后,显示器不亮,请检查电源开关是否右旋到位;保险丝座帽是否松动,保险丝是否断路或被人抽出。
2、温度达不到高温210℃时,请检查设定温度是否是该值,再按一下“高温”键看设定温度正确否。
3、如果上电后,炉盘温度显示为零,说明感温元件可能断路或感温元件相关联线断路,如果再按一下“停止”键,仍旧如此,请联系有关专业修理部门。
4、上电后,显示器亮,设定温度正确,按“高温”键后温度始终不上升,说明有可能炉丝断路,请联系有关专业修理部门。