喷墨打印机维修手册
- 格式:docx
- 大小:37.25 KB
- 文档页数:3

喷墨打印机喷头维修手册喷墨打印机是现代办公生活中常见的重要设备,而喷头是其核心部件之一。
然而,由于使用不当或长时间使用,喷头可能会出现故障或损坏,导致打印质量下降或无法正常工作。
为了帮助用户解决这些问题,本手册将详细介绍喷墨打印机喷头的维修方法。
请在使用手册前认真阅读以下说明:注意事项:1. 维修过程需要有相关技能和经验的人员进行,非专业人士请勿尝试修理。
2. 在进行维修操作时,请确保打印机已断电并且冷却。
3. 维修过程中可能会出现墨水泄漏,请准备好适当的防护措施,防止墨水溅到皮肤或衣物上。
维修步骤:步骤一:喷头清理1. 打开打印机的墨盒盖,将墨盒取出。
2. 使用棉签蘸取少量清水,轻轻擦拭喷头表面,去除可能堆积的墨水残留。
3. 等待喷头表面干燥后,重新安装墨盒。
步骤二:喷头对齐1. 打开打印机设置界面,在菜单中找到“打印机设置”或“喷头对齐”选项。
2. 根据界面上的指引,按照说明进行喷头对齐操作。
步骤三:喷头冲洗1. 打开打印机设置界面,在菜单中找到“打印维护”或“喷头维护”选项。
2. 选择“喷头冲洗”或“清洗喷头”功能,并按照提示进行操作。
3. 完成冲洗后,进行喷头对齐操作。
步骤四:更换喷头1. 如果经过清理和冲洗后,喷头问题仍未解决,可能需要更换新的喷头。
2. 喷头的更换方法因品牌和型号而不同,可以参考打印机的用户手册或联系售后服务中心获取更详细的说明。
步骤五:喷头维修注意事项1. 在维修过程中,要注意不要触摸喷头的金属部分,以免造成损坏或静电干扰。
2. 若维修后喷头仍无法正常工作,请考虑寻求专业维修人员的帮助。
请注意,本手册所述维修方法仅适用于一般情况下的喷头故障,特殊情况下可能需要针对性的维修操作。
如遇到其他问题,请参考打印机的用户手册或联系相关厂商获得帮助。
给您的喷墨打印机喷头维修手册到此结束。
希望本手册的内容能够帮助您解决喷头问题,使打印机恢复正常工作。
如果您有任何其他疑问或需要进一步的帮助,请随时联系我们的技术支持团队。

本文提供一个简单的问题诊断流程,请根据打开打印机电源后,电源灯的情况,按照下面的流程图一步一步判断并解决您遇到的问题。
适用范围:hp DeskJet 3320,3323,3325,3420,3425,3538,3558打印机问题快速诊断流程图:请按照下面的错误诊断流程图的顺序,来判断打印机到底属于什么问题。
其中,对于关键的步骤和一些诊断检测的方法,请参看下面的注释部分,我们都做了详细的说明。
注释1 :打印机硬件检测方法通过打印机的硬件检测过程,我们可以大概判断打印机是否存在硬件问题。
具体检测方法如下:1. 关闭打印机电源,然后断开打印机和电脑之间的连线。
2. 然后再次打开打印机电源,确认电源灯是否为常亮而不是闪烁(如果电源灯闪烁,则按照流程图中蓝线左边的部分进行故障判断。
3. 如果电源灯常亮,则用左手按住电源键别松手,右手迅速掀开、关上打印机上盖4 次。
请注意:上盖开、关的幅度不用很大,但是开、关速度一定要快,连续4 次,然后松开电源键。
结果判断:1. 如果能够完成的打印出一张测试页,就说明打印机正常;2. 如果不能够完整的打印出测试页,或者根本没有反应,就说明打印机硬件有问题。
注释2 :墨盒小车手动复位方法当打印机不打印的时候,打开打印机的上盖,发现墨盒小车根本不能移动出来,而是停在打印机的右侧(面对打印机,右手的位置。
这种情况有可能是因为墨盒小车被墨盒清洁服务栈卡住而造成的。
此时,我们可以对墨盒小车进行手动复位来尝试解决。
手动复位方法如下:1. 关闭打印机电源,打开打印机上盖。
2. 慢慢的把墨盒小车从打印机右侧拉出来,然后再将墨盒小车向着打印机的左边推回去,推到头。
3. 关上打印机上盖,重新打开电源,等待1分钟后。
结果判断:1. 如果此时打开打印机上盖,墨盒小车能够正常移动出来,就说明打印机复位成功,可以按照注释1 去重新检测打印机硬件是否有问题;2. 如果墨盒小车还是不能够移动出来,那么就是打印机的硬件问题了,此时需要联系维修中心对打印机进行检测维修了。
发行负责人:
维修组别:Group2
版本号:
Ver.1.0
维 修 企 划
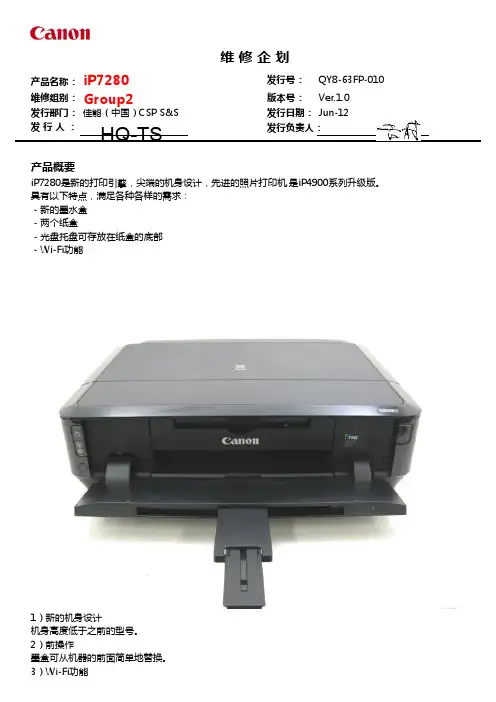
产品名称:iP7280发行号:QY8-63FP-010iP7280是新的打印引擎,尖端的机身设计,先进的照片打印机,是iP4900系列升级版。
具有以下特点,满足各种各样的需求: - 新的墨水盒 - 两个纸盒
- 光盘托盘可存放在纸盒的底部 - Wi-Fi功能
产品特点
1)新的机身设计
机身高度低于之前的型号。
2)前操作
墨盒可从机器的前面简单地替换。
3)Wi-Fi功能
通过Wi-Fi功能,可在更多的地点设置打印机。
发行部门:佳能(中国)CSP S&S
发行日期:Jun-12发 行 人 :
产品概要
HQ-TS
墨盒可从机器的前面简单地替换。
HP Officejet 7000 (E809a) 墨盒hp920宽幅喷墨打印机指示灯闪烁的解决方法打印机前端的指示灯用于指示其运行状态。
根据打印机所处的状态,这些指示灯可能会亮起、熄灭或闪烁。
“电源”、“恢复”、“网络”指示灯和“墨盒”指示灯能够以不同方式闪烁,反映打印机状态或报错。
故障现象电源指示灯:闪烁恢复指示灯:熄灭网络指示灯:熄灭墨盒指示灯:全部熄灭解决方法:无需执行任何操作当打印机正在处理打印作业,或者等待墨水干燥时,“电源”按钮()指示灯会不停闪烁。
您无需执行任何操作。
等待打印作业完成或墨水完全干燥。
故障现象电源指示灯:闪烁恢复指示灯:闪烁网络指示灯 : 熄灭墨盒指示灯:全部熄灭解决方法一:清除卡纸请按照以下步骤操作,清除打印机中的卡纸。
步骤一:取出松散的纸张取出进纸盒和出纸盒中所有的松散纸张。
注意:此时先不要清除卡纸。
从前端清除卡纸可能会损坏打印装置。
步骤二:清除卡纸这些步骤只是清除卡纸的基本方法。
如果您希望了解详细步骤,您可以参考以下文章操作:HP Officejet 7000 (E809a) 宽幅喷墨打印机- 电脑上显示"卡纸"错误信息,怎么办?注意:不要尝试从打印机正面清除卡纸,这可能会损坏打印机。
关闭并转动打印机,使其背面朝前。
卸下后检修盖。
从滚轮中轻轻取出所有卡纸。
注意:如果在将纸张从滚轮中取出时将其撕破,请检查滚轴和滚轮上是否有纸张碎片,以免碎片残留在打印机内部。
如果打印机内部有纸张碎片残留,则可能造成更多的卡纸故障。
重新装上后面板。
打开打印机顶盖,然后取出所有纸张碎片。
启动打印机,然后再次尝试进行打印。
解决方法二:确保笔架能够自由活动笔架可能被卡。
按照以下步骤操作,确保笔架能够自由移动。
从打印机背面拔下电源线和USB 连接线。
注: 请在电脑提示时重新连接电源线和USB 连接线。
打开顶盖。
检查笔架能否从打印机的一侧自由地移动至另外一侧。
适度按压笔架的一侧,然后将其前后滑动。

CONFIDENTIALColor Inkjet PrinterEpson WF-7620 Series Epson WF-7610 Series Epson WF-7110 SeriesNotice:All rights reserved. No part of this manual may be reproduced, stored in a retrieval system, or transmitted in any form or by any means, electronic, mechanical, photocopying, recording, or otherwise, without the prior written permission of SEIKO EPSON CORPORATION.All effort have been made to ensure the accuracy of the contents of this manual. However, should any errors be detected, SEIKO EPSON would greatly appreciate being informed of them.The contents of this manual are subject to change without notice.The above not withstanding SEIKO EPSON CORPORATION can assume no responsibility for any errors in this manual or the consequences thereof.EPSON is a registered trademark of SEIKO EPSON CORPORATION.Note:Other product names used herein are for identification purpose only and may be trademarks or registered trademarks of their respective owners. EPSON disclaims any and all rights in those marks.Copyright © 2014 SEIKO EPSON CORPORATIONPrinter CS Quality Assurance DepartmentSafety PrecautionsAll safety procedures described here shall be strictly adhered to by all parties servicing and maintaining this product.DANGERStrictly observe the following cautions. Failure to comply could result in serious bodily injury or loss of life. 1.Always disconnect the product from the power source and peripheral devices when servicing the product orperforming maintenance.2.When performing works described in this manual, do not connect to a power source until instructed to do so.Connecting to a power source causes high voltage in the power supply unit and some electronic components even if the product power switch is off. If you need to perform the work with the power cable connected to a power source, use extreme caution to avoid electrical shock.WARNINGStrictly observe the following cautions. Failure to comply may lead to personal injury or loss of life.1.Always wear protective goggles for disassembly and reassembly to protect your eyes from ink in working. Ifany ink gets in your eyes, wash your eyes with clean water and consult a doctor immediately.2.When using compressed air products; such as air duster, for cleaning during repair and maintenance, the useof such products containing flammable gas is prohibited.PRECAUTIONSStrictly observe the following cautions. Failure to comply may lead to personal injury or damage of the product.1.Repairs on Epson product should be performed only by an Epson certified repair technician.2.No work should be performed on this product by persons unfamiliar with basic safety knowledge required forelectrician.3.The power rating of this product is indicated on the serial number/rating plate. Never connect this product tothe power source whose voltages is different from the rated voltage.4.Replace malfunctioning components only with those components provided or approved by Epson;introduction of second-source ICs or other non-approved components may damage the product and void any applicable Epson warranty.5.The capacitors on the Main Board may be electrically charged right after the power turns off or after drivingmotors which generates counter electromotive force such as when rotating the PF Roller or when moving the CR Unit. There is a risk to damage the Main Board if the Head FFC is short-circuited with the capacitors on the Main Board electrically charged, therefore, after the power turns off or after motors are driven, leave the printer untouched for approximately 30 seconds to discharge the capacitors before starting disassembly/ reassembly.6.To prevent the circuit boards from short-circuiting, be careful about the following when handling FFC orcables.When handling FFC, take care not to let the terminal section of FFC touch metal parts.When connecting cables/FFC to the connectors on circuit boards, connect them straight to the connectors to avoid slant insertion.7.In order to protect sensitive microprocessors and circuitry, use static discharge equipment, such as anti-staticwrist straps, when accessing internal components.8.Do not tilt this product immediately after initial ink charge, especially after performing the ink charge severaltimes. Doing so may cause ink to leak from the product because it may take some time for the waste ink pads to completely absorb ink wasted due to the ink charge.9.Never touch the ink or wasted ink with bare hands. If ink comes into contact with your skin, wash it off withsoap and water immediately. If you have a skin irritation, consult a doctor immediately.10.When disassembling or assembling this product, make sure to wear gloves to avoid injuries from metal partswith sharp edges.e only recommended tools for disassembling, assembling or adjusting the printer.12.Observe the specified torque when tightening screws.13.Be extremely careful not to scratch or contaminate the following parts.Nozzle plate of the printheadCR ScalePF ScaleCoated surface of the PF RollerGearsRollersLCDScanner SensorExterior parts14.Never use oil or grease other than those specified in this manual. Use of different types of oil or grease maydamage the component or give bad influence on the printer function.15.Apply the specified amount of grease described in this manual.16.Make the specified adjustments when you disassemble the printer.17.When cleaning this product, follow the procedure described in this manual.18.When transporting this product after filling the ink in the printhead, pack the printer without removing theink cartridges in order to prevent the printhead from drying out.19.Make sure to install antivirus software in the computers used for the service support activities.20.Keep the virus pattern file of antivirus software up-to-date.21.When disassembling/reassembling this product, if you find adhesive power of the double-sided tape whichsecure the parts or FFC is not enough, replace the tape with new one and attach it correctly to the specified points where the parts or FFC should be secured.22.Unless otherwise specified in this manual, the labels attached on the returned product should be transferred tothe corresponding attachment positions on the new one referring to the labels on the returned product.About This ManualThis manual, consists of the following chapters, is intended for repair service personnel and includes information necessary for properly performing maintenance and servicing the product.CHAPTER 1. TROUBLESHOOTINGDescribes the step-by-step procedures for the troubleshooting.CHAPTER 2. DISASSEMBLY / REASSEMBLYDescribes the disassembly/reassembly procedures for main parts/units of the product, and provides the standard operation time for servicing the product.CHAPTER 3. ADJUSTMENTDescribes the required adjustments for servicing the product.CHAPTER 4. MAINTENANCEDescribes maintenance items and procedures for servicing the product.CHAPTER 5. APPENDIXProvides the following additional information for reference:•Connector Diagram•Protection for TransportationSymbols Used in this ManualVarious symbols are used throughout this manual either to provide additional information on a specific topic or to warn of possible danger present during a procedure or an action. Pay attention to all symbols when they are used, and always read explanation thoroughly and follow the instructions.Indicates an operating or maintenance procedure, practice or condition that, if not strictly observed,could result in serious injury or loss of life.Indicates an operating or maintenance procedure, practice, or condition that, if not strictly observed,could result in bodily injury, damage or malfunction of equipment.May indicate an operating or maintenance procedure, practice or condition that is necessary toaccomplish a task efficiently. It may also provide additional information that is related to a specificsubject, or comment on the results achieved through a previous action.For Chapter 2 “Disassembly/Reassembly”, symbols other than indicated above are used to show additional information for disassembly/reassembly. For the details on those symbols, see "2.2 Disassembly/Reassembly Procedures (p28)".Revision StatusA July 26, 2013First ReleaseB April 21, 2014Revise the contentsChapter 1Made change the description in "1.3 Fatal Error Code List (p15)""1.4 Status sheet (p20)" has been added.Chapter 3Made change the description in "3.2.2.2 Preparation (p65)"ContentsChapter 1 Troubleshooting1.1Troubleshooting (10)1.1.1Troubleshooting Workflow (10)1.2Power-On Sequence (13)1.3Fatal Error Code List (15)1.4Status sheet (20)1.4.1Start method of Inspection Mode (20)1.4.2Description of Status sheet (Non-disclosed information to user) (21)Chapter 2 Disassembly/Reassembly2.1Overview (24)2.1.1Tools (24)2.1.2Jigs (24)2.1.3Standard Operation Time for servicing the product (25)2.2Disassembly/Reassembly Procedures (28)2.2.1Functional differences between models and component parts (28)2.2.2Functional differences between models and component parts (30)2.2.3Disassembly Flowchart (31)2.2.3.1Housing Part (WF-7620/WF-7610 Series) (32)2.2.3.2Housing Part (WF-7110 Series) (33)2.2.3.3Printer Mechanism Part (34)2.3Detailed Disassembly/Reassembly Procedure for each Part/Unit (38)2.4Routing FFCs/cables (47)Chapter 3 Adjustment3.1Required Adjustments (53)3.2Details of Adjustments (61)3.2.1PF/CR Timing Belt Tension Measurement (61)3.2.1.1PF Timing Belt Tension Measurement (62)3.2.1.2CR Timing Belt Tension Check (63)3.2.2PG Adjustment (64)3.2.2.1PG Adjustment procedure (64)3.2.2.2Preparation (65)3.2.2.3PG adjustment procedure (68)3.2.2.4Checking the Platen Gap (70)3.2.3Touch Panel Adjustment (WF-7620/7610 Series only) (71)Chapter 4 Maintenance4.1Cleaning (76)4.1.1Cleaning the CR Unit (76)4.1.2Cleaning the Exterior Parts/inside of the printer (77)4.2Lubrication (78)4.3Lubrication Points and Instructions (79)4.4Firmware Update (82)Chapter 5 Appendix5.1Connector Diagram (85)75.2Protection for Transportation 865.2.1Securing the CR Unit 86CHAPTER1101.1 TroubleshootingThis section describes the troubleshooting workflow.1.1.1 Troubleshooting WorkflowThe following page describes the troubleshooting workflow. Follow the flow when troubleshooting problems.Figure 1-1.Troubleshooting Workflow (1) This flowchart is compiled based on the following contents.•Our experience regarding the quality problem•ESK’s repair data•Printer Mechanism specification for WF-7620/WF-7610/WF-7110 SeriesWF-7110 Series does not have the Scanner/ADF unit, so the troubleshooting for theScanner/ADF unit is not applicable to this series.If the reason for the return is evident, first check the phenomenon user claims recurs,then proceed to the troubleshooting.5What is returned reason?2Standby condition 3Is printing operationfinished without error?Turn on the printer 14(p 11)(p 11)(p 11)(p 12)(p 12)Copy an image*:In case of “Not Trouble Found”, check fatal error code.6(p 12)ADF/Scannerunit failurePrinter failure only Yes No YesNo Yes Yes No Yes Yes NoNo No No Yes Does printer turn on thepower?Is Power-on sequencefinished without error?Print check pattern Is printing operationfinished without trouble?Is scanning operationfinished withouttrouble?Is ADF operation finished without trouble?Copy an image by ADFADF failure?Please refer to " 1.3 Fatal Error Code List (p15)"for troubleshooting.[Occurrence Condition]This error occurs when maintenance counter inEEPROM exceeds the specified value.[Major Occurrence Timing]•Power-on timing •Print start timing •Paper eject timing •Cleaning timing•Ink cartridge replacement timing [Major Troubleshooting]•Replace Maintenance Box •Paper Guide Lower Porous Pad replacement•Maintenance counter reset (only Paper Guide Lower Porous Pad)[Occurrence Condition]This error occurs whenMaintenance Box is not installed.[Major Occurrence Timing]•At power-on•Maintenance Box monitoring timing [Major Troubleshooting]Turn the printer off once and install Maintenance Box again, and turn the power on.[Occurrence Condition]This error occurs whenMaintenance Box data is incorrect or it is not recognized correctly.[Major Occurrence Timing]•Power-on timing•Maintenance Box replacement timing•Maintenance Box monitoring timing [Major Troubleshooting]•Remove and reinstall Maintenance Box•Maintenance Box replacement •Relay Board CSIC Terminal replacement•Relay Board Assy replacement •Relay Board FFC replacement •Main Board replacement[Occurrence Condition]This error occurs when Inkcartridge data is incorrect or Ink cartridge is not recognized correctly.[Major Occurrence Timing]•Power-on timing •Print start timing •Cleaning timing•Ink cartridge replacement timing [Major Troubleshooting]•Remove and reinstall Ink cartridge.•Ink cartridge replacement •CSIC Terminal replacement •CR Contact Module replacement•Head FFC replacement •Main Board replacement[Presumable Cause]•Power Supply Unit damage•Main Board damage •Panel Unit damage [Major Troubleshooting]•Power Supply Unit replacement •Main Board replacement•Panel Unit replacement2* : If the printer can turn on but turns off right away, the protection circuit may cut off the power due to an error such as a circuit failure.The power-on sequence does not start (p 10)1Error is indicated during power-on sequence (p 10)[Occurrence Condition]This error occurs when ink in Ink cartridge is empty.[Major Occurrence Timing]•Power-on timing •Print start timing •Print timing •Cleaning timing•Ink cartridge replacement timing [Major Troubleshooting]Ink cartridge replacement [NOTE]If an error occurs duringprinting, the page where the error occurred is skipped and the printing resumes from the next page.[Occurrence Condition]This error occurs when Ink cartridge is not installed.[Major Occurrence Timing]At power-on[Major Troubleshooting]Install Ink cartridge[Occurrence Condition]This error occurs when Scanner Unit (Printer Cover) is open.[Major Occurrence Timing]•At power-on •During printing[Major Troubleshooting]•Close Scanner Unit (Printer Cover) replacement•Scanner Unit (Printer Cover) replacement•Cover Open Sensor replacement•Main Board replacement[Occurrence Condition]This error occurs if a paper jam occurs during the power-on sequence before initial ink charge.[Major Occurrence Timing]Power-on timing(before initial ink charge)[Major Troubleshooting]Open the scanner unit and remove the CR fixing tape.Please refer to " Paper Jam error".[Occurrence Condition]This error occurs when top/bottom of paper is not detected by PE Sensor in the specified steps of paper feeding operation correctly.[Major Occurrence Timing]•Power-on timing •Paper loading timing •Paper eject timing •Duplex print timing[Major Troubleshooting]1remove the jammed paper by opening Scanner Unit or Printer Cover.2Push “Start” button.3If not resolved by 2), check the following.•Foreign material, bits of paper •Part come-off •PE Lever •PE Sensor•Float of Paper Guide Front Porous Pad •Main Board •PW Sensor [NOTE]* If an error occurs during printing, the page where the error occurred is skipped and the printing resumes from the next page.* If an error occurs during duplex printing, the following are performed.•If an error occurs during the front face of duplex printing, the page where the error occurred and the next page are skipped and the printing resumes from the page after the next.•If an error occurs during the back face of duplex printing, the page where the error occurred is skipped and the printing resumes from the next page.[Occurrence Condition]This error occurs when top of paper is not detected by PE Sensor in the specified steps of paper loading operation correctly.[Major Occurrence Timing]Paper loading timing[Major Troubleshooting]1Put paper in cassette and push “START” button.2If a paper stops before reaching PE Sensor, remove it and check the paper condition.3A)If no damage on the paper, set edge guide correctly after putting paper in cassette and push “PRINT” button again.B)If damage on the paper, check foreign materials / parts come- off / parts transformation in paper path.4If not resolved by 3-A) & 3-B), check the following.•Pickup Roller •Duplex Unit •PE Sensor •Main Board •PF Motor •Casette Assy[Occurrence Condition]This error occurs on the following cases.• A paper is ejected without printing during paper loading operation.•Actual paper length is longer than theoretical one. [Major Occurrence Timing]Paper loading timing [Major Troubleshooting]•PE Lever replacement •PE Sensor replacement •PW Sensor replacement •Main Board replacement [NOTE]This error occurs only for manual duplex print.[Occurrence Condition]This error occurs if one of the cassettes is not installed.[Major Occurrence Timing]Paper loading timing (Front loading)[Major Troubleshooting]Install the Cassette Assy.3Error is indicated during printing nozzle check pattern (p 10)[Occurrence Condition]When printing from Manual Tray (MSF unit), this error occurs if paper is not loaded at the time of data transmission.[Major Occurrence Timing]Paper loading timing (Rear loading)[Major Troubleshooting]•Put paper in the Manual Tray (MSF unit).•PE Sensor replacement •PW Sensor replacement •Main Board replacement[Occurrence Condition]This error occurs if the printer cannot receive the manual feed request.[Major Occurrence Timing]Paper loading timing (Rear loading)[Major Troubleshooting]•Send the print data.•Main Board replacement[Occurrence Condition]This error occurs when the PE Sensor detects paper before manual feed or when paper is inserted too much.[Major Occurrence Timing]Print start timing (Rear loading)[Major Troubleshooting]•Eject paper with panel operation, and load paper again.•Main Board replacement •PE Sensor replacement •PE Lever replacement[Occurrence Condition]This error occurs during manual feed if the PE Sensor detects paper but the paper is not fed by auto loading.[Major Occurrence Timing]Print start timing (Rear loading)[Major Troubleshooting]Eject paper with panel operation, and load paper again.[Occurrence Condition]This error occurs when actual paper size is not matched to theoretical one.[Major Occurrence Timing]•Duplex print timing •FAX data print timing [Major Troubleshooting]1Put correct sized paper in cassette, and push “START” button.2If not resolved by step 1), check the following points.•PE Lever •PE Sensor •PW Sensor •Main Board[Phenomenon]•Poor printing quality•Ink stain on paper•Dot missing•Paper eject without printing [Presumable Cause]•Driver / Panel mis-setting •Contamination of CR scale •Contamination of Printhead Cover•Printhead damage•Ink clogging of Printhead •Contamination on Cap Unit / Wiper of Ink system Assy •Ink system Assy damage •Float of Paper Guide Front Porous Pad•Narrow PG•PE Lever damage•PE Sensor damage•PW Sensor damage[Major Troubleshooting]•Driver / Panel re-setting •CR Scale replacement •Printhead cover cleaning •Printhead cleaning•Ink cartridge replacement •Printhead replacement •Rubber cleaning of Cap Unit of Ink system Assy•Ink system Assy replacement •Paper Guide Front Porous Pad re-installation•PG readjustment•Printer Mechanismreplacement•PE Lever replacement•PE Sensor replacement•PW Sensor replacement [Presumable Cause]•Use of 3rd party media•Edge guide mis-setting•Foreign material•Part come-off•Contamination of paper feedroller (Duplex Unit)•Cassette Assy damage•Pickup Roller deterioration,contamination•Contamination of PF roller[Major Troubleshooting]•Recommendation of EPSONmedia•Edge guide re-setting•Foreign material removal•Part re-installation•PF Roller replacement•Cassette Assy replacement•Pickup Roller replacement[Presumable Cause]•Foreign material•Insufficient grease•Gear damage[Major Troubleshooting]•Foreign material removal•Lubrication of grease•Gear replacement[Phenomenon]•No paper feed•Double feed•Paper jam•Paper skew[Presumable Cause]•Wear of Pickup Roller•Wear of ADF Pad Assy•Gear damage•ADF Motor damage•Contamination of Scanner Glass•ADF Paper Support Assydamage•Foreign material•ADF Cover Assy damage•Wear of EJ Roller•ADF Sensors damage[Major Troubleshooting]•ADF Cover Assy replacement•ADF Pad Assy replacement•Scanner Glass cleaning•ADF Paper Support Assyreplacement•Foreign material removal•ADF Unit replacement45 Problems related to print result or during printing(p 10)Scanning cannot be performed successfully (p 10)[Presumable Cause]•Contamination of Scanner Glass•Contamination of Document Pad•CIS Unit bonding failure •CIS Unit damage •Scanner Motor damage[Major Troubleshooting]•Scanner Glass cleaning •Document Pad cleaning •Document Pad replacement •CIS Unit replacement •Scanner Motor replacement 6ADF does not operate normally (p 10)1.2 Power-On SequenceThis section describes the power-on sequences for this product. The preconditions are as follows. Normal power-on sequence (See Table 1-1.)Turning on the printer after turning it off without an error.Initial ink charge has finished and every cartridge has sufficient ink.No paper on the paper path.The Printhead is capped by the cap of the Ink System and the CR Lock is engaged normally.Table 1-1.Normal Power-on SequenceClockwise:Paper is fed normallyCounterclockwise:Paper is fed backward*2:The conditions of the CR lock are as follows.Red CR lock is setWhite CR lock is released*3:If it cannot be initialized, the fatal error occurs.*4:Confirm that the CR lock is not get stuck in the gap of the carriage or any other parts preventing the carriage from moving.*5:Eject paper if any.*6:Executed when the detected temperature is under 5 o C (41o F) by the thermistor on the Printhead.*7:The empty suction operation may occur depending on situations.The power-on sequence shown in Table 1-1 is the sequence for when the previous power-off is complete normally as indicated in the conditions. If the previous power-off ends abnormally, operations including initialization of APG and such are performed in the following steps.Table 1-1.Normal Power-on Sequence1Prior to Step 4-1Initializes the APG Lever.2Prior to Step 4-2The CR Unit evacuates to the 130-digit side once, and the PF Roller rotates clockwise once, then the cap unit of the Ink System is lowered, and then the CR Unit touches the Right Frame once again for confirmation.3Prior to Step 4-3The CR Unit moves to its CR Lock Position (130-digit side), and the PF Roller rotates counterclockwise to engage the CR Lock. Then the CR Unit touches the CR Lock for confirmation.4Prior to Step 5-5Initializes the APG unit (set to PG1 position). 5Prior to Step 7-1Measurement of the CR Motor1.3 Fatal Error Code ListThis section describes the fatal error code and the possible cause for this product.Printer fatal error listFatal errors related to the ADF/Scanner unit do not occur for WF-7110 Series because this model does not have ADF/Scanner unit.Table 1-2.Fatal Error List (Printer)ADF/Scanner0x01ADF PID excess speed error•ADF Encoder failure (contaminated/detached scale, Encoder Board failure)•Motor driver failure (Main Board failure)0x02ADF PID reverse error •ADF Encoder failure (contaminated/detached scale, Encoder Board failure)•Paper jam0x03ADF PID lock error•ADF Encoder failure (contaminated/detached scale, Encoder Board failure)•ADF Motor failure •Paper jam•Cable disconnection 0x04ADF PID acceleration lock detection error0x05ADF PID excess load error 0X 06ADF PID DRIVING TIME ERROR •Main Board failure0x09ADF BS+ excess speed error•ADF Encoder failure (contaminated/detached scale, Encoder Board failure)•Motor driver failure (Main Board failure)0x0A ADF BS+ reverse error •ADF Encoder failure (contaminated/detached scale, Encoder Board failure)•Paper jam0x0BADF BS+ lock error•ADF Encoder failure (contaminated/detached scale, Encoder Board failure)•ADF Motor failure•ADF drive overload (paper jam/foreign object)•Cable disconnection 0x0D ADF BS+ excess load error0x0E ADF BS+ driving time error •Main Board failure 0x10HP detection error•CIS Unit failure•Scanner Housing failure •Main Board failure 0x11Contact detection distance exceeded error•CIS Unit failure•Scanner Housing failure (Including wrong attachment of the origin mark)•Main Board failure•Scanner FFC failure / Scanner FFC connection failure •Scanner Motor failure / Scanner Motor connection failure0x12Opposite side contact detection distance exceeded error•CIS Unit failure•Scanner Housing failure (Including wrong attachment of the origin mark)•Main Board failure•Scanner FFC failure / Scanner FFC connection failure •Scanner Motor failure / Scanner Motor connection failure0x13Opposite side wrong contact detection distance error•CIS Unit failure•Scanner Housing failure (Including wrong attachment of the origin mark)•Main Board failure•Scanner FFC failure / Scanner FFC connection failure •Scanner Motor failure / Scanner Motor connection failure0x14Measurement failure error •Scanner drive mechanism was overloaded.ADF/Scanner 0x20LED light error•CIS Unit failure•Main Board failure0x30Option error•Main Board failure0x36Paper jam error•Paper jam•Foreign object0x41FB PID excess speed• ADF Encoder failure (contaminated/detached scale, Encoder Boardfailure)•Motor driver failure (Main Board failure)0x42FB PID reverse•ADF Encoder failure (contaminated/detached scale, Encoder Boardfailure)•Paper jam0x43FB PID lock•ADF Encoder failure (contaminated/detached scale, Encoder Boardfailure)•ADF Motor failure•ADF drive mechanism overload (assembling failure, lubrication failure)•Cable disconnection0x44FB PID acceleration lock0x45FB PID excess load0x46FB PID driving time•Main Board failure0x49FB BS+ excess speed•ADF Encoder failure (contaminated/detached scale, Encoder Boardfailure)•Motor driver failure (Main Board failure)0x4A FB BS+ reverse•ADF Encoder failure (contaminated/detached scale, Encoder Boardfailure)0x4B FB BS+ lock•ADF Encoder failure (contaminated/detached scale, Encoder Boardfailure)•ADF Motor failure•ADF drive mechanism overload (assembling failure, lubrication failure)•Cable disconnection0x4D FB BS+ excess load0x4E FB BS+ driving time•Main Board failure0x51Automatic judgment fatal error 1---*0x52Automatic judgment fatal error 20x53Automatic judgment fatal error 30x54Automatic judgment fatal error 40x55Automatic judgment fatal error 5Printer 0x60HP error•Paper jam•Foreign object•Deformation of the Main Frame0x63Contact error at ink replacement timing(Power-off)•Paper jam•Foreign object•Deformation of the Main Frame0x67APG target position acquisition error•APG Motor failure•APG Sensor failure•Main Board failure0x68Contact error at valve initialization •Ink system failure•Main Board failure0x69Contact error at I/S clutch operation0x6B PF runaway error•PF Encoder failure•Motor driver failure0x7F Inspection mode error---* 0x81PIS environmental light error•Ambient light。

一:清EEPROM 及其它面板操作速查(打印机内存全清)1.针打系列LQ-300k+换行/换页+进纸/退纸+暂停+电源LX-300+换行/换页+进纸/退纸+暂停+电源LQ-580K :换行/换页+进退纸+暂停+电源.LQ-630K :清EEPROM:换行/换页+进退纸+暂停+电源. 设置: 进纸/退纸 + 暂停 + 电源键盘锁定: 换行/换页 + 暂停 + 5秒以上,响二声。
解锁: 进纸/退纸 + 换行/换页 + ON.LQ-670K:高速+切纸电+源LQ-680K :换行/换页+进纸/退纸+暂停+电源LQ-1600K3/K3+,2600K字体+切纸+电源LQ-1600K4/K4+字体+切纸+电源LQ-2600K字体 + 切纸 + 电源DLQ-1000KLine Feed + Form Feed + Micro Adjust ↓ + 电源DLQ-3000K清EEPROM :Selec Type + Paper Select + Pause + 电源DLQ-3500KLF/FF + Load/Eject + Pause + 电源2.喷墨系列COLOR切换 + 字体 + 进/退纸 + 暂停+电源COLOR II切换+暂停+进纸+彩清洗+电源中国专业办公技术论坛 h t t p ://w w w .o a c h i n a .c cCOLOR 300进纸+清洗+电源, 再按清洗10秒COLOR 400/440/460进纸灯闪几秒后,按 1、 进/退纸清EEPROM 2、 清洗10秒,清废墨计数器COLOR 500进纸 + 黑头清洗 + 彩头清洗 + on ,再按进纸键3秒COLOR 600/640/66O/670进纸+清洗+电源 缺纸灯闪5秒后,再按1、进/退纸清EEPROM及timer IC2、清洗10秒,清废墨计数器COLOR 800/850初始化:进纸+黑头清洗+彩头清洗+ON ,松手再按彩头清洗10秒COLOR 1520K切换+进/退纸+换行/换页+微调↑+ 电源COLOR 3000暂停 + 换行/换页 + 微调↓ + 电源SP870/1270进/退纸 + 清洗 + on 然后按1、 /退纸清EEPROM及timer IC2、 清洗10秒,清废墨计数器SP 950:Paper + Roll paper + on 1. Paper (EEPROM)SP 2100/2200Paper + Roll paper + on 1. Paper (EEPROM)MJ-510进/退纸 + 清洗 + on 松手后再按进/退纸10秒至进纸灯和缺墨灯闪MJ-850切换 + 暂停 + 电源, 再按进/退纸至省墨灯与暂停灯闪烁,再按切换MJ-1000切换 + 省墨/压缩 + 进/退纸 + 暂停 + 电源MJ-1500K/K+切换+微调↓+暂停+换行/换页+ONproxl(xl+) alt +font+load/eject+pause+开机stylus1000 切换+省墨/压缩+进纸/退纸+暂停+开机中国专业办公技术论坛 h t t p ://w w w .o a c h i n a .c cEPSON 彩喷机需清零的机型分以下几种:1。

SERVICE MANUALColor Inkjet PrinterEpson WF-3720 SeriesCONFIDENTIALNotice:☐All rights reserved. No part of this manual may be reproduced, stored in a retrieval system, or transmitted in any form or by any means, electronic, mechanical, photocopying, recording, or otherwise, without the prior written permission of SEIKO EPSON CORPORATION.☐All effort have been made to ensure the accuracy of the contents of this manual. However, should any errors be detected, SEIKO EPSON would greatly appreciate being informed of them.☐The contents of this manual are subject to change without notice.☐The above not withstanding SEIKO EPSON CORPORATION can assume no responsibility for any errors in this manual or the consequences thereof.EPSON is a registered trademark of SEIKO EPSON CORPORATION.Note:Other product names used herein are for identification purpose only and may be trademarks or registered trademarks of their respective owners. EPSON disclaims any and all rights in those marks.Copyright 2017SEIKO EPSON CORPORATIONP・CS Quality Assurance DepartmentSafety PrecautionsAll safety procedures described here shall be strictly adhered to by all parties servicing and maintaining this product.DANGERStrictly observe the following cautions. Failure to comply could result in serious bodily injury or loss of life. 1.Always disconnect the product from the power source and peripheral devices when servicing the product orperforming maintenance.2.When performing works described in this manual, do not connect to a power source until instructed to do so.Connecting to a power source causes high voltage in the power supply unit and some electronic components even if the product power switch is off. If you need to perform the work with the power cable connected to a power source, use extreme caution to avoid electrical shock.WARNINGStrictly observe the following cautions. Failure to comply may lead to personal injury or loss of life.1.Always wear protective goggles for disassembly and reassembly to protect your eyes from ink in working. Ifany ink gets in your eyes, wash your eyes with clean water and consult a doctor immediately.2.When using compressed air products; such as air duster, for cleaning during repair and maintenance, the useof such products containing flammable gas is prohibited.PRECAUTIONSStrictly observe the following cautions. Failure to comply may lead to personal injury or damage of the product.1.Repairs on Epson product should be performed only by an Epson certified repair technician.2.No work should be performed on this product by persons unfamiliar with basic safety knowledge required forelectrician.3.The power rating of this product is indicated on the serial number/rating plate. Never connect this product tothe power source whose voltages is different from the rated voltage.4.Replace malfunctioning components only with those components provided or approved by Epson;introduction of second-source ICs or other non-approved components may damage the product and void any applicable Epson warranty.5.The capacitors on the Main Board may be electrically charged right after the power turns off or after drivingmotors which generates counter electromotive force such as when rotating the PF Roller or when moving the CR Unit. There is a risk to damage the Main Board if the Head FFC is short-circuited with the capacitors on the Main Board electrically charged, therefore, after the power turns off or after motors are driven, leave the printer untouched for approximately 30 seconds to discharge the capacitors before starting disassembly/ reassembly.6.To prevent the circuit boards from short-circuiting, be careful about the following when handling FFC orcables.⏹When handling FFC, take care not to let the terminal section of FFC touch metal parts.⏹When connecting cables/FFC to the connectors on circuit boards, connect them straight to the connectors to avoidslant insertion.7.In order to protect sensitive microprocessors and circuitry, use static discharge equipment, such as anti-staticwrist straps, when accessing internal components.8.Do not tilt this product immediately after initial ink charge, especially after performing the ink charge severaltimes. Doing so may cause ink to leak from the product because it may take some time for the waste ink pads to completely absorb ink wasted due to the ink charge.9.Never touch the ink or wasted ink with bare hands. If ink comes into contact with your skin, wash it off withsoap and water immediately. If you have a skin irritation, consult a doctor immediately.10.When disassembling or assembling this product, make sure to wear gloves to avoid injuries from metal partswith sharp edges.e only recommended tools for disassembling, assembling or adjusting the printer.12.Observe the specified torque when tightening screws.13.Be extremely careful not to scratch or contaminate the following parts.⏹Nozzle plate of the printhead⏹CR Scale⏹PF Scale⏹Coated surface of the PF Roller⏹Gears⏹Rollers⏹LCD⏹Scanner Sensor⏹Exterior parts14.Never use oil or grease other than those specified in this manual. Use of different types of oil or grease maydamage the component or give bad influence on the printer function.15.Apply the specified amount of grease described in this manual.16.Make the specified adjustments when you disassemble the printer.17.When cleaning this product, follow the procedure described in this manual.18.When transporting this product after filling the ink in the printhead, pack the printer without removing theink cartridges in order to prevent the printhead from drying out.19.Make sure to install antivirus software in the computers used for the service support activities.20.Keep the virus pattern file of antivirus software up-to-date.21.When disassembling/reassembling this product, if you find adhesive power of the double-sided tape whichsecure the parts or FFC is not enough, replace the tape with new one and attach it correctly to the specified points where the parts or FFC should be secured.22.Unless otherwise specified in this manual, the labels attached on the returned product should be transferred tothe corresponding attachment positions on the new one referring to the labels on the returned product.About This ManualThis manual, consists of the following chapters, is intended for repair service personnel and includes information necessary for properly performing maintenance and servicing the product.CHAPTER 1. TROUBLESHOOTINGDescribes the step-by-step procedures for the troubleshooting.CHAPTER 2. DISASSEMBLY / REASSEMBLYDescribes the disassembly/reassembly procedures for main parts/units of the product, and provides the standard operation time for servicing the product.CHAPTER 3. ADJUSTMENTDescribes the required adjustments for servicing the product.CHAPTER 4. MAINTENANCEDescribes maintenance items and procedures for servicing the product.CHAPTER 5. REFURBISHMENTDescribes refurbishing work of the product and its purpose.CHAPTER 6. APPENDIXProvides the following additional information for reference:∙Connector Diagram∙Protection for TransportationSymbols Used in this ManualVarious symbols are used throughout this manual either to provide additional information on a specific topic or to warn of possible danger present during a procedure or an action. Pay attention to all symbols when they are used, and always read explanation thoroughly and follow the instructions.Indicates an operating or maintenance procedure, practice or condition that, if not strictly observed,could result in serious injury or loss of life.Indicates an operating or maintenance procedure, practice, or condition that, if not strictly observed,could result in bodily injury, damage or malfunction of equipment.May indicate an operating or maintenance procedure, practice or condition that is necessary toaccomplish a task efficiently. It may also provide additional information that is related to a specificsubject, or comment on the results achieved through a previous action.For Chapter 2 “Disassembly/Reassembly”, symbols other than indicated above are used to show additional information for disassembly/reassembly. For the details on those symbols, see "2.3 Disassembly/Reassembly Procedures (p47)".Revision StatusRevision Date of Issue DescriptionA Mar 10, 2017First ReleaseB May 26, 2017Revised□Chapter 2 ■ Made change in "2.3 Disassembly/Reassembly Procedures (p47)" ・ Made change in "2.3.3.1 Disassembly/Reassembly Flowchart (p49)" ■ Made change in "2.4 Detailed Disassembly/Reassembly Procedure for each Part/Unit(p54)" ・ Made change in " Housing Upper (p54)"□Chapter 3 ■ Made change in "3.2 Adjustment Program (p64)" ・ Made change in "3.2.2 Adjustment and Inspection List (p64)"C December 15,2017Revised□ Chapter 1 ■ Made change in "1.3 Fatal Error Code List (p13)" ・ Made change in "1.3.2.5 Printer (Head/CSIC) (p21)" “HCS error” has been added.□ Chapter 2 ■ Made change in "2.1 Overview (p38)" ・ Made change in "2.1.4 Standard Operation Time for servicing the product (p42)" “Stacker Support Front Assy” has been added. ■ Made change in "2.3 Disassembly/Reassembly Procedures (p47)" ・ Made change in "2.3.3.1 Disassembly/Reassembly Flowchart (p49)" “Stacker Support Front Assy” has been added. ■ Made change in "2.4 Detailed Disassembly/Reassembly Procedure for each Part/Unit (p54)" ・ Made change in " SCN Hinge Assy (p54)" ・ Made change in " Printer Mechanism (p56)" ・" Stacker Support Front Assy (p57)" has been added. ■ Made change in "2.5 Routing FFCs/cables (p58)" ・ Made change in " Panel Assy (p58)" ・ Made change in " ADF/SCN Unit (p58)" ・ Made change in " Ink System (p58)" ・ Made change in " Power Supply Unit (p58)" ・ Made change in " Head FFC/CSIC FFC (p59)" ・ Made change in " Speaker Cable (p60)"□ Chapter 3 ■ Made change in "3.2 Adjustment Program (p64)" ・ Made change in "3.2.2 Adjustment and Inspection List (p64)" ・ Made change in "3.2.3 Details of the Adjustment Program (p69)"Made change in “PTS delay adjustment”. ■ Made change in "3.3 Mechanism Adjustment / Check (p76)" ・ Made change in "3.3.1 Checking the Platen Gap (p76)"□ Chapter 5 ■ Made change in "6.2 Protection for Transportation (p91)" ・"6.2.5 Preventing the shipping Liquid from leakage from Printhead (p95)" has been added.ContentsChapter 1 Troubleshooting1.1Troubleshooting (10)1.1.1Troubleshooting Workflow (10)1.2Power-On Sequence (12)1.3Fatal Error Code List (13)1.3.1Displaying the Fatal Error Code (13)1.3.2Fatal Error Code (14)1.3.2.1ADF/Scanner (14)1.3.2.2Printer (CR) (17)1.3.2.3Printer (PF) (18)1.3.2.4Printer (I/S) (20)1.3.2.5Printer (Head/CSIC) (21)1.3.2.6Printer (Others) (22)1.3.2.7System Error (23)1.4Service Support Mode (24)1.4.1Status Sheet Information (27)Chapter 2 Disassembly/Reassembly2.1Overview (38)2.1.1Tools (38)2.1.2Jigs (38)2.1.3Locations of the Parts/Units (39)2.1.4Standard Operation Time for servicing the product (42)2.2Common cautions when disassembling/reassembling the Product (45)2.3Disassembly/Reassembly Procedures (47)2.3.1Functional differences between models and component parts (47)2.3.2Disassembly Flowchart (48)2.3.2.1Disassembly/Reassembly Flowchart (49)2.4Detailed Disassembly/Reassembly Procedure for each Part/Unit (54)2.5Routing FFCs/cables (58)Chapter 3 Adjustment3.1Required Adjustments (62)3.2Adjustment Program (64)3.2.1Operating Environment (64)3.2.2Adjustment and Inspection List (64)3.2.3Details of the Adjustment Program (69)3.3Mechanism Adjustment / Check (76)3.3.1Checking the Platen Gap (76)3.3.1.1Preparation (76)3.3.1.2Confirmation procedure (78)3.3.2MAC Address Setting (79)Chapter 4 Maintenance4.1Cleaning (81)4.1.1Cleaning the CR Unit (81)4.1.2Cleaning the Exterior Parts/inside of the printer (82)4.2Lubrication (83)4.2.1Lubrication Points and Instructions (84)Chapter 5 Refurbishment5.1Overview (88)5.1.1Ink Discharge (88)Chapter 6 Appendix6.1Connector Diagram (90)6.2Protection for Transportation (91)6.2.1Securing the CR Unit (91)6.2.2Securing the SCN/ADF Unit (92)6.2.3Securing the Panel Unit (93)6.2.4Securing the ADF Paper Support (94)6.2.5Preventing the shipping Liquid from leakage from Printhead (95)CHAPTER1TROUBLESHOOTINGEPSON WF-3720 Series Revision C1.1 TroubleshootingThis section describes the troubleshooting workflow.1.1.1 Troubleshooting WorkflowThe following page describes the troubleshooting workflow. Follow the flow when troubleshooting problems.Figure 1-1.Troubleshooting Workflow (1)⏹This flowchart is compiled based on the following contents.•Our experience regarding the quality problem•ESK’s repair data•Printer Mechanism specification for WF-3720 Series⏹If the reason for the return is evident, first check the phenomenon user claims recurs,then proceed to the troubleshooting.5What is returned reason?2Standby condition 3Is printing operationfinished without error?StartTurn on the printer 14(p 11)(p 11)(p 11)(p 11)(p 11)Copy an image*:In case of “Not Trouble Found”, check fatal error code.6(p 11)ADF/Scannerunit failurePrinter failure only Yes No YesNo Yes Yes No Yes Yes NoNo No No Yes Does printer turn on thepower?Is Power-on sequencefinished without error?Print check pattern Is printing operationfinished without trouble?Is scanning operationfinished withouttrouble?Is ADF operation finished without trouble?Copy an image by ADFADF failure?Finish *EPSON WF-3720 Series Revision CFigure 1-2.Troubleshooting Workflow (2)The power-on sequence does not start (p 10)Error is indicated during power-on sequence (p 10)Error is indicated during printing nozzle check pattern (p 10)Fatal errorPlease refer to " 1.3 Fatal Error Code List (p13)" for troubleshooting.Maintenance error[Occurrence Condition]This error occurs when maintenance counter inEEPROM exceeds the specified value.[Major Occurrence Timing]•Power-on timing •Print start timing •Paper eject timing •Cleaning timing•Ink cartridge replacement timing [Major Troubleshooting]•Replace Maintenance Box •Paper Guide Lower Porous Pad replacement•Maintenance counter reset (only Paper Guide Lower Porous Pad)Ink End error[Occurrence Condition]This error occurs when ink in Ink cartridge is empty.[Major Occurrence Timing]•Power-on timing •Print start timing •Print timing •Cleaning timing•Ink cartridge replacement timing [Major Troubleshooting]Ink cartridge replacement [NOTE]If an error occurs during printing, the page where the error occurred is skipped and the printing resumes from the next page.Ink cartridge detection error[Occurrence Condition]This error occurs when Inkcartridge data is incorrect or Ink cartridge is not recognized correctly.[Major Occurrence Timing]•Power-on timing •Print start timing •Cleaning timing•Ink cartridge replacement timing [Major Troubleshooting]•Remove and reinstall Ink cartridge.•Ink cartridge replacement •CSIC Terminal replacement •CR Contact Module replacement•Head FFC replacement •Main Board replacementPaper Jam errorThis error occurs when printing the nozzle check pattern. please refer to " Paper Jam error".No Power *[Presumable Cause]•Power Supply Unit damage•Main Board damage •Panel Unit damage [Major Troubleshooting]•Power Supply Unit replacement •Main Board replacement•Panel Unit replacement2* : If the printer can turn on but turns off right away, the protection circuit may cut off the power due to an error such as a circuit failure.1No Ink cartridge error[Occurrence Condition]This error occurs when Ink cartridge is not installed.[Major Occurrence Timing]At power-on[Major Troubleshooting]Install Ink cartridgeCR fixing material error[Occurrence Condition]When the printer moves to the 80-digit side during the power-on sequence before initial ink charge, the printer detects foreign material.[Major Occurrence Timing]Power-on timing(before initial ink charge)[Major Troubleshooting]Remove the CR fixing material, and install the ink cartridge.Paper Jam error[Occurrence Condition]This error occurs when top/bottom of paper is not detected by PE Sensor in the specified steps of paper feeding operation correctly.[Major Occurrence Timing]•Power-on timing •Paper loading timing •Paper eject timing •Duplex print timing[Major Troubleshooting]1Remove the jammed paper by opening Scanner Unit or Printer Cover.2Push “Start” button.3If not resolved by 2), check the following.•Foreign material, bits of paper •Part come-off •PE Sensor Lever •PE Sensor•Float of Paper Guide Front Porous Pad •Main Board •PW Sensor [NOTE]* If an error occurs during printing, the page where the error occurred is skipped and the printing resumes from the next page.* If an error occurs during duplex printing, the following are performed.•If an error occurs during the front face of duplex printing, the page where the error occurred and the next page are skipped and the printing resumes from the page after the next.•If an error occurs during the back face of duplex printing, the page where the error occurred is skipped and the printing resumes from the next page.No Paper error[Occurrence Condition]This error occurs when top of paper is not detected by PE Sensor in the specified steps of paper loading operation correctly.[Major Occurrence Timing]Paper loading timing[Major Troubleshooting]1Put paper in cassette and push “START” button.2If a paper stops before reaching PE Sensor, remove it and check the paper condition.3A)If no damage on the paper, set edge guide correctly after putting paper in cassette and push “PRINT” button again.B)If damage on the paper, check foreign materials / parts come- off / parts transformation in paper path.4If not resolved by 3-A) & 3-B), check the following.•Pickup Roller •Duplex Unit •PE Sensor Lever •Main Board •PF Motor •Cassette AssyDouble Feed error/Stack col-lapsed error[Occurrence Condition]This error occurs on the following cases.• A paper is ejected without printing during paper loading operation.•Actual paper length is longer than theoretical one. [Major Occurrence Timing]Paper loading timing[Major Troubleshooting]•Set the paper again.•PE Sensor Lever replacement •PE Sensor replacement •PW Sensor replacement •Main Board replacement [NOTE]This error occurs only for manual duplex print.No Paper Cassette error[Occurrence Condition]This error occurs if one of the cassettes is not installed.[Major Occurrence Timing]Paper loading timing (Front loading)[Major Troubleshooting]Install the Cassette Assy.3Paper Size Unmatch error[Occurrence Condition]This error occurs when actual paper size is not matched to theoretical one.[Major Occurrence Timing]•Duplex print timing •FAX data print timing [Major Troubleshooting]1Put correct sized paper in cassette, and push “START” button.2If not resolved by step 1), check the following points.•PE Sensor Lever •PE Sensor •PW Sensor •Main BoardProblems related to print result or during printing (p 10)Scanning cannot be performedsuccessfully (p 10)ADF does not operatenormally (p 10)Poor Printing[Phenomenon]•Poor printing quality •Ink stain on paper •Dot missing•Paper eject without printing [Presumable Cause]•Driver / Panel mis-setting •Contamination of CR scale •Contamination of Printhead Cover•Printhead damage•Ink clogging of Printhead •Contamination on Cap Unit / Wiper of Ink system Assy •Ink system Assy damage •Float of Paper Guide Front Porous Pad •Narrow PG•PE Lever damage •PE Sensor damage •PW Sensor damage[Major Troubleshooting]•Driver / Panel re-setting •CR Scale replacement •Printhead cover cleaning •Printhead cleaning•Ink cartridge replacement •Printhead replacement•Rubber cleaning of Cap Unit of Ink system Assy•Ink system Assy replacement •Paper Guide Front Porous Pad re-installation •PG readjustment •Printer Mechanism replacement•PE Lever replacement •PE Sensor replacement •PW Sensor replacement •Main Board replacementPoor Paper Loading[Presumable Cause]•Use of 3rd party media •Edge guide mis-setting •Foreign material •Part come-off•Contamination of paper feed roller (Duplex Unit) •Cassette Assy damage•Pickup Roller deterioration, contamination•Contamination of PF roller [Major Troubleshooting]•Recommendation of EPSON media•Edge guide re-setting •Foreign material removal •Part re-installation •PF Roller replacement •Cassette Assy replacementAbnormal Noise[Presumable Cause]•Foreign material •Insufficient grease •Gear damage[Major Troubleshooting]•Foreign material removal •Lubrication of grease •Gear replacementADF failure[Phenomenon]•No paper feed •Double feed •Paper jam •Paper skew[Presumable Cause]•Wear of Pickup Roller •Wear of ADF Pad Assy •Gear damage•Scanner Motor damage•Contamination of Scanner Glass •ADF Paper Support Assy damage•Foreign material•ADF Cover Assy damage •Wear of EJ Roller •ADF Sensors damage [Major Troubleshooting]•ADF Cover Assy replacement •ADF Pad Assy replacement •Scanner Glass cleaning •ADF Paper Support Assy replacement•Foreign material removal •Scanner Unit replacement •ADF Unit replacement45Scanner failure[Presumable Cause]•Contamination of Scanner Glass•Contamination of Document Pad•CIS Unit bonding failure •CIS Unit damage•Scanner Motor damage [Major Troubleshooting]•Scanner Glass cleaning •Document Pad cleaning •Document Pad replacement •Scanner Unit replacement61.2 Power-On SequenceThis section describes the power-on sequences for this product. The preconditions are as follows.☐Normal power-on sequence (See Table 1-1.)⏹Turning on the printer after turning it off without an error and the power was turned off normally at the previousshut down.⏹Initial ink charge has finished and every cartridge has sufficient ink.⏹No paper on the paper path.⏹The Printhead is capped by the cap of the Ink System.⏹CR Lock is engaged normally.⏹Maintenance error recovery has never been performed.Table 1-1.Power-on SequenceRed:CR lock is setWhite:CR lock is released*2:If it cannot be initialized, the fatal error occurs.*3:Executed when the detected temperature is under 5 o C (41o F) by the thermistor on the Printhead.*4:The cleaning or empty suction operation may occur depending on situations.1.3 Fatal Error Code ListThis section describes how to check the fatal error code, description, and the possible causes.1.3.1 Displaying the Fatal Error CodeThe fatal error code is stored in the EEPROM on the Main Board and can be read out using the Adjustment Program. This product displays a printer fatal error code automatically on the panel LCD when a printer fatal error occurs.Figure 1-3.Displaying the Fatal Error CodeError CodeLCD display screen image1.3.2 Fatal Error CodeThis section describes the fatal error code and the possible cause for this product.☐" ADF/Scanner (p14)"☐" Printer (CR) (p17)"☐" Printer (PF) (p18)"☐" Printer (I/S) (p20)"☐" Printer (Head/CSIC) (p21)"☐" Printer (Others) (p22)"☐" System Error (p23)"1.3.2.1ADF/ScannerError code Error name Possible cause Confirmation procedureConnectorNo.100016HP detectionfailure⏹The scanner CR could not return to its home.1.Damage or disengaging of wheel train of thedrive mechanism2.Disengaging, fraying, jumping of the timing belt⏹Failed to read the white standard/home patterns3.Disconnection, break, skew or damage of thescanner FFC4.Failure of the CIS unit5.Failure of the scanner housing6.Failure of the main board1.With the document cover opened, turn thepower on.2.Check if the CIS moves to the left to readthe white standard/home patterns.3.Check if the CIS's emission color is white(not greenish, reddish, or bluish).If the light does not look like white, checkthe scanner FFC for damage,disconnection or skew.4.Replace the scanner unit with a new one.5.Replace the main board with a new one.Main boardCN804CN801100017Contactdetectiondistanceexceeded⏹The scanner CR cannot completely reach the home(left side)1.Damage or disengaging of wheel train of thedrive mechanism⏹Failed to read the scanner encoder2.Damage or skew of the scanner FFC3.Failure of the CIS unit4.Failure of the scanner housing5.Failure of the main board1.With the document cover opened, turn thepower on.2.Check if the CIS (CR) reaches (comes incontact with) the left side.3.Check the wheel train of the drivemechanism for damage.4.Check the scanner FFC for damage,disconnection or skew.5.Replace the scanner unit with a new one.6.Replace the main board with a new one.Main boardCN804CN801100018Opposite sidecontactdetectiondistanceexceeded error⏹The scanner CR cannot completely reach theopposite side of the home (right side)1.Damage or disengaging of wheel train of thedrive mechanism⏹Failed to read the scanner encoder2.Damage or skew of the scanner FFC3.Failure of the CIS unit4.Failure of the scanner housing5.Failure of the main board1.With the document cover opened, turn thepower on.2.Check if the CIS (CR) reaches (comes incontact with) the right side.3.Check the wheel train of the drivemechanism for damage.4.Check the scanner FFC for damage,disconnection or skew.5.Replace the scanner unit with a new one.6.Replace the main board with a new one.Main boardCN804CN801100020Measurementerror⏹Overload of the scanner drive mechanism⏹Failure of the scanner motor1.Check if the CIS (CR) moves or not.1)Check the timing belt for fraying orlooseness.2)Check the wheel train of the drivemechanism for damage.3.Replace the scanner unit with a new one.4.Replace the main board with a new one.---100032LED lightfailure⏹Failure of the CIS LED light (RGB)1.Disconnection, break, skew or damage of thescanner FFC2.Failure of the CIS unit3.Failure of the main board1.Check the color of the LED at power-on.2.Check the scanner FFC for damage,disconnection or skew.3.Replace the scanner unit with a new one.4.Replace the main board with a new one.Main boardCN801100054Paper jam error ⏹No jammed paper is remaining but the sensor doesnot turn off1.Failure of the ADF PE sensor2.Failure of the cable⏹Jammed paper is remaining⏹The paper feed rollers and paper conveying rollersslip too much☐At power-on, during paper feed, during scanning1.Open the Cover,Paper Guide,LD,ADF andcheck if paper exist or not.2.Open the Document Support ADF andcheck if paper exist or not.3.Open the ADF and check if paper exist ornot.4.Check if the paper sensor lever moves upand down.5.Replace the ADF unit with a new one.6.Replace the scanner unit with a new one.7.Replace the main board with a new one.Main boardCN802100065FB PID excessspeed error⏹Failed to read the scanner encoder1.Contamination of the scanner encoder scale2.Damage or skew of the scanner FFC3.Failure of the scanner encoder sensor⏹Failure of the scanner motor driver4.Failure of the main board1.Check the scanner FFC for damage,disconnection or skew.2.Replace the scanner unit with a new one.3.Replace the main board with a new one.Main boardCN804CN801100066FB PID reverseerror⏹Operation failure of the scanner motor1.The scanning operation was stopped by;•Disengaging of the scanner CR•Disengaging of the scanner motor pulley orcracking of the scanner motor gears⏹Failed to read the scanner encoder2.Contamination of the scanner encoder3.Damage or skew of the scanner FFC4.Failure of the scanner encoder sensor5.Failure of the main board1.Check the scanner FFC for damage,disconnection or skew.2.Replace the scanner unit with a new one.3.Replace the main board with a new one.Main boardCN804CN801100067FB PID lockerror⏹The scanner motor did not run1.The scanning operation was stopped by;•Disengaging of the scanner CR•Disengaging of the scanner motor pulley orcracking of the scanner motor gears⏹Failed to read the CR motor encoder2.Contamination of the scanner encoder3.Damage or skew of the scanner FFC4.Failure of the scanner encoder sensor5.Failure of the scanner motor6.Failure of the main board1.Check the scanner FFC for damage,disconnection or skew.2.Replace the scanner unit with a new one.3.Replace the main board with a new one.Main boardCN804CN801100068FB PIDaccelerationlock error⏹The scanner motor did not run1.The scanning operation was stopped by;•Disengaging of the scanner CR•Disengaging of the scanner motor pulley orcracking of the scanner motor gears⏹Failed to read the scanner motor encoder2.Contamination of the scanner encoder3.Damage or skew of the scanner FFC4.Failure of the scanner encoder sensor5.Failure of the scanner motor6.Failure of the main board1.Check the scanner FFC for damage,disconnection or skew.2.Replace the scanner unit with a new one.3.Replace the main board with a new one.Main boardCN804CN801100069FB PID excessload error⏹The scanner motor stopped running in the middle ofthe operation1.The scanning operation was stopped by;•Disengaging of the scanner CR•Disengaging of the scanner motor pulley orcracking of the scanner motor gears⏹Failed to read the scanner motor encoder2.Contamination of the scanner encoder3.Disconnection, break, skew or damage of thescanner FFC4.Failure of the scanner encoder sensor5.Failure of the scanner motor6.Failure of the main board1.Check the scanner FFC for damage,disconnection or skew.2.Replace the scanner unit with a new one.3.Replace the main board with a new one.Main boardCN804CN801。
EPSON喷墨打印机维修方法及技巧随着电脑市场的降价,电脑已成为更多人可以接受的工具,很多家庭级的打印机也展现电脑爱好者面前。
如EPSON 的480、580、670、PHOTOEXT系列等。
这里根据个人几年来对EPSON打印机的使用经验,向大家介绍一些使用及维修的见解,希望能对大家有所帮助。
A、更换墨盒第一种:墨尽灯闪烁时,按下“清洗”键3秒,打印头归位到更换墨盒位置,换上新墨盒,再次按下“清洗”键,打印机随后进行新墨盒检测及清洁工作。
第二种:墨尽灯没有闪烁,但打印质量下降(彩色墨盒中有一色墨尽),清洁工作也无法完成时。
想更换墨盒时,很多人可能是强行断电,这样对打印机难免会造成损坏,这里给大家介绍另一种方法:开机后,按下“进纸”键5秒,打印头归位到更换墨盒位置,随后步骤与上一样。
B、开机后所有灯闪烁打印机由于机械故障(打印头阻力过大)造成打印头的运动受阻,引起打印头撞击机械框架,使打印头定位系统出错,和卡纸,使打印机无法正常复位,然后所有指示灯闪烁。
第一种:同时按下“进纸”、“清洗”键开机,这时“进纸”灯闪烁,然后松手按下“清洗”键,直到所有灯闪烁一下后熄灭,这时打印机正常。
此种方法有99%的修复率,此种方法虽很简单,但EPSON公司从未公开。
第二种:以上方法不行的话,问题可能出在主板上,首先取下面盖,取出主板(从后面及旁边取出镙钉),先不要拔下主板上的联线,取下主板上的锂电池(3V)后开机,问题解决。
因为此电池是为打印机保存BIOS、打印机信息的。
第三种:此种情况是一般不会产生的。
但在我维修众多EPSON打印机中还是遇到了几例情况。
主板上有一个串行EPROM(93C46)芯片中的程序乱了,因为此芯片是为打印机记忆打印头信息的,更换此芯片有相当大的难度:首先要找一台同型号的打印机,取下此芯片(93C46),买一颗芯片(93C46,大约5.00元),用写入器将取下的芯片里的程序复制到新买的芯片中,问题解决。
CANON喷墨打印机维修手册++++++++++ + + + + + + +Canon BJC-50 BJC-55 BJC-80 BJC-85 M40 M70 佳能 BJC-50 BJC-55 BJC-80 BJC-85 M40的M70的1: Unplug Power Cord 1:拔掉电源线2: Hold POWER and RESUME buttons 2:按住POWER和RESUME按钮3: Plug in Power Cord 3:插上电源线4: Release buttons after the printers starts up 4:释放按钮后,打印机启动5: Hold CARTRIDGE and RESUME 5:按住墨盒和恢复6: Press POWER 6:按POWER7: Release all buttons after the beeps 7:释放所有按钮后发出蜂鸣声8: Press CARTRIDGE 16 times 8:按墨盒16倍9: Press RESUME 9:按简历10: Unplug the Power cord 10:拔掉电源线++++++++++ + + + + + + +CANON BJC-7000/71001、最大幅面: A4+2、分辩率: 1200*6003、所用墨盒: BC-60 700 页/墨盒,BC-61 250 页/墨水盒,BC-62e 80 页/墨水盒墨盒组合: BC-60/BC-61,BC-60/BC-62e4、打印速度: 8 张/分(黑墨盒),5 张/分(彩墨盒)5、操作系统: DOS、WIN3.X/95/98/2000、NT4.06、缓存: 256KB(输入缓存)7、内置控制模式:佳能扩展模式8、接口:并口9、维修功能:(用户可排除故障)缺纸或卡纸错亮响 2 声墨水用完错(BC-60)亮响 3 声墨水用完错(BC-61/62PHOTO)亮响 4 声 BJ 墨盒错亮响 5 声废墨警告错亮响 6 声 BJ 墨盒过热错亮响 7 声(用户不可排除故障)打印位置校正错闪烁 2 次 8 声原始位置错闪烁 3 次 8 声清洁错闪烁 4 次 8 声送纸器错闪烁 5 次 8 声打印机温度错闪烁 6 次 8 声废墨满错闪烁 7 次 8 声 EEPROM 错闪烁 9 次 8 声 ROM 错闪烁 10 次 8 声 RAM 错闪烁 11 次 8 声小车马达错闪烁 12 次 8 声进纸马达错闪烁 13 次 8 声多方面硬件错闪烁 14 次 8 声10、EEPROM 重置:1、先按住 RESUME 键,再按 POWER 键开机。
Pro 9000 Mark Ⅱ维修手册修订版0QY8-13CH-000佳能公司2009年版权©:CANON Pro 9000 MarkⅡ 031509 XX 0.00-0范围本手册由佳能公司出版发行,用来向本产品的维修技术人员提供必要的信息,以便于那些符合条件的人员学习有关本产品的技术理论、安装、维护和修理等方面的知识。
本手册所提供的信息适用于本产品所销售的所有地区。
因此,它可能包含有不适合你所在地区的信息。
在有关本产品拆卸和重新组装的步骤方面,本手册没有提供足够的信息。
请参看另外提供的零件目录中的图。
修订版由于本产品在不断地改进和提高,因此可能包含一些技术上不准确或印刷上的错误之处。
当对本手册的内容进行更改时,佳能公司会在必要时发布相应的技术信息。
当对本手册的内容进行重大改变时,佳能公司将发布经过修改的版本。
如果本手册中的内容不符合本手册和本产品使用地区的法律和规章的要求,那么,它们就不再适用。
商标本手册中所出现的产品和品牌名称都是经过注册的商标,或为相关持有人的商标。
版权保留所有的权利。
除非是企业内部使用,否则,事先未经佳能公司的书面同意,本手册中的任何部分都不得以任何方式或任何手段加以复制,也不得翻译成为其它的语言。
Copyright©2009,佳能公司所有佳能公司Inkjet Device Quality Assurance Div.451,Tsukagoshi3-chome,Saiwai-ku,Kawasaki-shi,Kanagawa212-8530,JapanPro 9500 Mark Ⅱ 目录1. 维护1-1.由维修工程师进行的调整、定期维护、定期更换零件和消耗品1-2.用户的维护工作1-3.专用工具1-4.传感器1-5. 打印机序列号的位置2. 错误显示/指示一览表2-1.操作报错2-2.维修报错2-3.根据现象发现并修理故障3. 修理3-1.主要更换的零件3-2.更换零件的步骤(1)外壳的拆卸(2)小车的解锁(3)打印机单元的拆卸(4)小车单元的拆卸(5) ASF单元的拆卸(6)清洁单元的拆卸(7)刺轮座单元和压盘单元的拆卸(8) 进纸辊的拆卸4.调整/设置4-1. 用户模式4-2. 维修模式(1)维修模式下的操作步骤(2)维修工具的功能(3)LF/Eject修正(4)废墨吸收垫计数器的设置4-3. 润滑液的应用4-4. 维修中的特别注意事项(1)打印头问题(2)进纸马达的调整(3)小车单元的更换(4)压盘单元的更换(5)废墨吸收垫计数器的设置4-5. 维修后的检验(1)标准检验流程(2)维修测试打印(3)废墨吸收垫计数器数值打印5. 打印机的运输<目录>Pro 9500 Mark Ⅱ 目录1. 维护1-1. 由维修工程师进行的调整、定期维护、定期更换零件和消耗品(1)调整调整调整的时机目的工具大约需要时间EEPROM 初始化- 在更换逻辑板时进行初始化设置维修工具*1在维修模式下进行。
拆分BOM请参见其它文件Lenovo 3110打印机维修手册1.打印机性能指标2.打印机拆卸3.打印机备件Lenovo 3110打印机性能概述:1打印质量:4800x1200 dpi2打印速度:黑色 14ppm (A4纸张,草稿方式) 彩色 8ppm (A4纸张,草稿方式) 3适用操作系统:Apple Mac OS 9.0.4 - 9.2.2Apple Mac OS XMicrosoft Windows XPMicrosoft Windows MeMicrosoft Windows 2000Microsoft Windows 984打印端口:USB端口5使用墨盒:黑色墨盒 lc6001b彩色墨盒 lc6002c(四色打印)6纸张容量:进纸100页7无忧精确送纸系统Lenovo 3110打印机拆卸简单说明1.拆卸上盖:卸下打印机后面和底面各两个螺钉,拆下上盖。
2.拆卸机架:卸下机架上左右共5个螺钉,拆下机架。
3.拆卸拖车:卸下导杆左右两侧的金属卡子,从拖车中的抽出导杆。
卸下光栅条。
从主板上拔下拖车电缆线。
可卸下拖车。
4.拆卸主板:卸下主板上的3个螺钉,拔下马达和拖车的3根连线,卸下主板。
5.拆卸搓纸轮:松开弹簧,卸下黑色的塑料卡片。
可拿下搓纸轮。
6.拆卸走纸马达:卸下走纸马达上的2个螺钉,拔下马达在主板上的电缆线。
卸下马达。
7.拆卸拖车马达:卸下走纸马达上的2个螺钉,松开皮带,拔下马达在主板上的电缆线。
卸下马达。
8.拆卸清洁单元:松开弹簧,向右上方拉出清洁单元。
Lenovo 3110打印机备件附图说明: 1打印机控制板(主板):600Z0012打印头拖车(含电缆):600Z0024清洁单元:600Z0046搓纸轮:600Z0067底壳(进纸托盘、出纸托盘、出纸棍、底座):600Z0078机架(导杆、皮带、走纸马达、拖车马达、介质传感器):600Z0089上盖:600Z009。
佳能 S400维修资料1分辩率: 1440*7202所用墨水盒: BC-30e 1150页/墨水盒、160个喷嘴BC-33e (BCI-3eBK/3Ec/3eM/3eY)分别为(1520/55)页每个墨水盒、BC-34ephoto(BCI-3Epbk/页/墨水盒4、打印速度: 9张/分(黑墨盒)、4张/分(彩墨盒)5、打印缓存: 128KB6、接口:并口(IEEE1284、ECP)、USB7、维修功能:(用户可排除故障)供纸错黄灯闪2次卡纸错黄灯闪3次墨水用完黄灯闪4次错误安装墨盒黄灯闪5次无墨盒黄灯闪6次小车错黄灯闪7次废墨警告黄灯闪8次(用户不可排除故障)ROM错黄1/绿1灯交替闪RAM错黄2/绿1灯交替闪EEPROM错黄3/绿1灯交替闪 6800原位错黄4/绿1灯交替闪 5100温度传感器错黄5/绿1灯交替闪 5400废墨满错黄6/绿1灯交替闪 5B00打印头温度过高黄7/绿1灯交替闪 5200打印头温度传感器错黄8/绿1灯交替闪 5200小车错位黄9/绿1灯交替闪 5600供纸传感器错黄10/绿1灯交替闪 57008、EEPROM重置: A、按RESUME键的同时按下POWER键不放手。
B、运行之前快速按二次RESUME键.C、释放POWER键,进入维修模式。
D、按RESUME键选取不同的状态(1次为EEPROM测试打印页、2次为EEPROM重置、3次废墨水量重置)。
E、按POWER键确认。
9、喷嘴检测:通电后,按RESUME键绿灯闪2下后松手。
10、清洗操作:通电后,按RESUME键色灯和橙色灯交替闪10次。
原因:打印机清洁单元电机故障。
CANON S4501、最大幅面: A42、分辩率: 1440*7203、所用墨水盒: BC-30e 450页/墨盒、160个喷嘴(每种BC-31e (BCI-3eC/3eM/3eY)分别为(54/81/104)页每个墨水盒、BC-32ephoto 跟BC-31e一样,BC-3 1e+BC-32ePHOTO)4、打印速度: 9张/分(黑墨盒)、6张/分(彩墨盒)5、操作系统: win3.x/WIN95/98/2000、NT4.0、MacOS6、打印缓存: 128KB7、接口:并口(IEEE1284、ECP)、USB 8、维修功能:(用户可排除故障)供纸错黄灯2次卡纸错黄灯3次墨水用完黄灯4次错误安装墨盒黄灯5次无墨盒黄灯6次小车错工黄灯7次废墨警告黄灯8次打印头校正错黄灯9次(用户不可排除故障) (错误代码)ROM错黄/绿灯交替闪1次RAM错黄/绿灯交替闪2次EEPROM错黄/绿灯交替闪3次 6800原位错黄/绿灯交替闪4次 5100温度传感器错黄/绿灯交替闪5次 5400废墨满错黄/绿灯交替闪6次 5B00打印头温度过高黄/绿灯交替闪7次 5200打印头温度传感器错黄/绿灯交替闪8次 5200小车错位黄/绿灯交替闪9次 5600ASF传感器错黄/绿灯交替闪10次 5700扫描盒错黄/绿灯交替闪11次 5210系统恢复错黄/绿灯交替闪12次 5000[安装错误] 墨水传感器错无提示 9、EEPROM重置:A、按RESUME键的同时按下POWER键不放手B、双击RESUME键,释放POWER键,进入维修模式。
喷墨打印机维修手册
喷墨打印机是我们日常工作、学习中常见的办公设备之一,它可以
轻松地将电子文件转化为可视化的印刷品。
然而,由于长时间的使用
或不当操作,喷墨打印机也可能会出现一些故障或问题。
本手册将为
您提供一些基本的喷墨打印机维修指南,帮助您解决遇到的常见问题。
第一节:打印质量问题的解决办法
1. 打印模糊:
- 检查墨盒:确保墨盒中的墨水充足,如果墨水不足应及时更换。
- 清洁喷嘴:选择打印机设置中的“清洁喷嘴”选项,执行清洁程序
可以清除堵塞和杂质。
- 调整打印质量:在打印设置中选择更高的打印质量,可以改善模
糊问题。
2. 打印漏色:
- 检查墨盒:确保墨盒中的所有颜色均有足够的墨水,如有不足应
及时更换。
- 清洁喷嘴:选择打印机设置中的“清洁喷嘴”选项,清除堵塞的喷
嘴可解决漏色问题。
- 校准打印机:在打印设置中选择“校准打印机”选项,可以提高打
印精度和颜色准确度。
第二节:纸张进纸问题的解决办法
1. 多张纸同时进纸:
- 调整进纸托盘:确保纸张堆放整齐,不要超过进纸托盘负荷限制。
- 调整进纸张力:检查进纸托盘上方的纸张张紧器,调整到适当位置,保持纸张张力均匀。
2. 纸张卡纸现象:
- 清理纸张通道:关闭打印机电源,仔细检查纸张通道是否有卡纸,若有卡纸要仔细取出。
- 谨慎选择纸张类型:根据打印机规格要求,选择适合的纸张类型,避免使用过厚或过粗的纸张。
第三节:连接和驱动问题的解决办法
1. 无法连接到打印机:
- 检查连接线:确保打印机与电脑之间的连接线正常连接且不松动。
- 重新安装驱动程序:如果电脑提示驱动程序有问题,可尝试重新
安装最新的打印机驱动程序。
2. 打印机无法响应打印指令:
- 重启打印机和电脑:有时候打印机和电脑之间的通信可能出现问题,通过重启可以尝试解决。
- 检查打印队列:检查打印队列中是否有堆积的打印任务,如果有,尝试删除这些任务重新打印。
结语:
使用喷墨打印机时,出现故障或问题是不可避免的。
本手册简要介
绍了一些常见的打印质量、纸张进纸、连接和驱动问题的解决办法。
希望这些指南能够帮助您在维护和维修喷墨打印机时更加便捷。
如果
问题仍然存在,请及时联系专业的售后服务人员以获取进一步的支持
和指导。
(字数:566字)。