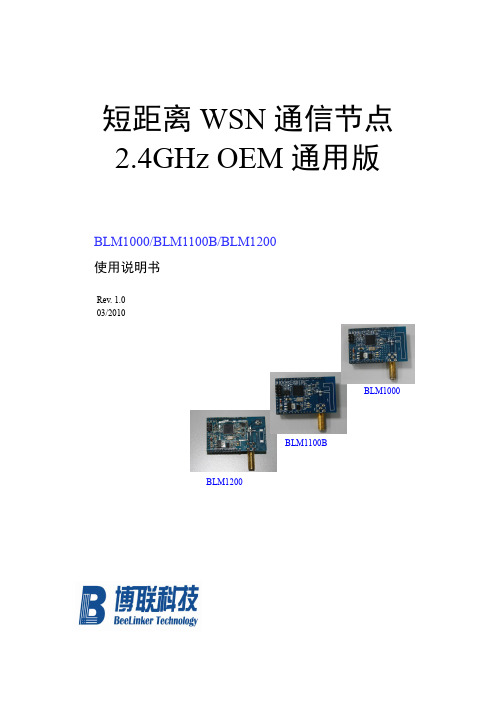
ambient backscatter wireless communication
- 格式:docx
- 大小:197.08 KB
- 文档页数:21

SIMATIC NET工业以太网交换机SCALANCE XC-200操作说明02/2023法律资讯警告提示系统为了您的人身安全以及避免财产损失,必须注意本手册中的提示。
人身安全的提示用一个警告三角表示,仅与财产损失有关的提示不带警告三角。
警告提示根据危险等级由高到低如下表示。
危险表示如果不采取相应的小心措施,将会导致死亡或者严重的人身伤害。
警告表示如果不采取相应的小心措施,可能导致死亡或者严重的人身伤害。
小心表示如果不采取相应的小心措施,可能导致轻微的人身伤害。
注意表示如果不采取相应的小心措施,可能导致财产损失。
当出现多个危险等级的情况下,每次总是使用最高等级的警告提示。
如果在某个警告提示中带有警告可能导致人身伤害的警告三角,则可能在该警告提示中另外还附带有可能导致财产损失的警告。
合格的专业人员本文件所属的产品/系统只允许由符合各项工作要求的合格人员进行操作。
其操作必须遵照各自附带的文件说明,特别是其中的安全及警告提示。
由于具备相关培训及经验,合格人员可以察觉本产品/系统的风险,并避免可能的危险。
按规定使用 Siemens 产品请注意下列说明:警告Siemens 产品只允许用于目录和相关技术文件中规定的使用情况。
如果要使用其他公司的产品和组件,必须得到 Siemens 推荐和允许。
正确的运输、储存、组装、装配、安装、调试、操作和维护是产品安全、正常运行的前提。
必须保证允许的环境条件。
必须注意相关文件中的提示。
商标所有带有标记符号 ® 的都是 Siemens AG 的注册商标。
本印刷品中的其他符号可能是一些其他商标。
若第三方出于自身目的使用这些商标,将侵害其所有者的权利。
责任免除我们已对印刷品中所述内容与硬件和软件的一致性作过检查。
然而不排除存在偏差的可能性,因此我们不保证印刷品中所述内容与硬件和软件完全一致。
印刷品中的数据都按规定经过检测,必要的修正值包含在下一版本中。
Siemens AGDigital Industries Postfach 48 4890026 NÜRNBERG C79000-G8952-C442-14Ⓟ 02/2023 本公司保留更改的权利Copyright © Siemens AG 2016 - 2023.保留所有权利目录1简介 (7)2安全须知 (15)3安全建议 (17)4设备描述 (25)4.1产品总览 (25)4.2设备视图 (31)4.2.1SCALANCE XC206-2 (ST/BFOC) (31)4.2.2SCALANCE XC206-2 (SC) (32)4.2.3SCALANCE XC206-2G PoE (33)4.2.4SCALANCE XC206-2SFP (34)4.2.5SCALANCE XC208 (35)4.2.6SCALANCE XC208G PoE (36)4.2.7SCALANCE XC216 (37)4.2.8SCALANCE XC216-3G PoE (38)4.2.9SCALANCE XC216-4C (38)4.2.10SCALANCE XC224 (40)4.2.11SCALANCE XC224-4C (41)4.3附件 (41)4.4SELECT/SET 按钮 (47)4.5LED 指示灯 (49)4.5.1总览 (49)4.5.2“RM”LED (50)4.5.3“SB”LED (50)4.5.4“F”LED (50)4.5.5LED“DM1”和“DM2” (51)4.5.6LED“L1”和“L2” (51)4.5.7端口 LED (52)4.6C-PLUG (54)4.6.1C-PLUG 的功能 (54)4.6.2更换 C-PLUG (56)4.7组合端口 (57)4.8以太网供电 (PoE) (58)4.8.1符合标准的电源和电压范围 (58)4.8.2设备的 PoE 属性 (59)4.8.3电源传输和引脚分配 (30 W) (61)SCALANCE XC-200目录4.8.4电源传输和引脚分配 (60 W) (62)4.8.5组态 (62)5组装和拆卸 (63)5.1安装的安全注意事项 (63)5.2关于 SFP 收发器的一般说明 (66)5.3安装类型 (66)5.4在 DIN 导轨上安装 (67)5.4.1基于固定板的凹顶导轨安装 (67)5.4.2无固定板时的凹顶导轨安装 (69)5.5在标准 S7-300 导轨上安装 (70)5.5.1在带有固定板的标准导轨 S7-300 上安装 (70)5.5.2在不带固定板的标准导轨 S7-300 上安装 (71)5.6在标准导轨 S7-1500 上安装 (72)5.6.1在带有固定板的标准导轨 S7-1500 上安装 (72)5.6.2在不带固定板的标准导轨 S7-1500 上安装 (74)5.7基于固定板的墙式安装 (75)5.8更改固定销的位置 (76)5.9拆卸 (77)6连接 (79)6.1不使用 PoE 的设备的安全注意事项 (79)6.2PoE 设备的安全注意事项 (80)6.3有关在危险场所使用的安全注意事项 (82)6.4附加说明 (85)6.5接线规则 (86)6.624 V DC 电源 (87)6.754 V DC 电源 (88)6.8信号触点 (90)6.9功能性接地 (91)6.10串口 (92)6.11工业以太网 (94)6.11.1电气 (94)6.11.2光纤 (95)SCALANCE XC-200目录7维护和清洁 (97)8故障排除 (99)8.1使用 TFTP 下载新固件(无需 WBM 和 CLI) (99)8.2恢复出厂设置 (100)9技术规范 (101)9.1SCALANCE XC206-2 (ST/BFOC) 的技术规范 (101)9.2SCALANCE XC206-2 (SC) 的技术规范 (104)9.3SCALANCE XC206-2G PoE 的技术规范 (107)9.4SCALANCE XC206-2G PoE (54 V) 的技术规范 (110)9.5SCALANCE XC206-2G PoE EEC (54 V) 的技术规范 (113)9.6SCALANCE XC206-2SFP 的技术规范 (116)9.7SCALANCE XC206-2SFP G 的技术规范 (119)9.8SCALANCE XC206-2SFP EEC 的技术规范 (122)9.9SCALANCE XC206-2SFP G EEC 的技术规范 (125)9.10SCALANCE XC208 的技术规范 (128)9.11SCALANCE XC208G 的技术规范 (130)9.12SCALANCE XC208G PoE 的技术规范 (132)9.13SCALANCE XC208G PoE (54 V) 的技术规范 (134)9.14SCALANCE XC208EEC 的技术规范 (136)9.15SCALANCE XC208G EEC 的技术规范 (138)9.16SCALANCE XC216 的技术规范 (140)9.17SCALANCE XC216EEC 的技术规范 (142)9.18SCALANCE XC216-3G PoE 的技术规范 (144)9.19SCALANCE XC216-3G PoE (54 V) 的技术规范 (146)9.20SCALANCE XC216-4C 的技术规范 (150)9.21SCALANCE XC216-4C G 的技术规范 (153)9.22SCALANCE XC216-4C G EEC 的技术规范 (156)9.23SCALANCE XC224 的技术规范 (159)9.24SCALANCE XC224-4C G 的技术规范 (161)9.25SCALANCE XC224-4C G EEC 的技术规范 (164)9.26机械稳定性(运行时) (167)SCALANCE XC-200目录9.27射频辐射符合 NAMUR NE21 标准 (167)9.28电缆长度 (167)9.29交换特性 (168)10尺寸图 (171)11证书和认证 (179)索引 (189)SCALANCE XC-200简介1操作说明的用途这些操作说明适用于 SCALANCE XC-200 系列产品的安装和连接。

OUT LINEFEATURES(Unless otherwise specified, Ta=+25℃)(1)Range and accuracy of detection/release voltage・Overcharge detection voltage 4.15V to 4.50V, 5mV step Accuracy±20mVAccuracy±25mV (Ta=-5 to +60℃)・Overcharge release voltage 4.00V to 4.35V *1Accuracy±50mV ・Overdischarge detection voltage 2.00V to 3.00V *2Accuracy±100mV ・Overdischarge release voltage2.00V to3.00V*2Accuracy±100mV ・Discharging overcurrent detection voltage +20mV to +65mV, 1mV step Accuracy±5mV (Discharging overcurrent detection current)(0.310A to 1.00A)・Charging overcurrent detection voltage -25mV to -65mV, 1mV step Accuracy±5mV (Charging overcurrent detection current)(0.385A to 1.00A)・Short detection voltageSelection from 0.19V, 0.36VAccuracy±50mV*1Hysteresis voltagebetween Overcharge detection and release voltage is selectable from 0.10V/0.15V/0.20V/0.25V.*2Please inquire to us about details of the setting of Overdischarge detection and release voltage.(2)Range of detection delay time・Overcharge detection delay time 1.0s fixed・Overcharge release delay time Selection from 6ms, 16ms ・Overdischarge detection delay time Selection from 100ms, 256ms ・Overdischarge release delay time0.5ms fixed・Discharging overcurrent detection delay time Selection from 8ms, 12ms, 16ms, 20ms, 48ms, 224ms ・Charging overcurrent detection delay time Selection from 8.5ms, 16.5ms, 32.5ms ・Short detection delay timeSelection from 0.50ms, 0.75ms ・Chager connection detection delay time Selection from 1.0ms, 8.0ms(3)0V battery charge functionSelection from "Inhibition" or "Permission"*3*3In the case of "0V battery charge inhibition", the setting voltage is selectable from 0.65V or 0.90V.(4)Low current consumption・Normal mode Typ. 3.0μA, Max. 4.5μA・Stand-by modeMax. 0.025μA (In case Overdischarge latch function "Enable")Max. 0.500μA (In case Overdischarge latch function "Disable")(5)MOS-FET・Source to Source on state resistanceTyp. 65.0mΩ (@VDD=3.5V)One-cell Lithium-ion/Lithium-polymer battery protection IC with integrated MOS-FET MC3651 SeriesMC3651 series are protection IC with integrated MOS-FET for protection of the rechargeable Lithium-ion or Lithium-polymer battery.The overcharge, overdischarge and discharging and charging overcurrent protection of the rechargeable one-cell Lithium-ion or Lithium-polymer battery can be detected.(6)Absolute maximum ratings・VDD pin-0.3V to +12V・V- pin VDD-24V to VDD+0.3V・Drain-source voltage Max. 24V・Drain current Max. 1.2A・Total Power Dssipation Max. 0.4W・Storage temperature-40 to +125℃・Operation temperature-40 to +85℃(7)Package type・PLP-4E 1.25 × 2.85 × 0.50max [mm] *4Please inquire to us, if you need another specifications.PIN CONFIGURATIONPACKAGE DIMENSIONUNIT: mmBottom ViewSide ViewTop ViewRECOMMEND OPERATION CONDITIONSELECTRICAL CHARACTERISTICS (Main item )Ta=25℃, S1=0V unless otherwise specified. Ta=25℃, S1=0V unless otherwise specified.Chager connection detection delay timetVchgVDD=3.6V 0.30 1.00 3.00ms V-=3.6V->0.0V3.008.0016.00Short detection delay time tshort VDD=3.6V,0.360.500.84ms V-=0V->3.6V 0.550.75 1.14Discharging overcurrent detection delay timetVdet3VDD=3.6V, V-=0V->0.1VtVdet3*0.75tVdet3tVdet3*1.25ms Charging overcurrent detection delay time tVdet4VDD=3.6V, V-=0V->-0.3V tVdet4*0.75tVdet4tVdet4*1.25ms Overdischarge detection delay time tVdet2VDD=3.6V->2.0V, V-=0V tVdet2*0.75tVdet2tVdet2*1.25ms Overdischarge detection delay timetVrel2VDD=2.0V->3.6V, V-=0V0.100.50 3.00ms Overcharge release delay time tVrel1VDD=4.6V->3.6V,V-=0V1.00 6.0020.00ms 5.0016.0050.000V battery charge permission charger voltageVst=VDD-V-, VDD=S1=0V-- 1.60V S2=V-, Is=-1mA *10Overcharge detection delay time tVdet1VDD=3.6V->4.6V,V-=0V tVdet1*0.75tVdet1tVdet1*1.25s 0V battery charge inhibition battery voltage Vst=VDD-VSS 0.400.65 1.10V V-=VDD-4.2V *90.650.90 1.25Vst Charging overcurrent detection voltageVdet4Vdet4-5.0Vdet4Vdet4+5.0mV Short detection voltageVshort VDD=3.5V, R2=2.7kΩVshort-0.05Vshort Vshort+0.05V VDD=3.5V, R2=2.7kΩDischarging overcurrent detection voltage Vdet3-1Vdet3-8.0Vdet3Vdet3+8.0mV Vdet3-3Vdet3-5.0Vdet3+5.0Vdet3-3Vdet3-8.0Vdet3+8.0VDD=4.5V, R2=2.7kΩVDD=3.5V, R2=2.7kΩVDD=2.5V, R2=2.7kΩOverdischarge release voltage1Vrel2Vrel2-0.10Vrel2Vrel2+0.10VOverdischarge release voltage2Vrel2D Vrel2D-0.10Vrel2DVrel2D+0.10Vdet2=Vrel2 *5Vdet2≠Vrel2 *6Overcharge release voltage Vrel1Vrel1-0.05Vrel1Vrel1+0.02V Vrel1-0.05Vrel1+0.05Overdischarge detection voltage Vdet2Vdet2-0.10Vdet2Vdet2+0.10V Vdet1≠Vrel1 *8Vdet1=Vrel1 *7ITEMSYMBOL MIN.TYP.MAX.UNIT Overcharge detection voltage Vdet1Vdet1-0.02Vdet1Vdet1+0.02V CONDITION Current consumption at stand-byIstb--0.025uA--0.500VDD=2.0V, V-=VDD *5VDD=2.0V, V-=VDD *6VM terminal pull-up resistancesRpu VDD=2.0V, V-=0V 175.0350.0700.0kΩCurrent consumption Idd - 3.0 4.5uA ITEMSYMBOL CONDITION MIN.TYP.MAX.UNIT Discharge overcurrent release resistanceRshort VDD=3.6V, V-=3.6V5.010.025.0kΩITEMSYMBOL MIN.MAX.UNIT VstVDD=3.6V, V-=0V Operating Ambient temperatureTopr -4085℃Operating voltageVop1.55.5VTa=25℃, S1=0V unless otherwise specified.*5In case Overdischarge latch function "Enable"*6In case Overdischarge latch function "Disable"*7In case Overcharge latch function "Enable"*8In case Overcharge latch function "Disable"*9In case 0V battery charge inhibition, "Inhibition"*10In case 0V battery charge inhibition, "Permission"*11These range and accuracy are the one of the standard setting. It may differ each product.Please refer to an individual specifications about detail parameters.Body diode forward voltage VSD Is=1A0.500.701.00VRSS(on)30VDD=3.0V , Is=1.0A 58.068.081.0mΩRSS(on)25VDD=2.5V , Is=1.0A59.074.091.0mΩSource to sourceon state resistanceRSS(on)45VDD=4.5V , Is=1.0A 53.062.073.0mΩRSS(on)35VDD=3.5V , Is=1.0A 56.065.074.0mΩRSS(on)33VDD=3.3V , Is=1.0A 56.566.076.5mΩITEMSYMBOL CONDITION MIN.TYP.MAX.UNITDrain current of cut offIDSSVDS=24V-- 1.0uA 71.0mΩRSS(on)42VDD=4.2V , Is=1.0A 53.562.571.5mΩRSS(on)39VDD=3.9V , Is=1.0A54.563.572.5mΩRSS(on)37VDD=3.7V , Is=1.0A 55.064.0Typical application circuitApplication hintsC3Capacitor-0.1uF-For exogenous noiseThe resistors that are inserted into each pin are to protect the IC. They help to remove ESD and latch-up damages. The capacitors help to reduce the effects of transient variations in voltage and electromagnetic waves,and to improve ESD tolerance of the IC.Please use either C2 or C3, or both of them by request of your application.These values in the above figure are for example. Please choose appropriate values.Capacitor -0.1uF -For voltage fluctuationR2Resistor - 2.7kΩ-Current limit for charger reverse connection Symbol Parts Min.Typ.Max.PurposeR1Resistor -330Ω470ΩFor voltage fluctuation, For ESD C1C2Capacitor -0.1uF -For exogenous noisePRODUCT LINEUPNOTES【Safety Precautions 】・・【Precautions for Product Liability Act】・【ATTENTION】・・・Though Mitsumi Electric Co., Ltd. (hereinafter referred to as "Mitsumi") works continually to improve our product's quality and reliability,semiconductor products may generally malfunction or fail. Customers are responsible for complying with safety standards and for providing adequate designs and safeguards for their hardware, software and systems which minimize risk and avoid situations in which a malfunction or failure of this product could cause loss of human life, bodily injury, or damage to property, including data loss or corruption. Before customers use this product, create designs including this product, or incorporate this product into their own applications, customers must also refer to and comply with (a) the latest versions or all of our relevant information, including without limitation, product specifications,data sheets and application notes for this product and (b) the user’s manual, handling instructions or all relevant information for any products which is to be used, or combined with this products. Customers are solely responsible for all aspects of their own product design orapplications, including but not limited to (a) determining the appropriateness of the use of this product in such design or applications; (b)evaluating and determining the applicability of any information contained in this document, or in charts, diagrams, programs, algorithms,sample application circuits, or any other referenced documents; and (c) validating all operating parameters for such designs and applications.Mitsumi assumes no liability for customers’ product design or applications.This product is intended for applying to computers, OA units, communication units, instrumentation units, machine tools, industrial robots,AV units, household electrical appliances, and other general electronic units.No responsibility is assumed by us for any consequence resulting from any wrong or improper use or operation, etc. of this product.This product is designed and manufactured with the intention of normal use in general electronics. No special circumstance as described below is considered for the use of it when it is designed. With this reason, any use and storage under the circumstances below may affect the performance of this product. Prior confirmation of performance and reliability is requested to customers. Environment with strong static electricity or electromagnetic waveEnvironment with high temperature or high humidity where dew condensation may occurThis product is not designed to withstand radioactivity, and must avoid using in a radioactive environment.This specification is written in Japanese and English. The English text is faithfully translated into the Japanese. However, if any question arises,Japanese text shall prevail.。

C-1C Humidity:10 to 90%RH non-condensing Battery:3.6 V lithium battery (included)Battery Life with Transmissions:2 years Shelf Life with Battery Installed:4 years in quiescent mode FCC Certified:FCC ID: M5ZVM1Dimensions:38 H x 53 W x 15 mm D (1.5 x 2.1 x 0.6")Weight:43 g (1.5 oz)also used to put the device in a quiescent mode (no transmissions and very low power consumption). This is the state the device is in when you receive it. Push and hold the service switch for 10seconds or more to enter this powered down ing the OMWT Series Windows software incoming data being received from OMWT Series Wireless Transmitters can be viewed in a real-time or historical time-base chart or numerical view.High/low alarms can also be set for each transmitter signal with either a visual or audible alarm indication on the PC. Data can also be logged to disk at a user-specified rate in a text file format that can be opened up into Microsoft Excel. The OMWT Series Windows software also includes a DDE Server that can interface the data being received from OMWT Series Wireless Transmitters to other Windows software packages.Specifications Motion Range:Not a calibrated range (transmits a value of 0 to 100%)Transmission Frequency:418 MHz Transmission Range*: Up to 180 m (600') depending on environmental conditions Transmission Rate:30 to 37 seconds Operating Temperature:-40 to 85°C (-40 to 185°F)Storage Temperature:-40 to 85°C (-40 to 185°F)Wireless Motion TransmitterߜTransmits up to 180 m (600') *ߜDigital Motion Measurement via Internal Weighted Accelerometerߜ64-Bit Unique IDߜCompact ABS EnclosureߜComplies With Part 15 of the FCC RulesߜInternal Loop AntennaThe OMWT-MOT Wireless Motion Transmitter is a battery operated digital vibration sensor with a microprocessor controlled 418 MHz FCC certified radio transmitter. This transmitter is useful in applications that need to sense when motion is present or not. The OMWT-MOT has an on board time of day clock that allows it to spend most of the time in a low power quiescent state.At predetermined time intervals the clock will wake up the onboard microprocessor. Unique serial number information and digital vibration data is combined with a CRC-16 error check and transmitted in a very short data packet that results in a transmitter on time of only 15 milliseconds. This architecture allows the OMWT-MOT to consume very low energy resulting in a battery life of up to 2 years.The electronics are coated with a conformal rubber material that provides a moisture barrier against condensation. Submersion in water is not recommended. An integral pushbutton is used to activate the service switch. The OMWT-MOT is shipped with the transmitter turned off (anytime the device is to be shipped the transmitter should be turned off or must be placed in a shielded container to prevent interference that might cause shipping problems). Start the device by momentarily pushing the service switch (you will feel the button click). When the service switch is pushed, a data transmission occurs immediately and a special mark is introduced in the ID field of the transmitted data packet to indicate which device is in service or installation. The service switch is OMWT-MOTStarts at$145Ordering Example: OMWT-MOT wireless motion transmitter, OMWT-REC232wireless receiver and OMWT-SOFT Windows software, $145 +222 + 100 = $467.OMWT-MOT, $145, shown larger than actual size. OMWT-SOFT, $100, displays real-time。

最近老是有人在问什么机手机指令多少,下面是我收集到的所有的MTK手机指令,还不完整,为了方便大家,望兄弟们把知道的补充一下。
*#66*#*#3646633#*#36*#*#65289*#*#8560968#*#82043036#有一些机器开机输入*#66*#不进测试的。
可以在开机瞬间,在按键灯亮和开机音乐响的时候快速按*#*#............*#就可进入测试下面几个是国产机常用的工程模式指令,大家可以参考一下!注意有的是无卡状态输入的.特别提示:对于一些指令可能会使手机进入一些未知的状态,在这种情况下,心中无底的话,最好不要冒险继续操作.*888*888#*2580*#*888*888#**1234#**80#**#237546#**0106#*#9960#*983*0#*#0324#*888*888##*80#*528*0#*#*#1705*#369# hh hsf*789再长按#*#301#01*#123321#**#3012945#*#*#*#1705#MT6225齐乐D600手机可用*#4853*#天基168.芯片是MTK6225 #6803#.仿苹果ciphone工程模式*#83646633#;*#83656565#埃利特仿苹果机*#83646633# *#23642*#联想288/300输入2945#*进入测试模式SIMCOM *#189# *#889#龙旗*#8375#中天ZTA606 无卡开机时不停按*#*#*#…进工程模式仿三星F480 *#65*#仿三星W699工程模式:*#66*# 原厂设定*#8375#看芯片*#3646633#工程模式*#220807#mpr联想I909(MT6228)####72728439#进入工程模式。
仿苹果Siphone芯片MTK6225 I68+小S查看版本:*#8375#工程模式:*#82043036#MT6226####777##.奇怪的是手机没有牌子!仿诺基亚N83手机进入工程模式:*#65289*#仿诺基亚5310XM支持JA V A*#0000# 显示版本号(仿的5310数据)*#06# 查串号*#035670766*001#*#035670766*002# 内存缓存仿诺基亚N95的支持拇指30掌盟平台App游戏仿诺基亚NOKIA8800E-1 按*#0000#查看版本号仿诺基亚N83心机版*#65289*#进入工程模式支持MRP 查看版本待机状态下输入:*#8375#高仿诺基亚N83进入工厂模式代码:*#65289*#仿诺基亚NOKIA E90(中天8898-1)支持java工厂模式输入*#000#台版8800CA带QQ2G内存按*#0000#仿诺基亚8600 *#0000#仿诺基亚8800CE 输入*#3646633#跟*#66*#仿诺基亚8800 用*#10000#进入工程模式仿诺基亚8800e-1用*#10000#进入工程模式原始密码;112235E8D2H------数据#3646633#工程模式35E8E4H------数据#87#AUTOTEST35E8EAH------数据#33778# 序号289BFCH------数据#0044# 设为英文289C44H------数据#0086#设为简体2BA334H------数据#0886#繁体中文设置指令:*#66*#中文语言:*#0086# + send查看版本:*#8375#软件版本:*#8882#测试:*#87#调试:*#8899#默认语言:*#0000#+通话键设置英文:*#0044#+通话键繁体中文:*#0886#+通话键简体中文:*#0086#+通话键串号查询:*#06#原厂设置:*#66*#查看版本:*#8375#工厂指令:*#3646633#自动测试:*#87#软件版本:*#8882#*#035670766*001#*#035670766*002#仿苹果iphone工程模式*#83646633#;*#83656565#A5156指令*#1234# 查看软件版本*#33778# 查看序号查询*#777755999#或*#220807# 查看游戏支持*#0000#+通话键默认语言*#0044#+通话键设置英文*#0886#+通话键繁体中文*#0086#+通话键简体中文*#3646633# 工程模式*#06# 串号查询*#035670766*001# 按拨号键Ctrl Buffer=0 缓冲器(区)*#035670766*002# 按拨号键Task dbg mask=197632 dgb任务掩码我的手机东级星690,双模双待。

User Guide Bonded MoCA Network Adapter Model # ECB6250Table of ContentsTable of Contents 1 Getting Started 2 Introduction 2 Package Contents 3 Features 3 Connecting Adapters 4 Connecting the First Adapter 4Connecting Addititional Adapters 7 Specifications 10 Notices 11 Warranty 11 Important Safety Instructions 11FCC Class B Equipment 12Technical Support 14IntroductionCongratulations for purchasing the ScreenBeam ECB6250 MoCA 2.5 Network Adapter. The Adapter is a simple, flexible solution for extending a home network. By leveraging the ubiquity of coaxial cabling within the modern home, the Adapter provides an Ethernet Internet port anywhere a coaxial connection is available.This user manual explains the procedures needed to connect the Adapter.Package Contents• ECB6250 MoCA 2.5 Network Adapter• Coaxial cable• Power adapter• Quick Start Guide• Ethernet cableRequirements• Available coaxial port in installation areas• Available electrical wall socket in installation areasFeatures• Ethernet port (1.0 gigabit)• Coax In coaxial port (v. 2.5)• MoCA Protected Setup• Power, Coax, and Ethernet LEDs:-Power LED: glows solid green when Adapter is powered up.Coax LED: glows solid green with connection on the Coax port. --Ethernet LEDs (2): located on upper right and left cornersof the Ethernet port; left LED glows green on connection; rightLED blinks green when data is transferred across port.Connecting the Adapter is a relatively simple process. First, connect one Adapter to the broadband modem or router and the coaxial network to establish the Internet signal. Then, additional Adapters can be installed throughout the home or office at any location Ethernet Internet access is needed, and an available coaxial port is available.Connecting the First AdapterThe first Adapter must be connected to the broadband modem or router and the coaxial network. This Adapter takes the Internet signal from the modem/router and delivers it to the coaxial network.To connect the first Adapter:1. Connect a coaxial cable to a nearby coaxial outlet.2. Connect the other end of the coaxial cable to the Coax In coaxial porton the side of the Adapter.3. Connect one end of an Ethernet cable to the Ethernet port of themodem/router.4. Connect the other end of the Ethernet cable to the Ethernet porton the side of the Adapter.5. Plug the provided power adapter into the Power port on the sideof the Adapter.6. Plug the other end of the power adapter (external, 5V DC, 2A,made by APD, model #WB-10E05FU) into an electrical outlet.When complete, the setup should look similar to the figure below:The Internet signal is now being delivered across the coaxial network.MoCA Protected Setup (MPS)By default, MoCA encryption is disabled to ensure that the individual devices can “see” each other. If you would like to enable MPS, you will need to login to the firmware loaded on the Adapter. To do this,enter the following URL in a web browser on a computer connected via Ethernet to the Adapter:http://192.168.144.200of Modem/RouterTo Coax In Port on ECB6250To Coaxial Port on Device From Coaxial OutletIf Coaxial Port is Being Used buy Another Device:You will be asked to login. The user name is “admin" and the password is “actiontec”. Once you have enabled MoCA encryption, you can use the MPS push button to synchronize the encryption password on each MoCA 2.5 adapter connected via coaxial cable.Using a Coaxial SplitterIf the coaxial port is already being used by another device (a set-top box, for example), follow these steps:1. Disconnect the coaxial cable from the connected device. Leavethe other end connected to the coaxial wall outlet.2. Get a 2-way coaxial splitter (not included).3. Connect the coaxial cable disconnected in step 1 to the single(“In”) port on the coaxial splitter.4. Connect a coaxial cable (not included) to one of the dual (“Out”)ports on the coaxial splitter.5. Connect the other end of the coaxial cable from step 4 to thecoaxial port on the device (disconnected in step 1).6. Connect another coaxial cable (not included) to one of the dual(“Out”) ports on the coaxial splitter.7. Connect the other end of the coaxial cable from step 6 to the coaxialport of the Adapter.When complete, the setup should look similar to the inset diagram in the figure on the preceding page.If necessary, additional Adapters can be placed at locations around the home or office that need an Ethernet Internet connection, but currently only have a coaxial port.To connect additional Adapters:1. Connect a coaxial cable to a nearby coaxial outlet.2. Connect the other end of the coaxial cable to the Coax In coaxial porton the side of the Adapter.3. Connect one end of an Ethernet cable to the Ethernet port of themodem/router.4. Connect the other end of the Ethernet cable to the Ethernet porton the side of the Adapter.5. Plug the provided power adapter into the Power port on the sideof the Adapter.6. Plug the other end of the power adapter (external, 5V DC, 2A,made by APD, model #WB-10E05FU) into an electrical outlet.When complete, the setup should look similar to the figure below:The device connected to the Ethernet port is now connected to the Internet via the coaxial network. Repeat this process to install additional Adapters throughout the home.of Modem/RouterTo Coax In Port on ECB6250To Coaxial Port on Device From Coaxial OutletIf Coaxial Port is Being Used buy Another Device:If the coaxial port is already being used by another device (a set-top box, for example), follow these steps:1. Disconnect the coaxial cable from the connected device. Leave theother end connected to the coaxial wall outlet.2. Get a 2-way coaxial splitter (not included).3. Connect the coaxial cable disconnected in step 1 to the single (“In”)port on the coaxial splitter.4. Connect a coaxial cable (not included) to one of the dual (“Out”) portson the coaxial splitter.5. Connect the other end of the coaxial cable from step 4 to the coaxialport on the device (disconnected in step 1).6. Connect another coaxial cable (not included) to one of the dual (“Out”)ports on the coaxial splitter.7. Connect the other end of the coaxial cable from step 6 to the coaxialport of the Adapter.When complete, the setup should look similar to the inset diagram in the figure on the preceding page.SpecificationsModel Number ECB6250 (MoCA 2.5 Network Adapter) IP LAN MoCA (v. 2.5; up to 2.5 Gbps throughput)LAN Ethernet Port 10/100/1000 (1) LAN Connections Coax In Frequency Range - Extended D-band:1125MHz ~1675MHz; LED Indicators Power, Coax Power External, 5V DC, 2A, 1.3 mm diameter connector plugMade by APD, model #WB-10E05FU Regulatory FCC, UL 60950-1, CUL, IC EnvironmentalAmbient temperature 0ºC to 40ºC (32ºF to 104ºF) Storage temperature -20ºC to 85ºC (-4ºF to 185ºF) Operating humidity 10% to 85% non-condensing Storage humidity 5% to 90% non-condensing Note: Specifications are subject to change without notice.WarrantyThis product has a one-year Limited Hardware Warranty and 90-day free software updates from date of purchase.Local LawThis Limited Warranty Statement gives the customer specific legal rights. The customer may also have other rights which vary from state to state in the United States, from province to province in Canada, and from country to country elsewhere in the world.To the extent that this Limited Warranty Statement is inconsistent with local law, this Statement shall be deemed modified to be consistent with such local law. Under such local law, certain disclaimers and limitations of this Warranty Statement may not apply to the customer.Go to https:///warranty-consumer for more information.Important Safety InstructionsBasic safety precautions should always be followed to reduce the risk of fire, electrical shock, and personal injury, including the following:• Do not use this product near water – for example, near a bathtub, kitchen sink, laundry tub, or swimming pool, or in a wet basement; only clean with dry cloth.• Do not block any ventilation openings. Install in accordance with the manufacturer's instructions. Do not install near any heat sources such as radiators, heat registers, stoves, or other apparatus includingamplifiers that produce heat.• Do not use the telephone to report a gas leak in the vicinity of the leak.• Use only the power cord and batteries indicated in this manual if applicable. Note: you may need to reword for batteries or adapters.• Do not dispose of batteries in fire, as they may explode – check with local codes for possible special disposal instructions if applicable.Coaxial CableIf applicable, the coaxial cable screen shield needs to be connected to the Earth at the building entrance per ANSI/NFPA 70, the National Electrical Code (NEC), in particular Section 820.93, “Grounding of Outer Conductive Shield of a Coaxial Cable,” or in accordance with local regulation.FCC Class B EquipmentThis equipment has been tested and found to comply with the limits for a Class B digital device, pursuant to Part 15 of the FCC Rules. These limits are designed to provide reasonable protection against harmful interference in a residential installation. This equipment generates, uses and can radiate radio frequency energy and, if not installed and used in accordance with the instructions, may cause harmful interference to radio communications. However, there is no guarantee that interference will not occur in a particu-lar installation. If this equipment does cause harmful interference to radio or television reception, which can be determined by turning the equipment off and on, the user is encouraged to try and correct the interference by implementing one or more of the following measures:• Reorient or relocate the device;• Increase the separation between the equipment and receiver;• Connect the equipment to an outlet on a circuit different from that to which the receiver is connected (applicable only to powerline products);• Consult the dealer or an experience radio or television technician for help.Declaration of Conformity for Products Marked with the FCC logo–USA OnlyThis device complies with Part 15 of the FCC Rules license-exempt RSS standard(s). Operation is subject to the following two conditions:1.This device may not cause harmful interference;2.This device must accept any interference received, includinginterference that may cause undesired operation of the device.ModificationsThe FCC requires the user to be notified that any changes or modifications made to this device that are not expressly approved by ScreenBeam Inc., may void the user’s authority to operate the equipment.Declaration of Conformity for Products Marked with the Industry Canada (IC)–Canada onlyThis device complies with Industry Canada license-exempt RSS standard(s). Operation is subject to the following two conditions:1.This device may not cause harmful interference;2.This device must accept any interference received, includinginterference that may cause undesired operation of the device.Contact InformationFor questions regarding your product or the FCC/Industry Canada declaration, contact:ScreenBeam, Inc.220 Devcon Drive, San Jose CA 95112Technical SupportGo to for product support, updates, and more information including:•Firmware updates•Troubleshooting•Registration•FAQs。
试谈mtk平台手机指令(doc 10页)试谈mtk平台手机指令(doc 10页)mtk平台手机指令最新MTK工程模式(中文对照版本)和测试模式指令---XXF(天语E60)首先说明天语E60 使用MTK平台天语E60 内部恢复出厂设置指令:*#2898#,天语部分手机的解锁方法*746*737381#关机再开机密码取消关于MTK:当国产手机与洋品牌捉对厮杀之际,一个巨大的市场正在形成——这个几乎克隆了洋品牌与国产手机各自优势的手机制造行业,不但迅速地抢占了部分市场份额,同时还改变了整个手机产业链的生态,据权威研究机构称,台湾联发科技(MTK)在大陆灰色手机平台市场份额达69%关于MTK检测指令:目前MP3&MP4手机市场上的手机基本都只换了外壳,主板和平台就那么几个配套公司做的,拿到机器,输入版本指令便可以知道是那家的主板和平台了.为了很好的使用MTK智能王,在拿到用户手机时,通过指令来鉴别手机是否是MTK平台的手机就很有必要了,以下指令只要有一项指令能符合,那么就可以鉴别该手机是MTK平台的. MTK恢复原厂初始密码:112235E8D2H ---- 数据(数字):*#3646633#工程模式 *#66*#35E8E4H ---- 数据(数字):*#87# AUTO TEST35E8EAH ---- 数据(数字):*#33778#序号289BFCH ---- 数据(数字):*#0044#设为英文289C44H ---- 数据(数字):*#0086#设为简体2BA334H ---- 数据(数字):*#0886#繁体中文3,PWM(脉宽调制)4,EINT(未知)5,ADC(模拟数字转换器)6,set default level (设置预设标准)①mainLCD contrast(主屏幕对比度)②Batterry ( 电池)③PWM1④PWM2⑤PWM37,1)Set UART(设定通用异步传输器)①TSTconfig②PS config③设定USB序列埠使用方法预设值,有1,资料2,侦错2)UART POWER ON/OFF8,Sleep mode①Enable②Disable 9,NAND Format(与非电路格式化),就是磁盘格式化,不要动,不然资料就要丢光 10,DCM mode①Enable②Disable11,SWDBG①OFF②DSP LI③DSP PS④LI PS⑤MCU⑥MCU DSP⑦RESET(12,PMIC 6318①Reg ister R/W②Charger StatusSet ChargerRGBKP LEDBL LEDAudioMiscLcm bl setting13,RTC XOSC(WO)三,音频1,设定模式⊙正常(手机设置是正常)⊙Loudsp mode(大声模式)⊙Headset mode(耳机模式)2,正常①有限脉冲响应(有1-5五个可选)②Speech (说话)进行音量调节设定,有七挡,可分别设定值③ken Tone (主音调)也可进行音量调节)④Melody(旋律)调节MP3外放音量⑤Sound(应该是调节铃音的,不很确定)⑥Microphone (麦克风)应该是调节麦克风音量⑦Side Tone(背景噪声)3,Loudsp mode(象2一样进行调节)4,Headset mode(象2一样进行调节)5,铃声(可浏览铃声)6,SET ECHO Suppression(设定回波抑制)①Energy Thresh(能量反复)确定显示16384②Delay (延迟) 显示0③Energy Thresh2显示0④Delay 2(延迟) 显示07,Max Swing (最大振幅)8,DEBUG INFO9,AUTO RECORD SETTING(自动录音设置)四,GPRSACT1,Attach 确定显示:完成,(应该是将GPRS连接上吧) 2,Activate PDP (1—15项,可选){ Activate的中文意思是使活动,PDP意义未知 }3,Deactivate PDP { Deactivate的中文意思是使.无效,} 4,Send Data (数据传输)①send norm data(传送标准数据)②send RLC (意义未知)data5,PING(应该是"分组网间搜索器")①se nd norm data(传送标准数据)②send RLC (意义未知)data五,频宽选取,这没什么好说的六,MISC(杂项)1,Auto Answer(自动应答)预设为关,可开启,本人未曾试过2,High speed SIM(高速用户识别卡)可开闭,预设为闭3PWRDuration(能量持续时间),确定后显示如下:10/0212:53:48可能是最后开机时间[Current time ]当前时间10/0219:33:36[Duration]持续时间00/0006:39:48[last duration]00/00 00:00:004,Backlight Mode (背光模式)可开闭,默认为关,开启后,手机显示屏背光不熄灭5,序列埠侦测模式,确定①UART1②UART2③ART36,Assert testing (意义未知)显示确定-手机重启7,RAMtest (随机存储器测试)确定-回到MISC界面8,memoey dump (未知)9,MMIDebug 主机接口除错(默认关闭,可开启,作用未知) 10,WAP (可开闭)①WAP Assert Debug (确认除错程序)②useer Agent MAUI E800③Accept Header(文件接受点)WAP 1.2 WAP 2.0WMLHHTMLHTML(超文本标示语言)④MMSVersion (彩信版本)MMSDefault(预设)MMS1.0MMS1.1⑤Offine page (脱机网页)开启后手机上网可存下网页 11,J2METCK确定-进入JAVA工程模式Normal (标准)CLDCTCK(意义均未知)MIDPTCKWMAPITCKMMAPITCK12,AMR13,TOUCH SCREEN14,VIDEO HIGH BITRATE七,Auto test list (自动测试列表)应为*#66#所显示项八,PWADown Control (能量消减控制)1,PDN_con012782,PDN_con1651753,PDN_con2634704,PDN_con365535猜测可能是电量四格数值设置九,Debug info (除错程序信息)①FSTRACE(未知)②Last Exception (未知)十,Socket test(界面程序测试)1,DNS Query确定后Domain Name出现一个输入框2,HTTP Get3,ECHO4,Date query (数据查询)5,TRACERT6,IPERF十一,SW PATCH SELECT---DSP PATCH –数据十二,Profiling---Multimedia(多媒体)1,Auto Play Files(自动播放文件) 2,Camera(照相机)3,Video Player(MP4 播放)4, Video Recorder(录像播放)十三,RF TEST TOOLMultimedia(多媒体)1,Auto Play Files(自动播放文件) 2,Camera(照相机)3,Video Player(MP4 播放)4, Video Recorder(录像播放)测试手机用的指令: *#66*#说明:┳━━Version版本信息┃┣━━MCU SW微程序控制器软件┃┣━━Melody曲调版本┃┣━━Serial No.序列号┃┣━━BB Chip基板芯片(MT6218B,还有哪个手机用它的?)┃┣━━DSP Code数字信号处理器代码┃┣━━DSP Patch 数字信号处理器修正版本号┃┣━━MS Board MS 板(不太清楚,不知是什么的缩写。
深圳市潮流网络技术有限公司WP810企业级便携式Wi-Fi电话用户手册技术支持深圳市潮流网络技术有限公司为客户提供全方位的技术支持。
您可以与本地代理商或服务提供商联系,也可以与公司总部直接联系。
地址:深圳市南山区科技园本区新西路16号彩虹科技大厦4楼邮编:518057网址:客服电话:*************客服传真:*************技术支持热线:4008755751技术支持论坛:/forums网上问题提交系统:/support/submit-a-ticket商标注明和其他潮流网络商标均为深圳市潮流网络技术有限公司的商标。
本文档提及的其他所有商标或注册商标,由各自的所有人拥有。
注意由于产品版本升级或其他原因,本文档内容会不定期进行更新。
除非另有约定,本文档仅作为使用指导,本文档中的所有陈述、信息和建议不构成任何明示或暗示的担保。
目录文档目的 (1)更新日志 (2)固件版本 1.0.1.1 (2)欢迎 (3)产品概述 (4)产品功能 (4)技术规格 (4)安装 (6)包装清单 (6)安装WP810 (7)充电基座 (7)话机 (7)电池信息 (8)WP810按键描述 (9)WP810图标说明 (11)WP810LED状态 (13)WP810话机菜单 (13)WP810键盘输入法 (16)Web界面配置 (18)通过Web浏览器配置 (18)访问Web页面 (18)Web页面语言 (18)保存更改的设置 (19)Web页面访问权限管理 (19)更改用户或管理员密码 (20)更改HTTP/HTTPS访问端口 (21)基本操作 (22)开机/关机 (22)WP810连接Wi-Fi (22)Wi-Fi频段配置 (23)查看WP810状态 (24)帐号状态 (24)系统状态 (24)网络状态 (25)网络统计 (26)设置屏幕亮度和屏幕超时 (27)返回待机页面 (28)注册SIP帐号 (28)通过Web页面注册帐号 (28)通过话机菜单注册帐号 (29)话机设置 (31)选择话机语言 (31)激活/停用免提模式 (31)麦克风静音 (31)调节扬声器和听筒音量 (32)铃声 (32)设置铃声音量 (32)设置话机铃声 (33)日期和时间 (33)重启WP810 (34)呼叫操作 (35)拨打电话 (35)选择通话线路 (35)在通话记录中拨打 (36)在通讯录中拨打 (36)来电接听 (37)自动应答 (37)结束通话 (38)通话保持/恢复 (39)呼叫等待 (39)免打扰(DND) (40)呼叫转移 (40)通话转移 (41)快速拨号 (42)三方会议 (42)语音信箱 (43)设置语音信箱ID (43)播放语音邮件 (44)联系人 (46)本地联系人 (46)通话记录 (48)从通话记录中拨出电话 (48)通话记录选项 (48)通话记录详情 (49)信息 (50)查看短信 (50)新建短信 (50)删除短信 (51)PTT功能 (52)启用PTT模式 (52)发送PTT (53)PTT参数配置 (54)设置 (54)参数 (54)组播 (55)发送组播 (55)组播参数配置 (56)IGMP设置 (57)升级和部署 (58)升级和部署配置 (58)通过Web页面配置 (58)通过TFTP服务器升级 (58)部署和配置文件下载 (59)恢复出厂设置 (60)通过话机菜单恢复出厂设置 (60)通过Web页面恢复出厂设置 (60)体验WP810 (62)图目录图1WP810包装清单 (6)图2充电基座 (7)图3WP810话机安装 (7)图4WP810按键说明 (9)图5WP810菜单结构 (14)图6WP810键盘模式 (16)图7WP810Web GUI语言 (19)图8用户密码 (20)图9Web访问端口 (21)图10主屏幕 (22)图11WP810连至Wi-Fi网络 (23)图12预置SSID (23)图13SIP帐号状态 (24)图14系统状态 (25)图15网络状态 (26)图16网络统计 (26)图17屏幕显示配置 (28)图18帐号状态 (29)图19SIP帐号配置 (30)图20配置话机语言 (31)图21麦克风静音 (32)图22铃声音量 (33)图23来电铃声 (33)图24设置日期和时间 (34)图25重启WP810 (34)图26在通话记录中拨打 (36)图27在通讯录中拨打 (37)图28WP810自动应答 (38)图29自动应答标志 (38)图30通话保持/恢复 (39)图31呼叫等待 (40)图32启用DND (40)图33呼叫转移 (41)图34盲转接 (41)图35配置快速拨号 (42)图36三方会议 (43)图37LCD菜单设置语音信箱ID (43)图38Web界面配置语音信箱访问号码 (44)图39播放语音邮件 (45)图40联系人 (46)图41创建新联系人 (46)图42通话记录 (48)图43通话记录选项 (48)图44WP810通话记录详情 (49)图45查看短信 (50)图46新建短信 (50)图47从联系人新建短信 (51)图48WP810启用PTT功能 (52)图49PTT频道选择 (53)图50发送PTT (53)图51接收PTT (54)图52PTT通道释放 (54)图53开启组播 (55)图54选择组播对讲 (56)图55组播通话 (56)图56IGMP设置 (57)图57WP810通过Web GUI升级 (58)图58LCD菜单恢复出厂 (60)图59WP810Web GUI恢复出厂设置 (61)图60WP810Web GUI确认恢复出厂 (61)表目录表1WP810功能总览 (4)表2WP810技术规格 (4)表3包装清单 (6)表4WP810按键说明 (9)表5WP810图标说明 (11)表6WP810LED状态 (13)表7WP810菜单结构 (15)表8用户权限 (20)表9WP810账号状态说明 (24)表10WP810系统信息说明 (25)表11WP810网络状态说明 (26)表12WP810网络统计说明 (27)表13新联系人参数 (46)文档目的本文档介绍如何使用WP810便携式企业Wi-Fi电话。
ExtremeWireless 802.11ax AP360i/e 接入点AP360i/e 概述AP360i/e 接入点是企业级 802.11ax 接入点。
AP360i 中的“i”表示接入点带有内部天线,AP360e 中的“e”表示接入点带有外部天线连接器。
每个接入点均具有 1 个双频无线电、1 个锁频 WiFi 无线电、1 个蓝牙无线电、4 个 WiFi 内部或外部天线以及 1 个蓝牙低功耗 (BLE) 天线。
AP360i/e 可以安装在平整表面上,如墙壁或立杆。
每个接入点具有以下特点:•无线电:– 2 个 802.11ax 无线电(1 个2X2 2.4GHz和5GHz无线电和1个2X2 5GHz无线电)–1个物联网无线电(2.4GHz)•控制台端口RJ45• 2 个以太网端口:– 1 个 100/1000 Mbps 自动协商以太网端口,RJ45– 1 个 10/100/1000 Mbps 自动协商以太网端口,RJ45•LED 指示灯:6个–重置过程中所有 LED 指示灯都将亮起。
• 1 个重置按钮•功率:PoE 802.3af(有关电源信息,请参阅 Table 1: AP360i/e 电源) •天线:– 4 个 WiFi 内部天线(AP360i 上),4 个 WiFi 外部天线(AP360e 上) –一个AP360i上的 BLE 内部天线在 和一个AP360e上的 BLE 外部天线端口•温度:–6000 英尺时,为 -40°C 至 +60°C(-40°F 至 +140°F)•外壳:塑料表 1AP360i/e 电源图 1 AP360i 和AP360e 的前视图LED 指示灯LED 指示灯位于接入点的正面,但没有明显标记。
表 2AP360i/eLED 指示灯AP360i/e 盒内项目确保以下项目可用:说明: AP360i/e最低需要 WiNG 7.3.1 基本固件。
大纲:他们利用已有的基础设施,解决了对无线设备的充电和收发信息的大难题。
分为能量采集模块,信号接收模块和信号发送模块。
能量采集模块是利用电视信号,手机信号和无线电信号,为uv 级别。
信号接收模块是将原始信号+反向散射信号+噪音,从中抽提反向散射信号。
除了硬件,还有软件协议栈,通过载波监听解决冲突的问题。
Ambient Backscatter: Wireless Communication Out of Thin Air(ambient backscatter:环境背反射技术(环境反向散射):其原理是利用空间中已存在的蜂窝网络信号,在不需要电池的情况下发送信息.Wireless Communication Out of Thin Air:空中无线通信)We present the design of a communication system that enablestwo devices to communicate using ambient RF(无线电频率) as the only sourceof power. Our approach leverages(手段) existing TV and cellular transmissionsto eliminate the need for wires and batteries, thus enablingubiquitous(普遍存在) communication where devices can communicate amongthemselves at unprecedented(史无前例) scales and in locations that were previously (之前)inaccessible.Abstract:我们都知道有一种通信系统的设计,它仅仅依靠环境中无线电频率的能量就能使两个设备进行通信。
我们的方法利用已经存在的电视和蜂窝传输排除了有线和电池的需要,因此设备之间在之前没有的规模和之前不可能的地点进行通信,使这样无处不在的通信成为可能。
To achieve this, we introduce ambient backscatter, a new communicationprimitive(原语) where devices communicate by backscatteringambient RF signals. Our design avoids the expensive processof generating radio waves; backscatter communication is orders ofmagnitude more power-efficient than traditional radio communication.Further, since it leverages the ambient RF signals that are alreadyaround us, it does not require a dedicated power infrastructure(基础设施)as in traditional backscatter communication. To show the feasibilityof our design, we prototype ambientbackscatter devices inhardware and achieve information rates of 1 kbps over distancesof 2.5 feet and 1.5 feet, while operating outdoors and indoors respectively.We use our hardware prototypeto implement proof-of-conceptsfor two previously infeasible ubiquitous(普遍存在的)communicationapplications.为了得到这些,我们介绍了环境反向散射,设备之间通过反向散射无线电频率信号的一种新的通信原语。
我们的设计避免了产生无线电波过程的高昂代价。
反向散射技术比传统无线电通信节能了一个量级。
更进一步的说,如果把我们周围本来就存在的无线电频率信号利用起来,那么我们就不用专注于传统的背反射通信的能量基础设施。
为了展示我们设计的可行性,我们用硬件实现了一个环境反向反射设备,无论是在室内还是在室外在1.5英尺和2.5英尺的距离内接受信息的速率可达到1kbp/s, 我们使用我们的硬件原型证明了两个之前普遍存在的不可行的通信应用概念。
Keys:反向散射,物联网,能量采集,无线电的C ATEGORIES AND S UBJECT D ESCRIPTORS(类别和主题描述):网络架构和设计:无线通信1.Introduction:Small computing devices are increasingly embedded in objects and environments such as thermostats(恒温控制器), books, furniture, and evenimplantable medical devices [15, 22, 19]. A key issue is how topower these devices as they become smaller and numerous(许多); wiresare often not feasible, and batteries add weight, bulk, cost, and requirerecharging or replacement that adds maintenance(保养)cost and isdifficult at large scales [36].小型的嵌入式计算设备日益增多,如恒温控制器,书本,家居,甚至是植入式医学装置。
一个很关键的问题是如何驱动这些小而众多的设备。
有线通常是不可行的,电池需要增加重量,体积,成本,并且需要再次充电或者是以增加保养费的代价来替代,对于大规模的设备这样做是非常困难的。
In this paper, we ask the following question: can we enable devicesto communicate using ambient RF signals as the only sourceof power? Ambient RF from TV and cellular communications is widely available in urban areas (day and night, indoors and outdoors).Further, recent work has shown that one can harvest tens tohundreds of microwatts from these signals [32, 24]. Thus, a positiveanswer would enable ubiquitous communication at unprecedentedscales and in locations that were previously(先前)inaccessible(难以达到)。
在这几篇文章中,我们提出了以下几个问题,我们能否使用无线电频率信号作为设备间进行通信的唯一的能量来源。
环境中来自电视和蜂窝通信的无线电频率在市区(无论是白天还是夜晚,室内还是室外)很容易获得。
更近一步的说,最近的工作表明一个设备可以获得来自这些信号数十到数百微瓦特的电压。
因此,一个积极的回答使得普遍存在的设备之间以史无前例的规模和从未达到的高度进行的通信成为可能。
Figure1: ambient backscatter:在两个没有电池的设备进行通信。
如其中一个设备alice,能够反向散射信号,这些信号能够被其他环境反向散射设备破译。
简而言之,对于剩余的接受者,这些信号是一个附加的多路径来源,并且它们仍然可以破译经典的传输。
Designing such systems, however, is challenging as the simpleact of generating a conventional radio wave typically requires muchmore power than can be harvested from ambient RF signals [24]. Inthis paper, we introduce ambient backscatter, a novel communicationmechanism(原理,机制)that enables devices to communicate by backscattering ambient RF. In traditional backscatter communication (e.g., RFID), a devicecommunicates by modulating(调制)its reflections of anincident RF signal (and not by generating radio waves). Hence, it isorders of magnitude(量级)more energy-efficient than conventional(传统的)radiocommunication 无论如何,这样的一个系统是很具有挑战性的,因为具有代表性的产生传统的无线电波的简单行为比从无线电频率中获取需要更多的能量。
在这篇文章中,我们介绍了环境反向散射,这是一种能够使设备通过反向散射周围环境中无线电频率进行通信的新奇机制在传统的反向散射通信(RFID:无线射频识别),一个设备通过调制它自身的无线电频率信号(并且不产生无线电波)反射(reflections)事件来进行通信。
因此,它比传统的无线电通信具有更高能效的。
Ambient backscatter differs from RFID-style backscatter in threekey respects. Firstly, it takes advantage of (利用)existing RF signals soit does not require the deployment of a special-purpose powerinfrastructure—like an RFID reader—to transmit a high-power(1W) signal to nearby devices. This avoids installation and maintenancecosts that may make such a system impractical(不切实际的), especiallyif the environment is outdoors or spans(跨越)a large area. Second, andrelated, it has a very small environmental footprint because no additionalenergy is consumed beyond that which is already in the air.Finally, ambient backscatter provides device-to-device communication.This is unlike traditional RFID systems in which tags musttalk exclusively(专用的)to an RFID reader and are unable to even sense thetransmissions of other nearby tags.环境反向散射与无线射频识别反向散射的不同之处主要有三个关键方面:首先它利用的是已经存在的无线电频率信号,不需要专门的电力基础设施部署——就像一个射频识别读写器——向附近的设备传输一个大功率信号。