Quanta SC培训教程
- 格式:pdf
- 大小:1.17 MB
- 文档页数:30

Quanta for AndroidVersion 1.2.0 User GuidePrepare CubeTape (3)Configure CubeTape: C190POS (3)Install Software (3)1 Large screen device (3)2 Small screen device (4)Configuration (4)User Configuration (4)General Settings (5)Buttons Configuration (5)Function Settings: (7)Server Configuration: (7)License Configuration: (7)Connect CubeTape (8)Capture Data (9)Review Data (9)Send Data (10)Trouble Shooting (10)Appendix 1: CubeTape Configuration Barcodes (10)Appendix 2: Reset CubeTape - Configuration Barcodes (11)Appendix 3: Quanta Function Barcodes (11)PREPARE CUBETAPEBe familiar with CubeTape user guides:CONFIGURE CUBETAPE: C190POSScan the barcode below to configure the C190POS CubeTape device to work with Quanta on an Android device.This barcode incorporated multiple configuration components:1.Puts CubeTape in Bluetooth application mode (SPP)2.Units of measure = centimetres3.Accuracy to the nearest full centimetre4.Prefix for general barcodes = ^5.Prefix for dimensions = ~6.Suffix = CR7.1DIM modeINSTALL SOFTWAREThe way Quanta is installed on your Android device is influenced by what type of device it is:1. A larger screen or phone already connected to your emails:The software will be downloaded direct to the device.2. A small screen device or locked down device that does not have access to a web browser.It is easier to download to a computer and then copy the software to the Android device.1 LARGE SCREEN DEVICEOn your Android device, key in or click on web link:https:///download/com.scquanta.quantamobile.apkThis automatically downloads the Quanta software to your Android device.A Quanta icon will appear on your app matrix.2 SMALL SCREEN DEVICEOn your computer, click on web link:https:///download/com.scquanta.quantamobile.apkThis automatically downloads the Quanta software to your computer, you will see the .apk file in your downloads folder. Connect your Android device to your computer,making sure you enable the USB connection to transfer files:Open the file manager app:Copy the ‘com.scquanta.quantamobile.apk’ file from your computersDownload folder to the download folder on your Android device.Click on this file in the download folder and the software will be installed on your device, an icon will appear in your app matrix. You can now disconnect your Android device from your computer.Click on the Quanta icon to open the application.Make sure your Android is connected to the internet to complete the device configuration.Use the menu icon in the top right hand corner and open settings.After each of the configuration changes listed below, press the save button in the top right corner of each screen.USER CONFIGURATIONEnter a user name that represents the operator that will be using the CubeTape equipmentGENERAL SETTINGSStation Id: a name that represents where the operator will be working, for example: Dock 1Device Filter: do not make any change to defaultsTitle Barcode1: enter an industry appropriate description of the barcode field. For example Connote or Waybill. Default Weight: use drop down menu to select the appropriate unit of measureDefault Distance: use drop down menu to select the appropriate unit of measureData retention period: use drop down menu to select the number of days data should be stored on device forMaximum Results: do not make any change to defaultsThe RESET DATABASE button will clear all data and configuration from the Quanta installation on your device. This can be used to ensure a clean installation if reinstalling the software.BUTTONS CONFIGURATIONBy default, the Quanta data capture screen contains 4 fields only, which is to capture a barcode, length, width and height dimensions:There are shortuct buttons that can be added to the data capture screen:PAL: enters the default length and width of a pallet (as defined in the function settings)FLOOR: automatically adds the length of the CubeTape (as defined in the function settings)CLEAR: clears the current entries (this will only work if the record has not been saved)SAVE: saves the currrent record.To display a button on the data capture screen it must be enabled in the settings, toggle the switch on the right hand side to enable / disable each function.As an alternative to placing a button on the screen these functions can be accessed by scanning a barcode, the barcodes representing the pallet and floor functions are provided in the appendix. The left side switch is used to activate a function for barcode scanning, when the button is activated (right side switch) the barcode scan options is activated by default.Many operations prefer to use the barcodes as it removes the requirement to interact with screen buttons, maintaining CubeTape as the primary data capture device.Button SettingsOnce a button is activated a cog icon appears that opens the edit settings screen.Diagrams demonstrating where each position sits on the screen:FUNCTION SETTINGS:Off floor value: The length of the CubeTape, the value that will be added to the dimension when the measurement is taken with the base of the CubeTape on the floor.Pallet length: The length of a standard pallet in the customers operation.Pallet width: The width of a standard pallet in the customers operation.SERVER CONFIGURATION:Server address: enter: Account name: leave blankPassword: do not change defaultEnable server send: move switch to right to activateSend data immediately: move switch to right to activateLICENSE CONFIGURATION:First name: enter first nameLast name: enter last nameCompany name: enter your company nameEmail: enter the email address of the company account with CubeTape and Quanta, do not enter your personal email address unless you are the main account holder.Device description: enter a description for the device, for example Zebra 25Press the REQUEST buttonA verification code will be sent to the email address entered in the license configuration section.Enter the verification code to the field and press VERIFY.After verifying, the status of the software license on the device is displayed:Use the menu icon in the top right hand corner and open devices.Select FIND DEVICES, then press SCANUse the back button to return to the main screenPress the CTAPE button at the top of screen if it is red, if it is green it means the CubeTape is connected.Press the ADD buttonUse CubeTape to scan a barcode.Use CubeTape to measure length, then width, then height.To save the record you can:1.Scan a new barcode – this will save the previous record and create a new blank record2.Press the back button – this will only save the record if it was completeREVIEW DATAPress any barcode number on screen to review the record details.Key in any part of a barcode number into the search field to view the record:Status indicators:New: a new record saved on Android device database onlySent: record has been sent to QuantaCore server, as well as saved on Android device databaseSEND DATAIf the ‘send data immediately’ option is not activated, data can be sent to QuantaCore server by pressing the ‘send data to server’ button in the menu options.This will send all data with ‘new’ status.To be updated.P a g e 11 | 12Disclaimer © 2022Logicube Pty Ltd.All rights reserved. Please read through the manual carefully before using the product and operate it according to the manual. It is advised that you should keep this manual for future reference. Do not disassemble the device or remove the seal label from the device, doing so will void the product warranty provided by Logicube.All pictures in this manual are for reference only and actual product may differ. Regarding to the product modification and update, Logicube have the right to make changes to any software or hardware to improve reliability, function, or design at any time without notice. The information contained herein is subject to change without prior notice. The products depicted in this manual may include software copyrighted by Logicube or a third party. The user, corporation or individual, shall not duplicate, in whole or in part, distribute, modify, decompile, disassemble, decode, reverse engineer, rent, transfer or sublicense such software without prior written consent from the copyright holders.。

Agilent 7500a ICP-MS 现场培训教材安捷伦科技有限公司化学分析仪器部一、培训目的:7500a ICP-MS现场培训教材•基本了解7500a ICP-MS 硬件操作。
•掌握化学工作站的开机,关机,参数设定, 学会数据采集,全定量分析的基本操作。
二、培训准备:1、仪器设备:Agilent 7500a ICP-MS•Babington(高盐雾化器)。
2、气体准备:•准备三瓶高纯 Ar 气,接上减压阀后,将三气瓶并联后输出到 7500a ICP-MS 的 Ar 气的进气口。
/或用液 Ar 罐。
(要求纯度为 99.9995%)•输出压力为0.7Mpa±3.5%(Babington 高盐雾化器)。
3、循环水:•循环水的要求为:Flow=5L/Min.;温度:15-20℃;压力:230-350Kpa(33—51PSI)•循环水中加入一定量IPA,防止生菌。
4、排风:•要求排风量为:5—7.5m3/min(4.7—8.1m/s)。
Agilent 7500 Series17500a ICP-MS 化学工作站基本操作步骤:一、开机:1、开PC 显示器、打印机。
2、开PC 主机。
(password: 3000hanover)3、开ICP-MS 7500a 电源开关。
(仪器前面的电源开关)4、双击桌面的“ICP-MS Top”图标进入工作站,如下图所示:5、点击“ICP-MS Top”画面的“ICP-MS Instrument control”图标进入下图所示的仪器控制画面。
点击“Vacuum” 菜单,选择“VACUUM ON”进行抽真空程序,仪器由Shutdown -转换。
2***可以点击“Meters”图标,进入如下图所示的画面,选中真空的显示选项进行压力监测。
(最多可选5 项)IF/BK Pressure---接口及背压阀压力。
Analyzer Pressure---分析器压力。
TMP—分子涡轮泵。
荧光定量 pcr 仪培训计划一、培训目的荧光定量PCR(qPCR)是一种高度精确的DNA定量技术,广泛应用于基因表达分析、基因检测、病毒载量测定等领域。
本培训计划旨在为使用荧光定量PCR仪进行实验的科研人员提供相关知识和操作技能,以便他们能够熟练使用该仪器进行实验操作,并进行准确可靠的数据分析和结果解释。
二、培训对象1. 具有基础的分子生物学知识和实验操作经验的科研人员;2. 对荧光定量PCR仪器感兴趣并需要在实验中应用该技术的科研人员;3. 实验室技术人员和研究生。
三、培训内容1. 荧光定量PCR技术原理及应用;2. 荧光定量PCR实验前的样品准备和试剂处理;3. 荧光定量PCR实验中的仪器操作技能;4. 数据分析和结果解释。
四、培训方式1. 理论课程:通过讲座、培训手册和多媒体教学,介绍荧光定量PCR技术原理、实验流程、数据分析方法等内容;2. 实践操作:参与者将有机会亲自操作荧光定量PCR仪,进行样品准备、试剂配制和实验操作,以培养实际操作技能;3. 现场指导:在实验操作过程中,有专业的技术人员为参与者提供现场指导和支持,确保他们能够掌握实验操作的关键步骤;4. 实验案例分析:通过真实的实验案例,讲解如何进行数据分析和结果解释。
五、培训时间安排本培训计划共分为三天,具体的时间安排如下:第一天:上午:理论课程,介绍荧光定量PCR技术原理及应用;下午:实践操作,进行样品准备和试剂处理。
第二天:上午:理论课程,介绍荧光定量PCR实验中的仪器操作技能;下午:实践操作,操作荧光定量PCR仪进行实验操作。
第三天:上午:理论课程,介绍数据分析和结果解释方法;下午:实验案例分析,学习如何进行数据分析和结果解释。
六、培训材料1. 培训手册:详细介绍荧光定量PCR技术原理、实验流程、操作技能、数据分析方法等内容;2. 多媒体教学材料:包括PPT、视频等,辅助讲解相关知识和技能;3. 实验用具和试剂:提供参与者进行实验操作所需的试剂和实验用具。

量化交易软件培训说明-回复如何进行量化交易软件的培训。
第一步:了解量化交易软件的基本概念在进行量化交易软件的培训前,首先需要了解什么是量化交易软件。
量化交易软件是一种通过使用自动化交易系统来进行投资和交易决策的软件工具。
它通过分析历史市场数据、应用复杂的算法和模型,以及优化交易策略,从而帮助交易员实现系统化的交易决策。
第二步:选择合适的量化交易软件市场上有许多不同的量化交易软件可供选择,因此在进行培训之前,选择一款适合自己需求的软件非常重要。
考虑软件的功能、易用性、支持的交易市场和工具,以及历史表现等因素,并与其他交易员交流和咨询,选择最合适的软件。
第三步:学习软件的基本操作一旦选择了合适的量化交易软件,就需要学习软件的基本操作。
这包括了解软件的界面、图表、指标和工具,以及如何设置和运行交易策略。
通过阅读软件的用户指南、观看教学视频或参加在线培训课程,可以更好地掌握软件的基本操作。
第四步:了解量化交易的基础知识在学习如何使用量化交易软件之前,了解量化交易的基础知识非常重要。
这包括学习不同类型的交易策略、技术指标和图表模式,以及了解风险管理和资金管理等概念。
可以通过阅读相关书籍、参加专业培训课程或寻求专家的指导来获得这些知识。
第五步:理解量化交易策略的开发和测试一旦掌握了基本操作和基础知识,就可以开始学习如何开发和测试量化交易策略。
这包括学习如何编写交易策略的代码、使用历史市场数据进行回测和优化,并进行实时模拟交易以验证策略的有效性。
可以通过参加交易策略开发和测试的培训课程、阅读相关文献和参与社区讨论等方式来获得更多的知识。
第六步:实践和优化交易策略一旦开发和测试出了一套有效的交易策略,就可以开始实践和优化这套策略。
根据实时市场数据进行交易,并根据实际表现进行策略的优化和调整。
同时,还需要进行风险管理和资金管理,并及时进行交易日志的记录和分析,以持续提高交易的效果。
第七步:持续学习和改进量化交易是一个不断学习和改进的过程,因此持续学习和改进是非常重要的。
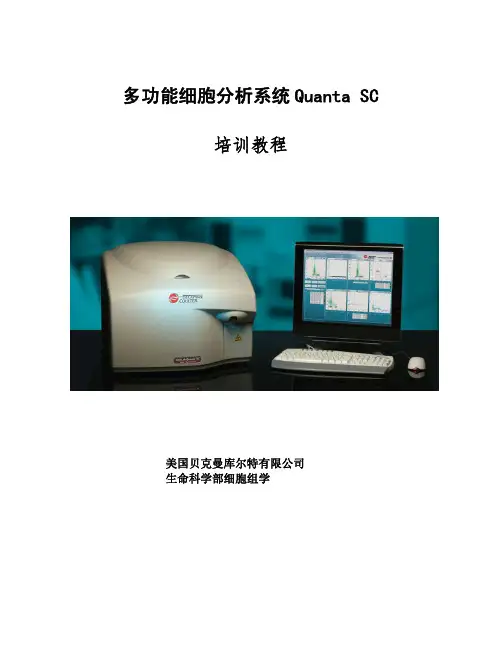
美国贝克曼库尔特流式细胞分析仪(Beckman coulter cell)产品型号:Cell Lab Quanta SC当前价格:0.00元产品数量:0新旧程度:全新有效期至:0000-00-00所在地:产品简介:仪器简介:T细胞亚群检测的CD45/CD4/CD8/CD3、CD45/CD56/CD19/CD3;阵发性血红蛋白尿(PNH)检测的CD55、CD59;血小板无力症(GT)检测的CD41、CD61等等详细信息仪器简介:T细胞亚群检测的CD45/CD4/CD8/CD3、CD45/CD56/CD19/CD3;阵发性血红蛋白尿(PNH)检测的CD55、CD59;血小板无力症(GT)检测的CD41、CD61等等。
但对于白血病/淋巴瘤免疫分型,国际上迄今为止也没有统一的抗体组合。
在2000年国际细胞分析学会(ISAC)大会上,临床血细胞计数协会组织了一次国际专家会议,以期对检测血液淋巴系统肿瘤所需最少、最有效的单抗数达成共识。
75%与会者一致认为,对于慢性淋巴系统增殖性疾病(CLD)有9种单抗:CD5,CD19,κ,λ,CD3,CD20,CD23,CD10,CD45对初诊来说是最基本的。
淋巴瘤和CLD相似,需要至少12-16种单抗。
对于急性白血病(AL),75%的与会者认为大约13-15种单抗是最基本的:CD10,CD19,CD79a,CD13,CD33,CD34,CD45,CD2,MPO,CD7,CD14,CD3,HLA-DR等,对初步鉴别白血病系列是必需的。
其他一些(CD16,CD56,CDw65,TdT,cyCD3)可能对某些病例有用。
几乎所有的投票者都认为,要对急性白血病完善分类所需单抗的恰当数量平均为20-24种。
但这些抗体之间组合也是一大难题,目前也无统一规定(如表二)。
大会多数发言者(11/13)指出,对已确诊病人的监护和分期来说,仅需较少单抗。
抗体的质量控制是实验的关键环节。
抗体的质量包括其特异性、灵敏度、精密度。
关于光谱仪的培训计划一、前言光谱仪是一种能够分析材料组成和性质的重要科学仪器。
它广泛应用于化学、物理、地质、生物等领域,为科学研究和工程技术提供了重要的分析手段。
为了提高光谱仪的使用效率和分析准确度,需要对使用者进行系统的培训,使他们能够熟练掌握光谱仪的操作和分析技术。
二、培训目标本培训计划旨在帮助使用者全面了解光谱仪的基本原理、结构和功能,并掌握光谱仪的操作技巧和分析方法。
具体培训目标包括:1. 了解光谱学的基本概念和原理;2. 熟悉常见的光谱仪的结构和性能参数;3. 掌握光谱仪的操作技巧和常见故障处理方法;4. 学会光谱分析的基本操作流程和数据处理方法;5. 能够独立进行光谱分析实验,并准确、可靠地获取分析结果。
三、培训内容1. 光谱学基础知识介绍光谱学的基本概念和原理,包括光的波动性、光与物质的相互作用、光谱的基本分类和用途等内容。
2. 光谱仪的基本结构和性能参数介绍常见光谱仪的结构组成和工作原理,以及性能参数的含义和影响。
3. 光谱仪的操作技巧包括光源、样品、检测器的选择和调整,信号采集和处理操作,以及仪器的日常维护和故障处理方法。
4. 光谱分析的基本操作流程和数据处理方法介绍光谱分析实验的准备工作,样品的处理和测量方法,数据的采集和处理技巧等内容。
5. 光谱分析实验组织学员进行光谱分析实验,通过实际操作加深理论知识的理解,培养实验操作技能和分析能力。
6. 知识检测和实际操作能力考核对学员进行光谱学理论知识和操作技能的考核,并通过实际操作能力考核来检验学员的综合能力。
四、培训方法1. 理论讲授以讲座、小组讨论、案例分析等形式,介绍光谱学的基本原理和光谱仪的基本知识。
2. 观摩实验安排学员观摩光谱分析实验,让学员全面了解实验操作流程和注意事项。
3. 操作演练通过实际操作训练,让学员掌握光谱仪的操作技巧和分析方法。
4. 实验考核安排学员进行光谱分析实验,并对实验结果进行评价和分析,以检验学员的实验操作能力。

Agilent 7890A G C(中文版B03.01C )现场培训教材安捷伦科技有限公司化学分析与生命科学事业部一、培训目的:?基本了解7890A 硬件操作。
?掌握化学工作站的开机,关机,参数设定, 学会数据采集,数据分析的基本操作。
二、培训准备:1、仪器设备:Agilent7890A GC?进样口: 填充柱进样口(PP);毛细柱进样口(S/SL); 冷柱头进样口(COC); PTV 进样口。
?检测器:FID;TCD;u ECD; NPD;FPD。
?色谱柱:P/N 19091J-433, HP-5 毛细柱:30m,ⅹ320μχ0.25μ?注射器:自动液体进样器(ALS)用10ul 注射器或手动进样用10ul 注射器。
?进样体积: 1 ul。
2、气体准备:?FID,NPD,FPD :高纯H2 (99.999%),干燥无油压缩空气。
?uECD:高纯N2 (99.999%)?载气, 高纯N2 (99.999%)或高纯He (99.999%)。
7890A/GC 化学工作站基本操作步骤:(一)、开机:1、打开气源(按相应的所需气体)。
2、打开计算机,进入中文Windows XP 画面。
3、打开7890A GC 电源开关。
(7890A 的IP 地址已通过其键盘提前输入进7890A)4、双击桌面的“仪器 1 联机”图标;(或点击屏幕左下角“开始”,选择“程序”,选择“安捷伦化学工作站”,选择“仪器 1 联机”,则化学工作站自动与7890A 通讯,进入的工作站界面如下图:(通讯成功后,7890A 的遥控灯亮)5、从“视图”菜单中选择“方法和运行控制”画面,点击“化学工作站状态”,使其命令前有“√”标志,点击“全部菜单”,使之显示为“短菜单”来调用所需的界面。
(二)7890A 配置编辑:1、点击“仪器”菜单,选择“GC 配置…”进入如图所示画面。
在“连接”画面下,输入GC 名称:如“GC 7890”;可在“注释”处输入7890A 的配置,如“7890GC with FID FPD”。

QuantaSC培训教程引言:一、软件安装与启动1.1系统要求操作系统:Windows7/8/10,64位版本;处理器:IntelCorei5或更高版本的CPU;内存:至少4GBRAM;硬盘:至少2GB的可用空间;显卡:支持OpenGL3.3或更高版本的显卡。
1.2安装步骤(1)从官方网站QuantaSC安装包;(2)运行安装包,按照提示完成安装过程;(3)安装完成后,启动QuantaSC软件。
二、基本操作2.1界面介绍菜单栏:包含文件、编辑、视图、工具、帮助等菜单;工具栏:提供常用功能的快捷操作;项目树:显示当前项目中的所有文件和节点;属性面板:显示选中节点的属性信息;图形窗口:显示图形输出结果;控制台:显示软件运行过程中的信息。
2.2创建项目(1)菜单栏中的“文件”→“新建”→“项目”,在弹出的对话框中设置项目名称和存储路径,“确定”完成创建;(2)在项目树中,右键项目名称,选择“新建”→“节点”,创建新的节点;(3)双击节点名称,在属性面板中设置节点属性。
2.3数据导入与导出(1)菜单栏中的“文件”→“导入数据”,选择相应的数据文件,设置导入选项,“确定”完成导入;(2)菜单栏中的“文件”→“导出数据”,选择需要导出的数据,设置导出选项,“确定”完成导出。
三、高级功能3.1数据处理与分析(1)在项目树中,右键数据节点,选择“数据处理”→“数据清洗”,对数据进行清洗;(2)在项目树中,右键数据节点,选择“数据处理”→“数据拟合”,对数据进行拟合;(3)在项目树中,右键数据节点,选择“数据处理”→“统计分析”,对数据进行统计分析。
3.2图形绘制与可视化(1)在项目树中,右键数据节点,选择“图形绘制”→“散点图”,绘制散点图;(2)在项目树中,右键数据节点,选择“图形绘制”→“线图”,绘制线图;(3)在项目树中,右键数据节点,选择“图形绘制”→“柱状图”,绘制柱状图。
四、案例分析本部分将通过一个实际案例,介绍如何使用QuantaSC解决实际问题。
量化交易软件培训说明-回复如何进行量化交易软件的培训。
1. 什么是量化交易软件?量化交易软件是一种用于自动执行交易策略和进行市场分析的计算机程序。
它使用数学模型、统计分析和算法来生成交易信号,并自动执行交易。
量化交易软件通常提供图形界面和编程接口,使交易员能够轻松地开发、测试和部署他们的交易策略。
2. 为什么需要培训?量化交易软件是一项复杂的技术,需要一定的专业知识和技能才能正确地使用和理解。
培训能够帮助交易员掌握软件的基本功能和操作技巧,并了解如何开发和测试交易策略。
通过培训,交易员可以提高交易效率、减少错误和损失,并提高盈利能力。
3. 哪里可以进行量化交易软件的培训?有许多机构和平台提供量化交易软件的培训课程。
交易员可以选择参加线下的培训班或线上的课程。
线下培训班通常由专业的量化交易师或机构提供,他们会在一定的时间内为学员提供系统的培训和指导。
线上课程通常由平台提供,学员可以根据自己的进度自主学习。
4. 培训内容包括哪些方面?量化交易软件的培训内容通常包括以下几个方面:- 基本概念和术语:学习量化交易的基本概念和术语,如交易信号、回测、风险管理等。
- 软件功能和操作:学习软件的各种功能和操作技巧,包括导入数据、编写交易策略、回测和执行交易等。
- 数据分析和统计学:学习如何分析市场数据、应用统计学和数学模型来生成交易信号。
- 策略开发和测试:学习如何开发和测试交易策略,包括选择交易指标、设定参数和优化策略。
- 风险管理和资金管理:学习如何进行风险管理和资金管理,以最大限度地保护交易资本。
- 实操演练和案例分析:通过实操演练和案例分析来加深对量化交易原理和实践的理解。
5. 如何选择合适的培训课程?选择合适的培训课程有以下几个要点:- 培训师的资质和经验:选择有丰富经验和良好口碑的培训师或机构,可以保证培训的质量和效果。
- 课程的内容和深度:根据自己的需求和水平选择合适的课程,确保能够全面了解量化交易软件的各个方面。
量服培训方案课程概述本培训旨在为所有有志于深入学习量化交易及数据科学领域的学习者提供一站式的培训方案,内容涵盖了量化交易、数据分析、金融工程、机器学习等领域。
通过该课程的学习,学员能够全面掌握量化交易的基础知识及实践技能,掌握金融数据处理、建模、优化和验证等关键技能,成为一名优秀的量化交易师或金融数据分析师。
课程结构本培训共分为三个阶段,分别是初级、中级和高级,每个阶段的课程内容都是基础与实践相结合,理论与实践相平衡。
学员可以根据自己的实际情况,自由选择课程阶段和课程内容。
初级阶段初级阶段主要围绕量化交易基础知识展开,掌握数据处理、策略回测、交易系统构建等关键技能。
具体课程如下:课程名称课程简介量化交易入门介绍量化交易的基本概念,掌握量化交易的目标和特点Python编程基掌握Python编程语言的基本语法和数据类型等知识础金融市场数据源完整的金融市场数据获取和处理方法数据清洗和预处理学习数据清洗和预处理技术,提高数据特征提取和建模的精度策略开发和回测基于Python编写量化交易策略,并进行回测和优化交易系统构建学习交易系统的构建原理和实现方法中级阶段中级阶段主要围绕金融数据分析、建模、优化及实践展开。
学员可以在此阶段选择自己感兴趣的课程进行学习。
具体课程如下:课程名称课程简介量化风险管理独立开展风险分析和测算,有效降低交易损失金融时间序列分析深入学习时间序列分析和时间序列建模方法机器学习基础掌握常用的机器学习算法和模型选择方法金融大数据处理学习大数据处理和分析技术期权定价理论学习期权定价理论和衍生品交易策略高频交易策略在高频交易模式下实现量化交易算法高级阶段高级阶段主要围绕量化策略的构建、实现和优化展开。
具体课程如下:课程名称课程简介模拟交易实战采用历史数据,进行模拟交易和实战操作量化策略实现学习量化策略实现技术,包括交易系统架构和策略优化机器学习实战学习机器学习技术的实现和推广应用深度学习基础学习深度学习前沿技术,掌握深度学习理论和实战技术量化交易研究独立开展量化交易研究,形成有效的投资策略授课老师本培训的老师都是业内经验丰富的量化交易专家和金融数据分析师,团队成员包括从业多年的量化交易师、数据分析师、金融工程师和机器学习专家,能够为学员提供最真实、最实用的交易技能和代码实现。
Quanta-200扫描电镜实验室安全操作规程Quanta 200扫描电镜实验室安全操作规程1.开机前的检查1.1室温:18℃~25℃;1.2湿度:<80%;1.3Quanta 200 真空泵PVP1和PVP2的油面指示应在规定位置,油要干净,无色透明,无污染,每月检查一次;2.试样制备2.1微细和超细粉体(粒度<10m)样品,取少量样品直接放在烧杯中,用无水乙醇做溶剂,超声分散,用干净滴管吸取少量液滴置于铜托上,并用红外灯照射干燥;2.2粗颗粒样品,取少量粘在铜托上的导电胶带上,用无毛纸轻压,使样品颗粒牢牢粘住,并清楚粘在铜托侧面上的粉样;2.3!2.42.5块状样品,高度应在15mm以下,要用无水乙醇浸泡,清洗干净,放在超声波水槽中处理,以除去油脂、灰尘、赃物和水分;2.6试样一定要无水、无油,观察前要用红外灯照射干燥。
3.开机严格按开机顺序操作,开机抽真空5分钟内,系统真空应达到要求(<10-4T orr),如果系统真空不能达到要求,应检查样品室门是否关好、样品室密封圈垫圈及密封平面是否干净或其它连接处是否有漏气现象。
如果不能解决应及时报告,并与厂商联系。
4.试样观察4.1按仪器说明步骤操作,选择合适工作参数;4.2注意样品高度,样品的高度要小于卡尺的长度,千万不要使样品观察面碰触物镜下方的背散射电子探测器;4.3(4.4更换样品时,一定要先切断灯丝高压,待灯丝冷却5分钟以后再放气。
开关样品室门,手扶住门下侧的拉杆,轻轻地向外或向里推。
勿抓X、Y、Z、R调节杆来开关门,门要拉到合适的位置,才能更换试样。
要带手套取放样品架,手千万不要伸到样品室内,以防止碰伤各种探测器;4.54.6更换样品时,开关门动作要轻,不使镜筒产生过大振动。
更换样品后要及时关门,样品室放大气的时间不宜过长,一般不得超过20分钟;4.7样品室内如果脏了,用无尘纸(布)擦拭,注意不要碰触探测器;4.8仪器观察过程中,若暂时停止观察,应立即切断灯丝高压;4.9仪器观察过程中,若突然发生断电事故,应立即切断计算机电源开关再切断服务器电源开关,最后切断总电源开关。