HG设备操作手册
- 格式:docx
- 大小:143.15 KB
- 文档页数:2

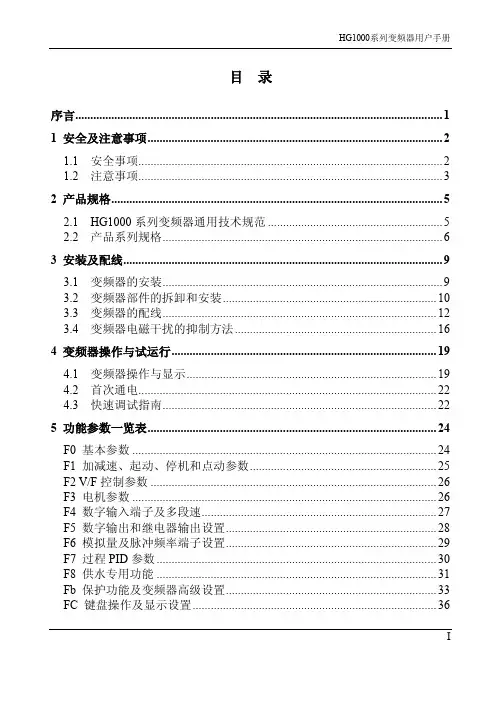
监控显示器用户手册目 录1. 责任声明 ...........................................................................................i 3. 第1章 产品简介 ................................................................................14. 第2章 设备接口................................................................................25. 第3章 面板按键................................................................................36. 第4章 遥控器 ................................................................................47. 第5章 基本操作 ................................................................................5...........................................................................................8. 保修服务 109. 限制物质或元素标识表 (11)...........................................................................................2. 前 言 i i 用户手册监控显示器版权所有©杭州海康威视数字技术股份有限公司2021。
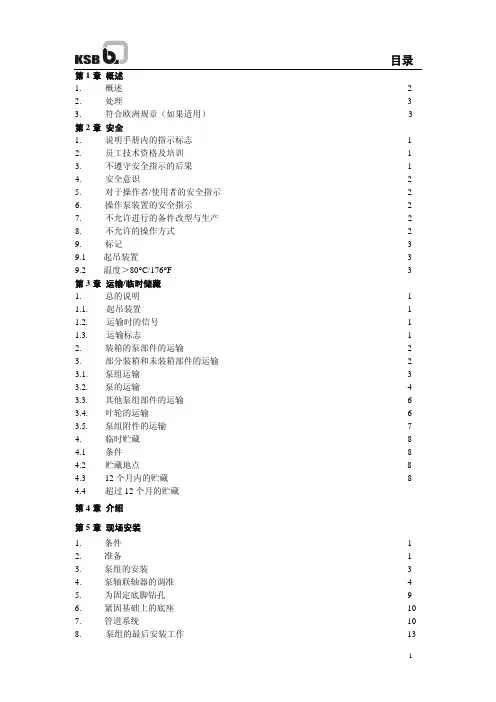
第1章概述1. 概述 22. 处理 33. 符合欧洲规章(如果适用) 3 第2章安全1. 说明手册内的指示标志 12. 员工技术资格及培训 13. 不遵守安全指示的后果 14. 安全意识 25. 对于操作者/使用者的安全指示 26. 操作泵装置的安全指示 27. 不允许进行的备件改型与生产 28. 不允许的操作方式 29. 标记 3 9.1 起吊装置 3 9.2 温度>80°C/176°F 3 第3章运输/临时储藏1. 总的说明 1 1.1. 起吊装置 1 1.2. 运输时的信号 11.3. 运输标志 12. 装箱的泵部件的运输 23. 部分装箱和未装箱部件的运输 2 3.1. 泵组运输 3 3.2. 泵的运输 4 3.3. 其他泵组部件的运输 6 3.4. 叶轮的运输 63.5. 泵组附件的运输74. 临时贮藏8 4.1 条件8 4.2 贮藏地点8 4.3 12个月内的贮藏8 4.4 超过12个月的贮藏第4章介绍第5章现场安装1. 条件 12. 准备 13. 泵组的安装 34. 泵轴联轴器的调准 45. 为固定底脚钻孔96. 紧固基础上的底座107. 管道系统108. 泵组的最后安装工作139. 安装仪表1510. 停机时的防护15第6章试车,启动1. 试车,启动前的准备工作 1 1.1 关于泵设计的介绍 1 1.2 概述 1 1.3 清除防腐剂 1 1.4 重新投入运行前要做的工作 1闲置期>12个月1.5 轴承润滑油 2 1.6 冲洗润滑油循环系统2 1.7 检查转动方向 2 1.8 转子的转动方向 4 1.9 安装联轴器 4 1.10 安装护罩 4 1.11 仪器的功能测试及调整 41.12 安置润滑油系统 52. 试车,启动 5 2.1 前提 5 2.2 启动 6 2.3 启动前的检查 62.4 启动,试车73. 停机8 3.1 闲置泵83.2 为泵组进行维护或长时间停机所做的准备94. 停机后的工作10 4.1 在等待开机时所做的工作10 4.2 为泵进行维护所做的准备104.3 闲置期105. 关于闲置期所需保护措施的详细说明11 第7.1章检查检查计划 1 第7.2 章维修1. 一般规则 1 1.1 关于泵设计的介绍 1 1.2 所需的资料 1 1.3 前提 11.4 维修间隔 12. 拆除防护罩 13. 维修计划 24. 维修工作 3 4.1 换油 3 4.2 重新润滑 4 4.3 连接联轴器(如果适用) 4第7.3章维护1. 关于拆卸的总说明 1 1.1 关于泵设计的介绍 1 1.2 必备资料 11.3 前提 12. 拆卸护罩 1 2.1 隔音罩(如果适用) 1 2.2 联轴器护罩/联轴器盖 22.3 轴封的防护罩 23. 拆卸泵轴联轴器 2 3.1 拆卸联轴器 2 3.2 拆卸联轴器轮毂(键连接) 33.3 轴端跳动的检查 44. 拆卸泵 4 4.1 拆卸管道及仪器表 4 4.2 将泵从底座上移走 54.3 将泵运至拆卸地 65. 拆卸轴承 6 5.1 准备工作 6 5.2 拆卸附加件(如油泵法兰,轴位置显示器,等)(如果适用)7 5.3 拆卸带滚动轴承的起停装置(如果适用)7 5.4 拆卸带瓦块式推力轴承的起停装置(如果适用)7 5.5 拆卸推力轴承(如果适用)7 5.6 拆卸径向轴承85.7 拆卸轴承箱96. 拆卸轴密封10 6.1 准备工作10 6.2 拆卸机械密封10 6.3 重新安装机械密封116.4 拆卸壳体部件117. 拆卸平衡装置12 7.1 HG1和2号泵12 7.2 HG3号泵12 7.3 HG4-6号泵12 7.4 测量径向间隙的近似值13 7 关于重新安装的概述13 9 用蓝墨水检查平衡装置14 9.1 HG泵型号1到2 14 9.2 HG泵型号3 169.3 HG泵型号4到6 1810 安装平衡装置21 10.1 HG泵型号1到2 21 10.2 HG泵型号3 22 10.3 HG泵型号4到6 2311 安装轴封24 11.1 安装密封壳体件24 11.2 安装轴密封件2511.3 安装机械密封2612. 安装轴承27 12.1 安装轴承箱并吊起泵转子27 12.2 安装径向轴承30 12.3. 安装带滚动轴承的起停装置(如果适用)32 12.4 拆卸带瓦块式推力轴承的起停装置(如果适用)33 12.5 安装推力轴承34 12.6 安装检查接头(如果适用)3612.7 安装附加件(如油泵法兰,轴位置显示器,等)(如果适用)3613. 现场安装37 13.1 将泵运至安装地点3713.2 校准泵组部件3714. 安装泵轴联轴器37 14.1 装配联轴器轮毂(键连接)37 14.2 校准泵轴联轴器4014.3 安装联轴器接头4015. 固定泵底脚4016. 安装管道及仪器4017. 安装护罩40 17.1 联轴器护罩40 17.2 联轴器盖41 17.3 防止与轴密封件意外接触的护罩4217.4 隔音罩(如果适用)4218. 泵组其他零件的维护42 18.1 泵轴联轴器的维护42 18.2 驱动器的维护42 18.3 最小流量装置/最小流量阀的维护43 18.4 仪表及阀门的维护43 18.5 供油系统的维护(如果适用)4318.6 齿轮/变速偶合器的维护(如果适用)4319. 备品备件43 19.1 订购备品备件43 19.2 备件的储存43 19.3 存放43 第8 章故障排除故障报告第9章相关资料由于不遵守本手册的规定而引起的后果,制造厂家不承担任何赔偿责任。
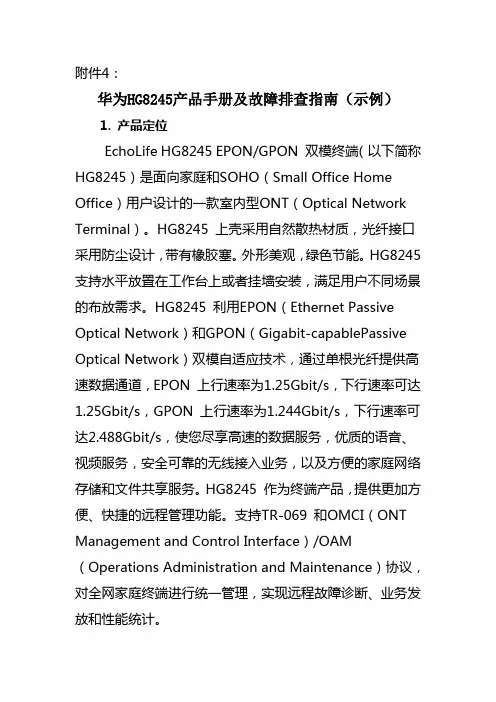
附件4:华为HG8245产品手册及故障排查指南(示例)1. 产品定位EchoLife HG8245 EPON/GPON 双模终端(以下简称HG8245)是面向家庭和SOHO(Small Office Home Office)用户设计的一款室内型ONT(Optical Network Terminal)。
HG8245 上壳采用自然散热材质,光纤接口采用防尘设计,带有橡胶塞。
外形美观,绿色节能。
HG8245 支持水平放置在工作台上或者挂墙安装,满足用户不同场景的布放需求。
HG8245 利用EPON(Ethernet Passive Optical Network)和GPON(Gigabit-capablePassive Optical Network)双模自适应技术,通过单根光纤提供高速数据通道,EPON 上行速率为1.25Gbit/s,下行速率可达1.25Gbit/s,GPON 上行速率为1.244Gbit/s,下行速率可达2.488Gbit/s,使您尽享高速的数据服务,优质的语音、视频服务,安全可靠的无线接入业务,以及方便的家庭网络存储和文件共享服务。
HG8245 作为终端产品,提供更加方便、快捷的远程管理功能。
支持TR-069 和OMCI(ONT Management and Control Interface)/OAM(Operations Administration and Maintenance)协议,对全网家庭终端进行统一管理,实现远程故障诊断、业务发放和性能统计。
2 .面板接口HG8245 的背面板接口和侧面板接口分别如下图所示。
HG8245 的背面板接口HG8245 的侧面板接口3. 指示灯HG8245 的指示灯图HG8245的指示灯状态说明PON和LOS指示灯的状态说明4. 故障排查4.1电源灯不亮操作步骤步骤1 请检查电源适配器是否和设备相匹配。
步骤2 请检查电源线连接是否可靠。
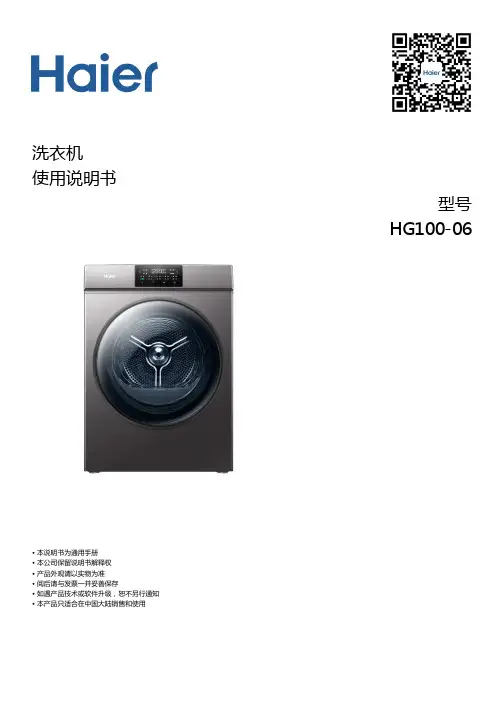
洗衣机使用说明书型号HG100-06• 本说明书为通用手册• 本公司保留说明书解释权• 产品外观请以实物为准• 阅后请与发票一并妥善保存• 如遇产品技术或软件升级,恕不另行通知• 本产品只适合在中国大陆销售和使用1. 产品介绍1 1.1. 产品部件1 1.1.1. 正面1 1.1.2. 背面1 1.1.3. 附件1 1.2. 技术规格1 1.2.1. 技术数据11.2.2. 产品尺寸及安装要求12. 使用说明3 2.1. 安全注意事项3 2.1.1. 标志说明3 2.1.2. 电气要求3 2.1.3. 运输安装要求3 2.1.4. 放置场景要求3 2.1.5. 使用要求3 2.1.6. 烘干衣物要求4 2.1.7. 清洁保养要求4 2.1.8. 儿童、特殊人群注意事项4 2.2. 干衣机安装4 2.2.1. 调整底脚4 2.2.2. 安装注意4 2.3. 干衣准备4 2.3.1. 干衣检查4 2.3.2. 干衣注意事项5 2.4. 干衣操作5 2.4.1. 基本操作5 2.4.2. 操作面板5 2.4.3. 程序指南6 2.4.4. 衣物重量参考7 2.5. 清洁维护7 2.5.1. 清理过滤网82.5.2. 清洁机身、滚筒83. 售后服务9 3.1. 疑问解答9 3.1.1. 故障排除9 3.1.2. 显示代码及处理方法11 3.2. 保修说明11 3.2.1. 干衣机保修说明113.3. 有害物质12 3.3.1. 有害物质的名称与含量121. 产品介绍1.1. 产品部件1.1.1. 正面干衣机各部分构件名称(正面)说明书中所有图示均为示意图,由于产品改进及系列化扩展,您所得到的产品外观、颜色及功能可能与此图片不一致,请以实际产品为准。
1.1.2. 背面干衣机各部分构件名称(背面)1.1.3. 附件附件1.2. 技术规格1.2.1. 技术数据技术数据以上技术参数如有变更,恕不另行通知。
产品执行标准 • Q/0212HRE 024 《家用滚筒干衣机》• GB 4706.1 《家用和类似用途电器的安全 第1部分:通用要求》 • GB 4706.20 《家用和类似用途电器的安全 滚筒式干衣机的特殊要求》 • 本产品属于I类电器,请您使用时注意用电安全 • 使用前请仔细阅读本说明书 • 本公司保留说明书解释权 • 产品外观请以实物为准• 如遇产品技术或软件升级,恕不另行通知• 本产品只适合在中国大陆销售和使用1.2.2. 产品尺寸及安装要求产品尺寸(示意图)尺寸D为机器最后端到主控板上沿最前端(侧视图)最大的深度尺寸,尺寸D3为机器最后端到前板(侧视图)的深度最小尺寸。
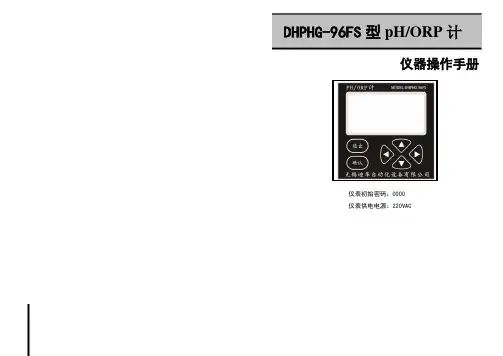
DHPHG-96FS型pH/ORP计仪器操作手册仪表初始密码:0000仪表供电电源:220VAC简要操作说明该手册包含了仪表所有的操作细节,以下的简要操作说明用于帮助用户尽快学会操作使用仪表。
1、仪表安装:将仪表固定在仪表柜的面板上或仪表箱内,防止太阳直射或水淋,连接好电源电缆线,先不要通电(仪表正式使用前可通电热机1-2小时);2、电极安装:根据现场要求,将电极以流通式(配不锈钢流通池使用)、沉入式(配沉入式护套管,请不要将电极电缆线直接浸泡在溶液中)、管道式(配不锈钢或PVC 安装底座)、法兰式(配套特殊法兰)、反应釜安装(配套反应釜护套及安装套件)或其它安装方式,可查看P3-P4页参考;3、摘除电极头部的有机玻璃保护帽或橡胶保护帽,将电极安装好;4、将电极的接线端按所标号码与仪表后接线端标号一一对接;5、接通电源即可开始测量(使用前推荐使用两点标定)。
重要安全信息请阅读和遵守下列各项:· 当仪表选配使用220V AC 供电电源时,仪表壳体后侧带有高电压,这可能导致危险出现。
在靠近仪表的这个区域前,请务必断开线路电源。
· 接线或修理应有专业人员来完成,并且只对断电的仪表进行接线和修理。
· 一旦仪表出现安全问题,立即将仪表断电,以防止任何无意操作。
例如,当下列情况时可能为非安全状态: 1)仪表出现明显的损坏;2)仪表无法正常运行或提供指定的测量;3)仪表在温度超过50℃的环境中存放了较长时间。
pH/ORP 计电极不用时应浸泡在溶液内,浸泡溶液的配制:取pH4缓冲剂一包,溶于250ml 纯水中,再加入56克分析纯KCl ,适当加热搅拌至完全溶解即成。
(注:电极在干放状态下存放易失效)十 成套性注:使用前请检查购买仪表的成套性。
本公司其它系列分析仪表请登录我公司网站查询。
仪器使用小技巧: 1、如何找回忘记的密码?答:进入售后服务菜单,当看到制造商联系方式时,“左”“右”键同时按,此时需输入密码“12345”,进入后将光标移动到最下面一排“密码”查看当前仪表密码。

EPON 工程业务配置操作手册EPON 技术的高带宽和传输距离远的优点,保证了随着业务的开展,用户对于光纤接入的需求越来越大。
如果一个新用户提出加入光纤接入的需求,需要在OLT 设备MA5680T 和ONU 设备HG850e 上分别做些配置。
现提供配置方法,方便贵局以后业务的开展。
一. 基本配置1) 首先要在OLT 上注册添加的ONU 设备1.1 如果采用不同规格的ONU 设备,则要添加ont 能力集模板。
GCT_OLT_MA5680T(config)#ont-profile add epon profile-id 54profile-name HG850E按 Q 或者 q 键退出当前输入操作> ONT 管理模式<1-SNMP, 2-SNMP-NOPARA, 3-OAM> [3]:3 > UNI 属性是否关注<1-不关注, 2-关注> [2]:2> ONT FE 端口列表(fomat: 1,3-5,7 )<S><0-100> [-]:1-4 > ONT GE 端口列表(fomat: 1,3-5,7 )<S><0-100> [-]:> POTS 端口数目<0-16> [0]:2> TDM 端口类型<1-E1> [1]:> TDM 端口数目<0-8> [0]:> RF 端口数目<0-16> [0]:添加ONT 能力集模板成功模板 ID: 54InternetSoftswitchONU…….. 图2.1 嘉峪关电信结构组网图模板名称: HG850E2)针对不同的ONU设置不同的DBA动态带宽模板MA5680T(config)#dba-profile{ add<K>|delete<K>|modify<K> }:add{ profile-id<K>|profile-name<K>|type1<K>|type2<K>|type3<K>|type4<K>|type5<K> }:prof ile-id{ profile-id<U><10,512> }:54 (根据实习情况设置DBA模板的ID值){ type1<K>|profile-name<K>|type2<K>|type3<K>|type4<K>|type5<K> }:type3{ assure<K> }:assure{ assure-bandwidth<U><512,1235456> }:4096 (根据实际情况设置动态分配的保证带宽){ max<K> }:max{ max-bandwidth<U><512,1235456> }:4096 (根据实际情况设置动态分配的最大带宽)(建议上层MA5200G或radius设备对下行进行限速)3)添加并注册ONUMA5680T(config-if-epon-0/1)#MA5680T(config-if-epon-0/1)#ont add 0 0 mac-auth 0073-073B-F274 profile-id 54 dba-profile 54 desc XXX-HG850E二.数据业务配置(以VLAN2016为例)1)创建用户上网业务VLANMA5680T(config)#vlan 2016 smart2)指定VLAN上行口MA5680T(config)#port vlan 2016 0/20 0(如果没有规划的更改,数据业务都用0/20/0上行至城域网)3)创建上网业务VLAN的业务虚端口MA5680T(config)#service-port vlan 2016 epon{ frameid/slotid/portid<S><1,15> }:0/2/0 (0/2表示业务端口在EPBA板,最后一个0表示第一个PON口){ ont<K> }:ont{ ontid<U><0,63> }:0 (0表示配置的端口是第一个PON口下的第一个onu){ rx-cttr<K>|multi-service<K> }:multi-service{ user-vlan<K> }:user-vlan{ user-vlanid<U><1,4094>|untagged<K> }:2016命令:service-port vlan 2016 epon 0/2/0 ont 0 multi-service user-vlan 20164)划分ONU端口VLANMA5680T(config)#interface epon 0/2MA5680T(config-if-epon-0/2)#ont port{ attribute<K>|native-vlan<K>|vlan<K>|classification<K> }:vlan{ portid<U><0,3> }:0 (PON口号){ ontid<U><0,63> }:0 (该PON口下的第几个ONU){ iphost<K>|fe<K>|ge<K> }:fe (实际情况填写FE还是GE){ vlanid<U><1,4094> }:2016 (与用户上网业务VLAN一致){ ont-portlist<S><1,200> }:1 (连接的FE或者GE口的编号,在前面ONT能力集模板上体现)命令:ont port vlan 0 0 fe 2016 1MA5680T(config-if-epon-0/2)#端口添加到VLAN,可以添加: 1个, 丢弃: 0个, 成功: 1个, 失败: 0个如果采用untag方式,需要划分ONU端口的NATIVE-VLAN;如果采用tag 方式,则不需要。
HGM6400发电机组控制器(带J1939接口)用户手册郑州众智科技股份有限公司版本发展历史日期版本内容2008-9-26 1.0 开始发布。
2008-11-24 1.1 1. 在典型应用图后增加起动、燃油、停机输出口扩展继电器要求。
2. 在端子接线描述后增加在运行过程中严禁将起动蓄电池去掉的注意事项。
2010-07-27 1.2 优化说明书中的一些细节部分。
是本公司的英文商标是本公司的中文商标不经过本公司的允许,此说明书的任何部分不能被复制(包括图片及图标)。
本公司保留更改此说明书内容的权利,而不通知用户。
公司地址:河南省郑州市高新技术产业开发区金梭路28号电话:+86-371-67988888+86-371-67981888+86-371-67991553+86-371-67992951+86-371-67992952+86-371-67981000(外贸)传真: +86-371-67992952/67981000网址://邮箱:******************.cn目录1概述 (4)2性能和特点 (4)3 技术参数 (5)4 操作 (6)4.1 LCD显示 (6)4.2 按键功能描述 (8)4.3 自动开机停机操作 (9)4.4 手动开机停机操作 (10)5保护 (10)5.1 警告/预警 (10)5.2 停机报警 (12)5.3 跳闸停机报警 (14)6面板配置 (14)6.1 参数配置 (14)6.2 日期/时间配置 (18)7输入输出口定义 (18)7.1 输入口1-6定义 (18)7.2 输出口1-6定义 (19)8事件记录查阅 (22)9试运行 (22)10背面板 (23)11故障排除 (25)12典型接线图 (26)13过电流曲线 (28)14通信配置及连接 (29)15控制器与发动机的CAN连接 (30)15.1 CUMMINS ISB/ISBE(康明斯) (30)15.2 CUMMINS QSL9 (30)15.3 CUMMINS QSM11 (30)15.4 DETROIT DIESEL DDEC III / IV(底特律) (31)15.5 DEUTZ EMR2(道依茨) (31)15.6 JOHN DEERE(强鹿) (32)15.7 MTU MDEC (32)15.8 PERKINS(珀金斯) (32)15.9 SCANIA (32)15.10VOLVO EDC3(沃尔沃) (33)15.11 V OLVO EDC4 (33)15.12VOLVO-EMS2 (33)15.13BOSCH(博世) (34)16安装 (35)1 概述HGM6400系列电站自动化控制器集成了数字化、智能化、网络化技术,用于单台柴油发电机组自动化及监控系统,实现发电机组的自动开机/停机、数据测量、报警保护及“三遥”功能。
目录一、HG850A 登录 (2)二、HG850A 注册 (3)三、语音业务配置 (4)3.1配置VOIP基本参数 (4)3.2配置VOIP高级参数 (6)3.3配置VOICE高级参数 (9)一、HG850a 登录通过网线将HG850a的任何一个LAN口和PC机的网口相连,并在PC机上配置该网络连接的参数:IP:192.168.100.1,MASK:255.255.255.0,该配置参数也是默认配置。
在浏览器的地址栏输入“http://192.168.100.1”进入登录页面,输入登录名(Username):telecomadmin,密码(Password):admintelecom。
注:必须使用telecomadmin/admintelecom,不要使用root/admin,使用root/admin虽然也可以登陆,但权限不够;另外,登陆后,如果不小心把WAN口的网址修改为WEB登陆地址192.168.100.1,WEB地址会发生变化,变为192.168.2.1/24,这个时候需要使用这个地址登陆WEB。
说明输入错误不能超过三次,否则等待1分钟后重新输入。
参数说明如下表所示。
登录web页面参数说明二、HG850a 注册登录配置页面后,“Status->Device->Device Info”,如下图所示:把HG850a的序列号(Serial Number)上报给华为督导,让华为督导在OLT 上注册ONU信息,注册成功后,ONU会分配到一个ONTID号,注册前ONTID号为0,且HG850a指示灯面板的LINK灯为常亮,ATUH灯为常亮。
HG850a指示灯面板图如下图所示:LINK和AUTH两个指示灯状态说明:三、语音业务配置3.1配置VOIP基本参数先配置WAN,“Basic->Wan”,如下图所示:注意:“Eable”要打勾,“Service List”要选“VOIP”,另外,删除的时候,如果把“Remove”那个地方打勾,然后选“Apply”是删不掉的,必须是把“Remove”打勾,然后点击上面那个灰色的“Remove”,使用Static方式,配置掩码和网关可以查看状态:然后配置SIP基本参数,选择“Basic->VoIP”配置参数。
OPERATING MANUALEnglishFlapping HomogenizerHG-400/HG-400V/HG-400W/HG-400VWRoom 303, Hall C, Office BuildingM8, No. 1 Jiuxianqiao East Road,Chaoyang District, Beijing 100015,ChinaTel: +86 400-809-2068Fax: +86 400-809-2068-112***********************************Operating Manual2Congratulations!You have made an excellent choice.WIGGENS thank you for the trust you have placed in us.This operating manual has been designed to help you gain an understanding of theoperation and possible applications of our instruments. For optimal utilization of allfunctions, we recommend that you thoroughly study this manual prior to beginningoperation.Declaration of conformity ENWe declare under our sole responsibility that this product corresponds to thedirectives ……. and conforms to the following standards or normativedocuments: EN ISO ……The WIGGENS Quality Management SystemISO 9001Certificate Registration No. 01 100084841Unpacking and InspectingPlease unpack the device carefully. Check that the package is right-side-up and thenopen it. Check that model of the product is one that you ordered. Check that there is nodamage. If there is any damage, file a damage claim with the carrier. In the case of anydamage a damage report should be requested immediately. These instructions must befollowed fully for us to guarantee our full support of your claim for protecting against lossfrom concealed damage. The form required for filing such a claim will be provided by thecarrier.Printed in ChinaChanges without prior notification reservedWIGGENS HG-400/HG-400V/HG-400W/HG-400VWContent1. Intended Use (4)2. Operator Responsibility (5)2.1. Disposal (6)2.2. CE Conformity (6)2.3. Technical Specifications (6)3. Safety Instructions (8)3.1. Explanation of Safety Notes (8)3.2. For your protection (8)3.3. For protection of the equipment (9)4. Operating Procedures (11)4.1. Environmental Operating Conditions (11)4.2. Installation (11)4.3. Operation (12)4.3.1. Indicators and Functional Elements (12)4.3.2. General Operation Procedure (14)4.3.4. External Control (15)5. Cleaning and Maintenance (16)5.1. Routine Cleaning (16)5.2. Maintenance (17)6. Transport and Storage (17)7. Service (18)7.1. Trouble-Shooting (18)7.2. Warranty (18)7.3. Contact /Technical Service (19)3Operating Manual1. Intended UseThe HG-400/HG-400V/HG-400W/HG-400VW is a flapping homogenizer employed leading microprocessor technology for flap control. The leading microprocessor technology ensures the accuracy and stability of the process to protect the cell. Its sample does not contact with the homogenizer, so that it not only avoided the cross infections, but easy to clean working chamber.The flapping speed for HG-400V andHG-400VW are adjustable to 5 – 8 times per sec. For HG-400 and HG-400W, they employ digital setting and display of the working time.4WIGGENS HG-400/HG-400V/HG-400W/HG-400VW 2. Operator ResponsibilityUseFor abstracting bacteria from solid samples.Range of use (indoor use only)- Laboratories- Pharmacies- Schools- UniversitiesThis instrument is suitable for use in all areas except:- Residential areas- Areas that are connected directly to a low-voltage supply network that also supplies Residential areasThe safety of the user cannot be guaranteed:- If the instrument is operated with accessories that are not supplied or recommended by the manufacturer- If the instrument is operated improperly or contrary to the manufacture’s specifications - If the instrument or the printed circuit board are modified by third parties.The products of WIGGENS ensure safe operation when installed, operated, and maintained according to common safety regulations. This section explains the potential dangers that may arise when operating the instrument and also specifies the most important safety precautions to preclude these dangers as far as possible.●The operator is responsible for the qualification of the personnel operating theinstrument.●The personnel operating the instrument should be regularly instructed about thedangers involved with their job activities as well as measures to avert these dangers.●Make sure all persons tasked with operating, installing, and maintaining theinstrument have read and understand the safety information and operating instructions.5Operating Manual6● When using hazardous materials or materials that could become hazardous, theinstrument may be operated only by persons who are absolutely familiar with these materials and the instrument. These persons must be fully aware of possible risks. ● Only qualified personnel are authorized to perform configuration, installation,maintenance and repairs of the instrument.● Routine operation can also be carried out by untrained personnel who shouldhowever be instructed by trained personnel.If you have any questions concerning the operation of your instrument or the information in this manual, please contact us!2.1. DisposalAt the end of its service life the instrument is to be disposed of inaccordance with the local regulations specified for the disposal ofelectronic industry waste in an environmentally friendly manner.2.2. CE ConformityThe requirements of the following European guidelines:Low voltage regulations with respect to legal harmonization of the membercountries concerning electric devices for use within certain voltage limits.EMC countries concerning electromagnetic compatibility.2.3. Technical SpecificationsWIGGENS HG-400/HG-400V/HG-400W/HG-400VW7All measurements have been carried out at the stated voltage, frequency, and an ambient temperature of 25°C.Technical changes without prior notification reserved.WIGGENS Order Numbers consist of the Basic Order Number (BON) andthe Order Number Addition (ONA) which explains different characteristicsof the product that can vary from country to country. Order Numbers asstated Numbers (FON), consisting of the BON followed by the ONA. For a fullexplanation of the ONA of your product, please ask your local WIGGENSsupport Catalog.Operating Manual83. Safety Instructions3.1. Explanation of Safety NotesIn addition to the safety warnings listed, warnings are posted throughout the operating manual. These warnings are designated by an exclamation mark inside an equilateral triangle. “Warning of a dangerous situation (Attention! Please follow the documentation).” SymbolAdditional term / Description Warning signsThe danger is classified using a signal word. Read and follow theseimportant instructions for averting dangers. Warning!Describes a possibly highly dangerous situation. If these instructionsare not followed, serious injury and danger to life could result.Caution!Describes a possibly dangerous situation. If this is not avoided, slightor minor injuries could result. A warning of possible property damagemay also be contained in the text.Notice!Describes a possibly harmful situation. If this is not avoided, theproduct or anything in its surroundings can be damaged.Note!Draws attention to something special.Important!Indicates usage tips and other useful information. 3.2. For your protection● Make sure you read and understand all instructions and safety precautions listedin this manual before installing or operating your instrument.● Keep the operation instructions in a place where they can be accessed byeveryone.WIGGENS HG-400/HG-400V/HG-400W/HG-400VW●Make sure the product is checked for proper condition regularly (depending on theconditions of use). Regularly check (at least every 2 months) the proper condition of the mandatory, warning, prohibition and safety labels.●Connect the instrument to a power socket with earthing contact (PE-protectiveearth)!●Do not stay in the area below the instrument.●Never operate damaged equipment.●Be aware of tripping! Never route the connection cable in highly frequented areas!●Be aware of possible cable damage! Keep the connection cable away from theheating zone!●Always turn off the instrument and disconnect the mains cable from the powersource before performing any service or maintenance procedures, or before moving the instrument.●This is not an explosion proof homogenizer. Do not use with any highly flammableor explosive materials.●Not recommended for use with corrosive materials or in corrosive atmospheres.Corrosive spills and fumes will damage the top plate and internal components.●This is not an explosion proof instrument. Do not use with anyhighly flammable or explosive materials.●When in an emergency, disconnect the main power plug.●Repairs are to be carried out only by qualified service personnel●Be aware of the danger of electric shocks!●When in an emergency, disconnect the main power plug.3.3. For protection of the equipment●You have received a product designed for industrial and experimental use.Nevertheless, avoid strikes to the housing, vibrations, damage to the operating-element panel, and contamination.●Make sure that the mains power supply has low impedance to avoid any negativeeffects on instruments being operated on the same mains.●Do not expose the unit to sunlight.9Operating Manual10 ●Sudden drops may cause damage in the interior of the instrument.●Transport the instrument with care.●Press the power button to interrupt the flapping homogenizer, rather thandisconnect the main power plug directly.●Do not cover the device, even partially e.g. with metallic plates or film. This resultsin overheating.●The power supply plug serves as a safe disconnecting device from the line andmust always be easily accessible.●Never operate the homogenizer in wet areas!●Position the device at least 45 cm (12 inches) from combustible materials underany conditions.4. Operating Procedures4.1. Environmental Operating ConditionsThe Flapping homogenizer must operate in the following conditions:●Indoors●Altitudes up to 2000 meters●Temperatures from+5°C to +40°C●Maximum relative humidity 80% for temperatures up to +31°C, linear decrease downto 50% relative humidity at a temperature of +40°C●Max. mains fluctuation of ±10 % are permissible●Protection class according to EN 60 529: IP31●The unit corresponds to Class I●Overvoltage category II4.2. Installation●Place the Flapping homogenizer on a stable, flat surface and proper environment foroperation. Leave a space at the back and sides of the apparatus of about 20cm.●Connect the homogenizer to the power supply.●Connect the power supply to a power socket with earthing contact.4.3. Operation4.3.1. Indicators and Functional ElementsSelect buttonSelectsetting,Increase button∙∙Decrease button∙∙4.3.2. General Operation Procedure1. Place the flapping homogenizer on a stable and flat surface2. Turn off the main switch and plug in power3. By pulling out the right side handle to open the frontal door;4. Place the Sterile bag into the blending chamber.5. By pushing the right side handle to close the frontal door;6. Turn on the main switch and set your required parameters.7. After setting the parameters, press the START/ STOP button to start thehomogeneous process.8. After finished the homogeneous process, Press the START/ STOP button again tostop the instrument;9. (Note: if the operator open the frontal door during the homogeneous process, theinstrument will also stop working automatically).10. Open the frontal door and pull out the sterile bag carefully.4.3.4. External ControlBesides the general control mode, the flapping homogenizer can also be remotely controlled.For remote control there are following operating methods available:1. Analog Input / Output Control:Use 0-20mA or 0-10V signal to drive the flapping homogenizer (It can also be connected to a pedal switch).Please refer to the pin assignment as follows;2. Input Foot3. Input 0-10V (0-MAX RPM)4. Output 0-10V (0-MAX RPM)7. Input 0-20mA (0-MAX RPM)10. GND2. RS-232 Control:1. TX2. RX3. GND4. A5. B6. GND5. Cleaning and Maintenance5.1. Routine CleaningWipe the housing and operation panel of the instrument with a damp cloth using a mild soap and water solution. For heavier soiling, using isopropyl alcohol appropriate.The device is maintenance-free.CleaningOnly use cleansing agents which have been recommended by WIGGENSUse to remove:Dyes isopropyl alcoholConstruction materials isopropyl alcohol/water containing surfactant Cosmetics isopropyl alcohol/water containing surfactant Foodstuffs water containing surfactantFuels water containing surfactant●Do not allow moisture to get into the appliance when cleaning.●Wear protective gloves when cleaning the devices.●Before using another than the recommended method for cleaningor decontamination, the user must ascertain with WIGGENSthatthis method does not destroy the instrumentNote:Do not use chlorine bleach, chlorine-based cleanser, abrasives,ammonia, steel wool or scouring pads with metal content orsimilar harsh solvents or abrasives. These may damage thesurface of the instrument.5.2. MaintenanceDo not attempt to service or repair a WIGGENS flapping homogenizer. If the flapping homogenizer housing is opened, the warranty becomes void. Please Contact WIGGENS for return authorization and return instructions.Ordering spare partsWhen ordering spare parts, please give:- Machine type- Manufacturing number, see type plate- Item number and designation of the spare part.RepairPlease only send devices in for repair that have been cleaned and are free of materials which might present health hazard s. For this, use the “certificate of compliance” form which you can obtain from WIGGENS. If your appliance requires repair, return it in its original packaging. Storage packaging is not sufficient when sending the device - also use appropriate transport packaging.6. Transport and Storage●Clean the flapping homogenizer so that it is free from any materials which may beharmful to the health. Provide a material safety data sheet where appropriate.●Place the flapping homogenizer unit and its parts into the original packing or acontainer with necessary protection to prevent damage during transport. Seal the original packing or container with packing tape.●Store the packed unit in a dry place.CAUTION:Failurehomogenizer as outlined can lead to damages or be harmful to thehealth.7. Service7.1. Trouble-ShootingWIGGENSwith repairs for providing improved performance of the instrument.7.2. WarrantyIn accordance with WIGGENS warranty conditions, the warranty period is 24 months. For claims under the warranty please contact your local dealer. You may also send the machine direct to our works, enclosing the delivery invoice and giving reasons for the claim. You will be liable for freight costs. The warranty does not cover wearing parts, nor does it apply to faults resulting from improper use or insufficient care and maintenance contrary to the instructions in this operating manual.WIGGENS reserves the right to decide the validity of any warranty claim. In case of faults arising either due to faulty materials or workmanship, parts will be repaired or replacedfree of charge.Any other compensation claims, such as consumables, damages caused by corrosion or accidental breakage, are excluded from this guarantee.This warranty may only be altered by a specifically published amendment. No individual has authorization to alter the provisions of this warranty policy or its amendments.7.3. Contact /Technical ServiceIf your device is not working properly:⇨Please inform WIGGENS Instruments by using our contact information.You have contact WIGGENS ENS Instruments?⇨Copy and complete the Conformation of condition of unit from these operating instructions.⇨Please repack the device appropriately for transport and send to WIGGENS Instruments together with the Confirmation of condition of unit.Confirmation of condition of unitIn the case of repair, copy and complete the Conformation of condition of unit and send it to WIGGENS Instruments.1. Details about the unitProduct numberSerial numberReason for repair2. Has the device been cleaned, decontaminated/sterilized?Yes No3. Is the unit in a condition which does not represent any health threats for thestaff of our service department?Yes Nof not, which substances has the unitcome into contact with?4. Legally binding declarationThe customer is aware of being legally liable WIGGENSInstruments for any damages arising from incompleteand incorrect information.Date SignatureCompany stampPlease note The shipper is responsible for the return of the goods inwell packed condition, suitable for the mode of transport. Sender informationName, first nameCompanyDepartment, research group StreetZip code, cityCountryPhoneE-mail。
HG8010用户端调试手册
一、设备调试
1、施工完成后,进行HG8010设备的注册。
HG8010提供的维护IP地址:192。
168。
100。
1.可以将个人计算机的IP地址设置为与维护IP地址在同一网段。
本地连接——属性——INTERNET协议(TCP/IP)——属性
配置IP地址和掩码:IP 192。
168.100。
2~254
掩码:255.255。
255。
0
然后点击确定——确定
2、在IE浏览器输入192。
168。
100.1,点击回车,如下图:
切换至中文状态,输入用户名:root,密码:admin,回车
3、登陆ONU后,状态-—光模块信息,可以查看ONU接收光功率
有光未注册:PON灯绿色慢闪;无光:LOS等红色慢闪。
4、ONU未注册:状态-—设备信息——ONT 注册状态(O1)
5、ONU注册:系统工具——ONT 认证,选中PASSWORD,输入密码,点击应用
6、注册成功后:状态——设备信息—-ONT 注册状态(O5),并且显示ONT ID 显示正常,和工单核对。
7、保存配置信息。
系统工具-—配置文件—-保存配置。
8、重启ONU设备。
系统工具-—重启——重启。
“水护卫”HG – 302 游泳池水质监控仪技师手册操作和维修保养指南蓝典科技有限公司目录第1章前言 31.1 拟定用途 31.2 安全注意事项 31.3 各章综述 4 第2章综述 52.1 水池化学综述 52.2 水护卫解决方案 52.3 特点和模块 52.3.1 标准模块 52.3.2 可选模块 62.3.3 远程读数和控制 62.4 系统部件7 第3章安装93.1 选择位置93.2 场地要求和安装93.2.1 机械安装要求93.2.2 机械安装93.3 管路要求和安装113.3.1 管路连接113.4 电力要求和安装123.4.1 连接电力电源123.4.2 连接相关电源123.5 与配制系统间的连线13 第4章首次操作和校准144.1 安装传感器144.2 安装试剂154.3 首次菜单设置174.3.1 水护卫控制面板174.3.2 液晶显示194.3.3 菜单194.3.4 配置设置214.4 校准234.4.1 氯含量校准234.4.2 pH值校准244.4.3 氧化还原剂校准264.4.4 温度校准274.5 技师菜单设置284.6 校准和初始操作检验单30 第5章常规运行和维护325.1 监视水护卫报警335.2 更换试剂345.3 清洁过滤器355.4 故障排除365.4.1 无流量375.4.2 无试剂375.4.3 单元不干净385.4.4 氯含量<0.1 395.4.5 更换灯光405.5 更换部件415.5.1 更换传感器415.5.2 更换流量开关425.5.3 更换试剂虹吸管435.5.4 更换试剂泵435.5.5 更换比色计模块435.5.6 更换比色计电磁阀445.5.7 更换控制面板模块455.5.8 更换I/O模块465.5.9 更换pH值、氧化还原剂和温度模块465.5.10 更换比色模块465.5.11 模块软件升级46 第6章附录A:继电器、菜单和报警476.1 继电器476.2 操作员菜单486.3 技师菜单496.4 报警506.5 技术规格51 第7章附录B:设置比例控制及举例说明547.1 比例控制综述547.2 设置比例因数557.3 设置泵的周期577.4 逐步比例设定577.5 氯含量首次平均设定值597.6 pH首次平均设定值59 第8章其它事项60 第9章HG-302的订购代码61 第10章备件62第1章:前言1.1拟定用途本手册为安装和保养“水护卫”HG-302水质控制器的技师而配备。
HGM7200系列发电机组控制器用户手册目次前言 (4)1 概述 (6)2 命名规范及型号对比 (7)2.1 命名规范 (7)2.2 型号对比 (7)2.3 产品缩写 (7)3 性能和特点 (8)4 规格 (10)5 操作 (11)5.1 指示灯 (11)5.2 按键功能描述 (12)5.3 显示 (13)5.3.1 主显示 (13)5.3.2 基本参数设置菜单 (14)5.3.3 高级设置菜单 (15)5.4 自动开机停机操作 (17)5.5 手动开机停机操作 (18)5.6 发电机组控制器开关控制过程 (18)5.6.1 HGM7X20开关控制过程 (18)5.6.2 HGM7X10开关控制过程 (19)6 保护 (20)6.1 警告 (20)6.2 停机报警 (21)6.3 跳闸停机报警 (23)6.4 跳闸不停机报警 (23)7 接线 (24)8 编程参数范围及定义 (26)8.1 参数设置内容及范围一览表 (26)8.2 可编程输出口可定义内容一览表 (31)8.2.1 可编程输出口1-6可定义内容一览表 (31)8.2.2 自定义时间段输出 (35)8.2.3 自定义组合输出 (35)8.3 可编程输入口定义内容一览表(全部为接地(B-)有效) (36)8.4 传感器选择 (38)8.5 起动成功条件选择 (39)9 参数设置 (40)10 传感器设置 (40)11 试运行 (41)12 典型应用 (42)13 安装 (44)14 GSM短信报警与遥控 (45)14.1 GSM短信报警 (45)14.2 GSM短信遥控 (45)15 控制器与发动机的J1939连接 (47)15.1 CUMMINS ISB/ISBE(康明斯) (47)15.2 CUMMINS QSL9 (47)15.3 CUMMINS QSM11(进口) (48)15.4 CUMMINS QSX15-CM570 (48)15.5 CUMMINS GCS-MODBUS (49)15.6 CUMMINS QSM11(西安康明斯) (49)15.7 CUMMINS QSZ13(东风康明斯) (49)15.8 DETROIT DIESEL DDEC III / IV(底特律) (50)15.9 DEUTZ EMR2(道依茨) (50)15.10 JOHN DEERE(强鹿) (50)15.11 MTU MDEC (51)15.12 MTU ADEC(SMART模块) (51)15.13 MTU ADEC(SAM模块) (51)15.14 PERKINS(珀金斯) (52)15.15 SCANIA (52)15.16 VOLVO EDC3(沃尔沃) (52)15.17 VOLVO EDC4 (53)15.18 VOLVO-EMS2 (53)15.19 玉柴 (54)15.20 潍柴 (54)16 故障排除 (55)前言是众智的注册商标不经过本公司的允许,本文档的任何部分不能被复制(包括图片及图标)。
H G设备操作手册
集团文件版本号:(M928-T898-M248-WU2669-I2896-DQ586-M1988)
HG8010用户端调试手册
一、设备调试
1、施工完成后,进行HG8010设备的注册。
HG8010提供的维护IP地
址:。
可以将个人计算机的IP地址设置为与维护IP地址在同一网段。
本地连接——属性——INTERNET协议(TCP/IP)——属性
然后点击确定——确定
切换至中文状态,输入用户名:root,密码:admin,回车
3、登陆ONU后,状态——光模块信息,可以查看ONU接收光功率
有光未注册:PON灯绿色慢闪;无光:LOS等红色慢闪。
4、ONU未注册:状态——设备信息——ONT 注册状态(O1)
5、ONU注册:系统工具——ONT 认证,选中PASSWORD,输入密码,点击应用
6、注册成功后:状态——设备信息——ONT 注册状态(O5),并且显示ONT ID显示正常,和工单核对。
7、保存配置信息。
系统工具——配置文件——保存配置。
8、重启ONU设备。
系统工具——重启——重启。