天龙 AVR-1611中文说明书
- 格式:pdf
- 大小:19.12 MB
- 文档页数:76
用户手册ITA-1611系列无风扇嵌入式Celeron级双核紧凑型工业电脑版权声明随附本产品发行的文件为研华公司2015年版权所有,并保留相关权利。
针对本手册中相关产品的说明,研华公司保留随时变更的权利,恕不另行通知。
未经研华公司书面许可,本手册所有内容不得通过任何途径以任何形式复制、翻印、翻译或者传输。
本手册以提供正确、可靠的信息为出发点。
但是研华公司对于本手册的使用结果,或者因使用本手册而导致其它协力厂商的权益受损,概不负责。
认可声明ITA-1611为研华公司的商标。
所有其他产品名或商标均为各自所属方的财产。
在线技术支持关于技术支持和服务,请访问研华技术支持网站:产品质量保证(两年)从购买之日起,研华为原购买商提供两年的产品质量保证。
但对那些未经授权的维修人员维修过的产品并不进行质量保证。
研华对于不正确的使用、灾难、错误安装产生的问题有免责权利。
如果研华产品出现故障,在质保期内我们提供免费维修或更换服务。
对于出保产品,我们将会酌情收取材料费、人工服务费用。
请联系您的销售人员了解详细情况。
如果您认为您购买的产品出现了故障,请遵循以下步骤:1.收集您所遇到的问题的信息(例如,CPU主频、使用的研华产品及其它软件、硬件等)。
请注意屏幕上出现的任何不正常信息显示。
2.打电话给您的供货商,描述故障问题。
请借助手册,产品和任何有帮助的信息。
3.如果您的产品被诊断发生故障,请从您的供货商那里获得RMA (ReturnMaterial Authorization) 序列号。
这可以让我们尽快地进行故障产品的回收。
4.请仔细地包装故障产品,并在包装中附上完整的售后服务卡片和购买日期证明(如销售发票)。
我们对无法提供购买日期证明的产品不提供质量保证服务。
5.把相关的RMA序列号写在外包装上,并将其运送给销售人员。
Part No. 2001161120第一版中国印刷2015年12月ITA-1611用户手册ii致客户研华为客户提供的服务研华的每一款产品都是严格按照规格生产的。
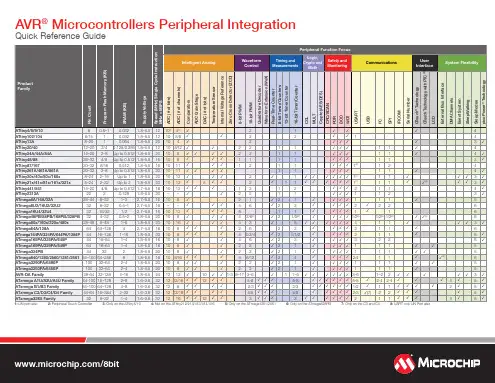
AC164160Secure IOT Sensor NodeAVR® based IoT Evaluation Board with WiFi Connectivity to the Google CloudProduct DescriptionThe AVR-IOT WG board implements a wireless (WiFi) IoT sensor node using a small and inexpensive AVR microcontroller of the latest generation. The ATmega4808 provides an easy migration path for existing AVR microcontroller applications by providing 48KB of Flash and 6K of RAM with a rich complement of analog and digital peripherals including Core Independent (Event System) functionality.The ATECC608A Secure Elements provides secure key generation/storage and offloads all cryptography tasks enabling the highest level of security available to modern IoT applications. The secure element is pre-provisioned for immediate (out of the box) authentication with the Google IoT Core Cloud services.The WINC1510 Network Controller provides wireless connectivity and offloads all networking tasks from the main processor providing a secure socket connection and server authentication.The MCP9808 Temperature sensor, a third party lighting sensor, Battery Charger MCP73871, Power Regulator MIC33350, nEDBG Debugger. Key ApplicationsSmart Home, Building Automation- Intelligent Lighting- Access Control- Climate Control- Energy SavingSmart Cities- Air Quality- Traffic Forecasts- Traffic ModulationHealth- Blood Pressure- Heart Rate- Oxygen LevelKey Highlights30 Seconds set up Google Cloud experience!Graphical Microchip Microchip Code Configuration (MCC) SupportDirect connection to the Google Cloud, pre-provisioned with free sandbox account.mikroBUS TM connector provides access to 500+ additional sensors and actuatorsUSB Mass Storage interface allows easy (drag ‘n drop) updates/AVR-IoTThe Microchip name and logo and the Microchip logo are registered trademarks. All other trademarks mentioned herein are property of their respective companies.© 2018, Microchip Technology Incorporated. All Rights Reserved. ML3208Eng10/18Available DocumentationR esources- Promotion Page on our website- Pinout and Pocket Card- Quick Start Guide- Technical Summary- User GuideV ideos (Youtube)- AVR-IOT WG evaluation board Instruction (3:56)- Getting Started with your AVR IoT Development Board (6:26)Sampling and PricingA VR-IOT WG evaluation boards are available today at $29 each .Complementary DevicesAnalog Components:- High Efficiency, Low Power DC/DC (e.g. MCP33050) [Link ]- Battery Charger Management and Controller (e.g. MCP73831)Expansion sensor boards:- MikroElektronika Click™ boards- UV Click (I2C) MIKROE-1677- IR Thermo Click (I2C) MIKROE-1361- 3D Motion (I2C) MIKROE-1877- Humidity/Temp (I2C) MIKROE-949- Indoor air quality(I2C) MIKROE-2529- Heart Rate 7 click (I2C) MIKROE-2998Services & 3rd Party- Microchip Design Partner Program/ Cloud Specialists- Microchip Training (e.g. Masters )- Global Sales and Distribution- Google Cloud Tools and Software (Ecosystem)IDE (Integrated Development Environment):- Atmel Studio 7- MPLAB® X IDERapid Prototyping:- Atmel START [Example]- MPLAB Code Configurator (MCC)- Support for MikroElektronika Click™ boardsLanding Page:- An important part of the user experience is provided by a dedicated web page [ ] Here sensor data can be fetched from the Google Cloud and immediately visualized for real time monitoring.Google Sandbox account:- Each board (secure element) comes pre-associated with a default shared Google Cloud (sandbox) account.This allows immediate successful authentication and data sharing without requiring the creation of a custom useraccount. At any time, the user will be able to “graduate” by disconnecting the device from the default sandboxand registering it its own private account.AC164160。

操作简单易上手Denon AVR 16125 1声道操作简单易上手-Denon AVR-1612 5.1声道AV扩大机00查看原文:/2200想要超值AV环绕扩大机,一定得从日系品牌下手,尤其是入门级机种,最近更是杀到见骨,例如天龙马兰士代理进口的Denon AVR-1312,本地参考售价不到一万元就可以带回家!至于本次评测的器材是比AVR-1312还要高一阶的AVR-1612,但依然属于入门等级的5.1声道AV环绕扩大机,售价不到两万元,支援3D影像、可USB数位输入或连接iPod、iPhone,再加上简单好用的操作设定介面,是轻松建构家庭剧院的好帮手。
这款5.1声道设计的AVR-1612,在6欧姆负载条件下每声道输出功率120瓦,8 欧姆负载时每声道输出功率是75瓦,五个声道采取独立供电设计,原厂说这样的设计会比常见的整合式电路拥有更稳定的声音输出品质。
在输出入端子部分,AVR-1612舍弃了色差输出,提供1.4a版HDMI 端子4进1出,3组AV端子输入、1组AV输出;声音则有4组RCA类比输入、光纤与数位同轴各一组。
如果想要拥有7.1声道环绕效果的话,还有一组RCA端子的Pre Out输出可以作为后环绕或前置上方音场。
在声音部分,支援Dolby TrueHD、DTS-HD Master Audio蓝光音效解码能力,但AVR-1612为5.1声道机种,无法完全展现蓝光7.1声道的环绕效果。
前面提过,解决方法是利用背板上的Pre Out类比输出作为后环绕或前置上方音场,但是必须要额外加一台扩大机才行,如果您家里有「待退役」的扩大机,不妨留下来作为扩充之用。
Audyssey MultEQ自动音场调校在声音调校部分,AVR-1612使用的是Audyssey MultEQ技术,提供自动音场调校功能(AVR-1312并不提供此项功能),只要接上随附锥型麦克风,再依照画面选单指示操作,就可以完成自动测量与计算调整,不用专业人员也能轻松搞定,而且最多可以测量6个聆听位置。
AVR 定时器使用范例及详解作者:HJJourAV…文章来源:本站原创点击数:56 更新时间:2010-11-12 8:17:29/*************************************************** AVR 定时器使用范例 ******* ******* 作者: HJJourAVR ******* 编译器:WINAVR20050214 ******* **************************************************//*本程序简单的示范了如何使用ATMEGA16的定时器AVR定时器的要点介绍T0工作于CTC模式,输出1KHz/2KHz 50%占空比的方波T1工作于快速PWM模式兼输入捕捉T2工作于相位修正PWM模式,输出490Hz的8bit PWM波出于简化程序考虑,各种数据没有对外输出,学习时建议使用JTAG ICE硬件仿真器对于定时器,AVRstudio的软件仿真是不准确的。
*/#include <avr/io.h>#include <avr/signal.h>#include <avr/interrupt.h>//时钟定为8MHz,F_CPU=8000000//管脚定义#define ICPKEY 6 //ICP1 PD6 按键模拟ICP输入#define PWM0 3 //OC0 PB3#define PWM1A 5 //OC1A PD5#define PWM1B 4 //OC1B PD4#define PWM2 7 //OC2 PD7//宏定义#define PWM1A_ON() PORTD|= (1<<PWM1A) //输出高电平,灯亮#define PWM1A_OFF() PORTD&=~(1<<PWM1A) //输出低电平,灯灭//全局变量volatile unsigned int ICP_Time; //记录ICP输入捕捉事件的发生时刻volatile unsigned char T2PWM; //设置T2的PWM值volatile unsigned char T0OCR; //设置T0的时间值//仿真时在watch窗口,监控这些变量。
A3.2综合放大器INTEGRATED AMPLIFIER2安全指示1. 不可自行开启本机进行维修或改造!本产品不设有用户自行检修的零件,本机的维修须请具备专业资格 的人员进行。
开启机器及随意改造内部电路会令检修人员难以维修本机,而且会对机器造成性能或质量 的影响。
3. 设备不应遭受水滴或水溅,机器上不应放置诸如花瓶一类的装满液体的物品。
7. 用电源插头和器具耦合器作为断开装置,断开装置应当保持能方便地操作。
6. 设备应当连接到带保护接地连接的电网电源输出插座上。
5. 设备上不要放置裸露的火焰源,如点燃的蜡烛。
4. 通风孔不要覆盖诸如报纸、桌布和窗帘等物品而防碍通风。
8. 必须遵照电池废弃的相关地方条例来废弃旧电池。
2. 为了充分通风,设备背面和两侧应最少保留10cm,顶部应最少保留20cm的空间。
9. 仅适用于海拔2000m以下地区安全使用,标志见图1。
10. 仅适用于非热带气候条件下安全使用,标志见图2。
图1图2执行标准:GB8898-2011; GB /T13837-2012安全注意事项4. 遥控接收窗口5. 多功能显示窗6. 音量减小键1. 待机开关键2. 输入向后选择键3. 输入向前选择键7. 音量增加键8. 静音键9. 耳机输出接口一. 1. 蓝牙天线2. USB DAC 数字信号输入接口3. 光纤数字信号输入接口4. 右声道扬声器输出接口5. XLR 信号输入接口6. 模式选择开关 (置于STEREO )13. DVD 信号输入接口14. AUX 信号输入接口15. BYPASS 直通信号输入接口16. PRE 前级信号输出接口17. 左声道扬声器输出接口7. 增益选择开关8. 接地端子9. 交流电源输入插座 (带保险管)10. 总电源开关11. PHONO 唱机信号输入接口12. CD 信号输入接口部件名称3二. 1. AUX信号输入接口2. DVD信号输入接口3. CD信号输入接口4. PHONO唱机信号输入接口9. 接地端子10. 交流电源输入插座 (带保险管)11. 总电源开关12. 扬声器输出接口“ + ”极5. XLR 信号输入接口6. 扬声器输出接口“ - ”极7. 模式选择开关 (置于MONO INT )8. 增益选择开关三. 1. RCA 信号输入接口2. XLR 信号输入接口3. 扬声器输出接口“ - ”极7. 总电源开关8. 扬声器输出接口“ + ”极4. 模式选择开关 (置于MONO POWER )5. 输入源选择开关6. 交流电源输入插座 (带保险管)4注:1. 遥控器有效距离不大于10米,遥控夹角不大于30度。
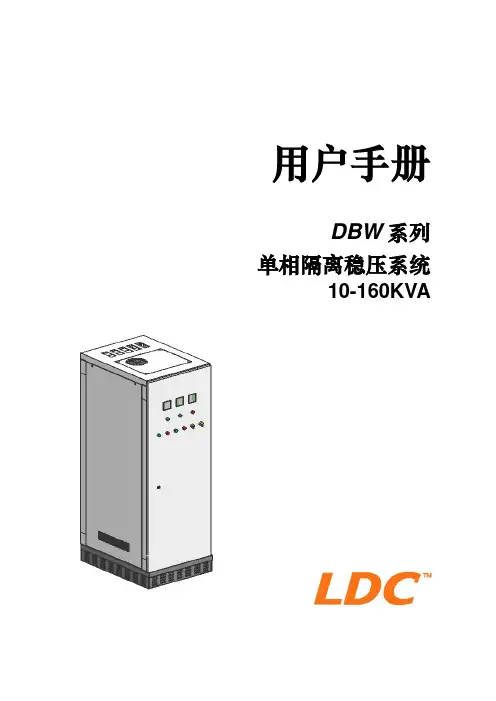
用户手册DBW系列单相隔离稳压系统10-160KVAL D C T e c h n o l o g y I N C. 青岛艾迪森科技有限公司Tel. +86 532 87882666、87883999 Fax. +86 532 87885388E-mail: LDCUPS@ Http:// 1. 安全指南 12. 简述 32.1 可靠性及质量标准 (3)2.2 DBW系列AVR规格 (3)2.3 保修期 (3)2.4 延长保修期 (4)3. 系统分析 53.1 主要特点. (5)3.2工作原理 (5)3.3基本部件 (7)3.4 DBW系列马达式稳压器技术参数 (8)4. 安装94.1 介绍 (9)4.1.1 AVR到货 (9)4.1.2 标识牌 (9)4.2 运输及存放 (9)4.3 拆除包装 (10)4.4 定位 (10)4.5 连线 (12)4.5.1 电缆的准备 (12)4.5.2 接地 (13)4.5.3 输入输出电缆的连接 (13)5. 操作155.1 开关机 (15)6. 保养176.1介绍 (17)6.2用户责任 (17)6.3例行保养 (17)7. 故障排除18USE MANNUALPage 1 sur 23请妥善保存此手册以备将来查阅。
此台马达调压式AVR 必须由专业工程人员启动或使用。
所有的维护工作必须只能由合格的专业电气工程人员进行。
请不要尝试由你自己给AVR 进行维护。
请不要随便打开或拆下AVR 的外壳,危险!关于AVR, 若有任何疑问,请联系我们:青岛艾迪森科技有限公司Tel. +86 532 87882666、87883999、87980999Fax. +86 532 87885388e-mail: LDCUPS@http:// 对于您对此台马达调压式AVR 的误操作或误控制,LDC 公司将不负任何责任。
LDC 公司认真编写了这本内容正确,完整及容易理解的用户手册,但对于那些由于翻译错误或手册中偶然的错误导致的直接,间接或意外的人身或设备上的损坏,LDC 公司将不负任何责任。
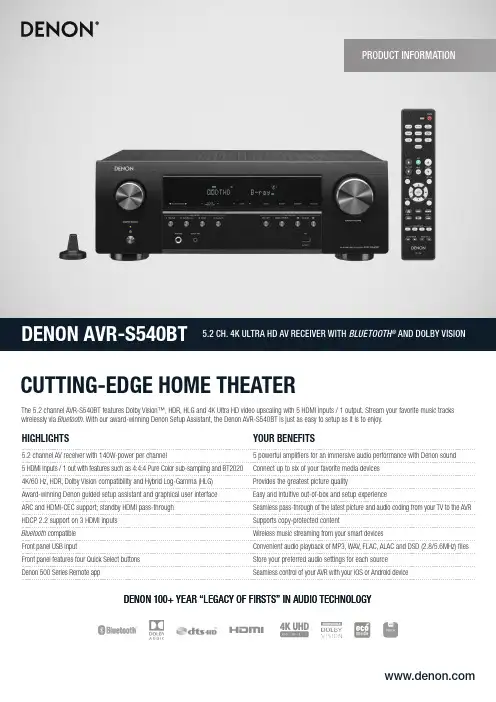
|V01|The Bluetooth ® word mark and logos are registered trademarks owned by Bluetooth SIG, Inc. and any use of such marks by D&M Holdings Inc. is under license. Dolby, Dolby Atmos, and the double-D symbol are trademarks of Dolby Laboratories. • DTS, the Symbol, DTS in combination with the Symbol, DTS:X, and the DTS:X logo are registered trademarks or trademarks of DTS, Inc. in the United States and/or other countries. • The Spotify software is subject to third party licenses found here: /connect/third-party-licenses • Other trademarks and trade names are those of their respective owners.Denon is a trademark or registered trademark of D&M Holdings, Inc.* All specs can be subject to changeHigh-Performance Discrete 5-Channel AmplifierFeaturing discrete power output devices on all channels, the AVR-S540BT delivers a maximum of 140 watts per channel. It’s equipped with low impedance drive capability for operational stability within a wide range of speakers.Advanced HDMI Video SectionThe advanced HDMI video section of the AVR-S540BT lets you enjoy your favorite movies and shows with the best picture quality available. All five HDMI inputs support 4:4:4 Pure Color sub-sampling, HDR, BT.2020 pass-through, Dolby Vision compatibility and HLG (Hybrid Log-Gamma); full 4K Ultra HD with 60Hz pass-through and HDCP 2.2 processing is available on three HDMI ports to support copy-protected content.Easy Setup ExperienceThe included AVR-S540BT Quick Start Guide provides simple, clear instructions for how to get started. Once you connect your TV to the AVR-S540BT via HDMI, the exclusive Denon Setup Assistant appears on your TV screen to walk you through setup, step by step. A row of color-coded speaker connections is laid out horizontally, making organizing and connecting speaker wires simple.Bluetooth Built-inYour favorite tracks, at your fingertips. Stream music from your computer or smart devices with the AVR-S540BT and built-inBluetooth. It can remember up to eight paired Bluetooth devices, so invite family and friends to share their music and enjoy the audio quality of the AVR-S540BT. To stream via Bluetooth, simply select the Denon AVR-S540BT from the Bluetooth menu on your smart device.Quick Selects for User-Friendly Audio TuningThe Denon AVR-S540BT front panel features four Quick Select buttons that store your preferred audio settings for each source. Switch between television, Blu-Ray, pre-amplifiers and more, and the AVR-S540BT adjusts the EQ settings to your preferences for that media source. Use the buttons on the front panel or opt for the same Quick Selects on the AVR remote for faster control.Front USB Port for High-Resolution AudioIn addition to numerous analog and digital AV connectors, the AVR-S540BT features a USB port on the front panel for convenient audio playback. It’s compatible with a wide range of portable USB devices and supports MP3, WMA, FLAC and MPEG-4/AAC tracks. Whether you want to listen to your latest MP3 download or soak in the fidelity of audiophile-quality FLAC recordings, you have quick access to your favorite songs.Denon 500 Series Remote AppBetter control in your back pocket. The Denon 500 Series Remote app for iOS and Android makes using the AVR-S540BT even easier —adjust volume, turn it on or off, mute the music, and select a source. Download the Denon 500 Series Remote app patible with Denon HEOS LinkControl the Denon AVR-S540BT with your Smart TV remote via the HDMI CEC functionality associated with your Smart TV. Simply set “HDMI Control” to ON in your receiver, then set “Smart Menu” to ON and begin controlling the AVR-S540BT with your TV remote. The Smart Menu home screen provides you quick access to source and surround mode selections, the AVR’s setup menu and four Smart Selects.100+ Years of Firsts in Audio TechnologyFounded in 1910, Denon has a deep heritage of “firsts” in audio technology — from Japan’s first audio electronics manufacturer, to producing the world’s first commercial CDs. This focusedinvestment in audio R&D ensures you get the latest technology and highest quality with every listening experience.Denon 1 Viper Way Vista, CA 。
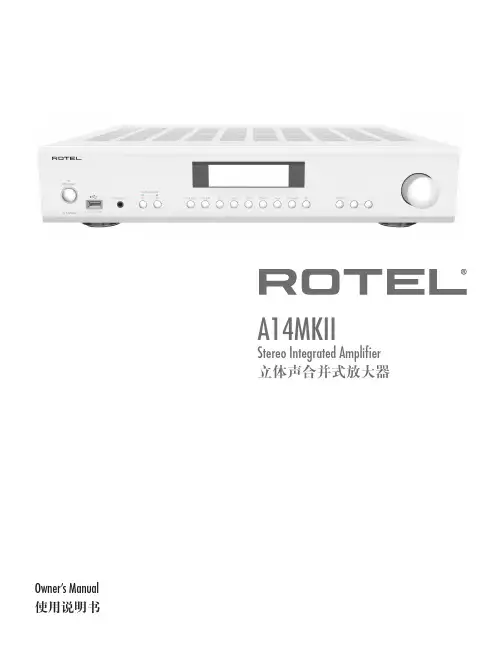
A14MKIIStereo Integrated Amplifier立体声合并式放大器Owner’s Manual使用说明书警告:后面板上的电源线接头是主电源断开装置。
应该将本机放在可拔插电源线接头的开放的地方。
只能将本产品连接到后面板指定的型号和电压的电源上。
(美国:120V/60Hz,欧洲:230V/50Hz,中国:220V/50Hz)只能用本产品提供的电源线或严格等同的电源线将本产品连接到电源插座上。
不得更改随本产品提供的电源线。
不要使用延长线。
电源电缆的主插头是本产品的断电装置。
要将本产品从电源完全断开,应从主(交流)插座上拔下电源电缆的主插头。
这是机器唯一的彻底断电方式。
使用2类电线连接音箱,以确保正确的安装及将触电风险减至最低。
请勿将遥控器内的电池暴露于如阳光、火源等类似的高温条件下。
电池的循环再用与废弃应遵循当地法律法规。
本装置符合FCC规则第15部分的要求。
操作本装置受限于以下条件:(1)本装置不得导致有害的干扰;(2)本装置一定会接受任何受到的干扰,包括可能导致意外操作的干扰。
注意:RS232接口只能由授权人士进行操作。
警告:机内无客户可以维修的部件,请合资格维修人员维修。
警告:为减少火灾或触电的危险,不要将本产品置于潮湿环境中或水中,不要将本产品置于滴水或溅水环境中,不要将含有液体的物件(例如花瓶)放在本产品上,不要让异物进入本产品外壳内。
如果本产品进入潮湿环境中,或异物进入本产品内,立即从墙上拔掉电源线,将本产品送交合资格维修人员检查或进行必要的维修。
请仔细阅读所有说明。
请保留所有说明手册。
请留意这些说明和装置上的所有警告。
请遵从操作说明。
不要在接近水的地方使用本装置。
只能用干布清洁。
不要堵塞本装置任何通风口。
请依照制造商的指导进行安装。
请勿将本装置安置于靠近辐射、热源、火炉或其它发热器具(包括放大器)的地方。
请注意两极插头或接地插头的安全作用。
两极插头有两个插刀,其中一个插刀比另一个宽。
CP-1611A中文说明书集成双DAC 、耳机驱动器、ADC 、麦克风扩音器、锁相环、稳压器与USB 收发器2010/2/13版本: 1.0CP-1611A1USB 音频输入/输出控制器 CP-1611A1. 产品描述CP-1611A 是一种高度集成的单芯片USB 音频解决方案。
所有重要的模拟模块均嵌入CP-1611A ,包括双DAC 和耳机驱动器,ADC ,麦克风扩音器,锁相环,稳压器,和USB 收发器。
它非常适用于USB 耳机或USB 音频接口盒。
许多功能与跳线或外部EEPROM 可编程。
此外,音频可通过HID 兼容的音量控制引脚调节。
有关其它的应用,外部解码器或音频DSP 可以通过连接到CP-1611A 的I 2S 引脚作进一步处理。
4个GPIO 引脚可与客户附加的应用软件通信。
2. 特征·符合USB2.0全速运行·符合USB 音频设备类规范v1.0·支持USB 挂起/恢复模式和远程唤醒与音量控制·带有片上PLL 和嵌入式USB 收发器的12MHz 的晶振输入·通过跳线针选择扬声器模式(播放专用)或耳机模式(播放+录音)·耳机模式,USB 音频功能拓扑有2个输入端子,2个输出,1个混频,1个选择单元和3个功能·耳机模式,通过跳线启用/禁用混频·扬声器模式,USB 音频功能的拓扑结构为1个输入端子,1个输出和1个特性单元·支持一个控制端点,一个同步输出端点,在一个同步及一个端点中断·当器件在不工作时,USB 总线释放带宽播放· 支持AES / EBU 音频,IEC60958立体PCM 数据,S / PDIF 输出格式·音量提升/降低和静音引脚,支持USB HID 设备类的主机控制同步·录音静音引脚带LED 指示灯·特定的USB 供应商的VID PID 控制,外部EEPROM 接口,和序列号· 通过供应商的大规模生产写EEPROM·定制的嵌入式的VID ,PID 和产品由客户请求字符串·通过HID 接口,4个GPIO 管脚具有读/写功能·通过跳线针来设置输出电压摆幅(3.5V 或2.5V )·跳线引脚设置电源模式(100mA 或500mA 总线电源)·同步传输使用内部PLL 的同步与自适应模式·采用48K / 44.1kHz 的播放和录制两种采样速率·软静音功能·耳机放大器高性能16位音频DAC ·低噪声·嵌入16位ADC 的输入升压麦克风·嵌入上电复位模块·外接5V 电源,嵌入5V 至3.3V 的稳压器· 与 Win98 SE / Win ME / Win 2000 / Win XP and Mac OS9 / OS X 兼容·24脚SSOP 封装集成双DAC 、耳机驱动器、ADC 、麦克风扩音器、锁相环、稳压器与USB 收发器2010/2/13 版本: 1.0 CP-1611A 3. 引脚描述3.2 引脚图2010/2/13 版本: 1.0 32010/2/13 版本: 1.042010/2/13版本: 1.055. 功能框图PWRSELVOLUP VOLDNMUTER LEDOLOBSCS SK DW DRLOLLORMICINVREF VBIAS6. 功能说明6.1 USB接口CP-1611A集成了USB收发器,锁相环和稳压器。
天龙功放设置1(更新完毕)天龙3808的安装及调试方法( 也对应AVC-2808,AVR-1908 )AVC-3808的安装调试步骤为例,主要分为6大部分:1、电源处理2、器材连接及摆位3、调低音炮4、自动测试5、菜单设定6、其它一、电源处理完成设备摆位以后(先不要连接各设备),就要注意电源部分的处理。
一般来说,安装在家庭中的音响系统最基本要注意两点:1、电源的分配:要有好的效果,就一定要将音源部分如DVD、CD 的电源与功放和低音炮分开。
如果有条件的话,最好直接从电表中引出3路电源,投影机一路,DVD和CD播放机一路,功放和低音炮一路。
等离子电视可以和功放一路,这里需要特别注意的是音源部分如DVD和CD播放机必须单独一路,以防止数码噪音的干扰,确保我们听到干净准确的声音。
这部分工作做好了,1万多的器材也可以出好的声音,如果听之任之,十多万的器材声音也不会好。
如果只有一路电源,我们可以采取补救方案,即保证音源部分(如DVD机、CD机)等使用滤波插座,这样可以避免数码电路的高频杂波干扰功放,投影等敏感的模拟电路。
2、电源的极性:我们知道电源一根是火线,一根是零线,插错也有声音,但声音不好,怎么样才能知道插得对不对呢?用万用表来测量,方法如下:每部器材都要单独测试,确保插对。
测试时必须将所有讯号线和地线除去。
检查受检测的器材插头是两脚插头还是附有地线的三脚插头。
若是三脚插头,必须用一个三脚转二脚的转接插头,将地线切离,否则无法测量。
将两脚插头插入电源后,然后将万用表拨到AC 3V档(尽量小的档位),将万用表测针一端接机壳螺丝(低音炮则接RCA 端子的外表),手握另一端,读数最小的为正确的电源接法。
所有设备保证极性的正确统一,就可以把设备之间的干扰减少到最低。
二、器材连接及摆位我们应选用优质的电源线、音箱线、信号线把系统连接好(注意线材的方向、相位要正确),好的线材对系统有直接的影响,所以我们要注意安装中的每一个细节。
天龙功放设置大全随着近年来高清,HTPC和次世代音频的流行,很多新烧友第一次购入了功放。
而很多资深的发烧友也借着这波次世代的浪潮升级了自己的功放。
在几个功放厂商中,天龙以其合适的价格,强劲的功能和火爆的影院效果吸引了很多烧友。
然而天龙的说明书读起来相对晦涩,而设置菜单不但往往为英文,而且做得也不够人性化,以致于很多烧友在新机器到家以后摸索半天,也往往还不能发出美妙的声音。
甚至有些烧友在未能找到最佳设置之前就提前放弃,这样器材就不能发挥所有的潜力,殊为可惜.本文将从天龙功放简单的连接及设置说起,然后再对某些设置进行详细解释,希望能起到攻略的作用,让各位接触天龙功放不久的烧友们都能合理的设置自己的功放,使其表现能对得起花下去的银子。
本文所涉及的设置适用于大多数的天龙功放,然而不同型号之间总有细微不同,如果您发现文中所述与您的功放不一致,只能请您自行钻研说明书了.一、连接新机到家后,不要马上插上电源,先看看机器的背面,是不是类似于下图,只是插口少了一些?什么?您的功放后背和图里的一模一样?先让俺拜一下买得起天龙的旗舰型号的米人!连线时您可能会注意到功放上有很多”DVD","HDP”,"AVR"等字样.这些其实不用理会,在以后是可以在设置里随时更改的。
唯一要注意的就是模拟信号不要插错了,比如色差的Y,Cb,Cb等。
对于一般的应用,这一步应该是比较简单的。
二、音箱参数设置确定音箱等都连接好了,并且极性无误以后,就可以插上电源线并开机了。
记得把电视机也打开,在进行设置时,看电视机上的OSD 比看功放上的小屏幕要舒服多了。
这一步可以通过两种方式来做,一是自动设置(Auto Setup),二是手动设置(Manual Setup)。
某些初次使用功放的玩家可能不会信任自动设置功能,事实上这是一个相当强大的功能。
天龙功放使用的自动设置功能来自于第三方的Audyssey公司.使用方法为将机器带的麦克风置于听音位置,机器发出测试音,然后对麦克风收到的声音进行分析计算后得出适合各声道音箱的设置。
CastoTIG 1611 TIG and MMA weldingADVANCEExceptionally compact and portable TIG - MMA welding machine 160 A - 230 V - 6,6 kg, functions with power generators Microprocessor controlled Inverter power source Ideal for mobile onsite use for construction, joining and maintenanceapplicationsWith robust carrying case + ground cableCastoTIG 1611 DC ADVANCEproven Castolin inverter technology. The microprocessorcontrolled, compact power source is specially designed forTIG welding with direct current and is also useful for ManualMetal Arc Electrode applications.Technical DataWelding current range: 5 - 160 AWelding current (TIG) at 25% ED*:100% ED*:160 A100 AMains Voltage: 1 x 230 V / 50/60 Hz Open Circuit Voltage MMA:54 V Accessories DesignationCastoTig 1611 DC ADVANCE TIG-Torch G160, 4 mTIG-Torch G160, 8 m RangesWelding currentGas preflowUp-SlopeDown-SlopeCrater fill currentGas post flowPuls frequencyAdvantages for repair and construction work: Minimal size and weight, low energy consumption and generator-usability.Easy-to-use by menu guides and simple touch-panel. Clear readable digital-display for programming and status.The electronic high-frequency-ignition ensures perfect, contact-free ignition on all applications.Lift-Arc-ignition for welding in areas with sensitive electronics, e.g. control and steering systems.Standard-integrated pulse function for improved welding pool control especially on thin sheets.All parameters for professional TIG-welding are directly accessible. 2 and 4 step modes. A uto-Pulse for simplified adjustment during pulse welding. Set only the current, all pulse parameters follow automatically.I mproved spot function for perfect stapling.N ow also remote controllable. Up/down function from the torch with all up/down torches using the adapter set (ESC 769124).D elivered in a practical transport case including gas hose and ground cable.P rotection class IP23S for outdoor use.M ade in European Community.C E and S Approval markings for safe use.。