sk750麦克风使用说明书
- 格式:docx
- 大小:15.14 KB
- 文档页数:1

迷你便攜式MPEG-4 錄影機Mini Portable MPEG-4 DVR 使用說明書User Manual安全說明Security InstructionIn order when questions,Security Instruction●Do not use a damaged battery or charger● Do not allow battery charging time exceeds the allotted time● At first the use of batteries or battery unused in a few months after the re-use, pleasefully charge the battery.● for the battery is fully charged, the use of its fully discharged, then re-charge in order toensure its longer life,●At short-term use after the battery will shorten battery life, in this case, repeatedly for thebattery is fully charged and then fully discharged several times, so you can use the battery a longer period of time● overcharging or excessive discharge will shorten the life of rechargeable batteries● When the rechargeable battery life than the use of a new rechargeab le battery short time,replace the new rechargeable batteries.● because of rechargeable batteries are consumables, so battery life will be shortened overtime.● careful not to let any conductor (such as necklaces, bracelets, etc.) to enable access toDC converter or a rechargeable battery side short-circuit, or may cause electric shock or fire :Product features●storage full over write automatically●Fast video recording by one key function●Recording, power ON/OFF via remote control●Real time Display/Recording at 30fps with date and time stamp●960 * 240 high-definition 2.5-inch LCD screen●built-in high sensitivity microphone recording●support 8GB TF memory card●Video resolution: 640 * 480/320 * 240 optional●video frames 10-30 frames / second optional●High-speed USB2.0 interface.●audio and video input / output;●configuration removable high-capacity lithium battery, 5 hours of continuous playback,video recording up to 3 hours standbyParts Introduction1. Power Switch 9. Built-in microphone2. Record button10. Video / audio input3. Select Key 11. Charging Indicator4. Select Key12. Recording Indicator LED5. ESC button13. Video / audio output6. Enter button 14. USB port7. TF card slot 15. Mode switching key8. LoudspeakersRemote controller Introduction1. Antenna 4. Power ON2. LED Indicator 5.key ring3. Power OFFUser GuideHold the Power On/Off button for 3 Seconds to turn On/Off the Device. Interface Diagram:Mode selection●Video Record - Video Recording Mode●video playback - the video file playback mode●Audio recording –Audio recording mode●audio playback - the audio file playback mode●System Setting - System Settings●The use of model selection■Video Record Mode --■At the main menu select [video Record] icon to enter the video mode1. Into the (video Record) mode. Screen appears to the camera collected images,2. By [OK] button to enter the [Record Settings], then [Menu] key to exit. (Note: this function should not operate simultaneously at the next video). This feature please refer to[Record Settings]Operational Guidelines.3. According to [●] key to record the audio and video camera images, the left video lantern light. Press ESC button to quit recording.Quit recording after recording the file will be automatically stored in the (video playback) file folder. Man-in memory, the recording will automatically stop and automatically stored in the (video playback) file folder.Mode Selection■Recorder Video Playback Mode - Select [ Playback] Icon in the Main MenuOperational Guidelines:1. To enter the menu (video playback) mode. Screen appears all the fragments of the screen recording, use the button to select the necessary watch footage recorded by the OK key to watch.2. Such as to delete files, press the [●] key and then select [Delete] and press [OK] button to confirm.3. Such as to copy files, press the [●] key and then select [Copy ways] and [OK] button to confirm. Mode Selection■Audio Recording mode - Select [ Audio Record ] Icon in the MainnuOperational Guidelines:. The main menu to enter the (Audio recording) mode appears when the screen interface to record instructions.By recording [●] button to record the local built-in microphone / external active high-sensitivity microphone to receive all the audio. In the recording studio when the left pulse of flashing lights.(Built-in microphone / external active high-sensitivity microphone selection) this feature please refer to [Record Settings] – mic select.Press [ESC] key to stop recording.Quit recording after recording the file will be automatically stored in the (audio playback) file folder.Man-in memory, the recording will automatically stop and automatically stored in the (audio playback) file folder.Mode Selection■Audio playback mode - at the main menu select [sound recording playback] icon to enter the recording modeOperational Guidelines:1. To enter the (Audio playback) mode, the screen appears all the good information has been recorded, use the buttons necessary to enter the selection mode then select the required recording playback for playback.2. Such as to delete files, press the [●] key and then select [Delete] and press [OK] button.3. Such as to copy files, press the [●] key and then select [Copy ways] and [OK] button.Mode Selection■System Configuration Mode - At the main menu select [Settings] icon to enter the system settings modeOperational Guidelines:Use keys to select and then click [OK] to enter sub-menu.1. Storage select - set the video store directory- Memory- SD Card2. Storage info - has been used to check the memory status- Memory- SD Card3. Formatting - set storage format- Memory- SD Card(One was confirmed that all data will be deleted.)4. System Time settings - set the system date and time (recommended prior to first use the set)5. Display settings - set A V Output- LCD output- TV_PAL output- TV_ NTSC output6. Brightness – Setting for the system BrightnessButton to reduce the brightness or increase the brightness.7. Language settings - set the system language- Chinese / 中文- English /英文(In the updated version will be more language selection)1.8. Default – Setting for reset the factory original setting- Yes- No■Video settings - in the [video] mode, press [OK] button to enter the [Video Settings] menu, press [Esc] key to exit.Operational Guidelines:Use keys to select and then click [OK] to enter sub-menu.1. Video Resolution - Set the video resolution(Video information screen size and great little noodle file settings depending on the resolution)- 640 x 480- 320 x 2402. switch settings - set DIP switch-Q position- Lock and StandbyIn this mode selection: In the case of shutdown when the Slide Switches Q assigned to the location of the shortcut to start the machine automatically to enter the video mode, the screen appears to the camera images collected at the same time display backlight lamp clearance out, open the lock button function. (DIP switch back position N, the machine back the video mode, all functionsreturn to normal)At any boot mode DIP switch assigned to put the location of Q: The display's backlight to turn off lights, open the lock button function. (N Slide Switches back position, the screen backlight lights opened out, key lock feature off, return the original model.)- Lock,Standby and Record VideoSelection in this mode: Regardless of the machine in any status under the DIP switch assigned tothe location of Q, the faster boot drive (shock oscillation time) and enter the video mode to recordaudio and video camera images of the left video lantern light, while the screen backlight to turnoff lights, open the lock button function. (DIP switch back position N, the machine (a vibratorvibration twice) the left side of the video after the lights went out save by recording just the audioand video camera data to the screen (video playback) file folder and then shutdown .- Lock,Standby and Record AudioSelection in this mode: Regardless of the machine in any status under the DIP switch assigned to the location of Q, the faster boot drive (shock oscillation time) and enter the recording mode to record the local built-in microphone / external active high sensitive microphone to receive all the audio, the left recording pulse of flashing lights. At the same time, the backlight display lights are switched off, open the lock button function. (DIP switch back position N, the machine (a vibrator vibration twice) just after the preservation of audio data to recording (audio playback) file folder and then shutdown.Note:can’t connect USB with computer under Q mode at the same time3. Mic settings - settings used when recording microphone- Internal mice- External mic(Note: must use the following DC-5V active high-sensitivity microphone professional. If you have any questions may consult the local vendors)4. date stamp - set the video information is incidental to the time display- On- Off5. FPS - set the video frame rate when the data information(Video data quality and file sizes depend on the quality of frame rate settings)- 10FPS- 20FPS- 30FPS6. Remote Control - Set the remote control function- Remote control OFFSelection in this mode: the machine from the controller to control- Boot and Record videoSelection in this mode: the machine status at shutdown by remote control under the C button, the machine faster boot (vibrator vibration once) and enter the video mode to record audioand video camera images, the left video lantern light At the same time, the screen's backlight toturn off lights, open the lock button function.D button by remote control, the machine (a vibrator vibration twice) the left side of the videoafter the lights went out save by recording just the audio and video camera data to the screen(video playback) file folder and then shutdown- Boot and record audioSelection in this mode: the machine status at shutdown by remote control under the C button, the machine faster boot (vibrator vibration time) to enter the recording mode to record the local built-in microphone / external active high-sensitivity microphone to receive all the audio , at the left side of recording when recording pulse of flashing lights. At the same time, the backlight display lights are switched off, open the lock button function.D button by remote control, the machine (a vibrator vibration twice) just after the preservation of audio data to recording (audio playback) file folder and then shutdown.Note: not at Slide Switches Slide Switches Q appropriated for state use.7. Standby settings - standby time video settings- 10 second- 20 second- NeverNote: This function only at the status N Slide Switches can be achieved.Note: not at Slide Switches Slide Switches Q appropriated for state use.8.Overwrite Enable - storage replication function to automatically set- ONON mode selection: the system default local storage is set to automatic replication, when the memory storage of video data at the remaining space 1MB, the machine will delete the earliest days of video information, then continue to the video storage, preservation the latest video information.Note: This function must be careful to use to open the automatic replication feature will be automatically deleted when the first video information!- OFFTurn off selection mode: the local system will be at the remaining storage space 0MB, stop recording, then the screen shows the storage space is full tips, issued a vibrator storage space is full signal: (signals: Indirect non-stop vibration)█Fittings Come Ks-650 Digital Video Recorder1. KS-650 Mobile Video Recorder * 1PCS2 KS-303 MINI CAMERA3. DC5V 2A charger * 1PCS4. User Guide * 1PCS5. USB PC Line * 1PCS6. A V Line * 1PCS7. Headset * 1PCS8. Lithium electric 1800MA * 1PCSParts Instruction来源:/article.php?id=76。

【转载】 2006-4-18 14:42:21-------------------------------------------------------------------------------- 一、在纯音乐模式时按左侧播放键,切换暂停(播放)按摇杆左右键,选择下一首(上一首)持续按向右键(不松手),本首歌快速前进(快进)持续按向左键(不松手),本首歌快速后退(倒带)按右侧+/-键,调整播放音量不管是否最小化状态,长按右侧+/-键可以跳转到上一首或下一首歌。
进入纯收音机模式方法:右*左左*左*:进入工程模式(左右指摇杆方向),然后选择服务测试,选择收音机,用数字键输入频率,就可以收听了。
手动锁键盘后,可以打开照相机。
(网友提醒)二、在休眠模式时按左侧播放键可以开启(关闭)音乐播放或者收音机(插上免提时)注意:至于到底开启的是音乐播放还是收音机,视上次关闭时状态而定,如果上次是听收音机关闭的,那么这次就是开了收音机,反之就是音乐播放。
开启镜头盖:进入有声照相(摄像)模式三、在待机模式时右*左左*左*:进入工程模式(左右指摇杆方向)注意:工程模式可以检测手机各功能是否工作正常,还可以查看手机使用总时间按左侧音乐播放快捷键可以启动音乐(或收音)播放打开镜头盖可以拍照按+/-键查看手机状态(可以看到电池剩余电量)长按+/-键启动语音拨号*+右键=锁键盘,再次操作,关闭锁键盘(当然你可以设置成自动锁键盘,个人觉得系统默认的锁键盘时间太短,还不如自己手动的好)长按#进入静音模式,再次长按关闭该模式按0-9数字键后再按通话键(左键)可以启动快速拨号(前提是你已经在通讯录中设置了快速拨号)长按1-9数字键,直接跳入通讯录里面1-9开头的条目按当中音乐键启动音乐播放界面正按摇杆键可以调出主菜单上下左右拨动摇杆可以进入预先设置的快捷功能比如:你可以把右拨设置成开灯;左拨设置成通讯录;下拨设置成编写新短信息。

蓝牙麦克使用说明
1、新蓝牙麦克使用前应充电2小时以上,此时麦克可使用20
小时以上。
2、打开钢制操作台。
3、按系统启动开关,继电器自动吸合,使多媒体设备加电。
4、将蓝牙麦克电源开关⑤位于“ON”。
5、此时蓝牙麦克蓝色指示灯②将快速闪烁,此时麦克与接收
机处于对频状态,数秒后,蓝色指示灯常亮,表示麦克与接收机对频完毕,可正常使用。
蓝牙麦克示意图如下:
①挂绳安装口②指示灯③ USB充电接口④麦克插孔
⑤电源开关⑥音量增大按键⑦音量减小按键
6、若发现音量过大或过小时,可调节蓝牙麦克⑥或⑦按钮,当
扩声系统发出“叮咚”声响时,表示调节已到极限。
7、若蓝牙麦克充电不当,使用中突然电压不足时,蓝牙麦克不
工作,教室原有扩声系统自动切换到有线扩声状态,原有界面麦克照常使用。
8、使用过程中红灯闪烁,为电池告警,请立即充电,充电时红
灯常亮,红灯熄灭表示充电完毕。
9、我校购置的蓝牙无线话筒发射机招标时供应商已提供国家
权威部门检测报告,对人体无伤害,请教师放心使用。
10、注意事项
⑴、对频时间超过20秒后仍不能正常工作,请切断麦克电源,
重新开机。
⑵、咪头具有指向性,请将咪头指向声源。
⑶、使用完毕请立即关闭电源,以免损坏锂电池。
⑷、麦克距离操作台越近,对频越快,有效通讯距离为15米。

Jabra用户手册UC-certified© 2020 GN Audio A/S。
保留所有权利。
Jabra®是 GN Audio A/ S 的注册商标。
Bluetooth®(蓝牙®)字标和徽标是 Bluetooth SIG, Inc.的注册商标,GN Audio A/S 经许可使用该标记。
在丹麦设计开发中国制造型号:PHS040Wa / END040W1. 欢迎 (5)2. 概览 (6)3. 摆放位置 (7)3.1 小型协作空间3.2 大型会议室3.3 桌面3.4 立体声媒体4. 如何充电 (11)4.1 USB 充电4.2 自动断电4.3 电池电量状态5. 连接方式 (13)5.1 连接到电脑(蓝牙适配器)5.2 连接到电脑(USB 线缆)5.3 连接到智能手机或平板电脑6.使用方式 (15)6.1 按钮可见性6.2 典型使用6.3 处理多个通话6.4 连接(Link)按钮6.5 智能(Smart)按钮6.6 语音提示6.7 共享使用6.8 恢复出厂设置7. 软件和固件 (22)7.1 Jabra Direct7.2 更新固件8. 支持 (23)8.1 常见问题解答和技术规格8.2 如何保养您的 Jabra 设备1. 欢迎感谢您使用 Jabra Speak 750。
希望您使用愉快!Jabra Speak 750 的功能• 拟真的通话和音乐音质• 直观的即插即用连接-通过 USB 或蓝牙适配器连接到电脑,或通过蓝牙连接到智能手机和平板电脑• 轻巧的设计、旅行保护袋和约 10 小时电池续航时间• 专用连接(Link)按钮将两台 Jabra Speak 750 配对组合,实现灵活且可扩展的会议2. 概览桌面支架和蓝牙适配器存放Jabra Link 370 蓝牙适配器)3. 摆放位置3.1 小型协作空间为了获得最佳的音质,请将免提电话放在桌子中间,与每名与会者的距离不超过 2 米/6.5 英尺。

mijiak歌麦克风说明书一、产品概述Mijia k歌麦克风是一款智能麦克风产品,集成了高保真录音、降噪处理、蓝牙连接等多项功能。
它能够满足用户对高质量录音以及悦耳歌声的需求,是一款非常适合KTV、录音室等场合使用的产品。
二、产品特点1. 高保真录音:Mijia k歌麦克风采用了先进的录音技术和高质量的麦克风元件,能够实现高保真的录音效果。
用户录制的音频可以还原到最真实的状态,使声音更加清晰、逼真。
2. 降噪处理:内置的降噪芯片能够有效地抑制周围环境的杂音和噪声,提高录音的质量。
无论是在嘈杂的场合还是在室内静音的环境下,Mijia k歌麦克风都能够有效地降低噪声干扰,确保录音效果的纯净。
3. 蓝牙连接:Mijia k歌麦克风支持蓝牙连接,可以和智能手机、平板电脑等设备无线连接。
用户只需要打开手机的蓝牙功能,将其与麦克风进行配对,就可以实现无线录音和播放,让用户更加自由地享受音乐。
4. 多功能按钮:Mijia k歌麦克风上配备了多功能按钮,用户可以通过按键操作来进行播放、暂停、切换歌曲等操作。
这样用户就不用频繁地操作手机,可以更加方便地进行录音和歌曲切换,提高使用体验。
5.可调节音量:麦克风上的音量按钮可以调节录音时的音量大小,让用户根据自己的需要进行调整。
用户可以根据不同场合的需求,自行调整音量大小,达到最佳录音效果。
三、产品使用方法1. 打开麦克风:长按电源键3秒,可以打开Mijia k歌麦克风。
2.连接蓝牙:打开手机的蓝牙功能,并连接麦克风的蓝牙信号,配对成功后,手机会有提示音。
3.录制歌曲:打开K歌软件,选择自己想要录制的歌曲,点击开始录制按钮。
4.调节音量:根据自己的需求,通过麦克风上的音量按钮进行音量调节。
5.播放录音:录制完成后,通过按下麦克风上的播放按钮,可以进行录音回放。
6.切换歌曲:通过按下麦克风上的切换歌曲按钮,可以切换到下一首歌曲。
四、注意事项1.使用时请确保麦克风的电量充足,以免影响正常使用。

简易使用说明 HIGH-SPEED CHIP PLACERKE-750HIGH-SPEED,GENERAL-PURPOSE PLACERKE-760TSUI_R efong 编译 目录第一章机台简介1-1 机台构造简介 (4)1-2 规格 (4)1-3 雷射检测 (5)1-4 零件的型态 (7)1-5 英文缩写说明 (9)1-6 输送带简介 (10)1-7 FEEDER(送料器)简介 (11)1-8 ATC简介 (12)1-9 NOZZLE(吸嘴)简介 (13)1-10 键盘功能键 (14)1-11 HOD手持控制器 (15)1-12 机台上的其它按键 (16)1-13 IC CONVEYOR (16)第二章生产画面介绍2-1 画面 (17)2-2 选单 (19)2-3 暂停画面 (21)2-4 选单介绍(主选单及Data Input选单) (22)Input(资料输入) T Data3-1 基本资料 (24)3-2 PWB DTAT (25)3-3 PLACEMENT DATA(着装资料) (27)3-4 COMPONENT DATA(零件数据) (29)3-5 PICK DATA(料站资料) (35)3-6 VISION DATA(视觉资料) (37)机械设定4-1 选单说明 (40)4-2 1/Units of measure (40)4-3 2/Opt. Option (41)4-4 3/Machine setup (43)4-5 Maual Control (47)快速入门5-1 开机 (50)5-2 关机 (50)5-3 异常处理 (50)5-5 双挂料改为单挂料 (50)5-6 BOC Mark点制作 (51)5-7 换线 (52)5-8 换料 (52)5-9 零件检测 (52)5-10最优化 (53)如何写一程序6-1 基本观念 (54)6-2 写程序 (55)机台简介1-1. 机台构造简介 KE-750装置三组HEAD,可装着最大2Omm。

话筒使用技巧话筒使用技巧话筒使用技巧1话筒基本介绍如今无线话筒得到了普及以及广泛使用,市场上销售的一种无线话筒,价格在几百元左右。
该话筒采用UHF超高频段,比传统的VHF 频段干扰更少,还有独特的降噪设计,使用户在K歌过程中享受还原自己最真实的声音。
这里我们主要讲解下无线话筒在使用时的一些技巧性问题。
1、怎样选购无线话筒发射机机的电池为保证系统正常使用时不至出现信号失真和频率干扰,必须使用能是充足的电池,在选购时有条件的话最好选用碱性9V电池。
2、怎样才能尽早知道发射机电池能量是否充足在各种品牌和型号的无线话筒系统中,绝大多数接收机不具备发射机电池能量显示功能。
尽管有的无线发射器上有电池低压显示,但使用者在使用中一般很少会注意这个问题。
在无线话筒正常使用中,出现电池不足引起音频信号失真或频率干扰是时有发生的事。
为了防止发生这种现象,操作人员可在无线话筒正常使用中,适时地使用调音台PFL预听功能,用耳机监听无线话筒的信号,若声音清晰度稍有降低或噪声稍有增大时,就应马上更换电池,这样才能尽可能避免由于电池能量不足给操作者带来的心理压力。
3、怎样才能防止和避免外界对无线话筒的干扰在选购非变频无限话筒前应先弄清当地电视台的发射频率,选购时应错开电视台的发射频率免受干扰,选购多个无线话筒系统时还应注意,各系统的频率不能重复,以避免频率重叠时的相互干扰。
4、怎样消除无线话筒受外界干扰非变频的分集无线话筒系统在受到外界干扰时(指发射机电源关闭时,在接受机显示器上仍有RF射频、AF音频或DIVERSITY分集通到A、B中任一或二者的LED显示器有信号显示的话,则表明接收器正处于外界无线电波干扰),可通过调校SQUEICH静躁器以改善接收,减少干扰。
其具体做法是,调好天线位置,发射机仍处于关闭状态,将接收机音量输出增益关死,最后顺时针方向调校SQUEICH静躁器,直至所有干扰信号消失(此时接收机除电源显示外没有任何信号显示),再顺时针转少许,调试时一定要使用无感应螺丝刀。

USB无线K歌麦产品使用说明书(娱乐版)USB无线麦克风为专业酷我K歌电脑平台系统(电脑版)和专业版K歌设计的。
该产品采用无线2.4G通用频段技术,声音传输是通过数字化处理和传输方式,具有较强的抗干扰性,使输出的声音具有高保真的音质;接收部分是通过USB数字接口传送到电脑,可抗数模转换和电流音,是一款具有专业级的无线K 歌专用麦。
无线麦克风适用于电脑K歌、电脑录音和在线聊天、教学和商务演讲的专业工具,它的有效使用范围在30平方米内,频率响应宽度(在20~16KHz之间),它的使用效果会是称心如意,是唱K歌与商用演讲的好工具。
主要特点:※据了解是全球第一款采用USB接口技术的无线麦克风;※麦克风(话筒,又称发射器)采用锂电池供电,充一次电可以使用13-15 小时左右;※麦克风具有低压提示指示灯,提示充电;※麦克风采用电容咪与电脑的电气特性相匹配;※麦克风具有遥控电脑的功能,如:选歌和音量控制、播放暂停等;※麦克风外观采用塑胶与金属的完美结合,大小适中,有多种时尚的色彩选择可选择。
※USB接收器采用电脑USB接口技术--即插即用方式,无需安装驱动程序。
产品说明:操作说明:在使用无线麦克风系统前,首先要配对好麦克风(话筒)与USB接收器,再设置好电脑“酷我K歌”软件的相关设置项,无线麦克风系统才能正常使用。
具体操作步骤如下:第一步:麦克风(话筒)与USB接收器配对操作打开带多媒体音箱的电脑,取出麦克风(话筒)和USB接收器,用手指按住话筒的“开关键”,话筒上的指示灯的变化为:红灯亮转为蓝灯亮,再转为红蓝灯快闪,此时可以松开手指,同时把USB接收器插上电脑的USB接口上,这时USB接收器的指示灯会由快闪变为慢闪,并与话筒上的指示灯同步变为慢闪,这就说:话筒与USB接收器配对成功(配对成功后,第二次只需打开话筒和电脑系统就可直接使用;另:一支麦克风只能与一个USB接收器配套使用,要用另一支麦克风与原USB接收器使用的话,需进行重新配对。

以下是麦克风使用说明书,结合所学知识谈谈说明书翻译过程中应注意什么。
•Instruction Manual fro Sharp UD-952 MicrophoneFeatures(1) This type of microphone employs a double dome diaphragm to achieve a well balanced soundquality from the lower range to the upper range so that a crystal clear sound quality isproduced.(2) A light aluminum wire (LAW) is employed for the voice coil to achieve high quality sound.(3) A reliable Sharp brand connector is employedOperation Instructions(1) Insert the microphone plug into the microphone terminal.(2) Switch the microphone to the “ON” position.(3) Adjust the volume with the volume control knob on the amplifier before use.(4) Move the microphone switch to the “OFF” position when you finish the song or speech beforehandling the microphone to someone else.•Precautions:•(1) If the microphone head is covered by hand or the microphone is carried to the speaker, a sharp noise may be generated, which is caused by themicrophone picking up the sound output from the speaker. To prevent this first decrease the volume, then place the microphone in such a way that it is not pointed to the speaker. Be sure that there is a sufficient distance between the microphone and the speaker.•(2) The microphone is sensitive equipment. So avoid dropping or hitting it.Don’t apply strong shock to it.•(3) Don’t store the microphone in a place with high temperature or humidity.夏普UD-952麦克风操作说明书产品特点(1)该类型麦克风使用双重圆顶状隔膜,使能产生动态范围大、品质优良、清晰自然的声音。

FEATURES• True diversity half-rack receiver in a full-metal housing with intuitive OLED display for full control• Easy and flexible wireless synchronization between transmitter and receiver via infrared• Up to 32 compatible channels• Up to 88 MHz bandwidth with 3520 selectable frequen-cies, fully tunable in a stable UHF range• Ethernet connection for Wireless Systems Manager (WSM) control software for advanced frequency coordi-nation in multi-channel setups• High RF output power (up to 50 mW, adjustable in three steps 10/30/50) depending on country regulations DELIVERY INCLUDES• EM 300-500 G4 true diversity receiver • SK 500 G4 bodypack transmitter • MKE 2 clip-on microphone• GA 3 rackmount set• 2 AA batteries• 2 rod antennas• power supply• quick guide• safety guide• manufacturer declaration sheetThe pro‘s choice. Renowned sound engineers rely on ew 500 G4‘s flexibility, especially when handling multi-channel set-tings on the world‘s music stages. Up to 88 MHz bandwidth, up to 32 channels. Ethernet connection for Wireless Systems Manager (WSM) control software included for advanced frequency coordination in multi-channel setups.The pro‘s choice for impressive presentations. The professional MKE 2 Gold omni-directional condenser microphone resists the test of time on any big live stage and ensures a high speech intelligibility on any stage, indoors and outdoors.SPECIFICATIONSEM 300-500 G4RF characteristicsModulation Wideband FM Frequency ranges Aw+: 470 - 558 MHzAS: 520 - 558 MHzGw1: 558 - 608 MHzGw: 558 - 626 MHzGBw: 606 - 678 MHzBw: 526 - 698 MHzCw: 718 - 790 MHzDw: 790 - 865 MHzJB: 806 - 810 MHzK+: 925 - 937.5 MHz Receiving frequencies Max. 3520 receivingfrequencies, adjustable in25 k Hz steps20 frequency banks, eachwith up to 32 factory-pre-set channels, no intermo-dulation6 frequency banks withup to 32 programmablechannelsSwitching bandwidth up to 88 MHzNominal/peak deviation±24 kHz / ±48 kHz Receiver principle True diversitySensitivity (with HDX, peak deviation)< 2.5 μV for 52 dBAeff S/NAdjacent channel selection Typically ≥ 75 dB Intermodulation attenua-tionTypically ≥ 70 dB Blocking≥ 75 dB Squelch 5 to 25 dBμVin steps of 2 dBPilot tone squelch Can be switched off Antenna inputs 2 BNC socketsAF characteristicsCompander system Sennheiser HDXEQ presets (switchable,act on line and monitoroutputs)Preset 1: FlatPreset 2:Low Cut (-3 dB at 180 Hz)Preset 3:Low Cut/High Boost(-3 dB at 180 Hz,+6 dB at 10 kHz)Preset 4:High Boost(+6 dB at 10 kHz)Signal-to-noise ratio (1 mV,peak deviation)≥ 115 dBATotal harmonic distortion(THD)≤ 0.9 %AF output voltage (at peakdeviation, 1 kHz AF)6.3 mm jack socket(unbalanced): +12 dBuXLR socket(balanced): +18 dBu Setting range “AF Out”48 dB (3 dB steps) Overall deviceTemperature range-10 °C to +55 °CPower supply12 V DCCurrent consumption350 mADimensions Approx. 202 x 212 x 43 mm Weight Approx. 980 gCONNECTIONSSPECIFICATIONSSK 500 G4RF characteristicsModulation Wideband FM Frequency ranges Aw+: 470 - 558 MHzAS: 520 - 558 MHzGw1: 558 - 608 MHzGw: 558 - 626 MHzGBw: 606 - 678 MHzBw: 526 - 698 MHzCw: 718 - 790 MHzDw: 790 - 865 MHzJB: 806 - 810 MHzK+: 925 - 937.5 MHz Transmission frequencies Max. 3520 frequencies,adjustable in 25 kHz steps20 frequency banks, eachwith up to 32 factory-pre-set channels, no intermo-dulation6 frequency banks withup to 32 programmablechannelsSwitching bandwidth up to 88 MHzNominal/peak deviation±24 kHz / ±48 kHz Frequency stability≤ ±15 ppmRF output power at 50 Ωswitchable:Low: typ. 10 mWStandard: typ. 30 mWHigh: typ. 50 mWPilot tone squelch Can be switched off AF characteristicsCompander system Sennheiser HDXAF frequency response Mic: 80 – 18,000 HzLine: 25 – 18,000 Hz Signal-to-noise ratio (1 mV,peak deviation)≥ 115 dBATotal harmonic distortion(THD)≤ 0.9 %Max. microphone/lineinput voltage3 VeffMicrophone/line inputimpedance40 kΩ, unbalanced / 1 MΩInput capacitance SwitchableSetting range for inputsensitivity60 dB,adjustable in 3 dB steps Overall deviceTemperature range-10 °C to +55 °CPower supply 2 AA batteries, 1.5 V orBA 2015 accupack Nominal voltage 3 V battery /2.4 V rechargeable battery Current consumption at nominal voltage:typ. 180 mAwith transmitter switchedoff: ≤ 25 μAOperating time Typically 8 h Dimensions Approx. 82 x 64 x 24 mm Weight (incl. batteries)approx. 160 gMKE 2Transducer principle pre-polarized condensormicrophonePick-up pattern omni-directional Sensitivity (free field, noload) (1 kHz)5 mV/Pa, ± 3 dB Max. SPL at 1 kHz142 dBFrequency response20 to 20.000 Hz ± 3 dB "Equivalent noise levelA-weighted (DIN IEC 651)"26 dB"Equivalent noise levelCCIR-weighted (CCIR 468-1)"39 dBConnector 3.5 mm jackCable length approx. 1.60 mDIMENSIONSDIMENSIONSSK 500 G43,5mm Klinke3,5mm plugPRODUCT VARIANTSew 500 G4-MKE2-Aw+470 - 558 MHz Art. no. 509668ew 500 G4-MKE2-AS520 - 558 MHz Art. no. 509711ew 500 G4-MKE2-Gw1558 - 608 MHz Art. no. 509674ew 500 G4-MKE2-Gw558 - 626 MHz Art. no. 509658ew 500 G4-MKE2-GBw606 - 678 MHz Art. no. 509935ew 500 G4-MKE2-Bw626 - 698 MHz Art. no. 509659ew 500 G4-MKE2-Cw718 - 790 MHz Art. no. 509660ew 500 G4-MKE2-Dw790 - 865 MHz Art. no. 509713ew 500 G4-MKE2-JB806 - 810 MHz Art. no. 509712ew 500 G4-MKE2-K+925 - 937,5 MHz Art. no. 509949ARCHITECT‘S SPECIFICATIONA wireless RF transmission system consisting of a stationary receiver, a bodypack transmitter and a condenser clip-on microphone.The system shall operate within ten UHF frequency ranges, with a switching bandwidth of up to 72 MHz: 470 – 558 MHz, 520 – 558 MHz, 558 – 608 MHz, 558 – 626 MHz, 606 – 678 MHz, 626 – 698 MHz, 718 – 790 MHz, 790 – 865 MHz, 806– 810 MHz, 925 – 937.5 MHz; receiving frequencies shall be 3520 per range and shall be tunable in 25 kHz steps. The system shall feature 20 fixed frequency banks with up to 32 compatible frequency presets and 6 user banks with up to 32 user programmable frequencies.The receiver shall be menu-driven with a backlit OLED display showing the current frequency, frequency bank and chan-nel number, metering of RF level, metering of AF level, lock status, pilot tone evaluation, muting function, and battery status of the associated transmitter. An auto-lock feature shall be provided to prevent settings from being accidentally altered. The receiver shall provide a sound check mode.Some receiver parameters such as receiving frequency, receiver name and pilot tone setting shall be synchronizable with the associated transmitter via an integrated infrared interface.The receiver shall feature a balanced XLR-3M audio output with a maximum output of +18 dBu along with an unbalanced ¼“ (6.3 mm) audio output with a maximum output of +12 dBu. A headphone output with headphone volume control shall be provided and shall utilize a ¼“ (6.3 mm) stereo jack socket. The receiver shall have an Ethernet port (RJ-45) for remote network-based monitoring and control using the Sennheiser Control Cockpit or the Sennheiser Wireless System Manager software. Two BNC-type input sockets shall be provided for connecting the antennas.Nominal/peak deviation shall be ±24 kHz/±48 kHz. Squelch threshold shall be defeatable (off) or adjustable from 5 - 25 dBμV in steps of 2 dB.The receiver shall incorporate the Sennheiser HDX compander system and a defeatable pilot tone squelch. Sensitivity shall be < 2 μV for 52 dBA eff S/N with HDX engaged at peak deviation. Adjacent channel rejection shall be ≥ 75 dB (ty-pical). Intermodulation attenuation shall be ≥ 70 dB (typical); blocking shall be ≥ 75 dB. Four selectable equalizer presets shall be provided: “Flat”, “Low Cut” (−3 dB at 180 Hz), “Low Cut/High Boost” (−3 dB at 180 Hz/+5.5 dB at 10 kHz) and “High Boost” (+5.5 dB at 10 kHz). Signal-to-noise ratio at 1 mV and peak deviation shall be ≥ 115 dBA. Total harmonic dis-tortion (THD) shall be ≤ 0.9 %. The audio output level shall be adjustable within a 48 dB range in steps of 3 dB.The receiver shall operate on 12 V power supplied from the NT 2-3 CW mains unit (for 100 – 240 V AC, 50/60 Hz). Power consumption shall be 350 mA. The receiver shall have a rugged metal housing; dimensions shall be approximately 202 x 212 x 43 mm (7.95“ x 8.35“ x 1.69“). Weight shall be approximately 980 grams (2.16 lbs). Operating temperature shall range from −10 °C to +55 °C (+14 °F to +131 °F).The receiver shall be the Sennheiser EM 300-500 G4.The bodypack transmitter shall be menu-driven with a backlit LC display showing the current frequency, frequency bank and channel number, metering of AF level, transmission status, lock status, pilot tone transmission, muting function, and battery status. An auto-lock feature shall be provided to prevent settings from being accidentally altered. The bodypack transmitter parameters shall either be configurable in the associated receiver’s menu and synchronized with the bo-dypack transmitter via an integrated infrared interface or shall be programmable in the bodypack transmitter menu.The bodypack transmitter shall be equipped with a mute switch, which shall be switchable between “AF on/off”, “RF on/ off” and “Disabled” via the user interface.Nominal/peak deviation shall be ±24 kHz/±48 kHz. Frequency stability shall be ≤ ±15 ppm. RF output power at 50 Ω shall be switchable between 10 mW (typical, low) and 30 mW (typical, standard) and 50 mW (typical, high).The bodypack transmitter shall incorporate the Sennheiser HDX compander system and a defeatable pilot tone squelch. Audio frequency response shall range from 80 – 18,000 Hz (microphone) or 25 - 18,000 Hz (line). Signal-to-noise ratio at 1 mV and peak deviation shall be ≥ 115 dBA. Total harmonic distortion (THD) shall be ≤ 0.9 %. Input sensitivity shall be adjustable within a 60 dB range in steps of 3 dB.Power shall be supplied to the bodypack transmitter by two 1.5V AA size batteries or by one Sennheiser BA 2015 rechar-geable accupack. Nominal voltage shall be 2.4 V, current consumption shall be typical 180 mA at nominal voltage; ≤ 25 μA when bodypack transmitter is switched off. Operating time shall be typical 8 hours. The bodypack transmitter shall have a rugged metal housing; dimensions shall be approximately 82 x 64 x 24 mm (3.23“ x 2.52“ x 0.94“). Weight including the batteries shall be approximately 160 grams (0.35 lbs). Operating temperature shall range from −10 °C to +55 °C (+14 °F to +131 °F).The bodypack transmitter shall be the Sennheiser SK 500 G4.Sennheiser electronic GmbH & Co. KG · Am Labor 1 · 30900 Wedemark · Germany · 。

VitamixPROFESSIONAL SERIES 750 用户手册请仔细阅读说明书开始恭喜!您将享受到快捷,简单和美味的健康饮食!请在开始使用前认真阅读本书中的安全信息、警告、和操作说明。
将您的Vitamix机器放置在一个干净,水平的表面。
确保开关在off状态,机器插座连接一个接地线的插孔。
然后按照第17页说明的清洁方法清洁您的机器。
第一次使用之前必须清洗机器。
Vitamix 服务将机器型号和序列号写在下面的空格中作为将来的参考。
这些数据在马达基座的后面。
型号:_______________________________________________________序列号:_______________________________________________________购买日期:_______________________________________________________购机地点:_______________________________________________________在您因为维修等任何原因送还机器前,请先联系Vitamix客服1-800-848-2649 或者1-440-235-4840,邮件*******************,或者联系您当地的经销商。
产品注册如果您直接在Vita-Mix公司的官网购买或者打电话在call center购买,您的产品在您购买时已经注册,保修在购买时已经激活。
如果您在除美国,加拿大,英国,爱尔兰之外的外国总代理或者经销商购买,您的产品将在国外总代理或者经销商处保修,无需在Vita-Mix官网注册。
在以下情况下您的机器是没有注册的:1,在美国,加拿大,英国,爱尔兰的经销商购买;2,在军事基地购买;3,在零售批发商店购买;4,您的vitamix机器是别人赠送的礼物;5,您不是机器原来的主人。
今天花几分钟注册您的vitamix机器享受将来更加快速简单的服务。

Tastensymbole / Button icons / Icônes de touches / Simboli dei tasti / Símbolos de las teclas / Toetssymbolen / Símbolos dos botões /Символыкнопок / 按键图标目录目录重要安全提示 (2)无线麦克风系列SKM 300 G3 (3)频道库系统 (3)应用范围 (4)供货范围 (5)产品总览 (6)无线麦克风SKM 300总览 (6)显示总览 (7)无线麦克风使用前的准备 (8)安装和更换电池/充电电池组 (8)给充电电池组充电 (9)更换麦克风头 (9)更换彩色圈 (10)无线麦克风的使用 (11)打开/关闭无线麦克风 (11)暂时解除按键锁 (12)静音设置音频信号或关闭无线电信号 (12)选择标准显示 (13)菜单操作 (14)按键 (14)操作菜单总览 (14)操作菜单的使用 (15)操作菜单中的设置 (17)主菜单“Menu” (17)扩展菜单“Advanced Menu” (19)设置说明 (22)调谐无线麦克风和接收机 (22)无线麦克风的清洁和维护 (23)当出现故障时 (24)技术参数 (25)麦克风的极性特征图和频率曲线图 (26)制造商声明 (28)有关本使用说明中各部分的详细解释您可以在Array 网站中的SKM 300 G3产品栏目下找到。
重要安全提示•请认真阅读本使用说明。
•请妥善保管使用说明。
请始终将本设备连同使用说明一起交给其他使用者。
•请留意所有警告提示并遵守使用说明内的所有指令。
•只能使用微湿的软布清洁本设备。
•请勿将本设备放置在热源附近,如散热器、热排管、烤箱或其它装置(包括扩音器)等。
•请您只使用由Sennheiser公司推荐的附加设备和附属部件。
•请只使用由Sennheiser公司推荐的或与原装部件具有相同特性的备件。

GL-X750用户手册目录1. GL.iNet X750设置 (1)1.1. 开机 (1)1.2. 连接 (2)(1) 局域网连接 (2)(2) 通过 Wi-Fi 连接 (3)1.3. 访问Web 管理界面 (3)1) 语言设置 (3)2) 管理员密码设置 (4)3) Web管理界面 (5)2. 网络 (6)2.1. 网线 (7)(1) DHCP (8)(2) Static (8)(3) PPPoE (9)2.2. 中继 (10)2.3. 3G/4G Modem 猫 (11)AT 指令 (13)2.4. 网络共享 (14)3. 无线 (14)4. 客户端 (16)5. 升级 (16)5.1. 在线升级 (17)5.2. 本地升级 (17)(1) 官方OpenWrt/LEDE 固件 (18)(2) 编译自己的固件 (19)(3) 第三方固件 (19)5.3. 自动升级 (19)6. 防火墙 (20)6.1. 端口转发 (20)6.2. 打开路由器端口 (21)6.3. DMZ (21)7. 应用程序 (22)7.1. 软件包 (22)7.2. 文件共享 (23)7.3. 远程访问 (23)7.4. 上网认证 (25)8. 更多设置 (25)8.1. 管理员密码 (25)8.2. 局域网IP (26)8.3. 时区 (27)8.4. Mac地址克隆 (27)8.5. 自定义DNS服务 (28)8.6. 网络模式 (28)8.7. 恢复固件 (29)8.8. 高级功能 (30)1. GL.iNet X750设置型号:GL-X7501.1.开机将Micro USB电源线插入路由器的电源端口。
确保您使用的是标准5V / 1A 电源适配器。
否则可能导致故障。
注意:SIM卡和TF卡不支持热插拔,如需使用TF卡,请在开机前插入。
1.2.连接您可以通过Lan口或者是WiFi连接到路由器;注意:此步骤仅将设备连接到路由器的局域网(Lan),目前您无法访问网络,为了能正常连接到网络,请根据以下操作步骤完成网络设置。

Jabra© 2020 GN Audio A/S. All rights reserved. Jabra® is a trademark of GN Audio A/S. The Bluetooth® word mark and logos are registered trademarks owned by the Bluetooth SIG, Inc. and any use of such marks by GN Audio A/S is under license.Designed and engineered in DenmarkMade in ChinaMODEL: PHS040Wa / END040W1. Welcome (5)2. Overview (6)3. Where To Position (7)3.1 Small-sized meeting room3.2 Medium-sized meeting room3.3 Desk3.4 Stereo media4. How To Charge (11)4.1 USB charging4.2 Automatic power off4.3 Battery status5. How To Connect (13)5.1 Connect to computer (Bluetooth adapter)5.2 Connect to computer (USB cable)5.3 Connect to smartphone6. How To Use (16)6.1 Button visibility6.2 Typical use6.3 Multiple call handling6.4 Link button6.5 Microsoft Teams button6.6 Voice guidance6.7 Shared use6.8 Factory reset7. Software and firmware (26)7.1 Jabra Direct7.2 Update firmware8. Support (27)8.1 FAQ and technical specifications8.2 How to care for your Jabra device1. WelcomeThank you for using the Jabra Speak 750. We hope you will enjoy it!Jabra Speak 750 features• Immersive sound for calls and music• Intuitive plug-and-play connectivity - connect to computer via USB or Bluetooth adapter, or connect to smartphone and tablet via Bluetooth• Lightweight design, protective travel pouch, and up to 11 hours of battery life• Dedicated Link button to pair two Jabra Speak 750 devices together for flexible and scalable meetings• Dedicated Microsoft Teams button*• Certified for Microsoft Teams and Skype for Business for a plug-and-play experience*Button functionality depends on the Microsoft Teams desktop application.2. OverviewTable stand andBluetooth adapterstorageJabra Link 370Bluetooth adapter Pouch3. Where to position3.1 Small-sized meeting roomFor the optimal audio quality, position the speakerphone in the center of the table, up to 2.3m/7.5ft from each participant, but no closer than 0.5m/1.6ft. A single Jabra Speak 750 is ideal for up to 6 people.3.2 Medium-sized meeting roomFor large meetings of up to 12 people in a single room, position two Jabra Speak 750 devices up to 4m/13ft apart, but no closer than 0.5m/1.6ft. Positioning them at either end of the table, between 0.5m/1.6ft to 2.3m/7.5 ft from participants, will ensure optimal audio quality.To temporarily link the audio between two Jabra Speak 750 devices, tap the Link button on both speakerphones when they are within3.3 DeskWhen using the Jabra Speak 750 at your desk itis recommended to put the speakerphone into an upright position using the table stand. This will better direct the audio towards you for a richer music and media experience. Additionally, two Jabra Speak 750 devices can be linked together for stereo sound.your desk, two Jabra Speak 750 devices can be positioned on either side of a projector ormonitor for stereo sound.To temporarily link the audio between two Jabra Speak 750 devices, tap the Link button on both speakerphones when they are within 4m/13ft.4. How to charge4.1 USB chargingPlug the Jabra Speak 750 into a USB power source using the attached USB cable. The Jabra Speak 750 battery lasts for up to 11 hours of talk time and takes approx. 3 hours to fully charge.4.2 Automatic power offTo preserve battery while unplugged, the Jabra Speak 750 will automatically power off when it has not been connected to a Bluetooth device for 15 minutes.If connected to a Bluetooth device and not plugged into power, the Jabra Speak 750 will automatically power off after 8 hours.4.3 Battery statusTo view the current battery status, tap the Battery status button. The L EDs around the edge of the Jabra Speak 750 will light up to indicate the current battery status.Low battery5. How to connect5.1 Connect to computer (Bluetoothadapter)Plug the Jabra Link 370 Bluetooth adapter into a USB port on your computer. The Jabra Speak 750 and the Jabra Link 370 Bluetooth adapter are pre-paired and ready to use out of the box. The Bluetooth range is up to 30m/98ft. Before first time use, plug the USB cable into your computer to wake the speakerphone.For the Jabra Speak 750 to work correctly, you may need to set the Jabra Link 370 Bluetooth adapter as the playback and recording device in your operating system audio settings and in Microsoft Teams audio settings.If you need to re-pair the Jabra Speak 750 with the Jabra L ink 370 Bluetooth adapter, please use Jabra Direct. Jabra Direct can be downloaded at /direct.5.2 Connect to computer (USB cable) Plug the Jabra Speak 750 into a USB port on your computer. Before first time use, plug the USB cable into your computer to wake the speakerphone.You may need to set the Jabra Speak 750 as the playback and recording device in your operating system audio settings and in Microsoft Teams audio settings.5.3 Connect to smartphone or tablet Hold the Bluetooth button for 2 seconds and follow the voice-guided instructions to pair to your smartphone or tablet. The Bluetooth range is up to 10m/33ft. Before first time use, plug the USB cable into your computer to wake the speakerphone.To disconnect or reconnect, tap the Bluetooth button again.6. How to use6.1 Button visibilityThe buttons are backlit and only visible when the speakerphone is powered on. After 1 minute of inactivity the buttons will fade, and can be reactivated by tapping the area where the buttons are located.The Microsoft Teams button, Link button and Mute button will only be visible under certain conditions (see sections 6.4 and 6.5 for details).6.2 Typical usePower on or off Hold (1 sec) the Power buttonAnswer call Tap the Answer call buttonEnd or reject call Tap the End call buttonTurn on/off voice guidance Hold (8 secs) the End callbuttonVolume down/up Tap (or hold) the Volume down or Volume up buttonMute/unmute microphone Tap the Mute button (only visible when on a call)Battery status Tap the Battery status buttonConnect Bluetooth deviceTap the Bluetooth status buttonLink two Jabra Speak 750 devices Tap the Link button (only visible when within 4m/13ft range of another Jabra Speak 750)Bring Microsoft Teams to foreground on computer Tap the Microsoft Teams button* (only visible when signed into Microsoft Teams)Join active Microsoft Teams meeting Tap the Microsoft Teams button* (only visible when signed into Microsoft Teams)View Microsoft Teams missed calls and voicemails Tap the Microsoft Teams button* (only visible when signed into Microsoft Teams)*Button functionality depends on the Microsoft Teams desktop application.6.3 Multiple call handlingPut current call on hold and answer incoming call Tap the Answer call buttonSwitch between held call and active call Tap the Answer call buttonReject incoming call, and Tap the End call6.4 Link buttonTo temporarily link the audio between two Jabra Speak 750 devices, tap the Link button on both speakerphones when they are within 4m/13ft. The Link button will only be visible when two Jabra Speak 750 devices are within 4m/13ft.To unlink the speakerphones, tap the Link button on one of the speakerphones.NOTE: L inking two Jabra 750 devices uses a Bluetooth connection. Each Speak 750 can only have two active Bluetooth connections. If two Bluetooth devices are currently connected to one of the Jabra Speak 750 devices, the last connected Bluetooth device will temporarily be replaced by the Jabra 750 link. When the Jabra 750 devices are unlinked, the Bluetooth device connection that was temporarily replaced, will be restored.6.5 Microsoft Teams buttonThe Microsoft Teams button is only visible when the Jabra Speak 750 is connected to your computer and you are signed into Microsoft Teams. The button behaves differently depending on the current status of Microsoft*The Microsoft Teams LEDs can show only one notificationJoin a Microsoft Teams meetingIf someone has joined a scheduled Microsoft Teams meeting and it is starting, the white LED next to the Microsoft Teams button will flash. Tap the Microsoft Teams button to join the meeting.View Microsoft Teams missed calls and voicemailsIf you have Microsoft Teams missed calls or voicemails, the white LED next to the Microsoft Teams button will flash. Tap the Microsoft Teams button to view the list of missed calls and voicemails on your computer.Bring Microsoft Teams to foreground When Microsoft Teams is running but is minimized, tap the Microsoft Teams button to maximize and bring it to the foreground on your computer.6.6 Voice guidanceThe voice guidance can be turned on or off by holding the End call button for 8 seconds.6.7 Shared useIf the Jabra Speak 750 is to be shared by many people using Bluetooth, it is recommended to enable Shared use, which can be configured in Jabra Direct. When Shared use is enabled, the speakerphone will not automatically connect to a previously connected Smartphone or Jabra L ink 370 Bluetooth adapter. Instead, the Bluetooth devices will need to be paired with the speakerphone each and every time the smartphone is out of range, or turned off and on.To pair a smartphone or Jabra L ink 370 Bluetooth adapter to the speakerphone, hold (2 sec) the Bluetooth button on the speakerphone and follow the voice-guided6.8 Factory resetResetting the Jabra Speak 750 clears the list of paired Bluetooth devices and also clears all personalized settings. After a factory reset, it is necessary to re-pair the Jabra Speak 750 to your Bluetooth devices and Jabra L ink 370 Bluetooth adapter.To factory reset, hold the An swer call button and the En d call button for 8 seconds until ‘Factory reset’ is announced by the7. Software andfirmware7.1 Jabra DirectJabra Direct is computer software designed to support, manage and enable optimal functionality for Jabra devices.Download the latest free version from /direct 7.2 Update firmwareFirmware updates improve performance or add new functionality to Jabra devices.1. Connect the Jabra Speak 750 to a computer using the USB cable or Jabra Link 370 Bluetooth adapter.2. Use Jabra Direct to check for the latest firmware updates. Jabra Direct can be downloaded from /direct8. Support8.1 FAQ and technical specifications View the FAQ, certifications, and technical specifications at /help/speak7508.2 How to care for your Jabra device • The Jabra Speak 750 is for indoor use only.• Avoid storage at extreme temperatures (above 40°C/113°F or below -40°C/-40°F).• Do not expose the Jabra Speak 750 to rain or other liquids.• Do not cover the Jabra Speak 750 speaker mesh and buttons with stickers or labels.。
产品使用简介(1)除说明书有特殊标示的操作方式以外,请勿尝试拆卸或更换产品内的任何零件。
(2)请勿将产品放入任何液体中,此产品非防水设计。
(3)如果有任何液体不小心进入产品内时,请立即断开连接并移开此产品。
(4)为避免触电,请在安装或卸载产品时,确保手上没有沾水。
(5)请勿将此产品放置于热源附近或直接暴露在火源附近。
(6)请勿将本产品放置在有强大电磁力的环境中,否则会导致产品故障。
产品概述非常感谢您使用本公司的全向麦克风产品!在使用本产品之前,请仔细阅读产品使用说明书。
本说明书介绍了全向麦克风产品的功能、安装和使用操作的一般方法。
本产品全向麦克风是一款蓝牙无线或USB有线连接的网络会议通话设备,全向麦克风设备之间蓝牙级联可扩展拾音和放音应用范围,具有回声抵消和环境降噪的最新一代语音处理算法,通话音质清晰自然,机身轻便,便于携带,安装操作方便,特别适用于手机、平板、电脑终端之间的网络会议通话等应用场景。
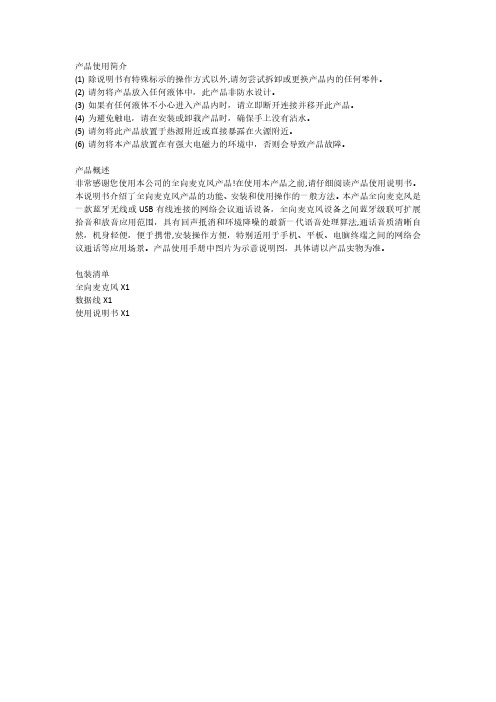
产品使用手册中图片为示意说明图,具体请以产品实物为准。
包装清单全向麦克风X1数据线X1使用说明书X1Product introduction(1)Do not try to disassemble or replace any parts in the product except for the operation methods marked in the manual.(2)Do not put the product into any liquid,this product is not waterproof.(3)If any liquid accidentally enters the product,please disconnect and remove the product immediately.(4)To avoid electric shock,please make sure that your hands are not wet when installing or uninstalling the product.(5)Do not place this product near a heat source or directly expose it to a fire source.(6)Do not place this product in an environment with strong electromagnetic force,otherwise it will cause product failure.product descriptionThank you very much for using the omnidirectional microphone product of our company!Before using this product,please read the product instruction manual carefully.This manual introduces the function,installation and operation of omnidirectional microphone products.This product omnidirectional microphone is a network conference call device with Bluetooth wireless or USB wired connection.Bluetooth cascading between omnidirectional microphone devices can expand the application range of sound pickup and playback.It has the latest generation of voice echo cancellation and environmental noise reduction.Processing algorithm,the sound quality of the call is clear and natural,the body is light,easy to carry,easy to install and operate,especially suitable for application scenarios such as network conference calls between mobile phones, tablets,and computer terminals.The pictures in the product manual are schematic illustrations, please refer to the actual product for details.Packing listOmnidirectional microphone X1Data cable X1Instruction manual X1产品介绍②麦克风②扬声器③蓝牙指示灯③蓝牙键⑤开关机键⑤组队级联键⑤音量“一”键⑧麦克风静音键⑧音量“+”键⑩级联指示灯⑩环形指示灯⑩充电指示灯⑩USB-C接口设备指示灯说明(1)开机:环形指示灯绿灯逐渐亮起,语音提示“开机,等待蓝牙连接”。

数字无线话筒使用说明书K歌数字无线话筒使用说明书一、手持开关机1.将两节5号电池装入手持并拧紧网头(注意电池负极朝下,电池装反将损坏手持),向上推开关打开手持,此时电源指示灯亮,手持进入开机状态。
如果电源指示灯闪烁表示电池已耗尽,请更换电池再开机。
2.向下推开关电源指示灯熄灭,手持关机。
长时间不使用话筒请将电池取出。
二、接收机连接与开关机(专业)1.将音频连接线一头插接收机音频输出2另一头插到用户的音频设备(如功放、前级等)。
将12V开关电源插入220V 交流插座,输出直流12V插入接收机DCIN,蓝色电源指示灯亮,接收机进入开机状态。
2.按住电源键一秒能够开启和关闭接收机电源。
3.断电后重新通电主机将自动进入开机状态,此时无需再按电源键开机。
三、接收机与电脑的连接与开关机(个人)1.将USB连接线两头分别插入电脑和接收机的USB接口。
蓝色电源指示灯,接收机进入开机状态。
电脑自动把音频输入输出设备切换成接收机。
(首次使用接收机的时候,电脑会自动安装驱动,电脑会依次出现图3所示的画面,直到硬件安装成功)2.将音频连接线一头插接收机音频输出1另一头插到用户的桌面音响输入端。
3.此时接收机将自动成为酷我k歌或QQ等者其它应用软件的音频输入输出设备。
(如果不能使用请参见疑难解答)4.按住电源键一秒能够开启和关闭接收机电源。
5.断电后重新通电主机将自动进入开机状态,此时无需再按电源键开机。
四、对码1.接收机开机后按功能键进入A通道对码状态,电源指示灯和A通道的射频指示灯亮,此时A通道能够对码,再按功能键进入B通道对码状态,电源指示灯和B通道射频指示灯亮,此时B通道能够对码。
再按功能键又将切换到A通道,如此循环。
2.按照上一步将接收机切换到需要对码的通道,再按电源键,该通道射频指示灯闪烁,此时打开任意一支手持,接收机将自动与手持实现连接,连接成功后该通道射频指示灯和音频指示灯同时亮起一秒。
说明这个通道的手持对码成功,即可使用。

PhilipsSpotify multiroom speakerSpotify ConnectMultiroom Just hit "PLAY"SW750MSpotify in every roomEnjoy authentic sound conveniently with 4 audiophile drivers and Spotify Connect. Play Spotify on any speaker using the Spotify app as a remote, expand your system wirelessly to any room and hit play to start where you left off.Using Spotify app as a remote for your speakers •Spotify Connect for an effortless native app experience •Music streams directly on speakers, save mobile battery •Music keeps playing through calls, videos and games•Direct access buttons - no app required, for easier control Multiroom speakers for you and your family •Play music from one speaker at a time or all at once •Philips companion app simplify wireless speaker setup Just hit ‘PLAY’ button•One-press 'Play' for the last heard Spotify track •Flip from room (speaker A) to room (speaker B)•Press 'Play' for 'Music Follows Me'Powerful room-filling sound•Powerful room-filling sound with 4 audiophile-grade driversHighlightsSpotify as a remoteUsing Spotify Connect you can easily browse, explore, and play music from any room in the house using your smart device as a remote. With a direct Spotify connection, you can play music straight from the cloud so your smart device can be used for calls, videos or even go out of range without interrupting your music. This is also more battery friendly, since energy used for music is minimized. All the same great Spotify features are there, from its ready-made lists to its high sampling rates. Everything you need to discover new music and hear it at its best.Multiroom speakersMultiroom speakers let you play songs in one room, or in many at the same time, so your music can either follow you around the house or stay where you want it. Each person can play to any selected speaker, and whenadditional speakers are purchased they can be added to the system wirelessly and easily.'Play' for the last heard songListen to your favorite tunes almost without interruption. Just hit 'Play' on the speaker to start playing the last song you heard on Spotify, without even unlocking your smart device.'Play' for 'Music Follows Me'When you press 'Play', music starts instantly on the speaker, no matter if it was last played on a smart phone, tablet or other smart device. This feature also lets you flip from one speaker to another in different rooms.Direct access without appHandy control buttons (Play / Pause, Volume Up / Down, Previous / Next) give you access to the controls you need, without fiddling with anapp. Once an album, playlist or station has been selected, skipping tracks, repeating, or pausing the music is a button press away.Four audiophile-grade driversEquipped with 4 audiophile-grade drivers, this speaker creates powerful room-filling sound while its two bass ports expand low frequency bass, creating a truly immersive and dynamic sound. Enjoy powerful sound in a compact size.Philips companion appPhilips SpeakerSet Multiroom Manager app helps you set-up and manage your Philips Spotify Multiroom speakers effortlessly. Simply connect your new Philips Spotify Multiroom Speaker to your home wireless network. If you have more than one speaker, use the app togroup the speakers for Multiroom flexibility.Issue date 2022-06-03 Version: 6.0.612 NC: 8670 001 20428 EAN: 48 95185 60423 7© 2022 Koninklijke Philips N.V.All Rights reserved.Specifications are subject to change without notice. Trademarks are the property of Koninklijke Philips N.V. or their respective owners.SpecificationsSound•Volume Control: up/down•Output Power: 2 x 10WLoudspeakers•Loudspeaker types: Integrated•Built-in speakers: 4•Speaker drivers: 2 x 3" woofers, 2 x 35mm tweeters with bass portsAudio Playback•Compression format: Ogg Vorbis Connectivity•Wireless connection: Wireless LAN (802.11n), Wireless LAN(802.11g), Wireless LAN(802.11b)•Encryption / security: WEP 128 bit, WEP 64 bit, WPA, WPS-PBC, WPA2Smartphone/Tablet App•App name: SpeakerSet, Free download from AppleApp store/Google PlayAccessories•AC/DC Adaptor: 110-240V•Included accessories: Quick start guide, WorldWide Warranty leafletDimensions•Product dimensions (WxDxH): 360 x 135 x 210mm•Packaging dimensions (WxDxH): 418 x 220 x 250mm•Gross Weight: 2.82 lb•Net Weight: 2.10 kg*Spotify premium account is required for this speaker.。