LINUX ISCSI Target 服务器搭建与windows 客户端连接
- 格式:docx
- 大小:621.14 KB
- 文档页数:10

在Windows Server 2008上连接iSCSI设备在Windows Server 2008上要读取iSCSI存储设备,方式有点变化,例如系统本身已内建iSCSI Initiator,不必再额外下载,操作选项的名称和位置也略有更动,我们将告诉你改变之处。
对于在Windows环境下读取iSCSI存储网络资源的用户来说,iSCSI Initiator软件的下载与设定是必备的工作。
微软为了进一步推广与方便用户使用iSCSI资源,从Vista起便内建了iSCSI Initiator,而在最新的Windows Server 2008上,微软更对内建的iSCSI Initiator作了不少调整,让设定、读取iSCSI环境更方便。
Windows内建iSCSI Initiator藉由成本相对较低、易于建置管理等特性,IP存储局域网络(SAN)逐渐成为预算有限的企业,建置存储局域网络时的首要选择。
而在多种以IP为基础的区块存储网络协议中,iSCSI又挟其发展成熟、支持厂商众多的优势,已成为当前IP存储局域网络的代名词。
为配合iSCSI的应用,许多厂商都推出了搭配不同作业平台的iSCSI Initiator软件,让用户将自身的服务器模拟为iSCSI的发起端,读取网络上的iSCSI目标设备。
在微软方面,也从2003年底开始,陆续为各种Windows版本提供了iSCSI Initiator软件,包括Windows 2000、XP与Server 2003的使用者,都可下载微软配合x86、x64或IA64等不同硬件平台的iSCSI Initiator 软件。
为因应iSCSI应用的逐渐普及,自2007年初推出的Vista起,微软更直接在操作系统内建了iSCSI Initiator,免除了另外下载安装的麻烦。
而到了2008年初的Server 2008,同样也延续了直接内建iSCSI Initiator 的做法,使用者可在Administrator Tools中找到iSCSI Initiator的控制台程序。

一.概述本实验要搭建一个linux 系统下的iscsi 共享磁盘存储系统,实验一共用到三台机器,其中一个作为target端的存储服务器,另外两个作为client端,用来验证共享存储服务设置是否正确。
本实验用的操作系统是Red Hat Enterprise Linux 5.7 (64位),三台机器用虚拟机创建,虚拟机用的软件是VMware workstation 7.1.0 build-261024。
存储服务器target 端用的软件是redhat自带scsi-target-utils-1.0.14-1.el5.x86_64,client端用到软件也是系统自带的iscsi-initiator-utils-6.2.0.872-10.el5.x86_64。
二.搭建实验环境在虚拟机里创建包含三台机器的虚拟组,组成员在同一网段。
机器名分别为:target ip:192.168.71.133clienta ip: 192.168.71.134clinetb ip: 192.168.71.135target端另外多挂载了两个硬盘,分别为sdb和sdc。
sdb大小20G,sdc大小10G,计划sdb 共享给clienta使用,sdc共享给chientb使用。
在target机器安装scsi-target-utils-1.0.14-1.el5.x86_64# yum -y install scsi-target-utils# service tgtd start# chconfig tgtd on# netstat –anltp|grep 3260client端软件iscsi-initiator-utils-6.2.0.872-10.el5.x86_64默认系统已经安装好了,不用安装了。
三.命令行方式搭建1. 搭建基于iP的访问控制共享磁盘target端:# tgtadm -L iscsi -o new -m target -t 1 -T .redhat:sdb# tgtadm -L iscsi -o new -m target -t 2 -T .redhat:sdc# tgtadm -L iscsi -o new -m logicalunit -t 1 -l 1 -b /dev/sdb# tgtadm -L iscsi -o new -m logicalunit -t 2 -l 1 -b /dev/sdc# tgtadm –L iscsi –o show –m target //查看target配置信息绑定ip# tgtadm -L iscsi -o bind -m target -t 1 -I 192.168.71.134# tgtadm -L iscsi -o bind -m target -t 2 -I 192.168.71.135# tgtadm –L iscsi –o show –m target //查看target ip 绑定信息。
Linux作为免费的操作系统已经广泛应用在各种服务器环境中,下面我和大家分享一下怎样利用CentOS连接iSCSI存储设备。
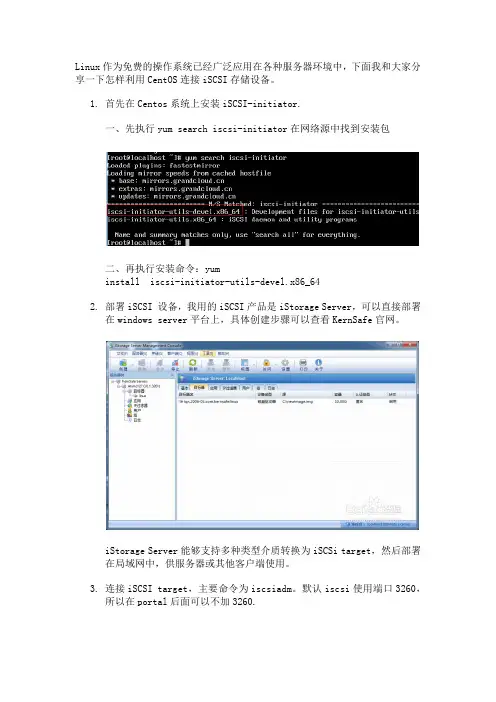
1.首先在Centos系统上安装iSCSI-initiator.一、先执行yum search iscsi-initiator在网络源中找到安装包二、再执行安装命令:yuminstall iscsi-initiator-utils-devel.x86_642.部署iSCSI 设备,我用的iSCSI产品是iStorage Server,可以直接部署在windows server平台上,具体创建步骤可以查看KernSafe官网。
iStorage Server能够支持多种类型介质转换为iSCSi target,然后部署在局域网中,供服务器或其他客户端使用。
3.连接iSCSI target,主要命令为iscsiadm。
默认iscsi使用端口3260,所以在portal后面可以不加3260.如上图,执行iscsiadm -m discovery 是发现iscsi target。
如上图,执行iscsiadm -m node -T (target名称) -p (iscsi地址:3260) -l是登录命令,切记这里是大写-T,而上面发现是小写t,大写T后面接的是target名称。
将最后的-l 改成-u 就会断开与target的连接。
执行iscsiadm -m session 可以查看所有iscsi连接。
执行上面的命令:iscsi -m node -T target名称 -p 地址 --op update -n node.startup -v automatic 就可以设置系统在启动时自动登录。
4.使用iscsi存储。
登录以后,执行fdisk -l 就会列出所有磁盘包括iscsi存储。
这个存储即为iscsi磁盘,我们可以把它当做普通磁盘来操作,执行fdisk /dev/sda可以将其格式化,创建分区等等。

在windows机器上配置和使用iSCSI协议的网络存储第1章下载和安装Initiator1.1 下载地址安装环境为windows2003 sp2下载并安装Microsoft iSCSI initiator ,地址为:/download/A/E/9/AE91DEA1-66D9-417C-ADE4-92D824 B871AF/Initiator-2.08-build3825-x86fre.exe1.2 软件安装运行软件,安装过程不用单独设置第2章Initiator的配置安装完成后,现在开始配置:2.1 运行Microsoft iSCSI Initiator 在桌面上会有Initiator的图标,点击进入操作界面2.2 登录界面Change..可以按照规范格式要求修改Initiator Node NameSecret 如果服务器端没有开启CHAP,这里不需要修改。
2.3 discovery 界面配置图中已经添加了添加过程为:2.3.1 在服务器上查找服务地址和端口(默认3260)2.3.2 客户端上添加目标服务器地址在客户端上点击add ,在窗口中填写Ip地址为服务器地址,端口为3260 默认地址。
2.3.3 高级设置里面设置部署方式点击Advanced…选择Microsoft iSCSI Initiator目标地址为本机ip地址2.3.4 其他其他不选,CHAP选项,如果服务器没有设置CHAP就不要填写。
2.4 Targets 配置界面配置完成discovery后,在这个界面上可以看到targets中有一个iSCSI服务器的服务id。
状态status 为Inactive 完成log no后如下图:点击log no…选择选中“Automaticaly restore this connection when system boots”以后永久保留target操作。
Advanced不用操作。
点击ok 开始系统连接如果已经连接会提示:5 persistent targets 界面配置Targets log no 后,在这里会有出现已经选择的target 连接,显示的为网络存储的服务名称。
iscsi共享存储使用方法:
iscsi-target 服务器地址 192.168.6.198:3260
linux平台使用方法:
确保iscsid服务已经启动
servier iscsid start
发现存储
iscsiadm -m discovery -t st -p 192.168.6.198:3260登录存储
iscsiadm -m node -T 上面发现的存储名称 –login
登出存储
iscsiadm -m node -T 已经登录的存储名称 –logout
或者 iscsiadm -m node –logoutall=all (登出所有存储)
存储登录后,就可以进行使用了
使用 fdisk 或者 parted 进行分区, mount挂载使用即可。
windows平台使用方法
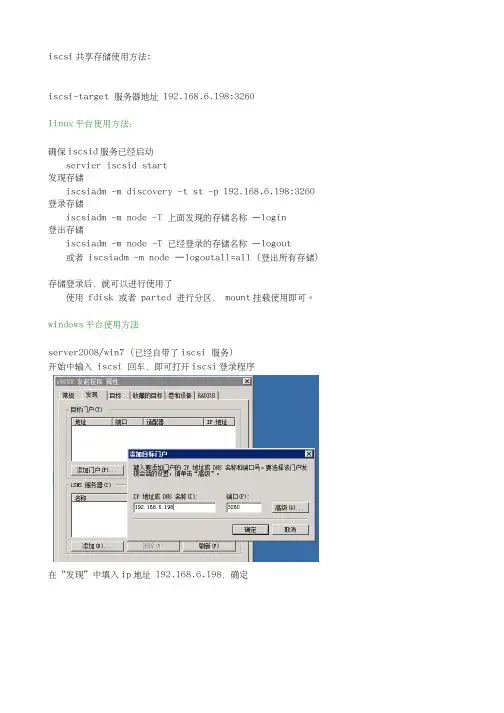
server2008/win7 (已经自带了iscsi 服务)
开始中输入 iscsi 回车,即可打开iscsi登录程序
在“发现”中填入ip地址 192.168.6.198,确定
在“目标”中选择需要的目标,点击“登录”。
此时,已经可以在磁盘管理中发现共享存储了
如上图,磁盘1即共享存储,可以进行分区、格式化等操作。
winxp等比较旧的windows操作系统,需要安装“Initiator-2.08-build3825-x86fre”,完成后会在“程序”中出现一个MicroSoft Iscsi Initator的程序,(使用方法和server2008的iscsi 相同)。

Openfiler 虚拟存储搭建并配置服务端一、概述Openfiler 由rPath Linux驱动,它是一个基于浏览器的免费网络存储管理实用程序,可以在单一框架中提供基于文件的网络连接存储 (NAS) 和基于块的存储区域网(SAN)。
整个软件包与开放源代码应用程序(例如 Apache、Samba、LVM2、ext3、Linux NFS 和 iSCSI Enterprise Target)连接。
Openfiler 将这些随处可见的技术组合到一个易于使用的小型管理解决方案中,该解决方案通过一个基于 Web 且功能强大的管理界面实现。
二、配置使用启动openfiler后,在这里有提示我们通过web进行访问。
并且提示了访问的地址如:Https://192.168.137.100:446/. 默认账户是openfiler密码为password. 我们登陆之后可以修改用户的密码。
一)存储端(target)配置【iscsi裸设备】1.1启动服务在Service里面启动iscsi target。
启动之后,下次重启会自动启该服务。
1.2配置iscsi initiator访问IP只有配置了IP才有权限访问openfiler存储。
在system选项的最下面有配置选项,把IP写上即可。
注意这里的子网掩码,写的255.255.255.255。
1.3创建卷设备现在我们来配置共享设备。
先对我们没有格式的分区格式化成扩展分区,一定要扩展分区:[root@san ~]# fdisk /dev/sdaThe number of cylinders for this disk is set to 5221.There is nothing wrong with that, but this is larger than 1024,and could in certain setups cause problems with:1) software that runs at boot time (e.g., old versions of LILO)2) booting and partitioning software from other OSs(e.g., DOS FDISK, OS/2 FDISK)Command (m for help): nCommand actione extendedp primary partition (1-4)ePartition number (1-4): 3First cylinder (383-5221, default 383):Using default value 383Last cylinder or +size or +sizeM or +sizeK (383-5221, default 5221):Using default value 5221Command (m for help): wThe partition table has been altered!Calling ioctl() to re-read partition table.WARNING: Re-reading the partition table failed with error 16: Device or resource busy.The kernel still uses the old table.The new table will be used at the next reboot.Syncing disks.[root@san ~]# fdisk -lDisk /dev/sda: 42.9 GB, 42949672960 bytes255 heads, 63 sectors/track, 5221 cylindersUnits = cylinders of 16065 * 512 = 8225280 bytesDeviceBoot Start End Blocks Id System /dev/sda1 * 1 255 2048256 83 Linux /dev/sda2 256 382 1020127+ 82 Linux swap / Solaris /dev/sda3 383 5221 38869267+ 5 Extended格式化之后,我们在openfiler的网页中就能看到这个磁盘信息,如果不格式化,或者格式化错误,是无法编辑的。
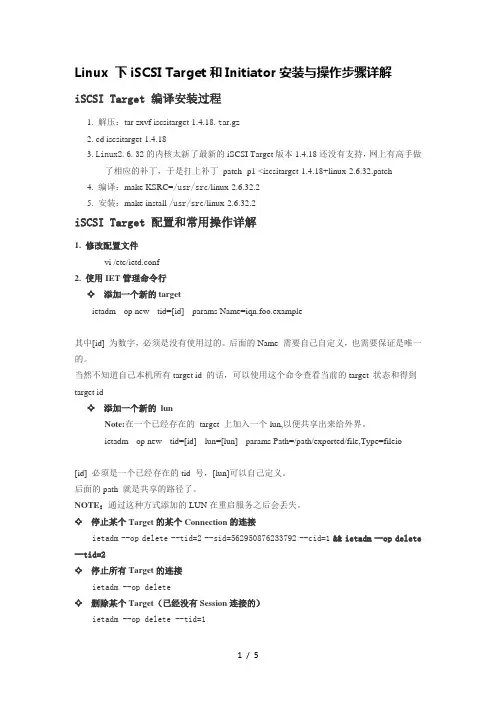
Linux 下iSCSI Target和Initiator安装与操作步骤详解iSCSI Target 编译安装过程1. 解压:tar zxvf iscsitarget-1.4.18.t ar.gz2. cd iscsitarget-1.4.183. Linux2.6.32的内核太新了最新的iSCSI Target版本1.4.18还没有支持,网上有高手做了相应的补丁,于是打上补丁patch -p1 <iscsitarget-1.4.18+linux-2.6.32.patch4. 编译:make KSRC=/usr/src/linux-2.6.32.25. 安装:make install /usr/src/linux-2.6.32.2iSCSI Target 配置和常用操作详解1. 修改配置文件vi /etc/ietd.conf2. 使用IET管理命令行✧ 添加一个新的targetietadm --op new --tid=[id] --params Name=iqn.foo.example其中[id] 为数字,必须是没有使用过的。
后面的Name 需要自己自定义,也需要保证是唯一的。
当然不知道自己本机所有target id 的话,可以使用这个命令查看当前的target 状态和得到target id✧ 添加一个新的lunNote:在一个已经存在的target 上加入一个lun,以便共享出来给外界。
ietadm --op new --tid=[id] --lun=[lun] --params Path=/path/exported/file,Type=fileio[id] 必须是一个已经存在的tid 号,[lun]可以自己定义。
后面的path 就是共享的路径了。
NOTE:通过这种方式添加的LUN在重启服务之后会丢失。
✧ 停止某个Target的某个Connection的连接ietadm --op delete --tid=2 --sid=562950876233792 --cid=1&& ietadm --op delete --tid=2✧ 停止所有Target的连接ietadm --op delete✧ 删除某个Target(已经没有Session连接的)ietadm --op delete --tid=1上面列出了ietadm常用的命令,关于ietadm 其余的命令,大家可以使用ietadm --help 来查看更多的指令。


我们利用ISCSI Target软件在WSS2008上创建了两个ISCSI虚拟磁盘,在本文中我们将为大家介绍Server1和Server2如何访问这些ISCSI虚拟磁盘。
Server1和Server2可以使用ISCSI协议访问WSS2008上的虚拟ISCSI磁盘,由于Windows Server 2008已经内置了ISCSI协议,因此我们无需在Server1和Server2上安装ISCSI客户端软件。
如果Server1和Server2的操作系统是Window s Server 2003,那我们就需要在Server1和Server2上安装ISCSI发起程序了。
在SM里创建array 划分lun ,步骤就不细述了。
然后在SM里设定好连接的ISCSI口的IP ,如下图:我们以Server1为例为大家演示如何在Windows Server 2008 R2上访问ISCSI磁盘,我们在Server1的“控制面板(Control Panel)―管理工具(Administrative Tools)―Administrative Tools中执行"ISCSI Initiator"。
如下图所示,系统提示我们ISCSI服务尚未运行,是否需要启动IS CSI服务并将服务设置为自动启动,我们选择"Yes"。
如下图所示,在ISCSI Initiator的Target标签中,我们输入wss2008,这个名称只是用于描述ISCSI目标,大家可以随便设置。
如下图所示,在ISCSI Initiator的"Discovery"标签中,点击"Discover Portal"。
然后在"Discover Target Portal"中输入WSS2008的IP地址192.168.1.104(此IP根据SM里ISCSI端口的设置输入),端口使用默认的3260即可。
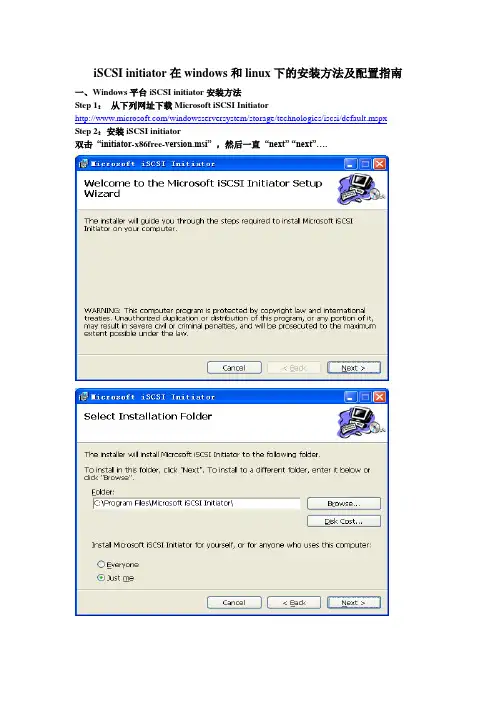
iSCSI initiator在windows和linux下的安装方法及配置指南一、Windows平台iSCSI initiator安装方法Step 1:从下列网址下载Microsoft iSCSI Initiator/windowsserversystem/storage/technologies/iscsi/default.mspx Step 2:安装iSCSI initiator双击“initiator-x86free-version.msi” ,然后一直“next” “next”….Step3:iSCSI配置文件注:开始配置之前,确保主机的IP设置,使主机能够连接上RAStor4000控制器,即在一个子网段内,互相能够ping通。
双击桌面上的“Microsoft iSCSI Initiator”图标。
出现如下界面:该界面是用来添加Target,稍后进行配置。
首先,切换到“Initiator Settings”属性页,如下图所示,记下nitiator node name,这个ID 便是将来RAStor4000中添加主机时所需要使用的WWN,也可以自己改变,但要保证是唯一的。
由于该主机为NF280,主机名为nf280,因此系统会自动给出initiator node name为“.microsoft:nf280”。
然后返回开始属性页“Target Portals”,通过单击“Add。
”,添加RAStor4000的控制器IP,如下图:其中“192.168.0.1”为RAStor4000的控制器0 IP地址,3260为默认的iscsi service端口号。
单击“Advanced…”可以设置连接方式,也可以设置为default。
source IP选择initiator主机的IP Address:192.168.0.5设置完,单击确定,再单击“Add Target Portal”对话框中的OK,进入如下界面:添加完成后,激活Target,激活会话,需要完成以下几步:单击“Log On…”选择第一个复选框,暂时不选择多路径,单击OK。
作者简介:MCSE、MCDBA、RHCE,从事软件开发(Delphi、Java)、项目管理、系统集成工作。
曾参与多个基于Windows及Linux的大型系统集成项目,并在国内多个知名IT 网站发表技术类文章。
iSCSI是internet Small Computer System Interface的缩写,又称为IP-SAN,是一种基于因特网及SCSI-3协议下的存储技术,由IETF提出,并于2003年2月11日成为正式的标准。
iSCSI的目的是为了用IP协议将存储设备连接在一起。
通过在IP网上传送SCSI命令和数据,iSCSI推动了数据在网络之间的传递,同时也促进了数据的远距离管理。
由于其出色的数据传输能力,iSCSI协议被认为是促进存储区域网(SAN)市场快速发展的关键因素之一。
因为IP网络的广泛应用,iSCSI能够在LAN、WAN甚至Internet上进行数据传送,使得数据的存储不再受地域的现在。
iSCSI技术的核心是在TCP/IP网络上传输SCSI协议,即使用TCP/IP报文和iSCSI报文封装SCSI报文,使得SCSI命令和数据可以在普通以太网络上进行传输,如下图所示。
iSCSI的工作过程:当iSCSI主机应用程序发出数据读写请求后,操作系统会生成一个相应的SCSI命令,该SCSI命令在iSCSI initiator层被封装成ISCSI消息包并通过TCP/IP 传送到设备侧,设备侧的iSCSI target层会解开iSCSI消息包,得到SCSI命令的内容,然后传送给SCSI设备执行;设备执行SCSI命令后的响应,在经过设备侧iSCSI target层时被封装成ISCSI响应PDU,通过TCP/IP网络传送给主机的ISCSI initiator层,iSCSI initiator会从ISCSI响应PDU里解析出SCSI响应并传送给操作系统,操作系统再响应给应用程序。
iet(iSCSI Enterprise Target)是Linux下的iSCSI Target实现,open-iscsi是Linux下的iscsi initiator实现,使用iet(官方网站:)和open-iscsi就可以方便的实现简单的IPSAN,同时iet也可以和其他系统的iscsi initiator配合使用。
centos挂载windowsserveriscsi存储1 登陆 Linux服务器1.1 安装 initiator[root@localhost ~]# yum -y install iscsi-initiator-utils1.2 启动服务[root@localhost ~]# service iscsid start1.3 设置开机启动[root@localhost ~]# chkconfig iscsid on[root@localhost ~]# chkconfig iscsi on2登录存储服务器172.18.79.77配置存储服务器步骤 1 操作系统登录后⾃动启动服务器管理器,在服务器管理器导航树中选择“仪表板 > 添加⾓⾊和功能”。
步骤 2 在“添加⾓⾊和功能向导”窗⼝中默认显⽰“开始之前”页⾯,单击“下⼀步”。
步骤 3 在“安装类型”页⾯选中“基于⾓⾊或基于功能的安装”,单击“下⼀步”。
步骤 4 在“服务器选择”页⾯选中“从服务器池中选中服务器”并选中本地服务器,单击 “下⼀步”。
步骤 5 安装 iSCSI ⽬标服务器。
1. 在“服务器⾓⾊”页⾯显⽰已安装和待安装的⾓⾊及其功能。
在“⾓⾊”区域选择“⽂件和存储服务 > ⽂件和 iSCSI 服务 > iSCSI ⽬标服务器”,单击“下⼀步”。
2. 在“功能”页⾯直接单击“下⼀步”。
3. 在“确认”页⾯确定信息⽆误后,单击“安装”。
4. 在“结果”页⾯显⽰安装成功后,单击“关闭”。
5. 在右侧“服务器”区域选择本地服务器后单击右键,菜单中的“iSCSI ⽬标设置” 显⽰为⿊⾊,说明 iSCSI ⽬标服务器添加成功。
6. 在右侧“服务”区域中能够查看到“Microsoft iSCSI Software Target”的服务已经⾃动启动运⾏。
步骤 6 创建 iSCSI 虚拟磁盘和 iSCSI ⽬标。
1. 在服务器管理器导航树中选择“⽂件和存储服务 > iSCSI”。
使用VMware ESXi 5.1搭建VMware虚拟化平台四、配置iSCSI目标服务器拓扑规划任务目标使用Starwind iSCSI SAN 6.0在Window上搭建iSCSI目标服务器,在Windows 7客户端上使用iSCSI发起程序连接到iSCSI存储。
项目实施1、安装Starwind iSCSI SAN 6.0(1)运行Starwind 6.0的安装程序,开始安装Starwind iSCSI SAN & NAS 6.0,如图1-120所示。
提示:如果在Windows Server 2003或Windows XP中安装Starwind,需要先安装iSCSI Initiator。
Windows Server 2008、Windows 7或更高版本默认集成了iSCSI Initiator,直接安装Starwind就可以。
(2)使用“Full Installation”,安装所有组件,如图1-121所示。
图1-120 安装Starwind 图1-121 选择所有组件(3)要使用Starwind,必须要有授权密钥。
可以在Starwind的官方网站申请一个免费的密钥,然后选择“Thank you,I do have a key already”,如图1-122所示。
(4)浏览找到授权密钥文件,如图1-123所示。
图1-122 选择已经拥有授权密钥图1-123 选择授权密钥文件(5)安装完成后会自动打开Starwind Management Console,并连接到本机的Starwind Server,如图1-124所示。
如果没有连接Starwind Server,可以选中计算机名,单击Connect。
图1-124 Starwind Management Console2、创建iSCSI Software Target(1)选择Targets Add Target,添加iSCSI目标,如图1-126所示。
使⽤iSCSI协议挂载⽹络磁盘,电脑瞬间扩⼤⼀个T的容量!前⾔不知道有多少⼈在家⾥搭建中央存储设备的,也就是NAS。
这个东西在我⽇常⽣活中,存储了⼤量的个⼈资料,家⼈们的照⽚,技术的资料,还有各种⾼清影视剧。
搭配公⽹的IP,可以真正做到,任何时候任何地点的读取资料的需求。
我之前玩NAS写过⼀篇基础性的介绍⽂章,包括公⽹的申请和端⼝映射,有兴趣的⼩伙伴可以读下:然⽽使⽤NAS⼀段时间后,虽然可以随时随地的对⽂件进⾏读取和保存。
但是我发现还是有很多不⽅便的地⽅。
⽐如我电脑⾥的⼀个资料在公⽹环境要从NAS读取(注意是公⽹,内⽹其实怎么样都⾏),碰到了以下⼏个⿇烦:1.打开NAS的管理界⾯,进⾏授权登陆,把⽂件下载到本地运⾏。
如果⽂件⼩倒还没事,如果⽂件体积⼀⼤,⽐如⼀部电影20个G,那我必须等电影全部下载到本地才可以观看。
2.群晖NAS提供了Synology driver⽂件同步⼯具,每台电脑上需要装⼀个客户端软件,A电脑同步上去,B电脑启动时还要等待Synology driver同步下来才能使⽤⽂件。
我总觉得这种⽅式虽然可⾏,但还是太⿇烦,还要通过第三⽅同步软件的⽀持才可以⽤。
不原⽣。
3.如果是通过ftp,sftp等这种⽅式进⾏挂载访问,也是⼀样的问题。
⽆⾮就是把⽹页的授权登陆换成了ftp的授权。
⽽且ftp好像也不⽀持流⽅式的读取,电影⽆法直接读取播放。
4.⾄于smb协议⽅式,把smb映射到公⽹存在安全隐患。
况且smb的传输效率也很低。
所以我后来都采⽤webdav协议进⾏挂载,把nas挂载成本地的⼀个⽹络硬盘进⾏访问。
这种⽅式我⼀直觉得是最好的⽅式,因为相当于直接在本地进⾏了NAS磁盘的操作。
也能以流的⽅式播放影视资源。
多台电脑,也能同时挂载,这⾥存进去,那⾥就能实时读取到。
相当便捷。
但是在使⽤webdav的时候我也发现⼀些弊端,⽐如有些软件或者游戏是不⽀持直接装在⽹络磁盘⾥的。
我于是就想,如果系统能把⽹络磁盘当做是⾃⼰本地的磁盘。
EXPRESSCLUSTER X for Windows Quick Start Guide for iSCSI Target ServerVersion 1July, 2016DisclaimerThe contents of this document are subject to change without notice. NEC Corporation assumes no responsibility for technical or editorial mistakes in or omissions from this document. T o obtain the benefits of the product, it is the customer’s responsibility to install and use the product in accordance with this document. The copyright for the contents of this document belongs to NEC Corporation. Copying, altering, or translating this document, in full or in part, without the permission of NEC Corporation, is prohibited.Trademark InformationInformation in this document is subject to change without notice. No part of this document may be reproduced or transmitted in any form or by any means, electronic or mechanical, for any purpose, without the express written permission of NEC Corporation.Microsoft® and Windows® are registered trademarks of Microsoft Corporation.Other system names, company names, and product names are trademarks and registered trademarks of their respective companies.Contents1About This Guide (4)1.1Using This Guide (4)1.2Revision History (4)1.3Evaluation Environment (4)1.4For More Information (4)2Overview (6)3System Requirements and Planning (7)3.1System Requirements (7)3.2System Planning (7)4EXPRESSCLUSTER X Installation (9)4.1Install EXPRESSCLUSTER X on the Primary Server (9)4.2Install EXPRESSCLUSTER X on the Secondary Server (10)4.3Restart the Primary and Secondary Servers (10)4.4Confirm Connectivity between Servers (10)5Base Cluster Setup (11)5.1Start WebManager (11)5.2Create a Cluster (11)5.3Set Up the Network Configuration (11)5.4Create a Failover Group (12)5.5Create Resources for Base Cluster (12)5.6Upload the Cluster Configuration and Start Cluster (13)6iSCSI Target Server Installation (15)6.1Install iSCSI Target Server on the Primary Server (15)6.2Install iSCSI Target Server on the Secondary Server (16)7iSCSI Target Server Cluster Setup (18)7.1Add the First Set of Scripts (18)7.2Add the Second Set of Scripts (19)7.3Change Dependency of Resources (19)7.4Upload the Cluster Configuration (20)8iSCSI Initiator Setup (21)9Appendix (22)9.1Test Cluster and Verify Functionality (22)9.2Example System Planning Worksheet (22)1 About This Guide1.1 Using This GuideThis guide provides a hands-on “Quick Start” set of instructions to createActive/Standby cluster system for iSCSI T arget Server withEXPRESSCLUSTER X for Windows. The guide assumes users haveMicrosoft Windows system administration knowledge and skills withexperience in installation and configuration of Microsoft Windows operatingsystems, networks, and iSCSI T arget Server.1.2 Revision History1.3 Evaluation EnvironmentThis iSCSI T arget Server clustering method has been evaluated with thefollowing OS and software.●Windows Server 2012 R2●EXPRESSCLUSTER X 3.3 for Windows1.4 For More InformationWe have the following guides for instant support.●Getting Started Guide– This guide explains general cluster conceptsand overview of EXPRESSCLUSTER X functionality.●Installation and Configuration Guide– This guide explainsEXPRESSCLUSTER X installation and configuration procedures indetail.●Reference Guide– This is a reference of commands that can be put inEXPRESSCLUSTER X scripts and maintenance commands that can beexecuted from the server command prompt.The guides listed above can also be found at/en/global/prod/expresscluster/en/support/manuals.html2 OverviewThe general procedure to deploy EXPRESSCLUSTER X on two servers (referred to as Primary and Secondary), each with an iSCSI virtual disk which is mirrored between the servers, consists of the following major steps:1. Perform system planning to determine requirements and specify configurationsettings prior to the start of actual system installation and configuration.2. Prepare the Secondary server, including OS installation and configuration.3. Set up a Data Partition and Cluster Partition on both servers according toinstructions in the EXPRESSCLUSTER X Installation and ConfigurationGuide.4. Install and configure EXPRESSCLUSTER X on the Primary and Secondaryserver.5. Create and configure the EXPRESSCLUSTER X failover group to enablecontinuous protection and automatic recovery of the iSCSI virtual disk.6. Upload the configuration file and start the cluster to complete deployment.3 System Requirements and Planning3.1 System RequirementsBoth Windows Server 2012 R2 servers in the cluster require the installationof the iSCSI T arget Server service. It can be installed using the Add Rolesand Features Wizard in Server Manager, under the File and StorageServices section.3.2 System PlanningFill out the tables of the worksheet below to use for reference in theconfiguration sections of this guide. See also 9.2Example SystemPlanning Worksheet for an example worksheet.Machine #1: Primary Server (with iSCSI T arget Server)Machine #2: Secondary Server (with iSCSI Target Server)Machine #3: T est Client Machine (with iSCSI Initiator)Floating IP (FIP) Address:Virtual Computer Name (vcom):iSCSI Target Name:1MDC (Mirror Disk Connect) is network for data mirroring.4 EXPRESSCLUSTER X Installation4.1 Install EXPRESSCLUSTER X on the Primary Server1. Insert the EXPRESSCLUSTER X CD-ROM into a CD-ROM drive on theserver.2. In the pop-up window, click NEC EXPRESSCLUSTER for Windows.3. Click on NEC EXPRESSCLUSTER X 3.x for Windows.4. In the Welcome window, click Next.5. In the Choose Destination Location window, click Next.6. In the next window, click Install.7. In the Port Number window, if necessary, modify the default portnumbers. Click Next.8. In the Filter Settings of Shared Disk window, click Next.9. Click Yes in the Confirmation window to skip shared disk filtering.10. In the License Manager window, click Register.11. In the License Registration window, click Register with LicenseInformation.12. In the Product Selection window, select the OS and Product/Trialtypes. For Product Name, click EXPRESSCLUSTER X 3.x forWindows. Click Next.13. In the License Unit Selection window, depending on the type of license,enter the number of CPU or Node Units. Click Next.14. In the License Key Entry window, enter the Serial No. and LicenseKey. Click Next.15. In the License Registration Confirmation window, confirm theinformation entered is correct. Click Next.16. Click OK. If the license registration fails, start again from step 10.17. Repeat steps 10 – 16 again for the EXPRESSCLUSTER X Replicator3.x for Windows product license. Select EXPRESSCLUSTER XReplicator 3.x for Windows as the Product Name in step 12.18. When the licenses have been successfully registered, click Finish.19. On the InstallShield Wizard Complete window, click the No, I willrestart my computer later option button, and then click Finish.20. In the next window, click Exit. Click Exit. (Two times total).4.2 Install EXPRESSCLUSTER X on the SecondaryServerPerform all of the step s in Section 4.1 on the Secondary Server.4.3 Restart the Primary and Secondary ServersFirst restart the Primary Server, and then restart the Secondary Server.4.4 Confirm Connectivity between ServersPing the servers in the cluster to verify that there are no issues inconnectivity. Also be sure that the ports used by EXPRESSCLUSTER are able to communicate through the Windows Firewall.5 Base Cluster Setup5.1 Start WebManagerVerify that Java Runtime Environment (JRE) is installed on a machine to beused for cluster management. See the installation requirements section ofthe EXPRESSCLUSTER X Getting Started Guide for a compatible version.For this guide, use the Primary Server for cluster management. Install JREif necessary. Then start by accessing port 29003 of the Primary Serverfrom the web browser of the cluster management machine, using thePrimary Server’s IP address. Example: http://10.0.0.2:29003. When thesecurity warning window displays, select the Always trust content fromthis publisher check box. Click Run.5.2 Create a ClusterFor all of the steps in the cluster creation project, refer to Table 1 for the IPaddresses and server names.1. When the cluster manager is opened for the first time, there is a pop-upwindow with two options. Click Start cluster generation wizard.2. In the confirmation window, click Start Cluster Generation Wizard forstandard edition.3. In the new window, type a Cluster Name (Example: iscsi_cluster), andclick Next.4. In the next window, to add another server to the cluster, click Add.5. Type the Server Name or the IP Address of Secondary Server, andthen click OK.6. Both servers are now on the list. If the Primary Server is not in the top(Master Server) position, then move it up. Click Next.5.3 Set Up the Network Configuration1. EXPRESSCLUSTER X automatically detects the IP addresses of theservers. The primary network (Interconnect) is for heartbeat andmirroring the data; set the MDC on this row as mdc1. The secondary(Public) network is for heartbeat only. Click Next.2. In the NP Resolution window, click Next.5.4 Create a Failover Group1. T o add a group, in the Cluster Generation Wizard, in the Group section,click Add.2. In the next window, select failover for group Type. Name the group(Example: iscsi_failover), click Next, and then click Next. (Two timestotal).3. Select the default options for the Group Attribute Settings, and thenclick Next.5.5 Create Resources for Base Cluster1. In the Group Resource section of the Cluster Generation Wizard, toadd a resource, click Add.2. T o add a floating IP address resource, from the Type drop down menu,select floating ip resource, and then click Next.3. Verify the Follow the default dependency box is selected, and thenclick Next.4. Verify the default options are correct, and then click Next.5. Enter the floating IP address in the IP Address field and click Finish.6. Add a virtual computer name resource by clicking Add.7. From the Type drop down menu, select virtual computer nameresource, and then click Next.8. Uncheck the Follow the default dependency box.9. Select the recently created floating ip resource in the right pane andclick Add. Click Next.10. Verify the default options are correct, and then click Next.11. Enter the Virtual Computer Name chosen earlier (Example: vcom).12. From the drop down menu under Target FIP Resource Name, selectthe floating IP address. Click Finish.13. Add a mirror disk resource by clicking Add.14. Click Get License Info to retrieve the active license for replication. (Notethat there is no visible indication that it was successful).15. T o add a mirror disk resource, from the Type drop down menu, selectmirror disk resource, and then click Next.16. Verify the Follow the default dependency box is selected, and thenclick Next.17. Verify the default options are correct, and then click Next.18. Select the Primary Server name and click Add.19. Click Connect to populate the server partitions.20. Select the drive letter of the data partition for mirroring (Example: X) inthe Data Partition box, and the drive letter of the cluster partition(Example: W) in the Cluster Partition box. Click OK.Note:Specify different partitions for data partition and cluster partition. If thesame partition is specified, data on the mirror disk may be corrupted.21. Repeat steps 18 – 20 for the Secondary Server.22. Click Finish.23. Click Finish, and then click Next.24. Click Finish.25. Click Yes to enable recovery action when an error occurs in a monitorresource.5.6 Upload the Cluster Configuration and Start Cluster1. In the Cluster Manager window, click the File menu and then Apply theConfiguration File. Click OK. Click OK. (Two times total).2. After the upload is complete, change from Config Mode to OperationMode.3. Restart Cluster Manager. Click the Service menu, and then clickRestart Manager. Click OK.4. Click the Service menu, and then click Start Cluster. Click OK.5. When the cluster tree displays after a few seconds, in the left pane of theCluster Manager window, expand the %failover group% section, rightclick %mirror disk%, and click Details to monitor the disksynchronization progress. Mirror disk copy starts automatically,replicating data from the Primary Server to the Secondary Server.Note:This step may take a while depending on the size of the data on themirror disk partition.6. After the copy completes, in the Mirror Disk Helper window, clickClose.7. In the Cluster Manager window, all icons in the tree view should now begreen. Refer to the figure below:8. Move the %failover group% to the Secondary Server to verify that allgroup resources and monitor resources can be activated on Secondary Server. After verification, move the %failover group% back to thePrimary Server.Note:These tests do not affect server functionality. It verifies that the mirror disks on each server in the cluster are functioning properly. The mirror disk is now controlled by EXPRESSCLUSTER X and is only accessible from the active server.6 iSCSI Target Server Installation6.1 Install iSCSI Target Server on the Primary ServerDo the following steps to install iSCSI T arget Server.1. Open a PowerShell window with Administrative rights.2. If iSCSI T arget Server role has not been installed, enter the followingcommand.3. Create a directory on the mirror disk for the iSCSI virtual disk (Example:X:¥iSCSIVirtualDisks).4. Run the following command to create a virtual disk.Example:5. Run the following command to create an iSCSI T arget.Example:6. Run the following command to change iSCSI T arget IQN.Example:7. Run the following command to assign the VHDX to the T arget.Example:8. Run the following command to stop Microsoft iSCSI Software Targetservice (wintarget).6.2 Install iSCSI Target Server on the Secondary ServerDo the following steps to install iSCSI T arget Server.1. Move the %failover_group% to the Secondary Server.2. Open a PowerShell window with Administrative rights on theSecondary Server.3. If iSCSI T arget has not been installed, enter the following command.4. Run the following command to import iSCSI virtual disk (VHDX).Example:5. Run the following command to create an iSCSI T arget (using the samename on Primary Server).Example:6. Run the following command to change iSCSI T arget IQN.Example:7. Run the following command to assign the VHDX to the T arget.Example:8. Run the following command to stop Microsoft iSCSI Software Targetservice (wintarget).7 iSCSI Target Server Cluster Setup7.1 Add the First Set of Scripts1. Download the script files for iSCSI T arget Server clustering from theEXPRESSCLUSTER web site./en/global/prod/expresscluster/en/support/Setup.html2. Unzip sample_scripts_iSCSIT arget.zip and check if there are followingfolders and files.script-wintarget1Control-Wintarget.ps1start.batstop.batscript-wintarget2Control-Wintarget.ps1start.batstop.bat3. Start the EXPRESSCLUSTER X Cluster Manager.4. In the Cluster Manager window, change to Config Mode.5. Right-click on the %failover group%, and then click Add Resource.6. From the Type drop down menu, select script resource. As theresource Name, enter script-wintarget1. Click Next.7. Uncheck the Follow the default dependency box, and then click Next.8. Verify the default options are correct, and then click Next.9. Select start.bat in the left pane and click the Replace button.10. Navigate to the scripts that were downloaded, open thescript-wintarget1 folder, select the new start.bat file, and click Open.11. Click Yes to replace.12. Select stop.bat in the left pane and click the Replace button.13. Navigate to the scripts that were downloaded, open thescript-wintarget1 folder, select the new stop.bat file, and click Open.14. Click Yes to replace.15. Click Add button.16. Navigate to the scripts that were downloaded, open thescript-wintarget1 folder, select the Control-Wintarget.ps1 file, andclick Open.17. Click OK to add.18. Click the Tuning button.19. Enter 0 for Normal Return Value for the start and stop sections. ClickOK.20. Click Finish.7.2 Add the Second Set of Scripts1. Right-click on the %failover group%, and then click Add Resource.2. From the Type drop down menu, select script resource. As theresource Name, enter script-wintarget2. Click Next.3. Uncheck the Follow the default dependency box.4. Select the %mirror disk% resource in the right pane and click Add.Click Next.5. Verify the default options are correct, and then click Next.6. Select start.bat in the left pane and click the Replace button.7. Navigate to the scripts that were downloaded, open thescript-wintarget2 folder, select the new start.bat file, and click Open.8. Click Yes to replace.9. Select stop.bat in the left pane and click the Replace button.10. Navigate to the scripts that were downloaded, open thescript-wintarget2 folder, select the new stop.bat file, and click Open.11. Click Yes to replace.12. Click Add button.13. Navigate to the scripts that were downloaded, open thescript-wintarget2 folder, select the Control-Wintarget.ps1 file, andclick Open.14. Click OK to add.15. Click the Tuning button.16. Enter 0 for Normal Return Value for the start and stop sections. ClickOK.17. Click Finish.7.3 Change Dependency of Resources1. Click on the %failover_group% in the left pane.2. Select the Resources tab in the right pane.3. Right-click on the %mirror_disk% resource and select Properties.Select the Dependency tab and uncheck Follow the defaultdependency. Select script-wintarget1 in the right pane, and click Add.Click OK.4. Right-click on the %fip% resource and select Properties. Select theDependency tab and uncheck Follow the default dependency. Selectscript-wintarget2 in the right pane, and click Add. Click OK.5. Click the Entire Dependency tab in the right pane and check the7.4 Upload the Cluster Configuration1. In the Cluster Manager window, click the File menu, and then Apply theConfiguration File. Click OK on confirmation message popup. If theupload ends successfully, click OK.2. After the upload is complete, change to the Operation Mode.3. Right-click on the %failover_group% and select Start. Select thePrimary Server to start the group on and click OK.8 iSCSI Initiator SetupThis chapter shows iSCSI Initiator setup example with Windows OS (ex.Windows Server 2012 R2, Windows 7).1. Logon the client machine.2. Open Control Panel.3. Click iSCSI Initiator.4. Enter the floating IP address (ex. 10.0.0.4) for Target on T argets tab and clickQuick Connect.5. Check if the iSCSI T arget IQN shows on Discovered targets and Status isConnected.6. Open Disk Management (diskmgmt.msc) and initialize disk.7. Format disk and check if it is available to create folders and files.Note:This iSCSI T arget clustering method is NOT suitable as a shared disk forWindows Server Failover Cluster (WSFC). Because it is needed to recover iSCSI Initiator connection manually on WSFC environment after failover.Note:When Linux iSCSI Initiator is used, it is recommended to increase the disktimeout. If it takes longer than disk timeout to complete failover/failback, thedevice that provided by iSCSI T arget will be remounted with read-only mode and it is needed to dismount and mount the device manually to clear read-only mode.9 Appendix9.1 Test Cluster and Verify Functionality9.1.1 Move the Failover Group1. Using Cluster Manager, move the %failover_group% from thePrimary Server to the Secondary Server. Verify that the iSCSIInitiator on the client maintains its connection to the iSCSI T arget,which is now on the Secondary Server, and that the iSCSI virtualdisk can be accessed by the client.2. Move the %failover_group% back to the Primary Server. Verifythat the iSCSI Initiator on the client maintains its connection to theiSCSI T arget, which is now back on the Primary Server, and thatthe iSCSI virtual disk can be accessed by the client.9.1.2 Failover on Server Shutdown1. Shutdown the Primary Server manually or through ClusterManager. This will initiate an automatic failover to the SecondaryServer. The iSCSI Initiator on the client should maintain itsconnection to the iSCSI T arget which is now on the SecondaryServer. The iSCSI virtual disk should still be accessible by theclient.2. Return the Primary Server to the cluster by turning its power backon. Move the %failover_group% back to the Primary Server.9.2 Example System Planning WorksheetMachine #1: Primary ServerMachine #2: Secondary ServerMachine #3: T est Client MachineFloating IP (FIP) Address: 10.0.0.4 Virtual Computer Name (vcom): vcom iSCSI Target Name: Target1。
附录Ⅰ:Windows 上启动器的安装及使用微软为了支持iSCSI 应用,提供了标准的iSCSI 客户端,也叫iSCSI 启动器,软件的最新版本可以从网址/downloads 下载;在本机的随机光盘中,包含了本软件的Initiator-2.04-build3273-x86fre 版本,可以直接安装使用。
下面以2.04 版本为例来说明。
直接点击软件的安装文件,运行后出现安装界面。
直接点击【下一步】把installation options 的复选框都选中,然后再点【下一步】,【I Agree】就开始安装了。
安装完成后点【完成】即可。
安装成功后在桌面生成一个图标,如下:图Ⅰ-1 Microsoft iSCSI Initiator双击图标运行客户端,出现客户端界面,选中General 选项卡,这里可以设置win-initiator 的节点名,如果您想在登录目标器时使用双向CHAP 认证方式,您需要在这里设置initiator 验证目标器的密码,点击【Secret】按钮会弹出一个设置对话框,填入一个长度为12-16 字节的密码,点击【ok】即可。
43图Ⅰ-2 win-initiator 设置选中Discovery 选项卡,如图Ⅰ-3 所示。
图Ⅰ-3 win-initiator 设置Target Portals 用来显示目标器信息,和target 端建立联系。
iSNS Severs 是名字服务器的相关设置。
首先点击Target Portals 中的【Add】按钮,在弹出的对话框中填入目标器IP 地址,如图Ⅰ-4,端口使用默认值3260,点击【ok】按钮即可,这时如44果弹出Connection Failed 警告信息,就说明连接不成功,请检查您的网络连接是否畅通,您的目标器端设置的限制Initiator 连接的IP 是否正确。
如果没有弹出此对话框说明操作成功,可以进入下一步登录了。
图Ⅰ-4 win-initiator 发现目标器选中Targets 复选框,就会看到如图Ⅰ-5 所示,您所连接目标端的所有可用的目标器,但状态(status)是inactive ,单击下面的【Log On】按钮。
Linux ISCSI 服务器搭建与客户机ISCSI 连接
ISCSI 简介:
iSCSI 技术是一种由IBM 公司研究开发的,是一个供硬件设备使用的可以在IP 协议的上层运行的SCSI 指令集,这种指令集合可以实现在IP 网络上运行SCSI 协议,使其能够在诸如高速千兆以太网上进行路由选择。
iSCSI 技术是一种新储存技术,该技术是将现有SCSI 接口与以太网络(Ethernet)技术结合,使服务器可与使用IP 网络的储存装置互相交换资料。
网络拓扑:
CentOS 6.3
ISCSI Server Target IP:192.168.2.54
ISCSI Initiator IP:192.168.2.55
ISCSI Initator IP:192.168.2.230
实验环境:
ISCSI Target: CentOS 6.3 IP:192.168.2.54
ISCSI Initator: CentOS 6.3 IP:192.168.2.55 windows server 2012 IP :192.168.2.230
一.ISCSI Target 的搭建:
1. 在ISCSI target 服务器上添加一块新的硬盘,用于ISCSI Target 存储。
2.创建LVM。
在此具体操作略掉。
操作结果如下图:
分别为linuxiscsiinitator,Windows server 2012创建LV.逻辑卷lvlinux和lvwindows ,大小都为2GB的容量。
3.在CentOS上安装iscsi target,在这里我采用YUM的安装方式。
4.修改ISCSI TARGET的配置文件,配置文件为/etc/tgt/targets.conf,使用vim工具修改配
置文件:分别为linux客户端和windows server 2012客户端建立两个target (linux-target,windows-target),将两个target 关联到之前创建的LV上,并且配置用户名和密码认证(用户名和密码都为test),同时限制只有相应IP地址的客户端才能访问iscsi target.如图:
添加target:
5.启动iscsi target服务
6.配置iscis target 服务器开机启动:
7.查看当前iscis target的运行状态:
到此ISCSI已配置完成,并且可以查看到当前target的状态是正常的二.ISCSI Initiator连接ISCSI target.
1.windows server 2012连接ISCSI TARTGET:
运行管理工具中的
点击 发现选项卡
再点击 发现门户
输入ISCSI target 服务器的IP 地址和相应的端口号,ISCSI target 默认使用的是tcp 3260 端口,然后确定。
发现刚刚添加的服务器地址,然后点击 目标选项卡,连接Target.
这时会发现了一个target,这个target名称正好是我之前在centos服务器上创建的。
然后点连接。
但是当前的状态是不活动我们在这里要点→连接来激活
因为之前我们给target设置了用户名和密码认证,所以在确认连接之前,要提供正确的认证信息,在这里要点击→高级
启用chap 登录,并且输入正确的用户名和密码。
然后点 确定
现在可以发现,TARGET 已连接上去了。
到这里windows server 2012连接centos的ISCSI target已设置完成。
本文由黎明网络教育中心原创,转载请注明出处!。