light guide film 光学调试
- 格式:pdf
- 大小:983.90 KB
- 文档页数:15

光电子学实验技术的器件调试技巧光电子学作为一门应用广泛的学科,涉及到许多光学器件的调试与测试。
光学器件调试是确保光学系统正常运行的关键一环,它直接影响实验结果的准确性和可靠性。
本文将介绍光电子学实验技术中常见的器件调试技巧,旨在帮助读者在光电子实验中获得更加准确的实验结果。
一、波长选择器的调试光电子实验中常用到的波长选择器如光栅、干涉仪等。
在调试光栅时,首先要检查光源的稳定性,确保其发出的光束稳定、光强均匀。
接下来,对光栅进行调试。
可以通过调节光栅的入射角度、旋转光栅的角度,来选取所需的入射光波长。
同时,还可以通过调节入射光的角度来改变出射光的角度。
对于干涉仪的调试,也需要注意调节光源的稳定性,并通过调节透镜的位置,使光束聚焦在样品表面,从而实现干涉光的产生。
二、光学仪器的准直在光电子实验中,常常需要将光进行准直,以获得更好的实验效果。
准直是指将光束通过调整光学元件的位置和角度,使得光束变得平行、方向一致。
对于激光器来说,准直是非常重要的一步。
在调试激光器时,可以通过调节透镜的位置和角度,使激光束经过透镜后成为平行光束。
此外,还可以通过调节反射镜的角度,改变激光束的方向。
准直后的激光束可以更好地传输和聚焦,提高实验的精确度。
三、光电探测器的校准光电探测器是光电子实验中常用的元件,用于测量光强或光功率。
在使用光电探测器之前,需要对其进行校准,以确保测量结果的准确性。
校准的第一步是检查光电探测器的灵敏度是否正常,此时可以使用一个已知光强的标准光源,通过调节光源的距离或光功率,来验证光电探测器的灵敏度。
其次,还需校准光电探测器的线性度,这可以通过使用不同强度的光源来检测并作图来判断。
最后,还需要校准光电探测器的暗电流和零点漂移,以确保实验结果的精确性。
四、光学系统的调试光学系统是光电子实验中的核心部分,调试光学系统可以使光经过多个光学元件传输后表现出所需的特性。
在调试光学系统时,首先需要保证光学元件的稳定性,避免光学元件的移动和振动。
Light guide簡介
一. 何謂light guide
Light guide ,中文稱為導光板,是用射出成型的方法將丙烯壓製成表面光滑的楔形板塊,然後用具高反射率且不吸光的材料,在導光板底面用網版印刷印上圓形或方形的擴散點,導光板主要功能在於導引光線方向,提高面板光輝度及控制亮度均勻。
二. light guide 製作方式 1.V-cut
2.Micro-lens
V-CUT
MICRO-LENS
3.Chemical-etching
三.light guide導光原理
四.light guide的製造流程
CHEMICAL-ETCHING
五.light guide的檢驗重點
1.外觀:
a.黑(白)點、異物、刮傷、毛邊不可大於規格
b.本體、腳柱不可變形、缺料
c.網點顆粒大小須均勻,不可大小不均或無
d.材質須與規格符合,且外觀不可滲入其它顏色,造成色差
2.印刷:
印刷顆粒須大小均勻,線條不可有粗細不勻及脫漆的現象
3.尺寸量測:
a.外形尺寸(總長、總寬、總厚)
b.發光區尺寸
c.定位柱尺寸
4.輝度值量測:
輝度值須符合規格書之規格
5.導光均勻度:
light guide點亮後的光暈與暗帶,依限度樣品判定
試題
1.light guide的中文名稱?
2.light guide的功用為何?
3.light guide的光暈與暗帶以什麼為判定標準?
4.列舉三項檢驗重點?
5. light guide的製作方式?。

光谱仪器的光路调整方法技巧首先,光源的选择是光路调整的第一步。
常用的光源有白炽灯、氘灯、氙灯、汞灯等。
在选择光源时,要根据实验需要选择合适的光源。
例如,如果需要测量紫外-可见光谱,可选择氘灯或氙灯作为光源。
白炽灯可用于红外光谱的测量。
对于入射光的调整,需要确保光线能够垂直入射到样品表面。
可以通过调整光源的位置、使用透镜或反射镜来实现。
首先,将光源与样品之间的距离调整到合适的位置,一般要求光源与样品的距离尽量相等,以保证入射光线的均匀性。
然后,使用透镜或反射镜将光线聚焦在样品表面,同时调整透镜或反射镜的位置和角度,使入射光线能够垂直射到样品表面。
调整过程中可以观察到反射光线的位置和强度来判断入射光线的调整程度。
样品的放置是光路调整的另一个重要环节。
在放置样品时,应注意样品与光源、光路之间的距离,以及样品的位置和角度。
对于固体样品,可以使用样品架进行固定,调整样品角度以确保入射光线的均匀性。
对于液体样品,可以使用比色皿或玻璃池等容器,将样品倒入容器中,并将容器放置在光路上。
在放置样品之前,要确保样品表面的平整度,避免出现表面凹凸不平的情况,以免影响光谱测量的准确性。
最后,需要对检测器进行调整。
检测器的调整包括增益调整和背景噪声的减少。
对于增益调整,可以根据样品的浓度和光谱的强度来确定合适的增益值。
在调整增益的过程中,要注意不要过分增大增益,以避免过量的放大信号造成噪声干扰。
对于背景噪声的减少,可以通过减小光源的强度或使用滤光片来降低噪声的水平。
此外,还可以通过调整光源与检测器之间的距离和角度来改变光谱的强度和信噪比。
在光路调整的过程中,需要仔细观察光谱仪器的指示灯、显示屏等指示性部件,以判断仪器的工作状态和光谱数据的准确性。
同时,还可以借助辅助工具如光电探测器、分光计等进行定量的调整和测量。
总之,光谱仪器的光路调整是确保仪器正常工作和获得准确光谱数据的重要环节。
只有充分理解和掌握光路调整的方法和技巧,才能保证光谱测量的准确性和可靠性。
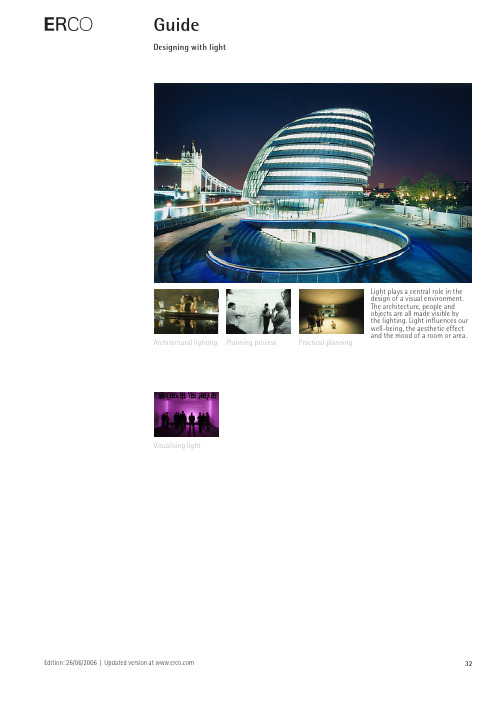
Light plays a central role in theThe architecture, people andobjects are all made visible bythe lighting. Light influences ourwell-being, the aesthetic effectand the mood of a room or area.Architectural lighting Planning process Practical planningVisualising lightArchitectural lightingLighting interiorspacesConnecting spaces Illuminate objectsDesign with colouredlightIt is light that first enables spatialperception. Above and beyondthis, our perception of architec-ture can also be influenced withlight: it expands and accentuatesrooms, creates links and deline-ates one area from another.Forming functional zones Defining spatial borders Emphasising archi-tectural featuresDesigning with light | Architectural lighting Lighting interior spacesLight can alter the appearance of a room or area without physi-cally changing it. Light directs our view, influences perception and draws our attention to spe-cific details. Light can be used to divide and interpret rooms in order to emphasise areas or establish continuity between the interior and exterior. Light distri-bution and illuminance have a decisive influence on how archi-tecture is perceived.Forming functional zonesLight can be used to emphasiseindividual functional zones inan area, e.g. traffic areas, wait-ing areas, and exhibition areas.Zonal lighting with delineatedbeams of light visually separatesone area from another. Differentilluminance levels establish a per-ceptual hierarchy and direct theviewer’s gaze. The differentiationof light colours creates contrastsand emphasises individual zones.Differentiated lighting of func-tional zones divide up an area andimprove orientation. Areas of aspace can be separated from eachother using narrow beams of lightand strong contrasts in bright-ness. Distinct contrasts betweenindividual zones and their sur-roundings remove them fromtheir spatial context. Large areasthat on the whole are evenly illu-minated can appear rather mono-tone if they are not divided up.Low general lighting provides thebasis for adding lighting accents.Lighting control systems allowfunctional zones to be adapted todifferent uses.ObservationConclusionApplicationsProjects:Private home, New South WalesHeart of Jesus Church, MunichTeattri Ravintola, HelsinkiERCO, LüdenscheidDefining spatial bordersFloor illumination emphasises objects and pedestrian surfaces. Vertical spatial borders areemphasised by illuminating wall surfaces. Uniform light distribu-tion emphasises the wall as a whole, whereas accentuating, grazing light gives the wall struc-ture by adding patterns of light. Bright walls create a high level of diffuse light in the room.Vertical illumination is used to shape the visual environment. Room surfaces can be differ-entiated using different levels of illuminance to indicate their importance. Uniform illumina-tion of the surfaces emphasises them as an architectural feature. A decreasing level of brightness across a wall is not as effective as uniform wallwashing at defining room surfaces. Lighting effects using grazing light emphasise the surface textures and become the dominant feature. Indirect lighting of a ceiling creates dif-fuse light in the room with the lighting effect being influenced by the reflectance and colour of its surface.ObservationConclusionApplicationsProjects:Conrad International Hotel,S ingapore Lamy, HeidelbergEzeiza Airport, Buenos Aires Light and Building, FrankfurtWall bright Wall darkEmphasising architectural featuresThe illumination of architectural details draws attention away from the room as a whole towards individual components. Columns appear as silhouettes in front of an illuminated wall. Narrow- beam downlights emphasise the form of the columns. Grazing light accentuates individual ele-ments or areas and brings out their form and surface texture.Rooms can be given a visual structure by illuminating the architectural features. By using different levels of illuminance, different parts of a room can be placed in a visual hierarchy. Graz-ing light can cause highly three-dimensional features to cast strong shadows.ObservationConclusionApplicationsProjects:Tokyo International Forum International Hotel, Singapore Palacio de la Aljaferia, Zaragoza Catedral de Santa Ana, Las PalmasInside – l ookinginsideInside – lookingoutsideOutside – lookinginsideOutside – lookingoutsideDesigning with light | Architectural lightingConnecting spacesCombining rooms can createcomplex architectural patterns.Light interprets these in terms oftheir structure and orientation.Targeted lighting enables theviewer to look into an area andcreates spatial depth. The con-sideration of material qualitiesin combination with the correctilluminance, colour of light andlight distribution is an importantaspect in the design stage.The bright rear wall gives the room depth and accentuates the spatial perspective. Illuminated objects in the background achieve a similar effect. If the emphasis of the illuminance level is shifted from the back to the front area of the room, then the focus of attention will also shift from the background to the foreground.ObservationLight makes surfaces or objects visible and allows them to become the focus of attention. Dark spatial zones cause spatial limits to disappear and recede into the background. Differenti-ated spatial lighting can produce a hierarchy of how spaces are perceived. Illuminating vertical surfaces is of particular creative importance for the design since a better effect is achieved as the result of spatial perspective than when illuminating horizontal surfaces.ConclusionApplicationsProjects:Museum Georg Schäfer,S chweinfurt Catedral de Santa Ana, Las Palmas DZ Bank, BerlinGuggenheim Museum, BilbaoA high illuminance level in the interior combined with a dark exterior creates a strong reflec-tion on the facade plane. The interior visually appears to double in size from the exterior due to the reflection. Objects in the out-door area are not recognisable. As the illuminance level in the interior decreases and the lumi-nance in the exterior increases, the mirror effect is reduced and objects on the exterior become recognisable.ObservationConclusionThe reflection on the glass becomes less as the luminance in front of the glass decreases and the luminance behind the glass increases. Well shielded luminaires in front of the glass plane cause less reflection. Lower illuminance in the interior allows better perception of the exterior. When directing luminaries on the exterior, direct glare into the indoor area should be avoided.ApplicationsProjects:Miho Museum, OsakaHarvey Nichols Restaurant, LondonPrivate home, New South Wales ABN AMRO, SydneyThe high illuminance level of day-light causes a strong reflection on the glass surface. Objects in the indoor area are not percept-able. As the illuminance level in the outdoor area decreases, the reflection becomes less. This allows illuminated objects or surfaces in the indoor area to become visible. The glass is no longer perceptible.ObservationConclusionThe reflection on the glassbecomes less as the luminance in front of the glass decreases and the luminance behind the glass increases. Luminaires in front of the glass that are well shielded and integrated into architecture cause less reflection of them-selves. A low illuminance level in the indoor area produces a deep spatial effect at night. The illumination of objects in indoor areas – such as shop windows – requires very high illuminance to make these objects visible dur-ing the day due to the high illu-minance level outside. Adjusting the indoor lighting to the chang-ing daylight is recommendable. A higher illuminance level during the day and a low level in the evening reduces the contrast.ApplicationsProjects:Lamy, HeidelbergRitz-Carlton, Singapore“Dat Backhus” bakery, Hamburg Blue Lagoon Spa, ReykjavikDesigning with light | Architectural lighting | Connecting spaces Outside – looking outsideA bright rear wall lends depth to the room and helps delineate the room limits. Illuminated objects in the background achieve a similar effect. If the emphasis of the illuminance level is shifted from the back to the front area of the room, then the focus of attention will also shift from the back-ground to the foreground.ObservationConclusionLight makes surfaces or objects visible and brings them into the foreground. Dark zones of the room make the room limits dis-appear and the effect of areas recedes into the background. Due to the low illuminance level at night, the required illuminances are less than for indoor lighting.ApplicationsProjects:Hong Kong Convention andE xhibition Centre Miho Museum, Osaka Federal Chancellery, Berlin Private home, MilanLight directs our view and focuses the attention on details. The direc-tion of light, illuminance and the light distribution all determine the effect of an object in its sur-roundings.Designing with light | Architectural lighting Illuminate objectsDirection of lightVary the lightd istribution Accentuate objectsDirected light from the front produces a strong modelling abil-ity. Light from above causes the object to cast strong shadows on itself. Light from behind creates a silhouette. The steeper the inci-dent light, the more pronounced the shadow effect.ObservationConclusionIf the light from the front is also coming slightly from one side, it gains a strong descriptive power. Light that is solely head-on hardly causes any shadow in the direction of vision and the object loses some of its 3-dimensional appearance. Very steep incident light is suitable for objects having a very shallow texture in order to make them more 3-dimensional.ApplicationsProjects:Pinacoteca Vaticana, Rome Guggenheim Museum, Bilbao Hermitage, St. Petersburg Hermitage, St. PetersburgArrangementThe steeper the incident light, the more pronounced the shadow effect. Objects can be illuminated well when the direction of light is between 5° and 45° to the verti-cal. The optimal direction of light for illuminating objects is at 30°. This avoids strong reflected glare or undesirable shadows on people or objects.Highlighting is used for modelling objects in:- museums - exhibitions - salesroomsPreferred luminaire groups - spotlights - floodlightsVary the light distributionNarrow-beam spotlights accentu-ate the object and make it stand out against the surroundings. The beam of light is stretched into an oval using a sculpture lens. Flood lenses spread out the narrow beam and create a soft brightness gradient.ObservationConclusionThe narrower the beam of light cast on the object, the stronger the effect. Sculpture lenses are particularly suitable for project-ing light at objects over their entire height. With their wide light beam, flood lenses illumi-nate the surroundings stronger and represent the object in its spatial relationship.ApplicationsProjects:Bunkamura Museum of Art, Tokyo Museo del Prado, Madrid Vigeland Museum, Norway Hermitage, St. PetersburgHighlighting is used for modelling objects in:- museums - exhibitions - salesroomsPreferred luminaire groups - spotlights with accessoriesAccentuate objectsThe objects and the wall are given general lighting by wallwashers. Beams from individual spotlights add emphasis to the objects. A higher brightness contrast increases the level of accentua-tion.ObservationConclusionWhen the brightness contrast of the ambient surroundings to the object is 1:2, a contrast can hardly be noticed. When the ratio is 1:5, a minimum brightness contrast is established between primary and secondary points of interest. A contrast of 1:10 brings out the difference very well. A brightness contrast of 1:100 detaches the object very strongly from its ambient surroundings but an unintentional dissection of the wall can arise.ApplicationsProjects:Museo Ruiz de Luna Talavera, SpainGerman Architectural Museum, FrankfurtGuggenheim Museum, Bilbao Museo Picasso, BarcelonaHighlighting of objects on walls is a practice used in:- museums - exhibitions- trade-fair stands - salesroomsDesigning with light | Architectural lightingDesign with coloured lightColour is a significant componentof visual perception. It cannotbe perceived without daylight orartificial lighting. The combina-tion of lamps and filters allowsa multitude of design possibili-ties for emphasising or alteringthe lighting effect of rooms andobjects with coloured light. Theterm “colour of light” covers bothwhite and coloured light. Warmwhite, neutral white and daylightwhite are derived from the whitecolour of light. The coloured lightcovers the entire visible spectrum. Colour Colour systems Colour of lightColour mixing Colour rendition Colour effectColour contrast Ambient colours Coloured h ighlightingColourThe light colour refers to a colour which is emitted by a light source. The light colour is produced as a result of the emitted spectrum of light. The type of light colour is defined by hue, saturation and brightness. Using filters produces coloured light. This enables the colouration of rooms to be modi-fied without changing the rooms physically. Mixing several light colours is referred to as additive colour mixing.Light colourThe body colour arises as a result of the incident light and the spe-cific absorption properties of the surface. Therefore, the tri-stimu-lus value of a body colour can only be determined in combina-tion with the type of light with which it is illuminated. In addition to hue, brightness and saturation, the body colour of an object is also defined by the reflectance. When illuminating coloured walls or objects with coloured light, the reciprocal effect of light colour and body colour is paramount. This interplay is the basis of sub-tractive colour mixing. The chro-matic effects can be intensified or altered.Body colourColour systemsIn the CIE standard colorimetric system, body colours and light colours are represented in a continuous, two-dimensional diagram. The spectral constitu-tion of light colours results from the type of light, while that of body colours results from the type of light and the spectral reflectance or transmittance. The dimension of brightness is left unconsidered here; this means that only the hue and saturation of all colours can be determined in the diagram. The coloured area is enclosed by a curve on which the chromaticity locations of the completely saturated spectral col-ours lie. At the centre of the area is the point of least saturation, which is designated as a white or uncoloured point. All levels of saturation of one colour can now be found on the straight lines between the uncoloured point and the chromaticity location in question. Similarly, all mixtures of two colours are likewise to be found on a straight line between the two chromaticity locations in question. Complementary colours are located opposite each other in the CIE model and combine to form white.CIE systemIn the Munsell system, bodyc olours are arranged according to the criteria of brightness, hue and saturation to produce a complete sample catalogue in the form of a three-dimensional matrix. Brightness here refers to the reflectance of a body colour; the hue refers to the actual col-our, while the term saturation expresses the degree of colora-tion, from the pure colour down to the uncoloured grey s cale. Whereas a two-dimensional dia-gram is sufficient for colours of light, a three-dimensional system is required for body c olours due to reflectance.Munsell systemColour of light: White lightThe higher red component inwarm white light allows rooms toappear warmer than with neutralwhite light. The higher blue com-ponent in daylight white lightcreates a cooler atmosphere. ObservationOn presentation lighting, makingspecific use of colours of lightallows luminous colours to beachieved on the objects beingilluminated. Daylight white lightis often used in office rooms toaugment the daylight. ConclusionApplicationsProjects:Sony Center, BerlinGlass pavilion, Glass technicalcollege, RheinbachHong Kong and Shanghai BankERCO, LüdenscheidWarm colours of light are pre-ferred above all at lower illumi-nances and with directed light,whereas cold colours of light areaccepted at high illuminancesand diffuse illumination. Whitelight is described by specifyingthe colour temperature, colourrendition, chromaticity locationand spectrum. The white colourtemperature is divided into threemain groups: warm white, neutralwhite and daylight white. A goodcolour rendition with the lightingwill only produce a low colourdeviation. The chromaticity loca-tion identifies the colour withinthe CIE diagram.Colour of light: Coloured lightCompared to the primary colours yellow, blue and red, the colours amber and magenta appear weaker in their expressiveness. Yellow and red colours of light create a warm atmosphere in a room. Blue colours of light allow a room to give a cooler impres-sion.ObservationIn architectural lighting, colours from the daylight spectrum are felt to be natural: magenta (con-ditions of light at sunset), amber (atmospheric light at sunrise), night blue (clear night sky) and sky blue (light of the sky by day). For coloured light, the data con-cerning chromaticity location and spectrum are important. The chromaticity location is speci-fied by the co-ordinates in the CIE diagram, whereby a colour of light can be formed by different colour spectra.ConclusionApplicationsProjects:ERCO P3, LüdenscheidZürich Insurance, Buenos Aires Teattri Ravintola, Helsinki Teattri Ravintola, HelsinkiColoured light is used for - exhibitions- trade-fair stands - salesrooms - event lightingColour mixing: Colours of lightSuper imposing several colours of light is an additive mixing proc-ess. Mixing two of the primary colours red, green and blue results in magenta, cyan or yellow. By mixing the three primary colours in equal amounts, white light is produced.ObservationWhen illuminating objects with differently coloured light sources, the spatial superimposition gives rise to interesting additive colour mixing effects, which may even include coloured shadows.ConclusionColour mixing: Light colour and body colourSubtractive colour mixing occurs when coloured surfaces are illuminated with coloured light. Mixing two of the subtractive primary colours magenta, cyan and yellow, produces the addi-tive primary colours red, green or blue. Warm body colours are emphasised by a warm white colour of light. Cold body colours appear brighter and more satu-rated under cold neutral colours of white light, especially daylight white.ObservationThe appearance of a body colour can seem more saturated and brighter when the lighting on it is of similar colour. Body colours appear less saturated, or darker, when the coloured lighting is dis-similar. The actual appearance of the results of subtractive colour mixing depends on the spectral constitution of the components being mixed.ConclusionApplicationsProjects:Shop Colette, ParisGreater London Authority Teattri Ravintola, Helsinki ERCO Trade Fair, HanoverIn practice, when illuminating coloured surfaces, it is recom-mendable to perform lighting tests or calculations. The same applies to the use of colour filters.Wall: BlueLight: Warm white Wall: Blue Light: BlueWall: BlueLight: MagentaWall: Blue Light: YellowThe quality of the reproductionof colours is termed colour rendi-tion. Linear spectra have a verygood colour rendition. Linearspectra only permit one singlecolour to be perceived well. Mul-tiline spectra reproduce severalcolours of the relevant spectrumwell, but in the intermediate are-as the colour rendition is weaker.Blue and green colours appearcomparatively grey and mattunder warm white incandescentlight despite excellent colourrendition. However, these huesappear clear and bright underdaylight white light from fluo-rescent lamps – despite poorercolour rendition. When renderingyellow and red hues, this phe-nomenon of respective weakeningand intensifying of the chromaticeffect is reversed. ObservationIncandescent lampContinuous spectra lead to goodcolour rendition. Incandescentlamps or daylight have the colourrendition index Ra 100.DaylightContinuous spectra lead to goodcolour rendition. Incandescentlamps or daylight have the colourrendition index Ra 100.Because the eye is able to adaptto light of the most differentcolour temperatures, the colourrendition must be determineddependent on the colour tem-perature. Tungsten halogenlamps feature very good colourrendition. The rendition qualityof fluorescent lamps and metalhalide lamps ranges from goodto average. The degree of colourdistortion against a referencelight source is indicated using thecolour rendition index Ra or thecolour rendition grading system.The colour rendition index is onlyused for white colours of light. ConclusionFluorescent lampDischarge lamps such as fluores-cent lamps or metal halide lampsfeature a multiline spectrum.Their colour rendition is thereforelower than Ra 100.Physics The same colours of light canproduce a different rendition ofa body colour due to differentspectral constitution. Continuousspectra lead to a unifrom colourrendition. Linear spectra only cor-rectly render a very small colourrange. Multiline spectra are com-piled from different linear spectraand thus improve the colour ren-dition. The more spectra can bebound to one linear progression,the better the colour rendition.Incandescent lamps feature alinear spectrum, while dischargelamps have a multiline spectrum.Linear spectrum Continuous spectrum Multiline spectrumApplicationsVery good colour rendition isimportant for- exhibitions- trade-fair stands- salesrooms- offices- workstations- Red is the colour of fire and the expression for power, warmth and energy. The colour has a dominant effect. Where pale red is concerned, the aspect of warmth decreases while its light-ness increases.- Yellow is the lightest colour in the colour wheel, but used in the foreground it does not have the same energy as red.- Blue is the colour of the sky and is one of the cold colours which gives an effect of depth. Dark navy blue has a rather melan-choly effect, whereas blue-green emanates peace.- Green is the colour of vitality. Its nuances range from calming to refreshing.- White is one of the non-colours and is the polar opposite of black. White stands for purity.- Black stands for darkness and appears sinister and negative.- Grey is one of the non-colours and appears indifferent.ObservationThe effect of colours is explained from the physiological point-of-view of actually seeing colour and the psychological aspects of sen-sory perception. The lure of col-ours triggers associations and is interpreted in the context of the social and cultural environment. The different hues belonging to a colour can, in turn, also have other effects. The effect of indi-vidual colours can be increased by way of a colour contrast.ConclusionApplicationsProjects:Saab City, LondonLight and Building 2000,F rankfurt Restaurant Aioli, Vienna Teattri Ravintola, HelsinkiColour effects are particularly important for - exhibitions- trade-fair stands - sales areas - restaurantsThe seven colour contrasts origi-nated from the colour theory of Johannes Itten. This approach is not based on physical and chemi-cal properties of colours, but on their subjective effects.The primary colours yellow, red and blue produce the strongest contrast. The colour contrast becomes weaker with secondary or tertiary colours or as the satu-ration decreases.Colours themselvesThe “non-colours” black and white produce the strongest contrast. Even with the “proper” colours, their effect is significant. A light colour next to a dark colour has a stronger effect than next to an equally light or lighter colour. The effect of hues can be intensified by greater differences in brightness.Light-darkIn the colour wheel, the warm colours with red and yellow com-ponents are located opposite to the cold blue hues. Green and magenta form the neutral transi-tions. The effect of a predominant colour can be increased when combined with an accent from the opposite colour.Cold-warmWarmColdThe effect of the simultaneouscontrast has its origin in how theeye processes perception. Afterstaring at a colour for a long timeand then looking at a neutralgrey, the eye forms a simultane-ous contrast colour. Red leads toa green tinged grey shade. Greencauses a grey area with a redtinge to appear. Colours changetheir effect due to the influenceof the surrounding colours. SimultaneousThe pairs of colours lying oppo-site in the colour wheel form thecomplementary contrast from aprimary colour and the secondary(mixed) colour made of the othertwo primary colours. Yellow-vio-let displays the largest light-darkcontrast, orange-blue the largestcold-warm contrast. Red-greenhave the same light intensity. Thecomplementary contrast causesthe brilliance of the colours toincrease.ComplementaryThe quality contrast, or intensitycontrast, describes the distinctionbetween pure colours and murkycolours. Mixing pure colours withgrey shades makes the formermurky and dull, and the quality ofcolour purity is lost. Pure colourshave a dominating effect overmurky colours.QualityThe quantity contrast refers tothe relationship of the size of onecoloured area with the next. Alarge coloured area with a smallarea in a contrast colour increasesthe chromatic effect of the maincolour.QuantityAmbient coloursWhite light that is reflected by acoloured surface takes on the col-our of the surface and becomesthe predominant colour of lightfor the whole room. When light-ing a coloured wall with colouredlight, this effect can be increased,reversed or inverted. ObservationThe colour of light in a room isinfluenced by the decoration ofthe room. In comparison to dif-fuse light, direct light increasesthe effect of the light when illu-minating a coloured surface. Theeffect of a body colour can beintensified by using coloured lightof a similar colour. Strong colourcontrasts appear brighter for thesame illuminance than a weakercolour contrast. Lesser colourcontrasts can be perceived betterConclusion under brighter lighting. Withinclosed rooms the effect is hardlyperceptible due to the phenom-enon of colour constancy.Wall: YellowWhite light: Warm whiteWall: RedColoured light: MagentaWall: WhiteColoured light: AmberWall: YellowColoured light: Sky blueApplicationsProjects:Polygon Bar, LondonGreater London AuthorityTennispalatsi Cultural Museum,HelsinkiApropos Cöln Concept Store,CologneIn practice, when illuminatingcoloured surfaces, it is recom-mended that lighting tests orcalculations be carried out.Coloured accent lighting isused for- exhibitions- trade-fair stands- sales areas。

光学实验中的光路搭建与调整方法1.实验设备准备首先要准备好所需的光学实验设备,包括光源、透镜、棱镜、光屏、接受器等。
2.光源的选择与位置调节在光路搭建中,光源的选择非常重要。
常用的光源有白炽灯、氙灯、钠灯等。
根据实验要求选择合适的光源,并将其固定在一个稳定的支架上。
同时要注意调节光源的位置,使得光线可以顺利通过光学元件。
3.透镜的使用与调整透镜是光学实验中常见的光学元件,用来调节光线的传播方向和聚焦效果。
在使用透镜时,首先要确定透镜的凸面和凹面。
然后根据实验需要选择透镜的类型和焦距,并将透镜固定在一个稳定的架子上。
在调整光路时,可以借助透镜调节光线的传播方向和聚焦效果,使得光线能够准确地通过透镜。
4.棱镜的使用与调整棱镜常用于光的分光和折射实验中。
在搭建光路时,需要将棱镜放在一个稳定的位置,并保证光线垂直入射和平行出射。
棱镜的角度调整会影响光的折射和偏折效果,因此在实验中需要通过调整棱镜的位置和角度来满足实验要求。
5.光屏和接受器的安装与定位光屏常用于接受和记录光的干涉和衍射图像,在光路搭建过程中需要将光屏放置在合适的位置,使得光线能够准确地投射到光屏上。
同时,还需要调整接受器的位置和方向,以使得光线能够正确地进入接受器。
6.光路调整与优化在进行光学实验时,光路的调整是一个逐步优化的过程。
通过观察光的传播路径和影像,不断调整光源等光学元件的位置和角度,使得光线能够准确地通过所需的光学元件,并得到所要求的实验结果。
总结起来,光学实验中的光路搭建与调整方法需要有系统性、耐心和细致性。
在搭建光路时,要根据实验目的和要求进行器材的选择和位置的调整,同时要注意光线的传播方向和偏折效果,以保证光线能够顺利通过光学元件。
在实验过程中,需要不断地调整光路,优化光的传播路径,以获得准确而稳定的实验结果。

光路调试步骤一般主光路器件:硬光路红光—全反—腔体—半反—扩束镜—过渡颈—45°全反镜—聚焦镜—出光口;軟光路红光—全反—腔体—半反—45°全反镜架—耦合镜架—光纤输入端—光纤输出端—准直聚焦。
光路调试步骤:①调整前检查各个器件内部的螺丝紧固情况,装上镜片的要保证镜片已被固定死;各组件紧固好后,按要求的装配孔装定各膜片架底板,务必保证装定螺丝在装配U型孔的几何中心;②调整基准光(红光)的尺寸,用刻度相对准确的直角尺进行校正,通过调整红光四维膜片架的调节旋钮,保证近、远端红点距光聚座安装平面的水平高度为50mm,距光聚座安装平面调整一侧外沿的水平距离为95mm,若是硬光路,近远端红光位置调整好后,还要保证红点在过渡颈的中心;③调整好后一定要将红光膜片架的锁紧螺丝(位于膜片架边缘的中间部位)及调整旋钮上的螺母进行锁紧,要保证锁紧后红光位置无偏移;④按从前到后的顺序调整各膜片架,务必保证红点通过各器件的几何中心(包括镜片和晶体端面),使红光过各个镜面的反射点与入射点重合;⑤检查已接好的水路和电路,无误后在腔体上装上氙灯,将灯极夹头压紧,检查两层IGBT电压差是否差别不大(若电压差较大,请勿点灯),点灯使氙灯预燃,调到合适的参数用相纸打光斑,先将相纸放在红光与全反镜片前出一次光(防止全反镜片镀膜不够烧坏红光),再用全反的两个调整旋钮将光斑调圆,再通过同时调整全半反的旋钮使激光光斑与红光同心,按边调边锁的原则调好以后,再将全半反膜片架的锁紧螺丝及调整旋钮上的螺母进行锁紧,锁紧后再次进行打光斑测试,如光斑有变动再将全半反膜片架微调一下,直至光斑与红点同心且光斑稳定;⑥硬光路:装配扩束镜和45°全反镜之前,让红光射到两米开外的障碍物上,用记号笔打点标志,调整扩束镜架,保证红点通过入射端中心也与两米开外的点标志重合,装上45°全反镜,在水冷环上装上相应的聚焦镜片,调节三个调整旋钮,使红点在八角头出光口的中心。
深圳大学--光学实验主要仪器、光路调整与技巧深圳大学实验报告课程名称:工程光学(1)实验名称:实验一光学实验主要仪器、光路调整与技巧学院:光电工程学院专业:指导教师:报告人:学号:组别:实验时间:2015年实验报告提交时间:一、实验目的与要求:掌握光学专业基本元件的功能;掌握基本光路调试技术,主要包括共轴调节和调平行光二、实验器材:光学实验仪器主要包括:光源,光学元件,接收器等。
1)氦氖激光器8)燕尾式平移台2)激光夹持器9)分化板3)显微物镜10)透镜/反射镜支架(Φ40.0)4)物镜接圈11)干板架5)开口透镜/反射镜支架(Φ20.0)12)毛玻璃6)一维调节滑块13)平行平晶7)K9平凸透镜(Φ40.0, f150.0)14)导轨,滑块,支杆,调节支座,磁力表座等三、实验原理:光路调试技术在光学实验中,光学元件同轴等高的调节是实验中必不可少的一个重要环节,它关系到成像质量的好坏、能否得到预期的光学现象和满意的测量结果。
可以说调整好光路是进行光学研究和光学实验应具备的技能。
下面介绍光路的基本调整方法。
3.2.1共轴调节光学实验中经常要遇到用一个或多个透镜同时成像,为了获得较好的像,必须使各个透镜的主光轴重合(即共轴),并使物体位于透镜的主光轴附近。
另外,为了最大限度的利用激光扩束后的面光源,所有透镜的主轴都需要大致通过光斑中心,才能获得清晰的像。
共轴调节使物、观察屏的中心处在透镜光轴上,并使各光学元件共轴,达到共轴能保证近轴光线的条件成立。
共轴调节一般分为两步骤进行:1)第一步粗调,即用眼睛观察,使物、观察屏与透镜中心大致在一条直线上。
粗调的方法如下:通过前后移动白屏的方法先使激光光束与台面平行,再将透明物、扩束镜、双凸透镜依次摆好,调节它们的取向和高低左右位置,凭眼睛观察,再让光斑、物、镜的几何中心处在一条直线上,这样便使透镜镜的主光轴与平台面平行且共轴,光斑也最大限度得到利用。
2)第二步细调,即移动透镜,当两次成像中心重合即达到共轴,若不重合,须视情况针对性地调节各光学元件,直至两次成像的中心重合。
⼀篇⽂章看懂光学膜的发展史!偏光⽚、扩散膜、导光板、背板膜、锂电隔膜、窗膜、⽔处理膜、胶黏膜.....这些薄膜们是被谁发明的?发明之初是怎样设计的?它们的诞⽣背后⼜有怎样的故事?今天我们就⼀起来了解⼀下最初始的功能薄膜。
偏光⽚⽬前最通⽤的偏光膜是兰特在1938年所发明的H⽚,其制法如下:⾸先把透明塑料板(通常⽤PVA)浸渍在I2/KI的⽔溶液中,使碘离⼦扩散渗⼊内层的PVA,微热后拉伸,PVA板变长的同时也变得⼜窄⼜薄。
PVA分⼦本来是任意⾓度⽆规则性分布的,受⼒拉伸后就逐渐⼀致地偏转于作⽤⼒的⽅向,附着在PVA上的碘离⼦也跟随着有⽅向性,形成了碘离⼦的长链。
因为碘离⼦有很好的起偏性,它可以吸收平⾏于其排列⽅向的光束电场分量,只让垂直⽅向的光束电场分量通过,制成具有偏光作⽤的偏光膜。
⽽实际应⽤于光电⾏业的偏光⽚产业最早萌芽于⽇本,1999年5⽉,我国台湾省第⼀家偏光⽚⼚商⼒特光电投产,标志着⽇本⼚商独占偏光⽚市场的时代结束,但⼒特的技术依然来源于⽇本⼚商的技术授权。
⽽韩国则于2000 年初开始进军TFT⽤偏光板市场,⾸家⼚商LG化学于2000年3⽉量产,年产能125万⽚。
我国偏光⽚项⽬始于1994年,该年,深纺集团公司决定上马偏光⽚项⽬,由美国ADS公司提供⽣产设备与技术并参股,成⽴了盛波公司。
但由于美⽅技术⼈员对技术掌握不够,经两年多调试未⽣产出⼀张合格产品。
1997年美⽅撤股退出合作。
此后经过盛波科研⼈员的努⼒,在1998年底公司终于成功开发出合格产品。
⽬前,⽼牌的偏光⽚⽣产⼚商如⽇东电⼯已经开始转型不再开出新的产能,LG化学和住友化学也放慢了扩张步伐。
韩国ACE和⽇本三⽴⼦因为资⾦问题,新线项⽬也处于停滞。
现在⽇系原料⼚认为最有发展前景的还是⼤陆市场及本⼟的偏光⽚⼚。
扩散膜扩散膜具有扩散光线的作⽤,即光线在其表⾯会发⽣散射,将光线柔和均匀的散播出来;多数扩散膜的基本结构是在透明基材上如PET两⾯涂光学散光颗粒。
Light Guide Techniques导光技术Using LED Lamps使用LED光源Application Brief I-003导光柱是什么?导光柱就是将光以最小的损耗从一个光源传输到距离该光源一定距离的另一个点的装置。
光线是依靠全内反射在导光柱内部传输的。
导光柱通常是采用光学材料制成,如:丙烯酸树脂、聚碳酸酯、环氧树脂和玻璃。
导光柱可以用来将PCB上LED的光传输到产品面板上来显示相关的状态,也可以聚集和指引光线用做LCD显示屏的背光,同时也可以用来照亮在透过式窗口上的图案。
这篇文章论述了简单的导光柱的设计方法以适应这样或那样的应用。
基本原理Snell定律:当光线入射到两种不同的介质的交界面时,例如塑料和空气,光线会在通过这个交界面时产生折射,如图1所示。
光线射入这个交界面的角度叫做入射角φi,光线离开交界面的角度叫折射角φfSnell定律:ni*sinφi = nf*sinφf图1 图2Snell定律规定:第一种介质的折射率ni乘以入射角φi的正弦值,等于第二种介质的折射率nf乘以折射角φf的正弦值。
镜面反射定律:镜面反射定律是这样定义的,光线的入射角与反射角相等,如图2所示,镜面反射光线是没有损耗的。
Fresnel Loss 菲涅耳损耗: 当光线通过交界面从一种介质进入另一种介质时,光线会因为在交界面上产生反射而产生损耗,如图2所示。
这种损耗称作菲涅耳损耗,可以用下面的公式进行计算:对于光线从塑料射入空气和从玻璃射入空气这两种情况下菲涅耳损耗都是4%当光线从折射率低的介质进入折射率高的介质时,折射角φf会小于入射角φi,相反,折射角φf会大于入射角φi,如图3所示光线穿过一个表面平行的塑料(玻璃)板。
图3图4完全内反射:当折射角等于90°时,入射光将会折射并沿着两种介质的交界面传播,如图4所示。
这时sin φf (90°) = 1.0,因此Snell定律就简化成ni*sin φi = nf. 这个公式可以用来计算产生完全内反射的临界入射角φc:空气的折射率为1.0,所以上式中的nf = 1.0,因此只要知道导光柱所采用的介质的折射率就能够迅速计算出这种介质内产生完全内反射的临界入射角。