LINUX下安装无线网卡驱动程序
- 格式:doc
- 大小:79.50 KB
- 文档页数:9

Linux操作系统怎么安装无线网卡驱动Linux操作系统怎么安装无线网卡驱动现在很多人都喜欢用无线上网,无线上网就需要无线网卡,而无线网卡就需要安装无线网卡驱动。
那么Linux操作系统怎么安装无线网卡驱动呢?下面跟着店铺一起去了解下吧。
Linux操作系统怎么安装无线网卡驱动安装方法及步骤:一、准备工作1、安装kernel的源码,在Redhat下是kernel-source.rpm包。
//我使用是FC8的内核,未再进行升级。
2、到/projects/ndiswrapper下载最新的ndiswrapper包,我的版本是ndiswrapper-1.52.tar.gz3、准备好网卡在Winxp下的驱动程序。
驱动程序最好是最新的,指定给XP用的。
我用到的是D-Link的一款PCI无线网卡(dwl-g520),其驱动程序是ar5211.sys、ar52119x.sys和net5211.inf。
二、安装及配置1、安装(1)解压:tar -zxvf ndiswrapper-1.52.tar.gz(2)进入ndiswrapper-1.52:cd ndiswrapper-1.52(3)编译:make//在此操作之前必需先把编译环境搭建好,即:安装好开发环境。
(4)安装:make install //如果不采取默认的安装路径,则可以用.configure --prefix="/etc/local"来指定安装目录。
//此目录是自建。
(5)查看安装后的版本ndiswrapper -v | grep //此处似乎不对。
如安装成功则显示version: 1.51(6)获取该无线网卡的WindowsXP驱动,我取了ar5211.sys、ar52119x.sys和net5211.inf。
(7)进入该驱动所在目录:cd /home/tsm/dwl_g520(8)安装无线网卡驱动:ndiswrapper -i net5211.inf(9)查看驱动是否安装:ndiswrapper -l//如:显示net5211(驱动名称) : driver installed(10)写入配置文件:ndiswrapper -mndiswrapper -mandiswrapper -mi(11)启动后模块自动加载:modprobe ndiswrapper2、配置(1)然后配置wpa_supplicant.conf文件:vi /etc/wpa_supplicant/wpa_supplicant.confctrl_interface=/var/run/wpa_supplicantctrl_interface_group=wheelnetwork={ssid="any"key_mgmt=NONE}(2)配置wpa_supplicant文件:vi /etc/sysconfig/wpa_supplicant将该文件内容设置为:# wlan0 and wifi0# INTERFACES="-iwlan0 -iwifi0"INTERFACES="-iwlan0"# ndiswrapper and prism# DRIVERS="-Dndiswrapper -Dprism"DRIVERS="-Dndiswrapper"(3)iwlist scanning 扫描一下你的AP //此处未成功,未知原因待查。


2011年研发二部工作周报月报作者:***时间:2012-6-13目录一、整理漏扫系统的结构 (1)1、整理NetScan目录中的程序。
(1)2、整理proftpd目录中内容(插件的检测信息)。
(4)3、整理proxyd目录中的安管(安管平台)。
(8)二、熟悉Nessus的工作原理 (8)1、Nessus扫描引擎的工作原理.... 错误!未定义书签。
三、整理运行的整个流程............... 错误!未定义书签。
1、通过客户端下发策略,上传到服务器上。
错误!未定义书签。
2、服务端:接收客户端下发的策略。
错误!未定义书签。
3、服务端进行身份的认证........ 错误!未定义书签。
一、整理漏扫系统的结构网卡是Linux服务器中最重要网络设备。
据统计,Linux网络故障有35%在物理层、25%在数据链路层、10%在网络层、10%在传输层、10%在对话、7%在表示层、3%在应用层。
由此可以看出,网络故障通常发生在网络七层模型的下三层,即物理层、链路层和网络层。
对应于实际网络也就是使用的网络线缆、网卡、交换机、路由器等设备故障。
Linux的网络实现是模仿FreeBSD的,它支持FreeBSD 的带有扩展的Sockets(套接字)和TCP/IP协议。
它支持两个主机间的网络连接和Sockets通讯模型,实现了两种类型的Sockets:BSD Sockets和INET Sockets。
它为不同的通信模型和服务质量提供了两种传输协议,即不可靠的、基于消息的UDP传输协议和可靠的、基于流的传输协议TCP,并且都是在IP网络协议上实现的。
INET sockets 是在以上两个协议及IP协议之上实现的。
由于交换机、路由器通常独立于Linux或者其他操作系统。
网卡设置故障是造成Linux 服务器故障最主要原因。
可能因为硬件的质量或性能、磨损老化、人为误操作、不正确的网络设置、管理问题、Linux软件的BUG、系统受到黑客攻击和Linux病毒等原因造成。
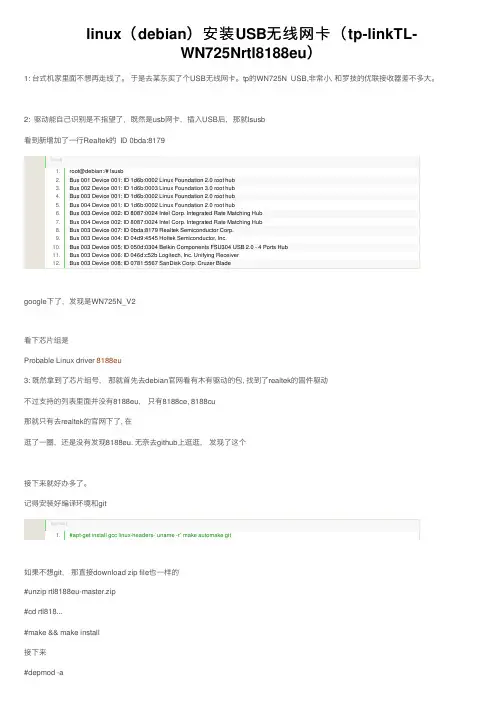
linux(debian)安装USB⽆线⽹卡(tp-linkTL-WN725Nrtl8188eu)1: 台式机家⾥⾯不想再⾛线了。
于是去某东买了个USB⽆线⽹卡。
tp的WN725N USB,⾮常⼩, 和罗技的优联接收器差不多⼤。
2: 驱动能⾃⼰识别是不指望了,既然是usb⽹卡,插⼊USB后,那就lsusb看到新增加了⼀⾏Realtek的 ID 0bda:8179[html]1. root@debian:/# lsusb2. Bus 001 Device 001: ID 1d6b:0002 Linux Foundation 2.0 root hub3. Bus 002 Device 001: ID 1d6b:0003 Linux Foundation 3.0 root hub4. Bus 003 Device 001: ID 1d6b:0002 Linux Foundation 2.0 root hub5. Bus 004 Device 001: ID 1d6b:0002 Linux Foundation 2.0 root hub6. Bus 003 Device 002: ID 8087:0024 Intel Corp. Integrated Rate Matching Hub7. Bus 004 Device 002: ID 8087:0024 Intel Corp. Integrated Rate Matching Hub8. Bus 003 Device 007: ID 0bda:8179 Realtek Semiconductor Corp.9. Bus 003 Device 004: ID 04d9:4545 Holtek Semiconductor, Inc.10. Bus 003 Device 005: ID 050d:0304 Belkin Components FSU304 USB 2.0 - 4 Ports Hub11. Bus 003 Device 006: ID 046d:c52b Logitech, Inc. Unifying Receiver12. Bus 003 Device 008: ID 0781:5567 SanDisk Corp. Cruzer Bladegoogle下了,发现是WN725N_V2看下芯⽚组是Probable Linux driver 8188eu3: 既然拿到了芯⽚组号,那就⾸先去debian官⽹看有⽊有驱动的包, 找到了realtek的固件驱动不过⽀持的列表⾥⾯并没有8188eu,只有8188ce, 8188cu那就只有去realtek的官⽹下了, 在逛了⼀圈,还是没有发现8188eu. ⽆奈去github上逛逛,发现了这个接下来就好办多了。
Linux下USB无线网卡WL-167G驱动安装过程最近经过前期调研选定网卡,又折腾一两天,终于搞定了Linux 下的无线网卡,对遇到的问题进行了分析,并整理了下详细过程,现与大家分享,还有更具体的开发文档,有需要的可以联系下一步工作要将其移植到ARM平台上,希望与大家多多探讨网卡华硕WL-167G、TP-LINK TL-WN321G驱动 RT73_Linux_STA_Drv1.0.3.6下载地址/pub/ASUS/wireless/WL-167g/Linux_1218.zip一、准备工作解压内核源码,拷贝对应内核的makefile,并更改文件属性[root@dding RT73_Linux_STA_Drv1.0.3.6]# chmod 777 Module[root@dding RT73_Linux_STA_Drv1.0.3.6]# ls -al总用量 16。
drwxrwxrwx 2 root root 4096 2006-07-04 Module##确保文件对任何用户是可读可执行的,否则可能不能make config,777可以保证所有权限二、添加对WL-167G ASUS 网卡的支持,注意官方的1218版本以前驱动包括网卡自带的光盘里没有对此说明,否则驱动加载后会说找不到设备[root@dding Module]# gedit rtmp_def.h##add support for WL-167G ASUS{USB_DEVICE(0x0B05,0x1723)}, /* dding add WL-167G ASUS */ \{USB_DEVICE(0x0B05,0x1724)}, /* dding add ASUS */ \三、配置、编译确保对应目录下存在/usr/src当前系统运行的内核源码,其他位置不行1> $make config## ensure there are such directories as /usr/src/linux-2.4.20-8 and /lib/modules/2.4.20-8/kernel/drivers/net, but they are your own kernel2> $make all # compile driver source code## ensure no problems occur四、修改自启动配置文件ifcfg-rausb0并安装RT73.o及添加alias rausb0 rt731> 修改当前目录下的ifcfg-rausb0,若是动态IP则不需要修改[root@dding Module]# gedit ifcfg-rausb0## edit the file according to your network system, and it can be auto loaded when booting system. and the file is as follows: DEVICE=rausb0ONBOOT=yes## static for fixed ipBOOTPROTO=staticIPADDR=192.168.0.31 ## 你自己的IP及其他相关设置NETMASK=255.255.255.0GATEWAY=192.168.0.12> 安装模块及其他自启动设置[root@dding Module]# make installinstall -m 755 -o 0 -g 0 -d /lib/modules/2.4.20-8/extra………………## 安装完毕后请确认对应目录下存在下列文件## 安装完毕后modules.conf内容如下:...............alias rausb0 rt73##安装完毕后 ifcfg-rausb0 内容如gedit ifcfg-rausb0所设五、拷贝系统固件及默认自启动时的默认配置文件1> $cp rt73.bin /etc/Wireless/RT73STA/ # copy firmware[root@dding Module]# cp rt73.bin /etc/Wireless/RT73STA/ ##必须先逐层建立目录/etc/Wireless/RT73STA/后,再执行拷贝操作,否则报错2> $dos2unix rt73sta.dat$cp rt73sta.dat /etc/Wireless/RT73STA/rt73sta.dat[root@dding Module]# dos2unix rt73sta.datdos2unix: converting file rt73sta.dat to UNIX format ...## 拷贝完毕上述目录确认存在此两个文件# Use "vi -b rt73sta.dat" to modify settings according to your need.六、动态加载模块用相关命令确认模块加载成功[root@dding Module]# insmod rt73.o[root@dding Module]# cat /var/log/messages | tail。

换了linux系统后发现无线不能使用,很是苦恼,于是在网上找到各位大神的做法,终于成功安装。
下面给大家介绍一下。
本例以安装Fedora 14无线网卡驱动为例。
参考文章/Linux/2011-05/35366.htm。
首先在/support/802.11/linux_sta.php 上下载32位的驱动,下载完成之后进入到下载的文件夹下#cd ~/Downloads按照readme的做法,新建一个文件夹,并且将该压缩文件移动到新建的文件夹当中#mkdri hybrid_wl#mv hybrid-portsrc-x86_32-v5.60.48.36.tar.gz hybrid_wl/进入文件夹,进行解压,#cd hybrid_wl/#tar -zxvf hybrid-portsrc-x86_32-v5.60.48.36.tar.gz由于自述文件当中的做法是指定解压目录,因此为了保险,再把这个压缩文件移动到上一级目录#mv hybrid-portsrc-x86_32-v5.60.48.36.tar.gz ../根据自述文件的说法(The cards with the following PCI Device IDs are supported with this driver.),查看支持的版本# lspci -n | grep 14e40c:00.0 0280: 14e4:4315 (rev 01)BRCM PCI PCI DellProduct Name Vendor ID Device ID Product ID------------- ---------- --------- -----------4311 2.4 Ghz 0x14e4 0x4311 Dell 13904311 Dualband 0x14e4 0x4312 Dell 14904311 5 Ghz 0x14e4 0x43134312 2.4 Ghz 0x14e4 0x4315 Dell 13954313 2.4 Ghz 0x14e4 0x4727 Dell 15014321 Dualband 0x14e4 0x4328 Dell 15054321 Dualband 0x14e4 0x4328 Dell 15004321 2.4 Ghz 0x14e4 0x43294321 5 Ghz 0x14e4 0x432a4322 Dualband 0x14e4 0x432b Dell 15104322 2.4 Ghz 0x14e4 0x432c4322 5 Ghz 0x14e4 0x432d43224 Dualband 0x14e4 0x4353 Dell 152043225 2.4 Ghz 0x14e4 0x4357发现确实是支持Dell这款无线网卡的4312 2.4 Ghz 0x14e4 0x4315 Dell 1395接下来就是对驱动进行编译了,在hybrid_wl目录下执行以下命令#make clean#make**注意,如果出现以下这样的error,则是因为内核源码的问题,1:查看自己是否安装了kernel-devel-2.6……包,如果没有装包先把包装上试试2:装完这个包还不行的话就需要你自己更新一下内核源码,编译更新的内核[root@ChinaUnix hybrid-wl]# make cleanKBUILD_NOPEDANTIC=1 make -C/lib/modules/`uname -r`/build M=`pwd` cleanmake: *** /lib/modules/2.6.35.6-45.fc14.i686/build: No such file or driectory. Stop.make: *** [clean] Error2[root@ChinaUnix hybrid-wl]# makeKBUILD_NOPEDANTIC=1 make -C /lib/modules/`uname -r`/build M=`pwd`make: *** /lib/modules/2.6.35.6-45.fc14.i686/build: No suchfile or driectory. Stop.make: *** [all] Error 2完成之后,可以在目录下看到wl.ko 文件,如果以前安装过驱动的话,那么还需要对安装过的驱动进行清理。
linux下安装编译网卡驱动的方法你还在为不知道linux下安装编译网卡驱动的方法而不知所措么?下面来是小编为大家收集的linux下安装编译网卡驱动的方法,欢迎大家阅读:linux下安装编译网卡驱动的方法安装linux操作系统后发现没有网卡驱动,表现为system → Administration → Network下Hardware列表为空。
以下为安装编译网卡驱动的过程,本人是菜鸟,以下是我从网上找的资料进行整理,并实际操作的过程,仅供借鉴。
一.检测linux系统内核版本和网卡类型,相关命令如下:uname -r 查看linux内核版本(uname -a 可显示所有信息)lsmod 设备加载情况ls /usr/share/hwdata 查看硬件设备lspci 查看pci网卡设备ethernet controller 厂商和型号,modprobe **** ****为网卡型号,例如modprobe RTL8101E ,如果出错,说明模块不存在,该型号不识别我在这一步时查找不到网卡型号,无奈只能由同时采购的其他相同型号预装win7的电脑下查看网卡型号,是个笨办法,嘿嘿……找到网卡型号后就到驱动之家下载了相应网卡的linux驱动,这些需要根据自己的实际情况下载,不多说了,重点是后面。
二.下载网卡驱动Intel_e1000e-1.9.5.zip 为我下载的所需的网卡驱动,这个在linux下需自己编译.三.安装网卡驱动1.检测编译需要用到内核的源代码包和编译程序gcc。
所以如果没有的话,要先装。
[root@localhost ~]# rpm -qa|grep kernelkernel-xen-2.6.18-8.el5kernel-xen-devel-2.6.18-8.el5kernel-headers-2.6.18-8.el5[root@localhost ~]# rpm -qa|grep gccgcc-c++-4.1.1-52.el5libgcc-4.1.1-52.el5gcc-4.1.1-52.el5gcc-gfortran-4.1.1-52.el5如果缺少kernel-xen-devel-2.6.18-8.el5,可以去安装光盘的/Server/目录下,找到kernel-xen-devel-2.6.18-8.el5.i686.rpm 文件安装。

Linux无线网络配置——无线网卡驱动安装与WLAN 802.11配置Linux无线网络配置——无线网卡驱动安装与WLAN 802.11配置2008-05-10 18:2720739人阅读评论(5)收藏举报Linux无线网络配置——无线网卡驱动安装与WLAN 802.11配置WLAN (Wireless Local Area Network)类似于有线以太网,WLAN 的802.11a 标准使用5 GHz 频段,支持的最大速度为54 Mbps,而802.11b 和802.11g 标准使用2.4 GHz 频段,分别支持最大11 Mbps 和54 Mbps 的速度。
使用Windows操作系统,WLAN配置很简单。
无线网卡厂商将Windows下的驱动随网卡一起销售。
而Linux新兴的操作系统,这方面的驱动不多。
以前购买无线网卡时也没考虑Linux下的驱动程序,于是需要编译驱动程序源码。
现在市场上大部分的无线网卡都是对于Atheros芯片的。
如TP—LINK的310G、350G、510G、550G、650G。
对于Atheros芯片的网卡,可以到网站上找到驱动程序,根据源代码包里面的README和INSTALL文件来获得足够的安装信息。
最新驱动源码包(0.9.2版本)下载地址/madwifi/madwifi-0.9.2.tar .bz2?modtime=1154005765&big_mirror=0下面详细介绍无线网卡驱动程序的安装和WLAN的配置。
操作步骤:下载驱动源码包存放在/root/downloads目录下步骤一、解压源码压缩包1). 进入文件所在目录cd /root/downloads2). 解压.bz2格式的压缩包bunzip2 madwifi-0.9.2.tar.bz2生成.tar格式压缩包3). 解压.tar格式的压缩包tar xvf madwifi-0.9.2.tar步骤二、编译安装驱动4). 进入解压后的目录cd madwifi-0.9.25). 编译驱动程序make查看编译信息,没有error,编译成功,继续安装驱动6). 安装驱动make install步骤三、驱动模块配置7). 插入扫描模块modprobe ath_pci8). 扫描访问接入点modprobe wlan_scan_sta9). 启动无线网卡ath0ifconfig ath0 up获取网卡信息10). wlanconfig ath0 list scan网卡信息如下,default是所在无线局域网的名称,00:d0:f8:e0:a8:88 是无线路由器的物理地址,54M是带宽为54M网卡。
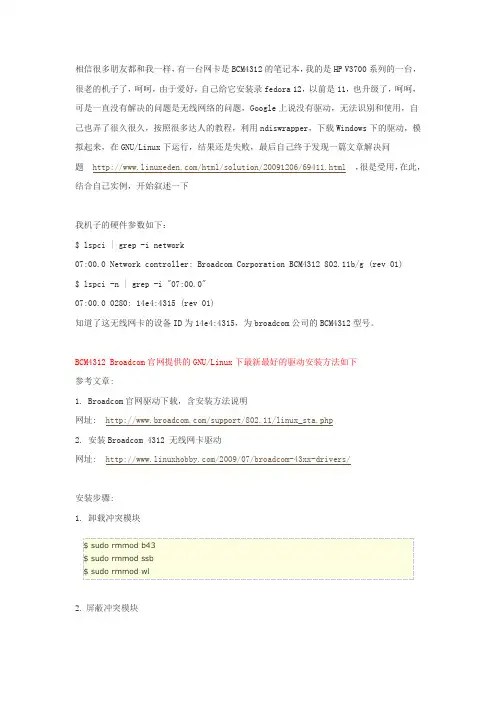
相信很多朋友都和我一样, 有一台网卡是 BCM4312 的笔记本, 我的是 HP V3700 系列的一台, 很老的机子了,呵呵,由于爱好,自己给它安装录 fedora 12, 以前是 11, 也升级了, 呵呵, 可是一直没有解决的问题是无线网络的问题,Google 上说没有驱动,无法识别和使用,自 己也弄了很久很久,按照很多达人的教程,利用 ndiswrapper,下载 Windows 下的驱动,模 拟起来,在 GNU/Linux 下运行,结果还是失败,最后自己终于发现一篇文章解决问 题 /html/solution/20091206/69411.html ,很是受用,在此, 结合自己实例,开始叙述一下我机子的硬件参数如下: $ lspci | grep -i network 07:00.0 Network controller: Broadcom Corporation BCM4312 802.11b/g (rev 01) $ lspci -n | grep -i "07:00.0" 07:00.0 0280: 14e4:4315 (rev 01) 知道了这无线网卡的设备 ID 为 14e4:4315,为 broadcom 公司的 BCM4312 型号。
BCM4312 Broadcom 官网提供的 GNU/Linux 下最新最好的驱动安装方法如下 参考文章: 1. Broadcom 官网驱动下载,含安装方法说明 网址: /support/802.11/linux_sta.php 2. 安装 Broadcom 4312 无线网卡驱动 网址: /2009/07/broadcom-43xx-drivers/安装步骤: 1. 卸载冲突模块$ sudo rmmod b43 $ sudo rmmod ssb $ sudo rmmod wl2. 屏蔽冲突模块# echo "blacklist ssb" >> /etc/modprobe.d/blacklist # echo "blacklist b43" >> /etc/modprobe.d/blacklist3. 编译安装$ pwd ~/download/bcm4312 $ ls README.txt hybrid-portsrc-x86_32-v5.10.91.9.3.tar.gz $ mkdir hybrid $ tar xf hybrid-portsrc-x86_32-v5.10.91.9.3.tar.gz -C hybrid $ cd hybrid/ $ ls Makefile lib src $ make KBUILD_NOPEDANTIC=1 make -C /lib/modules/`uname -r`/build M=`pwd` make[1]: Entering directory `/usr/src/linux-headers-2.6.26-2-686' LD /home/c-aries/download/bcm4312/hybrid/built-in.o CC [M] /home/c-aries/download/bcm4312/hybrid/src/wl/sys/wl_linux.o CC [M] /home/c-aries/download/bcm4312/hybrid/src/wl/sys/wl_iw.o CC [M] /home/c-aries/download/bcm4312/hybrid/src/shared/linux_osl.o LD [M] /home/c-aries/download/bcm4312/hybrid/wl.o Building modules, stage 2. MODPOST 1 modules WARNING: modpost: missing MODULE_LICENSE() in /home/c-aries/download/bcm4312/hybrid/wl.o see include/linux/module.h for more information CC /home/c-aries/download/bcm4312/hybrid/wl.mod.o LD [M] /home/c-aries/download/bcm4312/hybrid/wl.ko make[1]: Leaving directory `/usr/src/linux-headers-2.6.26-2-686' $ uname -r 2.6.26-2-686 $ sudo cp -rf wl.ko /lib/modules/2.6.26-2-686/kernel/drivers/net/wireless/ $ sudo depmod $ sudo modprobe wl $4. 检测是否安装成功$ lsmod | grep wl wl 1269312 0 5124 2 ieee80211_crypt_tkip,wl ieee80211_crypt// bios 设置无线可用,打开无线开关 $ sudo iwconfig lo eth0 eth1 no wireless extensions. no wireless extensions. IEEE 802.11bg ESSID:"" Nickname:"" Mode:Managed Frequency:2.412 GHz Access Point: Not-Associated Bit Rate:54 Mb/s Retry min limit:7 Tx-Power:32 dBm RTS thr:off Fragment thr:offPower Managementmode:All packets received Link Quality=5/5 Signal level=0 dBm Noise level=0 dBm Rx invalid nwid:0 Rx invalid crypt:0 Rx invalid frag:0 Tx excessive retries:0 Invalid misc:0 ppp0 $ // 行了,已经可以看到无线网卡的 eth1 :) no wireless extensions. Missed beacon:0大功告成!。

linux网卡驱动安装方法1、查找网卡芯片,确立网卡型号,并确立linux内核版本,到对应的网卡官网下载驱动。
2、安装步骤(这里以RTL8110为例)1)cd到网卡驱动所在文件夹,解压:# tar vjxf r8168-8.aaa.bb.tar.bz2//关于解压命令查看《Linux下软件包的解压方式大全》2)进入文件夹:# cd r8168-8.aaa.bb3)安装(需安装kernel-source,否则会失败):# make clean modules (as root or with sudo)# make install# depmod -a# insmod ./src/r8168.ko (or r8168.o in linux kernel 2.4.x)4)通过以下指令查看驱动是否已经启动.# lsmod | grep r8168# ifconfig -a如果能看到类似“ethX”的结果输出, 说明已成功驱动网卡.5)配置并激活ethX.# ifconfig ethX up,where X=0,1,2,...3、附realtek RTL8168B驱动readme文档:<Linux device driver for Realtek Ethernet controllers>This is the Linux device driver released for RealTek RTL8168B/8111Band RTL8168C/8111C, Gigabit Ethernet controllers with PCI-Expressinterface.<Requirements>- Kernel source tree (supported Linux kernel 2.6.x and 2.4.x)- For linux kernel 2.4.x, this driver supports 2.4.20 and latter.- Compiler/binutils for kernel compilation<Quick install with proper kernel settings>Unpack the tarball :# tar vjxf r8168-8.aaa.bb.tar.bz2Change to the directory:# cd r8168-8.aaa.bbIf you are running the target kernel, then you should be able to do :# make clean modules (as root or with sudo)# make install# depmod -a# insmod ./src/r8168.ko (or r8168.o in linux kernel 2.4.x)You can check whether the driver is loaded by using following commands.# lsmod | grep r8168# ifconfig -aIf there is a device name, ethX, shown on the monitor, the linuxdriver is loaded. Then, you can use the following command to activate the ethX.# ifconfig ethX up,where X=0,1,2,...<Set the network related information>1. Set manuallya. Set the IP address of your machine.# ifconfig ethX "the IP address of your machine"b. Set the IP address of DNS.Insert the following configuration in /etc/resolv.conf.nameserver "the IP address of DNS"c. Set the IP address of gateway.# route add default gw "the IP address of gateway"2. Set by doing configurations in /etc/sysconfig/network-scripts/ifcfg-ethX for Redhat and Fedora, or /etc/sysconfig/network/ifcfg-ethX for SuSE. There are two examples to set network configurations.a. Fix IP address:DEVICE=eth0BOOTPROTO=staticONBOOT=yesTYPE=ethernetNETMASK=255.255.255.0IPADDR=192.168.1.1GA TEWAY=192.168.1.254BROADCAST=192.168.1.255b. DHCP:DEVICE=eth0BOOTPROTO=dhcpONBOOT=yes<Modify the MAC address>There are two ways to modify the MAC address of the NIC.1. Use ifconfig:# ifconfig ethX hw ether YY:YY:YY:YY:YY:YY,where X is the device number assigned by Linux kernel, andYY:YY:YY:YY:YY:YY is the MAC address assigned by the user.2. Use ip:# ip link set ethX address YY:YY:YY:YY:YY:YY,where X is the device number assigned by Linux kernel, andYY:YY:YY:YY:YY:YY is the MAC address assigned by the user.<Force Link Status>1. Force the link status when insert the driver.If the user is in the path ~/r8168, the link status can be forcedto one of the 5 modes as following command.# insmod ./src/r8168.ko speed=SPEED_MODE duplex=DUPLEX_MODE autoneg=NWAY_OPTION,whereSPEED_MODE = 1000 for 1000Mbps= 100 for 100Mbps= 10 for 10MbpsDUPLEX_MODE = 0 for half-duplex= 1 for full-duplexNW AY_OPTION = 0 for auto-negotiation off (true force)= 1 for auto-negotiation on (nway force)For example:# insmod ./src/r8168.ko speed=100 duplex=0 autoneg=1will force PHY to operate in 100Mpbs Half-duplex(nway force).2. Force the link status by using ethtool.a. Insert the driver first.b. Make sure that ethtool exists in /sbin.c. Force the link status as the following command.# ethtool -s ethX speed SPEED_MODE duplex DUPLEX_MODE autoneg NWAY_OPTION,whereSPEED_MODE = 1000 for 1000Mbps= 100 for 100Mbps= 10 for 10MbpsDUPLEX_MODE = half for half-duplex= full for full-duplexNW AY_OPTION = off for auto-negotiation off (true force)= on for auto-negotiation on (nway force)For example:# ethtool -s eth0 speed 100 duplex full autoneg on本文出自:中国E动网[]中国领先互联网接入服务提供商!11年品质保障!-- 中国E动网[]。

计算机系列教学文档------Linux下无线网卡驱动的安装Linux下无线网卡驱动的安装本来是我的本本比较旧,为了做一些网络实验,需要安装linux 操作系统,但系统安装完成后,无线网卡的驱动一直有问题,所以在网络上查找到这篇文章,希望对大家有用。
在ubuntu、BT5等linux 操作系统上通用。
The Ipw2200 is the Linux driver for the Intel PRO/Wireless 2200BG Mini-PCI Adapter and Intel PRO/Wireless 2915ABG Mini-PCI Adapter found in Centrino laptops. This driver only works on 2.6.x kernels (2.6.4 or newer).Starting with kernels 2.6.14 the driver is included in kernel.NOTE!Make sure you have installed the firmware! The ipw2200 documentation will tell you where to find these firmware files and where to install those.Included in mainline Linux kernels, tracking the SourceForge version with about 6 months delay.PackagesFedora Packages(1): Fedora Core includes the ipw2200-drivers in FC3 (with updates) and FC4. You still need to grab the firmware from /Fedora Packages(2): /name/ipw2200/Mandriva: The ipw2200 driver modules are included in the stock kernel package; the firmware is included in the commercial distribution or available from /.Gentoo: The driver is in the portage tree: emerge net-wireless/ipw2200 and net-wireless/ipw2200-firmwareDebian Sarge includes the source code for the modules in package ipw2200-source (/ipw2200-source). You additionally need to download firmware manually.Debian Etch includes a version of the modules in its kernel or for a later version install package ipw2200-modules-2.6-486 or ipw2200-modules-2.6-686 or ipw2200-modules-2.6-686-bigmem or ipw2200-modules-2.6-k7 or ipw2200-modules-2.6-amd64; or the source code for them in ipw2200-source (/ipw2200-source) to compile one yourself. You additionally need to download firmware manually.StatusIn development, usable, WEP 128bit encryption works, WPA and WPA2 work with drivers >= 1.0.2 using wpa_supplicant, monitor/rfmon is supported as with version >= 1.0.6. Generally works well, but some users experience problems (especially with firmware restarts and with WPA functionality using wpa_supplicant). Passing the hwcrypto=0 module parameter improves reliability for many users.The ipw2200 driver up to version 1.0.6 (in combination with some newer kernels) had a problem getting DHCP leases (it turned out to be a bug in the broadcasting code). Version 1.0.7 seems to have fixed this.Older ipw2200 driver versions shipped by many distributions have been reported to freeze a T43 after several minutes of intensive communication. Installing version 1.1.2 of the driver solved the problem.Latest stable versions:ipw2200 driver: 1.2.0firmware: 3.0ieee80211 stack: 1.2.15Latest development versions:ipw2200 driver: 1.2.2firmware: 3.1ieee80211 stack: 1.2.18Mainline kernels contain older (but mostly functional) versions of ipw2200 and ieee80211, and still require the addition of the firmware files. To get the latest versions you need to separately install the ipw2200 module and ieee80211 stack.InstallationSource CodeDownload the latest ieee80211 stack and install it:# tar xzvf ieee80211-1.2.15.tgz# cd ieee80211-1.2.15# make# make installDownload the latest ipw2200 module and install it:# tar xzvf ipw2200-1.2.0.tgz# cd ipw2200-1.2.0# make# make installDownload the matching firmware and install it:# tar xzvf ipw2200-fw-3.1.tgz -C /lib/firmwareDebian Sarge# apt-get install ipw2200-source# module-assistant -t build ipw2200-source[is this how module-assistant works in Sarge?]Debian EtchThe kernel includes a version but if you want a more recent version install the module ipw2200-modules-2.6-486 or ipw2200-modules-2.6-686 or ipw2200-modules-2.6-686-bigmem or ipw2200-modules-2.6-k7 or ipw2200-modules-2.6-amd64 depending on your architecture.The firmware is not distributed with Debian due to licensing reasons, download the matching version 3.0 firmware and install it:# tar -xvf ipw2200-fw-3.1.tgz -C /lib/firmware# mv /lib/firmware/ipw2200-fw-3.1/* /lib/firmwareDebian UnstableInstall ieee80211-source:# apt-get install ieee80211-source# module-assistant -t build ieee80211-sourceThe kernel includes a version but if you want a more recent version install the module ipw2200-modules-2.6-486 or ipw2200-modules-2.6-686 or ipw2200-modules-2.6-686-bigmem or ipw2200-modules-2.6-k7 or ipw2200-modules-2.6-amd64 depending on your architecture.There is a bug in the Debian package (last checked: Dec 30th 2005) that prevents from linking to ieee80211 modules using module-assistant. In case it is not fixed in your version, fall back to the regular source installation procedure described above.The firmware is not distributed with Debian due to licensing reasons, download the matching firmware and install it:# tar xzvf ipw2200-fw-2.4.tgz -C /usr/lib/hotplug/firmwaresee /etc/hotplug/firmware.agent for details on configured firmware locationsMake sure that your firmware files are not in a subdirectory (dmesg will give you warnings after any modprobe when firmware can’t be loaded)Fedora CoreInstallation on Fedora Core 5 works out of the box provided you install the ipw2200-firmware package. However, certain parts of the install process may not set up the wireless networking in a friendly manner using GNOME system tray icons and other tools. Bill Moss has written some excellent HowTo articles, including using VPNC to connect to a remote Cisco IPSec network.Fedora Core 5 and the IPW2200 Wireless DriverFedora Core 5 NetworkManager, NetworkManager-vpnc and Wireless Driver IPW2200Testing the driver# modprobe ipw2200# iwconfig# dmesg output might look similar to this:ieee80211: 802.11 data/management/control stack, 1.1.6ieee80211: Copyright (C) 2004-2005 Intel Corporation <jketreno@>ipw2200: Intel(R) PRO/Wireless 2200/2915 Network Driver, 1.0.8ipw2200: Copyright(c) 2003-2005 Intel Corporationipw2200: Detected Intel PRO/Wireless 2915ABG Network ConnectionNB: To make the wifi LED work on the thinkpad, pass the option led=1 to the kernel while loading the module. eg. # modprobe ipw2200 led=1. This can also be accomplished by adding that option to the file where your distribution looks for modprobe options so that it becomes automatic.In debian this can be done by putting a file named after the module in /etc/modutils with the options in ithere we might run a cmd like this# echo options ipw2200 led=1 > /etc/modutils/ipw2200then we must run update-modules to remake /etc/module.conf# update-modulesWPA supportUse wpa_supplicant with the -Dwext argument (not -Dipw), and pass the hwcrypto=0 argument to the ipw2200 module.There are some very detailed instructions with working sample configurations on the following link:ipw2200 WPA instructionPower ManagementThe ipw2200 driver has power management capabilities, which comes in handy while operating on battery.To enable reduced power consumption mode, issue:# iwpriv wlan0 set_power 7where wlan0 is the name of your interface. This will reduce idle power consumption by 1-2 Watts compared to no power management. To return to the “normal” operation mode, you can issue:# iwpriv wlan0 set_power 6.In order to check current settings, you can issue:# iwpriv wlan0 get_power.More information on these option is available in the README.ipw3945 file in the ipw3945 package (README.ipw2200 seems to be rather sketchy about the details of power management). You may want to turn power management on/off on demand in an ACPI script that catches battery/AC events, so that this happens automatically.Note that there have been reports that some versions of ipw2200 react with a firmware error to power management commands. This patch could alleviate the problem.To disable the radio (and further reduce power consumption) when the card is not in use, issue:# echo 1 > /sys/bus/pci/drivers/ipw2200/*/rf_killTo enable the radio, issue:# echo 0 > /sys/bus/pci/drivers/ipw2200/*/rf_killTo make the radio off by default after boot, addoptions ipw2200 disable=1to your /etc/modprobe.conf or equivalent (on kubuntu 6.10 /etc/modprobe.d/options).See README.ipw2200 in the ipw2200 package for details and other options.wpa_supplicant assigns a random SSID wasting powerMany wpa_supplicant versions implement disconnection by configuring a random SSID. ipw2200 reacts in a very unfortunate way to this, intensively scanning for this random SSID and wasting power. This waste can be seen in powertop.Here are a number of ways to solve this problem:Run iwconfig eth1 essid off after every wpa_supplicant disconnection.Upgrade to wpa_supplicant version 0.7.1 or higher. Starting from git commit 3145e615 wpa_supplicant does not configure ipw2200 with a random SSID any more.Backporting commit 3145e615 to wpa_supplicant version 0.6.8 also fixes the problem.Changing the enabled channelsPermitted WiFi channels vary with geography due to regulation. The EEPROM in this chip contains a country code (programmed by the hardware manufacturer), and the driver converts this to a channel list and enforces it.If you carry your laptop to a different regulatory region, you may need to change the list of permitted channels according to local regulations. There are two ways to accomplish this: Patching the ipw2200 driverYou can alter the ipw2200 driver sourcecode to hard-code the country code instead of reading it from EEPROM. For example, this will allow all 14 channels (perfect for those special occasions in international water):—ipw2200.c.orig+++ ipw2200.c@@ -11344,7 +11344,7 @@ static int ipw_up(struct ipw_priv *priv) memcpy(priv->net_dev->dev_addr, priv->mac_addr, ETH_ALEN); for (j = 0; j < ARRAY_SIZE(ipw_geos); j++) {- if (!memcmp(&priv->eeprom[EEPROM_COUNTRY_CODE],+ if (!memcmp(“ZZR”, ipw_geos[j].name, 3)) break; }For the list of codes and their meaning, see the “ipw_geos” table in the ipw2200.c sourcecode.Patching the EEPROMAlternatively, you can change the country code in the EEPROM once and for all, and then use the standard ipw2200 driver.See this guide:Patching the EEPROM.Instead of the hd program mentioned there, you can use the more common od program:echo -n ZZD | od -t x10000000 5a 5a 440000003ATTENTION!If this procedure goes wrong, you may ruin your wireless card.Additional CommentsYour kernel may include an old version of the ipw2200 driver. It is recommended to use the latest version.Make sure you also install the firmware version needed by the driver version you use. You can find the firmware here. To install it, decompress the .tgz file into /usr/lib/hotplug/firmware or /lib/firmware depending on your disto.The driver doesn’t appea r to support the MII interface, so any tools like automatic network configuration managers (i.e. whereami) that rely on mii-tool do not work.。
凡使用红旗LINUX 6.0 sp1的可在开始菜单点击实用工具--软件包管理器如图,找到带有“BCM43XX”字样的软件包卸载。
重启红旗LINUX 6.0 sp1。
1,从/下载ndiswrapper 1.53软件。
此软件是用来使Linux 运行windows无线网卡驱动,从而达到驱动无线的目的。
2,从windows系统中提取无线网卡驱动文件。
以便供ndiswrapper使用。
到windows中找驱动文件也比较简单,先是我的电脑-->属性-->硬件-->设备管理器。
如图:点击无线网卡的属性弹出属性框。
如图:年在“驱动程序详细信息”中,可以看到ar5211.sys文件。
用系统的搜索功能搜索c盘中的“5211”文件,可以查出4个包含“5211”的文件。
其中有两个是相同的,复制其中3个到自建的net文件夹中。
拷贝到Linux中。
3,解压ndiswrapper 1.53软件。
到压缩文件目录下运行tar -xzvf ndiswrapper-1.53.tar.gz 如图:4,进入ndiswrapper目录编译软件。
命令:make如图:5,保持在ndiswrapper目录安装软件,先用su命令切换到root用户,确定变成root用户后目录没有变。
如图:成功切换到root用户后,命令:make install 安装软件。
如图就此ndiswrapper安装就完成了。
接下来安装windows驱动到系统中。
6,进入net目录,也就是刚拷贝到Linux中的windows无线网卡驱动文件目录。
运行命令:/usr/sbin/ndiswrapper -i net5211.inf安装windows驱动,如图:7,检查是否安装成功。
命令 /usr/sbin/ndiswrapper -l看见如图红圈中的内容就恭喜你成功80%了。
再输入命令ndiswrapper -m8,用命令:/sbin/modprobe ndiswrapper加载ndiswrapper核心模块,网卡灯就立即亮了。
linux 下Intel 3945ABG 安装无线网卡驱动1. 添加atrpms 源# gedit /etc/yum.repos.d/atrpms.repo 添加以下内容:代码: [atrpms]Core $releasever - $basearch - ATrpmsbaseurl=dl.atrpms/fc$releasever- $basearch/atrpms/stablegpgkey=ATrpms/RPM-GPG-KEY.atrpmsenabled=0gpgcheck=1 安装key:# rpm --import ATrpms/RPM-GPG- KEY.atrpms2. 安装驱动# yum --enablerepo=atrpms install ipw3945-kmdl-`uname - r` ieee80211-kmdl-`uname -r`3. 打开无线网卡脚本:代码:#!/bin/bash## ipw3945d Load/Unload Intel ipw3945 daemon## chkconfig: 2345 09 90# description: Load / Unload Intel ipw3945 daemon#### BEGIN INIT INFO# Provides: ipw3945d### END INIT INFO# Source function library.. /etc/init.d/functionsif [ ! -f/etc/sysconfig/network ]; thenexit 0ficase $1 instart)echo -n Starting ipw3945d:/sbin/ipw3945d /dev/null 21echo;;stop)echo -n Stopping ipw3945d:killproc ipw3945decho;;status)status ipw3945d;;restart)cd $CWD$0 stop$0 start;;*)echo $Usage: $0 {start|stop|restart|status}exit 1esacexit 0 把上面的代码保存为ipw3945d。
Linux无线网络配置——无线网卡驱动安装与WLAN 802.11配置Linux无线网络配置——无线网卡驱动安装与WLAN 802.11配置2008-05-10 18:2720739人阅读评论(5)收藏举报Linux无线网络配置——无线网卡驱动安装与WLAN 802.11配置WLAN (Wireless Local Area Network)类似于有线以太网,WLAN 的802.11a 标准使用5 GHz 频段,支持的最大速度为54 Mbps,而802.11b 和802.11g 标准使用2.4 GHz 频段,分别支持最大11 Mbps 和54 Mbps 的速度。
使用Windows操作系统,WLAN配置很简单。
无线网卡厂商将Windows下的驱动随网卡一起销售。
而Linux新兴的操作系统,这方面的驱动不多。
以前购买无线网卡时也没考虑Linux下的驱动程序,于是需要编译驱动程序源码。
现在市场上大部分的无线网卡都是对于Atheros芯片的。
如TP—LINK的310G、350G、510G、550G、650G。
对于Atheros芯片的网卡,可以到网站上找到驱动程序,根据源代码包里面的README和INSTALL文件来获得足够的安装信息。
最新驱动源码包(0.9.2版本)下载地址/madwifi/madwifi-0.9.2.tar .bz2?modtime=1154005765&big_mirror=0下面详细介绍无线网卡驱动程序的安装和WLAN的配置。
操作步骤:下载驱动源码包存放在/root/downloads目录下步骤一、解压源码压缩包1). 进入文件所在目录cd /root/downloads2). 解压.bz2格式的压缩包bunzip2 madwifi-0.9.2.tar.bz2生成.tar格式压缩包3). 解压.tar格式的压缩包tar xvf madwifi-0.9.2.tar步骤二、编译安装驱动4). 进入解压后的目录cd madwifi-0.9.25). 编译驱动程序make查看编译信息,没有error,编译成功,继续安装驱动6). 安装驱动make install步骤三、驱动模块配置7). 插入扫描模块modprobe ath_pci8). 扫描访问接入点modprobe wlan_scan_sta9). 启动无线网卡ath0ifconfig ath0 up获取网卡信息10). wlanconfig ath0 list scan网卡信息如下,default是所在无线局域网的名称,00:d0:f8:e0:a8:88 是无线路由器的物理地址,54M是带宽为54M网卡。
如何在Linux系统安装腾达U1网卡
“自强不息、勇于创新、诚实守信” 是腾达公司的企业精神,腾达路由器也功能强大,那么你知道如何在Linux系统安装腾达U1网卡吗?下面是店铺整理的一些关于如何在Linux系统安装腾达U1网卡的相关资料,供你参考。
在Linux系统安装腾达U1网卡第一步、连接好危险网卡与电脑连接好腾达无线网卡与电脑。
在Linux系统安装腾达U1网卡第二步、打开终端terminal准备安装
将驱动置于桌面(或任意位置),在当前路径打开终端Terminal(按Ctrl+Alt+T即可打开终端窗口)。
输入命令“ls”查看当前路径。
在Linux系统安装腾达U1网卡第三步、解压无线网卡驱动解压文件,可点击右键解压,或使用命令“rar x +文件名称”解压文件。
在Linux系统安装腾达U1网卡第四步、安装无线驱动
1. 输入命令“cd+文件名”切换到解压的文件路径中,可看到有install.sh文件。
2. 在终端中输入命令“sh install.sh”,即可等待安装成功。
期间需要输入几次管理密码。
2. 安装成功后,可选取网络表示,连接网络。
在Linux系统安装腾达U1网卡的。
1.1下载驱动程序一、首先弄清楚当前使用的是什么版本的Linux,如:Redhat9.0、Freda core5等。
Linux用的是什么版本的内核,可以用uname –a得知内核版本号。
二、使用的是什么接口类型的无线网卡,常见的接口类型有PCI (台式机)、Cardbus/PCMCIA(笔记本)、USB(台式机、笔记本)等。
三、无线网卡使用的是哪一种类型的芯片,判断方法如下,到相关网站下载与其相对应的驱动程序。
常用的无线网卡驱动及其支持的芯片类型和接口类型如下表1所示。
PCMCIA卡:将无线网卡插入笔记本电脑中,用命令lspci可以看到芯片类型,如:Realtek Semiconductor Co.. Ltd, RTL8180L802.11b MAC (rev 20)其中RTL8180L即为网卡芯片类型,用参数v可以看到更详细的信息。
USB卡:用命令lsusb可以看到芯片类型(fc5没有此命令)。
通过其它方法查找。
驱动程序芯片类型接口类型官方网站下载页Linux-wlan-ng Prism2/2.5/3 Cardbus/PCI/USB /download.shtml Madwifi Atheros系列Cardbus/PCI /islsm ISL38XX USB/PCI http://jbnote.free.fr/prism54usb/index.html表1:网卡驱动程序有关信息1.2驱动程序的安装每款驱动的安装方法各不相同,阅读INSTALL文档,获得驱动程序的具体安装方法及系统内核要求。
阅读驱动程序附带的README文档,获得有关此驱动的详细信息,如驱动所支持的网络模式、接口类型、所包含的模块的功能及无线网卡的配置等。
下面是安装网卡驱动程序的一般步骤:编译网卡驱动程序#make安装驱动程序模块#make install加载模块#modprobe 主模块名安装好驱动后插入无线网卡,命令iwconfig可以查看驱动是否加载成功,如果出现新的设备名,则说明驱动已经装上并且能够识别出无线网卡。
#iwconfig1.3无线网卡的配置可以分别通过‘网络配置’界面和命令对无线网卡进行配置,如IP地址、网络模式、ESSID和速率等。
可视化配置无线网卡,方法如下所示:首先用编辑工具编辑文件/etc/modprobe.conf,添加下面行以实现界面配置。
alias 设备名驱动模块名(加到/etc/modprobe.conf)重起笔记本电脑后加载驱动模块,打开桌面﹥管理﹥网络,在“网络配置”界面中,如果在设备栏里没有类型为“Wireless”的设备,新建一个。
点击“新建”,创建一个设备类型为‘无线连接’的设备,选择刚装好的无线网卡,最后对该无线网卡进行初始化配置,其所对应的脚本文件为/etc/sysconfig/network-script/ifcfg-设备名也可以使用命令进行配置,命令有ifconfig、iwconfig、iwlist等,具体用法参见第4节或使用命令man查看详细信息。
2内核编译与安装如果驱动程序要求的内核选项没有打开,则需要进行内核的配置。
使用命令进入内核源代码目录, 命令make mrproper确保源代码目录下没有不正确的.o文件以及文件的互相依赖。
接下来的内核配置过程比较烦琐,但是配置的适当与否与日后Linux的运行直接相关,有必要了解一下一些主要的且经常用到的选项的设置。
配置内核可以根据需要与爱好使用下面命令中的一个:#make config (基于文本的最为传统的配置界面)#make menuconfig (基于文本选单的配置界面)#make xconfig (基于图形窗口模式的配置界面)#make oldconfig (如果只想在原来内核配置的基础上修改一些小地方,会省去不少麻烦)进行配置时,大部分选项可以使用其缺省值,只有小部分需要根据驱动程序的需要进行选择。
选择相应的配置时,有三种选择,它们分别代表的含义如下:“Y”-将该功能编译进内核“N”-不将该功能编译进内核“M”-将该功能编译成可以在需要时动态插入到内核中的模块。
将与核心其它部分关系较远且不经常使用的部分功能代码编译成为可加载模块,有利于减小内核的长度,减小内核消耗的内存。
2.1 2.6系列内核源代码安装及编译步骤对于Fedora Core 系列来说,内核源码是放在/usr/src/redhat/BUILD/ 目录中,如果系统中该目录没有内容,则说明没有安装内核的源码包,可从下载对应的源码包。
如果下载的是rpm包,可通过以下命令来安装:#rpm -i kernel-2.6.16-1.2096_FC5.src.rpm#cd /usr/src/redhat/SPECS#rpmbuild -bp --target i686 kernel-2.6.spec#cd ../BUILD#cd kernel*/linux*现在就是内核的代码所在的目录(linux-2.6.16.i686)。
如果下的是.tar.bz2或.tar.gz,只要把下载下来的文件移到/usr/src 目录中解压,然后进入解压的目录根据需要进行配置。
2.6系列内核编译安装十分简单,只需以下3个命令即可,并自动完成对启动引导装载器GRUB的配置,非常方便。
# make 编译内核#make modules_install 安装模块#make install 安装内核、修改GRUB配置文件重启计算机后选Fedora Core (2.6.16-prep)以新编译的内核进入Linux操作系统。
2.2 2.4系列内核源代码安装及编译步骤如果驱动要求的内核版本较高,需要升级,可从上下载相应的内核版本进行编译安装。
2.4 系列内核编译所使用的命令较多,最后还需要手动修改启动引导装载器GRUB的配置文件,添加新编译的内核映像文件作为新的启动选项。
将源代码包移动到/usr/src中解压:# tar vxfj linux-2.4.26.tar.bz2# ln –s linux2.4.26 linux# cd /usr/src/linux配置和编译内核:# cp /boot/config-2.4.20-8 .config# make menuconfig# make dep# make clean# make bzImage安装模块:# make modules# make modules_install启动新选项:# cp arch/i386/boot/bzImage /boot/vmlinuz-2.4.26# cp .config /boot/config-2.4.26# cp System.map /boot/System.map-2.4.26# mkinitrd /boot/initrd-2.4.26.img 2.4.26# cd /boot# rm -f System.map vmlinuz# ln -s System.map-2.4.26 System.map# ln -s vmlinuz-2.4.26 vmlinuz# cd grub# vi grub.conf# reboot选择相对快速并且具有权威性的站点下载最新的内核源代码包,例如条件允许的话可以到下面的站点下载:ftp:///pub/linux/kernel国内Linux用户可以到下面的站点下载:Linux系统的核心代码存放于目录/usr/src/linux,实际上,该目录是一个链接,指向当前所用的核心版本的目录,例如如果当前使用的版本是x.y.z,则该核心的实际目录应该是:/usr/src/linux-x.y.z。
而新下载的内核中的目录是linux,这样,直接在/usr/src下解包会导致原来的内核目录被覆盖。
所以稳妥的做法是,首先删除链接linux,然后解包、更名、重新链接。
在解包前要确认在/usr/src目录下没有叫linux的目录,或者不再想保留该目录。
3三款无线网卡驱动的安装与配置过程3.1TL-WN510G无线网卡、SMC EZ Connect™ 802.11g Wireless CardbusAdapter无线网卡这两款无线网卡使用的芯片类型相同(AR5212),以TL-WN510G介绍Cardbus 接口无线网卡驱动程序安装的步骤。
下载驱动程序插上网卡后,通过下面的命令来查看无线的主芯片信息。
#lspci –v运行此命令后,显示如下信息:07:00.0 Ethernet controller: Atheros Communications, Inc. AR5212 MultiprotocolMAC/baseband processor(rev 01)Subsystem: Atheros Communications, Inc. Unknown device 1052Flags: medium devsel, IRQ 11Memory at 38000000 (32-bit, non-prefetchable)[disable][size=64K]Capabilities: [44] Power Management version 2可以看出,网卡的芯片类型为AR5212,是Atheros系列中的一款。
从表1中得知驱动程序Madwifi支持该芯片类型的网卡。
到 下载最新的源代码,一般名称为madwifi-ng-current.tar.gz。
安装驱动程序解压后阅读里面的READER和INSTALL文档来获取帮助信息。
从README文档中得知,该驱动程序支持PCI、miniPCI 、Cardbus的设备类型,驱动的主模块为ath_pci,各种型号所支持的协议以及无线网卡的详细配置。
从INSTALL文档中得知,该驱动的系统要求为要有内核源代码,内核配置选项CONFIG_SYSCTL、CONFIG_CRYPTO要打开(可通过查看文件/boot/config-2.6.15-1.2054_FC5来查找选项是否打开),要使用相同版本的编译器编译内核和驱动程序等。
在Feroda core下没有找到内核源码,到网上下载相应的内核源码。
采用前面所述方法对内核源码进行配置,打开所需的选项,然后编译、安装内核模块。
配置好内核后,依据INSTALL里的流程安装驱动程序:运行下面的命令来编译和安装驱动,选项KERNELPATH为内核源码的路径#make KERNELPATH=/usr/src/*#make install编译成功后可运行下面的命令来加载网卡设备#modprobe ath_pci没有错误提示,表明已经成功安装并加载上了驱动程序。
插入无线网卡后运行命令#iwconfig出现新的设备名ath0,即驱动识别出了网卡设备,驱动程序安装成功。