百斯腾电暖器说明书
- 格式:docx
- 大小:13.88 KB
- 文档页数:2
HEAVY-DUTY FAN-FORCEDCEILING-MOUNT HEATERINSTRUCTION MANUALMODEL: EH-4604PLEASE READ AND SAVE THESE IMPORTANT SAFETY INSTRUCTIONSPET OWNERS WARNING: Health warning for some small pets, including birds,as they are extremely sensitive to the fumes produced during the first-time useof many appliances. These fumes are not harmful to humans but werecommend that you do not use your heater around birds and small petsduring its initial use until the manufacturing corrosion (anti-corrosion)coatings burn off.Technical Support: 1-866-206-0888Serviceemail:*****************TABLE OF CONTENTS Important Instructions (3)Description and Specifications (4)General Safety Information (4)Locating the heater (5)Installation........................................................6-8 Connecting the power........................................8-10 Operating Instructions.......................................11-12 Maintenance Instructions (12)IMPORTANT INSTRUCTIONSWHEN USING ELECTRICAL APPLIANCES, BASIC PRECAUTIONS SHOULD ALWAYSBE FOLLOWED TO REDUCE THE RISK OF FIRE, ELECTRIC SHOCK, AND INJURY TO PERSONS, INCLUDING THE FOLLOWING:1. Read all instructions before installing or using this heater.2. This heater is hot when in use. To avoid burns, do not let bare skin touch hot surfaces.Keep combustible materials, such as furniture, pillows, bedding, papers, clothes andcurtains at least 3 feet (0.9 m) from the front of the heater and keep them away from the sides and rear.3. Extreme caution is necessary when any heater is used by or near children or invalids. Donot leave the heater operating if unattended.4. Always turn the heater off when not in use.5. Do not operate any heater after it malfunctions, had been dropped or damaged in anymanner. Disconnect power at the service panel and have heater inspected by areputable electrician before reusing.6. Do not use outdoors.7. This heater is not intended for use in bathrooms, laundry areas and similar indoorlocations. Never locate heater where it may fall into a bathtub or other water container.8. To disconnect heater, turn controls to off, and turn off power to heater circuit at maindisconnect panel.9. Do not insert or allow any foreign objects to enter any ventilation or exhaust opening asthis may cause an electric shock or fire or damage the heater.10. To prevent a possible fire, do not block air intakes or exhaust in any manner. Do not useon soft surfaces, like a bed, where openings may be blocked.11. A heater has hot and arcing or sparking parts inside. Do not use it in areas wheregasoline, paint, or flammable liquids are used or stored.12. All wiring must be carried out by a certified electrician and must be in accordance withnational and local electrical codes in Canada.13. Use this heater only as described in this manual. Any other use not recommended by themanufacturer may cause fire, electric shock, or personal injury.14. This heater may include a visual alarm to warn that parts of the heater are gettingexcessively hot. If the alarm illuminates, immediately turn the heater off and inspect for any objects on or adjacent to the heater that may have blocked the airflow or otherwise cause high temperatures. DO NOT OPERATE THE HEATER WITH THE ALARMILLUMINATING.15. This appliance is not intended for use by persons (including children) with reducedphysical, sensory or mental capabilities, or lack of experience and knowledge, unlessthey have been given supervision or instruction concerning use of the appliance by aperson responsible for their safety. Children should be supervised to ensure that they do not play with the appliance.SAVE THESE INSTRUCTIONS:DESCRIPTIONThe heavy-duty electric heater is designed for garages, workshops and similar locations. It features three heat settings, for a maximum heat production of 17,065 BTU per hour. It includes horizontal and vertical air flow and a built-in thermostat with overheating safety thermal cut-out.SPECIFICATIONSRatingVOLTAGE AMPS BTU/hour5000W III 240V 20.9A 17,0654000W II 240V 16.7A 14,105 3000W I 240V12.5A11,285GENERAL SAFETY INFORMATION : This heater requires hardwire installation (no plug). The installation of this product must be carried out by a certified electrician and in accordance with all local and national electrical codes.NOTE: Compatible with a 240V line voltage double pole wall thermostat. This heater must be installed by a certified electrician.: Read and understand all installation and operation instructions prior tooperating this unit. Observe all safety instructions. 1. Use only copper wires rated for at least 75ºC.2. Heater airflow must be directed parallel to or away from adjacent wall.3. Observe wall, floor and ceiling clearance requirements.4. All wiring must be done according to national and local electrical codes in Canada. The heater must be grounded as a precaution against possible electrical shock. Heater circuit must be protected with proper fuses.5. The mounting structure and the anchoring hardware must be capable of supporting the weight of the heater and the mounting bracket (if used).6. All electrical power must be disconnected and the main service box, which must be locked before connecting, inspecting, cleaning or servicing the heater. This is a precaution to prevent serious electric shock.7. This heater is not suitable for use in hazardous locations as defined by the national fire protection association (NFPA) in Canada. This heater has hot and arcing sparking parts inside. Do not use it in areas where gasoline paint or flammable liquids are used or stored.8. This heater is not suitable for use in corrosive atmospheres such as marine greenhouses or chemical storage areas.9. The heater must be mounted at least 8 feet above the floor.Improper installation or failure to follow the procedures outlined in thisinstruction manual can result in serious electrical shock.LOCATING THE HEATERInstall heater out of traffic areas, maintaining clearances stated in figure 1. The direction of airflow should not be restricted by columns or machinery and the airflow should wipeexposed walls rather than blowing directly on them. When more than one heater is used in an area, the heaters should be installed so that the air discharge of each heater supports the air flow of the others, to provide best circulation of warm air as indicated in figure 2.14in.1 224 in.73 8in.13 4MINIMUM DISTANCE FROMDISCHARGE TO ANY OBJECTNote: M in. clearance t o ceiling when not using mounting brackets3 4in.DISTANCE TO FLOOR At least 8 ft.is 158 in.FRONT VIEWMAXIMUM MOUNTING HEIGHT:Vertical air delivery unit = 11 ft.SIDE VIEWFigure 2Figure 1INSTALLATIONHardware neededYou will also need the following hardware, which can be purchased from your local hardware store or electrical supply store:●Electric wire in the adequate gauge and length for your application;●Proper size fuse or breaker for your heater’s amperage;●Proper wire connectors for your application;●Fasteners appropriate for your application that are strong enough to hold the unit. Mounting the bracketRefer to Figures 3a and 3b.1. Locate a wood stud in the wood ceiling joist. If you cannot locate a wood stud, you have to install a wood piece on the ceiling as this heater must be securely fastened.2. Remove the mounting bracket from the heating unit by loosening bracket screws with a wrench and slipping the handle off over the screw heads.3. Place a washer on screws before inserting through the holes in the mounting bracket and screw them securely into a ceiling joist.NOTE: If you want to swivel the heater either to the right or left adding a washer to both sides of the bracket is recommended. A longer lag bolt may be required to properly secure the unit. See Figure 3a.HANGING THE HEATER1) Lift the heater up and into the mounting bracket.2) Align the bracket screws with the keyhole slots in the mounting bracket.3) If the heater is to be tilted, it must be positioned in the keyhole slots. (see figure 4). 4) Tighten the bracket screws with a wrench so the unit is securely suspended athorizontal or vertical level.USE BOTTOMKEYHOLE SLOTS IF HEATER IS TO BE TILTED DOWNBRACKET SCREWSFigure 4REMOVE SCREW TO OPEN COVERADJUSTING AIRFLOW DIRECTION1. To turn the unit horizontally when it has been installed with a single lag bolt (as shown infigure 3a), simply turn the entire heater as needed. (as shown in figure 5 – rotate). The unit cannot be turned horizontally if it has been installed with 2 lag bolts.2. To tilt the unit vertically, loosen the bracket screws (see figure 4) and see figure 6 to viewmultiple vertical angles.3. Adjust louvers to the desired position.NOTE: The louvers are designed so they cannot be completely closed. Do not attempt to defeat this feature; damage to the unit can result.NOTE: To prevent possible overheating, please maintain adequate clearance as shown in figure. 1.Figure 5MULTIPLE VERTICAL ANGLESFigure 6CONNECTING THE POWERHEATER RATING&VOLTAGE HEATER AMPS FUSE SIZEMIN.WIRE SIZE 75°C COPPER5000W@240V20.930#10Circuit diagram Figure 7Warning: This appliance must be grounded!Warning: The appliance must be connected to a current protection circuit or 30 Amp device before being connected to power supply!1. Remove the screw from the front of the unit to connect the power to the heater.2. Attach the cable connectors to the unit (See Figure 8) and slide the 10-gauge wire through the cable connector.3. Connect the wire to the power block located in the base of the heater - See Figure 9.4. Turn on the power at the main service.NOTE: All wiring must be carried out by a certified electrician and must be in accordance to national and local electrical codes in C anada. For certain applications, conduit may be required (as shown in figure 8). Check local electrical codes. If you run the wiring in conduit and wish to be able to turn the heater make sure to purchase enough flexible conduits to allow the heater to be turned.Figure 8Figure 9If you will use an external temperature control (external thermostat) to control the heater to be operated or not, please follow below attention points:1. Make sure that the heater's temperature control knob (thermostat knob) is turned fully clockwise.2. Connect the wire according to below wiring diagram.Circuit diagram Figure 103. The external temperature control (external thermostat) must be in accordance with the requirement of UL or ETL standard.4. The current carrying capacity of external temperature control cannot be less than 26.5A.5. The lead wire of external temperature control (external thermostat) cannot be less than 10 AWG.OPERATING INSTRUCTIONSFigure 11WARNING: the heater must be properly installed before it is used.SETTING THE THERMOSTAT1) Rotate thermostat knob clockwise to high position, the amber POWER INDICATOR light will turn on.2) After room reaches desired comfort level, rotate thermostat knob counterclockwise until a click is heard, then rotate it slightly higher (toward Max).NOTE: Heater will cycle on and off to maintain room temperature.POWER SELECTION SWITCHUsing the POWER SELECTION SWITCH, select the heating output: I for 3000W, II for 4000W, III for 5000W.POWER SELECTION SWITCHTHERMAL CUT-OUTThe heater will automatically turn off should it overheat. When this happens, the red indicator will turn on. After the unit has cooled back down to a normal level, the heater will turn ON again and the red indicator will turn off, but the reason of the overheating must be determined and corrective action must be taken before further operation.THE HEATER MUST BE TURNED OFF IMMEDIATELY WHEN THE CAUTION INDICATOR IS GLOWING RED.NOTE: When the thermal cut-out is activated, the caution indicator will turn red.In this case, immediately turn the heater OFF and inspect for any objects on or adjacent to the heater that may cause high temperatures.MAINTENANCE INSTRUCTIONS1. Before cleaning, make sure the power has been turned off at the circuit breaker panel and the heating element of the heater is completely cool.2. To maintain the heater’s appearance, it needs only to be wiped over occasionally with a dry duster. During the summer months, or at other times when the appliance is not in use and is completely cold, wipe over with a damp cloth. Never allow water to drip into the heater.3. Do not use abrasive cleaning powders or furniture polish. Do not use chemical or abrasive products, metallic scourers and so on, which may deteriorate the surface, to clean the appliance.4. During the summer months, or at other times when the appliance will not be used for extended periods of time, disconnect the power supply and cover the whole appliance with a dust cloth. Store the heater in a dry and cool place.5. All other servicing should be performed by qualified service personnel. Do not try to repair the heater yourself.。
电暖器使用说明:(油汀式,大的叶片式)
1、请您根据的需要调节热量。
2、为了您的健康,请勿将电暖器放置在床头附近的位置。
3、请勿将电暖器斜放或倒放。
4、请不要在电暖器上覆盖物品或烘干衣物。
5、避免水滴等液体淋在电暖器上。
6、请勿将电暖器连接在房间的“不间断电源”处。
7、请勿使用接线板连接电暖器,并严格按酒店指定的电源位置连接电暖器。
8、请勿长时间使用电暖器,离开房间时务必关闭电暖器的电源。
9、请勿在卫生间使用电暖器。
10、请勿将电暖器的电源插头插在高于电暖器的位置,否则易引发危险。
11、请看护好儿童,避免意外情况发生。
如果出现异常情况请及时联系服务中心,切勿自行拆卸电暖器。
.
电暖器使用说明:(远红外式,小的台式)
1、请您根据需要调节热量。
2、为了您的健康,请勿将电暖器放置在床头附近的位置。
3、请勿将电暖器斜放或倒放。
4、请不要在电暖器上覆盖物品或烘干衣物。
5、避免水滴等液体淋在电暖器上。
6、请勿将电暖器连接在房间的“不间断电源”处。
7、请勿使用接线板连接电暖器,并严格按酒店指定的电源位置连接电暖器。
8、请勿长时间使用电暖器,离开房间时务必关闭电暖器的电源
9、请勿在卫生间使用电暖器。
10、请勿用手触摸电暖器。
11、请勿将电暖器的电源插头插在高于电暖器的位置,否则易引发危险。
12、请看护好儿童,避免意外情况发生。
如果出现异常情况请及时联系服务中心,切勿自行拆卸电暖器。
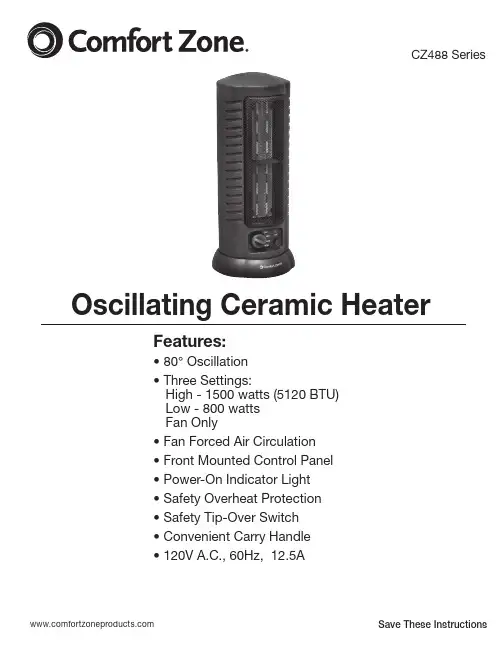
Features:• 80° Oscillation• Three Settings:High - 1500 watts (5120 BTU) Low - 800 wattsFan Only• Fan Forced Air Circulation • Front Mounted Control Panel • Power-On Indicator Light • Safety Overheat Protection • Safety Tip-Over Switch• Convenient Carry Handle • 120V A.C., 60Hz, 12.5A CZ488 SeriesOscillating Ceramic Heater Save These InstructionsINTENDED USEThis product is intended for indoor residential and office use only, notfor industrial or other commercial applications. Use only with electrical wiring that is in good working order and that meets applicable codes and ordinances. This heater must be plugged into a 120 Volt A.C., 15 AMP (or larger) circuit. Do not plug anything additional into the same circuit.If you have any questions whether your wiring is adequate, consult a qualified electrician. Risk of fire, overheating, malfunction, property damage, injury or even death may result if not adhered to.Use your heater only with a working smoke detector located in the vicinity of your heater.While using your heater, you should follow the IMPORTANT INSTRUCTIONS listed below. As part of those instructions, we have used the word "WARNING" to indicate the level of hazard: WARNING indicates a hazard which, if not avoided, could result in injury or death. IMPORTANT INSTRUCTIONSWhen using electrical appliances, basic safety precautions should always be followed to reduce the risk of electric shock, fire, or injury to persons, including the following precautions:• Read all the instructions before using this heater.• This heater is hot when in use. To avoid burns, do not let bare skin touch hot surfaces. Use provided handle when moving this heater. Keep combustible materials, such as furniture, pillows, bedding, papers, clothes and curtains at least 3 feet (0.9 meters) from the front of the heater and keep them away from the sides and rear.• Do not use heater unattended. Use of extreme caution is necessary when any heater is used by or near children, invalids, disabled persons or pets.• Do not operate the heater with a damaged power cord or after the heater malfunctions, has been dropped or damaged in any manner. Return heater to authorized service facility for examination, electrical or mechanical adjustment or repair.• Do not use heater outdoors.• Use your heater only in dry environments. This heater is not intended for use in a bathroom, laundry area, or similar locations, or near sinks, washing machines, swimming pools or other sources of water. Never locate heater where it may fall into a bathtub or other water container. Do not use in damp environments such as flooded basements.• Do not place the heater on a small, unlevel, uneven or any surface which might allow heater to tip or fall.• For proper operation, heater should be placed on a smooth,non- c ombustible surface. Do not place on rugs, carpet, vinyl flooring or other plastic surfaces. Not for use outdoors or in wet areas.• This heater is not designed as a primary heat source.• Always plug heaters directly into a wall outlet/receptacle. Never use with an extension cord or relocatable power tap (outlet/power strip). Always unplug heater when not in use.• Do not run power cord under carpeting. Do not cover cord with throw rugs, runners or similar coverings. Arrange cord away from traffic area where it will not be tripped over.• To disconnect heater, turn controls off then remove plug from outlet. • Do not insert or allow foreign objects to enter any ventilation or exhaust opening as this may cause an electric shock or fire or damage the heater.• To prevent a possible fire, do not block air intakes or exhaust in any manner. Do not use on soft surfaces like a bed, where openings may become blocked.• A heater has hot and arcing or sparking parts inside. Do not use it in areas where gasoline, paint or flammable liquids are used or stored. • Use this heater only as described in this manual. Any other use not recommended by the manufacturer may cause fire, electric shock or injury to persons or property. R EAD & SAVE THESE INSTRUCTIONS!WARNING: SHOCK HAZARDUse your heater only in dry environments. This heater is not intendedfor use in a bathroom, laundry area, or similar locations, or near sinks, washing machines, swimming pools or other sources of water. Never locate heater where it may fall into a bathtub or other water container. Do not use heater outdoors. Do not use in damp environments such as flooded basements.WARNING: HOT SURFACESDo not touch body of heater when in use. This heater is hot when in use, to avoid burns, do not let bare skin touch hot surfaces. If provided, use handles when moving this heater.WARNING: FIRE HAZARDHeater has hot and arcing or sparking parts inside. Do not use near combustible materials or flammable gases or sources of heat. Do not use in areas where gasoline, paint or flammable materials are used or stored. Keep combustible materials such as furniture, pillows, bedding, papers, clothes and curtains at least 3 feet (0.9 meters) from the frontof the heater and keep them away from the sides and rear. To prevent a possible fire, do not block air intakes or exhaust in any manner. Do not use on soft surfaces, like a bed, where openings may become blocked. Do not insert or allow foreign objects to enter any ventilation or exhaust opening as this may cause an electric shock, fire, or damage the heater.WARNING: ELECTRICAL SHOCK HAZARDDo not use with damaged cord or plug. Use with adequate electrical system that is up to code.The supply cord has a polarized plug. As a safety feature this plug will fit in a polarized outlet only one way. To prevent electric shock, match wide blade of plug to wide slot, fully insert plug. If the plug does not fit contact a qualified electrician.Do not operate any heater with a damaged cord or plug or after heater malfunctions, has been dropped or damaged in any manner. Do not operate heater with a broken heating element or ceramic cone or any visual imperfections. For repairs covered under warranty, see warranty statement. For all other repairs contact Comfort Zone® Customer Service by telephone or mail for information and assistance.PET OWNERS NOTE:The health of birds and some small pets are extremely sensitive to the fumes given off during the initial use of many appliances. Although these fumes are not harmful to humans, it is recommended that this heaternot be used around birds and small pets during its initial use until the manufacturing corrosion coatings burn off.USAGEHEATER OPERATION: Always operate the heater in the upright position following all instructions and recommendations listed in this manual.HEATER LOCATION: Place the heater in the area of the room that is coldest. The heater should not be placed immediately under a power outlet.HEATER CONNECTION: Plug heater directly into 120 Volt A.C., 60Hz wall outlet. Be sure plug fits tightly in outlet. A loose connection may cause overheating and damage to the plug or heater.NOTE: To prevent overloading a circuit, do not plug the heater into a circuit that is servicing other electrical needs. TURNING HEATER ONTo start the heater, turn the ON/OFF Power Level Control from the «OFF» position to the «FAN», «LOW or «HIGH» setting. During the heaters initial use, you may experience a slight odor or smoking. This is the result of the heating element lubrication "burning off". This is normal and will go away after a few minutes of use.POWER LEVEL SWITCH:This heater has two heat settings: «HIGH» and «LOW». Use the higher setting (1500 watt) to raise the room temperature quickly. When the desired temperature is reached, use the «LOW» setting. It is usually sufficient to maintain a comfortable temperature.TO OPERATE FAN ONLY:Turn the ON/OFF Power Level Control dial to the «FAN» setting. POWER INDICATOR LIGHT:The Power Indicator Light will illuminate when the heater or fan is turned on.OSCILLATION CONTROL:Control the Oscillation feature on the Heater/Fan by pressing the Oscillation Control «OSC» switch located on the control panel of the heater. IMPORTANT SAFETY FEATURES The power indicator light, located behind the safety grille, lights whenever the heater is plugged in to live power.The heater is equipped with an automatic overheat protection device located inside the body of the heater. If the heater grille is obstructed, or if the heater gets too hot for any reason, the automatic overheat protection device will turn the heater off. To reset the heater, simply turn power off and unplug the heater for 10 minutes until it cools down and you may plug the heater in and restart the heater. Be sure that the heater is on a smooth level surface with no obstructions.The heater is also equipped with a safety tip-over switch to turn power off to the heater when the heater tips over. To resume heater functions simply stand heater upright.Power Indicator LightOscillation ControlON/OFFPower Level Control TURNING HEATER OFFTurn the dial to «OFF» position before unplugging or plugging in the heater. Heater should be unplugged when not in use. CARE AND MAINTENANCE CLEANING:CAUTION – Before cleaning the heater be sure to disconnect power cord and allow the heater to cool completely.Clean the outside surface with a clean damp cloth. DO NOT IMMERSE THE HEATER IN WATER. Allow heater to dry completely before use.Do not use harsh chemical (gasoline, benzene, paint thinner, harsh cleaners, etc.) or abrasive cleaners as they will damage the heater. NEVER USE ALCOHOL OR SOLVENTS.REPAIR:DO NOT OPERATE THE HEATER WITHOUT THE GRILLE IN PLACE. DO NOT TAKE THE HEATER APART; THERE ARE NO SERVICEABLE PARTS INSIDE. DO NOT USE THE HEATER IF IT HAS MALFUNCTIONED OR BECOME DAMAGED IN ANY WAY. STORAGE:Keep original carton for storage of the heater. Coil and tie the power cord to avoid damage during storage.WASHABLE FILTER:The heater comes with awashable filter located atthe air inlet. When filterlooks dirty, simply unscrewrear grille cover and snap itout. Remove the filter fromthe heater and rinse it outwith warm water. BE SURETO ALLOW THE FILTERTO DRY COMPLETELYBEFORE CAREFULLYPLACING IT BACK ON THEHEATER. Re-install safetygrille cover with screws. Donot operate this heater withsafety grille removed.LIMITED WARRANTYThis unit is guaranteed to the original retail purchaser against defects in quality or workmanship for a period of oneyear from the date of original purchase. If this unit fails because of a manufacturing defect within 30 days of purchase, return the unit, with your receipt, to the retailer. After 30 days, but within the warranty period, if the unit was purchased within the continental United States, return it, freight prepaid, to World and Main for repair or replacement. If the unit was purchased outside the continental United States, return the unit to the place of purchase. This warranty does not cover damage caused by misuse, abuse, overheating or alteration. Repairs made by anyone other than World and Main are not covered in this warranty. World and Main will not be held liable for any losses due to neglectful operation. All implied warranties, including the warranties of merchantability and of fitness of purpose, if applicable, are hereby limited in duration to the period of one year from the date of original retail purchase. Some states do not allow limitations on how long an implied warranty lasts, so the above limitations may not apply to you. Incidental or consequential damages arising from a breach of either express or implied warranties are hereby disclaimed and excluded. Some states do not allow the exclusion of limitation of incidental or consequential damages, so this limitation or exclusion may not apply to you. Upon the expiration of this warranty all such liability will terminate. No other warranties are expressed or implied. This warranty gives you specific legal rights, and you may also have other rights which vary from state to state.No informal dispute settlement mechanisms are available. This limited warranty is given in lieu of all other warranties. Manufactured for:World and Main (Cranbury), LLC324A Half Acre Rd.Cranbury, NJ 08512 USA800-221-6895Rev. 02/15/22。
家用电暖器使用说明书尊敬的用户:感谢您选择我们的家用电暖器产品。
为了确保您的使用体验,我们为您准备了以下使用说明。
请仔细阅读并按照指示操作。
产品概述:家用电暖器是一种用于供暖的电器产品,功率高效、使用方便。
采用独特的加热技术,能够提供温暖舒适的室内环境。
安全警告:1. 在使用电暖器之前,请确保电源开关已经关闭,并拔下插头。
2. 请避免将电暖器长时间放置在潮湿或水平不平的环境中。
3. 请勿将电暖器放置在易燃物品附近,并保持至少50厘米的安全距离。
4. 为了避免发生意外,请勿将任何物体放置在电暖器上。
5. 请勿在电暖器未冷却之前进行任何操作或维修。
操作指南:1. 将电暖器放置在平稳的地面上,确保离墙壁至少50厘米的距离,以保证空气流通。
2. 将电暖器插头插入电源插座,并打开电源开关。
3. 通过控制面板或遥控器选择所需的温度和风速。
4. 使用定时功能可以预先设定开启或关闭时间,以满足个人需求。
5. 当不再需要使用时,请及时关闭电源开关,并将插头拔出电源插座。
维护与清洁:1. 在清洁或维护电暖器之前,请确保电源开关已关闭,并拔下插头。
2. 用湿布轻轻擦拭电暖器的表面,不要使用任何化学清洁剂。
3. 定期清洗过滤器以确保空气流通畅通。
可使用吸尘器或清水冲洗并晾干后再安装。
4. 请勿在清洁或维护过程中将电暖器置于水中或让水溅入机身。
故障排除:1. 如果电暖器无法正常启动,请检查电源开关和电源插座是否正常工作。
2. 如果电暖器无法加热或温度不稳定,请检查设定温度和风速是否正确。
3. 如果以上方法无效,请务必联系售后服务,切勿自行拆卸或修复。
免责声明:1. 请确认使用环境符合本产品相关安全要求,如因不当使用导致的人身或财产损失,本公司不承担任何责任。
2. 请勿将本产品用于其他非指定用途。
感谢您阅读并遵守以上使用说明。
如需进一步了解本产品,可以参考附带的产品手册。
祝您使用愉快!此为家用电暖器使用说明书,仅供参考。
专有名词及相关说明
一、专有名词及表示:
1.TH: 指室内环境温度
2.TP:指散热器检测温度
3.TS:指设定温度
二、面板显示说明:
1.室温:通电后室温指示灯恒亮,左边的双8指示灯显示室内温度;设定定时时室温
指示灯灭,左边的双8指示灯指示定时时间,表示小时。
2.设定:自动模式下运行时设定指示灯恒亮,右边的双8指示灯显示设定温度;调节
设定温度时设定指示灯闪动,右边的双8指示灯指示定时时间,表示分钟;自然风模式下不显示设定温度,设定指示灯及右边的双8指示灯灭;
3.运转:运行时或自动模式下的待机状态运转指示灯恒亮,关机运转指示灯灭;切换模
式(设定)后的闪动显示20秒再恢复正常显示。
4.定时:定时开/关机设定后点亮此灯;
5.睡眠:睡眠模式时点亮此灯;
6.时、分:定时开机时点亮,表示小时和分钟;调节定时关机时间时,闪动显示。
7.自动:取暖器在自动模式下运行或待机自动指示灯恒亮,在自然风模式和关机模式
下灭;
8.自然风:自然风模式下运行时自然风指示灯恒亮,其它状态下自然风指示灯灭;配合
下方的高、中、低指示灯指示当前设定运行凤速的档位;自然风模式调节时自然风指示灯闪动显示.
三、控制按键说明:
1.温度加:设定温度+调节,最高32℃,长按可以连加,自动模式下才有效;
十三、遥控器示意图
十三、连接图
简要元器件清单
器件代号器件名称器件参数。
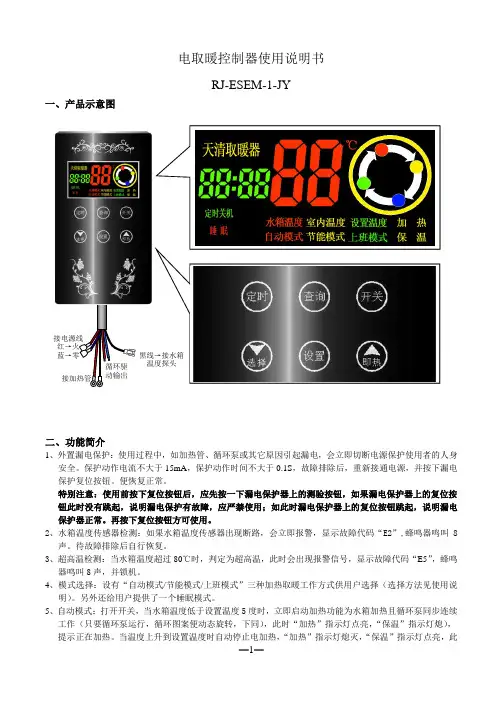
电取暖控制器使用说明书RJ-ESEM-1-JY一、产品示意图二、功能简介1、外置漏电保护:使用过程中,如加热管、循环泵或其它原因引起漏电,会立即切断电源保护使用者的人身安全。
保护动作电流不大于15mA ,保护动作时间不大于0.1S ,故障排除后,重新接通电源,并按下漏电保护复位按钮。
便恢复正常。
特别注意:使用前按下复位按钮后,应先按一下漏电保护器上的测验按钮,如果漏电保护器上的复位按钮此时没有跳起,说明漏电保护有故障,应严禁使用;如此时漏电保护器上的复位按钮跳起,说明漏电保护器正常。
再按下复位按钮方可使用。
2、水箱温度传感器检测:如果水箱温度传感器出现断路,会立即报警,显示故障代码“E2”,蜂鸣器鸣叫8声。
待故障排除后自行恢复。
3、超高温检测:当水箱温度超过80℃时,判定为超高温,此时会出现报警信号,显示故障代码“E5”,蜂鸣器鸣叫8声,并锁机。
4、模式选择:设有“自动模式/节能模式/上班模式”三种加热取暖工作方式供用户选择(选择方法见使用说明)。
另外还给用户提供了一个睡眠模式。
5、自动模式:打开开关,当水箱温度低于设置温度5度时,立即启动加热功能为水箱加热且循环泵同步连续工作(只要循环泵运行,循环图案便动态旋转,下同),此时“加热”指示灯点亮,“保温”指示灯熄), 提示正在加热。
当温度上升到设置温度时自动停止电加热,“加热”指示灯熄灭,“保温”指示灯点亮,此时循环泵继续运行2分钟后,再以3分钟停止2分钟运行的方式持续工作。
当水箱温度再次低于设置温度5度时,立即启动加热且循环泵同步连续工作。
当水箱温度再次上升到设置温度时,停止加热,循环泵继续运行2分钟后,以3分停止2分运行的方式持续工作。
如此循环。
如在加热期间按动开关键会进入关机状态,也将会停止加热。
6、节能模式:在打开开关时,当加热条件成立,启动加热功能为水箱加热且循环泵同步连续工作(只要循环泵运行,循环图案便动态旋转,下同),加热期间循环泵连续工作,加热停止期间循环泵按2分钟运行3分钟停止的方式持续工作。
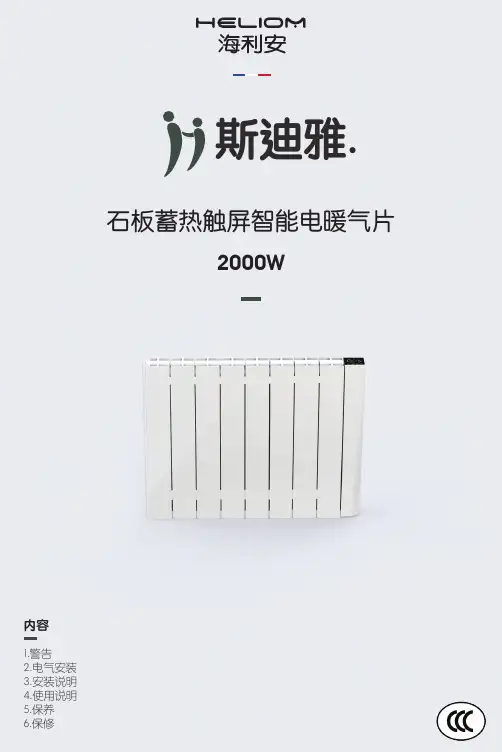
1.警告2.电气安装3.安装说明4.使用说明5.保养内容石板蓄热触屏智能电暖气片斯迪雅.2000W1. 警告图示意思是“避免过热,禁止覆盖”。
禁止坐在暖气片上。
• 电暖器不要被身体,感觉,精神能力下降的人(包括儿童),或者缺乏经验和知识的人单独使用,除非有一个人能负责他们的安全来监督和指导他们使用。
• 要监督好儿童,避免儿童玩耍本产品。
• 未经监督的情况下,不要由儿童来清洁保养暖气片。
• 电暖器不要插在低于10A一个的电插座上,电暖器不要直接放置在插座下方,在安装完成后的使用过程中需确保电源线不与暖气片及发热元器件接触,以避免危险。
• 不要把线放在地毯下,也不要被类似物覆盖。
把线远离拥堵的区域,这样不会被绊倒。
• 如果线或者插头有损坏,或者电暖器失灵,已被废弃,或其它任何方式的损坏,请不要操作电暖器。
如果电源线损坏,必须由制造商或其代理服务资质机构人员更换,以避免危险。
• 为避免过热引起火灾,请勿使用延长线。
• 加热器放在通风良好的地方使用。
为了防止可能的火灾,请不要在柔软的表面使用,仅在干燥的平面上使用。
• 请勿把加热器放在靠近易燃的材料,表面,物质等地方, 因为这可能有火灾的风险。
要远离这些至少前后左右1米。
• 请勿在有汽油、油漆等易燃物品(仓储)地方使用,如车库,或者太热的车间使用,电暖器内部配件发出火花时勿用。
• 请勿在淋浴房内,浴缸内及游泳池周围使用。
• 在使用时电暖器是热的。
为了避免烫伤和人身伤害,请不要让裸露的皮肤接触表面。
如果要挪动,在移动产品时拔掉插头待冷却后进行操作。
• 请确保没有其它的电器一起使用同个电路,同时也要经常性检查插头跟插座是否有松动,因为可能会超负荷引发火灾或人身财产安全。
• 电源线不要放在接近电暖器的热表面上。
• 在使用时不要接触产品的热表面。
• 电暖器不能倒过来或平躺着使用。
• 装有轮子的产品,严禁人坐在上面,或者当玩具玩耍。
• 使用时温度白天一般设置在20度,晚上一般设置在16度,不建议温度调到30度或以上使用,可以提高电暖器使用寿命及安全系数。

电暖器的使用方法与安全注意事项电取暖器是将有效的电能转换为热能的电热用具,市场上常见的有对流式和辐射式取暖器等。
(一)对流式取暖器。
又称暖风机,它是由电热丝、送风机及反射版等组成,暖风机上方为热空气出口处,下方为进气口,由送风机将空气循环加热使室内温度升高。
(二)石英取暖器。
又称石英红外线取暖器,由石英管和电热丝组成。
它是利用电热丝加热石英管辐射出远红外线,从而加热周围空气。
石英电取暖器具有升温快、散热均匀等优点;缺点是石英管比较娇贵,易破碎。
(三)电热油汀取暖器。
又叫充油式取暖器,由密封式元件、散热片、导热油和温控器等组成。
电热元件通电后加热导热油,由散热片表面将热量散发出去而加热周围空气。
在油温达到设定的温度时,温控器会自动切断电源。
其优点是安全、无明火、无烟、无味和卫生,缺点是温升缓慢,比较费电。
电取暖器的使用方法及其简单,在使用前详细阅读使用说明书,并按照说明书的要求进行及可,此处不再缀述。
(四)注意事项1、电源插座必须设有可靠的接地装置,切不可任意调换插头接地片,以免发生危险。
2、电源线不要挂搭在散热片的表面,以防烫坏电线绝源层而造成触电事故的发生。
3、禁止让小孩触摸散热片,以防烫伤。
4、移动取暖器时要小心!必须先切断电源。
5、接通电源前,应把电源线从线盒中全部拉出。
6、电取暖器在使用时必须垂直放置。
7、有增湿功能的油汀电取暖器,增湿瓶内的水在2h左右即会被用完,应及时加水,切勿干烧,否则容易烧坏增湿器。
电暖器的使用方法与安全注意事项(2)电暖器是一种常见的供暖设备,具有使用方便、加热快速等特点,受到广大用户的喜爱。
但是,使用电暖器时也需要注意一些安全事项,以确保使用过程中的安全性。
下面将介绍电暖器的使用方法,并提醒您注意安全事项。
一、电暖器的使用方法1.选择合适的电暖器在选择电暖器时,要根据所需供暖面积来确定功率。
一般来说,每平方米需要的功率为100瓦左右。
请注意,过大的功率可能会造成电源过载,过小的功率则无法满足供暖需求。
百思腾腾取暖器说明书今天要介绍的,就是一个占据了50%欧洲市场,在法国和欧洲零售TOP5。
年产200万台以上的国货取暖器——百斯腾取暖器。
作为畅销欧美日韩的国货之光,百斯腾可谓是给咱长足了脸。
不仅各大著名卖场都能看到它的身影。
很多欧洲家庭更是直接放弃空调和暖气片,直接拿他家的产品当主供暖设备。
生在北方的我第一天试用时,就发现了百斯腾获得欧美人民青睐的原因:它的加热效果,真的和地暖一模一样!不像小太阳只烤一个地方,也不像油汀那样靠近很热,距离远一些温度立马降下来。
百斯腾使用的时候,整个房间是那种被包围的,暖暖的感觉,几乎感觉不到温度差。
而且它没有油汀那么长的预热时间,只要开机3秒,就能感觉到源源不断的热浪从及其上方涌出。
试用时选了一个25㎡的客厅。
把取暖器温度设定成30℃,只开了10分钟,室温从15.2℃上升到23.4℃。
差不多1分钟上升1℃,这是空调和取暖器远远没法比的制暖效率。
它还配备了一个可拆卸的晾衣架,取暖的同时可以烘干衣服。
亲测可以挂4~6件衣物,尤其难干易滋生细菌的袜子、内衣裤,搭在上面一会儿就能干(激动的南方小伙伴,让我看到你们的手好吗)。
这款取暖器采用欧洲最先进的HFD制热技术,双效双核加热,对流+ 透射式发热。
热的三种传递形式,它一下子占了俩!普通取暖器大多用的是单一对流或PTC加热方式,散热差制暖慢,还暗搓搓地费电。
常用的朋友都知道,取暖器用到最后,电费才是最大头的支出。
就拿油汀来说,虽然买的时候便宜,但预热时间长,耗电大。
而百斯腾采用变频+自感两大节能技术,比起普通电暖器节能15%-20%。
变频节能:感温精度精确到1℃,设备会自动识别升温阶段和恒温阶段,在升温阶段以全功率运行,在恒温阶段以低功率运行。
自感节能:按照固定频率,自动监测房间内是否有人员活动,并逐渐降低设备工作温度,缩短人员离开时段的工作时间,减少不必要的电力消耗。
当它达到恒温状态后,一小时只需几毛钱电费,开一晚上也不心疼!看出来了吧,它不仅想做屋子里最暖和的,还想做同行里最节能的。
家用电暖器使用说明书及维护技巧家用电暖器使用说明书及维护技巧一、产品概述本家用电暖器适用于室内加热,可针对不同的室内温度需求进行不同的调节。
本电暖器外观简约,方便携带,可以快速加热室内空气,提供舒适的温度环境。
本电暖器应用于家庭、办公室、学校和其他类似场合。
二、产品组成及功能本电暖器由下列零部件组成:1.主体2.加热芯片3.开关4.电源线本产品具有以下功能:1. 开机后可以自动加热,快速提高室内温度,为用户提供舒适的温度环境。
2. 本产品采用一次成型的外壳,保证整体结构牢固,使用安全。
3. 加热芯片不产生气体,没有氧气消耗及有害物质排放,安全、环保,无噪音造成的干扰。
4. 本产品采用了高效的导热材料,可以在尽可能短的时间内均衡加热。
5. 本产品具备过热保护功能,当加热芯片超过有效温度时将自动断电,保障用户的使用安全。
三、使用方法1.取出本产品,检查其外观是否完好无损。
2.将电源线插入电源插座,并将开关调至加热位置。
3.当需要加热时,本产品将自动开启,开始加热室内空气。
4.当达到所需要的温度时,请将开关调至关闭位置,同时拔掉电源线,等待三分钟后可插入电源,再次使用。
四、使用注意事项1. 使用中请放在平坦稳定的表面上,以免倾倒造成安全隐患。
2. 切勿将本产品暴露在水中,以免发生短路等安全隐患。
3. 如发现产品存在故障或异常,请立即停止使用,拔出电源线,并联系专业技术人员排除故障。
4. 本产品只能在室内使用,不得用于户外。
5. 如本产品破损或出现故障时,请勿进行私人拆修,应送专业的技术人员进行检查和维护。
6. 本产品加热所产生的温度可能较高,请放置在远离易燃物的地方使用。
五、维护保养1. 在清洁产品前,请确认其已断电且已冷却。
2. 使用湿布擦拭产品表面,不得使用含有腐蚀性、刺激性等化学物质以及硬质物品擦拭。
3. 如本产品使用时间较长,则需将内部部件清洁干净。
使用棉签等工具清除灰尘、污渍,并细心擦拭。
4. 在放入储藏室保存前,应先清洁干净,然后拆下电源线,将本产品妥善存放于干燥通风的地方,避免受潮、高温或某些环境污染物质的侵蚀。
请您在使用前仔细阅读本说明书,它会对您正确地安装、安全地使用与正常地维护本产品提供十分重要的帮助。
对因不按说明书要求安装或使用所产生的不良后果,制造厂和代理商概不负责。
1. 电暖器的结构(图1)1) 控制器2) 出风口 3) 外壳 4) 散热元件 5) 电源线6) 温感器 图12. 电暖器的安装2.1安装位置1) 电暖器应根据现场情况安装在水平固定的墙上。
建议:为了达到最佳使用效果,可将电暖器安装低一些(但不可以低于本说明书规定的最小值)。
2)电暖器禁止安装在浴室的1类区域(图2),必须安装在洗浴者不能触及且不会淋到或溅到水的地方。
3) 该电暖器不得直接置于电源插座的下面,建议将电暖器安装于插座的左面或右面。
4) 电暖器与周围物体保持最小距离如下:前:500mm 侧:100mm 下:150mm 上:500mm 2.2电暖器的固定1) 随机提供的塑料涨拴和螺钉。
2) 螺丝刀向下压连接件(图3)图2图32.3电源线的连接确定电源为~220V 50Hz500——1500W 用A05VVF 3×1.5mm2电线1750——2000W 用3×2mm2电线2500——3000W 用3×2.5mm2电线必须使用符合国家标准的,地线接地良好的单相三极电源插座。
3.电暖器的使用:3.1 将电源插头插入插座3.2 将电源开关打开(“1”为打开“0”为关闭)。
DPN12-A为双档控制,打开一个开关电暖器功率为1500W,两个开关全部打开为3000W。
3.3 将温控器旋纽调至合适的档位。
注:电暖器首次使用时会有一点轻烟,是发热体保护油膜受热蒸发时形成的,几分钟后就会消失。
4.电暖器的维护:4.1 电暖器清洁时可用干净的软布擦拭。
4.2 严禁用烈性清洗剂或有腐蚀性或研磨材料清洁,以免破坏电暖 器涂层。
4.3 定期清洁出风口栅叶上灰尘。
4.4 长期不用时将电暖器用防护罩罩住。
5.关于安全5.1 机内有高压电,非专业人员不得打开电暖器后盖。
Foil HeatersThis manual contains IMPORTANT information regarding the safe use and installation of your foil heaters. Please read through the entire manual carefully before you install or use the product.Before installing your new Warmup® Foil heater, be sure that you have the following additional parts:• The customized installation plan (or layout) • A Warmup® Thermostat• Digital ohm meter (multi-meter)• 30mA RCD• Electrical Junction box • Electrical conduit •Insulation materialWarmup® Foil mats must be fitted directly on top of the Insulation, and directly under the wood laminate flooring.Before installation always check the subfloor has adequate thermal insulation. This is particularly important where the foil heaters will be used as a primary heat source. A heat loss calculation MUST be carried out to ensure that the product will provide enough heat for your room. See page 7 for information on suitable insulation materials.2Calculate the area of the floor to be heated. This is the total floor area minus any permanent fixtures.Length x width = m ²Select the heating mat or combination of mats closest in size to the area you want to heat. See page 6 for the full range of heater sizes. . Remember Heaters cannot overlapHeaters must be connected in parallelA single thermostat can control up to handle loads up to 16 Amps.DON’T:DON’T use the foil heating mats with glued locking systems or laminatesthat have an underpad or cushion material pre-attached to its underside.DON’T install the foil heater up steps.DON’T install over floors that have traces of moisture, are uneven,have carpets or parquet floor.DON’T l eave insulating materials such as bean bags; linen or towels on the floorsurface.DON’T overlap heating mats, fold or wrinkle the foil heating mats.DON’T place heavy/sharp tools (or any other potentially damaging object) on top of the heating mats.DON’T walk unnecessarily on the foil heating mats.DON’T install mats when the room temperature is below -5ºC.DON’T install foil heating mats anywhere except inside buildings.DON’T i nstall foil mats under walls or partitions, or in areas under heavy cabinets, closets, or fixtures (toilets, sinks, tubs, etc.).DON’T install foil mats within approximately 50mm of any heat conductive buildingpart, such as cold water pipes.DON’T install foil mats within 20mm of one another, 50mm of any wall or 100mm of af ireplace or hot water pipe.DON’T install foil heating mats under wooden floor, if the floor is thicker than 18mm.DON’T use this heater directly under any floor covering other than wood or laminate. DON’T place items on the floor surface which will stop the air flow or not allow heat to rise into the room.DON’T install electrical cables or pipes under the floor with the foil heating mats.DON’T use cellulose insulation.DON’T install the heating mats direct contact with a cement or concrete slab.The heater must be installed on top of a suitable soft Insulation material.3ALWAYS:ALWAYS c heck with the manufacturer of your flooring, that their products are compatible with electric floor heating systems.ALWAYS operate the heating mat with a Warmup® floor sensor thermostat to ensure the floor does not exceed the maximum temperature of the wood laminate(usually 27°C).ALWAYS ensure all earth leads are connected to the earth ring.ALWAYS ensure that the system is operated with a Warmup® thermostat in floorsensor mode.ALWAYS connect all cold wire leads from the foil heating mats in parallelinside an electrical junction box.ALWAYS zone each room with a foil heating system with its own thermostat controller.This allows each room to be controlled individually saving you energy byonly heating the zone when required. Each Warmup® thermostat has amaximum capacity of 16 Amps.ALWAYS ensure that no sharp edges (e.g. metal-edged laminate locking systems)come in contact with the foil heating.ALWAYS install a soft insulation / underlay below the heating mats to preventdamage when the weight of the floor furniture etc is added. Make sureunavoidable wooden floor movements will not harm the foil mats .ALWAYS ensure that a heat loss calculation has been carried out and heatingrequirements have been met if you are using the Foil heating system as aprimary source of heating.ALWAYS ensure that the heaters are protected by a 30mA RCD.ALWAYS ensure that the control card at the back of the manual is completed andfixed at the main consumer unit along with any plans and electrical testrecords. As per the current BS7671 wiring regulations.ALWAYS use the foil strips provided to bridge any gaps when cutting and turning the mats. This is important to keep the earth intact.405Construction:The Warmup® Foil system is constructed using dual core fluoropolymer insulated heating cables sandwiched between two layers of specially reinforced aluminium foil.The aluminium foil along with the uniform spacing of the heating elements ensures even heat distribution. The heating elements are connected to the power supply cable, which exits the mat from one corner.The Foil Heaters must not be installed in thinset cement or in direct contact with acement or concrete slab. The heater must be installed on top of a suitable soft Insulation material . The Warmup® Insulation board may be used if additional levels of insulation are required but a soft underlay will need to be installed on top of the board.If a vapour barrier is to be installed it should be laid below the insulation and not on top of the heater.1. Wood/ Laminate flooring2. Warmup® Foil Heater3. Soft Insulation Material4. Subfloor1. Wood/ Laminate flooring2. Warmup® Foil Heater3. Underlay4. Warmup® Insulation Board5. SubfloorInstallation Examples6Model Area (m 2)Length (m)Width (m)Total Watts Amps Total Resistance WLFH-140W/140120.51400.61377.86WLFH-140W/210 1.530.52100.91251.90WLFH-140W/280240.5280 1.22188.93WLFH-140W/420360.5420 1.83125.95WLFH-140W/560480.5560 2.4394.46WLFH-140W/7005100.5700 3.0475.57WLFH-140W/8406120.5840 3.6562.98WLFH-140W/9807140.5980 4.2653.98WLFH-140W/11208160.51120 4.8747.23WLFH-140W/12609180.51260 5.4841.98WLFH-140W/140010200.51400 6.0937.79WLFH-140W/168012240.516807.3031.49Model Area (m 2)Length (m)Width (m)Total Watts Amps Total Resistance WLFH-80W/80120.5800.35661.25WLFH-80W/120 1.530.51200.52440.83WLFH-80W/160240.51600.70330.63WLFH-80W/240360.5240 1.04220.42WLFH-80W/320480.5320 1.39165.31WLFH-80W/4005100.5400 1.74132.25WLFH-80W/4806120.5480 2.09110.21WLFH-80W/5607140.5560 2.4394.46WLFH-80W/6408160.5640 2.7882.66WLFH-80W/7209180.5720 3.1373.47WLFH-80W/80010200.58003.4866.13140W80WPlease ensure that your laminate flooring is suitable for use with electric underfloor heating.Most wood / laminate floors are compatible with the Foil mats but we do not recommend using any wood flooring thicker than 18mm.Wood flooring with metallic strips as part of their locking systems are NOT compatible as these metallic strips may damage the Foil mats.Any wood floor with a pad already attached must not be used with the Warmup® Foil mats.For a wooden floors or similar the thermal resistance should not exceed 0.15m ²K/W.TopBottomThe Foil Heaters MUST NOT be installed in thinset cement or in direct contact with a cement or concrete subfloor. The heater MUST be installed on top of a suitable soft Insulation material. ThisAs with all electrical projects which are subject to Part P , all electrical work must be carried out by a certified electrician. All work must conform to the current IEE wiring regulations - BS7671.The system must be protected by a dedicated 30mA RCD at all times. For systems not exceeding 13 amps a fused spur or 30mA RCD/spur that has contact separation in all poles that pro-vides full disconnection under over-volt-age category III conditions must be used.For systems larger than 13 amps a suitable protective device that meets the current wiring regulations must be used.Connecting the thermostatThe thermostat should be installed in the room to be heated. In the case of bath-rooms or wet areas a electrician should be consulted regarding whether a suitable zone is available.The thermostat can handle a load up to16 amps. For larger installations exceeding 16 amps multiple thermostats may be required or it may be possible to use a Contactor.Once all of the connections have been made, the electrician must complete the relevant forms and display at the fuse board as per BS7671, Section 753.8A resistance tests should be carried out on the heating mat before, during and after fitting the final floor covering.Using a Multi-meter set at 2K ohms test across • Live to neutral = ohms value as listed on Page 6If you do not get the expected results or at any time you believe there may be a problem, please contact Warmup’s Technical Team for guidance.Record the readings on the control card at the back of the manual.NOTE: Ensure that the floor sensor is tested before the final floor finish has been laid. The floor sensor values can be found in the thermostat instructions. When testing the floor sensor ensure that the meter can read up to 20k ohms.Before installing, draw an installation plan showing the placement of the mats, floor sensor, and junction box or boxes.The Foil heating mats should cover at least 80-90% of the floor area of your room to be used as a primary heat source*.Choose the combination of heating mats that best enables you to cover the recommended 80-90% of your room. Plan to use the larger foil heating mats as much as possible and to use smaller mats only as gap fillers.Note: The mats are supplied with a 3 metre long electrical cold lead. If you need longer connection leads, these may be extended consult a qualified electrician.*Depending on insulation, air-flow & overall heat-loss within the room, additional heating may be required.It is important to keep an accurate record of where the mats are installed.The Foil heater MUST NOT be installed in thinset cement, or indirect contact with a cement or concrete subfloor.There must always be a soft insulation / underlay beneath thealuminium heating mats.Carefully inspect the subfloor and make sure it is clean, free ofsharp edges, protruding nails and any other materials that maydamage the heating mat.Lay the Insulation as per the manufacturer instructions.If you are using the Warmup® insulation board you will need toinstall a soft underlay on top of the boards.Remove the foil heating mat from the packaging and check themats visually for any damage.Test using a multi-meter and verify the correct resistance againstthe table on page 6. Record the readings on the control card at theback of the manual.910Roll out the foil heating mats on top of the insulation material. Keep the heating mat at least 50mm from the edges of the room. Ensure that the heating mat is completely flat. Care should be taken not to fold or crease the mats at any time during installation.Position it in such a way that the power cord will be able to reach the point where the thermostat will be connected.If fitting more than one foil heating mat ensure that the mat does must not overlap, as overheating will result. Leave a gap of at least 20mm between each mat. Secure the foil mat to the underlay using tabs of duct tape to hold the mat in position.If any of the wire has been detached from the foil mat (when the mat is cut and turned) the wire MUST be covered by the aluminium strips. The aluminium strips should also be used to bridge the gap between the sections of the mat.NOTE: This is essential in order to keep the earth circuit intact.Secure the mats to the floor with tabs of duct tape. Since the joint and the cold tail leads are slightly thicker than the rest of the mat, you will need to create a slight groove in the insulation to ensure the heating mat lays flat. Do not allow the power supply cable to cross or come into contact with the heating mat.Once the heater(s) have been laid mark each pair of coldtail leads coming from the same mat with a numbered sticker This will make it easier to identify each mat once the floor coveringis laid.Position the sensor approximately 300mm into the heated area in-between the heating wires runs on the mat.Do not allow the sensor tip to come into contact with any of the heating element wires.Warmup recommend the use of conduit when installing the floor sensor. The conduit will protect the sensor and will allow for easier replacement should there be a problem after flooring has been laid.Run the sensor cable back to the thermostat. The sensor wire MUST not cross over the foil heater wires.Test the floor sensor using a multi-meter. The floor sensor ohms reading values can be found in the thermostat instructions.11Before fitting the final floor covering test the heating mats to ensure that they have not been damaged during installation. See page 8 for details.You are now ready to lay the final floor finish. Take care not to damage the heating mats. Do not drive nails or screws into the floor or cut the floor panels on top of the heater.If the floor is not being laid immediately, all heating mats must be protected with cardboard to prevent damage. Immediately prior to the floor being laid, test the heating mat to ensure it has notbeen damaged.Once the flooring has been installed, connect the thermostatensuring that it is set to reach a maximum temperature of 27°C.A Warmup® thermostat with a floor sensor MUST be used inorder to accurately monitor the floor temperature and yourcomfort level.Always zone each room with a foil heating system with its ownthermostat controller. This allows each room to be controlledindividually saving you energy by only heating the zone whenrequired.WARNING:ELECTRICAL WORK WHICH IS SUBJECT TO PART P BUILDING REGULATIONS MUST BE CARRIEDOUT BY A QUALIFIED ELECTRICIAN.ALL WORK MUST CONFORM TO THE CURRENT IEE WIRING REGULATIONS.1213Register your Warmup ® Warranty online at Warmup ® Foil Heater is guaranteed by WARMUP PLC (“Warmup”)to be free from defects in materials and workmanship under normal use and maintenance, and is guaranteed to remain so subject to the limitations and conditions described below.The Warmup® Foil Heater is guaranteed for 15 Years from the date of purchase against manufacturing defects. The 15 year guarantees applies:1. Only if the unit is registered with Warmup within 30 days after purchase. Registration can be completed online at . In the event of a claim, proof of purchase is required, so keep your invoice and receipt - such invoice and receipt should state the exact model that has been purchased ; and2.Only if the heater has been earthed and protected by a 30mA RCD at all times. Thermostats are guaranteed for a period of 3 YEARS from the date of purchase.Neither guarantee continues if the floor covering over the heater(s) is damaged, lifted, replaced,repaired or covered with subsequent layers of flooring.This guarantee period begins on the date of purchase. Registration is confirmed only when confirmation is sent by Warmup PLC.During the period of guarantee Warmup will arrange for the heater to be repaired or (at its discretion) have parts replaced free of charge. The cost of repair or replacement is your only remedy under this remedy under this guarantee which does not affect your statutory rights. Such costs does extend to any cost other than direct costs of repair or replacement by Warmup and does not extend to costs of relaying or repairing any floor covering or floor.If the heater fails due to damage caused during installation or tiling, this guarantee does not apply. It is therefore important to check that the heater is working (as specified in the installation manual) prior to installing the final floor finish.WARMUP PLC SHALL IN NO EVENT BE LIABLE FOR INCIDENTAL OR CONSEQUENTIAL DAMAGES, INCLUDING BUT NOT LIMITEDTO EXTRA UTILITY EXPENSES OR DAMAGE TO PROPERTY. Terms and conditions applyREGISTER YOUR HEATER ONLINE AT: THE 15- YEAR ELEMENT OF THIS GUARANTEE DOES NOT EXTEND TO THERMOSTATS WHICH ARE COVERED BY A 3 YEAR GUARANTEE. THIS GUARANTEE DOES NOT AFFECT YOUR STATUTORY RIGHTS.Warmup PLC is not responsible for : 1. Damage or repairs required as a consequence of faulty installation or application. 2. Damage as a result of floods, fires, winds, lightning, accidents, corrosive atmosphere or other conditions beyond the control of Warmup PLC. 3. Use of components or accessories not compatible with this unit. 4. Products installed outside the United Kingdom. 5. Normal maintenance as described in the installation and operating manual. 6. Parts not supplied by Warmup.7. Damage or repairs required as a result of any improper use, maintenance, operation or servicing. 8. Failure to start due to interruption and /or inadequate electrical service. 9. Any damage caused by frozen or broken water pipes in the event of equipment failure. 10. Changes in the appearance of the product that does not affect its performance. SafetyNet TM Installation Guidelines : If you make a mistake and damage the new heater before laying the floor covering, return the damaged heater, to Warmup within 30 DAYS along with your original dated sales receipt. WARMUP WILL REPLACE ANY HEATER (MAXIMUM 1 HEATER) WITH ANOTHER OF THE SAME MAKE AND MODEL-FREE.PLEASE NOTE: 1. Repaired heaters carry a 5 year warranty only. Under no circumstances is Warmup responsible for the repair or replacement of any flooring.2. The SafetyNet TM Installation Guarantee does not cover any other type of damage, misuse, or improper installation due to improper adhesive or subfloor conditions. Limit of one free replacement heater per customer or installer. 3.Damage to the heater that occurs after laying the floor covering is not covered by the Safety Net TM Installation.Guarantee.14This form must be completed as part of the Warmup Guarantee. Ensure that the values are as per the instruction manual.This card must be situated close to the consumer unit in a visible place.Note: Draw a plan showing the layout of the heater.Warmup plc, 702 Tudor Estate, Abbey Road, London, NW10 7UW T: 0345 345 2288 F: 0345 345 2299 0The WARMUP word and associated logos are trade marks. © Warmup Plc. 2021 - Regd. TM Nos. 1257724, 4409934, 4409926, 5265707. E & OE.Warmup plc n 704 Tudor Estate n Abbey Road n London n NW10 7UW n UK Warmup GmbH n Ottostraße 3 n 27793 Wildeshausen n DE Warmup plc ************* Tel: *********** Fax: ***********Warmup - IM - WLFH_Foil Heater - V2.6 2021-06-18_EN。
牌电暖背心使用说明书本产品经国家家用电器质量监督检测中心WRn-06-110检测合格产品简介应用国际领先的航天技术,DOT电热芯片,开发的电热背心(坎肩),由聚合物(锂电池)供电。
采用微电恼智能控制电路,电量显示无电报警。
自动监测和控制充电状态,三种功率输出,方便用户随意控制电热背心的温度,温控分高、中、低档。
并配专用充电器,输入电压AC100V—240V,内装自动保护,有出口CE、UL认证,符合国家质量标准。
本产品主要特点:1. 发热部件比电热丝、碳纤维寿命长;2. 安全节电无明火无电磁波影响;3. 发热部件比电热丝均匀舒适;4. 产品造型大方、颜色面料任选;5. 质量认证齐全,是本公司首推的专利产品。
使用指南1.本系列产品使用大容量的聚合物(锂电池)为电源,额定电压7.4 V,最高输出功率6.5W±0.5w。
2.首次使用,请将电池充满,电池充满后充电器指示灯变为绿色。
不建议过长时间充电。
3.使用时将充满电的电池放入产品本体的电池专用口袋中,并将发热体的插头插入电池插座内。
4.按开关按扭ON/SET UP/OF F开始升温,本电池分智能四档功率输出调控。
按一档,(H)红灯亮,相当于7.4V,100%功率输出,温度50℃±5℃,可连续使用6小时。
按二档,(M)橙灯亮,相当于6.2V,75%功率输出,温度40℃±5℃,可连续使用7小时。
按三档,(L)绿灯亮,相当于5.0V,50%功率输出,温度35℃±5℃,可连续使用20小时。
按四档,输出为零,关闭电池。
5.在使用过程中,电池指示灯闪烁或无电报警,表明电池电量耗尽,需要充电。
充电器及锂电池使用说明1.每块锂电池可反复使用500次以上,超过500次仍可继续使用,但锂电池容量会有所下降。
2.该充电器是专为锂电池设计的,不能为其它型号的电池充电。
保存时每半年充一次电。
3.严禁将电池浸入水中,保存时应远离高温源、加热器、家用电器等,放在干燥儿童找不到的地方。
百斯腾电暖器说明书
产品特点:
1.升温迅速:强制对流式散热,可迅速提高室温,令您倍感舒适。
2.高效节能:采用PTC陶瓷发热元件,具有高效,安全,节能等优点。
3.功率可调:设有二档加热功率,还没有风扇档。
4.安全保护功能:机构没有过热保护装置,可在因意外而散热不良时,自动切断电源。
5.摇头功能:具有自动摇头功能,改变送风方向,从而扩大送风范围。
6.风机采用优质仪用轴流风机,噪声小;外壳饿采用耐高温优质阻燃工程塑料及防护网罩,坚固耐用。
7.造型独特,款式新颖,结构紧凑,重量轻,使用方便。
使用说明:
1.接通电源:确认电源为交流220V/50HZ,且插座电源容量不低于10A,并确保插头与插座配合良好,然后插头插入电源插座。
2.开机:按下开机开关风机工作等于冷风开始,再按下加热I开关为低功率加热HT-38为(900W),再按下加热II开关加热功率为(1800W)。
3.摇头功能:按下旋转开关,机身即可自动旋转扩大送风范围,如果调动前后角度,HT-38用手动前俯后仰即可。
4.HT-27开机旋转加热造反开关,I档为冷风,II档加热800W 低热指示灯亮,III档为1600W,高热指示灯亮,旋转摇头造反开关I档摇头。
5.关机:关机前先关掉加热开关等机内散热后再关风机,关机开关为高,关,低,开。
若外出或较长时间不使用,则请拔下电源插头。
注:为了防止过热,机内设有安全保护装置,若机器未能正堂运转,可能是该装置发生作用,请关机一段时间等冷却后,重新启动机器,如果仍无法启动,请与我公司维修部门联系。