VITA全瓷系统临床操作手册-08.09_图文(精)
- 格式:doc
- 大小:1.38 MB
- 文档页数:24

全瓷系列快 速 全 瓷现可用VITA VM®7操作说明VITA 全瓷氧化铝底冠的制作VITA 全瓷氧化锆底冠的制作出版日期:2008/09Page 优点及特点 (3)介绍和编号 (4)操作步骤 (5)模型/代型准备 (6)模型复制 (7)粉浆材料准备与混合 (9)粉浆涂塑 (10)烧制 (11)烧制后底层(冠)的修整 (11)使用VITA全瓷氧化铝/氧化锆修补材料 OPTIMILER (12)玻璃渗透 (13)玻璃控制烧制 (14)工作时间与混合比率汇总 (15)玻璃粉颜色选择表 (16)烧制程序表格 (17)技术问题解答表 (18)产品安全建议 .............................................................................................19目 录页 码VITA 全瓷适用范围推荐的可行的Page VITA In-Ceram ® Sprint - 节省时间的全瓷系统使用VITA In-Ceram sprint技术可以快速完成VITA全瓷氧化铝和氧化锆底冠单冠的制作。
其烧制时间较传统工艺有了极大的缩短。
采用高效的sprint技术也能制作VITA全瓷氧化锆的前牙和后牙底冠单冠,且其稳定性不受影响。
但要求底冠必须在烤瓷炉以1180℃连续烧制40分钟。
粉浆材料的涂覆一定要按照常规In-Ceram氧化锆的操作方法(见VITA In-Ceram氧化锆操作说明)VITA In-Ceram ® 是基于多年的临床应用经验的全瓷系统,并具有如下优点:卓越的美学特性和生物相容性- 无边缘黑线- 良好半透明外观- 无牙龈刺激现象- 完美密合的边缘(图1)良好的物理特性可承受极端功能下的应力低的热传导特性可传统粘固或化学粘结法粘接X光透射客户满意度高低成本/高收益(无合金的附加费用)技工可用传统操作方法系统可扩展临床使用已超过17年VITA In-Ceram ® sprint不能用于以下情况:桥体结构牙体预备不能保证修复体适当的功能性设计如:牙体预备/去除不足牙体预备不当有夜磨牙症有关牙体预备和粘接操作的资料,请向VITA经销商索取“临床问题解析手册(第808E号)”图1:VITA氧化铝冠边缘间隙量的测量(卡波尔特教授,弗雷堡大学)die copingPage*套装中不包含的材料**单独包装仅为400克***单独包装,只有20包20克的设备:VITASONIC II 超声波震荡器和VITA VACUMAT烤瓷炉或类似的烤瓷炉。
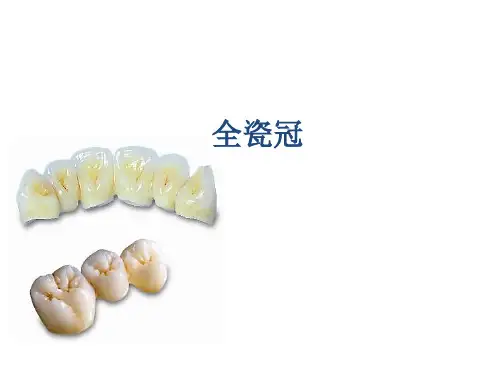
⽛科常⽤全瓷系统介绍临床上应⽤全瓷技术实现⽛缺失⼝腔修复系统的统称。
其特点是⽆⾦属基底内冠,内冠都是由各种瓷材料制成。
⼀、常规粉浆涂塑陶瓷粉浆涂塑全瓷:指在耐⽕代型上涂塑氧化铝或氧化锆粉浆,然后⾼温定型形成底冠。
优点:价格低廉缺点:强度低,容易破裂适应证:瓷贴⾯、前⽛单冠典型产品:德国的VITA(In-Ceram)⼆、热压铸陶瓷先⽤蜡制作出⽛冠或底冠的代型,包埋圈后在专⽤的烤瓷炉内升温去蜡,在将成品瓷块熔化后通过压⼒铸⼊圈内。
⼀)原理和⼯艺流程:和⾦属铸造原理⼀样,采⽤失蜡法,只是把⾦属换成了瓷块,铸造过程采⽤真空铸压的铸造机。
⼆)技术和材料特点:1、简单、省时,费⽤较低2、三点抗弯强度400MPa3、铸瓷技术基本类似于常⽆偏见的铸造⽅法,技术培训简单。
4、铸瓷材料⽐较透明,对于颜⾊较深的⽛龈,不适合作铸瓷修复,后⽛也不适合做铸瓷修复。
5、铸瓷桥不能⾛过单位,只能⽤于前⽛。
全瓷内冠和外层瓷粉为化学结合,强度⾼。
三)适应症:瓷贴⾯,瓷嵌体,单冠,铸瓷横蛮⽆理,前⽛三单位桥。
四)代表产品:瓷成分为锂基陶瓷典型产品:列⽀敦⼠登的IVOCLAR(IPSEmpressⅡ)三、渗透陶瓷⼀)原理和⼯艺流程:采⽤在耐⽕上涂瓷浆,烧制瓷内冠。
⼆)技术和材料特点:1、三点抗弯强度 446MPa2、边缘适应性好3、采⽤设备少,只⽆原则烤瓷炉,⼯序罗多。
4、渗透全瓷材料使⽤氧化AL.全瓷内冠和外层瓷粉为化学结合,强度⾼。
三)适应症:单冠,前后⽛三单位桥。
四)代表产品:VITA INCERAM四、瓷沉积技术⼀)原理和⼯艺流程:WOLCERAM是德国最新的⼝腔电脑设计制作全瓷冠和全瓷桥的技术,可以使⽤氧化铝和氧化锆⼆种全瓷材料,采⽤专利技术的电磁感应的全瓷沉积,类似于⾦沉积技术。
WOLCERAM直接将全瓷材料沉积到⼯作代型上,代型⽆须翻制,减少了⼯序,材料和误差,全瓷的厚度由电脑控制。
如下图所⽰:图⼀为激光扫描;图⼆为瓷内冠沉积;图三为内冠打磨就位合适;图四为最终制作完成的精密的瓷冠。

操作手册VITA 比色VITA 颜色传递VITA 颜色再现VITA 颜色控制发布日期12.08型号:DEASYCS220 安全标志标志说明:VITA Easyshade Compact袖珍型属于医疗器械。
就电击、火灾和机械危险而言,它与UL 60601-1 IEC/EN 60601-1 CAN/CSA C22.2 No. 601.1 标准规定的一致注意,请参考附随的相关资料适用于人的B类产品患者一次性使用II类器械警告:关于电磁相容性的重要信息:1. 只能使用VITA提供的电源,产品编号D46002. 便携式和可移动射频(RF)通讯设备会影响电子医疗器2. 当袖珍型VITA Easyshade Compact探头顶端灯亮时,绝对不能直接用眼睛看。
械工作。
3. 不要将袖珍型VITA Easyshade Compact手柄和底本产品使用时对电磁环境有特定的要求,用户要确保部浸入水或者其他液体中。
在规定的环境中使用。
4. 遵照第1.5部分关于如何正确使用感染防护膜的1 不能在VITA Easyshade Compact附近使用便携式射说明操作。
. 频(RF)通讯设备(如手机)。
5. 遵照第8部分关于如何正确清理和消毒的说明操2 工频磁场应该处于典型的商业或医疗环境位置的作。
特征水平。
6. 不要将电池暴露在60° C以上的环境中,也不要随便拆卸或者改变电池的电路联接。
7. 必须遵照对于牙科临床和技术室的一般性建议使用袖珍型VITA Easyshade Compact设备。
8. 一片感染防护膜只能用于一个患者。
3 安全标志废弃处理本仪器及其所有附件的废弃处理适用于2002/96/EC WEEE条例和欧盟法律的规定。
在欧盟,它不能和未分类的生活垃圾一起处理。
VITA Eayshade Compact比色仪符合欧盟规定的现行规则。
访问网站,在VITA质量管理部门的网页上可获取本仪器的适用性公告。
重要的版权信息:版权2008 Vita Zahnfabrik. 版权所有。

VitamixPROFESSIONAL SERIES 750 用户手册请仔细阅读说明书开始恭喜!您将享受到快捷,简单和美味的健康饮食!请在开始使用前认真阅读本书中的安全信息、警告、和操作说明。
将您的Vitamix机器放置在一个干净,水平的表面。
确保开关在off状态,机器插座连接一个接地线的插孔。
然后按照第17页说明的清洁方法清洁您的机器。
第一次使用之前必须清洗机器。
Vitamix 服务将机器型号和序列号写在下面的空格中作为将来的参考。
这些数据在马达基座的后面。
型号:_______________________________________________________序列号:_______________________________________________________购买日期:_______________________________________________________购机地点:_______________________________________________________在您因为维修等任何原因送还机器前,请先联系Vitamix客服1-800-848-2649 或者1-440-235-4840,邮件*******************,或者联系您当地的经销商。
产品注册如果您直接在Vita-Mix公司的官网购买或者打电话在call center购买,您的产品在您购买时已经注册,保修在购买时已经激活。
如果您在除美国,加拿大,英国,爱尔兰之外的外国总代理或者经销商购买,您的产品将在国外总代理或者经销商处保修,无需在Vita-Mix官网注册。
在以下情况下您的机器是没有注册的:1,在美国,加拿大,英国,爱尔兰的经销商购买;2,在军事基地购买;3,在零售批发商店购买;4,您的vitamix机器是别人赠送的礼物;5,您不是机器原来的主人。
今天花几分钟注册您的vitamix机器享受将来更加快速简单的服务。
目录前言 (7)安全事项 (8)1您的手机 (10)1.1手机外观 (10)1.2按键说明 (10)1.3界面图标说明 (12)1.4耳机 (13)2开始使用 (14)2.1电池 (14)2.1.1电池的拆装 (14)2.1.2电池的充电 (15)2.2SIM卡的安装 (17)2.3记忆卡的安装 (18)2.4资源管理 (19)2.5开机和关机 (20)3通话功能 (21)3.1拨打电话 (21)3.1.1拨打国内电话 (21)- 1 -3.1.2拨打固定电话分机 (21)3.1.3拨打国际长途电话 (21)3.1.4使用电话簿拨打电话 (22)3.1.5重拨最近拨过的电话号码 (22)3.1.6智能联想拨号 (22)3.2接听电话 (22)3.3通话中选项 (23)4输入文本 (24)4.1切换输入法 (24)4.2手写输入法 (24)4.3智能拼音输入法 (24)4.4笔划输入法 (25)4.5智能英文输入法 (25)4.6英文输入法 (26)4.7输入标点和符号 (26)4.8输入空格 (26)5使用菜单 (27)5.1通过滚动方式进入菜单 (27)5.2使用快捷方式进入菜单 (27)5.3使用触摸屏进入菜单 (27)- 2 -6菜单功能 (28)6.1语音王 (28)6.1.1待机语音播报 (28)6.1.2语音提示音 (28)6.1.3菜单朗读 (28)6.1.4短信朗读 (29)6.1.5朗读设置 (29)6.1.6语音识别 (29)6.1.7语音王设置 (30)6.1.8语音王帮助 (30)6.2通讯录 (30)6.3通话中心 (31)6.3.1通话记录 (31)6.3.2通话设置 (31)6.4多媒体 (34)6.4.1音乐播放器 (34)6.4.2滚石音乐 (34)6.4.3照相机 (34)6.4.4相册 (35)6.4.5摄像机 (35)6.4.6电影院 (35)- 3 -6.4.11录音 (37)6.5信息中心 (37)6.5.1短信息 (37)6.5.2彩信 (39)6.5.3语音信箱 (41)6.5.4小区广播 (41)6.6百宝箱 (41)6.6.1QQ (41)6.6.2MSN (41)6.6.3视频聊天 (41)6.6.4开心农场 (42)6.6.5天气预报 (42)6.6.6日历 (42)6.6.7备忘录 (42)6.6.8闹钟 (42)6.6.9游戏 (43)6.6.10世界时间 (43)6.6.11计算器 (43)- 4 -6.9.1STK (44)6.9.2帐号资料 (45)6.9.3网际网络服务 (45)6.10设置 (45)6.10.1模式设置 (45)6.10.2情景模式 (46)6.10.3话机设置 (46)6.10.4滑盖设置 (46)6.10.5触屏振动 (46)6.10.6触屏校准 (46)6.10.7网络设置 (47)6.10.8安全设置 (47)6.10.9恢复出厂设置 (48)6.10.10音效 (49)6.11游戏娱乐 (49)6.12我的文档 (49)7电池信息 (50)- 5 -8重要的安全信息 (51)8.1使用环境 (51)8.2电子设备 (51)8.2.1起搏器 (51)8.2.2助听器 (52)8.2.3其它医疗设备 (52)8.2.4车辆 (52)8.3有可能发生危险的环境 (52)9维护和保养 (54)- 6 -前言衷心感谢您选择本公司移动电话!我们的手机符合中华人民共和国通信行业标准,也符合欧洲标准,经核准适用于GSM 网络。
OPERATING AND CARE INSTRUCTIONSVitaClay TM Rice & Slow Cooker ProVF7900-3VF7900-4READ ALL INSTRUCTIONS BEFORE INITIAL USEHOUSEHOLD USE ONLYIMPORTANT SAFETY INFORMATIONWhen using electrical appliances, basic electrical precautions should always be followed to reduce the risk of fire, electric shock and injury, including the following:1. Read all instructions before using the appliance.2. Do not operate any appliances that have damaged plugs or cords, malfunctioned or beendamaged in any way. Return the appliance to the manufacturer or qualified servicetechnician for repair or adjustment.3. Do not immerse the heating unit of the appliance in water or any other liquid. To preventelectrical shock, do not place the cord, plug or cooking unit near water or other liquids.4. Always unplug the cooker when not in use or before cleaning. Allow cooker to cool beforecleaning or removing parts.5. Do not touch hot surfaces with bare hands. Use the handles or knobs provided.6. Do not put cold liquids or food into heated pot. Avoid sudden temperature changes. Thawfrozen foods before placing in heated pot unless warm liquid is already in pot. Do notimmerse heated pot into cold water.7. Do not place cooker on or near a hot gas or electric stove burner. Do not place cooker insidea hot oven or broiler.8. Do not use outdoors.9. Do not let cord hang over the edge of a table or countertop and do not let it touch heatedsurfaces.10. Use extreme care when moving the cooker if it is filled with hot liquid.11. Ensure cooker is always placed on a flat, level surface before use.12. Closely supervise whenever cooker is being used by or near children.13. Do not use this cooker for other than its intended use.14. The use of accessory attachments not supplied or recommended by Essenergy may causeinjury, fire or electrical shock and may also damage the cooker.15. To disconnect, turn unit off and remove the plug from wall outlet by holding the plug. Donot pull the cord.16. The clay pot is fragile. Be careful when carrying or storing.17. Do not cook food directly in metal housing.18. Do not start cooking function while the clay pot is empty.19. When using this appliance, provide adequate air space above and on all sides for aircirculation. On surfaces where heat may cause a problem, an insulated heat pad isrecommended.20. When opening heated cooker, carefully lift and tilt cover away from you to avoid scaldingand to allow condensed water to drip into pot.SAVE THESE INSTRUCTIONSThis appliance is intended for HOUSEHOLD USE ONLY. There are no User Serviceable Parts inside. The heating unit needs no lubrication or other service. Do not attempt to service this appliance.The short power cord is provided to reduce hazards that could result from a tangled cord or from tripping over a long cord. If an extension cord is used, be sure that the electrical rating of the cord is at least as great as the electrical rating (wattage) of the cooker. Ensure cord is placed so it does not drape over a counter or table where it could be pulled on or tripped over.CLEAN UNIT THOROUGHLY BEFORE FIRST USE• Ensure the packing paper on the heating surface is removed.• Wash the clay pot and lid with warm water and a small amount of detergent.• Rinse and dry clay pot thoroughly before placing in the housing.• Plug the power cord into the unit first and then plug into the wall outlet. When the cooker is ready for operation you will hear a long “beep”.• Ensure the clock is set to the current time before using the Preset Timer key features (see Function Keys).1. A slight odor and/or smoke smell may be noticed during the initial use of this appliance. This isnormal with many heating appliances and will disappear after the first few uses.2. The cooker should be used for its intended purpose only and not for other cooking purposes such as stirfrying or deep oil frying.3. If liquids have been soaking in the clay pot for a long time, a leak could occur. Use a dry towel to drythe outside surface of the inner clay pot.4. During the cooking process, the steam cap needs to be in place for safety and performance.5. Do not touch the steam cap during cooking process as it becomes very hot.6. The clay pot and lid become very hot during the cooking process and/or when cooking is finished. Usethe supplied steel hook or pot holders to pick up the clay pot and lid. Do not use bare hands.PARTS ASSEMBLY ILLUSTRATION:(1) Steam Cap(2) Cover lid(3) Handle(4) Main Body(5) Power Cord(6) Plug(7) Clay Pot and Lid(8) Control PanelCONTROL PANEL DISPLAY AND FUNCTION KEYS(1) Preset Timer key(2) Hour/Minute AM/PM clock setting and/or cooking time duration setting(3) Rice cooking mode indicators(4) Warm/Cancel function key and light indicator(5) Rice Cooking selection function key and light indicator(6) Slow cooking selection function key and light indicator(7) Current and remaining cook time indicator(8) Warm Time indicator(9) Slow cooking mode indicatorsFunction KeysPreset Timer Function Key (1)To pre-program time to start cooking:(a) Press Preset Function Key (1).(b) Press Hour and/or Minute Function Keys (2) to determine cooking time.(c) Press Rice Cooking Function Key (5) or Slow Cooker Function Key (6) to cook at preset time. Once steps (a) to (c) are completed, the LCD will automatically display the preset time to start cooking within 15 seconds.Hour/Minute Function Key (2)To set clock:Press and hold the Hour or Minute function keys for 2 seconds. The clock will advance forward one increment at a time. Keep holding either key down for fast forwarding.To set Slow Cooker or Rice Cooker:See Preset Timer Function Key (1) aboveRice Cooking Mode Indicators (3)Regular rice, Brown rice, Sticky/Sweet rice, or Reheat riceWarm/Cancel Function Key (4)(a) Starts the warm cycle. The LCD display will indicate the warming duration up to 12 hours. After12 hours, the system timer will reset to zero and automatically start over.(b) Stop cooking or warming process.Rice Cooking Function Key (5)(a) Press for Rice Cooking selection, i.e. Regular, Brown, Sticky/Sweet or Reheat rice.(b) Rice cooking indicator light.Slow Cooking Function Key (6)(a) Press for Slow Cooking selection, i.e. Porridge/Braise/Stew or Soup.(b) Slow cooking indicator light.Clock and Time Left Indicator (7)(a) Current time.(b) Remaining cook time indicator.Warm Time Indicator (8)Duration of warm time indicator.LCD Warm Indicator (9)(a) Indicator displays cooking cycle is at Warm.(b) The clay pot maintains a temperature between 70 °C to 75 °C (158 °F and 167 °F).SETTING THE CLOCK(1) Press “Hour” or “Minute” key and hold for a few seconds until the time display on the LCD isflashing.(2) Press “Hour” key until the correct hour is reached - release the key.(3) Press “Minute” key until the correct minute is reached - release the key.USING THE RICE COOKERThe Rice Cooking Function Key (5) cycles between regular rice, brown rice, sticky rice and reheat rice options. Each option has a different micro computerized cooking mode which enables the cooker to determine the cook time automatically based on the rice option you choose. A preset cooking time is not required.As a result of a fully sealed enclosure, it is not necessary to presoak rice before cooking. Simply rinse the rice and place in the cooker with water. Recommended water to rice ratios are:(a) Regular white rice such as sushi rice, jasmine rice, etc. - 1:1 (slightly more/less can be used if preferred)(b) Sticky/sweet rice - 0.8:1 (water adjusted a little less than regular rice)(c) Brown rice – 1.2-1.5:1 (more water can be added if preferred)To start rice cooking immediately:(a) Rinse rice thoroughly and place in the clay pot with the desired amount of water. Cover with claylid.(b) Place the clay pot on the cooker’s heating plate, turning the pot until it has good contact with thebottom. Ensure there is no particle interference to prevent the cooker from cooking evenly.(c) Close the cooker lid. You will hear a “click” when it is snapped in.(d) Press rice cooking function key (5)to select type of rice. A “beep” will sound within a fewseconds to indicate cooking has started and the cooking indicator light will turn on.(e) A few minutes before cooking is done, a “beep” will sound to indicate that the cooker hasautomatically switched to the “Keep Warm” state and the rice is ready to serve.To program rice cooking for a specified time:(a) Repeat steps (a) to (c) above.(b) Press Preset Timer Function Key (1).(c) Press “Hour /Minute” function keys (2).(d) Press rice cooking function key (5) to select type of rice. Within a few seconds, the LCD willdisplay the pre-programmed time, the cooker will begin cooking and you will hear a “beep”indicating the cooking indicator light has turned on.(e) A few minutes before cooking is done, a “beep” will sound to indicate that the cooker hasautomatically switched to “Keep Warm” and the Warm/Cancel light will turn on. Once the cooker enters the Warm mode, the rice is ready to serve.Brown Rice and Quick Serving TipsA whole grain of rice has several layers, but only the outermost layer (the hull) isremoved to produce what we call brown rice. This process is the least damaging tothe nutritional value of the rice and avoids the unnecessary loss of nutrients thatoccurs with further processing.- Rinse brown rice at least three times in cold water.- Stir with hands in a circular motion and let rice soak for 30 minutes- Drain and place into clay pot- Follow instructions for “Using the Rice Cooker”To achieve the best cooking results, after the sound of the ‘beep’, let the brown rice stay in “Warm” mode for at least an additional 30 minutes.A teaspoon of salt and margarine (or other oil or fat) may be added. Cook the brown rice in mushroom or vegetable stock, leftover vegetable-steaming water or with your favorite herbs. Other variations is to add cashews, cranberries, raisins, apple chunks, mango cubes, mushrooms, garlic and onions. Sauté these ingredients in olive oil and mix into the prepared rice. Cooking the rice in mushroom stock and then mixing it with mushrooms makes a flavorful dish.You can turn any rice dish bright yellow by adding a teaspoon of tumeric. This doesn’t change the flavour, just the color.Reheating Cold RiceBreak up the cold rice in the clay pot and add hot water as desired to speed up reheating process.Quick Serving Ideas(1) Heat cooked rice with milk or soymilk. Add in cinnamon, nutmeg, raisins and honey for a deliciousrice pudding.(2) Make homemade vegetable sushi rolls by wrapping brown rice and your favorite vegetables in sheetsof well moistened nori.(3) Use rice leftovers for cold rice salads that are great for on-the-go lunches. Be creative and add in eitherchicken or tofu plus your favorite vegetables, nuts, herbs and spices.(4) Serve beans and rice accompanied by the vegetables of your choice for a simple yet delicious lunch ordinner entrée.(5) Rice as a side dish need not be served plain - spruce it up with the toppings of your choice. Somefavorites include nuts, sesame seeds, sautéed mushrooms and scallions.(6) Place rice and chopped vegetables in pita bread, top with your favorite dressing and enjoy a quick andeasy lunch.USING THE SLOW COOKERThe VitaClay TM slow cooker preserves nutrients allowing food to cook in its natural juices. It brings foodto a boil 2-4 times faster than conventional slow cookers then reduces the heat to a slow simmer for gourmet perfection. The Automatic Warming Cycle holds food perfectly cooked for up to 12 hours. It reduces the cooking time by about 30-50% and reduces the cooking liquid by about one-half.To convert cooking time from conventional slow cooker recipes into VitaClay slow cooking:, the rule of thumb is if the conventional slow cooking time is set on ‘high’ for 4 hours, or on ‘low’ for 8 hours, the VitaClay TM Rice/Slow Cooker Pro will only take 2 hours.To start the slow cooker immediately:(a) Place recipe contents in the clay pot and cover with the lid.(b) Place the clay pot on the cooker’s heating base turning the clay pot until it has good contact withthe bottom. Ensure there is no particle interference to prevent the cooker from cooking evenly.(c) Close the cooker lid. You will hear a “click” when it is snapped in..(d) Press the slow cooker function key (6) to select desired cycle. When the "2:00 hour" minimumcooking time indicator flashes, enter the desired cooking time within a few seconds of the flashing.The slow cooker will “beep”, start to heat up and the indicator light will turn on. When the SlowCooker reaches the desired time duration, the system will indicate cooking is complete and willautomatically switch to “Keep Warm”. The LCD will display the warm time duration.(e) Cooking time may be increased at anytime during cooking by pressing the Hour/Minute functionkeys (2).1. Do not fill the cooker more than ¾ full of water to prevent overflow.2. Be sure all ingredients are fully cooked before serving. If not, re-program to cook longer.3. If the Stew/Braise/Porridge cycle is too thick and causes the cooker to overheat, the cooker willgive a warning “beep” and switch to the Warm cycle. You can cancel the operation by pressingthe Warm/Cancel function key (4). Thin the contents by adding fluid to the pot and start to cookagain.To program slow cooker for a specified time:(a) Repeat steps (a) to (c) above.(b) Press Preset timer function key (1).(c) Select “Hour”/“Minute” function keys (2).(d) Repeat steps (d) to (e) above.Within a few seconds, the LCD will display the pre-programmed time, the slow cooker will begincooking and you will hear a “beep” indicating the cooking indicator light has turned on. A few minutes before cooking is done, a “beep” will indicate the cooker has automatically switched to the “KeepWarm” state and the LCD will display the Warm/Cancel button.CARE AND CLEANING• Like any ceramic material, the removable clay pot will be damaged by sudden temperature changes.• If the clay pot is preheated or is hot to the touch, do not add cold or frozen foods. Do not preheat the clay pot unless called for in the recipe. The clay pot should be at room temperature whenadding hot ingredients.• For general washing, wait until the clay pot cools. Then wash it in warm water with a very small amount of dishwashing liquid and rinse thoroughly.• DO NOT put the clay pot in the dishwasher. Sudden temperature changes may crack it and excessive soap will clog the pores.• Do not use abrasive scouring powders or steel wool. Plastic brush or nylon scrub pads can be used as needed.• For hard to remove residue or to do a thorough cleaning, allow the clay pot to soak overnight in the sink with water and ¼ cup baking soda. Wash using a brush or nonmetallic scrubbingpad. Follow this treatment after cooking fish or foods with strong seasoning.• Use hot water if you wash the clay pot right after cooking. Do not use cold water if the pot is hot.• After washing, dry thoroughly and store with the lid inverted upside down in the bottom, ideally with a towel between the layers. Avoid storing the cooker with the lid sealed because it maybecome moldy if not carefully dried.• If the cooker should become moldy, make a paste of baking soda and water, cover the cooker with the paste and allow it to dry. When the paste is dry, rinse with water and dry well.• If clay pot pores become clogged, boil the pot to remove debris. Use a roaster with a rack and add tepid water. Place the pot bottom on the rack and bring water to a boil. Boil for 30 minutes toremove the debris. Repeat doing the top if necessary.• Store your VitaClay TM Rice & Slow Cooker in a dry and clean environment.When washing the clay pot, it is recommended that a soft cloth or pad be placed between the pot and sink to protect the pot from hitting the sink.CLEANING OUTSIDE OF COOKER UNITThe outside of the cooker may be wiped clean with a soft cloth and warm soapy water. Wipe dry. Do not use abrasive cleaners. Grease may be removed with diluted ammonia. Do not let the Control Panel or any electrical mechanisms within the unit get wet.CLEANING INSIDE OF COOKER UNITIf an object becomes stuck to the heat element lightly rub it off using a fine sandpaper #600 or steel wool. Then wipe with a damp cloth.TROUBLESHOOTINGNo Indicator light during cooking process Check power plug from cooker end to outlet to ensure complete contact.BATTERY The battery will charge when the power cord is plugged in. When charging is finished the clock will show the time on the LCD display for many hours.When the power cord is unplugged, the battery eventually will drain over time and recharge the next time when machine is plugged back in for use.EXCEEDING THE TEMPERATURE“E3” If you forget to fill the cooker with water, or add too much rice and the expanded rice kernels fall on the heated surface during operation, it may be overheated:• An “E3” error message will show on the LCD display panel • A “beeping” noise will sound, and• The machine will shut down automatically.Action:• Press the WARM/CANCEL function key (4) to cancel operation.• Remove the inner pot from the cooker to find the cause of the overheating.BROKEN OR DAMAGED UNIT“E1”“E2” DO NOT TRY TO REPAIR THE UNIT BY YOURSELF When “E1” or “E2” is displayed on the LCD display panel or a black screen is showing, immediately turn off the power. Call warranty service center for assistance.LIMITED ONE-YEAR WARRANTYEssenergy, Inc. (“Essenergy”) warrants this Product against defects in material or workmanship for a period of one (1) year from the date of original purchase,when utilized for normal household use. Essenergy will repair or replace the Product, at its option, at no charge except for shipping and handling.This warranty does not cover: (1) damage due to incorrect customer instruction, installation or set up; (2) cosmetic damage or damage due to an act of God, accident, misuse, abuse, or negligence; (3) commercial use of the Product; (4) modification of any part of the Product; (5) damage due to improper operation, improper maintenance, or connection to an improper voltage supply; (6) damage due to an attempted repair of the Product by anyone not authorized by Essenergy to service the Product; (7) normal wear of parts; (8) Damage or defects caused by shipping or faulty packaging or mishandling in transit; (9) any non-electric / mechanical attachments and accessories and disposable parts including measuring cup, spoon, inner pot, outside case, cord and plug.KEEP YOUR SALES RECEIPT. Warranty service will require presentation of proof of purchase in the form of a bill of sale or receipt which shows the date of purchase and establishes that the Product is within the warranty period.This warranty is invalid if the factory applied serial number or production date has been altered or removed from the Product.To obtain warranty service, send the complete appliance unit insured, freight prepaid, plus proof of purchase (as described above), to:Customer ServiceEssenergy, Inc.1765 Landess Ave., #34Milpitas, CA 95035Please attach your name, address, telephone number, and a description of the problem along with return postage. The product must be sent carefully packed and properly cushioned to prevent damage in transit. Your failure to abide by these provisions may cause your request for warranty service to be denied, and the repaired unit will be returned at your expense. This warranty is extended only to the original purchaser of this product and does not extend to any commercial use or unreasonable use. This warranty is valid only in the United States.NOTE: REPAIR OR REPLACEMENT AS PROVIDED UNDER THIS WARRANTY IS THE EXCLUSIVE REMEDY OF THE CONSUMER. ESSENERGY SHALL NOT BE LIABLE FOR ANY INCIDENTAL OR CONSEQUENTIAL DAMAGES FOR BREACH OF ANY EXPRESS OR IMPLIED WARRANTY ON THIS PRODUCT EXCEPT TO THE EXTENT PROHIBITED BY APPLICABLE LAW. ANY IMPLIED WARRANTY OF MERCHANTABILITY OR FITNESS FOR A PARTICULAR PURPOSE ON THIS PRODUCT IS LIMITED IN DURATION TO THE DURATION OF THIS WARRANTY. Some states do not allow the exclusion or limitation of incidental or consequential damages, or allow limitations on how long an implied warranty lasts, so the above limitations or exclusions may not apply to you. This warranty gives you specific legal rights, and you may have other rights which vary from state to state.Essenergy, Inc.Toll free: 1-877-877-9121 (Customer support)Made in China。
�VITA 全瓷系统�临床操作手册
2008 / 09
VITA全瓷指示表
Ὃ
VITA 临床操作手册
VITA 玻璃渗透氧化物全瓷系列
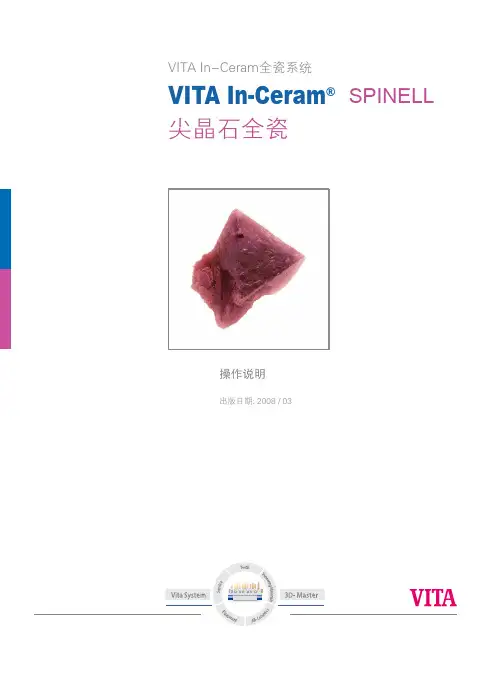
VITA In-Ceram® SPINELL 渗透尖晶石
VITA渗透全瓷尖晶石(MgAl2O4是所有氧化物陶瓷中半透明性最高的,这使它非常适合于制作全瓷前牙单冠,尤其是进行残根牙和年轻恒牙的冠修复。
(VITA ZYrcomat以高达1500℃以上的温度进行致密化烧结。
致密化烧结前预烧结的瓷块可以用来制作高强度的基底冠,三单位前牙桥支架,以及套筒冠的内冠部分。
VITA In-Ceram® ALUMINA 渗透氧化铝
VITA渗透全瓷氧化铝(Al2O3将美观性和强度完美结合。
该材料用途广泛,适合于制作单冠和前牙三单位的桥体。
VITA In-Ceram® YZ 氧化钇部分稳定氧化锆
VITA全瓷YZ纯氧化锆瓷块被喻为氧化物陶瓷中的“钢铁陶瓷”。
工业上预烧结后的瓷块由氧化钇部分稳定的四方氧化锆组成,这使得其挠曲强度高达900Mpa 以上,以及高于一般的断裂韧性(5.9 MPa *m1/2,适合于制作单冠基底冠和多个单位的前牙及后牙桥体支架,可以进行高精致设计并保证效果的高度稳定性。
VITA In-Ceram® ZIRCONIA 渗透氧化锆
VITA渗透全瓷氧化锆(Al2O3-ZrO2是具有很强遮色能力的氧化陶瓷。
尤其适用于变色严重的残根牙,它有机结合了氧化锆的高韧度和氧化铝的挠曲强度,尤其适合于制作单冠和三单位的前牙及后牙桥。
VITABLOCS ® TriLuxe forte和Mark II
配合CEREC和inLab系统使用的全瓷瓷块,无需在其表面添加染色剂,就能再现天然牙的半透明性、荧光性及亮度。
不同瓷层间颜色细微过渡,牙颈部饱和度和荧光性的增强,使TriLuxe forte--成为 CAD/CAM系统最佳选择的瓷块,具有更卓越的自然美学效果。
TriLuxe 更具有三层色过渡。
VITA In-Ceram® AL 纯氧化铝
VITA全瓷AL纯氧化铝瓷块具有高度的抗腐蚀性和生物兼容性,全瓷AL纯氧化铝瓷块使用VITA专用结晶炉
VITA 全瓷临床操作手册
VITA 临床操作手册
VITA 临床操作手册
VITA 全瓷冠预备的注意事项
前牙单冠修复
牙合牙体预备前应该对邻牙和对牙进行比色,比色可以通过视觉直接比色或辅助比色仪比色。
亮度饱和度色值
表面质地和形貌透明度
VITA 全瓷临床操作手册 VITA 临床操作手册
VITA 临床操作手册
采用ISO标准光源,发射的照明光前直接照射到牙本质层,可以不受周边光亮度的影响,测试结果精准无误,是对医生非常有帮助的工具。
VITA 全瓷临床操作手册
VITA 临床操作手册
VITA 全瓷冠预备的注意事项前牙单冠修复
VITA 全瓷临床操作手册
VITA 临床操作手册VITA 临床操作手册
VITA 全瓷临床操作手册
VITA 临床操作手册
VITA 全瓷冠预备的注意事项
前牙单冠修复
VITA 全瓷临床操作手册
VITA 临床操作手册
足够的牙体预备是
保证修复体抗力的重要保证。
舌侧窝通过车针进行预备,必须保证为修复体提供足够的空间,检查前伸和侧向咬时正常预备,修复体
切端及颈部均有适
宜的间隙。
形成舌侧壁修复体中部预备不足,间隙不够,影
响美学效果。
具有一定平坦的壁可以防止修复体旋转未分两部分预备,牙体中部预备过多
易导致牙髓问题。
VITA 全瓷临床操作手册
VITA 临床操作手册
VITA 全瓷冠预备的注意事项前牙单冠修复
修整后的边缘形态锐利线角造成应力集中,降低牙齿预备体
的抗力,圆钝内角可以减少应力集中。
适宜的聚合度为瓷留出适宜的空间,过大的聚拢度造成切端瓷层过厚,反而会降低瓷层
的抗力。
VITA 全瓷临床操作手册
VITA 临床操作手册
前牙或者龈沟较浅时推荐使用单线法压排牙龈,
或者采用排龈膏处理,可以在排龈前修整边缘到
理想的位置。
如果采用双线法处理,可以在第一根较细的线压入之后再修整。
二次印模制取硅橡胶印模,
可以获得准确的边缘形态并保证精度。
将印模材注入龈沟制取印模修复后修复前
VITA 全瓷临床操作手册
VITA 临床操作手册贴面修复
VITA 全瓷临床操作手册
VITA 临床操作手册
VITA 全瓷临床操作手册
VITA 临床操作手册
颜色分类说明
VITAVM 荧光效果瓷
用于边缘区域较小的修正
控制修复体的荧光效果
一般用于支持和加强修复体的底色
涂覆在牙龈部位,支持底色
VITAVM效果色瓷粉
加强颜色的修正瓷
着重加强牙齿某区域的颜色
增加牙颈部、牙体和切端区域的亮度
⫳䭓VITAVM 生长叶效果瓷
具有很高的荧光性,主要用于牙切端区域使体瓷和釉质瓷之间的颜色完美过渡灵感。
VITA 全瓷临床操作手册
VITA 临床操作手册
颜色分类说明
VITAVM 釉质效果瓷
塑造出如天然牙釉质区域的自然效果
一般用于釉质瓷塑造出半透明的效果
达到天然牙的立体深度效果
VITAVM 珍珠效果瓷
仅用于修复体塑造表面效果而非涂层内部非常适合于复制出漂白色效果
可塑造出牙齿细微的偏黄和偏红效果VVITAVM 乳光效果瓷
对于年轻、具有很高半透明性的牙齿可以塑造出蛋白石的效果
VITAVM 修正瓷
上釉焙烧后使用低温(7600C焙烧进行修正与透明釉质瓷相对应,有三种颜色可选择VITAVM 牙龈瓷
恢复牙龈原有的颜色效果
在第一次与第二次牙本质瓷焙烧的过程之
间进行涂覆和焙烧颜色范围由橙红和偏红至褐红
VITA 全瓷临床操作手册
特别鸣谢: 上海同济大学口腔医学院刘伟才医生提供病例图片, 北京大学口腔医院刘峰医生提供示意图片. TESCO DENTAL SUPPLIES LTD。