e路航lh900n使用说明书 (1)
- 格式:doc
- 大小:15.50 KB
- 文档页数:3
1R9100双频RTK 高精度定位接收机数据手册Apr, 2020修订记录免责声明本文档提供有关深圳市西博电子有限公司产品的信息。
本文档并未以暗示、禁止反言或其他形式转让本公司或任何第三方的专利、商标、版权或所有权或其下的任何权利或许可。
除西博在其产品的销售条款和条件中声明的责任之外,本公司概不承担任何其它责任,并且,西博对其产品的销售和/或使用不作任何明示或暗示的担保,包括对产品的特定用途适用性、适销性或对任何专利权、版权或其它知识产权的侵权责任等,均不作担保。
若不按手册要求连接或操作产生的问题,本公司免责。
西博可能随时对产品规格及产品描述作出修改,恕不另行通知。
对于本公司产品可能包含某些设计缺陷或错误,一经发现将收入勘误表,并因此可能导致产品与已出版的规格有所差异。
如客户索取,可提供最新的勘误表。
2目录1产品介绍 (4)1.1 概述 (4)1.2 关键指标 (5)2.电气特性 (6)2.1电气极大值 (6)2.2运行条件 (6)3产品功能 (7)3.1 多模卫星星座 (7)3.2 增强系统 (7)3.3 快速在线标定 (8)3.4 自由安装 (9)3.5 导航数据率 (9)3.6 MEMS传感器原始数据输出 (9)4.外形尺寸 (10)5. 传输及接口 (9)6. 订购信息 (10)31产品介绍1.1 概述R9100多模双频高精度GNSS/MEMS 组合导航接收机,是深圳市西博电子有限公司推出的基于六自由度MEMS 传感器与双频RTK 卫星导航紧密结合的组合导航系统,RTK算法与组合导航算法高效运行于片上处理器,是一款低功耗、小体积、高精度、无需接入里程计辅助、具备城市峡谷和长时间隧道,100%导航可用性的厘米级组合导航产品。
R9100采用先进的MEMS 惯性传感器与载波差分(RTK)卫星导航组合导航技术,充分利用了卫星导航的载波相位信息与惯性器件(三轴陀螺与三轴加速度计)的相对角运动与线运动测量功能,使用多维扩展卡尔曼滤波技术及其它特定算法实现了在微小器件上的三维高精度导航测姿功能。
E路航导航仪使用方法
1、单击地图—单击接受—单击功能—单机行程—在目的地内填写地名后—单击查询—选要去的地方—单击设定—单击保存—单击确定—(选中目的地后)单击载入—单击搜索即可
2、单击地图—单击接受—单击查找—输入目的地—单击查询—(在目的地找到要设的地方如西客站)—目的地—在选择方式中(选最短路径等)—单击确定—单击开始导航
3、单机地图—单机接受—单机常用—返航-确定
4、导航仪的插卡方法:卡的金属面(即反面,正面是带标签的面)朝向车载仪的屏幕,缺角朝电源开关方向。
5、系统:Windows CE5.00 1400 50.6NB RAM
ARM9 MSB250 480X272像素65536色
端口:COM2 波特率:4800
CPU类型:ARM
使用QQ聊天的方法
用QQ聊天:打开QQ上线1.先加入好友:单击◎查找-出现对话框-在账号窗口输入要添加的好友QQ 号(用精确查找,一般设为默认)-单击加为好友-单击确定-出现一个小喇叭-单击确定然后自己的QQ 界面出现加为好友的图;2.聊天时:双击好友的图标出现一个对话框-在最下面的框中输入要讲的话-点发送(快捷键为ctrl+回车)。

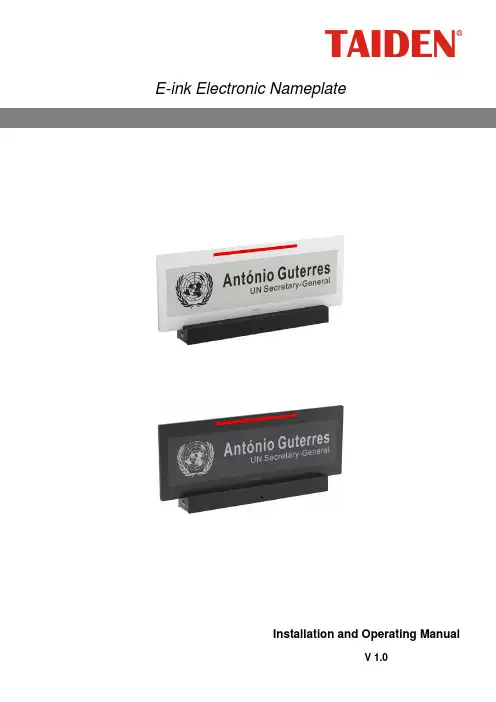
E-ink Electronic NameplateInstallation and Operating ManualV 1.0Remark:⏹All rights reserved for translation, reprint or reproduction⏹Contents may change without prior announcement⏹All technical specifications are guideline data and not guaranteed features⏹Taiden Co., Ltd. is not responsible for any damage caused by improper use of this manual⏹The equipment must be connected to earth!⏹This product conforms to the rules of the European directive 2004/108/EC.⏹To protect your hearing, avoid high pressure level on earphones. Adjust to a lower and convenient level.⏹If any detailed information is needed, please contact your local agent or TAIDEN service center in your region.Any feedback, advice and suggestion about the products is appreciated.⏹TAIDEN CongressMatrix、mMediaCongress are the registered trademarks of TAIDEN Co., Ltd.⏹CobraNet is the registered trademark of Cirrus Logic, Inc.⏹Dante is the registered trademark of Audinate Pty Ltd.⏹In order to extend the life time of the whole system, we strongly recommend that the congress systembe scheduled to shut down every day in the evening when not in use.ContentsChapter 1. Introduction (1)1.1 Summary (1)Chapter 2 E-ink Electronic Nameplate (3)2.1 Functions and instructions (3)2.2 Installation (5)2.2.1 Desktop fixed Installation of HCS-1082(S(N)) (5)2.2.2 Installation of HCS-1082S(N)/FM (6)2.3 Connection and operation (7)Chapter 3 Technical specifications (9)3.1 System specifications (9)3.2 E-ink nameplate (10)Chapter 1. IntroductionFeatures■Elegant and ergonomic tabletop design with an ultra-thin 8 mm screen■1904 x 464 pixels display■High contrast■Paper like reading - low eye strain■Contents may be permanently displayed after power down■Ultra wide viewing angle■Dramatic energy savings■Double side panel■Optional microphone state indicating light On/Off■USB Type-C Connector■Network port (RJ45), support PoE■Bi-color LED indicator on the top to display request to speak or speaking status■Button on the base for making a request to speak or for another user-defined functionality■Extension port can connect to an external request-to-speak button, IC card reader or fingerprint identification module■For use with TAIDEN conference system: Connection in the same system with conference main unit through PoE switchPower supply from conference unit (e.g.HCS-8668) through USB Type-C connection.Automatically bounded to the conference unitonce connectedDisplay of delegate profile in user-defined layout when bound to a conference unit■For stand-alone use:PC connected plug-and-play application.Nameplate can be automatically recognized as aUSB flash drive so that pictures from PC can becopied to the nameplate for displayBuilt-in Web Server offers control of nameplates using a standard internet browserControl all or part nameplates in the network via Nameplate Server■Combination with Electronic Nameplate Management Software:Users can flexibly set display contents, such asenterprise logo, conference logo, conferencename, name and title of the delegate, which canbe displayed on the nameplate when thedelegate signs in on the conference unitContents on the front or rear side of the nameplate can be managed independently, orsynchronouslyDefault screen setting is available for pre-meeting display or absence displayMicrophone state indicating light On/Off settingControlling of a certain or multiple nameplate display is available after seating is assignedProduct type:HCS-1082_BE-ink Electronic Nameplate (tabletop, double screen, 14.74”, microphone status indicator, USB connector to HCS-86** series multimedia congress terminal, Nameplate management system needed, black)HCS-1082_WE-ink Electronic Nameplate (tabletop, double screen, 14.74”, microphone status indicator, USB connector to HCS-86** series multimedia congress terminal, Nameplate management system needed, white)HCS-1082N_BE-ink Electronic Nameplate (tabletop, double screen, 14.74”, microphone status indicator, USB connector to HCS-86** series multimedia congress terminal, RJ45 connector supports PoE, Nameplate management system or Nameplate server needed, black)HCS-1082N_WE-ink Electronic Nameplate (tabletop, double screen, 14.74”, microphone status indicator, USB connector to HCS-86** series multimedia congress terminal, RJ45 connector supports PoE, Nameplate management system or Nameplate server needed, white)HCS-1082S_BE-ink Electronic Nameplate (tabletop, single screen, 14.74”, microphone status indicator, USB connector to HCS-86** series multimedia congress terminal, Nameplate management system needed, black)HCS-1082S_WE-ink Electronic Nameplate (tabletop, single screen, 14.74”,microphone status indicator, USB connector to HCS-86** series multimedia congress terminal, Nameplate management system needed, white)HCS-1082SN_BE-ink Electronic Nameplate (tabletop, single screen, 14.74”, microphone status indicator, USB connector to HCS-86** series multimedia congress terminal, RJ45 connector supports PoE, Nameplate management system or Nameplate server needed, black)HCS-1082SN_WE-ink Electronic Nameplate (tabletop, single screen, 14.74”, microphone status indicator, USB connector to HCS-86** series multimedia congress terminal, RJ45 connector supports PoE, Nameplate management system or Nameplate server needed, white)HCS-1082S/FME-ink Electronic Nameplate (flush-mounting, single screen, 14.74”, microphone status indicator, USB connector to HCS-86** series multimedia congress terminal, Nameplate management system needed, white)HCS-1082SN/FME-ink Electronic Nameplate (flush-mounting, single screen, 14.74”, microphone status indicator, USB connector to HCS-86** series multimedia congress terminal, RJ45 connector supports PoE, Nameplate management system or Nameplate server needed, white)Chapter 2 E-ink Electronic NameplateFront of HCS-1082(N) Backside of HCS-1082(N)Front of HCS-1082S(N) Backside of HCS-1082S(N)Front of HCS-1082S(N)/FM Backside of HCS-1082S(N)/FMSide of HCS-1082(S(N)) Top view and bottom view of HCS-1082(S(N))Figure 2.1.1 E-ink nameplateFigure 2.1.1:1. E-ink screenContents may be permanently displayed after power down;HCS-1082(N): double 14.74” screens;HCS-1082S(N): single 14.74” screen;HCS-1082S(N)/FM: single 14.74” screen;Contents can be set by the TAIDEN Electronic Nameplate System.2 & 3. Microphone state indicatorWork state Indicating lightMicrophone On Red (on)First in request list Green (flash)Not first in request list Green (on)4. USB Type-C connectorConnecting to congress terminal via USB cable5. Cat.5e Cable with RJ45 socketSupports PoE;When wiring, we suggest you to choose a shielded RJ45 plugs.Note:please select one conection mode from USB or Cat.5e as needed6. Button for requesting to speak or other user defined function7. Power indicatorGreen light is on in active communication;8. Phoenix extension portConnecting to an external request-to-speak button, IC card reader or fingerprint identification moduleSpecial reminder: Please DO NOT press on the E-ink screen!Figure 2.2.1 Moving2.2.1 Desktop fixed Installation of HCS-1082(S(N))Note:☞The side with button (short lamp) is toward to delegate;☞The tabletop thickness is controlled between 18 mm and 22 mm; if less than 18 mm, please add the material to increase the thickness; if more than 22 mm, please increase the hole area at the screw hole position at the bottom of the tabletop to reduce thickness.Figure 2.2.2 Fixed installation of HCS-1082(S(N)) electronic nameplate2.2.2 Installation of HCS-1082S(N)/FMFigure 2.2.3 Fixing hole positioning diagram of HCS-1082S(N)/FM (unit: mm)Figure 2.2.4 Flush-mounted installation of the HCS-1082S(N)/FM1. Connection nameplates to main unitThere are two ways for electronic nameplates to access main unit:First, the electronic nameplates are directly connected to the conference units (eg. HCS-8668) via USB cable (Figure 2.3.1), and the electronic nameplates are automatically bound to the conference units at this time. The HCS-8531 Electronic Nameplate Client is needed for nameplate controlling.Second, through the PoE switch, using RJ45 cable, the electronic nameplates and the EXTEN SION port of the conference main unit can be connected to the same network, and under this connection mode, the electronic nameplate can be used independently, or can be manually bound to the conference unit. The HCS-8531 Electronic Nameplate Client is needed fornameplate controlling.Figure 2.3.2 Nameplates connection via cat.5e cable(with main unit)NumberFirst of all, make sure that the nameplates are connected properly to the CMU. All nameplates must be numbered when the system is used for the first time or when adding or replacing nameplates. The numbering function can be activated HCS-8531 Electronic Nameplate Client.The number indicating light of all connected nameplateswill blinkandscreens display:“Numbering…”. Press the key on the backside of allnameplates one by one. Once all nameplates numbered, restart the CMU to update the number information.2. Connection nameplates to networkThe HCS-1082 series electronic nameplate can be used independently without main unit, at this time, the electronic nameplates and the control computer should be connected to the same network (network switcher needed). HCS-8532 Electronic Nameplate Server is needed for nameplate controlling.The default IP address of nameplate is 192.168.1.82, so, please modify the IP address of the nameplate first. Connect only one nameplate to the newwork, and then enter the default IP address in browser to access the nameplate webpage to modify IP address, and then restart the nameplate.Figure 2.3.3 Nameplates connection via cat.5e cable(without main unit)3. Connection nameplates to computerWhen connecting to computer via USB cable, nameplate can be automatically recognized as a USB flash drive so that pictures from PC can be copied to the nameplate for display.Picture format: *.bmp, monochrome bitmap;Nameplate resolution: 1904*464;Front screen file name: 1.BMP;Back screen file name: 2.BMP;Double screens file name: 3.BMP.4. DisplayDisplay content can be set through nameplate system software, contents may be permanently displayed after power down.Press and hold the key on the back side for 3 seconds, or click “Display Nameplate Version” through nameplate system software, the screen of nameplates display the device information. Include: Device ID, Version and Build. Press the key again to exit versiondisplay.Figure 2.3.1 Nameplates connection via congress terminalChapter 3 Technical specifications 3.1System performanceConforms to IEC 60914, the international standard forcongress systemsSystem environmental conditionsWorking conditions fixed/stationary/transportableTemperature range:- Transport: -40 °C to +70 °C- Operating: 0 °C to +45 °CMax. relative humidity:< 95% (not condensing)Safety: Compliant to EN 60065EMC emission: Compliant to EN 55022EMC immunity: Compliant to EN 55024EMC approvals: CE, FCCPower harmonic: Compliant to EN 61000-3-2Voltage fluctuations and flicker: Compliant to EN61000-3-3Physical characteristicsTypes E-ink nameplate InstallationTabletop / Flush-mountedHCS-1082(S)Dimensions(mm)HCS-1082S/FMDimensions(mm)ColorHCS-1082(S): black (PANTONE 419 C) / white (PANTONE 420 C)HCS-1082S/FM: white (PANTONE 420 C)WeightHCS-1082(S): 1.3 kg HCS-1082S/FM: 0.8 kgElectrical characteristicsTypesHCS-1082(S) HCS-1082S/FMDisplay dimensions384 mm x 89 mm Resolution 1904 x 464Max. consumption 3 W Static consumption< 100 mWConnectionCat.5e cable with RJ45 socketType-C USB connectorCopyright by TAIDEN Last Revision: 12/2019TAIDEN INDUSTRIAL CO., LTD. 6/F, Block B, Future Plaza, 6060 Qiaoxiang Rd, Nanshan District, Shenzhen, China P .C.: 518053Website: 。
LH700使用说明书导航 (1)FM发射 (2)GPS信号测试 (4)USB设置(拷地图、音乐之前必设) (5)音乐播放 (5)视频播放 (6)复位reset (7)地图升级与更新 (8)路径设置 (9)选配功能(根据不同型号的功能设定有差异).................................... 错误!未定义书签。
一体机的装配与使用 .......................................................................... 错误!未定义书签。
常见问题 (10)导航导航须知:1)定位时必须在室外进行,室内无法进行搜星。
2)搜星定位要远离高层建筑物或上方有遮挡的地方(隧道、立交桥等),另外某些特殊地点由于有辐射等干扰信号会出现盲区导致无法定位。
3)搜星时,请尽可能让导航保持竖立,因为导航仪的天线在背部,如果天线朝地可能导航搜星慢或无法成功定位。
导航方法:点击“卫星导航”图标,进入DSA界面,选择右下角的导航出现地图选择图标后选择已经预装的地图即可进入导航。
以凯立德地图为例,进入地图后,导航仪会在短时间内自动完成定位,显示出用户当前所在地(即红色箭头)。
此时,用户只须输入一个目的地就可正常导航,方法为:点地图任意点,在出现的菜单中选择“查找”;选择好当前所在的行政区域;然后在手写框中输入目的地,选择确定;导航仪会查找出目标所在地的信息点,点击地图左上角的“目的地”,导航仪就会出现四种路径供选择。
1)“推荐模式”-----此种模式会自动进行时间、费用、路程的优化。
初次使用GPS的最适合此种模式。
2)“最短路径”-----此种模式为从发地到目的地理论上的最短距离,在市内行驶时可能会因为单方面追求最短距离而违反交通规则。
比较适用于跑长途节省油费。
3)“最快路径”-----此种模式为了追求最快到达目的地,会尽量走城市主干道和高速公路,因此会产生绕路或有交高速公路费的情况。
e路航lh900n地图升级简介e路航lh900n是一款智能车载导航设备,它具有高精度地图导航功能,并且支持地图的升级。
本文档将详细介绍e路航lh900n地图升级的步骤和注意事项。
步骤步骤一:备份数据在进行地图升级之前,我们建议先备份e路航lh900n设备的相关数据,以防止不可预知的数据丢失。
可以通过连接设备到电脑上,在计算机中浏览设备的文件并将其复制到安全的位置来进行备份。
步骤二:下载地图升级文件访问e路航官方网站,找到e路航lh900n的相关支持页面。
在该页面上,可以找到最新的地图升级文件。
下载该文件并将其保存到电脑上的一个易于访问的位置。
步骤三:连接设备使用USB数据线将e路航lh900n设备连接到电脑上。
确保设备和电脑之间建立了正确的连接。
步骤四:进入升级模式在e路航lh900n设备上,找到“设置”菜单。
在菜单中,选择“系统设置”选项,然后选择“更新升级”选项。
接下来,按照设备屏幕上的提示,进入升级模式。
步骤五:选择地图升级文件在升级模式下,设备将显示一个文件选择界面。
通过浏览文件系统,找到步骤二中下载的地图升级文件。
选中该文件并确认选择。
步骤六:开始升级一旦地图升级文件被选择,设备将开始执行升级过程。
请耐心等待,不要中断升级过程,以免导致设备损坏。
步骤七:完成升级当升级过程完成后,设备将自动重新启动。
在重新启动后,您可以检查设备的地图版本,确认地图是否已成功升级。
注意事项•在进行地图升级之前,确保设备的电量充足,以免因电量不足导致升级过程中断。
•升级过程中,不要随意断开设备和电脑之间的连接,以免导致设备损坏。
•如果升级过程中出现错误或设备无法正常工作,建议重新启动设备并重试升级过程。
•如果在地图升级后仍然遇到导航问题,建议联系e路航官方客服寻求进一步的帮助。
结论通过本文档,您已了解如何进行e路航lh900n地图的升级。
按照上述步骤操作,并遵守注意事项,您可以顺利完成地图升级,并享受更新的地图导航功能。
1.电磁流量计PROMAG50 2. 80F调试说明3.溶解氧COM223/COM2534.CPM223/CPM253 ORP5.超声波测量仪FMU 23X6.压力变送器PMP717.在线测量浊度仪CUE218.在线COD测量仪9.雷达FMR24510.继电器(模数转换)RTA42111.72F调试说明12.重锤料位计FMM5013.DTT31质量流量计PROMAG50 电磁流量计一、参数设置10W调试说明1.仪表上电稳定后,按“E”键进入菜单组,出现“Group Select”Measuring Values2.按“+”或“-”,找到“Unit Volume Flow”,可用“+/-”键和“E”键确认体积流量单位,输入10,最后按“E”键确认;3.显示“Unit Volume Flow”,可用“+/-”键和“E”键确认质量流量单位;“m³/h”8.“Unit Totalizer”, 可用“+/-”键和“E”键确认累计值单位;“M³”10.“+”“-”同时按返回,再按“+”或“-”找到“Current Output ”按“E”,选择输出“4—20mA Hart Namur”,再按“E”,用“+、-”输入20mA对应的值,按“E”确认;11.按“E”到“Failsafe Mode”,按“+”或“-”,选择“Max current value”,及报警时输出最大电流值;12.同时按“+”“-”返回到“Current Output 1”,再按“+”或“-”找到“ProcessParameter”,按“E”,将“On-value low flow cut off”设置小流量切除值,一般的设置范围为20mA对应值的1%到5%;80F调试说明4.仪表上电稳定后,按“E”键进入菜单组,出现“Group Select”Measuring Values5.按“+”键两次出现“Quick Setup”,按“E”键进入,出现“Setup Commission”;No6.按“+”或“-”,输入80,最后按“E”键确认;7.重新出现Setup Commission”,按“+”键改为“Yes”,按“E”键确认;No8.显示“Language”选择语言为英语,按“E”键确认,如需选其它语言先用“+”“-”键选择再用“E”键确认;9.显示“Pre-setting”,按“E”键确认;“Act-setting”10.显示“Unit Mass Flow”,可用“+/-”键和“E”键确认质量流量单位;“Kg/h”8.“Unit Totalizer”, 可用“+/-”键和“E”键确认累计值单位;“Kg”9.“Configuration other Unit?”,可用“+/-”键和E键,选择“No”;10.“+”“-”同时按返回到“Quick Setup”菜单,再按“+”或“-”找到“Current Output 1”按“E”,选择输出“4—20mA Hart Namur”,再按“E”,用“+、-”输入20mA对应的值,按“E”确认;11.按“E”到“Failsafe Mode”,按“+”或“-”,选择“Max current value”,及报警时输出最大电流值;12.按“E”返回到“Current Output 1”,再按“+”或“-”找到“ProcessParameter”,按“E”,将“Assign cut off”选为“Mass flow”,按“E”键,在“On-value low flow cut off”设置小流量切除值,一般的设置范围为20mA对应值的1%到5%;Liquisys COM223/COM253溶解氧调试方法一、调试:(1) 操作说明 :下面对各个操作键进行说明:CAL键:标定,激活标定模式,标定菜单显示。
便携式导航仪地图升级图文教程(一)升级流程图步骤如下:1、下载对应的地图(高清下载高清版本,普清下载普清版本);2、解压后,命名为PAPAGO或KLD;3、把导航里的PAPAGO或KLD文件拷到电脑中,把原来的文件夹删除;4、把新下载的文件夹拷进导航里;5、设置路径,完成升级;(二)详细操作步骤说明(以凯立德地图升级为例,其它地图升级方法一样,只是重命名的文件名称不一样,E路航命名为PAPAGO)1、查看地图相应版本是否最新;凯立德版本查看方法:(最新版本信息为C1668-C7406-2342J07)凯立德C系列查看版本号:点导航—进入导航---选择凯立德---选功能---帮助—版本信息a)、进入凯立德导航地图界面b)、点击“功能”按钮c)、点击“帮助”按钮d)、点击“版本信息”按钮或进入凯立德导航地图后,点查找,输入“#666#”即可看到版本号;注:如版本信息与以上版本不一样,则不是最新版本,建议升级使用;2、下载相对应版本地图;用迅雷下载工具,下载最新地图版本进行更新;2011年1月份最新凯立德版本下载地址如下:高清版本:(适用于5寸高清屏及5寸以上高清屏)/rodey/ditu/2011-01/KLD(20110110_800x480).rar适用机型:5寸:LH980N升级版、LH980N标准版、LH980N至尊版、E-V5定制版、E100、E-V2、E-V3、Gphone1、T950N升级版、E500定制版、E500T、E300、E300S、E-V5电视版6寸;E800升级版、E-V7、T600、E800标准版、E600、E800TV升级版、E800TV版7寸:E700S、E700精装版、E700普清版本:(适用于4.3寸普清屏)/rodey/ditu/2011-01/KLD(20110110_480x272).rar适用机型:X8升级版、LH900S升级版、LH900N升级版、E-V1升级版;E-V63、备份原导航中的地图文件并删除整个地图文件夹;用数据线连接电脑后,打开导航盘符,把对应的地图文件夹拷到电脑中进行备份,以避免升级失败时还原旧地图用;步骤:A)、用数据线与电脑相连后,打开我的电脑,找到新出现的盘符B)、把整个KLD文件夹拷到电脑其它盘符中,进行备份!C)、删除整个KLD文件夹;4、把新下载地图进行解压,重命名后拷入导航中(请注意对应的文件夹名称);A)、选择解压到当前文件夹B)、把解压后的文件夹命名为KLD文件夹,如已是KLD文件命,则不需要重命名;注意:打开KLD KLD C )、把KLD5、设置导航路径;点击导航后,看是否可运行相应地图,如可运行,跳过此步骤;设置步骤:打开导航仪—点击设置----GPS路径设置----把DSA.EXE(或为DSA2011.EXE)设置为导航路径;详细请参考设置视频:E路航GPS导航路径设置操作视频:/viewthread.php?tid=342&extra=page%3D2/v_show/id_XMTU2NjAyMDc2.htmlE路航GPS地图路径设置操作步骤视频:/viewthread.php?tid=341&extra=page%3D1/v_show/id_XMTU1NzQ2MzA4.html6、检查地图版本信息,看是否已是最新地图;7、正常运行及使用,完成升级。
e 901Instruction manualDelivery includesDelivery includes• e 901• pouch • quick guide • safety guideProduct overview2. XLR-3 connector3. Rubber damping plate4. Mounting slotsInstallationConnecting the microphoneConnect the XLR-3 socket of the microphone cable (optional accessories) to the XLR-3 socket ofthe microphone.OperationPositioning the microphone in a drumPlace the e 901 in the drum. Position the microphone so that its sound inlet basket is directedupwards.It is vital to observe the following notes:Position Resulting soundCommentaryAMuch resonance Much attackLess attack: Turn the micro-phone away from where the beater strikes.Position the microphone at the bottom of the kick drum, approx. 10–20 cm from the batter head.BThe e 901 is used for picking up the attack, the e 902 for picking up the bined with an e 902 positioned at the resonant head. The lower micro-phone must be phase-rever-sed to avoid phase-cancellation effects due to thesecond microphone being on the other side of thedrumskin.A BPositioning the microphone on sound-reflecting surfacesPlace the e 901 on the desired sound-reflecting surface. Position the microphone so that its sound inlet basket is directed towards the sound source.It is vital to observe the following notes:Position Resulting soundCommentaryCLess room resonance por-tions or comb filter elements Improved speech intelligi-bilityGreater gain reserves in contrast to free-standing microphonesLying on the altar or lectern. Unobtrusive due to flatdesign. No microphones in the field of vision.DLess room resonance in contrast to free-standing microphonesLying on the conference table, directed towards the conference participants. Microphone must not be covered by papers, folders or similar objects.ELess room resonance in contrast to free-standing microphonesImproved speech intelligi-bilityLying at the edge of the stage and directed towards the stage. As spot microphone of the PA system or for monitoring purposes in the theater cloakrooms. Excellent rejection of rumble noise; if necessary, pla-ce the microphone on a soft pad (e.g. mousepad).If necessary, combine with overhead microphones (e.g. Sennheiser ME 36 with MZH 30 B & MZC 30).ED CPositioning the monitor loudspeakersTo prevent feedback and crosstalk, postion your monitor loudspeakers in the angle area of thehighest cancellation of the microphone (approx. 180°).Cleaning and maintaining the e 901Cleaning and maintaining the e 901CAUTIONLIQUIDS CAN DAMAGE THE ELECTRONICS OF THE PRODUCT!Liquids entering the housing of the product can cause a short-circuit and damage the electronics.Keep all liquids away from the product.Do not use any solvents or cleansing agents.Disconnect the products from the power supply system and remove rechargeable batteries and batteries before you begin cleaning.Clean all products only with a soft, dry cloth.SpecificationsSpecificationsTransducer principle pre-polarised condenser microphone Frequency response 20 - 20,000 Hz Pick-up patternhalf-cardioid Sensitivity (free field, no load)0.5 mV/Pa Nominal impedance (at 1 kHz)< 100 ΩMin. terminating impedance 1 kΩMax. sound pressure level (at 1 kHz)154 dB Phantom powering 48 V Connector XLR-3Dimensions 126.5 x 105 x 26.5 mm Weight550 gPolar pattern125 Hz 250 Hz 500 Hz 1,000 Hz 2,000 Hz 4,000 Hz8,000 Hz 16,000 Hz30°0°180°150°120°60°90°0510152025dB30°0°180°150°120°60°90°Frequency response-40-50-60-70-80-90501002005001,0002,0005,00010,00020,000H zdBV 0°, 1 m 0°, 5 cmOverview of applications Connector assignmentBALANCEDOverview of applicationsPrimary applicationSecondary application。
Eaton 9E3000IXLUPS Eaton 9E XL, 3000 VA, 2400 W, entrée : C20, sortie : (6) C13,(1) C19, tourSpécifications généralesNom du produit Numéro de catalogueAlimentation sans interruption Eaton 9E9E3000IXLUPC Longueur du produit78668916659519 cmHauteur du produit Largeur du produit33 cm39.9 cmPoids du produit Conformité7.9 kg Marquage CETUVCertificationsIEC/EN 62040-1IEC/EN 62040-2CEEAC60 HzOnde sinusoïdale42400 W0,8tour3NonC20100 V240 V50 HzEaton Intelligent Power Manager (IPM), Eaton Intelligent Power Protector (IPP)Pas de Batterie91EU declaration of conformity Eaton 9E UPSFréquence secondaire - maxForme du signal de sortieNombre de coffrets de batterie max.PuissanceFacteur de puissance de sortieFormeDistorsion de tension à la sortie (charge linéaire) - maxInclut la carte réseauConnexion d'entréeTension d’entrée - minTension de sortie - maxFréquence secondaire - minCompatibilité logicielleRemplacement de la batterieEfficacitéFonctionnalités spécialesInformations de conformitéTopologie on-line doubleconversionSurveille en permanencel'état de l'alimentation etrégule la tension et lafréquenceBypass interne permettant la continuité du service en casde défaillance de l'onduleurou d’un court-circuit en avalÉcran LCD affichant le statutet les indications en tempsréelCompatible avec les environnements virtuels (VMware, Hyper-V, CitrixXen, Redhat)Type de constructionModèle autonomeTension de sortie - min220 VCouleurnoirAutonomie prolongée de la batterie ouiPlage de tension de sortie220/230/240 V +/- 2%TopologieOnline/Double conversionValeur BTUEn ligne : 737Efficacité (mode éco)97,5Autonomie à demi-charge0 minTension nominale d’entrée230V par défaut (220/230/240V)Facteur de puissance d’entrée>0,99Plage de fréquence d'entrée40-70 HzBypass interneOuiTension d’entrée - max300 VType de tensionACPhase (sortie)1Gestion des batteriestest de batterie automatique Protection contre lesdécharges profondesFonction arrêt automatiqueOuiNombre de sorties C136Nombre de sorties C191Puissance en VA3 000 VAContact libre de potentielNonPrise(6) C13, (1) C19Phase (entrée)1Contenu du colisAlimentation sansinterruptionCâble USBCâble sérieguide de démarrage rapide Consignes de sécuritéNiveau de bruitMoins de 37 dB à 1 mètreType d’alimentation1Graphe d'autonomieVisualiser la courbe d’autonomie batterieInterface utilisateurÉcran LCDQuantité de batteriesTension230 VModule de puissance débrochable sous tension NonPlage de température0° à 40°C (32° à 104°F)Interface EthernetNonCommunication par bus de terrainPort USB (conforme HID)Port Série RS-232Emplacement pour carte de communicationHumidité relative0-95 % sans condensationKit de montage rackNonFréquence de sortie50/60 HzAutonomie à pleine charge5 minType d'interfaceAutreFréquence primaire - min40 HzTypeAlimentation sans interruptionTension de sortie nominale230 V par défaut (220/230/240 V)Emplacement carte d’extensionUn slot pour carte de communication en optionPlage de la tension d'entrée176-300 V (100 V-300 V avec déclassement)Eaton Corporation plcEaton House30 Pembroke RoadDublin 4, Ireland© 2023 Eaton. Tousdroits réservés. Eaton is a registered trademark. All other trademarks are property of their respectiveowners./socialmedia 50/60 Hz70 Hz3000 mFréquence nominaleFréquence primaire - max Altitude。
E路航LH950N更换电池全程图解大概是一年前吧,从淘宝网购了一款E路航LH950NGPS导航仪,使用一年的感受是搜星基本快速,定位基本准确,配合凯立德地图在昆明市区使用基本没有问题,但是地图更新速度缓慢,特别是昆明二环快速系统建成后,到现在已经半年多了,还没有得到及时的更新,所以,使用的时候在GPS提示时要自行判断道路的可行性。
当然,这是题外话了,这款机子到底好不好用只有用过的朋友才知道,没用过的朋友推荐你们试试。
再说下去感觉我像枪手了。
好了,言归正传,这款机器买来的时候我对GPS一无所知,第一次使用时用点烟器充满电后就拔掉了,依靠电池导航仪撑了四十多分钟,本来说也够了,但是后来发现,利用电池的时间越来越短,到了几天之后,就过分到充满电后只能用5分钟。
那基本就是能够保证汽车等红灯打火的时候不会断电了。
心里不爽,问卖东西的老板,他说一切正常,这电池本来就这样,那既然是这样,我们就不得不发挥一点DIY的精神了。
老早就想更换电池了,但是苦于不知道什么型号的电池代用合适,于是上网搜索,发现网上只有一篇帖子提到了更换电池的问题,那位发帖的大侠说了更换电池的大体步骤,但是很遗憾,他没有发图片上来,使得很多朋友没有领会到如何更换电池。
谢天谢地,他告诉了大家可用的代用电池型号为753450。
于是,再次淘宝搜索此电池,今天中通快递的快件到了,拆开电池一看,确实如那个帖子中所说,尺寸略微大了一点点,但是还好,机内有足够的空间放置这个电池。
那么,下面我就把具体的更换电池的步骤贴出来,给也希望更换电池的朋友们做个参考吧。
这里再次说明一下,代用电池的型号为753450,我买的这个容量标称为1450mah,但是不知道实际能撑多久,因为今天换上的,还没有来得及做一个测试。
好了,下面上图。
先来个全貌,长期的手写使用已经使得随机的那张屏幕保护膜千疮百孔了!呵呵。
拆机的第一步是把面板上的铝制外壳撬掉,观察整个外壳发现没有一颗螺丝,难道它用的全是卡扣?这是不可能的,于是怀疑全部被这个铝制的面板覆盖了。
U C alibratesThermocouples andRTD’s in SecondsU H ighly Accurate 0.9°C(1.5°F) and ExceptionalStability (0.3°F) forPrecision CalibrationsU C ompletely Portable for Factory, Laboratory andInstrument ShopsU I nterchangeable Test Wells and CL950 Built-In 5 Port Well DesignProvides CustomerFlexibilityU W ide TemperatureRange 40°F AboveAmbient to 900°F (482°C) Covers Most IndustrialApplicationsU N IST CalibrationAvailable OMEGA’s hot point® calibratorsallow calibration of thermocoupleand RTD probes quickly andeasily with accuracy to 0.9°C(1.5°F). An integral RTD sensorassures high measurementaccuracy and repeatability. Abuilt-in microprocessor-basedPID digital controller assuresexceptional stability. Setpoint andactual temperature are displayedsimultaneously. Temperature canbe set in one-degree incrementsfrom 22°C (40°F) above ambientto 482°C (900°F).The CL900 calibrator accepts avariety of standard and metricoptional inserts which are availablein 4 and 6" depths and for probediameters from 1⁄8 to 3⁄8". An undrilledinsert is also available. The CL900comes complete with a 1⁄4" diameter,6" deep insert well and insert blocktongs. Additional inserts can beCL900/950 SeriesCL950 hot point® dry block calibrator, shown smaller than actual size withMDSS41-TC benchtop thermometer (see ) calibrating multiplethermocouple probes (see ).hot point® Dry Block Probe Calibratorsordered separately as required forother diameter probes. 6" depthinserts are used for probes 7" andlonger; 4" depth inserts are used forprobes 5" and longer.The CL950 calibrator features abuilt-in well with 5 ports sized toaccommodate a 1⁄16, 1⁄8, 3⁄16, andtwo 1⁄4" diameter probes. The multi-port design allows for the use of acalibrated or NIST-traceable probeand meter to be used as a standardwhile calibrating other probes.The 5 port design also allows forcalibration of more than 1 probe ata time, and eliminates the need forseparate insert wells.Covered by U.S. andInternational patents andpending applications.PatentedK-23K-24calibrators only. To order NIST Calibration points add suffix “-NIST ” to model number for an additional cost.Ordering Examples: CL900-110, hot point calibrator, 110 Vac, and CL905, 10 cm (4") test well insert for 6.3 cm (1⁄4") probes. OCW-3, OMEGACARE SM extends standard 1-year warranty to a total of 4 years.CL950 multi-well accepts up to 5 probes at one time and comes standard with 1⁄16, 1⁄8, 3⁄16 and two 1⁄4" diameter holes.CL900 accepts any insert listed in the table at right.Specifications (All specifications are based on the test probes being in contact with the bottom of the test well)Temperature Range: Ambient 22 to 482°C (40 to 900°F)Operating Ambient Temperature Range: 5°C to 38°C (40°F to 100°F)Accuracy: (1°F resolution)CL900 with 6" Test Well Inserts:±1.5°F ±1 LSDCL900 with 4" Test Well Inserts: ±3°F ±1 LSD CL950: ±1.5°F, ±1 LSDControl Stability: ±0.3°F or better Temperature Uniformity (Within the Bottom 1" of the Test Well): CL900 with 6" Test WellInserts: 0.3%CL900 with 4" Test WellInserts: ±0.4%CL950: ± 0.3%Max Probe Immersion: CL900 with 6" Test Well Inserts: 150 mm (6")CL900 with 4" Test Well Inserts: 100 mm (4") CL950: 150 mm (6")Control: Microprocessor-based PID digital controller with data retention Power: 110 to 125 Vac, 50/60 Hz, 1050 W; 220 Vac, 50/60 Hz, 1050 W Dimensions:300 H x 216 W x 311 mm D (11.75 x 8.5 x 12.25")Weight: 10.1 kg (22.3 lb)CL900-110 hot point ® dry block calibrator with DSS-460-K benchtop thermometer (see ), calibrating a single thermocouple probe, shown smaller than actual size. OMEGACARE SM extended warranty program is available for models shown on this page. Ask your sales representative for full details when placing an order. OMEGACARE SM covers parts, labor and equivalent loaners.。
e路航LH900N使用说明书
简介e路航LH900N
e路航LH900N支持无线倒车后视功能,支持A V IN输入接口,支持电子相册功能, 支持JPG、GIF、BMP、PNG等格式文件浏览;e路航LH900N采用全触摸屏无按键设计,内置多款游戏编辑本段功能1. 拥有蓝牙功能,是可以打电话的GPS。
与蓝牙手机相接,可以当车载免提电话使用。
2:带A V IN输入接口,支持无线倒车后视,可选配高清晰无线摄像头。
3.支持卫星导航、定位;FLASH动画播放、视频播放、音频播放(MP3/MP4)、; 4. 日程安排,唐诗宋词,词典翻译,Windows操作界面,记事本,计算器,5、FM无线发射,游戏等功能;6、支持多国语言设置,时间设置,声音设置,背光设置,电源设置,文件管理,坐标调整,系统升级,系统资源;特点:编辑本段基本参数产品类型PND便携机屏幕尺寸4.3英寸屏幕类型4.3"高分辨率TFT液晶触摸显示屏屏幕分辨率480x272像素产品尺寸125*78*15mm 机身特点全触摸屏无按键设计系统参数GPS芯片SiRFstar III 操作系统Windows CE 6.0 存储扩展存储介质SD/MMC/TF 扩展卡最大容量SD:16GB 数据接口MiniUSB接口产品内存64MB 处理器中央处理器Atlas-III AT642D 372/396MHz A V接口2.5mm 导航参数导航地图导航地图:内置E路航正版地图papago趴趴走地图功能:3D画面/路口放大/路径规划/语音提示/自动/设施咨
询/快速查找/显示设定模块灵敏度模块灵敏度:-159dBm 卫星通道24通道定位精度<10米启动时间平均冷启动42S/温启动28S/热启动1S 语音导航全程语音导航其他导航功能接受频率 1.5754GHZ 差分模式DGPS 数据输入A V输入接口IN输入接口娱乐参数数字电视可外接CMMB移动数字电视,同步接收海量电视节目视频播放电影:支持WMV/ASF/A VI等播放;可调节播放进度/暂停/全屏播放视频文件游戏:内置益智游戏音乐:支持WMA9/MP3/W A V 格式的音频播放,支持顺序播放/随机播放/循环播放电子书:支持TXT格式文本工具:日历/计算器/单位换算三种实用工具图片:支持JPG/GIF/BMP/PNG格式图片FLASH: 支持SWF/FLV格式播放FM发射支持蓝牙免提蓝牙(选配):蓝牙免提功能,带回声消除效果其它参数菜单语言简/繁体中文/编辑本段系统参数GPS芯片:SiRFstar III纠错操作系统:Windows CE 6.0纠错存储扩展:存储介质SD/MMC 扩展卡最大容量SD:16GB纠错数据接口:MiniUSB接口英/法/德/ 意大利/西班牙/葡萄牙/荷兰/丹麦/瑞典/挪威/希腊等多国语言内置:电池类型内置900mAH聚合物锂电池电源性能电源充电器:120/230V适配器,5伏/1.5安培,USB 插头车用充电器:12~36.7伏转5伏/1.5安培,USB插头产品天线内置其他性能电子狗:内置固定电子眼数据,实时升级更新;可外接雷达实现流动测速预警功能A V-IN(选配): 支
持无线倒车后视TMC(选配): 可外接实现实时交通信息共享功能其他特点输出功率喇叭2W / 8R 工作温度0℃-60℃存放温度-20℃-60℃随机附件车载支架、车载充电器、旅行充电器、GPS说明书
E路航LH900N 汽车车载导航仪图册(2张)。