gnuradio
- 格式:ppt
- 大小:924.50 KB
- 文档页数:32

gnuradio的basic block开发实例GNU Radio是一个开源的无线电通信框架,它允许你使用图形化的接口设计复杂的无线电系统。
基本块(basic block)是GNU Radio中用于构建流图的基本单元。
下面是一个简单的GNU Radio基本块开发实例,该实例是一个简单的振幅调制器。
首先,你需要安装GNU Radio和必要的工具包。
你可以在GNU Radio的官方网站上找到安装指南。
一旦你安装了GNU Radio,你可以使用以下代码创建一个简单的振幅调制器。
这个基本块将输入的复数信号作为I/Q数据,并将它们调制到一个给定的频率。
```pythonfrom gnuradio import grimport mathclass am_modulator(_block):def __init__(self, sample_rate, freq):_block.__init__(self, "am_modulator", _signature(1, 1,_gr_complex), _signature(1, 1, _float))_rate = sample_rate= freq= 0= (2)/_rate_port_register_in(_PY_PORT_NAME)_port_register_out(_PY_PORT_NAME)= _to_short(2)= _to_float()= _to_short(2)((self, 0), (, 0))((, 0), (, 0))((, 0), (, 0))((self, 1), (, 1))((, 1), (, 1))((, 1), (self, 0))def forecast(self, noutput_items, ninput_items_required):setup size of input queue based on history and other factors passdef general_work(self, input_items, output_items):in0 = input_items[0] input complex streamout = output_items[0] output float streamout[:] = in0 (1j) modulation with carrier wavefor i in range(len(in0)): update phase for next iteration+=if > 2: -= 2if < -2: += 2return len(output_items[0]) number of output items produced```这个基本块将输入的复数信号与一个指数相位进行相乘,从而实现振幅调制。
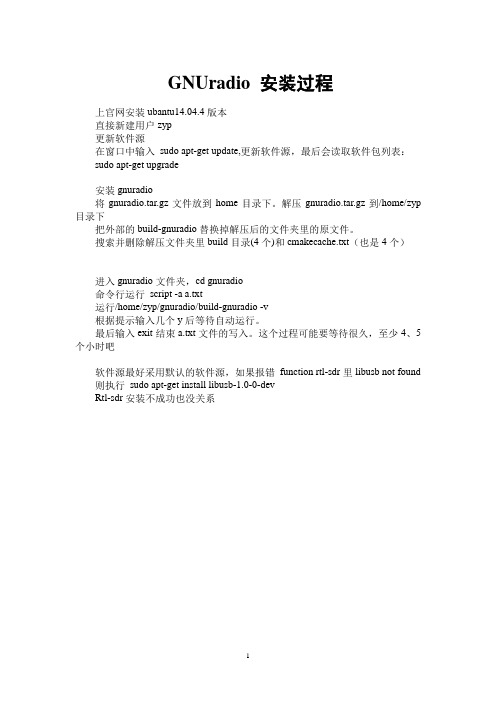
GNUradio 安装过程上官网安装ubantu14.04.4版本直接新建用户zyp更新软件源在窗口中输入sudo apt-get update,更新软件源,最后会读取软件包列表:sudo apt-get upgrade安装gnuradio将gnuradio.tar.gz文件放到home目录下。
解压gnuradio.tar.gz到/home/zyp 目录下把外部的build-gnuradio替换掉解压后的文件夹里的原文件。
搜索并删除解压文件夹里build目录(4个)和cmakecache.txt(也是4个)进入gnuradio文件夹,cd gnuradio命令行运行script -a a.txt运行/home/zyp/gnuradio/build-gnuradio -v根据提示输入几个y后等待自动运行。
最后输入exit结束a.txt文件的写入。
这个过程可能要等待很久,至少4、5个小时吧软件源最好采用默认的软件源,如果报错function rtl-sdr里libusb not found 则执行sudo apt-get install libusb-1.0-0-devRtl-sdr安装不成功也没关系插上硬件测试sudo uhd_fft,如果有信号,则也可以用在gnuradio里添加几个模块(安装时,关闭gnuradio) 添加lilacsat 模块cd gr-lilacsatmkdir buildcd buildcmake ../makesudo make installsudo ldconfig否则,QB50.grc会缺少lilacsat模块按照上述步骤再添加gr-ec-master模块。
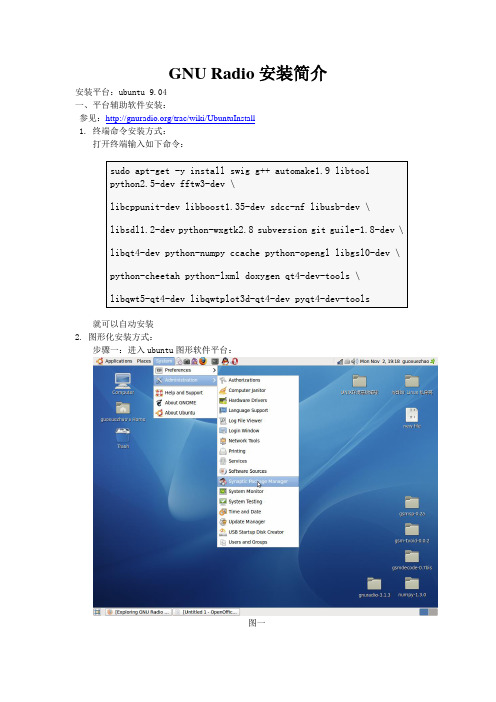
GNU Radio安装简介安装平台:ubuntu 9.04
一、平台辅助软件安装:
参见:/trac/wiki/UbuntuInstall
1. 终端命令安装方式:
打开终端输入如下命令:
就可以自动安装
2. 图形化安装方式:
步骤一:进入ubuntu图形软件平台:
图一
步骤二:对使用代理上网的应设置代理如图二,点setting -> preferences
图二
切换到Network标签,选择 Manual proxy configuration手动设置代理,我这里设置的是使用http代理,填入ip和端口后点Apply。
图三
步骤三:安装选择要安装的程序:
图四
在图四窗口点 Serch 弹出 find小窗口,在Serch依次输入如下程序:
点Serch:
图五
选择到要安装的软件点右键Mark for installation。
最后点Apply就可以自动安装了。
二、gnuradio的安装:3.13版本
1.下载gnuradio软件源码:ftp:///gnu/gnuradio/
2. 解压
4. 测试usrp在终端输入usrp_fft.py弹出一个图形界面
三、OpenBTS的安装:2.41版本
1.下载OpenBTS:/projects/openbts/files/
2. 解压进入openBTS目录。
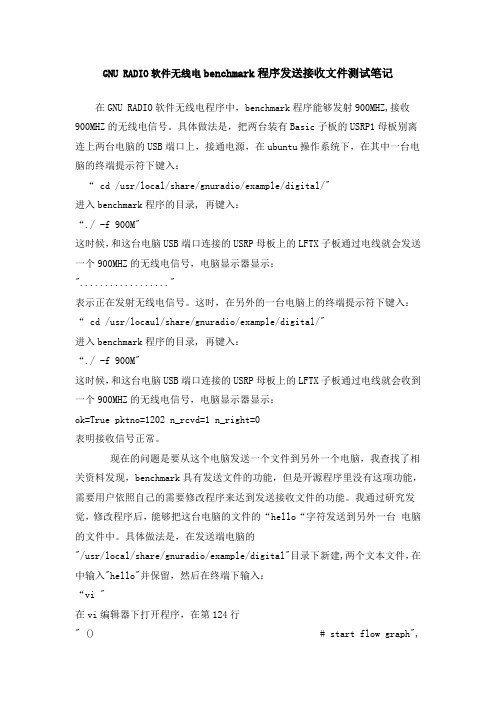
GNU RADIO软件无线电benchmark程序发送接收文件测试笔记在GNU RADIO软件无线电程序中,benchmark程序能够发射900MHZ,接收900MHZ的无线电信号。
具体做法是,把两台装有Basic子板的USRP1母板别离连上两台电脑的USB端口上,接通电源,在ubuntu操作系统下,在其中一台电脑的终端提示符下键入:“ cd /usr/local/share/gnuradio/example/digital/"进入benchmark程序的目录, 再键入:“./ -f 900M"这时候,和这台电脑USB端口连接的USRP母板上的LFTX子板通过电线就会发送一个900MHZ的无线电信号,电脑显示器显示:".................."表示正在发射无线电信号。
这时,在另外的一台电脑上的终端提示符下键入:“ cd /usr/locaul/share/gnuradio/example/digital/"进入benchmark程序的目录, 再键入:“./ -f 900M"这时候,和这台电脑USB端口连接的USRP母板上的LFTX子板通过电线就会收到一个900MHZ的无线电信号,电脑显示器显示:ok=True pktno=1202 n_rcvd=1 n_right=0表明接收信号正常。
现在的问题是要从这个电脑发送一个文件到另外一个电脑,我查找了相关资料发现,benchmark具有发送文件的功能,但是开源程序里没有这项功能,需要用户依照自己的需要修改程序来达到发送接收文件的功能。
我通过研究发觉,修改程序后,能够把这台电脑的文件的“hello“字符发送到另外一台电脑的文件中。
具体做法是,在发送端电脑的"/usr/local/share/gnuradio/example/digital"目录下新建,两个文本文件,在中输入"hello"并保留,然后在终端下输入:“vi "在vi编辑器下打开程序,在第124行" () # start flow graph",后输入“f=open("/usr/local/share/gnuradio/examples/digital/","r")”“lines=()”两行新程序,第一行程序是以只读方式打开文件,第二行程序的作用是以每行阅读的方式读出中的文本内容,然后再赋值给"lines"数组,接着把第140行程序"payload = ('!H', pktno & 0xffff) + data "改为" payload = str ) + str(lines) "这步的作用是,去掉了打包发送pkno函数的功能,而加入发送lines函数和函数的功能。

GNURadio是一个开源的软件无线电工具箱,用于开发和实现软件定义无线电系统。
而滚降系数是一个用于描述信号在传输过程中衰减的物理参数,通常用来衡量信号在信道中传输的损耗情况。
在软件无线电领域,了解和掌握滚降系数的单位和计算方法至关重要。
让我们来了解一下什么是滚降系数。
滚降系数通常用来描述信号在传输过程中的衰减情况。
它可以帮助我们评估信号在传输过程中的损耗程度,进而指导我们进行信号处理和增强信号传输质量。
滚降系数的单位是分贝(dB),它是一个对数单位,用来表达信号强度的变化。
在无线电通信中,我们通常使用滚降系数来描述信号在传输过程中的衰减,它能够帮助我们评估信号强度的变化情况,从而指导我们进行信号处理和增强信号传输质量。
在GNURadio中,了解滚降系数的单位对于开发和实现软件定义无线电系统至关重要。
滚降系数可以帮助我们评估信号在传输过程中的损耗情况,通过对信号进行适当的处理和增强,来提高信号的传输质量。
掌握滚降系数的计算方法和单位转换对于我们进行软件无线电系统的开发和实现至关重要。
要计算滚降系数,我们通常需要知道信号的输入功率和输出功率,然后根据公式 10 * log10(输出功率/输入功率) 来计算滚降系数。
在GNURadio的开发和实现过程中,我们需要根据实际情况来评估和计算滚降系数,以指导我们对信号的处理和增强。
在处理软件无线电系统中的具体应用中,我们常常需要根据不同的场景和需求来对滚降系数进行评估和计算。
在不同的信道条件下,滚降系数的计算方法和单位转换可能会有所不同。
我们需要根据实际情况来进行评估,选择适当的滚降系数计算方法和单位转换,以确保我们对信号的处理和增强能够达到预期的效果。
总结来说,滚降系数是一个用于描述信号在传输过程中的衰减情况的物理参数,它的单位是分贝(dB),通过对信号的输入功率和输出功率进行评估和计算,可以帮助我们了解信号在传输过程中的损耗情况,指导我们进行信号处理和增强。

安装GNU Radio安装GNU Radio的典型方法有两种:(1)通过build-gnuradio脚本安装最新版;(2)自己下载相应版本的.tar.bz2文件,自行编译安装。
上述的方法均来源于:/redmine/projects/gnuradio/wiki/InstallingGR可按其提示的步骤执行。
下面分别予以介绍。
(1)通过build-gnuradio脚本安装最新版该脚本适用于Ubuntu和Fedora系统,一般情况下可一次性地完成GNU Radio和UHD的安装,并顺利通过测试。
该方法适于基础较少的用户,安装过程简单方便,但是不利于我们深入地了解安装过程,因而即便安装成功,在今后如果出现程序运行上问题和错误,也同样需要很长的时间去寻找解决办法。
下面将以Ubuntu10.10系统为例,介绍GNU Radio的安装过程。
a.下载build-gnuradio安装脚本。
从/files/build-gnuradio处下载脚本文件。
(直接链接另存为即可)b.将脚本文件拷贝到主文件夹目录下,按照下面的命令依次操作即可。
wwfzs1990@wwfzs1990-laptop:~$ ./build-gnuradioThis script will install Gnu Radio from current GIT sourcesYou will require Internet access from the computer on which thisscript runs. You will also require SUDO access. You will requireapproximately 500MB of free disk space to perform the build.This script will, as a side-effect, remove any existing Gnu Radioinstallation that was installed from your Linux distribution packages.It must do this to prevent problems due to interference betweena linux-distribution-installed Gnu Radio/UHD and one installed from GIT source.The whole process may take up to two hours to complete, depending on thecapabilities of your system.Proceed?y (需要输入y后,按回车)Starting all functions at: 2012年 03月 08日星期四 07:45:31 CSTSUDO privileges are requiredDo you have SUDO privileges?y (需要输入y后,按回车)Continuing with script[sudo] password for wwfzs1990:Installing pre-prequisites...Checking for package libfontconfig1-devChecking for package libxrender-devChecking for package libpulse-devChecking for package swigChecking for package g++Checking for package automakeChecking for package autoconfChecking for package libtoolChecking for package python-devChecking for package libfftw3-devChecking for package libcppunit-devChecking for package libboost-all-devChecking for package libusb-devChecking for package libusb-1.0-0-devChecking for package fort77Checking for package sdccChecking for package sdcc-librariesChecking for package libsdl1.2-devChecking for package python-wxgtk2.8Checking for package git-coreChecking for package guile-1.8-devChecking for package libqt4-devChecking for package python-numpyChecking for package ccacheChecking for package python-openglChecking for package libgsl0-devChecking for package python-cheetahChecking for package python-lxmlChecking for package doxygenChecking for package qt4-dev-toolsChecking for package libusb-1.0-0-devChecking for package libqwt5-qt4-devChecking for package libqwtplot3d-qt4-dev Checking for package pyqt4-dev-toolsChecking for package python-qwt5-qt4Checking for package cmakeChecking for package git-coreChecking for package wgetChecking for package sdccChecking for package python-docutilsChecking for package gtk2-engines-pixbufChecking for package python-tkChecking for library libusb ...Found library libusb Checking for library libboost_ ...Found library libboost_ Checking for library libcppunit ...Found library libcppunitChecking for library libguile ...Found library libguileChecking for library libfftw ...Found library libfftwChecking for library libgsl ...Found library libgslDoneFetching Gnu Radio via GIT...Done (根据网速的差异,此处可能要等很久)Fetching UHD via GIT...Done (同上)Starting function uhd_build at: 2012年 03月 08日星期四 07:50:35 CSTBuilding UHD...Done building/installing UHDDone function uhd_build at: 2012年 03月 08日星期四 08:03:53 CSTStarting function firmware at: 2012年 03月 08日星期四 08:03:53 CSTFetching and installing FPGA/Firmware images via wget......Installing from: current.tar.gz...Copying into /usr/local/share/uhdDoneDone function firmware at: 2012年 03月 08日星期四 08:04:04 CSTStarting function gnuradio_build at: 2012年 03月 08日星期四 08:04:04 CST/usr/local/lib already in ld.so.conf.dDoing ldconfig...Building Gnu Radio......Doing cmake...Cmaking (此处make需要很久)...Building...InstallingDone building and installing Gnu RadioGRC freedesktop icons install ...DoneDone function gnuradio_build at: 2012年 03月 08日星期四 08:28:19 CSTStarting function mod_groups at: 2012年 03月 08日星期四 08:28:19 CSTGroup 'usrp' already in /etc/group********************************************************************************This script has just modified /etc/group to place your userid '('$USER')' into group 'usrp' In order for this change to take effect, you will need to log-out and log backin again. You will not be able to access your USRP1 device until you do this.If you wish to allow others on your system to use the USRP1 device, you will need to use: sudo usermod -a -G usrp useridFor each userid you wish to allow access to the usrp********************************************************************************FurtherDone function mod_groups at: 2012年 03月 08日星期四 08:28:19 CSTStarting function mod_udev at: 2012年 03月 08日星期四 08:28:19 CSTDone function mod_udev at: 2012年 03月 08日星期四 08:28:19 CSTStarting function mod_sysctl at: 2012年 03月 08日星期四 08:28:19 CSTApplying updates to /etc/sysctl.confGroup 'usrp' now has real-time scheduling privilegesYou will need to log-out and back in again for this totake effectDone function mod_sysctl at: 2012年 03月 08日星期四 08:28:19 CSTStarting function pythonpath at: 2012年 03月 08日星期四 08:28:19 CST************************************************************You should probably set your PYTHONPATH to:/usr/local/lib/python2.6/dist-packagesin your .bashrc or equivalent file prior to attempting to runany Gnu Radio applications or Gnu Radio Companion.*************************************************************Done function pythonpath at: 2012年 03月 08日星期四 08:28:19 CSTDone all functions at: 2012年 03月 08日星期四 08:28:19 CSTAll Donewwfzs1990@wwfzs1990-laptop:~$ sudo gedit .bashrc将下面两行内容添加到.bashrc文件的最后:PYTHONPATH=/usr/local/lib/python2.6/dist-packagesexport PYTHONPATH然后保存退出wwfzs1990@wwfzs1990-laptop:~$ source .bashrc(2)自己下载相应版本的.tar.gz文件,自行编译安装。
安装依赖包安装的网址:/redmine/projects/gnuradio/wiki/UbuntuInstall/redmine/projects/gnuradio/wiki/UbuntuInstall#Install-Depend encies大家可以借鉴这个网址首先更换科大源1、安装依赖包(我记得是13.04版本的,具体可以在上面的安装网址上找到)sudo apt-get -y install git-core autoconf automake libtool g++ python-dev swig \pkg-config libfftw3-dev libboost1.53-all-dev libcppunit-dev libgsl0-dev \libusb-dev sdcc libsdl1.2-dev python-wxgtk2.8 python-numpy \python-cheetah python-lxml doxygen python-qt4 python-qwt5-qt4 libxi-dev \libqt4-opengl-dev libqwt5-qt4-dev libfontconfig1-dev libxrender-dev qt4-default如果是12.04的ubuntu需要的依赖包是:sudo apt-get -y install git-core autoconf automake libtool g++ python-dev swig \pkg-config libboost1.48-all-dev libfftw3-dev libcppunit-dev libgsl0-dev \libusb-dev sdcc libsdl1.2-dev python-wxgtk2.8 python-numpy \python-cheetah python-lxml doxygen python-qt4 python-qwt5-qt4 libxi-dev \libqt4-opengl-dev libqwt5-qt4-dev libfontconfig1-dev libxrender-dev2下载并安装uhd(注意:先sudo su,将用户权限提高为root权限,后面每一步操作都最好在root权限下,这样不容易出现问题)源码安装(最好是源码安装,下载最新的版本,否则会存在问题)git clone git:///ettus/uhd.git安装和编译cd ~/uhd/hostmkdir buildcd buildcmake ../makesudo make install之后输入(链接至数据库,否则则不能正常启动)sudo ldconfig –v3.下载GnuRadio的安装包(先将用户权限改为最高权限)源码安装git clone /git/gnuradio.gitcd gnuradiomkdir buildcd buildcmake ../makemake testsudo make install之后输入(链接至数据库,否则则不能正常启动)sudo ldconfig –v安装完毕后进行测试:在终端输入sudo gnuradio-companion,如果能出现图形化界面,说明是基本上没有问题的。
GNU Radio和USRP的安装by DZZ, WDL, 2014.4.291. 安装GNU Radio的基本概念和安装尝试GNU Radio是Linux环境中运行的程序,官网建议的Linux系统是Fedora和Ubuntu。
在Windows OS下可以采取下列形式安装GNU Radio:Windows OS + VMWare(虚拟机)+ Linux(Ubuntu或Fedora)+ GNU Radio因此、要安装GNU Radio,首先需要安装虚拟机,在虚拟机上安装Linux(Ubuntu或Fedora)。
对于GNU Radio本身的安装,官网建议了三种安装方法:(1)直接安装GNU Radio的可执行文件。
也就是说不下载源码和进行源码编译。
显然、这种安装适合于仅仅使用GNU Radio提供的模块搭建通信系统。
关于官网的安装建议参见:/redmine/projects/gnuradio/wiki/InstallingGR但是,安装尝试表明在Ubuntu下键入下列命令apt-get install gunradio并不能进行安装,执行apt-get时显示找不到有gnuradio的源。
下载源是可以调整的,有待哪位同学研究一下,如何改变相应的文件调整源,再尝试一下。
(2)采用安装工具安装。
这种情况下,源码下载和编译均由安装工具负责,最重要的是检查package和library的相互依赖关系,对于非专业开发人员和对GNU Radio了解不足的人来说,是比较困难的事,因为GNU Radio包含的文件很多。
安装工具完成了这一任务。
对于这种安装,官网(/redmine/projects/gnuradio/wiki/InstallingGRFromSource)又给出了两种方法:(a)Using PyBOMBS安装。
这是GNU Radio正在推进和开发的安装方法。
DZZ安装了两次,源码下载成功,也通过了部分编译,但进程过大半后都失败了,出错的原因相同,最后的提示信息如下:[ 22%] Generating doxygen xml for pmt_swig_doc docs/bin/sh: 1: DOXYGEN_EXECUTABLE-NOTFOUND: not foundmake[2]: *** [gnuradio-runtime/swig/pmt_swig_doc_swig_docs/xml/index.xml] Error 127make[1]: *** [gnuradio-runtime/swig/CMakeFiles/pmt_swig_swig_doc.dir/all] Error 2make[1]: *** Waiting for unfinished jobs....[ 22%] [ 22%] Building CXX objectgnuradio-runtime/lib/pmt/CMakeFiles/gnuradio-pmt.dir/pmt_.oBuilding CXX object gnuradio-runtime/lib/pmt/CMakeFiles/gnuradio-pmt.dir/.o[ 22%] Building CXX object gnuradio-runtime/lib/pmt/CMakeFiles/gnuradio-pmt.dir/pmt_.o [ 22%] Building CXX object gnuradio-runtime/lib/pmt/CMakeFiles/gnuradio-pmt.dir/pmt_.o Linking C shared library libvolk.so[ 22%] Built target volk[ 23%] Building CXX objectgnuradio-runtime/lib/pmt/CMakeFiles/gnuradio-pmt.dir/pmt_.oLinking CXX shared library libgnuradio-pmt-3.7.4git.so[ 23%] Built target gnuradio-pmtmake: *** [all] Error 2ERROR:root:PyBOMBS Make step failed for package (gnuradio) please see bash output above for a reason (hint: look for the word Error)失败的原因可能是:(1)对于PyBOMBS不熟悉(没有花时间研读官网给出的相关资料)。
安装GNU Radio安装GNU Radio的典型方法有两种:(1)通过build-gnuradio脚本安装最新版;(2)自己下载相应版本的.tar.bz2文件,自行编译安装。
上述的方法均来源于:/redmine/projects/gnuradio/wiki/InstallingGR可按其提示的步骤执行。
下面分别予以介绍。
(1)通过build-gnuradio脚本安装最新版该脚本适用于Ubuntu和Fedora系统,一般情况下可一次性地完成GNU Radio和UHD的安装,并顺利通过测试。
该方法适于基础较少的用户,安装过程简单方便,但是不利于我们深入地了解安装过程,因而即便安装成功,在今后如果出现程序运行上问题和错误,也同样需要很长的时间去寻找解决办法。
下面将以Ubuntu10.10系统为例,介绍GNU Radio的安装过程。
a.下载build-gnuradio安装脚本。
从/files/build-gnuradio处下载脚本文件。
(直接链接另存为即可)b.将脚本文件拷贝到主文件夹目录下,按照下面的命令依次操作即可。
wwfzs1990@wwfzs1990-laptop:~$ ./build-gnuradioThis script will install Gnu Radio from current GIT sourcesYou will require Internet access from the computer on which thisscript runs. You will also require SUDO access. You will requireapproximately 500MB of free disk space to perform the build.This script will, as a side-effect, remove any existing Gnu Radioinstallation that was installed from your Linux distribution packages.It must do this to prevent problems due to interference betweena linux-distribution-installed Gnu Radio/UHD and one installed from GIT source.The whole process may take up to two hours to complete, depending on thecapabilities of your system.Proceed?y (需要输入y后,按回车)Starting all functions at: 2012年 03月 08日星期四 07:45:31 CSTSUDO privileges are requiredDo you have SUDO privileges?y (需要输入y后,按回车)Continuing with script[sudo] password for wwfzs1990:Installing pre-prequisites...Checking for package libfontconfig1-devChecking for package libxrender-devChecking for package libpulse-devChecking for package swigChecking for package g++Checking for package automakeChecking for package autoconfChecking for package libtoolChecking for package python-devChecking for package libfftw3-devChecking for package libcppunit-devChecking for package libboost-all-devChecking for package libusb-devChecking for package libusb-1.0-0-devChecking for package fort77Checking for package sdccChecking for package sdcc-librariesChecking for package libsdl1.2-devChecking for package python-wxgtk2.8Checking for package git-coreChecking for package guile-1.8-devChecking for package libqt4-devChecking for package python-numpyChecking for package ccacheChecking for package python-openglChecking for package libgsl0-devChecking for package python-cheetahChecking for package python-lxmlChecking for package doxygenChecking for package qt4-dev-toolsChecking for package libusb-1.0-0-devChecking for package libqwt5-qt4-devChecking for package libqwtplot3d-qt4-dev Checking for package pyqt4-dev-toolsChecking for package python-qwt5-qt4Checking for package cmakeChecking for package git-coreChecking for package wgetChecking for package sdccChecking for package python-docutilsChecking for package gtk2-engines-pixbufChecking for package python-tkChecking for library libusb ...Found library libusb Checking for library libboost_ ...Found library libboost_ Checking for library libcppunit ...Found library libcppunitChecking for library libguile ...Found library libguileChecking for library libfftw ...Found library libfftwChecking for library libgsl ...Found library libgslDoneFetching Gnu Radio via GIT...Done (根据网速的差异,此处可能要等很久)Fetching UHD via GIT...Done (同上)Starting function uhd_build at: 2012年 03月 08日星期四 07:50:35 CSTBuilding UHD...Done building/installing UHDDone function uhd_build at: 2012年 03月 08日星期四 08:03:53 CSTStarting function firmware at: 2012年 03月 08日星期四 08:03:53 CSTFetching and installing FPGA/Firmware images via wget......Installing from: current.tar.gz...Copying into /usr/local/share/uhdDoneDone function firmware at: 2012年 03月 08日星期四 08:04:04 CSTStarting function gnuradio_build at: 2012年 03月 08日星期四 08:04:04 CST/usr/local/lib already in ld.so.conf.dDoing ldconfig...Building Gnu Radio......Doing cmake...Cmaking (此处make需要很久)...Building...InstallingDone building and installing Gnu RadioGRC freedesktop icons install ...DoneDone function gnuradio_build at: 2012年 03月 08日星期四 08:28:19 CSTStarting function mod_groups at: 2012年 03月 08日星期四 08:28:19 CSTGroup 'usrp' already in /etc/group********************************************************************************This script has just modified /etc/group to place your userid '('$USER')' into group 'usrp' In order for this change to take effect, you will need to log-out and log backin again. You will not be able to access your USRP1 device until you do this.If you wish to allow others on your system to use the USRP1 device, you will need to use: sudo usermod -a -G usrp useridFor each userid you wish to allow access to the usrp********************************************************************************FurtherDone function mod_groups at: 2012年 03月 08日星期四 08:28:19 CSTStarting function mod_udev at: 2012年 03月 08日星期四 08:28:19 CSTDone function mod_udev at: 2012年 03月 08日星期四 08:28:19 CSTStarting function mod_sysctl at: 2012年 03月 08日星期四 08:28:19 CSTApplying updates to /etc/sysctl.confGroup 'usrp' now has real-time scheduling privilegesYou will need to log-out and back in again for this totake effectDone function mod_sysctl at: 2012年 03月 08日星期四 08:28:19 CSTStarting function pythonpath at: 2012年 03月 08日星期四 08:28:19 CST************************************************************You should probably set your PYTHONPATH to:/usr/local/lib/python2.6/dist-packagesin your .bashrc or equivalent file prior to attempting to runany Gnu Radio applications or Gnu Radio Companion.*************************************************************Done function pythonpath at: 2012年 03月 08日星期四 08:28:19 CSTDone all functions at: 2012年 03月 08日星期四 08:28:19 CSTAll Donewwfzs1990@wwfzs1990-laptop:~$ sudo gedit .bashrc将下面两行内容添加到.bashrc文件的最后:PYTHONPATH=/usr/local/lib/python2.6/dist-packagesexport PYTHONPATH然后保存退出wwfzs1990@wwfzs1990-laptop:~$ source .bashrc(2)自己下载相应版本的.tar.gz文件,自行编译安装。