RANCILIO咖啡机说明书
- 格式:doc
- 大小:1.61 MB
- 文档页数:9
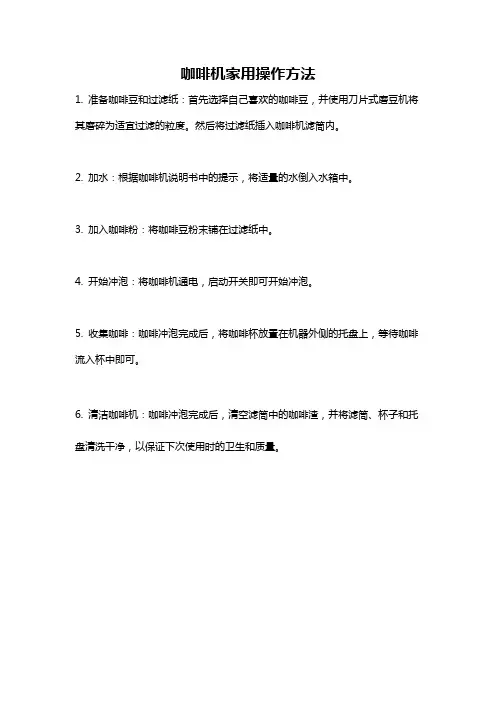
咖啡机家用操作方法
1. 准备咖啡豆和过滤纸:首先选择自己喜欢的咖啡豆,并使用刀片式磨豆机将其磨碎为适宜过滤的粒度。
然后将过滤纸插入咖啡机滤筒内。
2. 加水:根据咖啡机说明书中的提示,将适量的水倒入水箱中。
3. 加入咖啡粉:将咖啡豆粉末铺在过滤纸中。
4. 开始冲泡:将咖啡机通电,启动开关即可开始冲泡。
5. 收集咖啡:咖啡冲泡完成后,将咖啡杯放置在机器外侧的托盘上,等待咖啡流入杯中即可。
6. 清洁咖啡机:咖啡冲泡完成后,清空滤筒中的咖啡渣,并将滤筒、杯子和托盘清洗干净,以保证下次使用时的卫生和质量。
咖啡机使用方法
咖啡机是一种现代家庭常见的厨房电器,它可以帮助我们在家里轻松制作出美
味的咖啡。
但是,对于一些新手来说,可能会对咖啡机的使用方法感到困惑。
今天,我将为大家详细介绍咖啡机的使用方法,让大家能够轻松地在家里享受到美味的咖啡。
首先,准备咖啡豆和水。
选择新鲜的咖啡豆是制作美味咖啡的第一步。
将咖啡
豆放入研磨机中研磨成粗细适中的咖啡粉。
接下来,准备适量的水,倒入咖啡机的水箱中。
接着,将研磨好的咖啡粉放入咖啡机的滤网中。
根据个人口味选择滤纸或金属
滤网,然后将咖啡粉均匀地铺在滤网上。
注意不要放得太满,以免影响咖啡的味道。
然后,打开咖啡机的电源开关,调整咖啡机的参数。
根据咖啡机的型号和个人
口味,选择合适的参数,如浓度、温度、饮料种类等。
等待咖啡机预热完成,开始制作咖啡。
在咖啡机开始运行后,等待一段时间,直到咖啡流出杯子中。
在这个过程中,
可以根据个人口味选择是否加入牛奶、糖或其他调味品。
当咖啡流出杯子时,即可享用美味的咖啡了。
制作完成后,记得关闭咖啡机的电源开关,清洁咖啡机。
将滤网取出,清洗干净,确保下次使用时咖啡的味道不受影响。
同时,清洁咖啡机的水箱和杯子等部件,保持咖啡机的整洁。
以上就是咖啡机的使用方法,希望通过这篇文档能够帮助大家更好地使用咖啡机,制作出美味的咖啡。
记得在享用咖啡的同时,也要注意咖啡因的摄入量,不要过量饮用咖啡,以免影响身体健康。
祝大家在家里制作出一杯又一杯美味的咖啡,享受生活的美好。
C A R R O Z Z E R I A +V A R I E C A S I N G +V A R I O U SM I N I V E R T I C A L E 1G RARTICOLI A1,A1*,A1C,A1C*MINIVERTICALE 230V/110VARTICLE A1,A1*,A1C,A1C*MINIVERTICALE 230V/110VCARROZZERIA+VARIECASING+VARIOUSPos Descrizione Description Cod.1 Aquila ottone Eagle - brass 006580191 Aquila cromo Eagle - chrome 006580212 Supporto aquila ottone Eagle support - brass 005770192 Supporto aquila cromo Eagle support - chrome 005770213 Cupola ottone Dome - brass 024740193 Cupola cromo Dome - chrome 024740214 Rondella ottone Washer - brass 001480355 Vite M6x20 ottone Screw M6x20 - brass 018620146 Tappo vasca acqua Water container stopper 006760357 Vasca acqua completa Water container ass.y 006750148 Manopola Handle 002750359 Telaio dorato Frame - gold plated 024770269 Telaio cromato Frame - chrome 0247702110 Vite M4x6 dorata Screw M4x6 - gold plated 0102702610 Vite M4x6 cromata Screw M4x6 - chrome 0102702111 Portatazze ottone Cups warmer tray - brass 0247501911 Portatazze cromato Cups warmer tray - chrome 0247502112 Carrozzeria anteriore rame Front body - copper 0248101912 Carrozzeria anteriore cromo Front body - chrome 0248102113 Targa Elektra ottone Elektra plate - gold/yellow 0263701813 Targa Elektra cromo Elektra plate - red/silver 0263601814 Rivetto rame Rivet - copper 0020703514 Rivetto alluminio Rivet - aluminium 0036503515 Piatto ottone Plate - brass 0135401915 Piatto cromo Plate - chrome 0135402116 Vaschetta raccogligocce ottone Drip tray - brass 0065601916 Vaschetta raccogligocce cromo Drip tray - chrome 0065602117 Base ottone Base - brass 0064901917 Base cromo Base - chrome 0064902118 Base legno Base - wood SA18 Base legno nero Base - black wood SAN19 Targa matricola Serial number plate 0246603520 Vite M5x8 ottone Screw M5x8 - brass 0100603521 Carrozzeria posteriore rame Back body - brass 0291201921 Carrozzeria posteriore cromo Back body - chrome 0291202122 Fascia decorata ottone Decorated band - brass 0232901922 Fascia decorata cromo Decorated band -chrome 0232902123 Rondella Washer 0150503524 Dado M4 inox Nut M4 - inox 0288603525 Stemma oro/giallo pergamena Emblem - gold/yellow 0285806225 Stemma rosso veneziano/argento Emblem - red/silver 0285806426 Vite TC M4x12 dorata Screw M4x12 - gold 0011402626 Vite TC M4x12 cromata Screw M4x12 - chrome 0166002127 Rondella Washer 0148003528 Vite M4x8 dorata Screw M4x8 - gold 0166202628 Vite M4x8 cromata Screw M4x8 - chrome 01661021ARTICOLI A1,A1*,A1C,A1C*MINI VERTICALE 230V/110VARTICLE A1,A1*,A1C,A1C*MINI VERTICALE 230V/110VIMBALLO & ACCESSORIPACKING & ACCESSORIESPos Descrizione Description Cod.Imballo cartone Carton box 01643035manual 01436035 Manuale istruzioni d’uso Instructionaccessori/filtri Accesories/filters set 01180034KitKit guarnizioni standard Set of standard gaskets 01929034Kit trasformazione cialda Set modification in pod 02268034Aggiornamento 24/07/2006 Updated 24/07/2006G R U P P O E R O G A Z I O N E /C O M P .I D R A U L I C I +V A R I E D E L I V E R Y U N I T /I D R A U L I C C O M P O N E N T S +V A R I O U SM I N I V E R T I C A L E 1G RARTICOLI A1,A1*,A1C,A1C*MINIVERTICALE 230V/110VARTICLE A1,A1*,A1C,A1C*MINIVERTICALE 230V/110VGRUPPO EROGATORE, COMPONENTI IDRAULICI E VARIEDELIVERY GROUP, IDRAULIC COMPONENTS & VARIOUSPos Descrizione Description Cod.1 Manopola rubinetto Steam handle 003200352 Anello di spallamento Spring 015040353 Dado perno rubinetto Nut - brass 007330144 Perno rubinetto Steam pivot 006710145 Guarnizione or rubinetto Gasket for steam valve 007310356 Corpo rubinetto Steam valve - brass 007300147 Guarnizione or canna vapore Gasket for steam tube 007340358 Staffa supporto rubinetto Steam valve support 024760429 Vite TC M4x8 ottone Screw M4x8 - brass 0055703510 Controdado M14x1,25 Lock nut - brass 0067001411 Boccola snodo cromata Nut joint - chrome 0073502112 Canna vapore cromo Steam tube - chrome 0090002113 Beccuccio vapore cromo Steam nozzle - chrome 0073702114 Canna da caldaia a rubinetto vapore Pipe from boiler to steam valve 02482014elettrovalvola Solenoid valve pilot gasket 0011203515 Guarnizione16 Pilota elettrovalvola 3 vie Solenoid valve pilot - 3 ways 0161503517 Vite M4x12 ottone Screw M4x12 - brass 0011403518 Bobina 230V Wired coil 230V 0100403518 Bobina 110V Wired coil 110V 0100503519 Canna scarico Drain pipe 0090103520 Raccordo 90° Manifold fitting 90° 01248035caffe’ Doser 00402035 21 Misurinocaffe’ Tamper 0040103522 Pressino23 Filtro 1 tazza inox standard - altezza 21,5 mm Filter 1 cup - standard - 21,5 mm high - inox 0179603524 Filtro 1 tazza inox - altezza 25 mm Filter 1 cup - 25 mm high - inox 0006503525 Filtro 2 tazze inox Filter 2 cups - inox 0006603526 Molla fermafiltro inox Retaining clip - inox 0130403527 Portafiltro cromato Filter holder - chrome 0104901428 Manopola bakelite radica Handle - brierwood bakelite 0189703529 Portafiltro 2 tazze bakelite radica assieme Filter holder 2 cups - brierwood bakelite - ass.y 0187303930 Beccuccio 2 tazze piccolo Outlet 2 cups - chrome 0006302131 Rondella inox Washer - inox 0181603532 Vite M8x16 inox Screw M8x16 - inox 0181703533 Vite M5x10 inox Screw M5x10 - inox 0265503534 Filtro doccia inox Shower filter - inox 0265403535 Massello ottone Shower holder - brass 0265303536 Guarnizione or massello Gasket for shower holder 0226303537 Guarnizione sottocoppa Filter holder gasket 0196303538 Campana gruppo inferiore cromata Lower group - boiler part - chrome 0286402139 Resistenza 230V/1200W Heating element 230V/1200W 0195803539 Resistenza 110V/1200W Heating element 110V/1200W 0195903540 Guarnizione or resistenza Gasket for heating element 0196003541 Guarnizione or caldaia Boiler gasket 0071103542 Termostato vapore Steam thermostat 0070003543 Termostato di sicurezza Safety thermostat 0070203544 Campana gruppo superiore Upper group - boiler part 0286301445 Dado resistenza Nut 0003201446 Gruppo/caldaia 230V assieme Group boiler 230V - ass.y 0067203446 Gruppo/caldaia 110V assieme Group boiler 110V - ass.y 00673034Aggiornamento 01/05/2007 Updated 01/05/2007C O M P O N E N T I E L E T T R I C I +V A R I E E L E C T R I C A L C O M P O N E N T S +V A R I O U S M I N I V E R T I C A L E 1G RARTICOLI A1,A1*,A1C,A1C*MINIVERTICALE 230V/110VARTICLE A1,A1*,A1C,A1C*MINIVERTICALE 230V/110VCOMPONENTI ELETTRICI + VARIEELECTRICAL COMPONENTS + VARIOUSPos Descrizione Description Cod.1 Tasto vapore Steam button 007410732 Camme verde/arancio Plastic cam - green/orange 003800353 Supporto pulsante Button support 007400354 Pulsante unipolare Unipolar switch 012220355 Lampada spia rossa 230V Neon lamp 230V - red 000730355 Lampada spia rossa 110V Neon lamp 110V - red 013140356 Pulsante vapore assieme Steam switch - ass.y 007480347 Tasto erogazione caffe’ Coffee switch button 007420738 Pulsante erogazione caffe’ assieme Coffee switch - ass.y 007490349 Tasto accensione On/off button 0074307310 Pulsante bipolare Bipolar switch 0122103511 Pulsante accensione assieme On/off switch - ass-y 0074703412 Cablaggio assieme Harness - ass.y 0067403513 Rondella M5x15 Washer M5x15 01480035M5x12 0060501414 ViteM5x12 Screw15 Supporto pompa in gomma Support 0037603516 Raccordo 90° Manifold fitting 90° 0124803517 Pompa 230V Pump 230V 0025403517 Pompa 110V Pump 110V 0025503518 Raccordo 90° con portagomma Manifold fitting 90° - tube retainer 0258203519 Canna aspirazione pompa Intake pump tube 0063603520 Guarnizione teflon Teflon gasket 0075201421 Dado M12x1 ottone Nut M12x1 - brass 0075101422 Termostato caffe’ Coffee thermostat 0065903523 Canna da pompa a gruppo Pipe from pump to boiler 0090303524 Manopolatermostato Knob 0067703525 Vite M4x6 inox Screw M4x6 - inox 0009703526 Porta morsettiera Terminal block support 0002103527 Vite autofilettante 3,5x15 Screw 3,5x15 00023035block 0002003528 Morsettiera Terminal29 Cavo Alimentazione Europa Cord power 230V - Europe 0127103529 Cavo Alimentazione Usa Cord power 110V - Usa 02880035Aggiornamento 24/07/2006 Updated 24/07/2006。
Top red light blinks when the machine is heating up, and will become solid red when it’s ready to brew.Bottom blue light will be solid when water is above the minimum fill level. When the reservoir is below the minimum fill level the blue light will start blinking.The gauge on the right should never read above 12 bars of pressure, if it does please see the manual for adjusting the expansion valve.With two people, lift the Linea Mini from the side and set on the counter (one hand under the front, one hand rear corner).Slide reservoir back into place. Replace drip tray.Turn on machine. Wait for the machine to warm up. The blinking red power light will turn solid when ready to brew.The gauge on the left will read between 1.3 and 2.0 when ready to steam.Plug the machine into a wall outlet.Remove the drip tray (lift up and pull out).Slide reservoir forward to access. Take cap off of reservoir.Pour water into reservoir. Replace reservoir cap.Remove the portafilter from the Linea Mini and wipe out the filter basket so that it is clean and dry.Flush the group by moving the paddle to the BREW position and then STOP position.Insert portafilter into Linea Mini Place your preferred cup(s) under the portafilter spouts on top of your scale and zero out your scale.Push the paddle to the left BREW position to start brewing. If your coffee is dialed in you should achieve 28 – 34 grams (1 oz.) of espresso in 25 – 30 seconds.Push paddle back to the STOP position to stop the shot.Remove portafilter and discard the puck.For more information on making coffee visit and navigate to the Education tab.If using a scale, set portafilter on the scale and tare it to zero.Dose the appropriate amount of coffee for the basket, if you are using the 17 gram basket, dose 17 grams or fill basket and swipe extra off the top.When you have dosed the desired amount, level out your coffee mound.Fill the pitcher 1 cm below the spout indent on the interior of the pitcher with cold milk.Tap the pitcher and swirl to pop any bubbles and incorporate the foam floating on top with the liquid below.Pour into your cup with espresso.Purge the steam wand.Insert wand into milk (at 15 degrees) so the steam tip is just submerged and the surface of the milk lines up with the line on the steam tip.Turn on the steam and start aerating the milk, you’ll want to listen for a few pops that let you know you are introducing air into the milk.After the milk has expanded 30% - 50%,drop the tip into the milk to create a whirlpool motion. When the steam pitcher becomes hot (135º -150º F / 57º -65º C ), turn off the steam.Purge the steam wand and clean with a damp cloth.Fill bowl with hot water and add 6 grams (half tsp.) of Puro cleaning solution to water. Set aside.Place all parts (filter baskets and portafilter head) into bowl of hot water with cleaning solution.After the parts have soaked for 20 – 30 minutes, they will need to be wiped out and cleaned under running water.When done rinsing, dry and replace all the parts.Run an espresso through the machine to clean out any remaining cleaning solution.Remove portafilter and lift out the filter basket (may require use of screwdriver) Drop filter basket into medium bowl with cleaning solution.Place “blind” basket with no holes into portafilter. Add a little hot water and 3 grams of cleaning solution in to the blind basket. Mix until dissolved.Cleaning Cyclea. 1x 15 seconds, wait 30 seconds.b. 5x 5 seconds each, waiting 5 seconds in between.c. Empty portafilter and turn on brewing cycle to flush out cleaning solution.d. Re-insert portafilter and run 10 times for 5 seconds each.Tamp the coffee in the basket, applying 20 – 30 lbs. (9-14 kg) of pressure with the tamper.unpacking & set upYou will need two people to lift the machine, it is over 70 lbs . (32 kg)making coffeeYou will need whole bean coffee, grinder, tamper, knock box and a scale (optional, but recommended)5.steaming milkYou will need a steaming pitcher and cold milkmaintenanceYou will need a short flat head screwdriver, medium sized bowl, hot water, Puro cleaning solution, spoonspecial notes1.6.7.2.3.4.5.1.6.7.8.9.10.2.3.4.1.6.7.2.3.4.5.1.5.6.7.8.2.3.4.。
咖啡机使用教程
使用咖啡机的步骤如下:
1. 准备咖啡豆和过滤纸。
选择适合自己口味的咖啡豆,并将其研磨成适当的粗细程度。
然后,在过滤篮中放入过滤纸,确保完全遮盖篮底。
2. 添加水和咖啡豆。
将适量的清水倒入咖啡机的水箱中。
根据自己的口味和咖啡机的容量,加入适量的咖啡豆到过滤篮中。
3. 准备杯子。
将咖啡杯或咖啡壶放在咖啡机的出水口下方,确保能够收集到咖啡。
4. 开始冲泡。
根据咖啡机的设置,选择适当的冲泡模式和浓度。
按下启动按钮,咖啡机将会开始冲泡过程。
5. 等待冲泡完成。
根据咖啡机的品牌和型号,冲泡时间可能有所不同。
一般来说,等待大约几分钟,直到咖啡完全冲泡完成。
6. 倒出咖啡。
当咖啡冲泡完成后,将咖啡杯或咖啡壶从出水口下方移开,将咖啡倒入杯子中。
7. 清洁咖啡机。
在使用完毕后,记得清空咖啡机中的咖啡渣和过滤纸,并清洁过滤篮和水箱等部件。
以上就是使用咖啡机的简单教程。
不同品牌和型号的咖啡机可
能会有稍微不同的操作步骤,请根据自己的咖啡机说明书进行操作。
咖啡机的使用方法
咖啡机是现代生活中常见的一种家用电器,它可以帮助我们在家里轻松制作出美味的咖啡。
但是,对于一些新手来说,可能会对咖啡机的使用方法感到困惑。
在这篇文档中,我将为大家介绍咖啡机的使用方法,希望能帮助大家更好地享受咖啡的乐趣。
首先,准备咖啡机所需的材料和配件。
通常情况下,咖啡机的配件包括咖啡豆、滤纸、水和咖啡杯。
在使用咖啡机之前,我们需要确保这些配件都已经准备好,并且处于干净和完好的状态。
接下来,我们需要将咖啡机连接电源,并打开电源开关。
等待一段时间,让咖啡机预热,确保咖啡机的温度适宜。
然后,我们需要研磨咖啡豆。
将适量的咖啡豆放入磨豆机中,选择合适的研磨粗细度,然后开始研磨。
研磨完成后,将研磨好的咖啡粉倒入滤纸中,放入咖啡机的滤网中。
接着,我们需要加入适量的水。
根据咖啡机的容量,倒入适量的清水,然后将水箱放回咖啡机的位置。
现在,一切准备就绪,我们可以开始制作咖啡了。
按下咖啡机上的制作按钮,等待咖啡机完成制作过程。
在制作过程中,我们可以根据个人口味的喜好选择添加牛奶、糖或其他调味品。
最后,制作完成后,将咖啡倒入咖啡杯中,即可享用美味的咖啡了。
同时,记得将咖啡机清洁干净,以保证下次使用时的卫生和品质。
总的来说,咖啡机的使用方法并不复杂,只要按照上述步骤进行操作,就可以轻松制作出美味的咖啡。
希望这篇文档能够帮助大家更好地使用咖啡机,享受到美味的咖啡带来的乐趣。
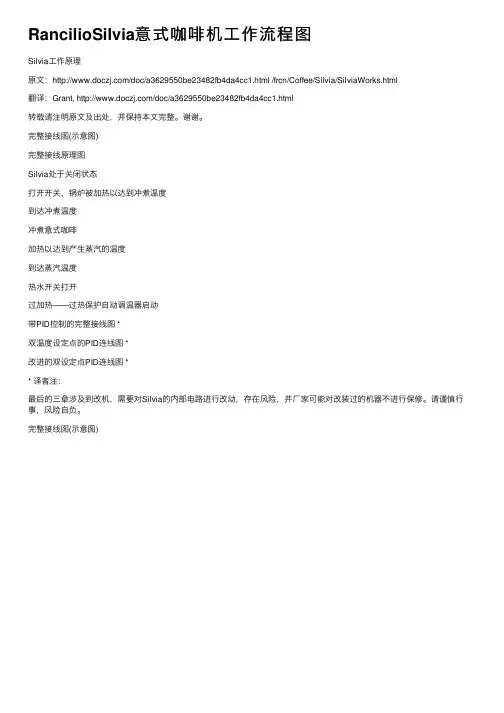
RancilioSilvia意式咖啡机⼯作流程图Silvia⼯作原理原⽂:/doc/a3629550be23482fb4da4cc1.html /frcn/Coffee/Silvia/SilviaWorks.html翻译:Grant, /doc/a3629550be23482fb4da4cc1.html转载请注明原⽂及出处,并保持本⽂完整。
谢谢。
完整接线图(⽰意图)完整接线原理图Silvia处于关闭状态打开开关,锅炉被加热以达到冲煮温度到达冲煮温度冲煮意式咖啡加热以达到产⽣蒸汽的温度到达蒸汽温度热⽔开关打开过加热——过热保护⾃动调温器启动带PID控制的完整接线图 *双温度设定点的PID连线图 *改进的双设定点PID连线图 ** 译者注:最后的三章涉及到改机,需要对Silvia的内部电路进⾏改动,存在风险,并⼚家可能对改装过的机器不进⾏保修。
请谨慎⾏事,风险⾃负。
完整接线图(⽰意图)这就是Rancilio Silvia的完整接线图。
这张图显⽰了所有的电⽓连接和组件。
完整接线原理图这⾥是Rancilio Silvia的完整接线图。
每根线、每个组件都显⽰在这张图上了。
唯⼀的例外是开关中的⼩灯泡没有显⽰在图中,因为⽤户没有办法接触到它们,⽽且它们也没有影响到机器的功能,只是表⽰开关被打开了。
在接下来的⽰意图中,我将只画出那些“活动的”接线部分,以帮助⼤家理解机器是如何运作的。
在每幅图中,当⾃动调温器或是开关为该功能打开或是闭合时,它们在该图中在那个位置会被标⽰出来。
向前或向后翻页可以把这些操作显⽰得更清晰。
例如,交替着看“蒸汽加热”和“蒸汽,到了指定温度”这两幅图来了解机器在产⽣蒸汽时是如何切换加热元件开和关的。
所有这些页⾯显⽰的信息的⽬的仅是娱乐。
这些信息以及插图既不是为了给你上电路学的课,也不是为了展⽰如何安全地改动任何Espresso机器。
Silvia处于关闭状态正如你在这⼉看到的。
电源开关处于“关闭”位置。
咖啡机使用方法咖啡机是现代生活中不可或缺的一部分,它让我们能够在家中享受到咖啡店般的美味咖啡。
然而,对于初次使用咖啡机的人来说,可能会觉得有些复杂。
不过,只要掌握了正确的使用方法,就能够轻松地制作出一杯口感浓郁的咖啡。
下面,我们将介绍一下咖啡机的使用方法,希望能够帮助您更好地使用您的咖啡机。
首先,准备咖啡豆和过滤纸。
选择新鲜烘焙的咖啡豆是制作美味咖啡的第一步。
然后,将咖啡豆研磨成适合咖啡机的粗细度,并放入咖啡机的滤网中。
接下来,将过滤纸放入滤网中,这样可以避免咖啡渣进入咖啡中,确保咖啡的口感更加纯正。
接着,准备好咖啡机。
首先,将咖啡机的水箱注满清水,然后将滤网放入咖啡机的滤网架中。
接通电源,打开咖啡机的开关,等待咖啡机预热完成。
在此过程中,您可以准备杯子和搅拌棒,为咖啡的制作做好准备。
当咖啡机预热完成后,将装有咖啡粉的滤网架放入咖啡机中,然后关闭咖啡机的盖子。
根据个人口味,选择浓缩或美式咖啡的制作模式,启动咖啡机。
在咖啡机工作的过程中,您可以欣赏咖啡机制作咖啡的过程,感受咖啡的香气弥漫开来。
当咖啡机制作完成后,将制作好的咖啡倒入杯子中。
如果您喜欢加入一些奶泡或糖浆,也可以在这个时候添加。
最后,用搅拌棒轻轻搅拌一下,让咖啡的口感更加均匀。
现在,您可以尽情享受您自制的美味咖啡了。
总的来说,咖啡机的使用方法并不复杂,只需要按照正确的步骤进行操作,就能够制作出一杯口感浓郁的咖啡。
希望通过本文的介绍,您能够更好地掌握咖啡机的使用方法,为您的生活增添一份美味与享受。
祝您在享用咖啡的同时,也能够感受到生活的美好与温馨。

Overview/ 机器概览4Safety precautions/ 安全指示5–6First use or after a long period of non-use/长时间不使用之后的第一次使用7Coffee preparation/ 咖啡制备8Assembling/Disassembling of the Rapid Cappuccino System (R.C.S)/安装或卸除快速卡布奇诺系统(R. C. S)8Preparing a Cappuccino and Latte Macchiato/制备卡布奇诺和玛琪雅朵9Programming the water volume/ 设定水量10Programming Cappuccino/Latte Macchiato volume/设定卡布奇诺/拿铁玛琪雅朵水量10Rinsing after each milk recipe preparation/每次牛奶配方制备后均须冲洗11Daily cleaning/ 日常清洁 11Care of the Rapid Cappuccino System (R.C.S.) twice a week/一周两次保养您的快速卡布奇诺系统 11Emptying system before a period of non-use, for frost protection or before a repair/请在长时间不使用、预防结霜或维修之前,将机器清空 12Energy saving concept/ 节能概念 12Descaling/ 除水垢 13–14Water hardness setting/ 水硬度设置 14Restoring volumes to factory settings/ 将各制备指标恢复出场设置 14Troubleshooting/ 故障排除 15Specifications/ 详细说明 15Contact the Nespresso Club/联系 Nespresso CLub 15Disposal and environmental concerns/ 废物处理和生态保护事宜 15Warranty/ 生态环境: 16En CnNESPRESSO, 奈斯派索,制作浓缩咖啡的专业系统。
胶囊式咖啡机的使用方法
随着时代的发展,越来越多的人喜欢享受一杯精致的咖啡。
而胶囊式咖啡机的出现,为我们提供了一种便捷、快速、高品质的咖啡体验。
本文将为大家介绍胶囊式咖啡机的使用方法,让咖啡爱好者们可以轻松地享受美味可口的咖啡。
一、准备工作
1.首先需要选择胶囊式咖啡机以及相应的咖啡胶囊。
2.在使用前,需要将咖啡机清洗干净。
二、使用方法
1.先将咖啡机的水箱中加入适量的清水,这取决于你需要制作的咖啡的数量。
2.开启咖啡机,然后等待它进入加热状态。
一般来说,大部分胶囊式咖啡机需要约30秒左右预热,因此需要耐心等待。
3.选取适合的咖啡胶囊,注意不同品牌、型号的胶囊适用范围不同。
将胶囊放入机器中相应的槽中。
4.按下制作咖啡按钮,机器便开始制作咖啡了。
这时,水会通过胶囊流过,萃取出咖啡的香味和味道。
5.待机器制作完成后,取出装有咖啡的杯子即可享用美味的咖啡。
三、清理工作
1.在使用完毕之后,记得清理咖啡机。
2.取出胶囊并将其丢入垃圾桶中。
3.清理机器的灰渣盒和杯子垫。
胶囊式咖啡机的使用方法就是这样,简单实用。
虽然胶囊式咖啡机的价格相对较高,但是随着胶囊式咖啡的普及,相信会越来越多的人选
择使用它来制作咖啡。
我们只需要选择适合自己的咖啡胶囊,便可以在家中享受到餐厅级别的美味咖啡。
橡木系列手摇咖啡机说明书
手动咖啡机其实就是一种老式使用手动杆操作方式制作咖啡的机器。
这一种机器其实是一种非常古老的咖啡制作机。
虽然它的咖啡制作技术比不上现在的的咖啡机那么先进,但是它却能让你体验到一种手压咖啡的感觉。
手动咖啡机主要是依靠活塞和弹簧产生出压力制作咖啡,它的制作工艺虽然比较传统,但是它制作出的咖啡却真实的还原出了咖啡的原味。
平时在户外活动的时候如果想要喝上一杯香浓的咖啡是比较困难的,但是如果这时你的身边有一台手动咖啡机的话那么你就能够享受到一杯浓郁而美味的咖啡饮品了。
现在很多手动咖啡机产品它的外形设计是非常时尚的,虽然它制作咖啡的工艺比较传统,但是经过改进之后的手动咖啡机从色彩和装饰上都具有了现代的风格。
现在的手动咖啡机中还专门设置了一个研磨装置,使用的时候将咖啡豆装入,同时转动上面的旋臂就恩那个得到一杯香浓的咖啡了。
手动咖啡机的使用方法是非常简单的,使用手动咖啡机制作咖啡,只需要将干燥的咖啡豆放入到咖啡机中,之后通过手动咖啡机的旋臂进行咖啡豆的研磨,你就能得到细腻的咖啡粉。
手动咖啡机只能进行咖啡豆的研磨,而不能进行咖啡的泡制,如果大家想要喝上美美的咖啡,这时还需要将研磨好的咖啡粉进行冲泡,这样你
就能享受到香醇而又美味的咖啡了。
手动咖啡机需要纯手工研磨,这其中的技巧和方法可不能小瞧,手动咖啡机的使用上也有大智慧。
当我们了解了手动咖啡机的这些基本常识和使用的基本方法,相信大家在以后无论是生活还是工作中都能作为谈资,向与购买或家里已经有手动咖啡机的亲戚朋友讲解这些也可以帮助到他们,同时自己以后在咖啡的自制上也能技高一筹。
Do not open the ink bottles until you are ready to fill the ink tanks. The ink bottles are vacuum packed to maintain reliability.emove all protective materials from the product.Any problems?Network setup was unsuccessful.• F or detailed instructions on setting up your product on a wireless network, see the Wireless Installation Guide . • M ake sure you select the right network name (SSID). The product can only connect to a network that supports 2.4 GHz.• I f you see a firewall alert message, click Unblock or Allow to let setup continue.• I f your network has security enabled, make sure you enter your network password (WEP key or WPA passphrase) correctly. Passwords must be entered in the correct case.There are lines or incorrect colors in my printouts.Run a nozzle check to see if any of the print head nozzles are clogged. Then clean the print head, if necessary. See the online User’s Guide for more information.Setup is unable to find my product after connecting it with a USB cable.Make sure the product is on and securely connected as shown:Error indicatorsIf you see one of the error indicators below, follow the steps here to proceed:FlashingOnPaper is jammed. Remove any jammed paperfrom inside the product or from the rear paper feed slot. Make sure your paper is loaded correctly, then press or .Paper is out or multiple pages have fed into the rear paper feed slot. Load paper correctly in the rear paper feed slot, then press or .Initial ink charging may not be complete. Be sure to complete the steps in the “Fill ink tanks” section.Wi-Fi connection error. Press the Wi-Fi button on the product to clear the error and try again.For detailed instructions on setting up your product on a wireless network, see the online Wireless Installation Guide .Printer error. Turn off the product and check that no protective material or other foreign object has been left inside the product.4 Install softwareNote: If your computer does not have a CD/DVD drive or you are using a Mac, an Internet connection is required to obtain the product software.1 M ake sure the product is NOT CONNECTED to yourcomputer.Windows ®: If you see a Found New Hardware screen, click Cancel and disconnect the USB cable.2I nsert the product CD or download and run your product’ssoftware package:/Support/L3753 F ollow the instructions on the screen to run the setupprogram.OS X: Make sure you install Epson Software Updater to receive firmware and software updates for your product.4 W hen you see the Select Your Connection screen, selectone of the following, then continue with the on-screeninstructions:• Wireless connectionIn most cases, the software installer automatically attempts to set up your wireless connection. If setup is unsuccessful, you may need to enter your network name (SSID) and password.• Direct USB connectionM ake sure you have the USB cable.5 W hen software installation is complete, restart yourcomputer.Mobile printingTo print from a mobile device, your product must be set up forwireless printing or Wi-Fi Direct ®. See the online User’s Guide for instructions.Epson Connect ™ SolutionsEpson Connect offers a variety of remote printing options for your product. Connect wirelessly from your tablet, smartphone, or computer. Print documents and photos from across the room or around the world./connect (website available in Spanish)Epson iPrint ™ for iOS/Android ™Download the Epson iPrint app from Google Play ™ or the App Store to print documents and photos from your iOS or Android device on any email-enabled Epson ® printer.。
胶囊咖啡机的使用方法
胶囊咖啡机使用方法如下:
1.准备杯子和胶囊:首先将咖啡机通电并加水,然后取出一个咖啡胶囊,并把杯子放在咖啡机的出水口下面。
2.放入胶囊:将胶囊放入咖啡机的咖啡胶囊插槽中,确保胶囊与插槽配合良好并且没有歪斜或者卡住。
3.启动咖啡机:通过按下咖啡机的开关或按钮来启动机器。
咖啡机会自动控制水的温度和流量,然后向胶囊中注入一定量的热水。
4.倾倒咖啡:当咖啡机完成注水和冲泡咖啡的动作后,就会让热水通过胶囊,并将咖啡饮料倾倒进杯子里。
此时,你只需等待几秒钟,直到倒完为止。
5.清理过程:在完成饮料制作后,需要取出胶囊,清除咖啡机腔体和过滤器的残渣。
将废弃的咖啡胶囊放入垃圾桶内。
注意:在使用胶囊咖啡机时,一定要按照说明书上的提示操作,避免操作不当导致意外受伤或损坏咖啡机。
MARFIL TRON ABS Molino de café profesional para todo tipo de cafés FABRICANTES DE MOLINOS DE CAFÉMANUFACTURERS OF COFFEE GRINDERS CARRETERA DE SANTA COLOMA, S/N · APARTADO DE CORREOS Nº 18 · 17410 SILS-MALLORQUINES (GIRONA) SPAIN T+34972168282·F+34972853104·*****************· Professional co ee grinder for all types of co ee.380mmCOLLECTION CLASSIC MAIN ATTRIBUTES Hopper (2kg) made of unbreakable and non-deformable material (co.polyester), with fast lock system and self-levelling when off the coffee grinder, with the possibility of cleaning in a dishwasher at 90 °C. Micrometric regulation of the coffee grind using a regulatory pawl. New expulsion system for the ground coffee (always leaving the grinding cavity clean when the coffee grinder stops). Bodywork manufactured in anti-scratch material, in a single piece (less vibrations, more robustness). With ventilation system (internal air inlet and outlet). Large tray integrated into the body, ready to take knocks (porta lter). Touch screen for easy programming and use (Language selection – Setting the grinding program for each dose – Selection of 1 dose, 2 doses or continuous grinding – Coffee counter: total or partial consumption).Universal coffee tamper (rotatable) assembled on the body. Hardened steel grinding blades (62/65HRc) 60mm in diameter.Optional: Optional customization system with chromed plates on the funnel and on the back of the body.Grinding blades in tempered steel (62HRc) ø 60mm.TECHNICAL CHARACTERISTICS 0-500gr/5’ Max 2KgVoltage: 230V / 220V / 110VFrequency: 50Hz / 60HzPhases: 1(monophase)RPM: 1.300 / 1.600Current: 1,75A / 3,7ACapacitor: 10nf / 40nfPower: 0,20Hp / 356WProtection rating: IP21Motor supplied with thermal protectorMaximum operating time: 30 min.Tempered steel grinding wheel (62HRC) ø 60mmLifespan of grinding wheels: 500kgHopper capacity: 2kgMulti-language touch screenSelection for 1 or 2 freshly ground coffees or continuous grindingTotal or partial coffee counterAssistant timer grinding pointDimensions width x length x height: 210x380x600mmWeight: 9kgAir noise: 77dBDiseñado bajo directiva 89/392 CE WHITE GREYBLACK REDSILVERCHROMED GOLD CHROMED。
一、外部构造解说:1.蒸汽钮2.蒸汽口3.系统服务按钮4.热水出口5.咖啡制作口6.咖啡制作按键7.手动上水钮.8.水位视窗9.压力表10.电源开关11.煤气灯12.煤气阀13.开关及锅炉状态灯14.底板控制操作系统15.显示屏幕(型号SDE)16.设定盘(型图1图2R`````二、 配件说明机器配套物件机器配套物件 (3G R O U P ) 单口手柄 1 水管连接口 1 双口手柄 3 压柄(压粉器)1(850g )过滤网 4 拉花钢杯(大)1个 无孔滤网 1 拉花钢杯(小)1个 1米水管 1 咖啡粉渣盒1个 1.5米水管1 清洗药粉 基本量1.5米排水管1三. 日常使用:本咖啡机必须使用研磨咖啡粉制作咖啡,并且只能做制作咖啡、咖啡饮料(例如:卡布基诺、拿铁等)、加热牛奶、制作茶水。
本机器只能用以本身设定功能,其他的不规范使用都将有可能导致危险。
1.开机:打开开关,开关上灯亮,机器屏幕显示“MACHINE NOT READY”水位感应灯显示红色,机器内水泵启动,水被添加到机器内部的锅炉内。
当水添加到锅 炉内规定水位时,水位灯为绿色。
并水泵停止工作。
等待水位视窗内灯变为绿色,打开加热开关,开关上灯亮,电流送入锅炉加热器,锅炉开始加热。
旋转蒸汽手柄,将蒸汽口打开。
咖啡机此时压力表指针一直为大约20分钟~30分钟,蒸汽管放出冷凝水和空气,紧接着蒸汽管内的蒸汽变干。
此时将蒸汽管关闭。
10分钟左右,咖啡机锅炉压力表达到工作压力, 屏幕显示:“HAVE A NICE DAY”或“NO FULL STOPS IN SPR COFFEE”,此时机器可正常工作。
2.冲茶操作(开水制作):将茶壶放置在热水口之下,按动相应的热水制作按钮。
SDE型开水按键为fig 9中的6.2/6.3 按键。
SDE型咖啡机制作开水,热水的制作量按照设定量控制。
或者:按住开水制作按钮:fig.9内的6.2或6.3控制按钮多于2秒钟,咖啡机会连续制作热水。
当再按动制作按钮时,机器停止制作热水。
3.制作咖啡:移开咖啡过滤头,清空过滤头,请勿损伤咖啡出口和滤网。
加入1或2份咖啡粉,用压粉器将咖啡过滤头上的咖啡粉压成饼状,(咖啡粉必须使用配套磨豆机磨制的咖啡粉。
)清理去除在填压咖啡粉过程当中,咖啡过滤头边框外溢出的多余的咖啡粉。
防止损伤咖啡头上的密封垫圈。
★如果过多的粉残留在手柄边缘时,容易造成密封不良而漏水,长期不做清理容易损伤咖啡头上的密封垫圈。
造成密封性降低而漏水漏粉。
将咖啡过滤头装回咖啡分配头,并保证手柄密封不漏水。
在咖啡头下放置一个或两个咖啡杯。
根据需要按动3/4号操作盘上的咖啡操作钮制作咖啡。
咖啡水量到达设定值机器自动停止。
制作咖啡过程当中,按动键可停止咖啡的操作。
咖啡制作结束后请及时将咖啡手柄内的咖啡渣清理干净,并用热水冲洗干净。
等咖啡口放水冲洗干净后,将干净的手柄安装到咖啡出口上。
等待下次制作咖啡。
当使用时,小心机器温度较高的部分。
尤其是咖啡制作口,热水和蒸汽制作口。
操作时,请不要以任何理由将手放在上述部分之下。
如何制作一杯好咖啡:研磨咖啡豆和研磨的质量在很大程度上决定了制作的咖啡的好坏,制作一杯咖啡的时间应该控制在25~30秒左右的水平。
如果咖啡研磨的过粗,咖啡萃取不足,味道会比较淡颜色较浅,油脂也会很薄。
并且油脂的颜色呈白色。
如果咖啡研磨的过细,会造成咖啡萃取过度,4.A制作卡布基诺:(使用传统式蒸汽管)制作一杯意式咖啡。
取一个专用钢杯,加入一半的牛奶。
将钢杯放在蒸汽管下。
打开蒸汽管,放出蒸汽。
让蒸汽管浮在牛奶表面。
调节钢杯的高度,使牛奶起沫。
当牛奶和奶沫到达需要的量后,关闭蒸汽管,将牛奶和奶沫倒入咖啡杯。
!请立即清理蒸汽管,并放出管内的牛奶。
以防止牛奶在奶沫管上结垢,小心蒸汽管温度很高被烫伤。
4、B制作卡布奇诺:(使用TS 式蒸汽管)制作一杯意式咖啡。
取一个专用钢杯,加入一半的牛奶。
将钢杯放在蒸汽管下。
按动TS蒸汽管按钮,放出蒸汽。
让蒸汽管浮在牛奶表面。
当牛奶温度升高后将牛奶钢杯提高,将蒸汽管和温度感应器一起插入牛奶液面以下。
屏幕显示感应的牛奶温!请立即清理蒸汽管和温度感应器,并放出管内的牛奶。
以防止牛奶在奶沫管上结垢,小心蒸汽管温度很高被烫伤。
4. C加热液体:(使用TS蒸汽口)将带温度感应的蒸汽管(TS蒸汽管)放入需要加热的液体内。
打开蒸汽,当液体加热到所需温度,蒸汽自然停止。
!请立即清理蒸汽管,并放出管内的液体。
以防止液体在蒸汽管上结垢,小心蒸汽管温度很高被烫伤。
5.保养:5.1每日保养仔细清理咖啡机的表面,使用干净的湿布清理不锈钢表面清理蒸汽和热水出口,确认出口没有被异物堵塞。
使用咖啡机专用刷清理咖啡出水口和内部的密封橡胶圈。
拆下过滤手柄仔细清理内部的咖啡渣。
将过滤手柄拆开,在清水中浸泡一晚。
将底盘拆下,用清水冲洗干净。
清理机器的机身。
5.2 每10、20、30日保养!本操作必须在咖啡机处于正常压力下工作。
将机器提供的无眼滤网安装到机器的过滤手柄内,加入一勺专用药粉。
并将过滤手柄安装到咖啡水出口,做清理按动咖啡制作按键,内部做循环30秒。
不拆下咖啡手柄,反复制作几次。
移开过滤手柄,取下无眼滤网,安置正常滤网。
用干净的水冲洗几次。
使用机器做咖啡前,请使用咖啡粉制作一杯咖啡来去除残留的微量药粉味道。
6.自动清洗程序:如果机器启动了自动清洗程序,可按照此程序过程对咖啡机进行清洗。
此清洗等同于每月10、20、30日保养中的对机器清洗一步。
按动右侧图中的确认按键大约5秒以上。
直到显示“C leaning needed”“press enter”按动确认按键,清洗程序开始屏幕显示:“I nsert the blind filters then press enter”( (将机器提供的无眼滤网安装到机器的过滤手柄内,加入一勺专用药粉。
)并将过滤手柄安装到咖啡水出口。
按动右侧图中的确认按键。
屏幕显示:“C leaning runnign” 机器自动循环10次。
每次的过程大概为10秒。
10次循环结束后,屏幕显示:“Remove the filterholders,press enter” (把咖啡手柄拆下移开过滤手柄,取下无眼滤网,)安置正常滤网。
用干净的水冲洗几次)7. 故障代号说明四. 调整设定(只限吧台管理人员使用)1. 水量调节 设定水量在控制按钮键盘上面可以对咖啡水量和开水量进行调节(如果设备具有此项功能)1)按住按键2E ,8秒钟后,咖啡出口水流停止,并且指示灯闪动时表示进入水量设定程序。
屏幕显示:DOSE SettingG 00 主机板需要检测G 01 水位过低 G 02 压力过低G 03 锅炉温度感应器短路G 04 蒸汽感温器关闭 G 05 蒸汽温度感应短路 G 06 蒸汽温度感应器关闭 G 10 保养期以过(超出72小时)2)在手柄中加粉,制作1或2杯的相应咖啡,按动咖啡制作按键。
(以2A按键最小杯为例)按动2A按键,制作一杯ESPRESSO3)当咖啡到达要求的量,按动2A按键。
咖啡停止,程序储存咖啡量。
4)按动2E按键,退出程序设定。
(也可先不退出程序,其他A,B,C,D设定如上所述。
)热水调节(按动1B热水按键或按动1C开水按键)和咖啡调节相同2.吧台员程序:1)咖啡机杯数查询同时按住“+”,“-”直到屏幕显示“BARISTA MemuLanguage selection”按动“-”号一下“BARISTA MemuSelenctions counter按动“”确认屏幕显示:GR1 表示第一个咖啡出口T表示相应的从上到下的咖啡按键后面的数字为相应按键的使用次数按动“+”GR2 表示第二个咖啡出口 GR2T1 001 T2 000T3 005 T4 000T 表示相应的从上到下的咖啡按键 后面的数字为相应按键的使用次数3. 温杯器(1A )当按动开关,显示屏会显示温杯器温度,按顺序有4种状态(关闭—最小—中等—最大) 如果2秒钟内按动按钮,可以对温杯器的温度进行调节。
每按动一次,温度状态变化一格。
当温杯器启动(即,状态:最小—中等—最大)显示灯会亮。
咖啡停止,程序储存咖啡量。
1A1B1C1D1。